How to Containerise and Deploy a MERN Stack Application with Docker Compose
 Pravesh Sudha
💡 Introduction
Welcome to the world of DevOps! Today, we’re diving into a hands-on guide to containerizing and deploying a MERN stack application using Docker Compose. If you're new to the MERN stack, it’s a three-tier architecture designed for building full-stack web applications. Here’s a quick breakdown:
Presentation Layer (Frontend): Built with React, this layer is what users interact with visually.
Logic Layer (Backend/Server): Handled by Express and Node.js, this layer processes requests, routes data, and manages the application’s core functionality.
Database Layer: MongoDB stores and manages data, linking everything together.
When you access a MERN stack application, the frontend communicates with the backend server, which processes your requests and interacts with MongoDB to retrieve or store data. This setup provides a seamless user experience while keeping the architecture organized.
In this blog, we’ll containerize each layer by writing Dockerfiles for both the frontend and backend. Additionally, we’ll use Docker’s run command to create a separate container for MongoDB, and we’ll establish a custom bridge network, named demo, to allow our containers to communicate without issues.
💡 Why Choose the MERN Stack?
The MERN stack is a popular choice among developers for several reasons:
Open Source: It’s cost-effective and accessible, ideal for students, startups, and growing teams.
JavaScript-Based: With JavaScript handling both frontend and backend, the learning curve is smoother for those familiar with the language.
Simplicity and Security: Its architecture allows for straightforward development while maintaining security standards.
Let’s get started by setting up our Docker environment and configuring each component of the MERN stack for deployment!
💡 Pre-requisites
Before we dive into containerizing and deploying our MERN stack application, let's ensure that our development environment has the required software installed. Below are the essential tools you'll need, along with installation commands for both Ubuntu and macOS.
1. Node.js & NPM
Node.js is crucial for running JavaScript on the backend, and npm (Node Package Manager) allows us to install necessary packages.
Ubuntu:
  sudo apt update
  sudo apt install -y nodejs npm
macOS (using Homebrew):
  brew update
  brew install node
2. Docker
Docker is used to create, manage, and run containers for our application.
Ubuntu:
  sudo apt update
  sudo apt install -y docker.io
Once installed, add your user to the Docker group to run Docker without
sudo:sudo usermod -aG docker $USERmacOS (using Homebrew):
brew install --cask dockerAdd your user to the Docker group:
sudo dscl . -append /Groups/docker GroupMembership $USERAfter this, restart your terminal or log out and log back in to apply the group changes.
3. Docker Compose
Docker Compose allows us to define and manage multi-container applications. This is especially useful for our MERN stack setup, where we’ll run separate containers for the frontend, backend, and MongoDB database.
Ubuntu:
sudo apt update sudo apt install -y docker-composemacOS:
brew install docker-compose
With these prerequisites installed, we're all set to start building our Docker setup for the MERN stack application!
💡 Cloning the Project and Exploring the Code Structure
To get started, let’s clone the project repository, which contains all the code we’ll need to set up our MERN stack application:
git clone https://github.com/Pravesh-Sudha/MERN-docker-compose.git
Once cloned, navigate to the project’s main directory. Inside, you’ll find a folder named mern, which includes the backend and frontend code.
💡 Backend Structure
The backend directory is where the server-side code lives. Here’s a quick breakdown of the key files:
db/connection.js: This file is responsible for connecting the backend server to the MongoDB database. The code within attempts to "ping" the database server to ensure a successful connection. Once connected, it logs a confirmation message, helping us verify that the backend and database are communicating smoothly.
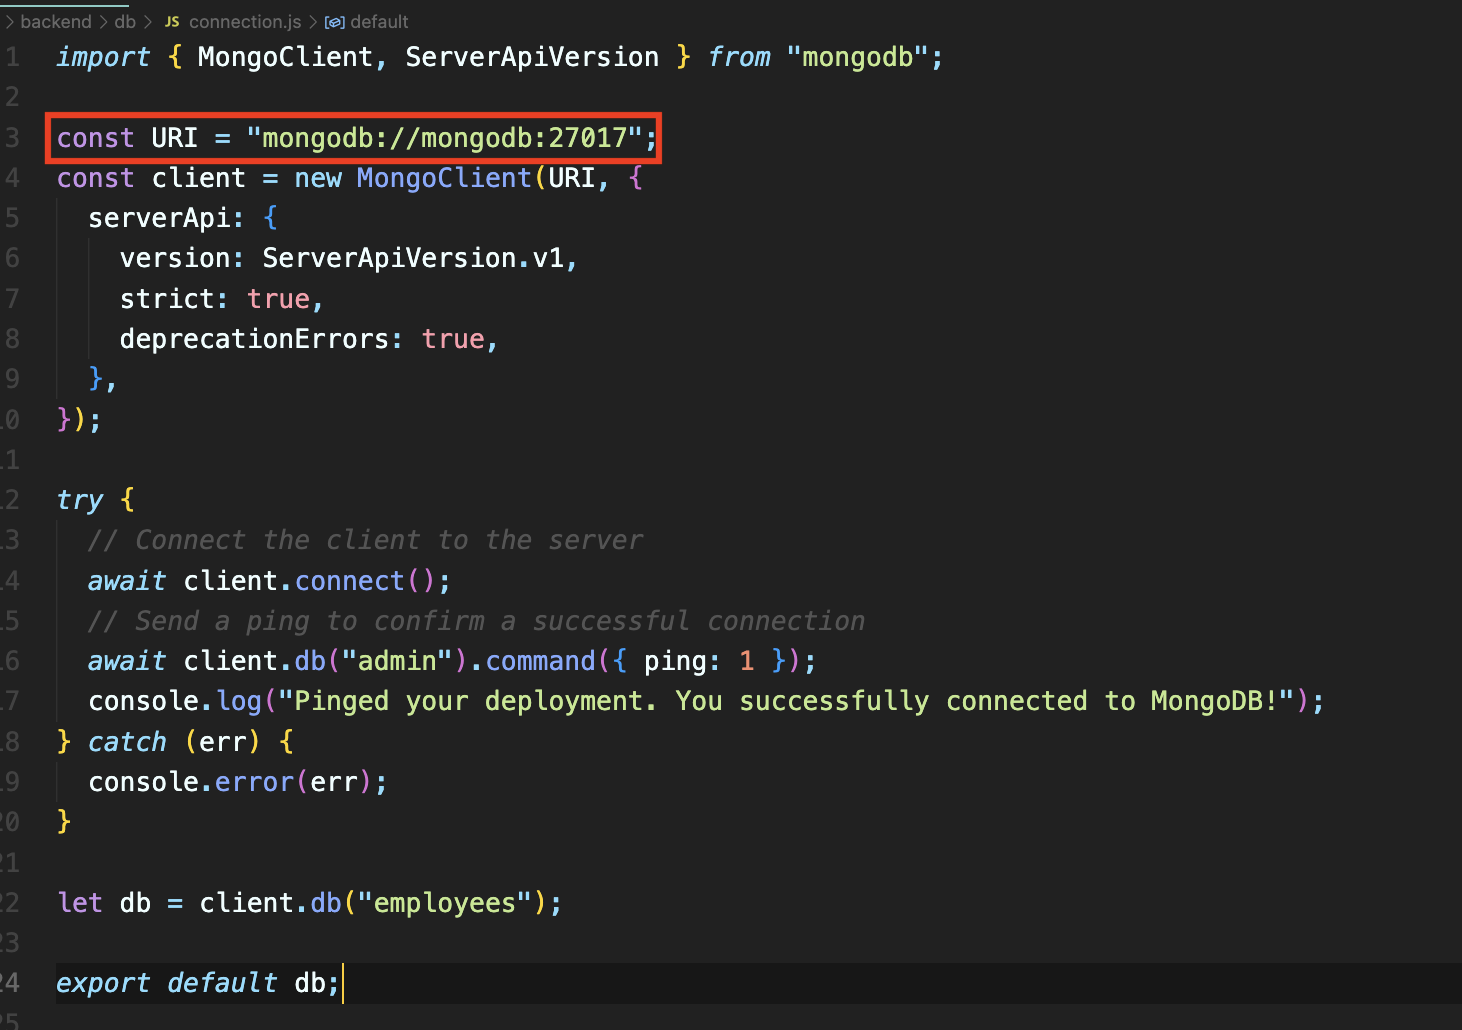
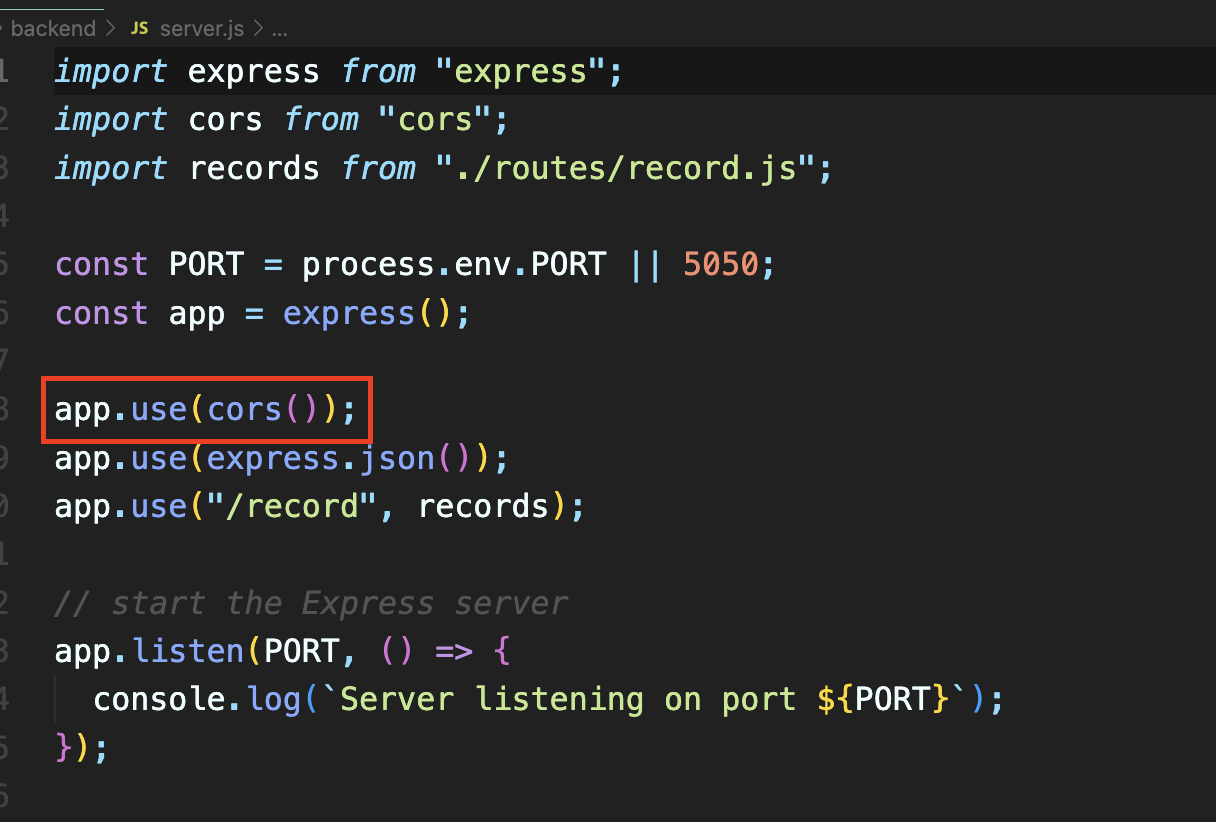
server.js: The server.js file is the core of our backend. It configures and starts the Express server, which listens for incoming requests and processes them. This file also enables CORS (Cross-Origin Resource Sharing). CORS is essential in web applications that access resources from different domains. By enabling CORS, we allow our frontend to communicate with our backend, even though they might be on different origins or ports, especially useful during development and when deployed in Docker containers.
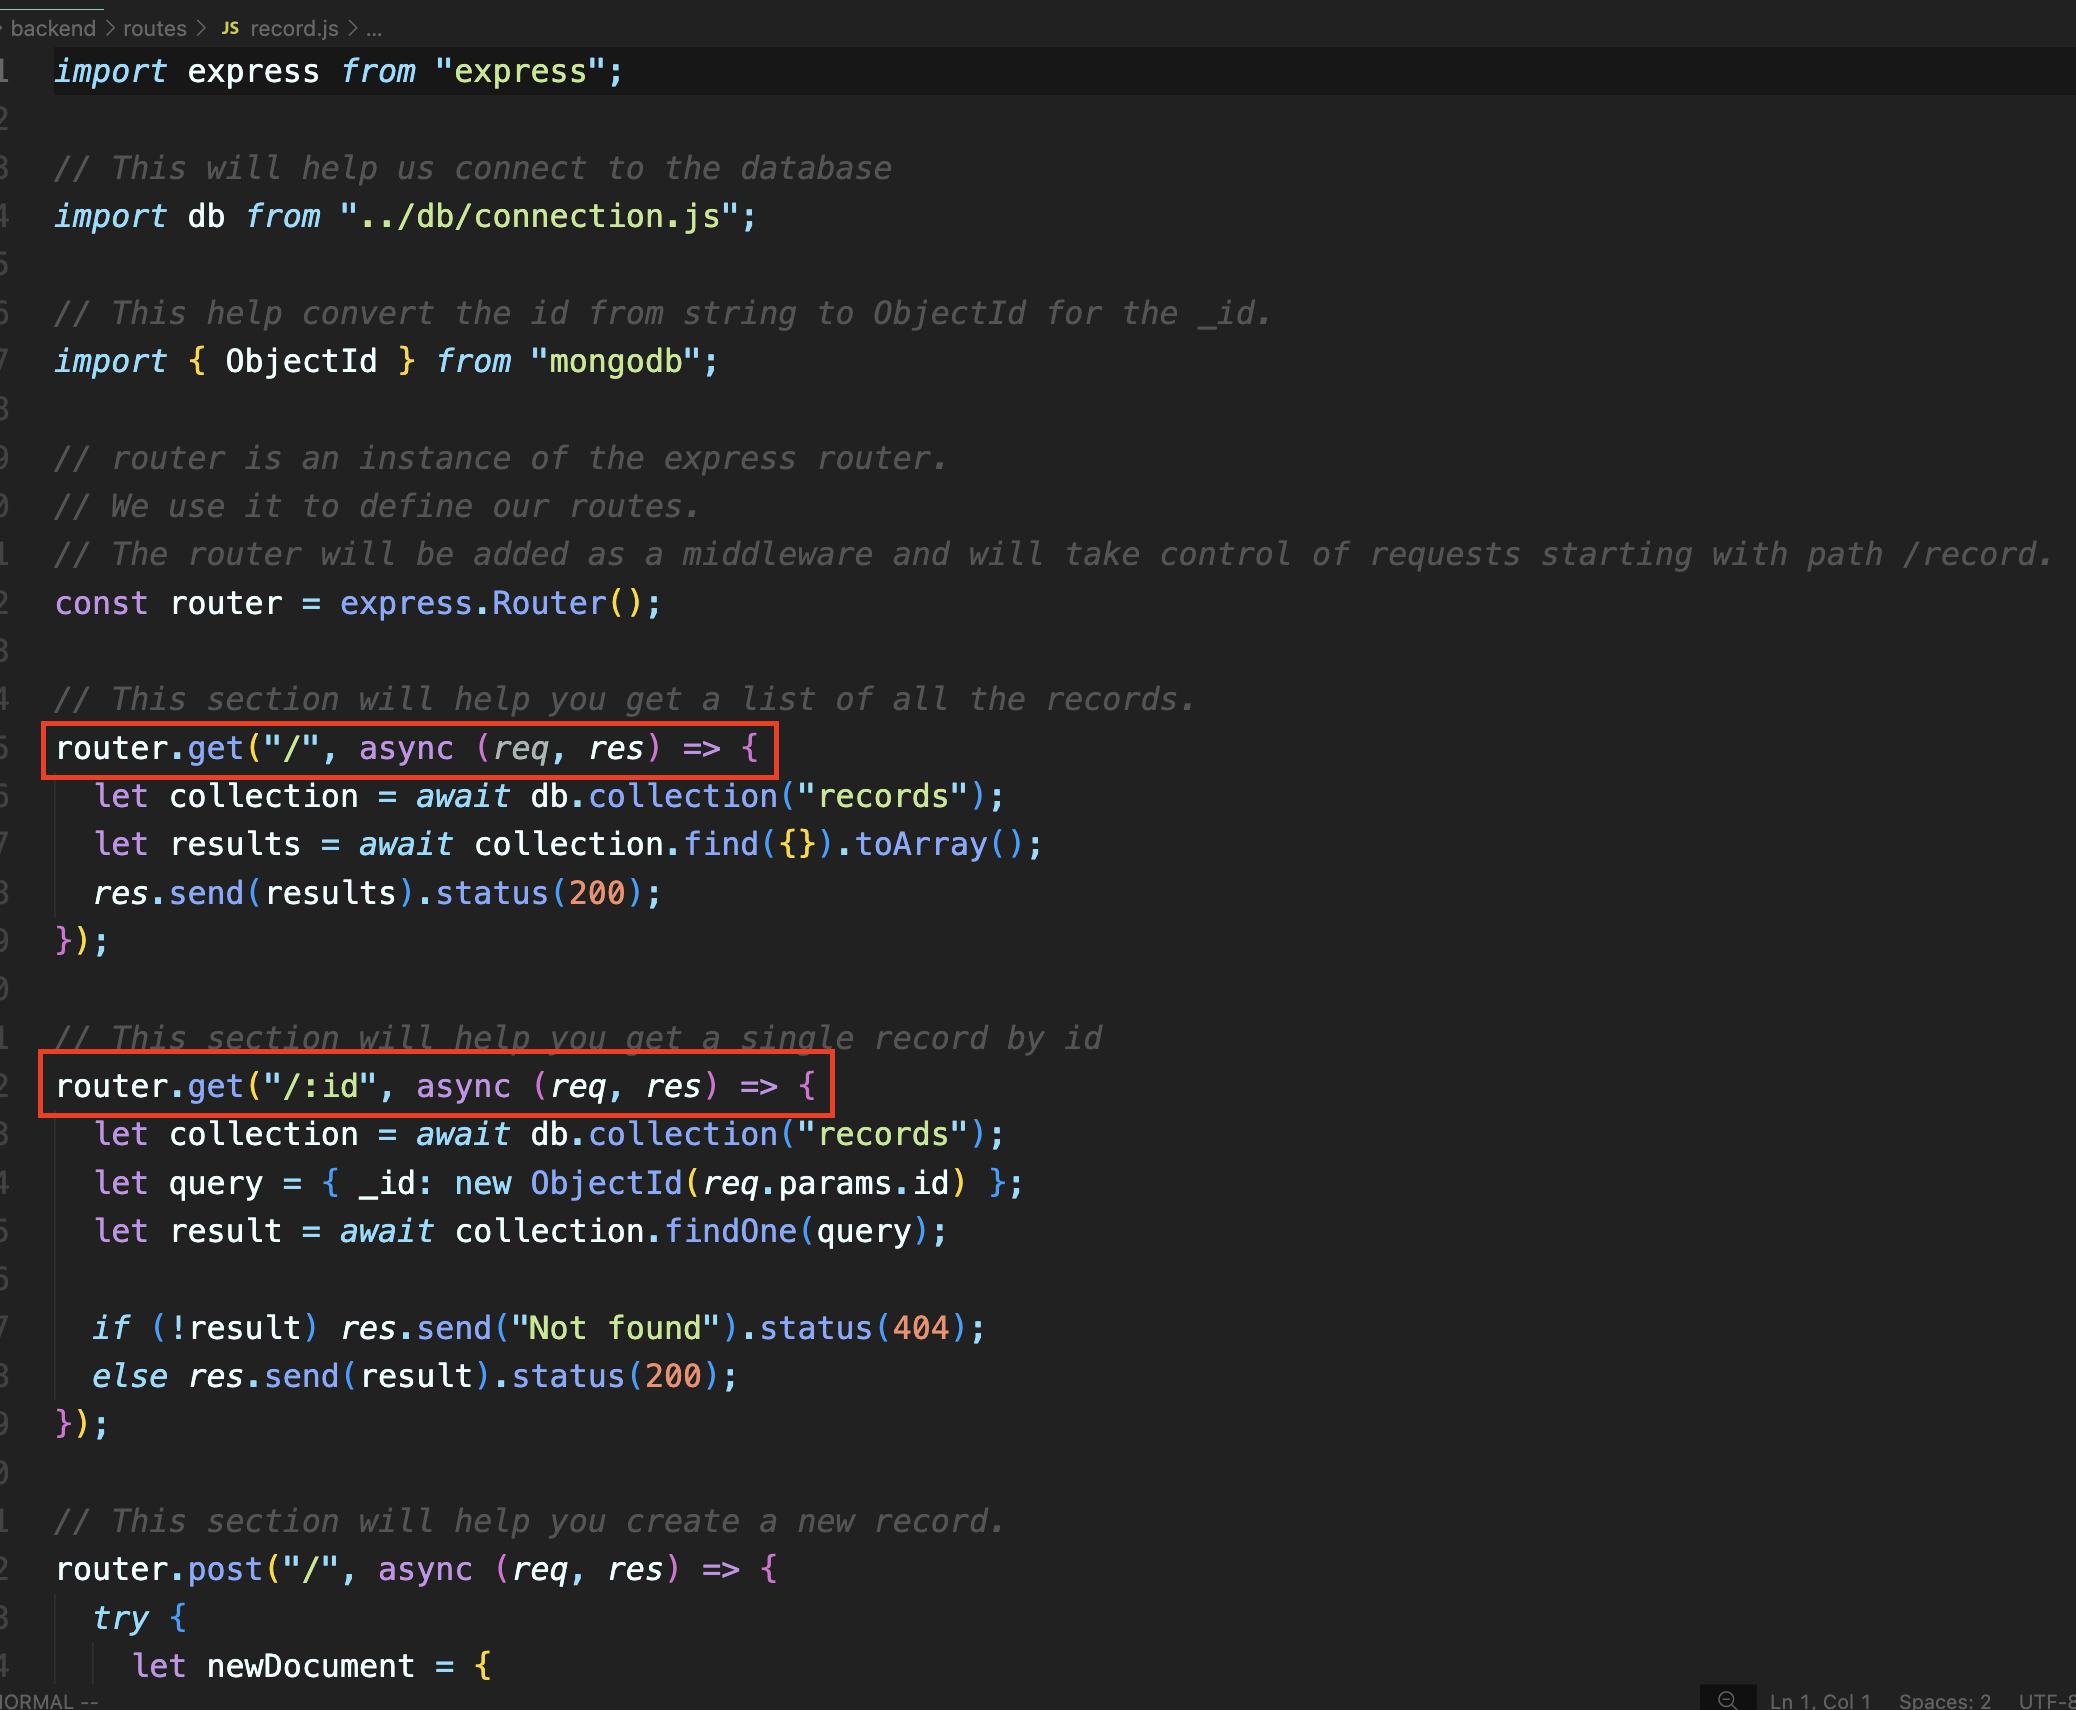
routes/record.js: This file contains all the API endpoints needed for our application. Each endpoint allows the frontend to interact with the backend to create, retrieve, update, or delete records in the database.
💡 Frontend Structure
In the frontend directory, we have the basic setup for a React application, where we’ll be building our user interface. The most interesting part of the frontend is the src/components/Record.jsx file. This component fetches data from our backend by making requests to localhost:5050, where our backend server will be running. Through this connection, the frontend retrieves and displays data for the user, keeping everything dynamic and interactive.
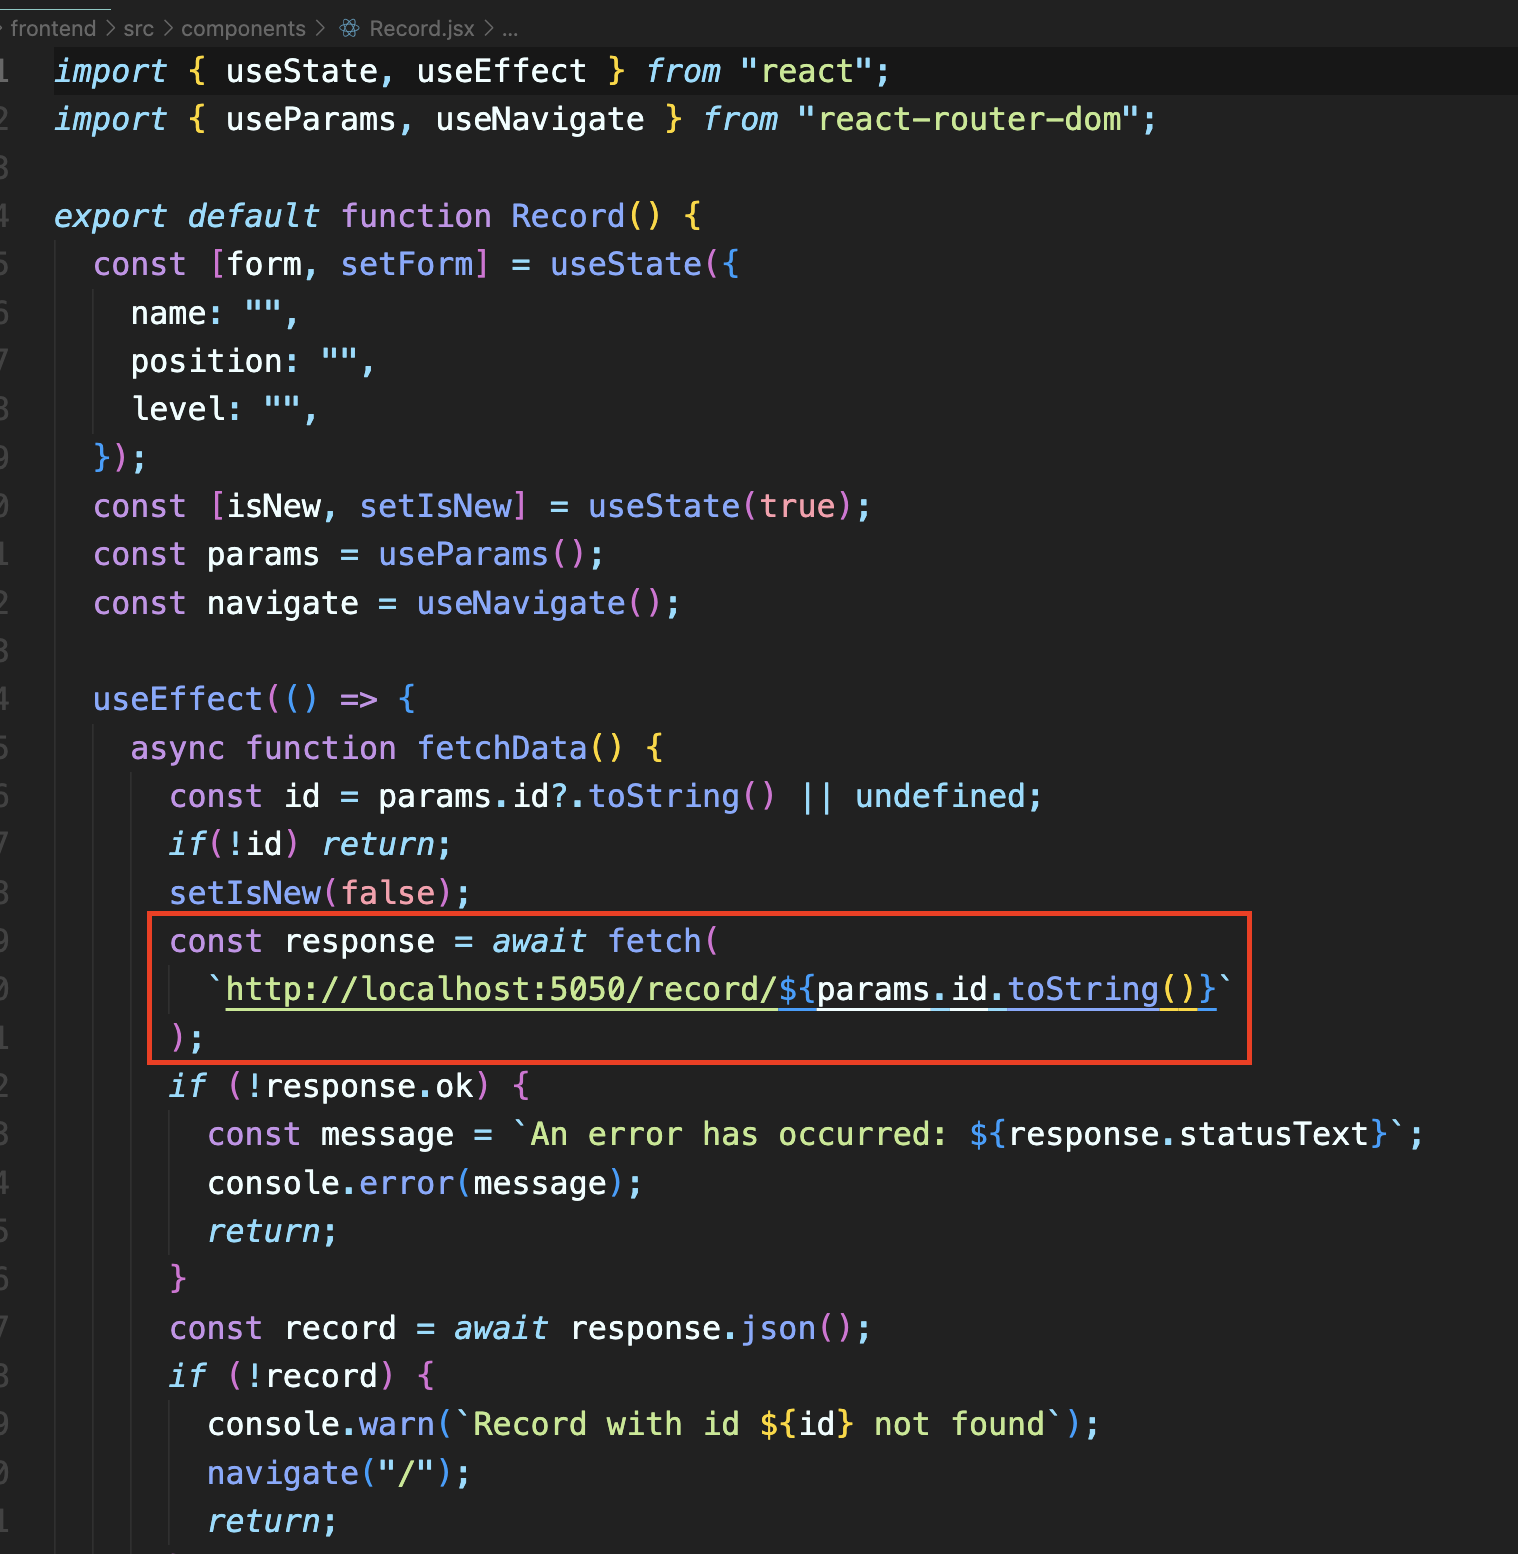
With this overview of the code structure, you should have a clearer picture of how the frontend and backend communicate within the MERN stack setup. Next, we’ll dive into creating Dockerfiles to containerize both the backend and frontend and set up Docker Compose for easy deployment.
💡 Containerising the Backend and Frontend
With our code organized, it’s time to containerize both the backend and frontend of our MERN stack application. We’ll create Docker images using Dockerfiles in each directory and set up a custom bridge network to allow the containers to communicate seamlessly.
Step 1: Writing Dockerfiles for Backend and Frontend
Backend Dockerfile
In the backend directory, we’ll use the following Dockerfile to containerize our backend:
# Use Node.js 18.9.1 as the base image
FROM node:18.9.1

# Set the working directory
WORKDIR /app

# Copy the package.json and install dependencies
COPY package.json .
RUN npm install

# Copy all other files
COPY . .

# Expose port 5050 for backend
EXPOSE 5050

# Start the backend server
CMD ["npm", "start"]
Frontend Dockerfile
Similarly, in the frontend directory, we’ll create a Dockerfile to containerize the frontend:
# Use Node.js 18.9.1 as the base image
FROM node:18.9.1

# Set the working directory
WORKDIR /app

# Copy the package.json and install dependencies
COPY package.json .
RUN npm install

# Expose port 5173 for frontend
EXPOSE 5173

# Copy all other files
COPY . .

# Start the frontend server
CMD ["npm", "run", "dev"]
Step 2: Building Docker Images
Now that our Dockerfiles are ready, let’s build Docker images for both the backend and frontend. Run the following commands from your terminal:
Build the backend image:
  cd mern/backend
  docker build -t mern-backend .
Build the frontend image:
  cd mern/frontend
  docker build -t mern-frontend .
Step 3: Setting Up the Docker Network
To ensure that the backend, frontend, and MongoDB containers can communicate smoothly, we’ll create a bridge network named demo:
docker network create demo
Step 4: Running MongoDB in a Container
Before starting the backend and frontend, we need to have MongoDB running. We’ll create a MongoDB container and attach it to our demo network:
docker run --network=demo --name mongodb -d -p 27017:27017 -v ~/opt/data:/data/db mongo:latest
In this command:
--network=democonnects the container to our custom network.--name mongodbnames the container.-p 27017:27017maps MongoDB’s default port to our local machine for access.-v ~/opt/data:/data/dbmounts a volume to persist MongoDB data.
Step 5: Running Backend and Frontend Containers
With MongoDB running, we can now start the backend and frontend containers:
Run the frontend container:
docker run --name=frontend --network=demo -d -p 5173:5173 mern-frontendRun the backend container:
docker run --name=backend --network=demo -d -p 5050:5050 mern-backend
In these commands:
--network=demoensures all containers are on the same network, allowing seamless communication.-pflags expose the frontend on port5173and the backend on port5050for local access.
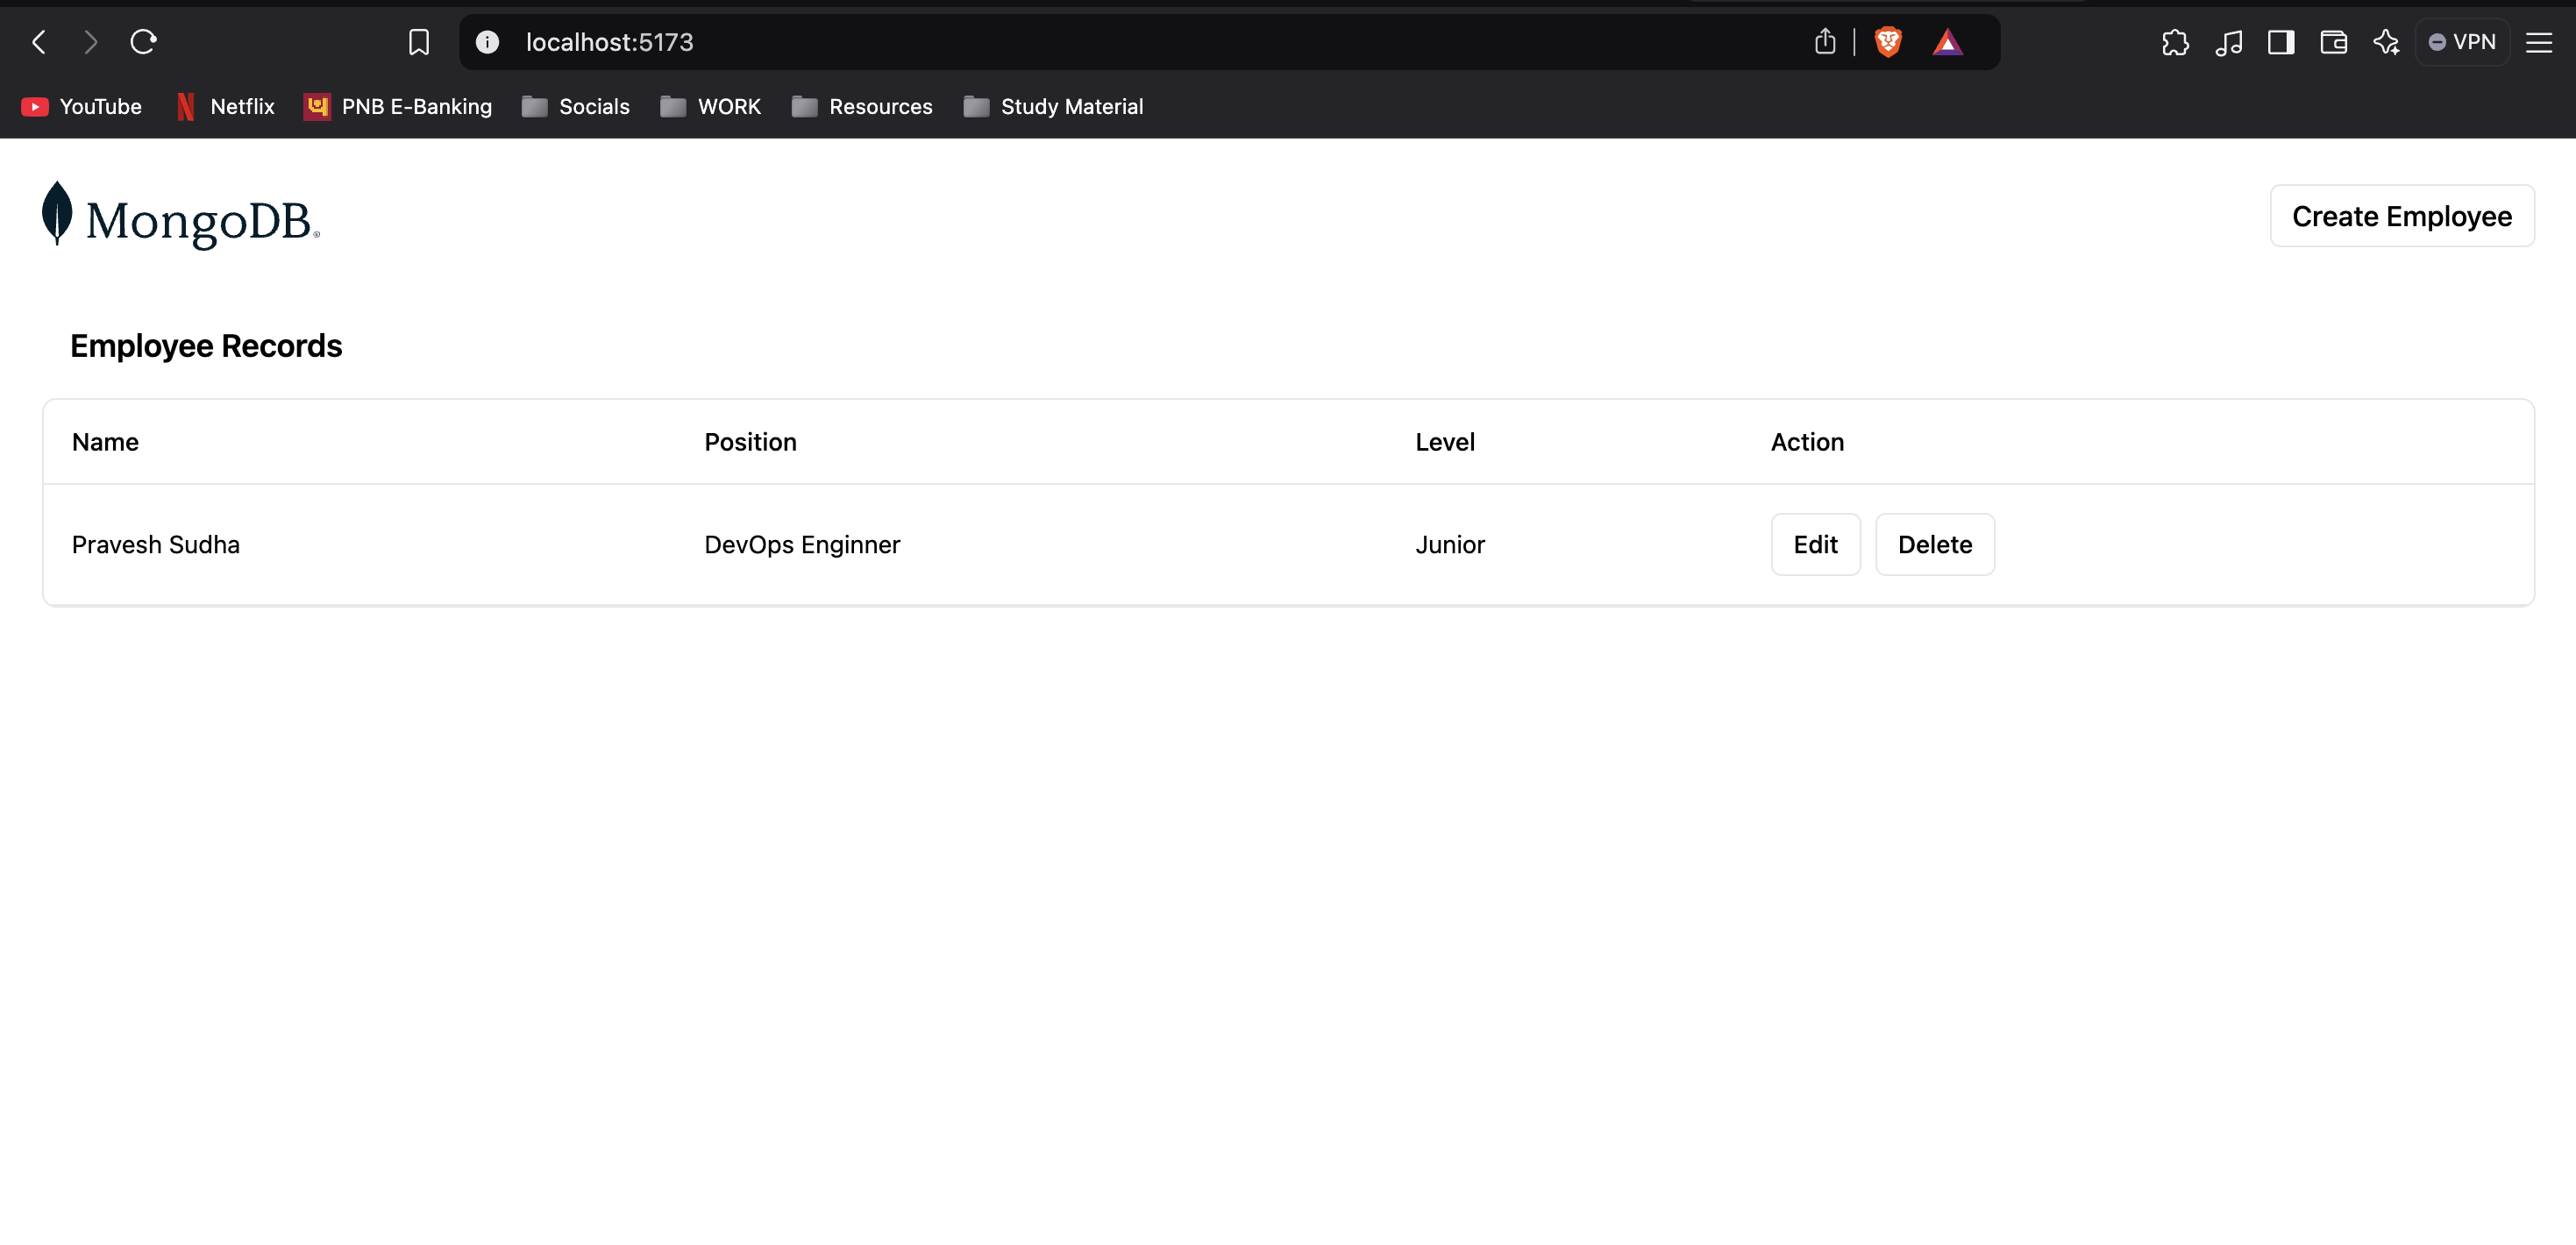
Our MERN stack application is deployed with Docker and is running fine. It is storing data in MongoDb database which is visible in the frontend.
With this setup, our frontend, backend, and MongoDB containers are now up and running, interconnected through the demo network. This containerized setup streamlines deployment and makes it easy to scale each service individually. In the next section, we’ll look at how to automate this with Docker Compose for an even smoother experience!
💡 Deploying the MERN Application with Docker Compose
After testing our MERN stack application using individual Docker containers, let’s simplify the deployment process by using Docker Compose. Docker Compose allows us to define and run multi-container Docker applications with a single YAML file. In our project’s root directory, we’ll create a docker-compose.yaml file to set up and run the frontend, backend, and MongoDB containers together.
Step 1: Writing the docker-compose.yaml File
Here’s the content for our docker-compose.yaml file:
services:
  backend:
    build: ./mern/backend
    ports:
      - "5050:5050"
    networks:
      - mern_network
    environment:
      MONGO_URI: mongodb://mongodb:27017/mydatabase
    depends_on:
      - mongodb

  frontend:
    build: ./mern/frontend
    ports:
      - "5173:5173"
    networks:
      - mern_network
    environment:
      REACT_APP_API_URL: http://backend:5050

  mongodb:
    image: mongo:latest
    ports:
      - "27017:27017"
    networks:
      - mern_network
    volumes:
      - mongo-data:/data/db

networks:
  mern_network:
    driver: bridge

volumes:
  mongo-data:
    driver: local  # Persist MongoDB data locally
Explanation of the Docker Compose Configuration
backend: This service builds the backend from the specified directory (
./mern/backend) and maps port5050to allow external access. We set an environment variableMONGO_URIto specify the MongoDB connection string. Thedepends_ondirective ensures that MongoDB starts before the backend does.frontend: This service builds the frontend from the
./mern/frontenddirectory and maps port5173. TheREACT_APP_API_URLenvironment variable points to the backend, enabling the frontend to communicate with the backend service onlocalhost:5050.mongodb: This service uses the latest MongoDB image, exposes port
27017, and mounts a volume (mongo-data) to persist MongoDB data even if the container restarts.networks: All services are connected to a custom bridge network,
mern_network, which allows them to communicate without exposing ports externally unless specified.volumes: The
mongo-datavolume persists MongoDB data on the local system, ensuring the data remains intact across container restarts.
Step 2: Running the Application with Docker Compose
With the docker-compose.yaml file in place, we can now start all services using the following command:
docker-compose up -d
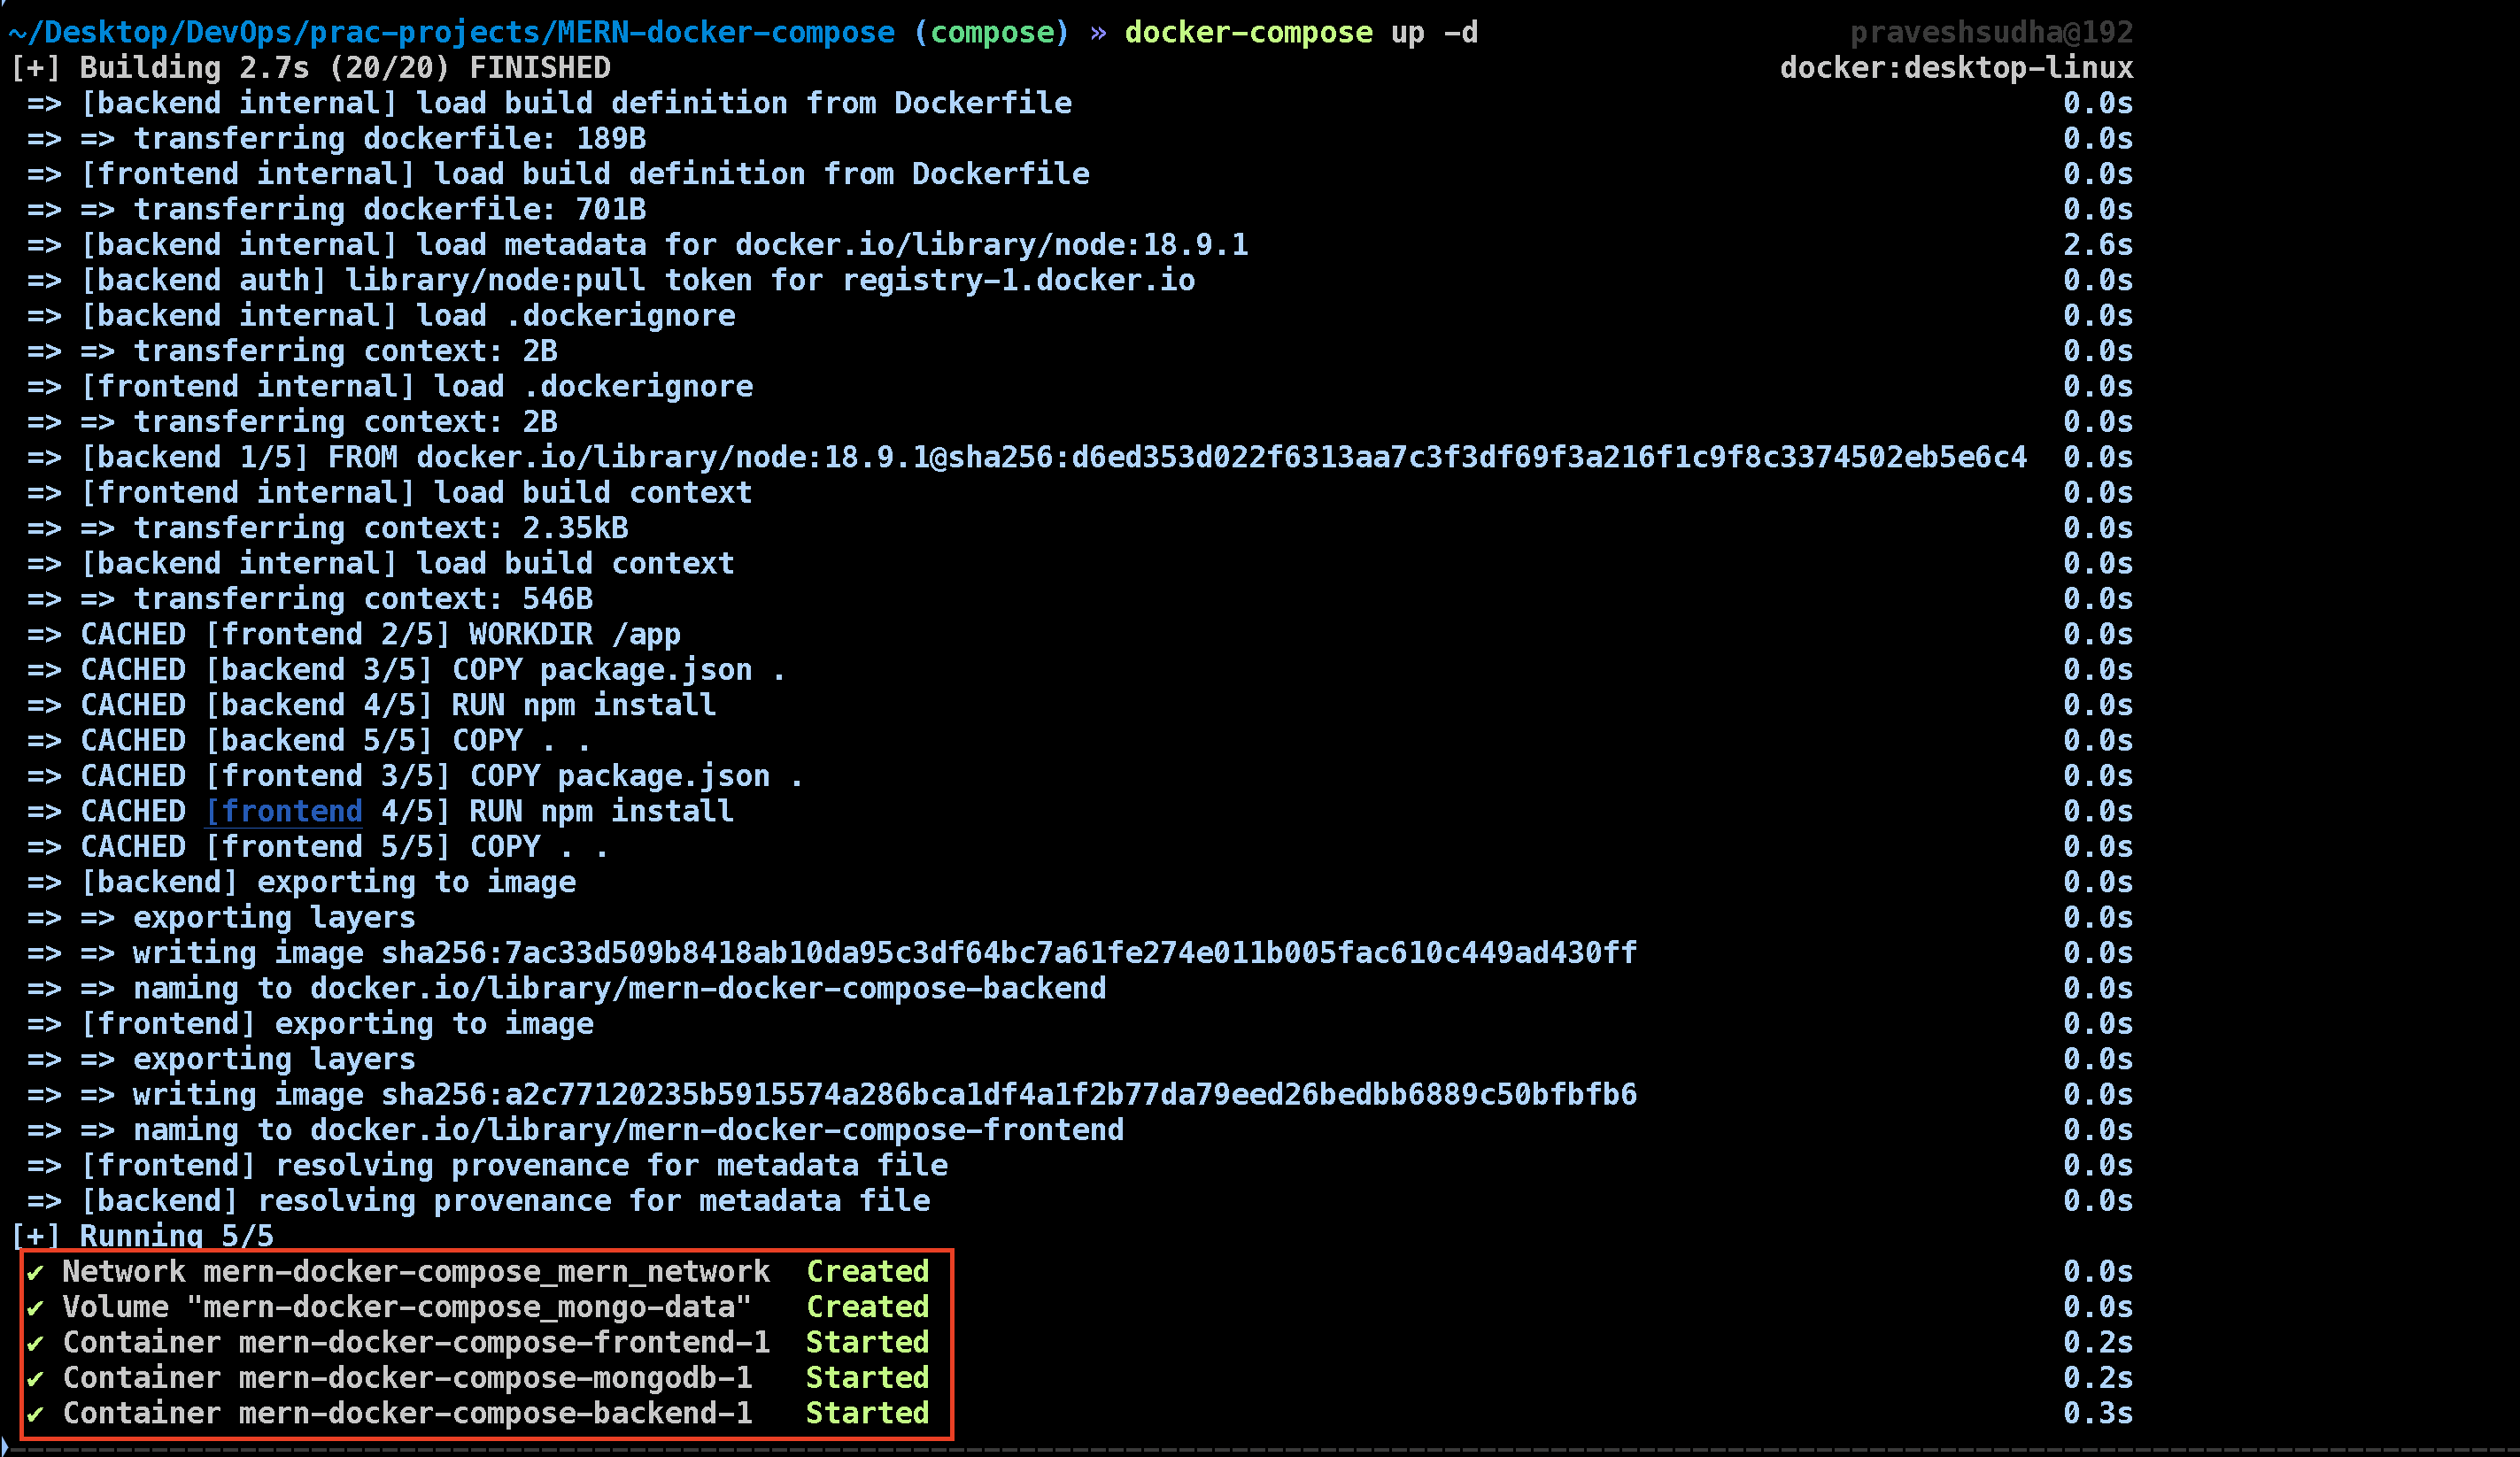
The -d flag runs the containers in detached mode, meaning they’ll run in the background. Docker Compose will build images, create containers, and set up networks and volumes as specified in the YAML file.
Step 3: Testing the Application
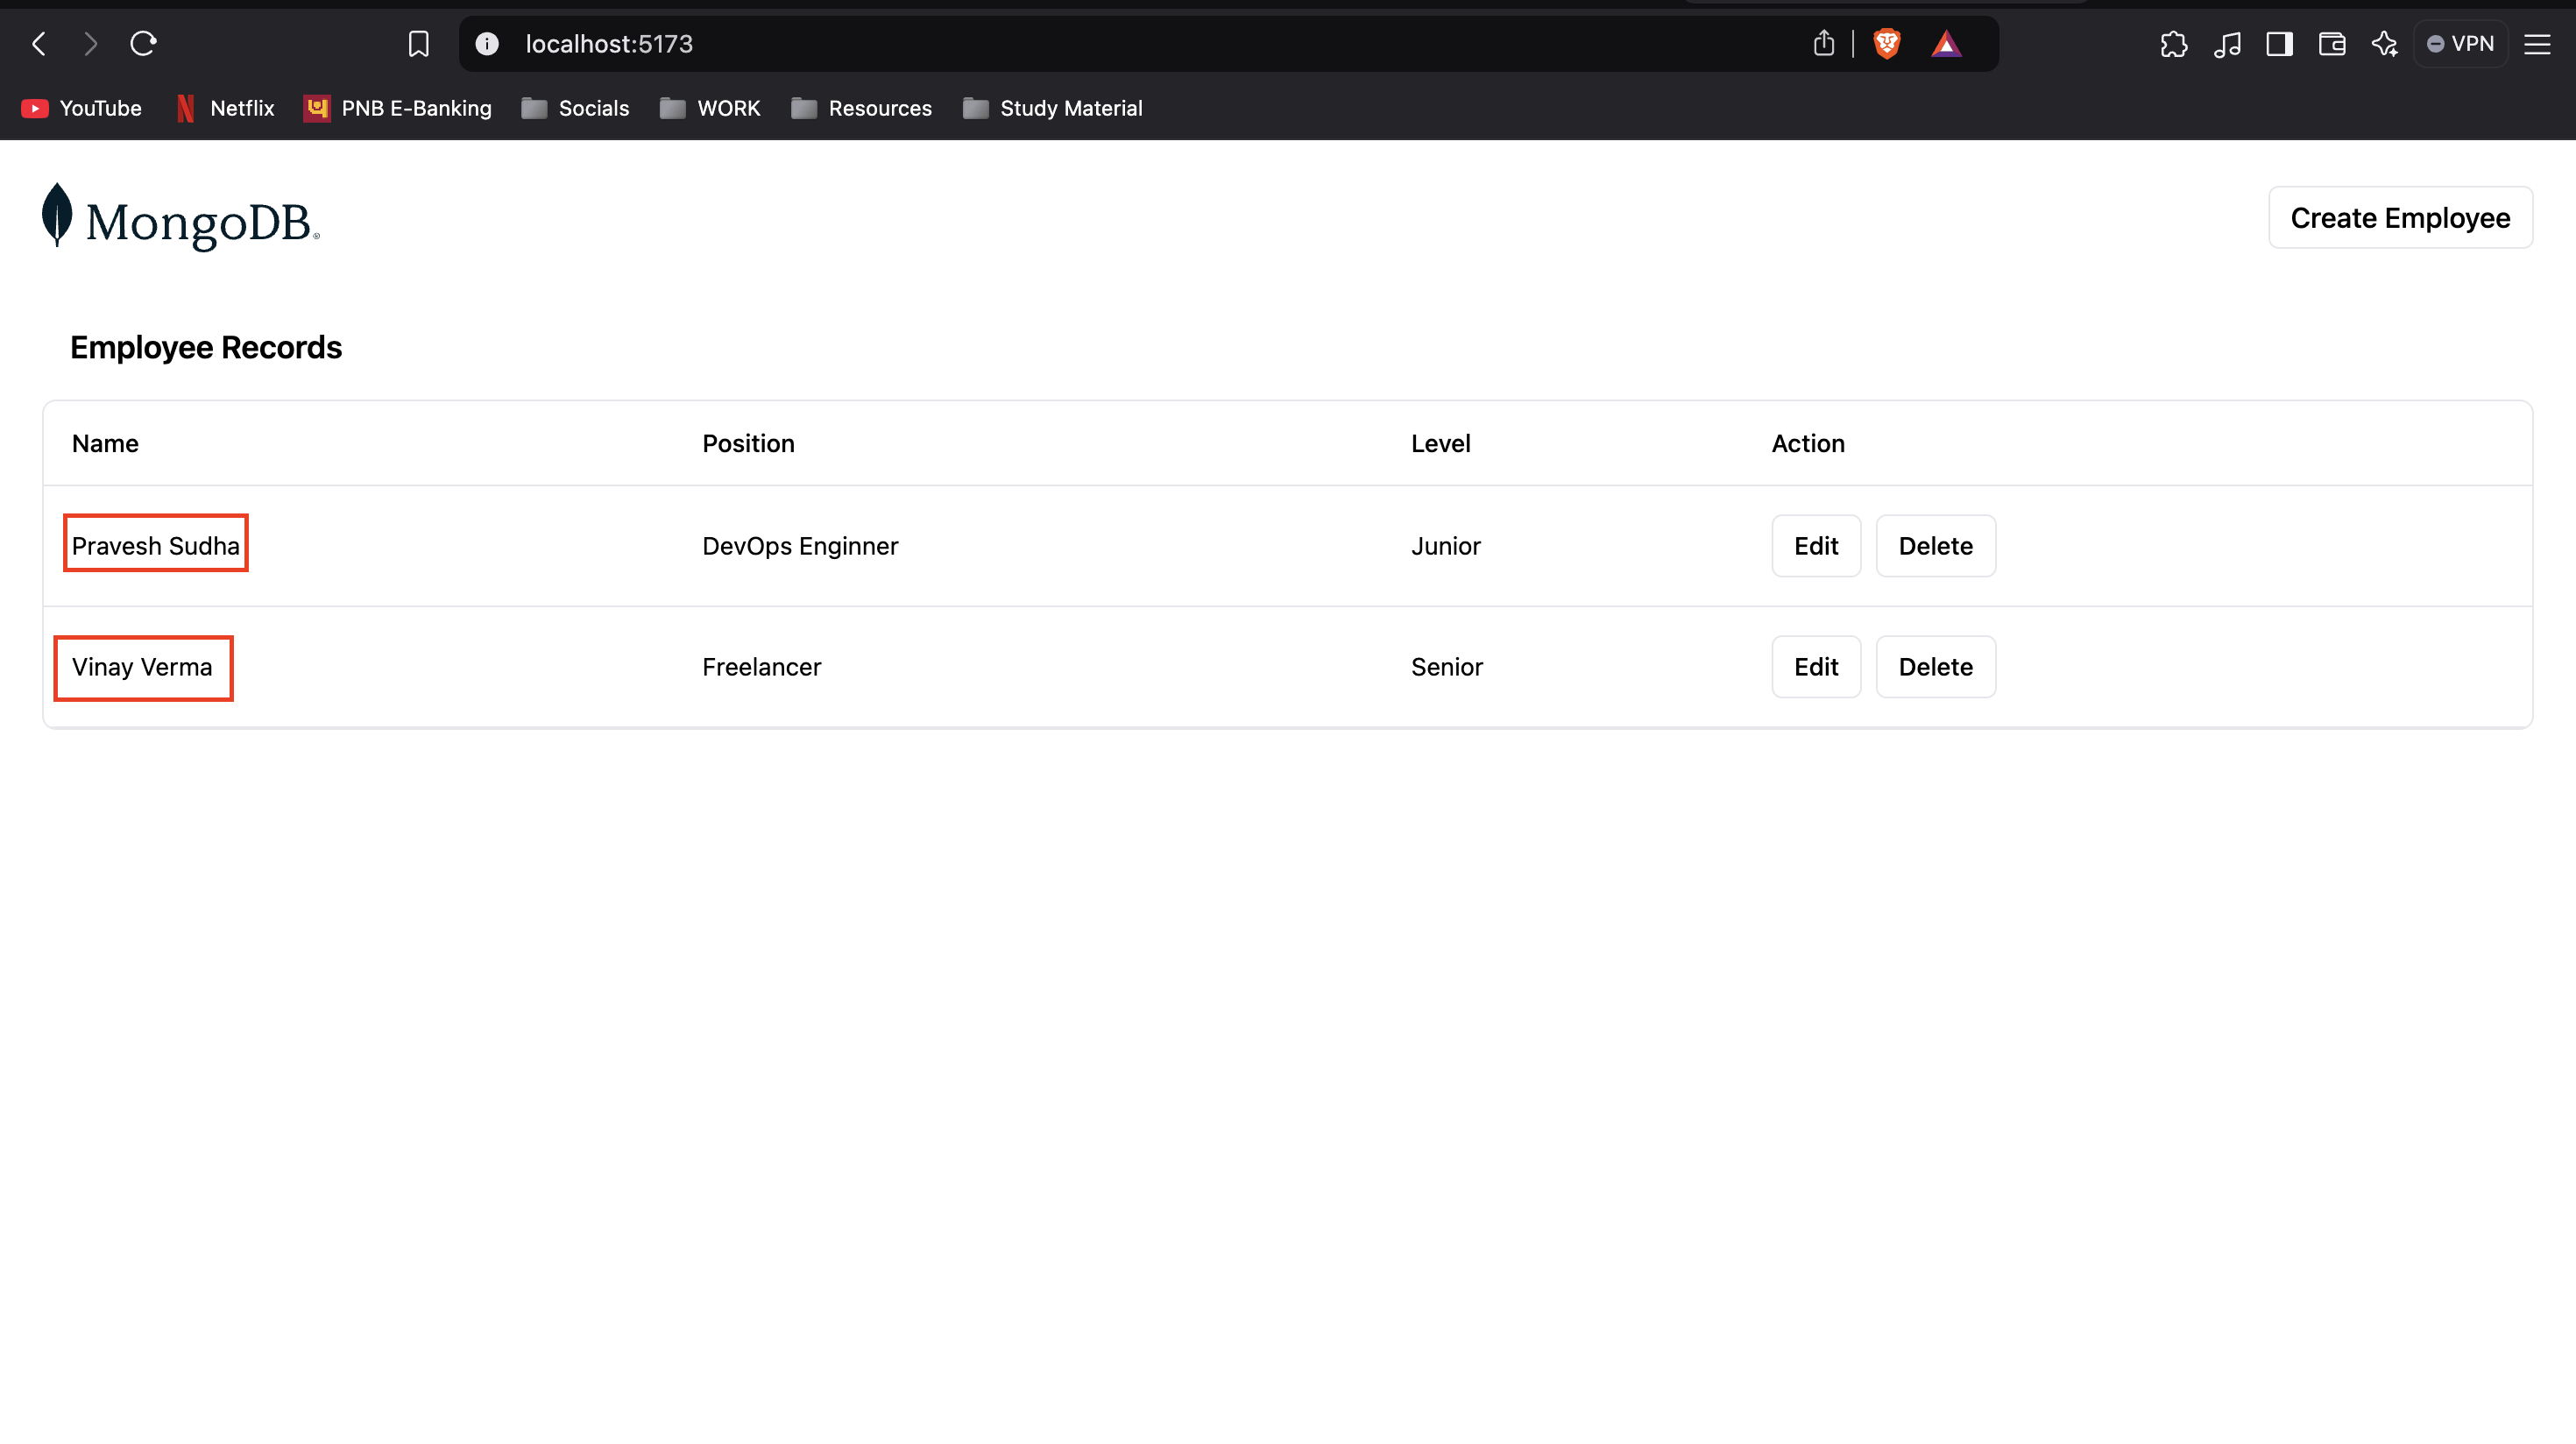
To test the application, open your browser and go to http://localhost:5173. You should see the application running smoothly.
Try adding a record, then refresh the page. The data should still be there, indicating that our MongoDB database is persisting the data and connecting successfully to the backend. This seamless interaction between frontend, backend, and database verifies our MERN application setup.
With Docker Compose, we’ve streamlined the process of deploying a multi-container application. It’s as easy as running a single command, making it ideal for both development and production environments.
💡 Conclusion
In this blog, we took a hands-on journey through containerizing a MERN stack application and deploying it using Docker Compose. By breaking down each component—frontend, backend, and MongoDB database—into isolated containers, we created a streamlined and manageable environment that ensures our application runs consistently across different setups.
Using Docker Compose, we simplified multi-container deployment with a single YAML file, making it easy to bring up and manage all services with just one command. This approach not only enhances scalability but also allows seamless communication between application components.
For students, startups, and developers alike, containerizing applications like the MERN stack offers several advantages: a faster development cycle, easy version control, and a smooth deployment experience. As you dive deeper into Docker and container orchestration tools, mastering Docker Compose will serve as a solid foundation, paving the way for deploying even more complex applications on platforms like Kubernetes.
Happy containerising! 🚀 For more informative blog, Follow me on Hashnode, X(Twitter) and LinkedIn.
Till then, Happy Coding!!
Subscribe to my newsletter
Read articles from Pravesh Sudha directly inside your inbox. Subscribe to the newsletter, and don't miss out.
Written by

Pravesh Sudha
Pravesh Sudha
Bridging critical thinking and innovation, from philosophy to DevOps.