Launching an Amazon EKS Cluster from the AWS Console: A Complete Guide
 Kandlagunta Venkata Siva Niranjan Reddy

Setting up an Amazon EKS (Elastic Kubernetes Service) cluster can seem complex, but with the right approach, it becomes manageable. This guide walks you through setting up a dedicated VPC, configuring IAM roles, deploying the EKS cluster, and managing your applications with Amazon's managed Kubernetes service.
Here are the main steps to be followed in your blog:
Dedicated VPC: Set up a custom VPC with public and private subnets to ensure network isolation and security for your EKS cluster.
IAM Roles: Create IAM roles for the EKS control plane and worker nodes, ensuring they have the necessary permissions to manage resources.
EKS Cluster: Deploy the Amazon EKS cluster to manage your Kubernetes applications and resources.
Node Groups: Configure EC2 instances as worker nodes to run your Kubernetes workloads within the EKS cluster.
Networking Configuration: Configure the VPC, subnets, and security groups to control communication and access to your cluster.
AWS CLI and kubectl: Install and configure AWS CLI and
kubectlto manage your EKS cluster and deploy applications.Optional - AWS EBS CSI Driver: Install the EBS CSI Driver if you need persistent storage for applications running in your EKS cluster.
Step 1: Create a Dedicated VPC for EKS Cluster
To ensure network isolation and security for your Kubernetes workloads, it’s best practice to create a custom VPC. AWS offers a CloudFormation template to simplify this process.
Navigate to AWS CloudFormation:
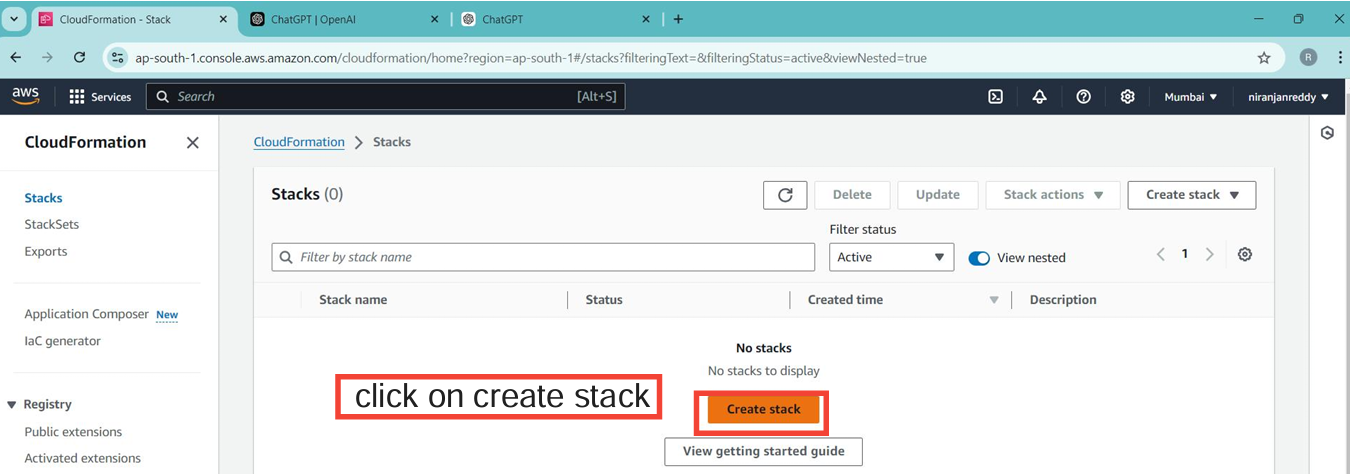
- In the AWS Console, search for CloudFormation and select Create Stack.

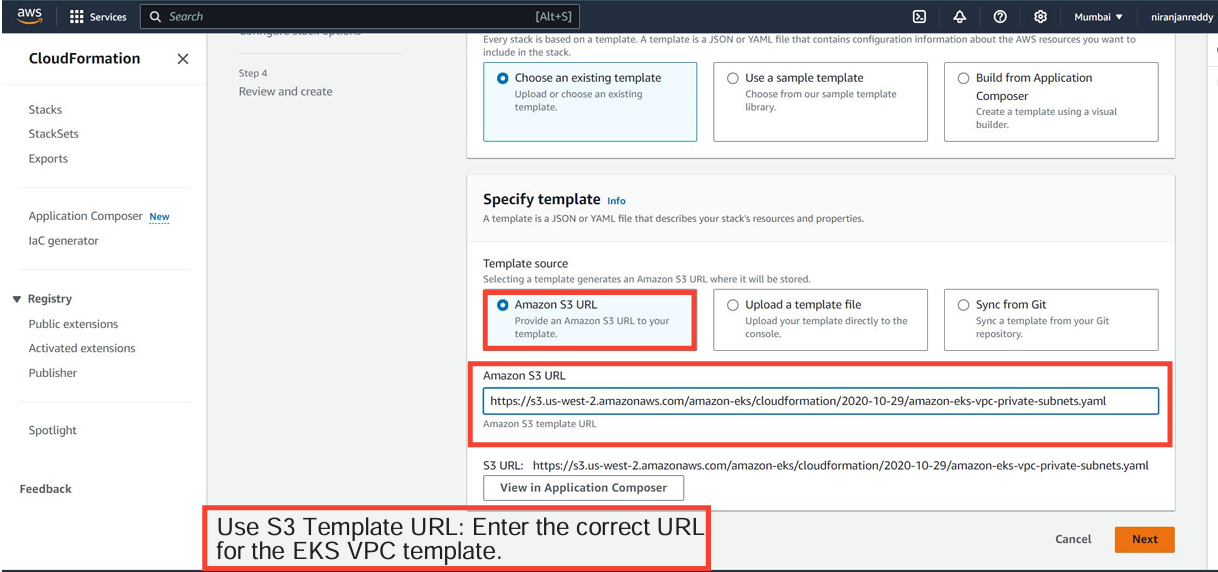
Enter the S3 template URL:
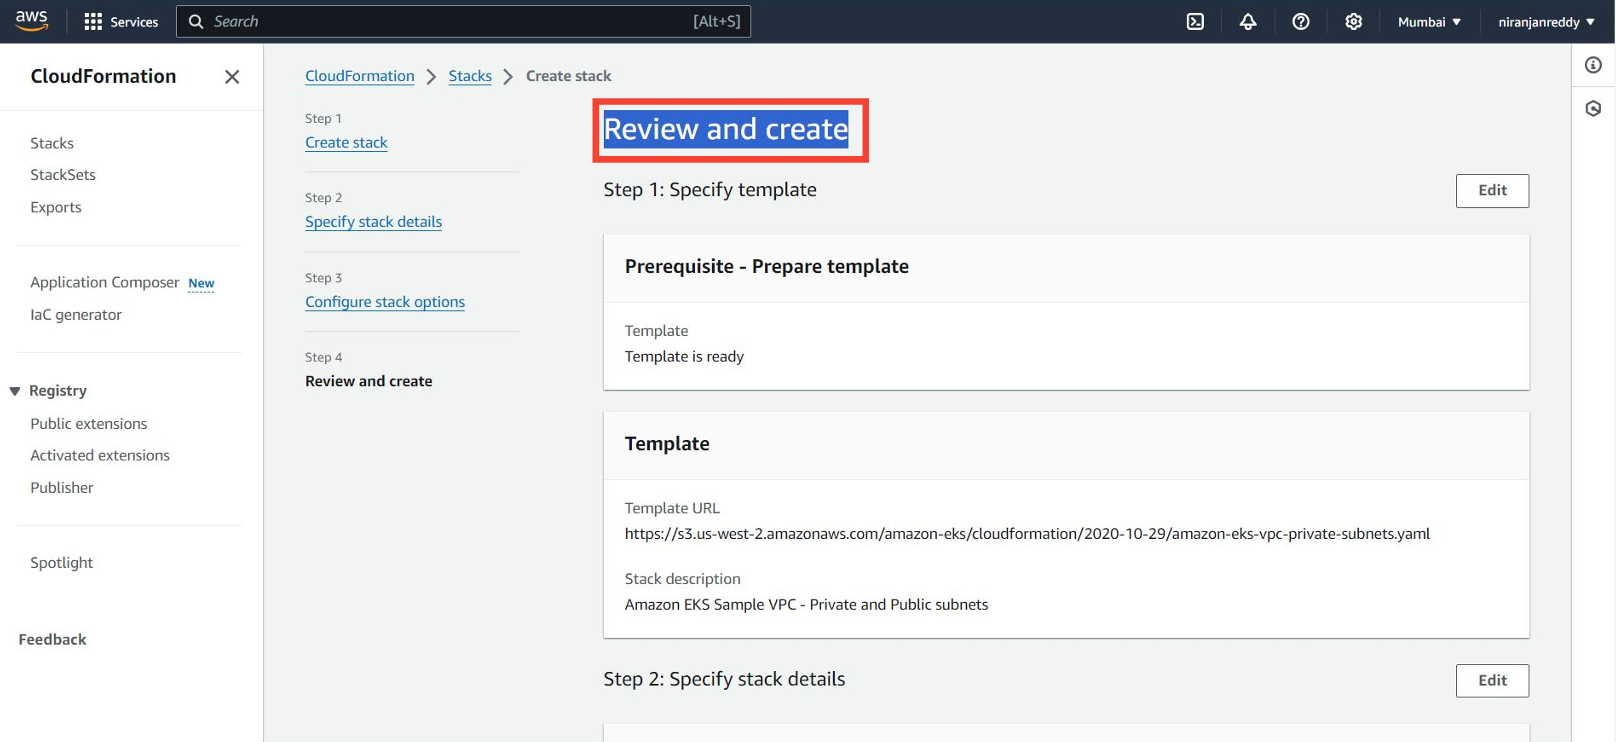
https://s3.us-west-2.amazonaws.com/amazon-eks/cloudformation/2020-10-29/amazon-eks-vpc-private-subnets.yaml
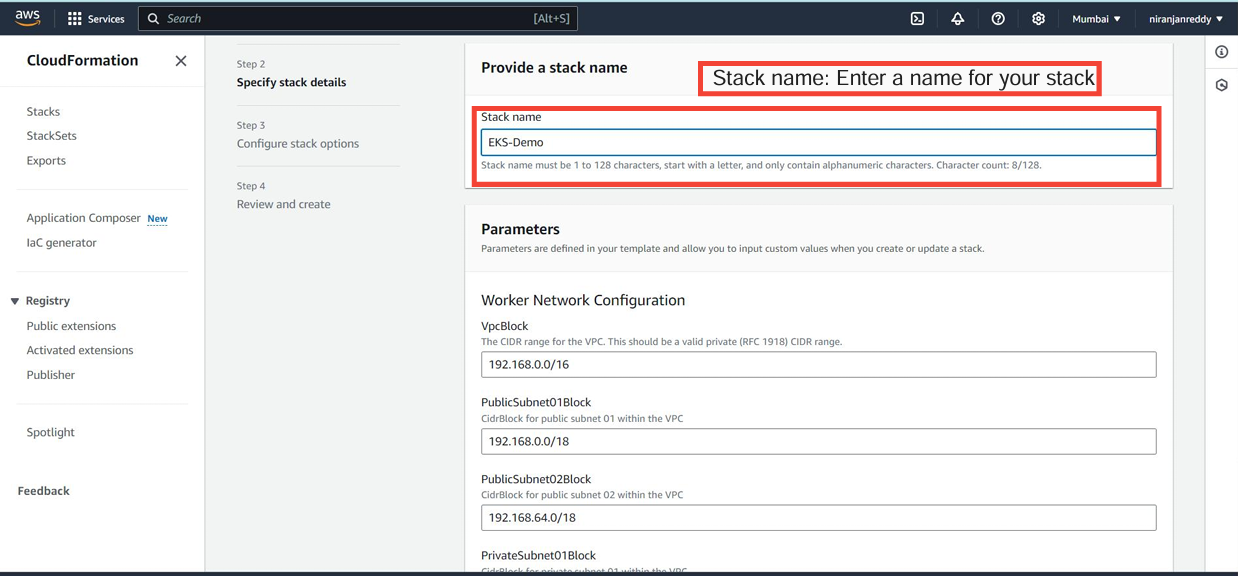
Give your stack a name, and click Next.
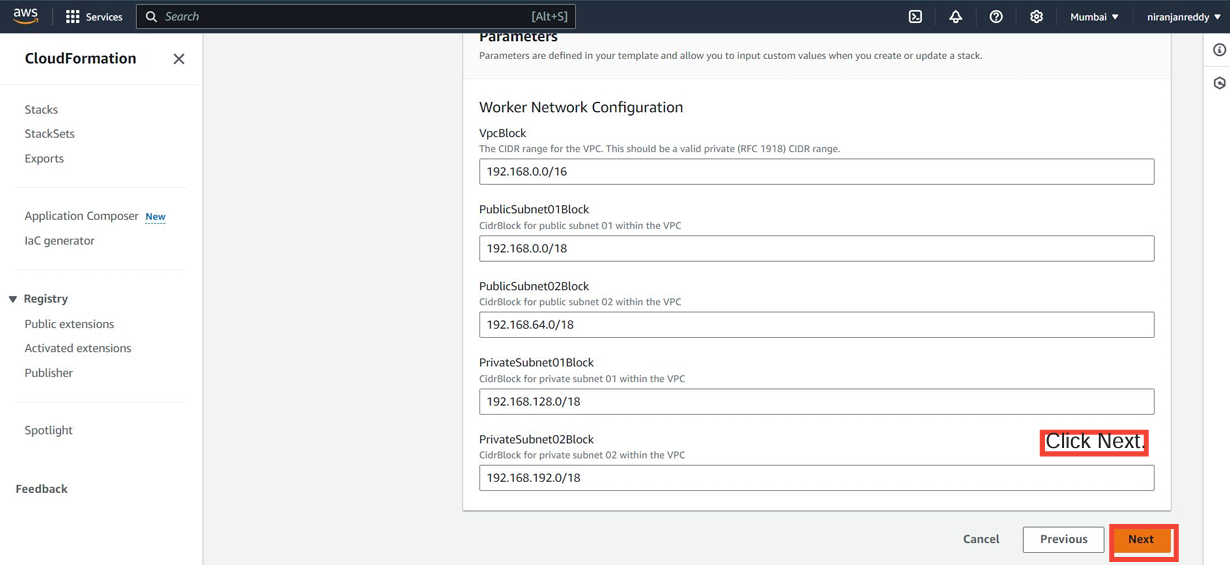
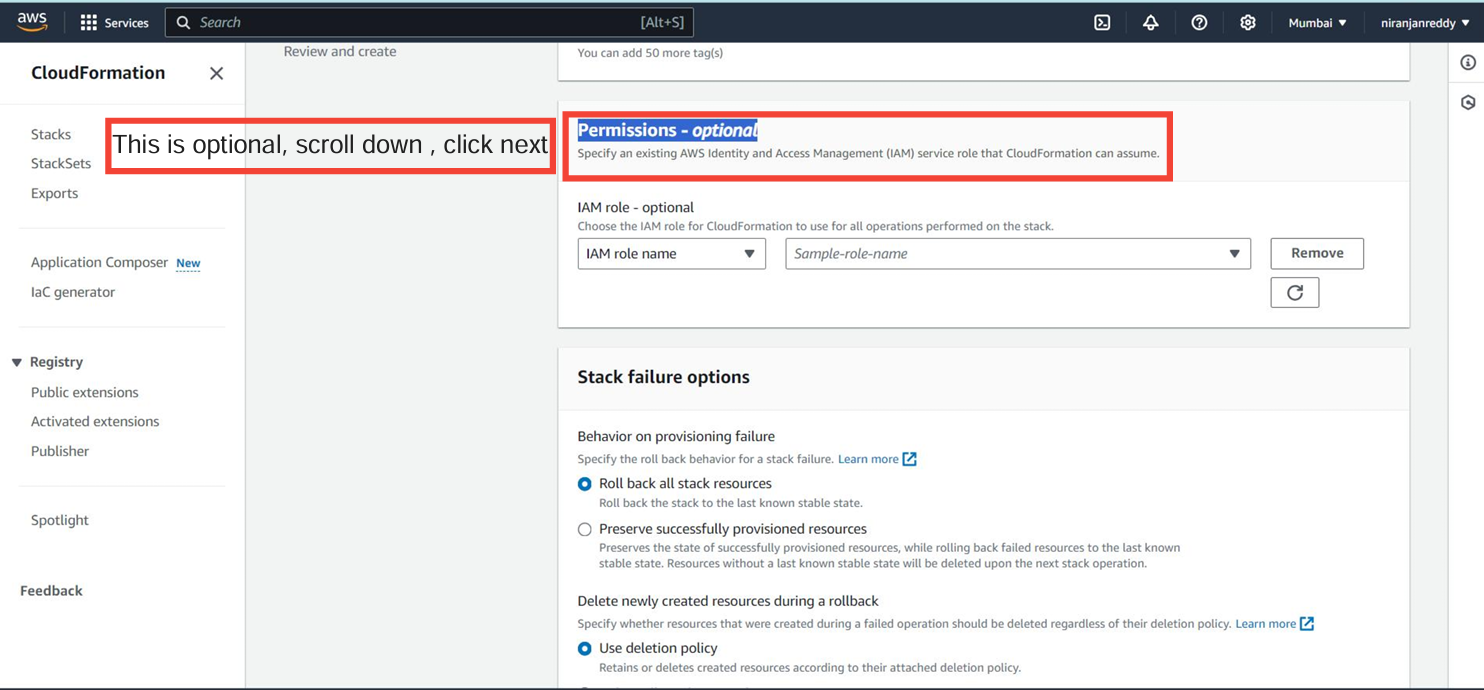
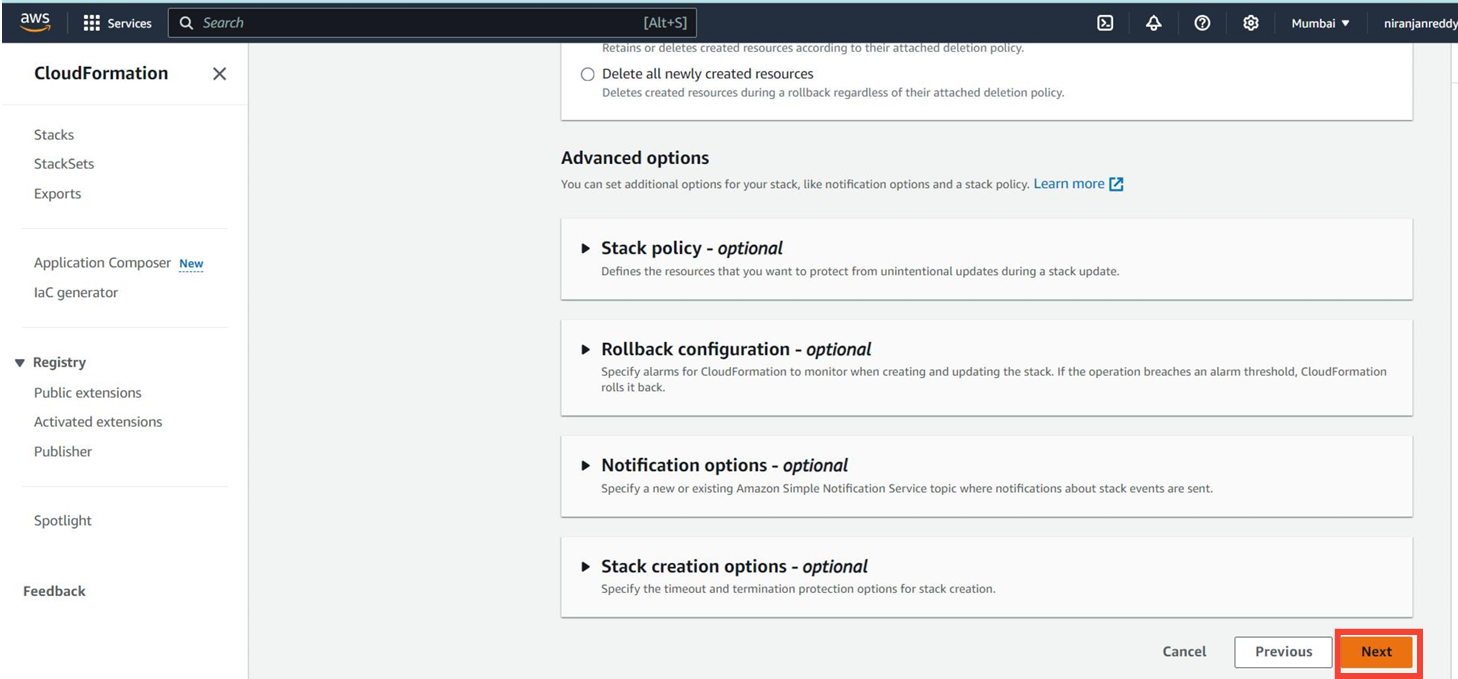
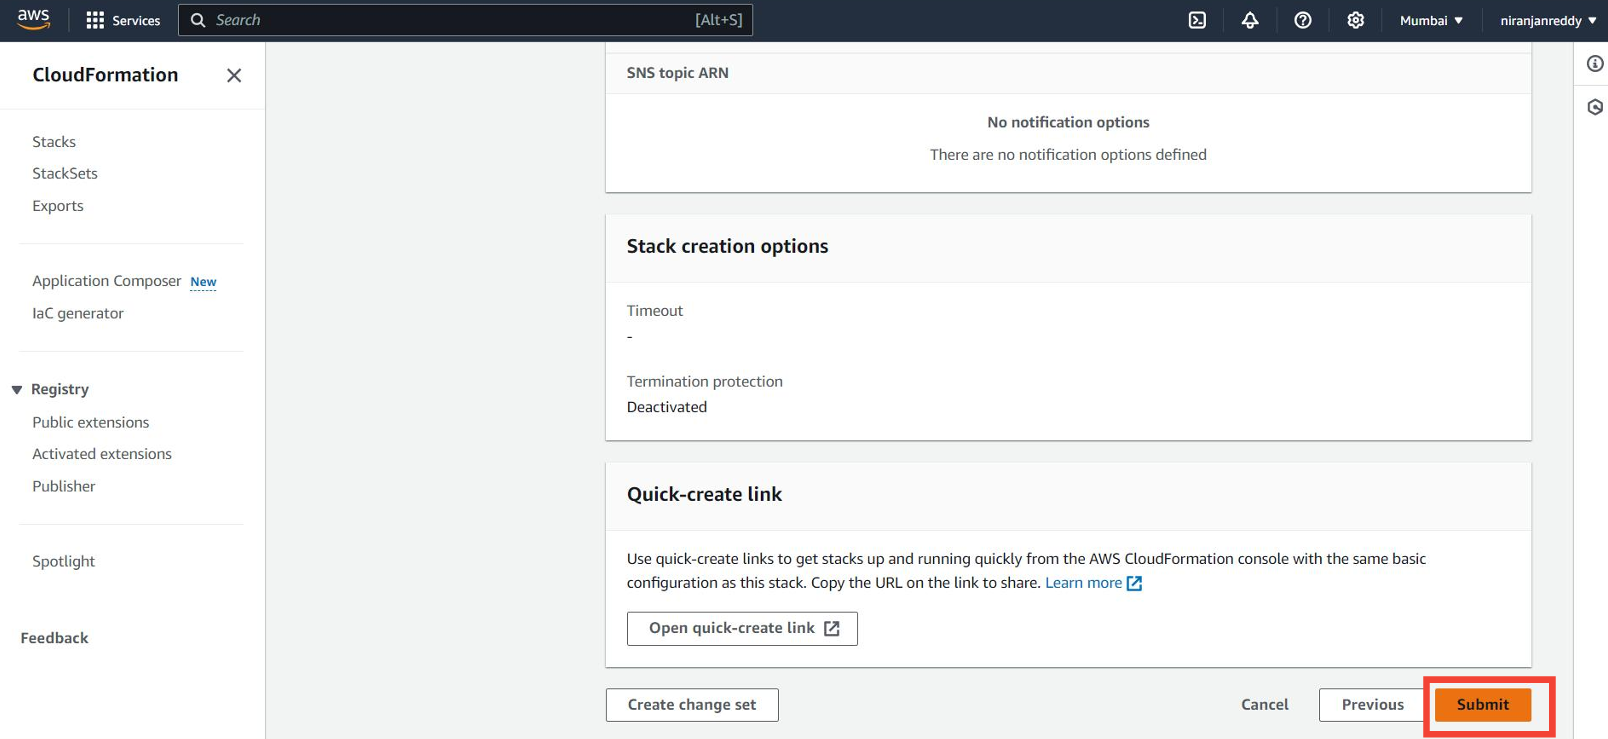
Review and Launch the Stack:
- Once launched, CloudFormation will automatically set up a VPC, public and private subnets, and routing tables.
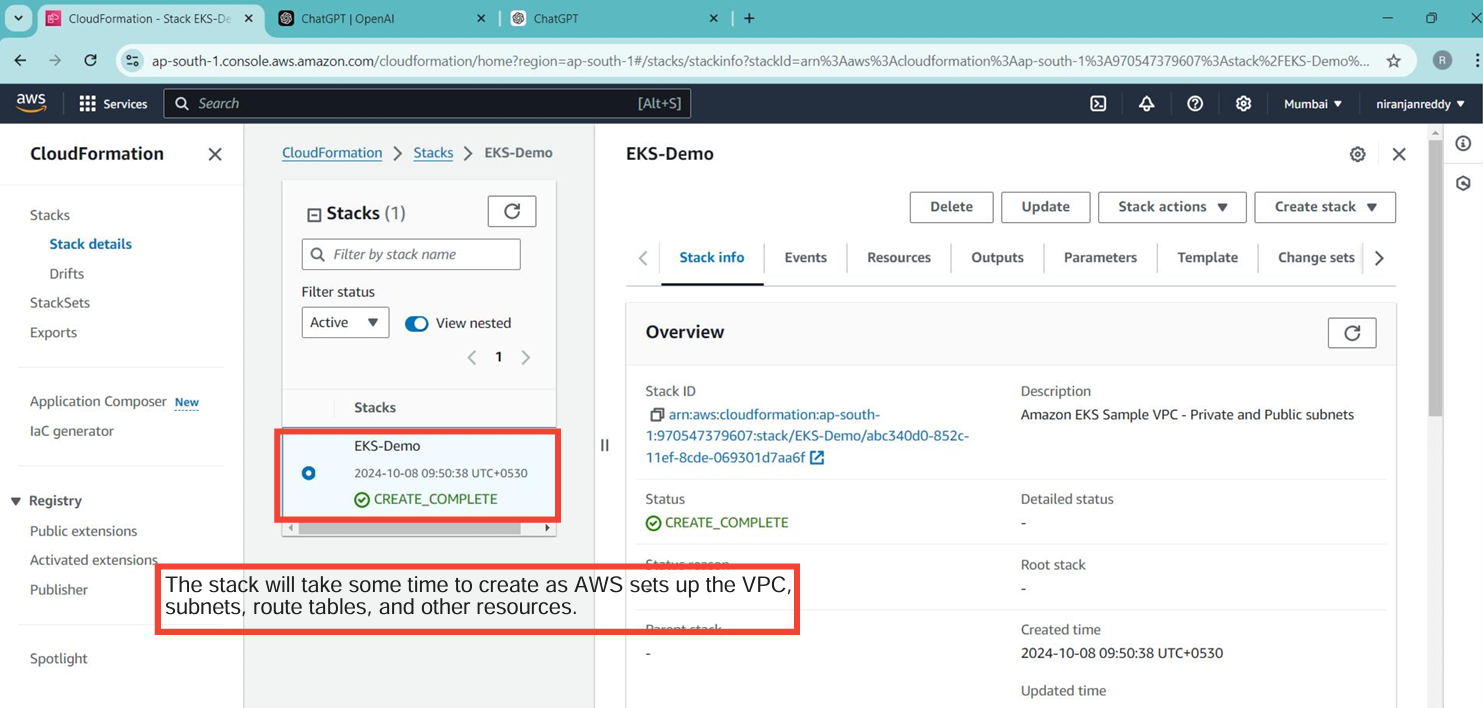
- Verify VPC Resources:
After the stack is created, navigate to VPC in the AWS Console to confirm the setup of subnets and route tables

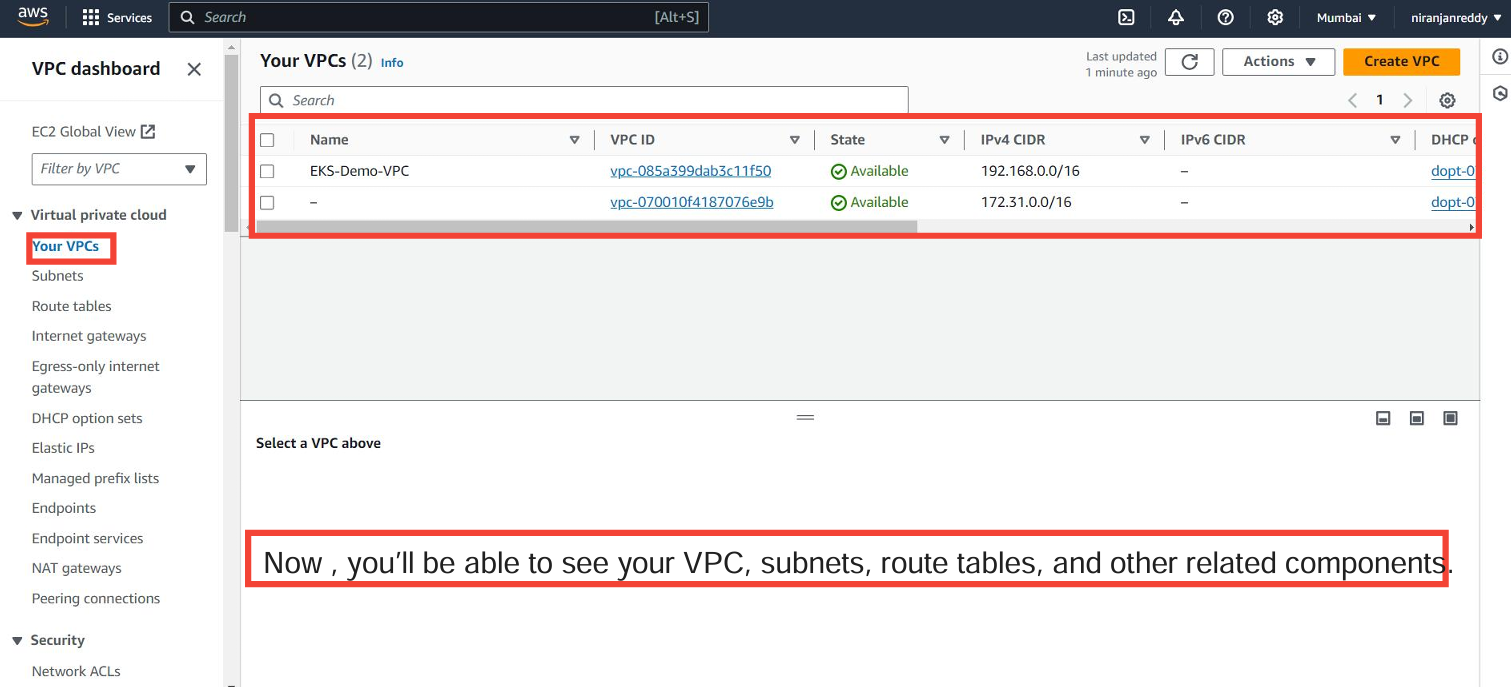

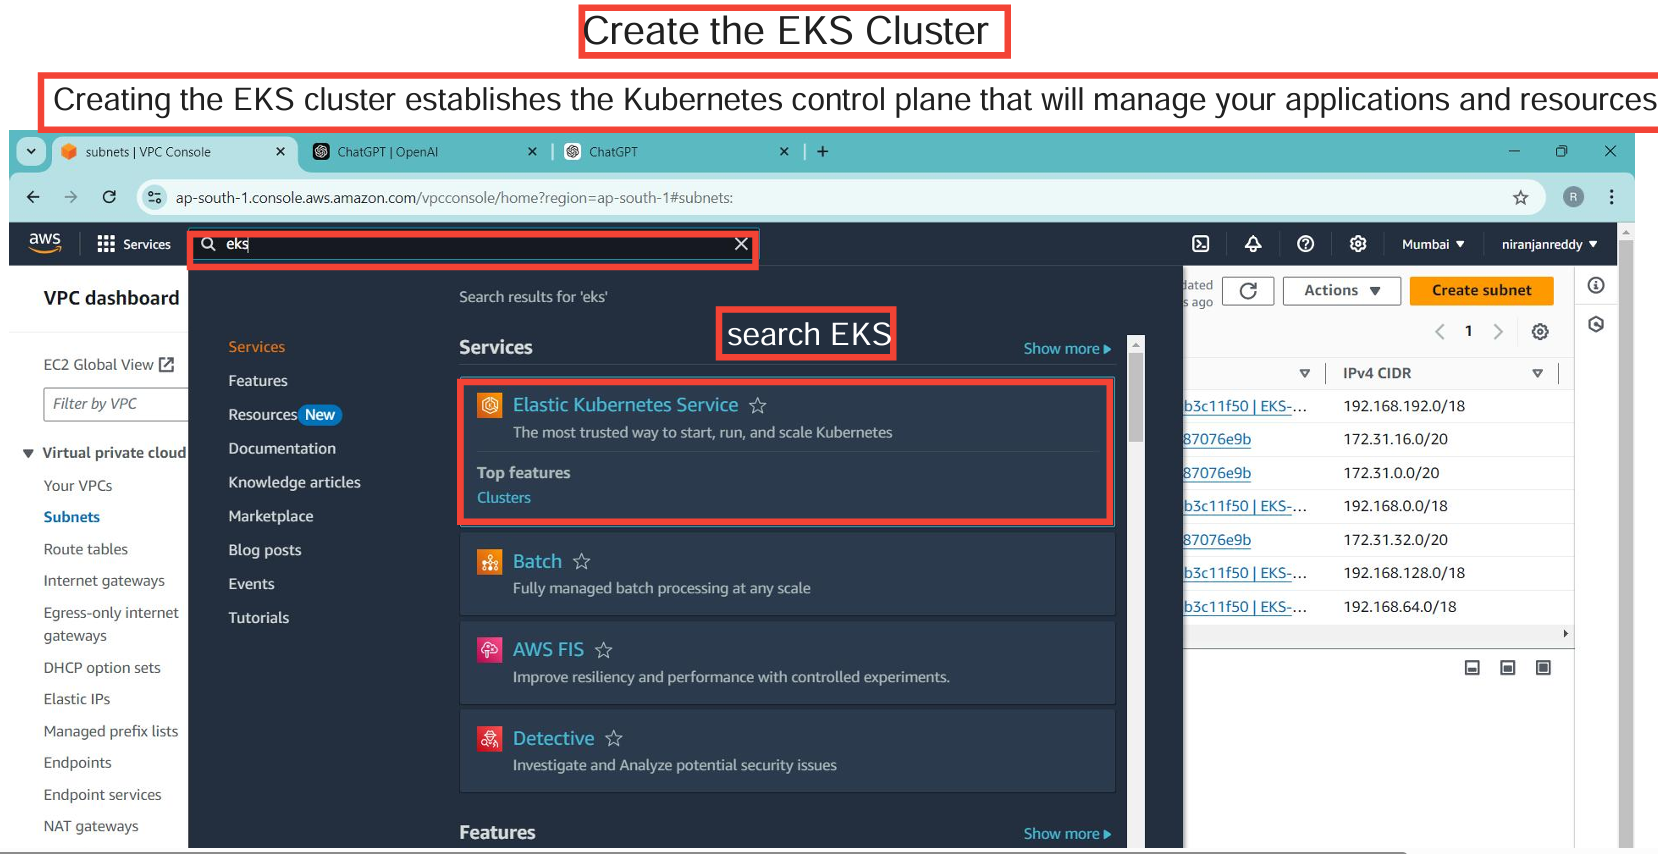
Create the Amazon EKS Cluster
Create the EKS Cluster:
- In the AWS Console, navigate to EKS and select Create Cluster.
Click on Add cluster and select Create.
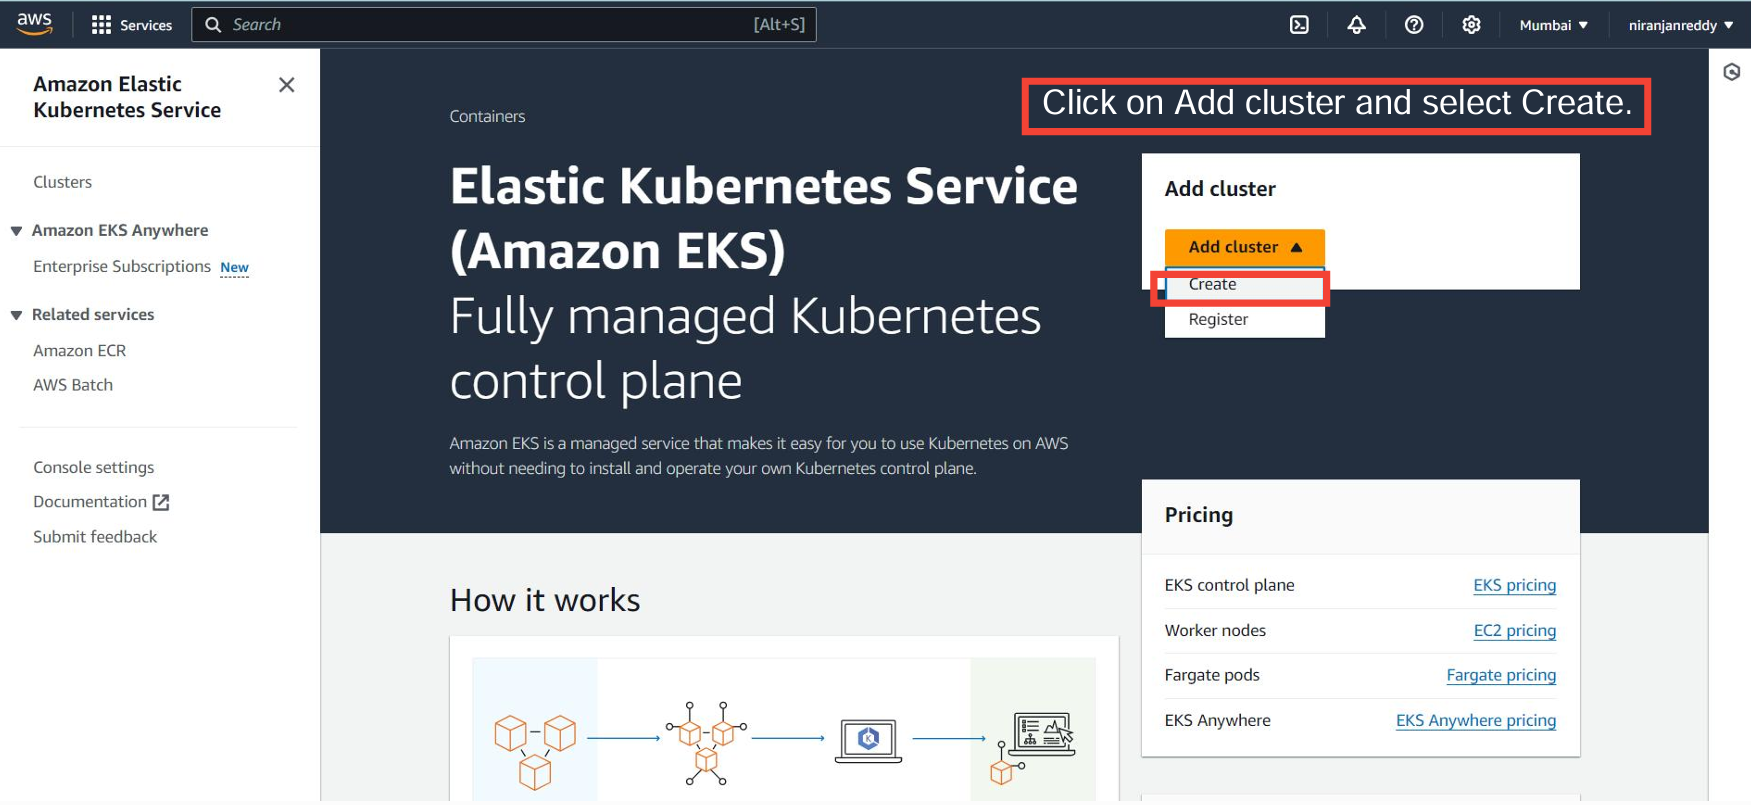
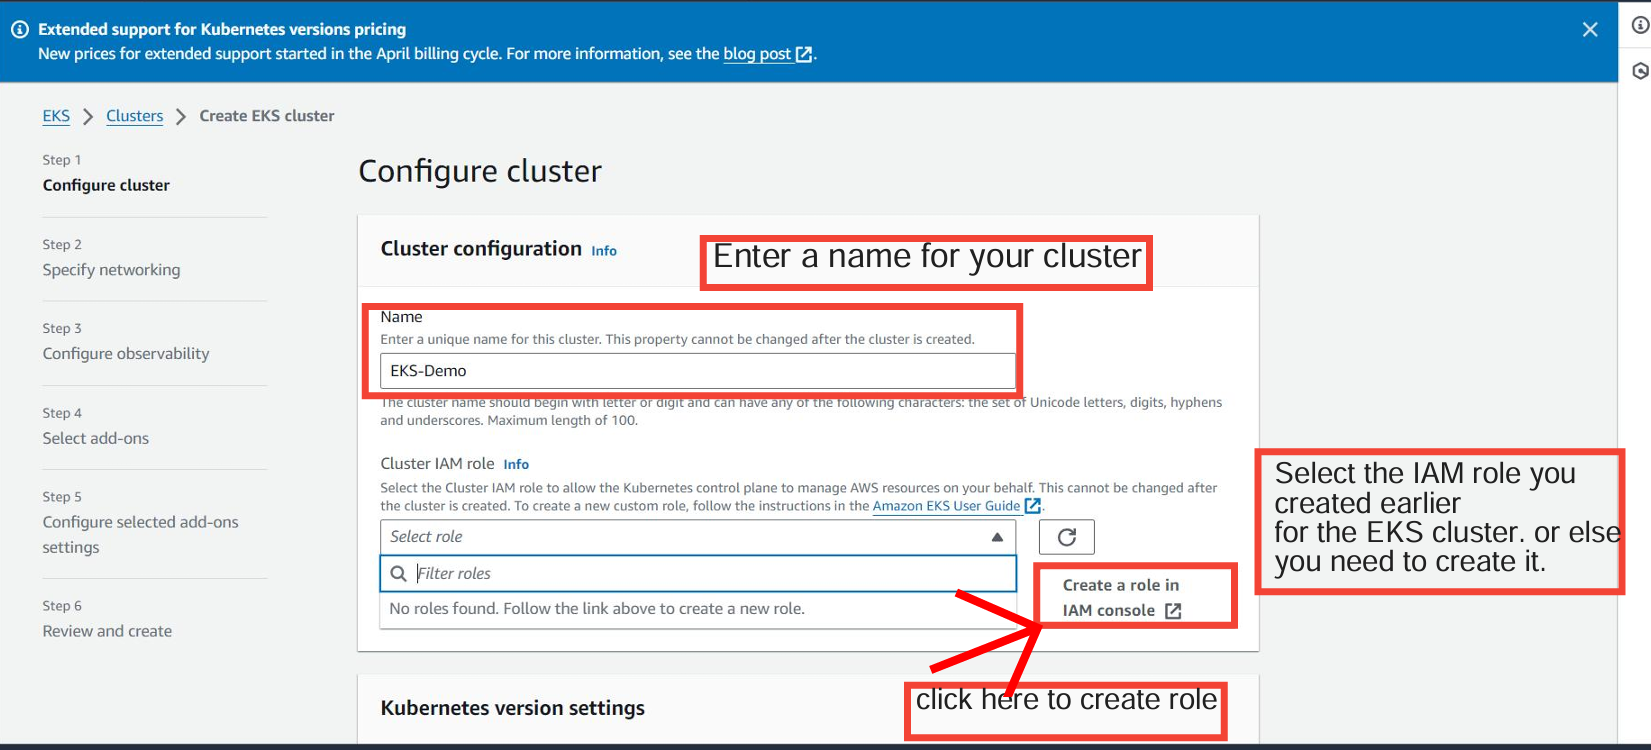
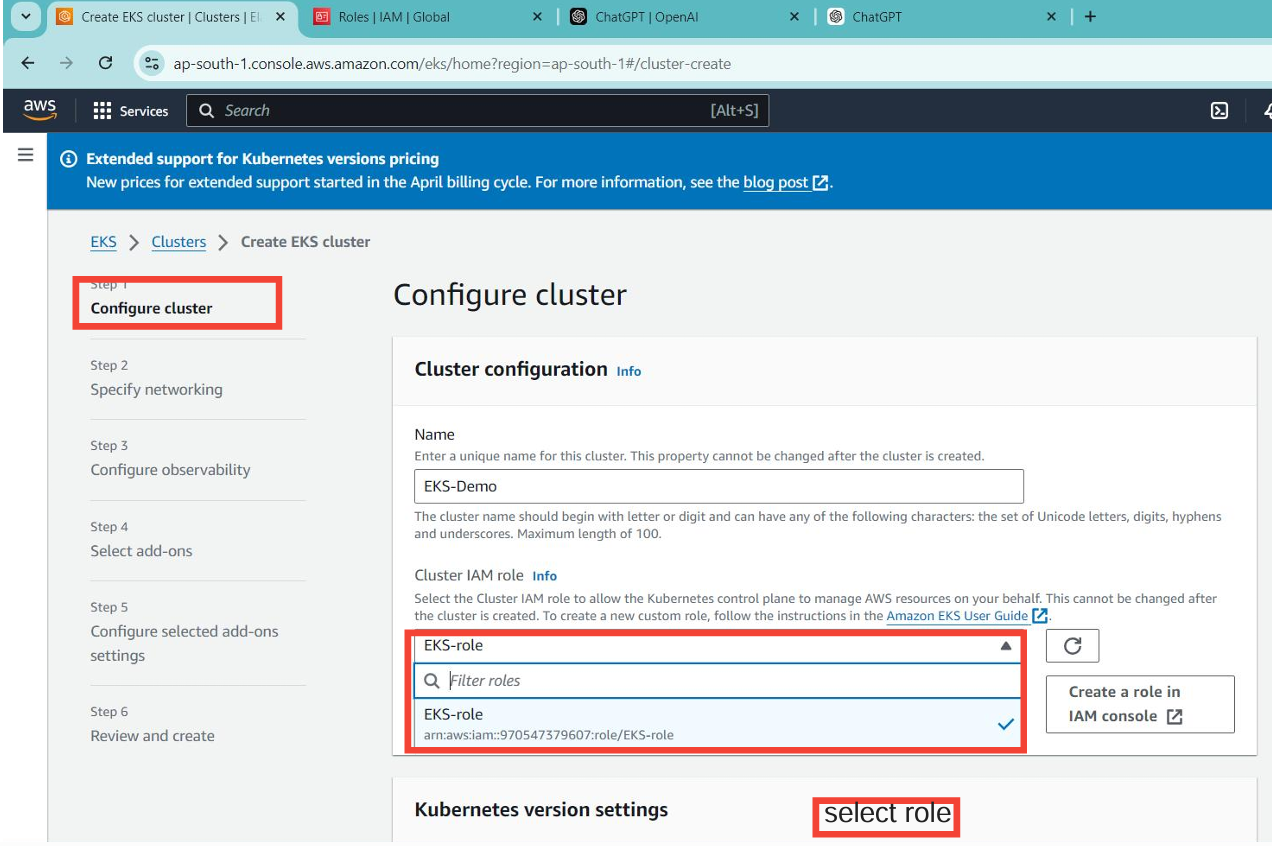
Give your cluster a name, and select the IAM role created for the control plane.
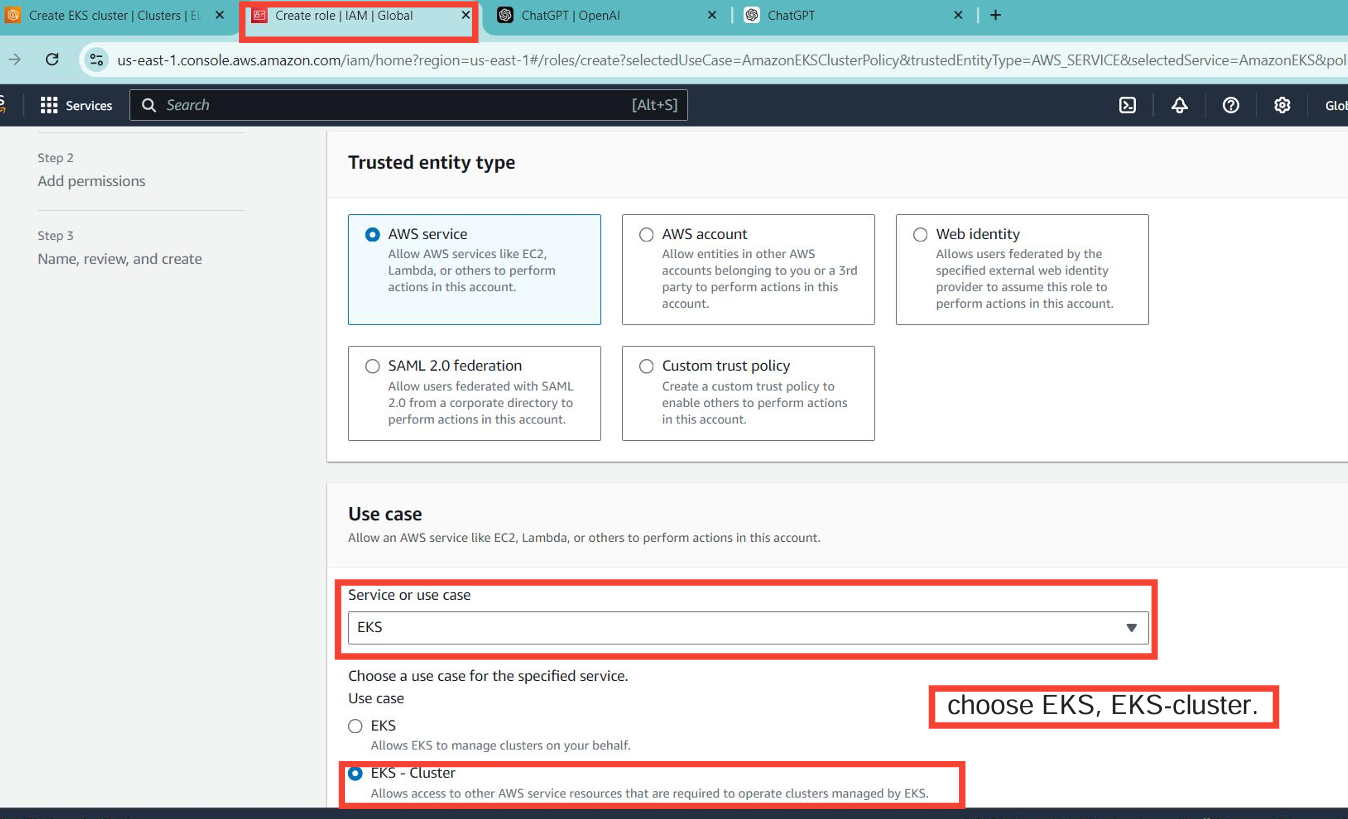
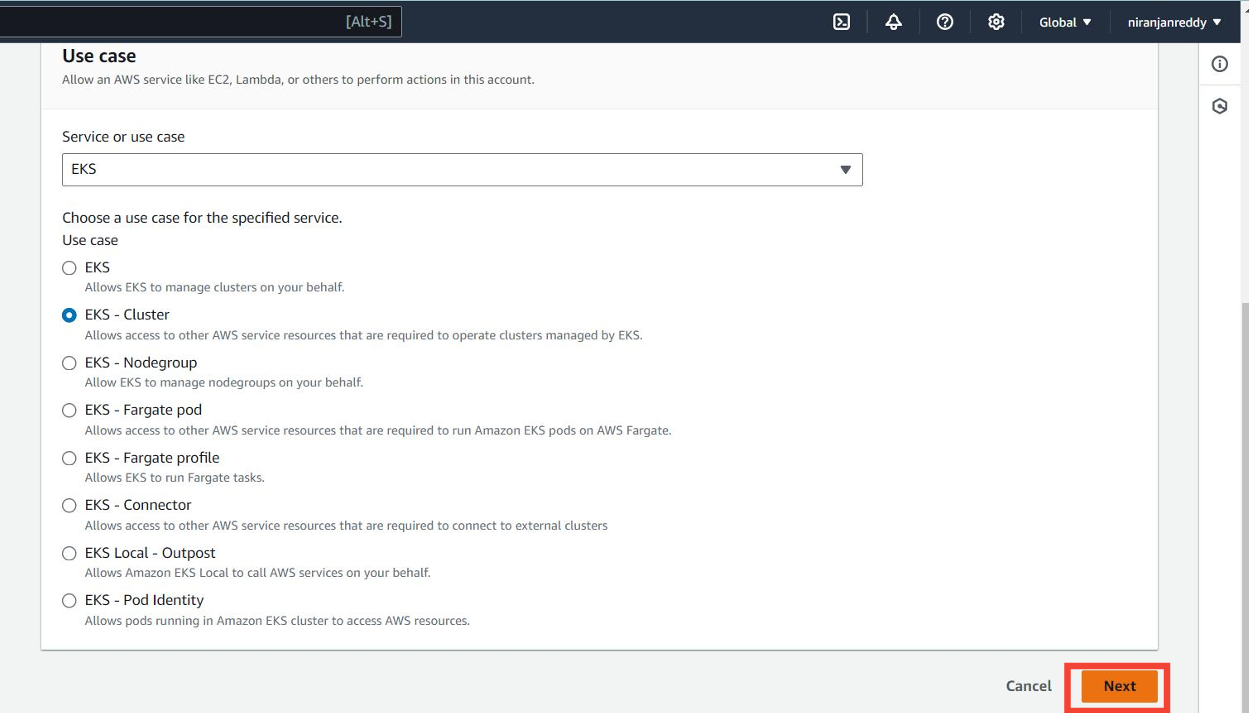
Select EKS as the service and EKS - Cluster as the use case.

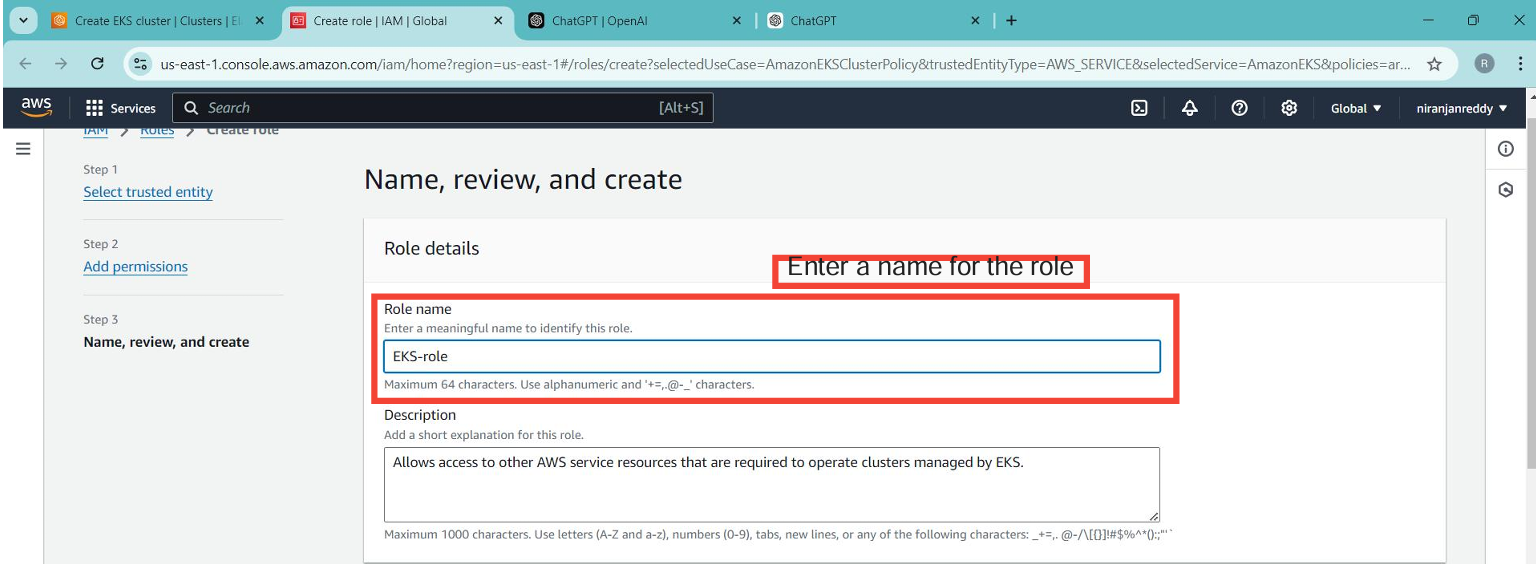
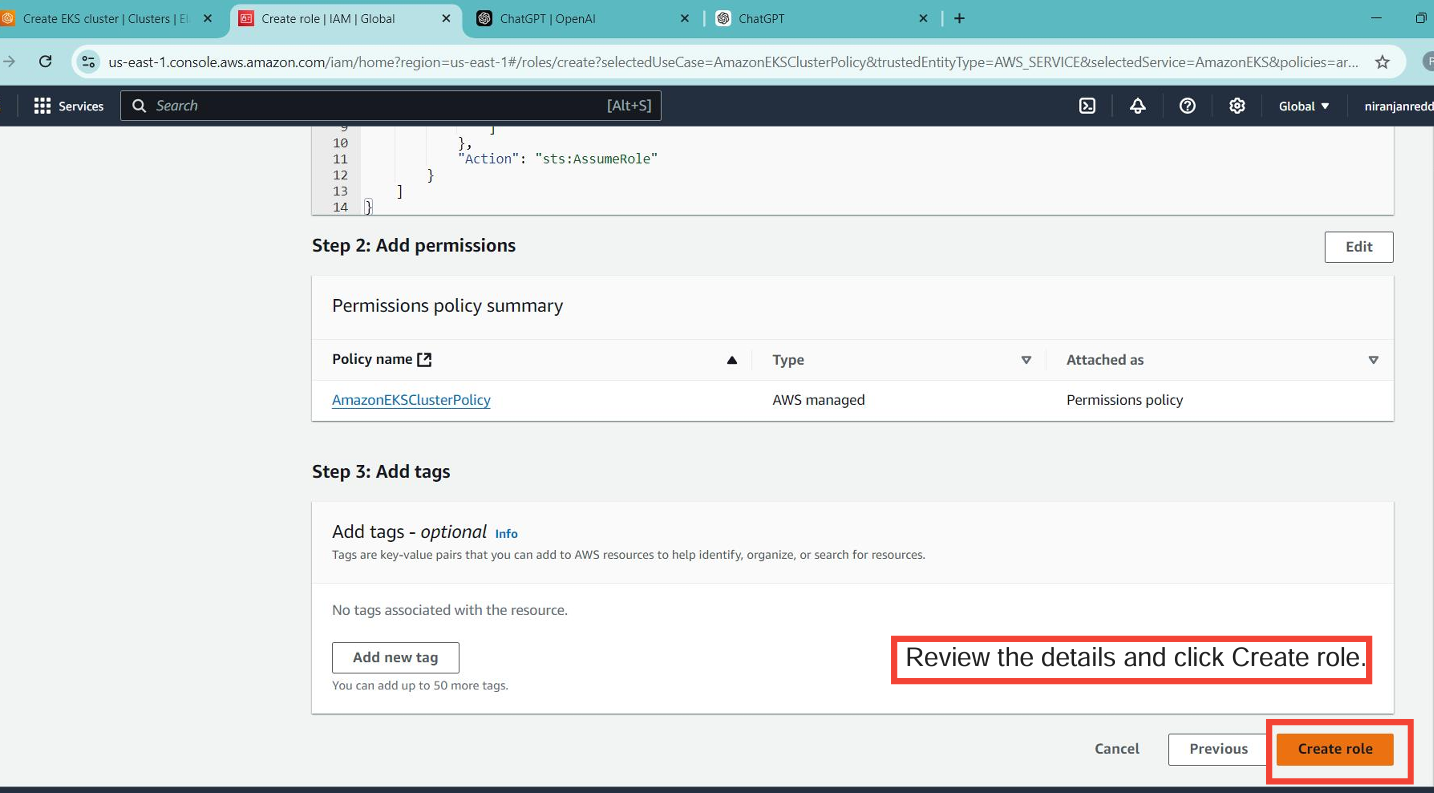
Give the role a name, such as EKS-role, and create it.
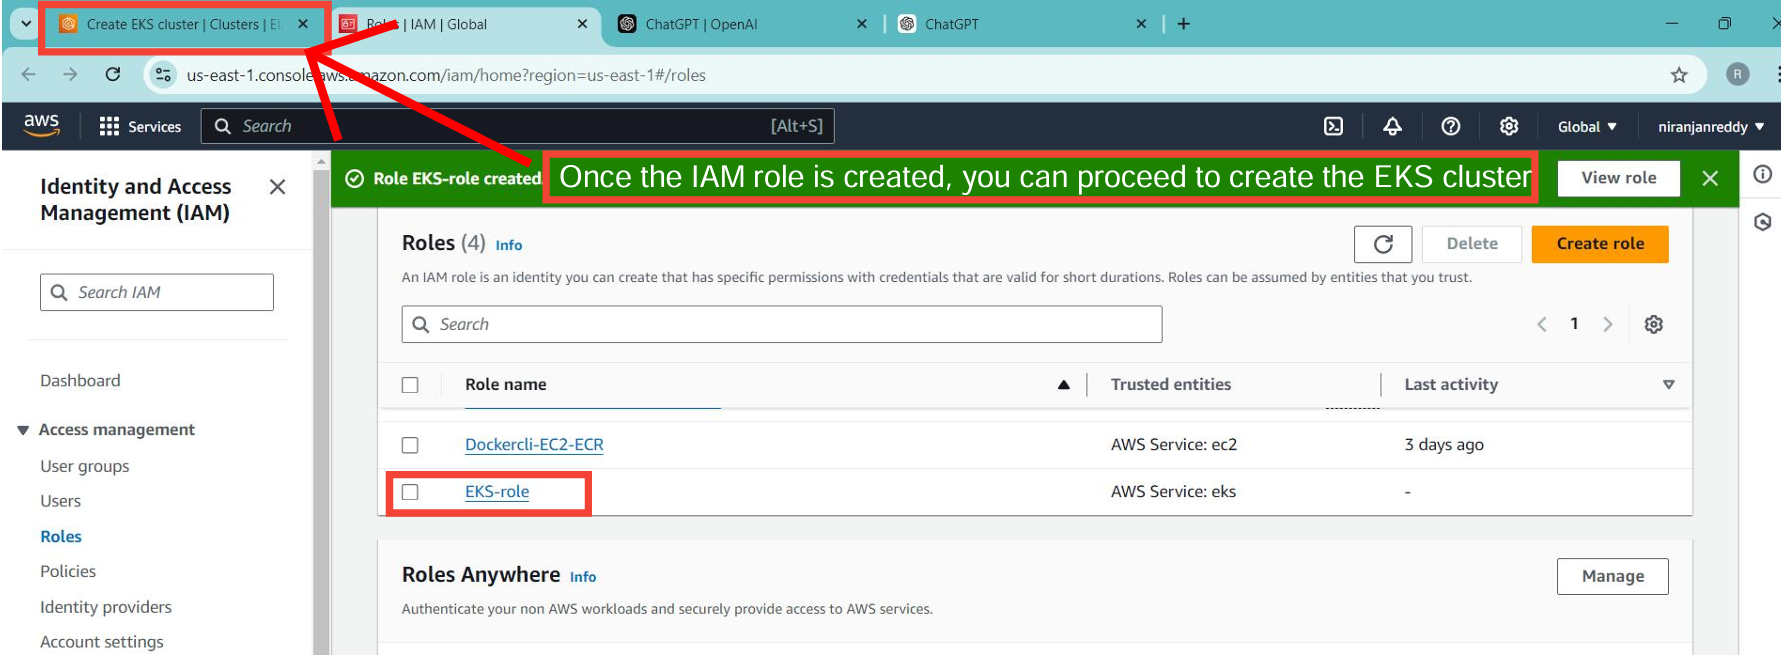
Once the IAM role is created, you’re ready to proceed with creating the EKS cluster.
Role: Select the IAM role you just created for the EKS cluster, which grants the necessary permissions to manage cluster resources.
VPC: Choose the VPC you set up for the cluster.
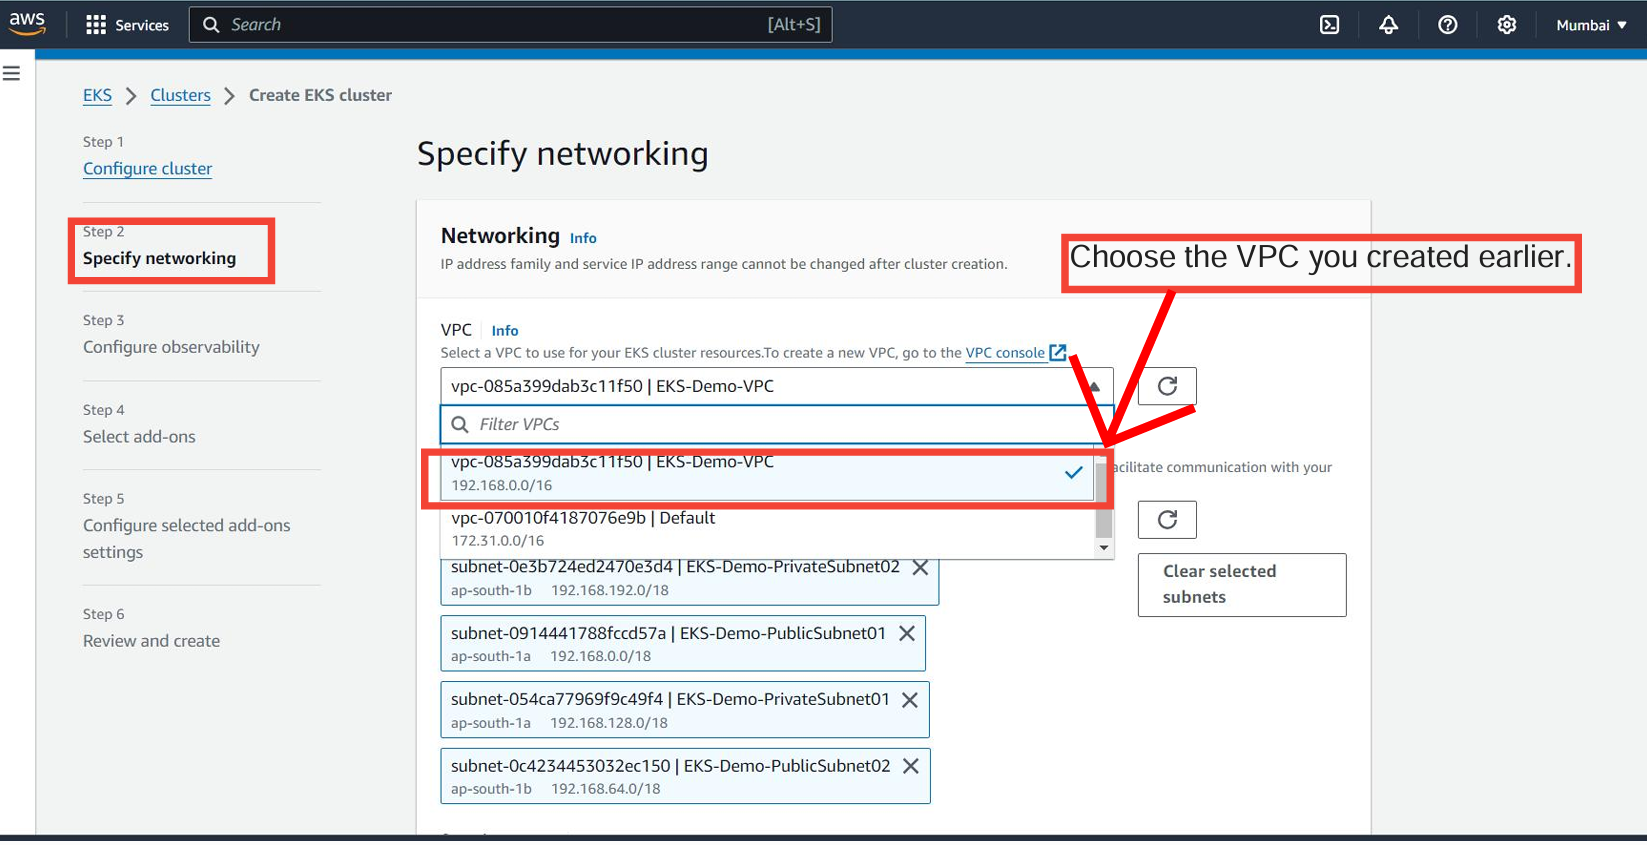
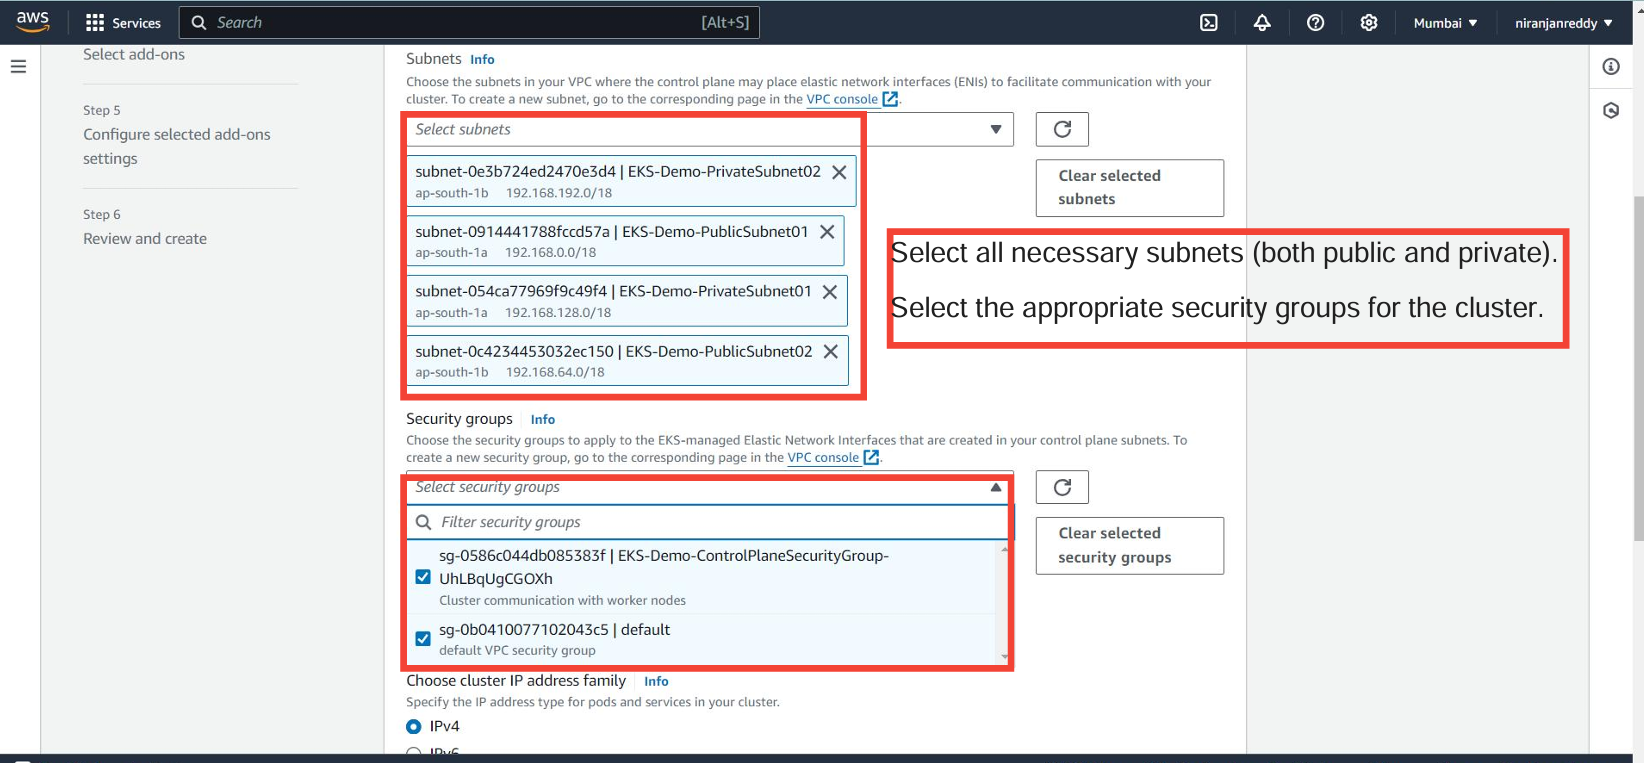
Subnets: Select the public and private subnets within your VPC. This network setup allows the cluster to manage communication between nodes.
Security Groups: Choose the appropriate security group(s) for controlling access to your EKS cluster.
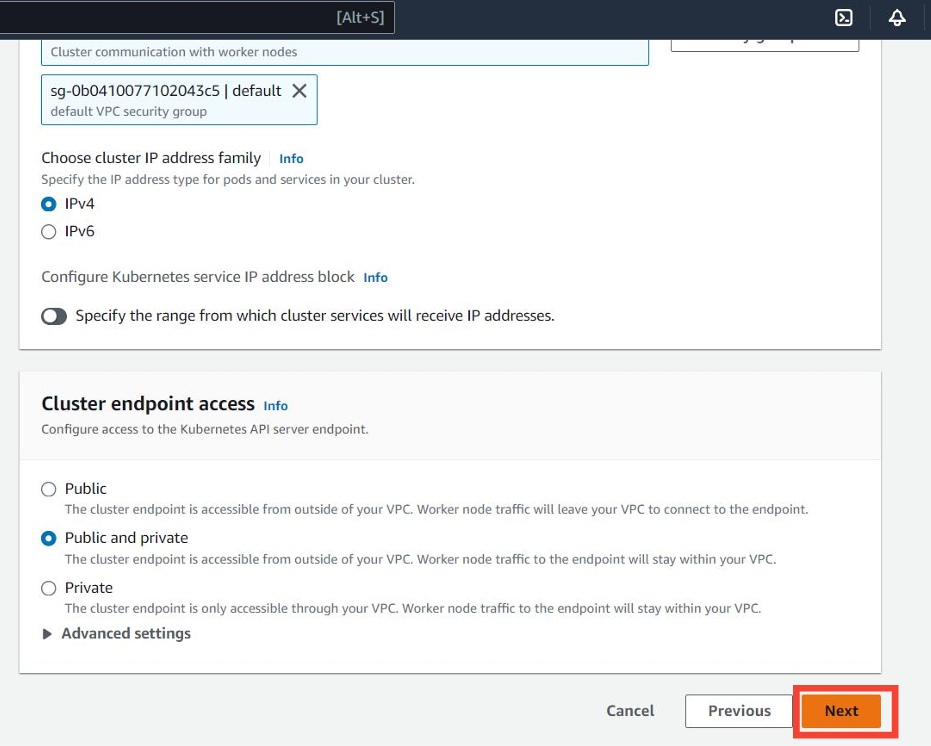
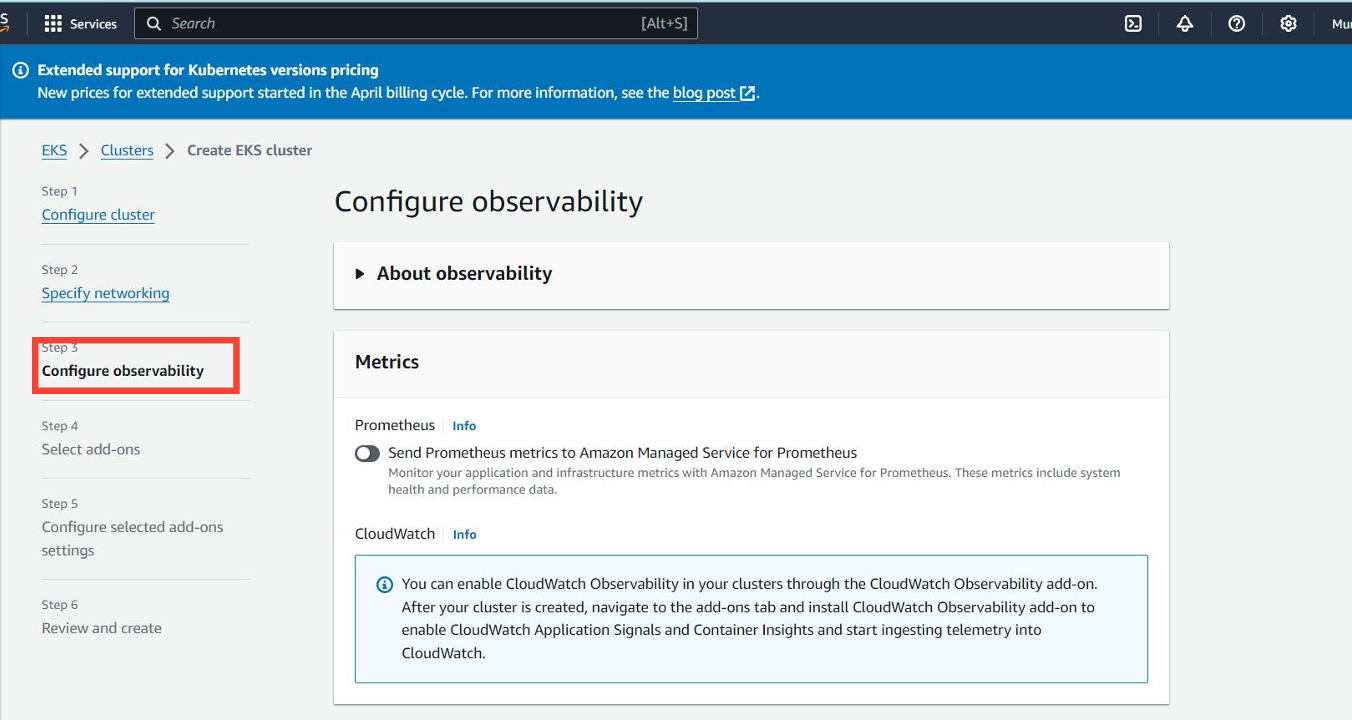
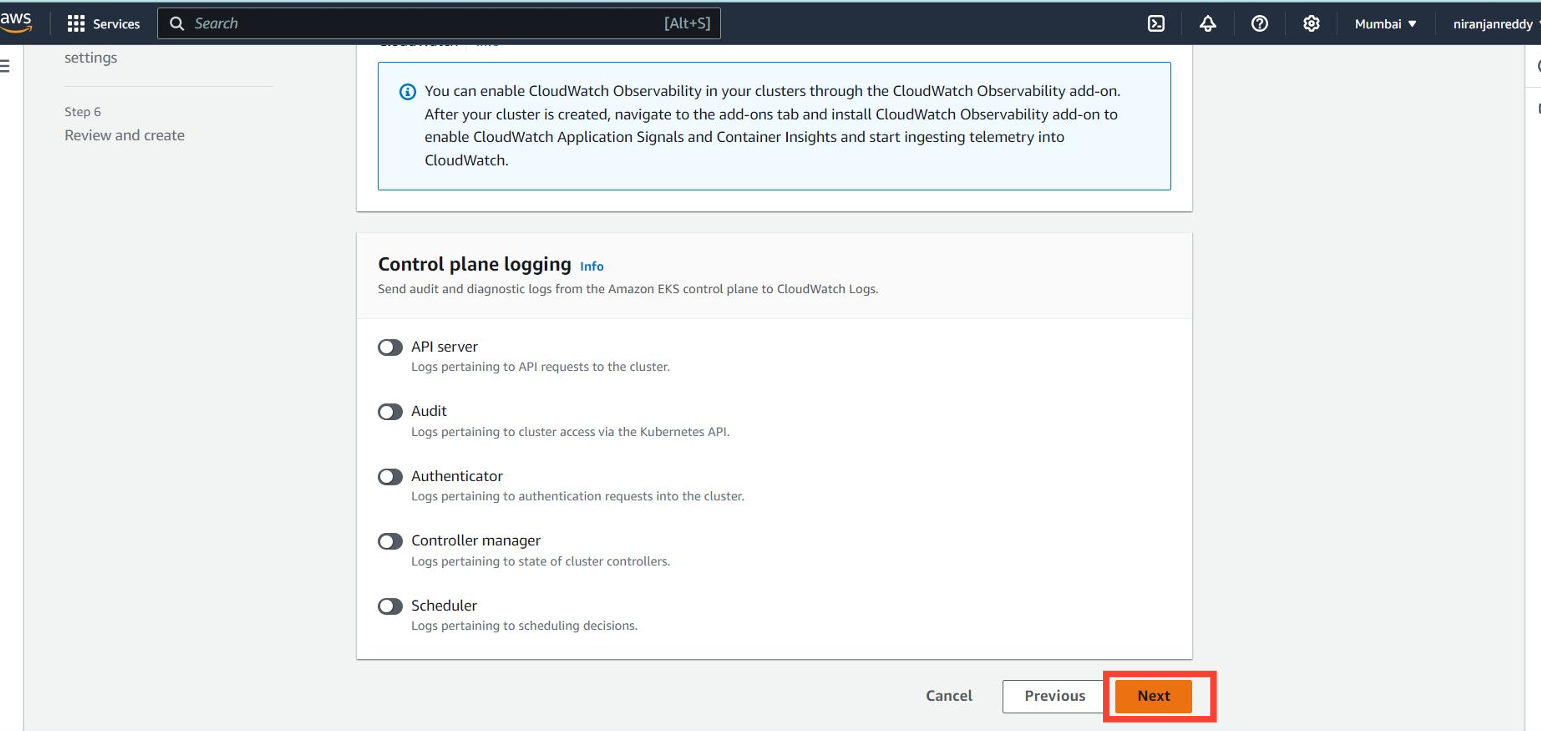
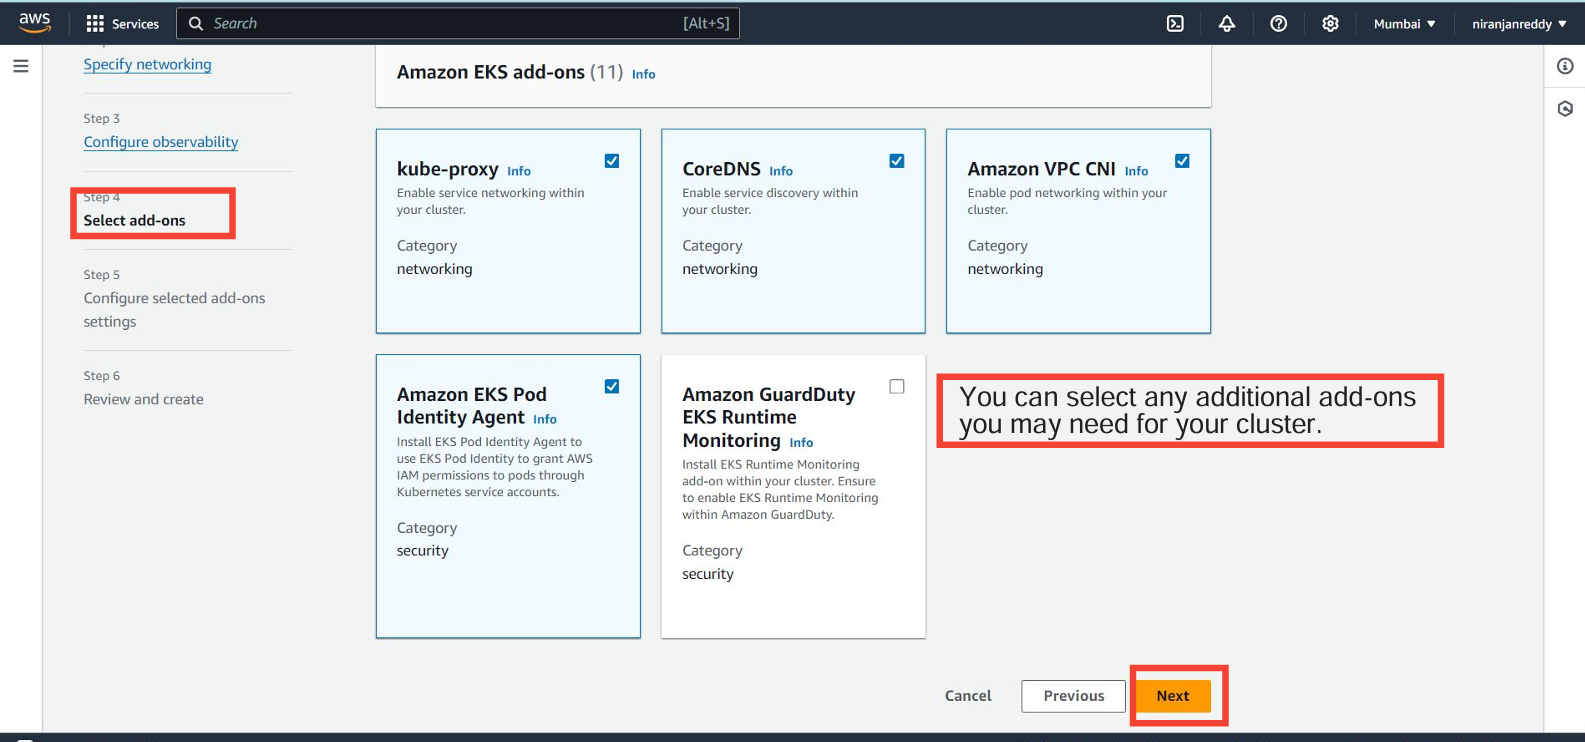
Additional Cluster Settings:
Kubernetes Version: Select the Kubernetes version you want for the cluster. AWS usually recommends the latest version compatible with EKS.
Cluster Logging (optional): Enable logging if you want to send cluster logs to CloudWatch for easier monitoring and troubleshooting.
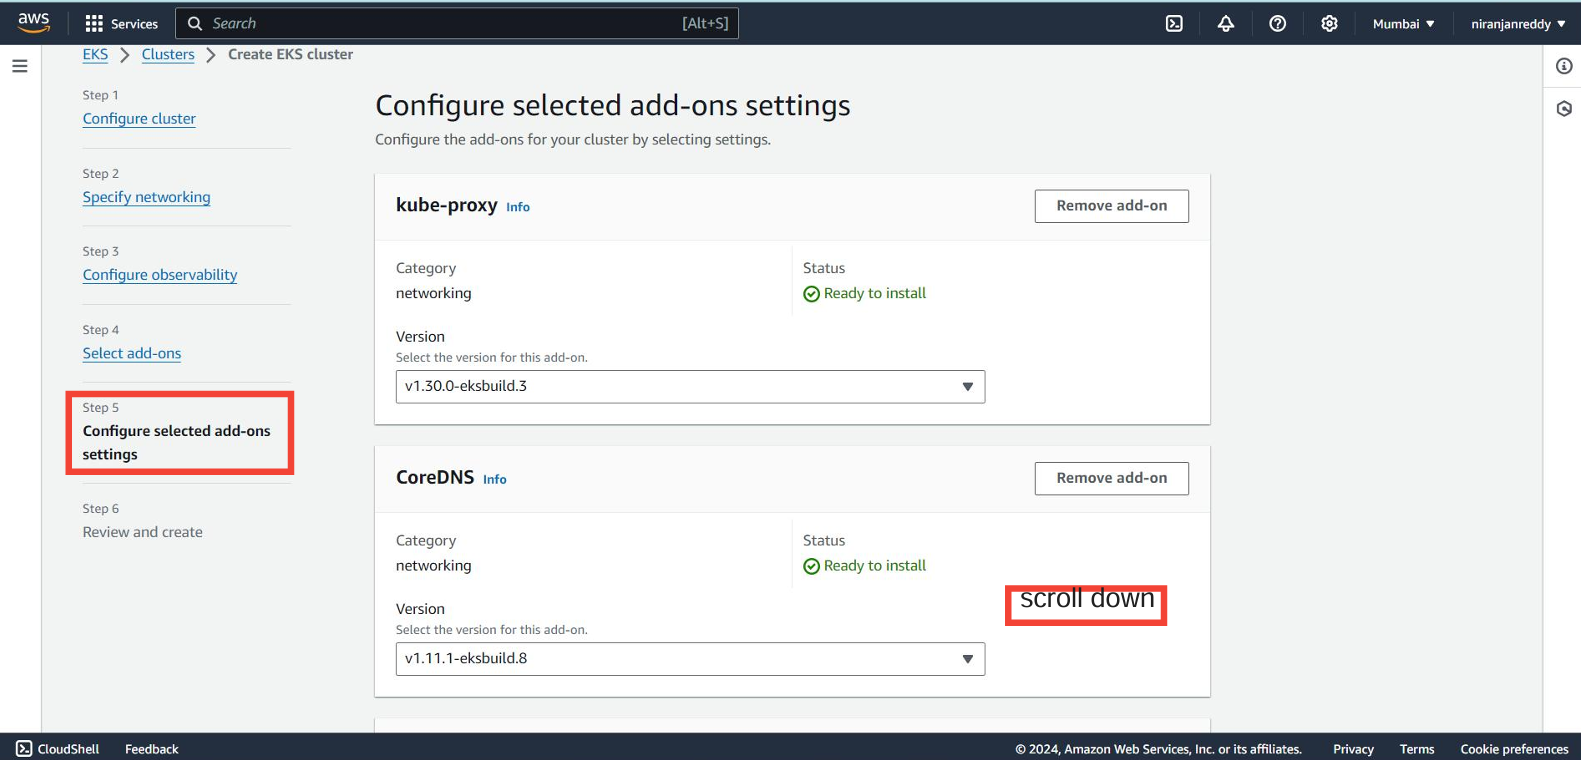
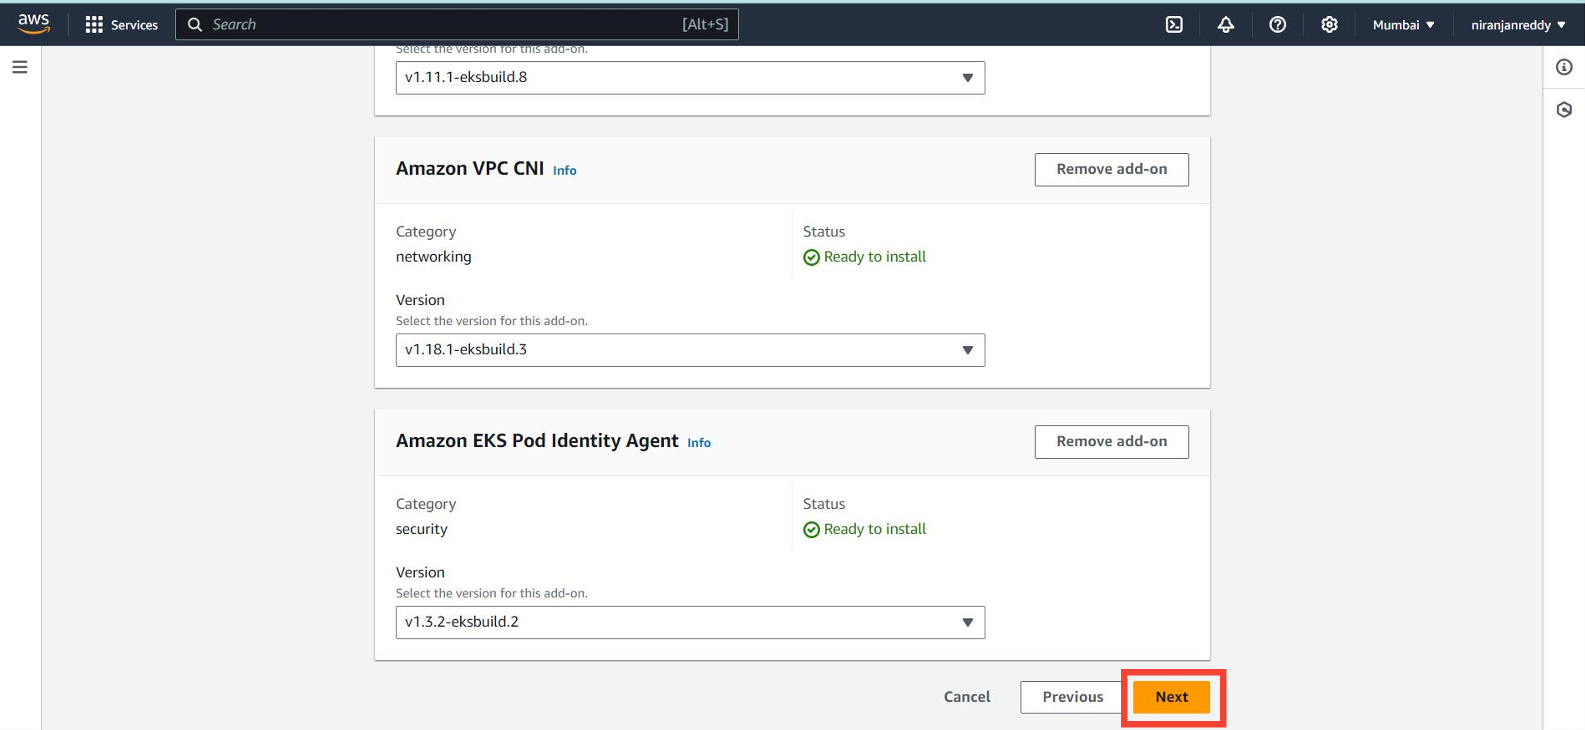
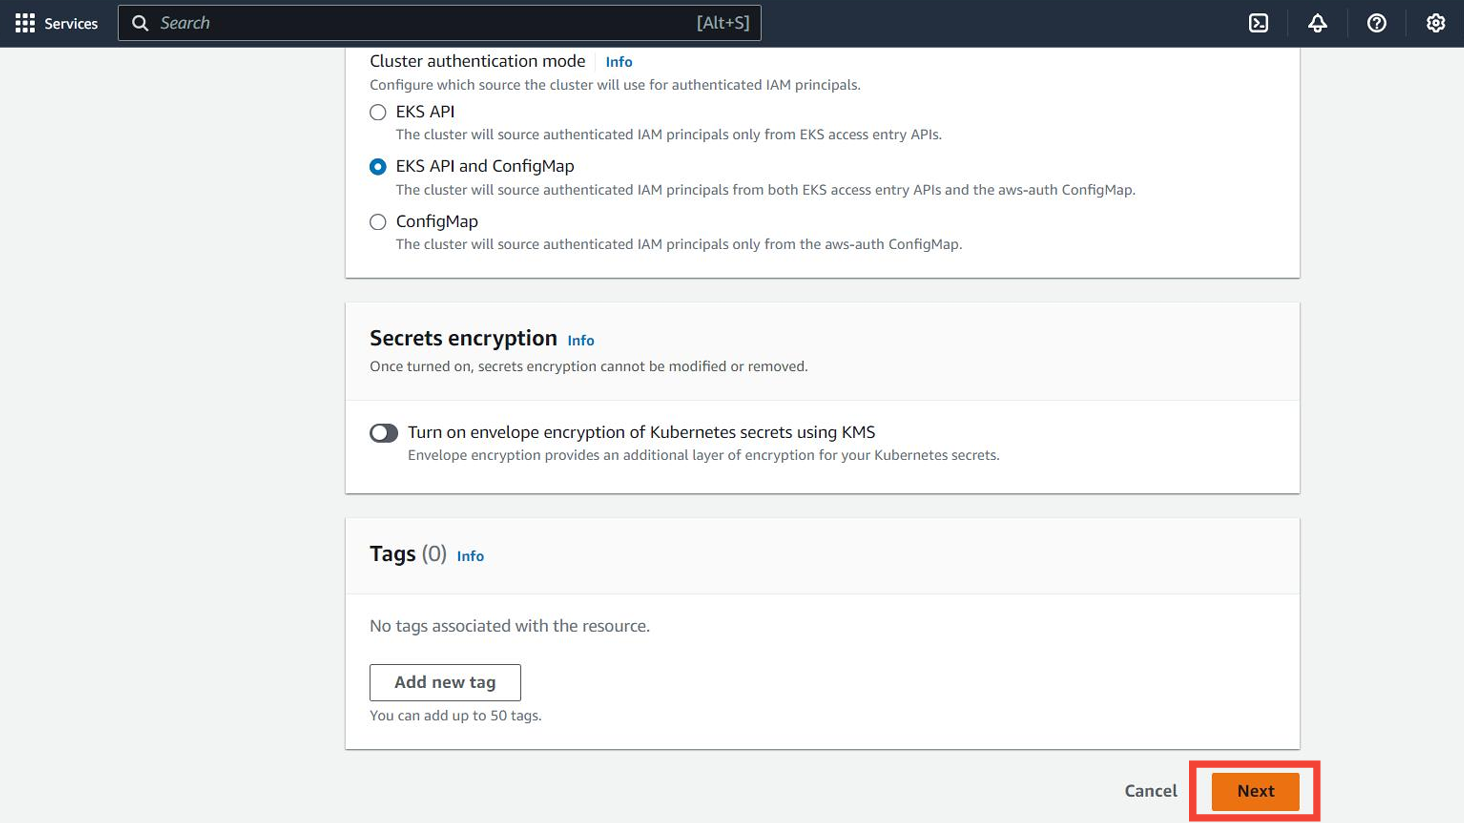
- Review all your settings, then click Create.
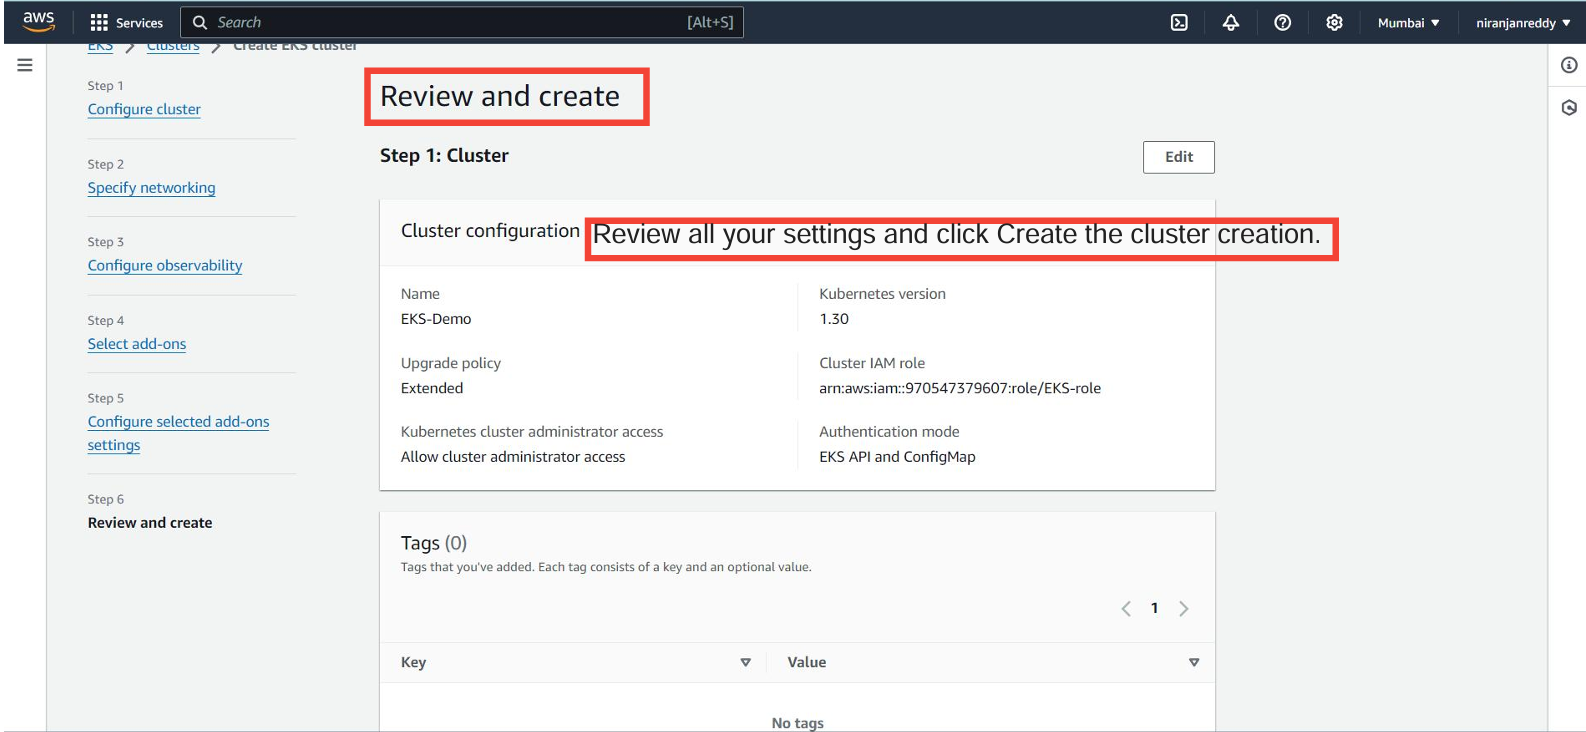
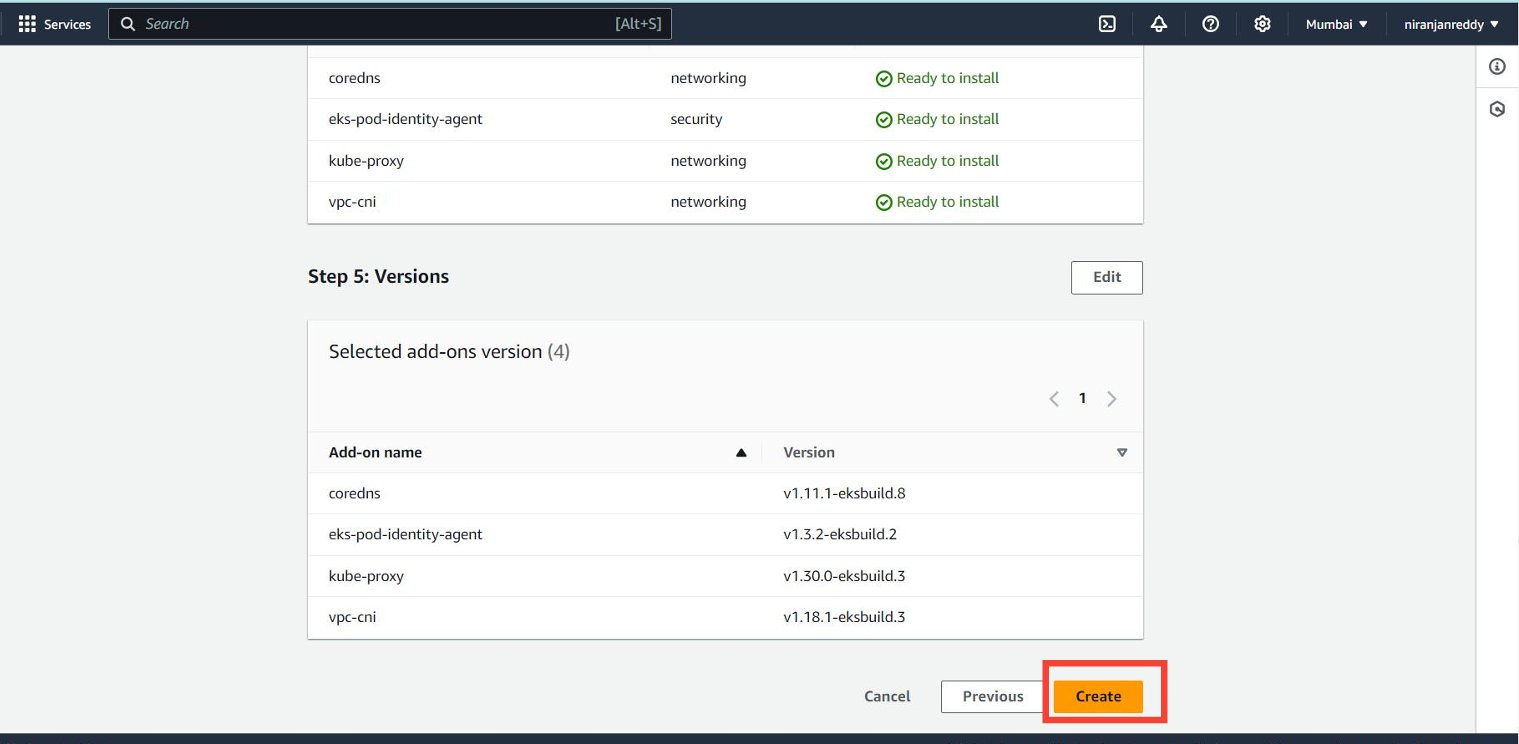
Cluster Creation Process
Note: It can take several minutes for AWS to set up the cluster. The EKS control plane is fully managed by AWS, so you won’t see it as an EC2 instance in your account.
- Confirmation: Once the cluster is created, you’ll see a status update in the EKS Console indicating that the cluster is active.
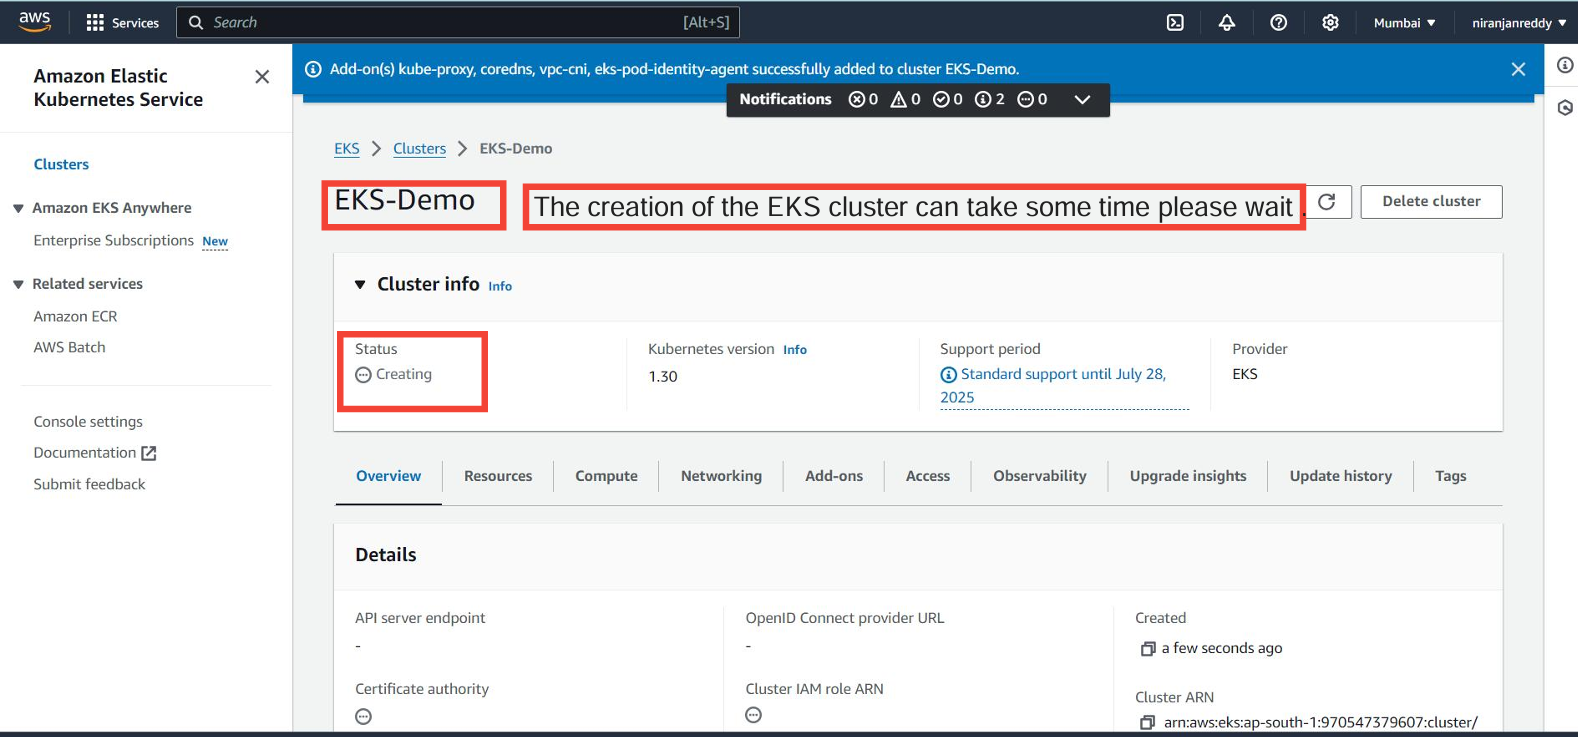
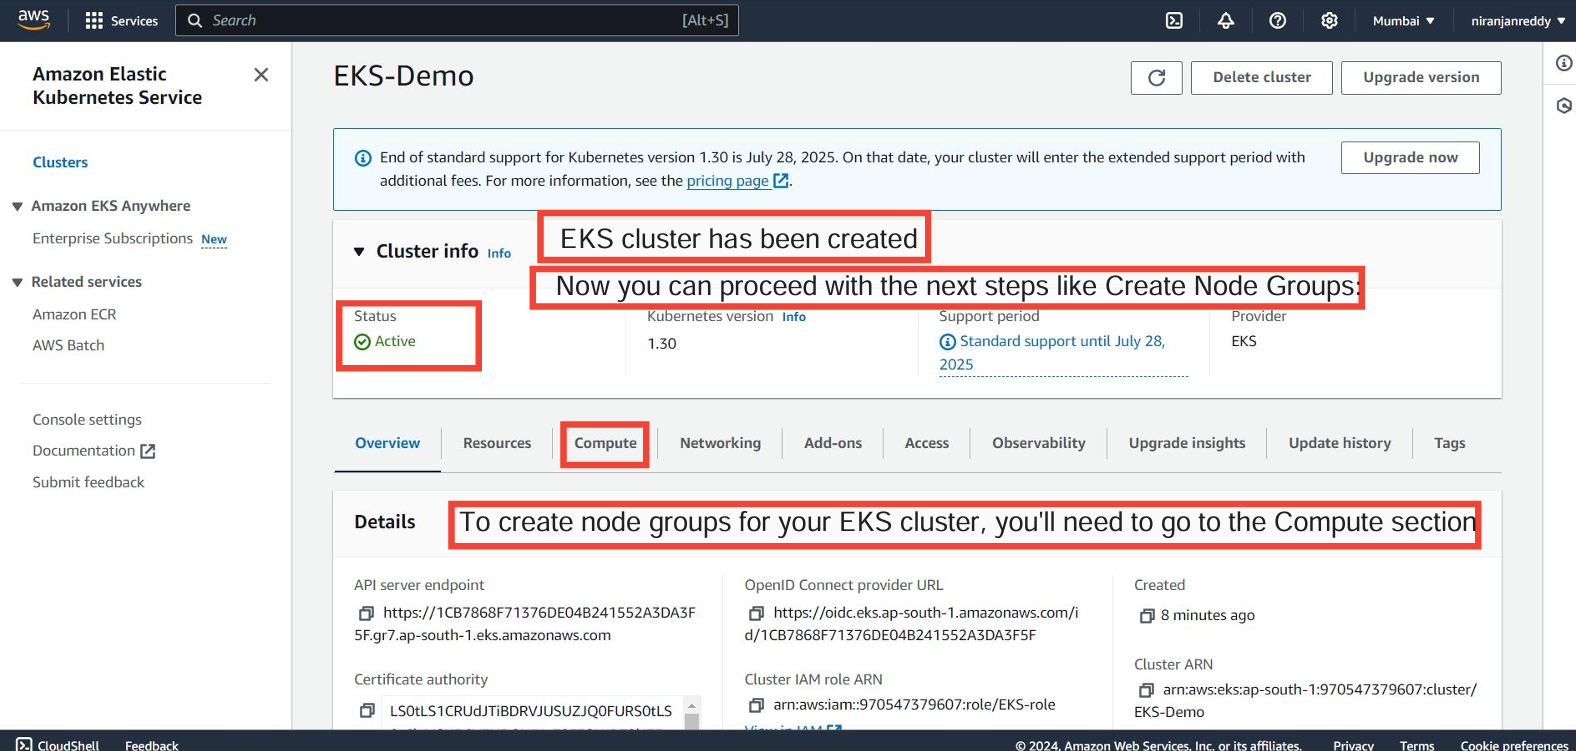
Next Steps: Creating Node Groups
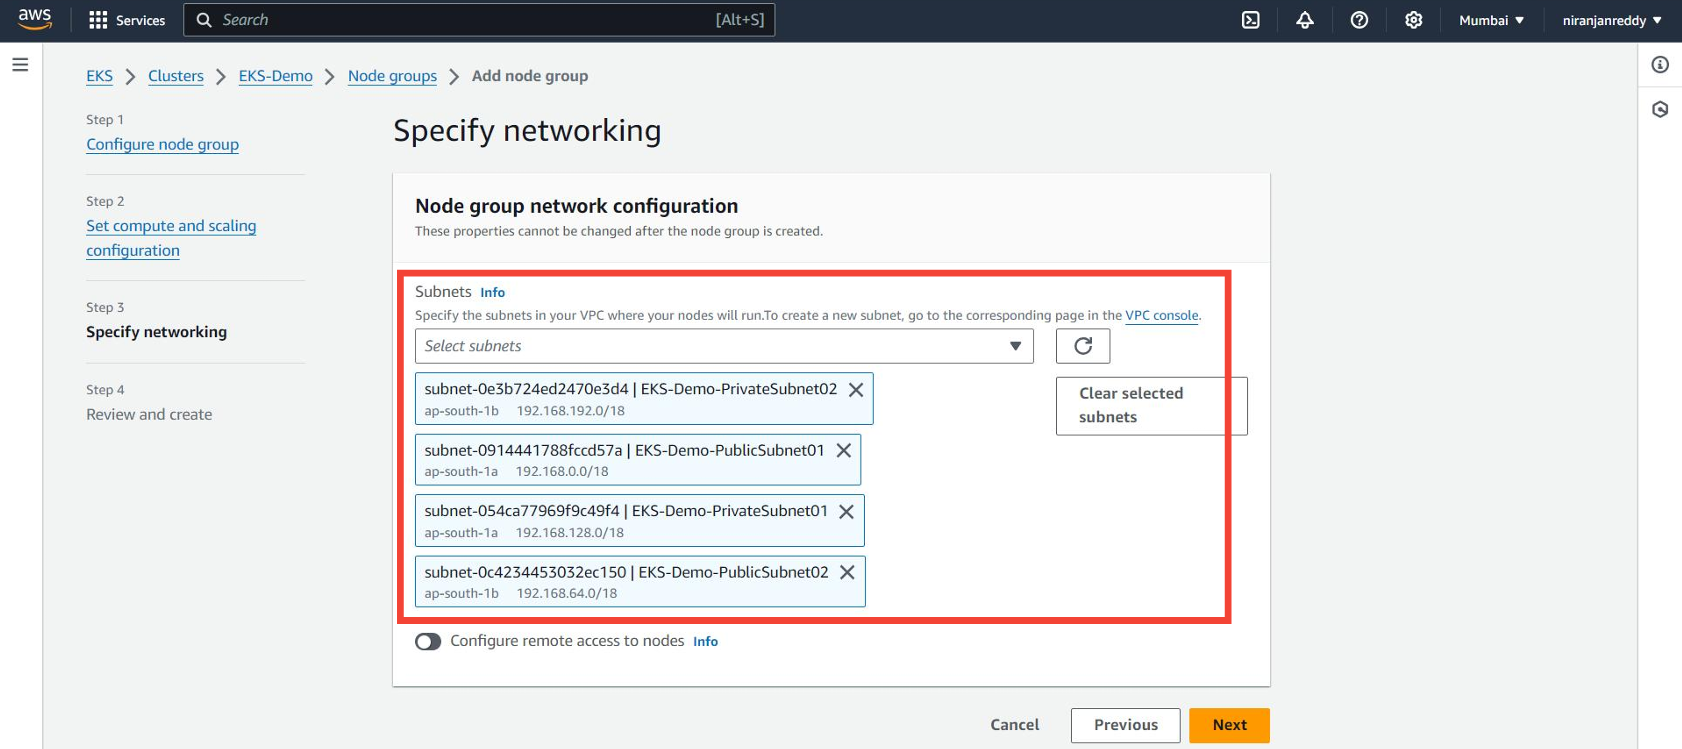
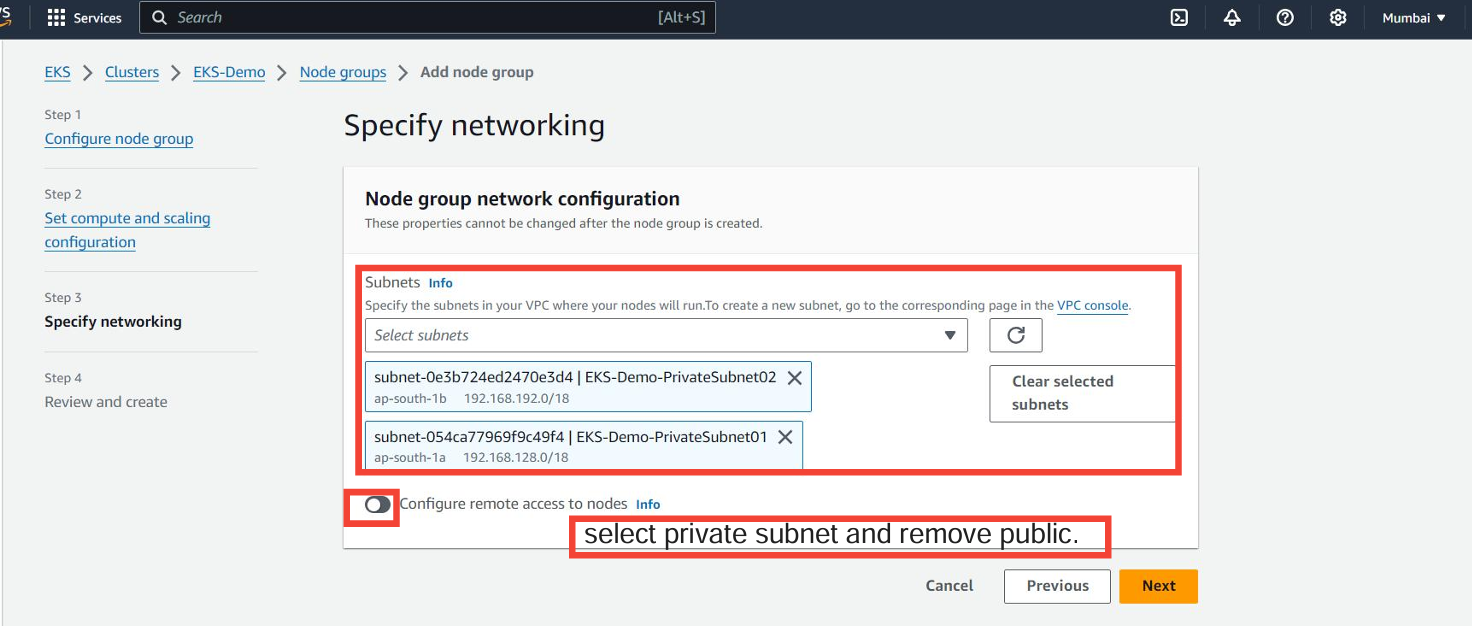
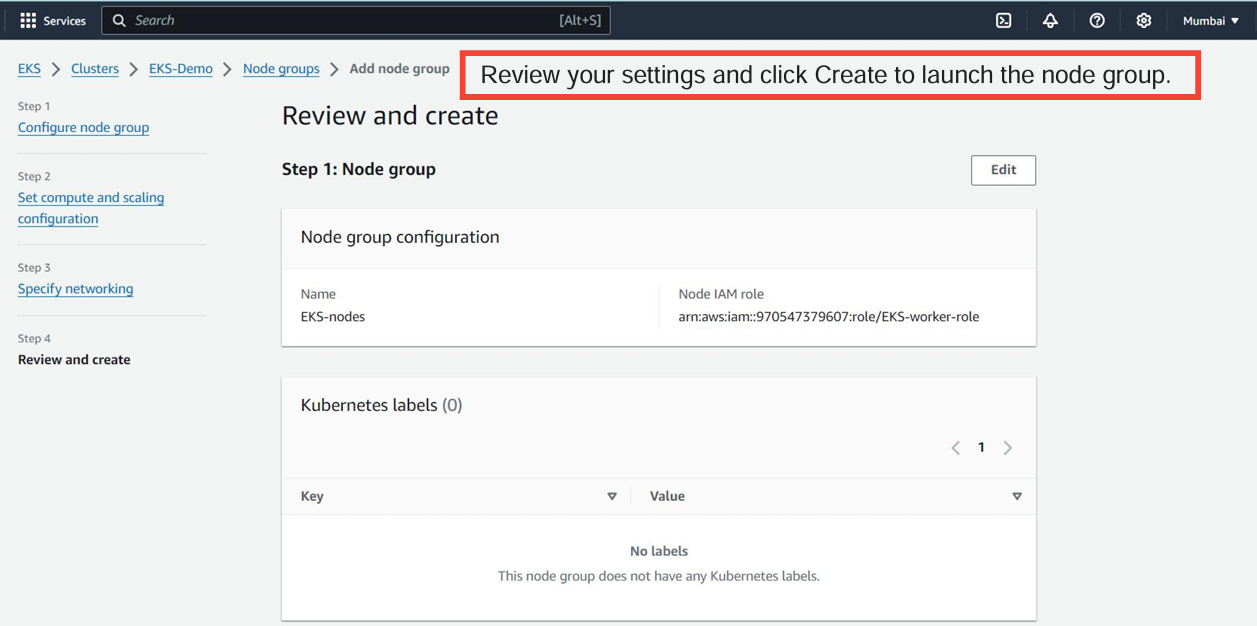
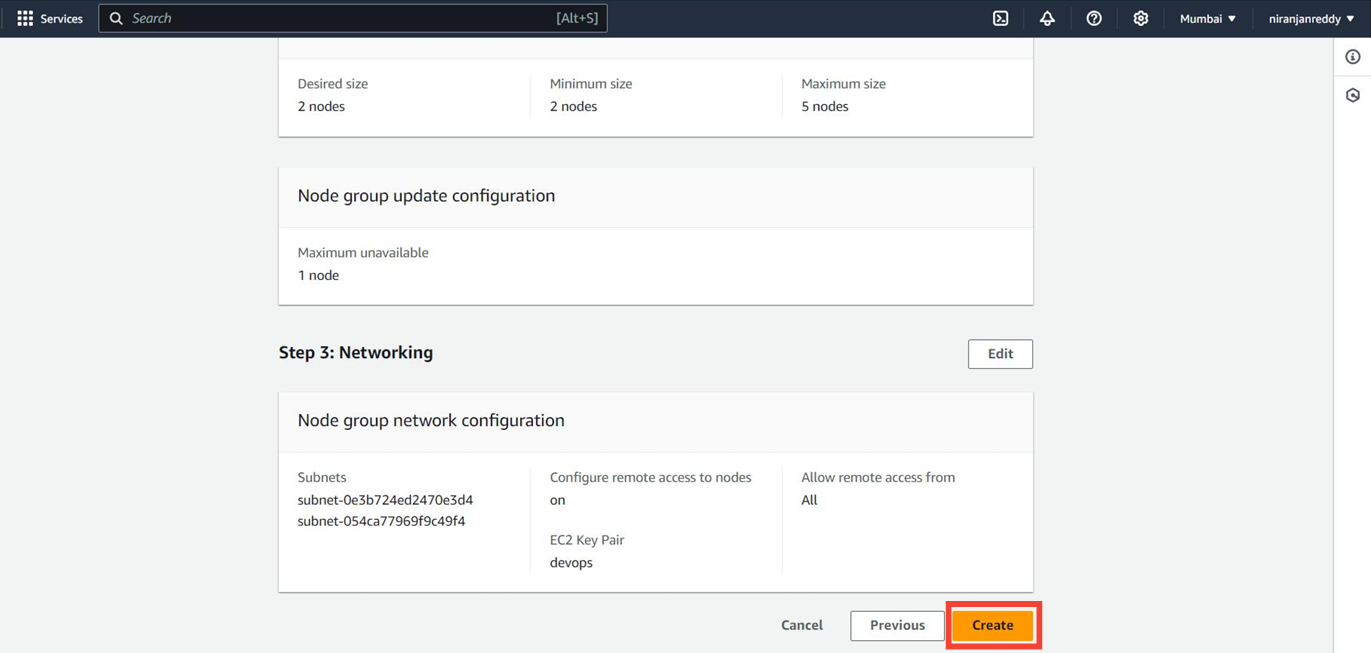
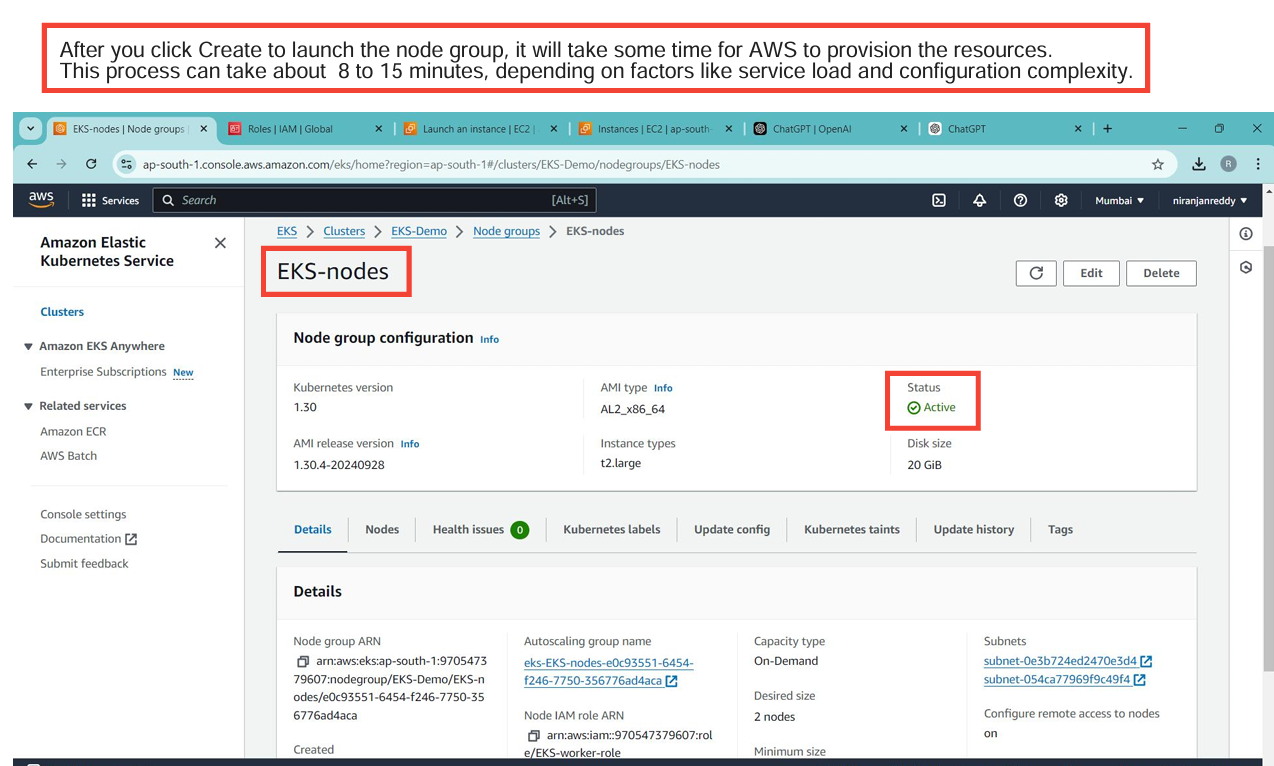
After the EKS cluster is ready, you’ll need to add node groups to provide the compute power for running your Kubernetes workloads.
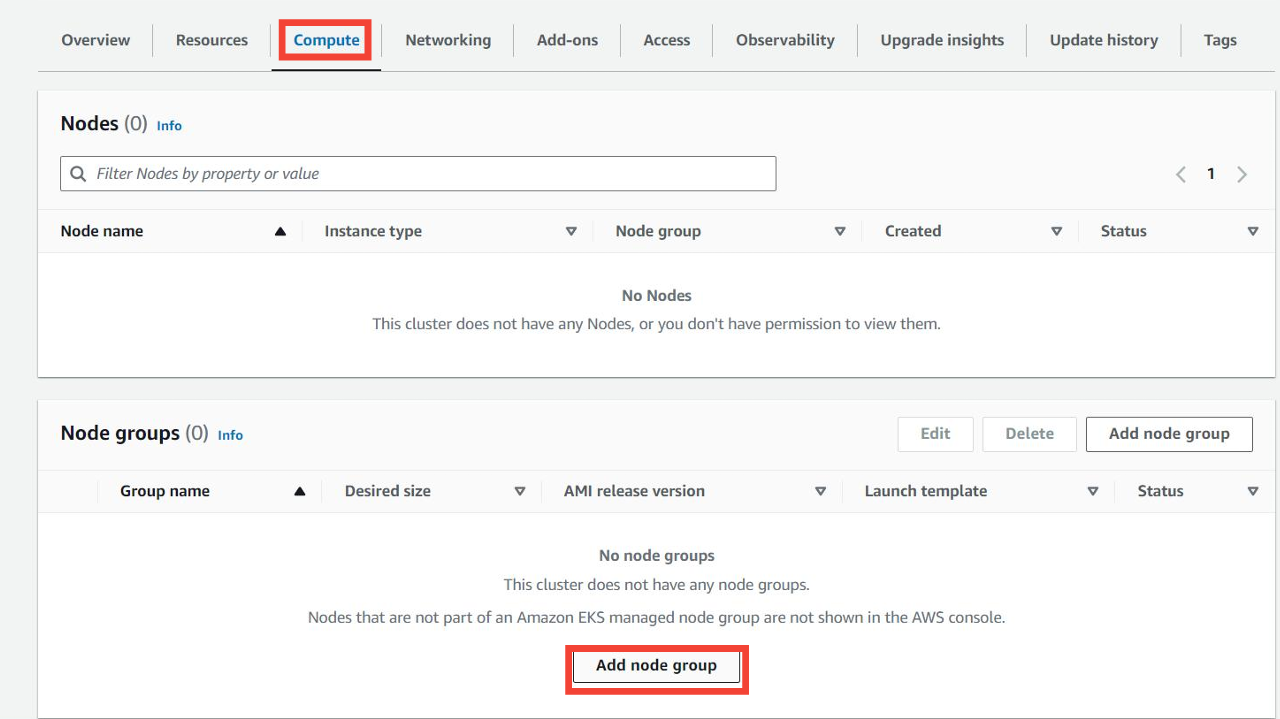
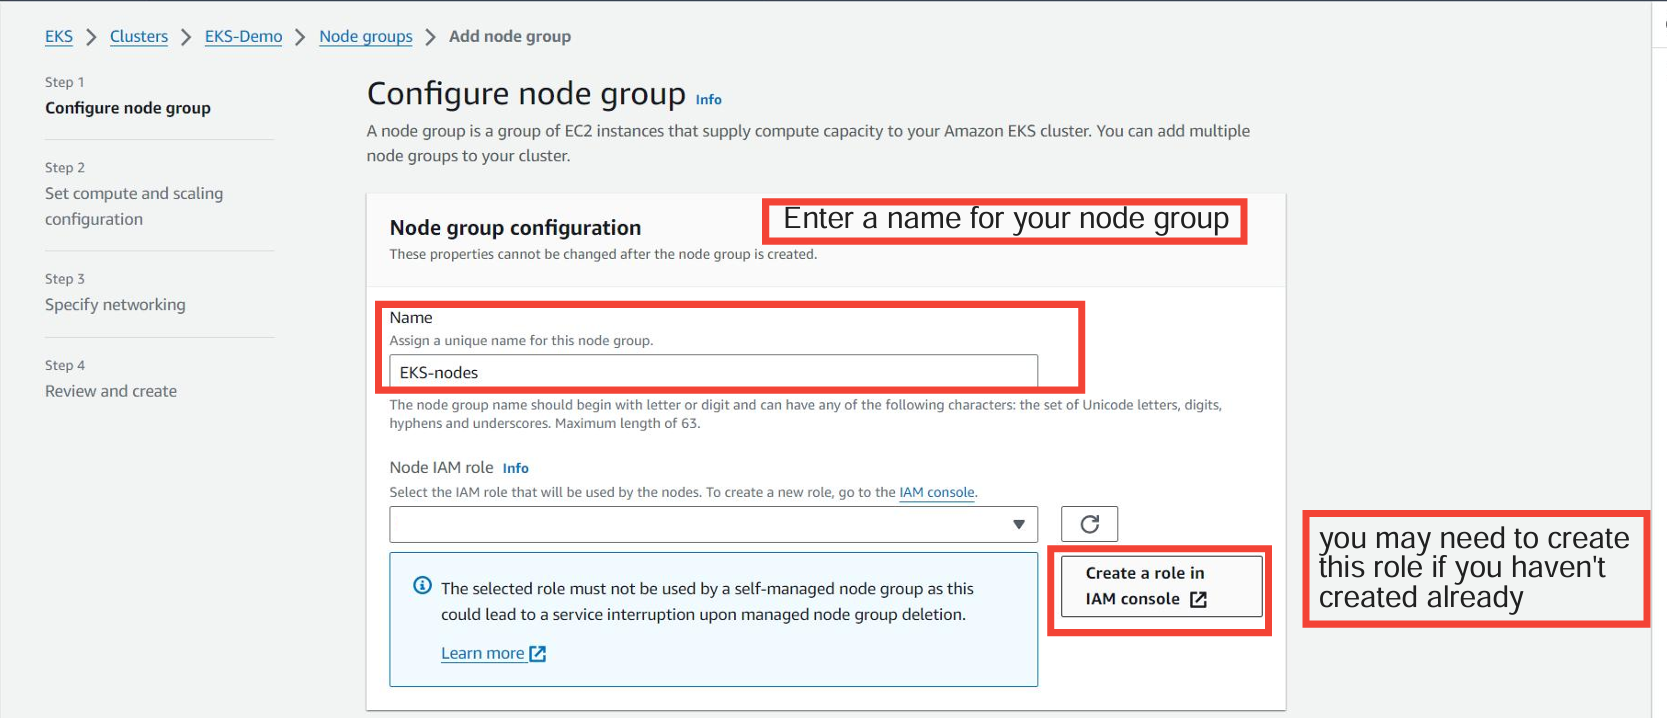
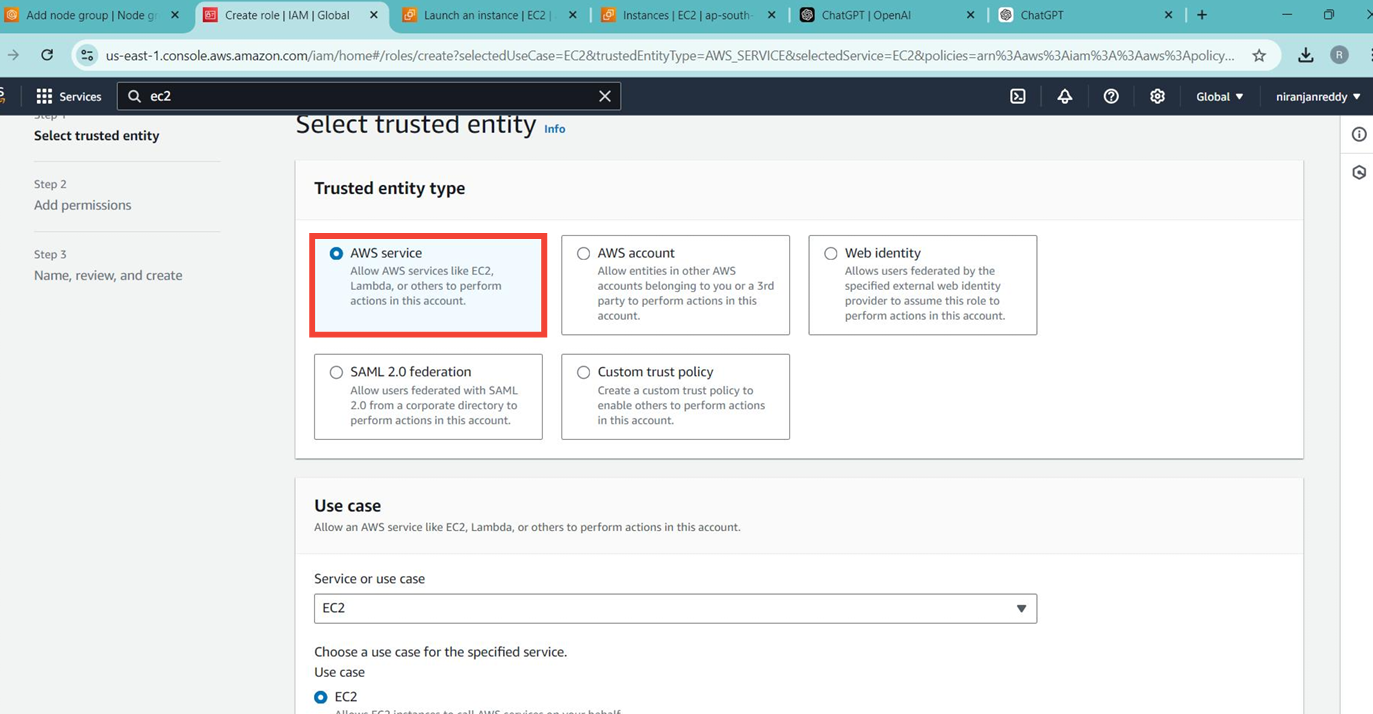
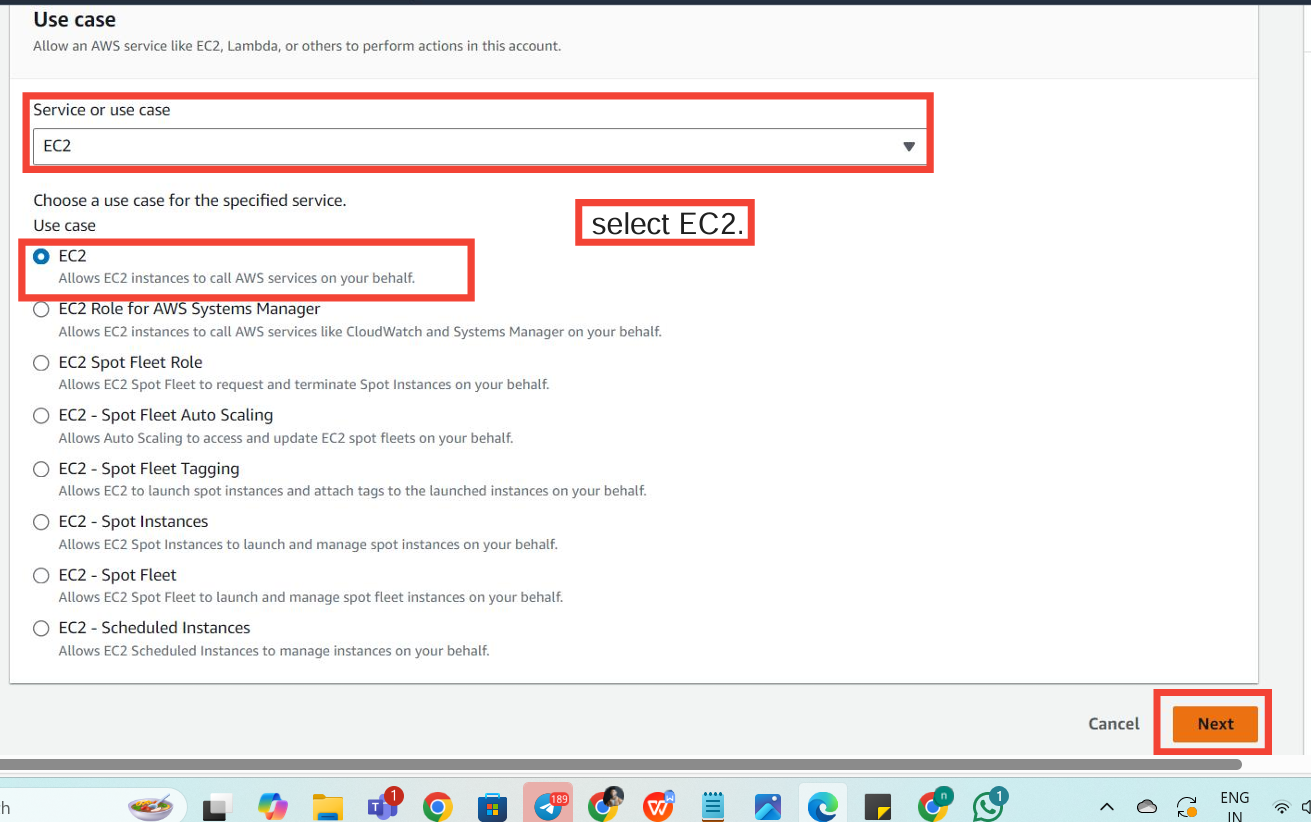
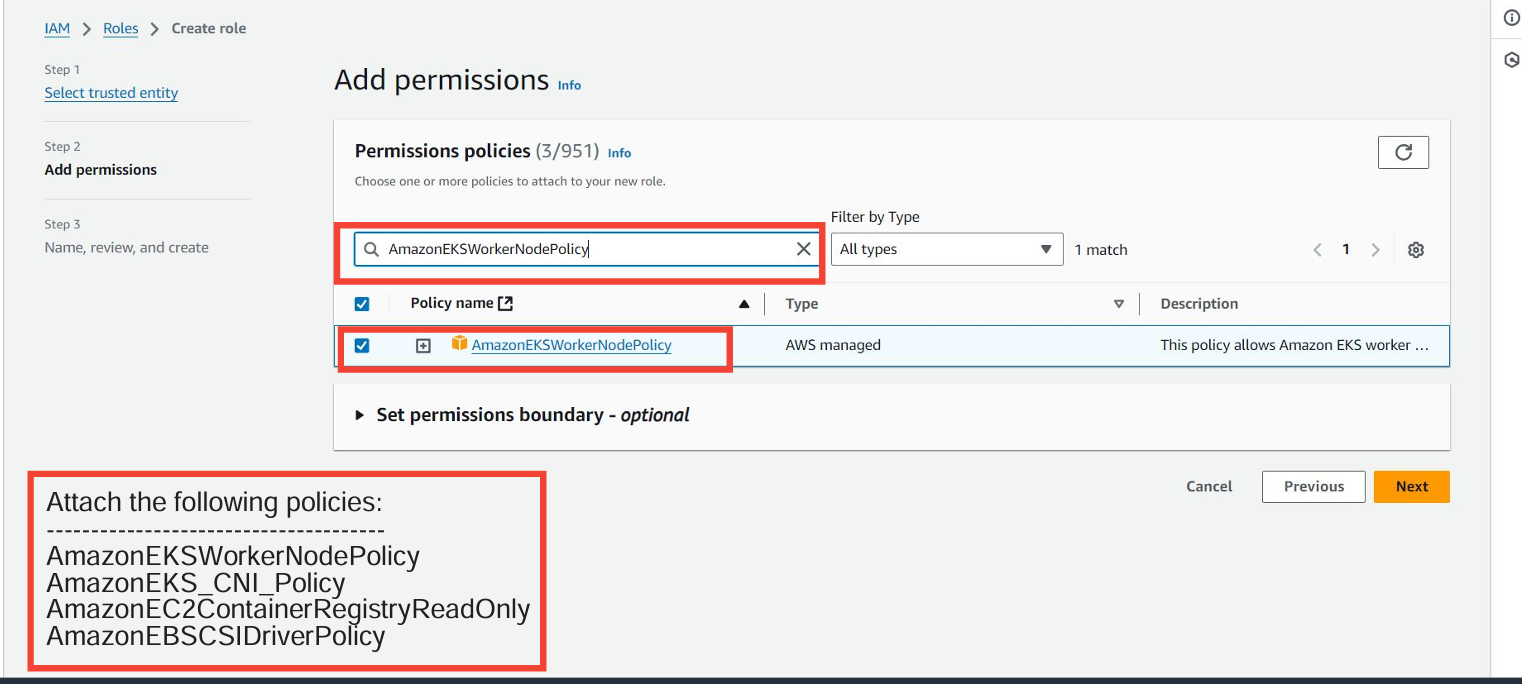
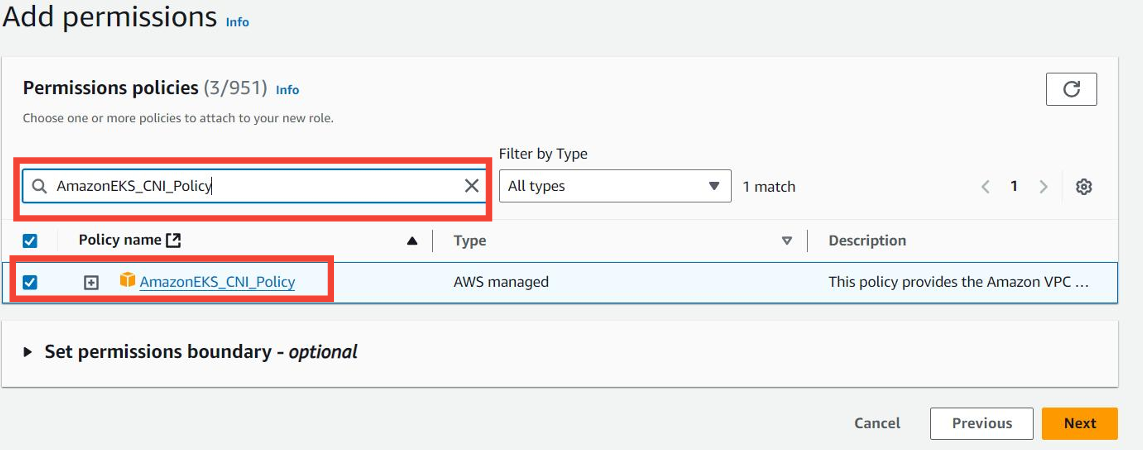
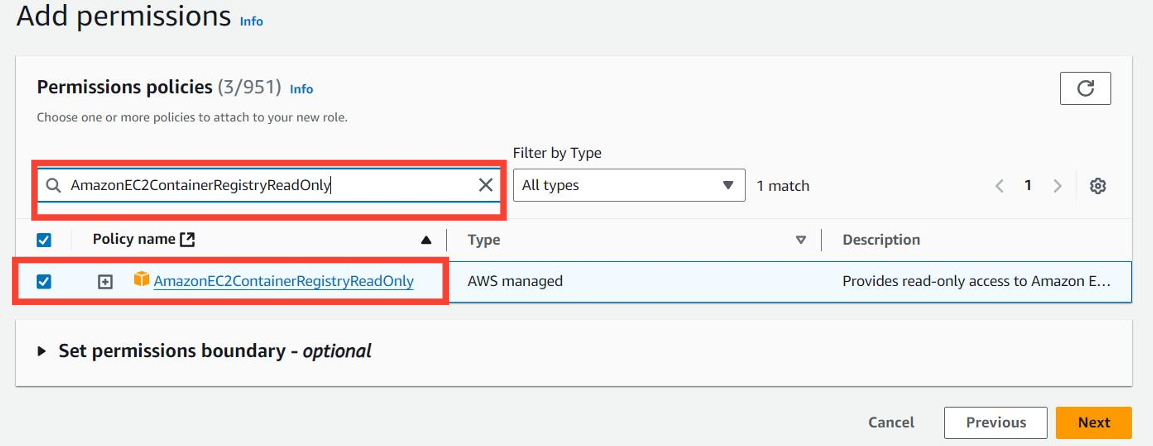
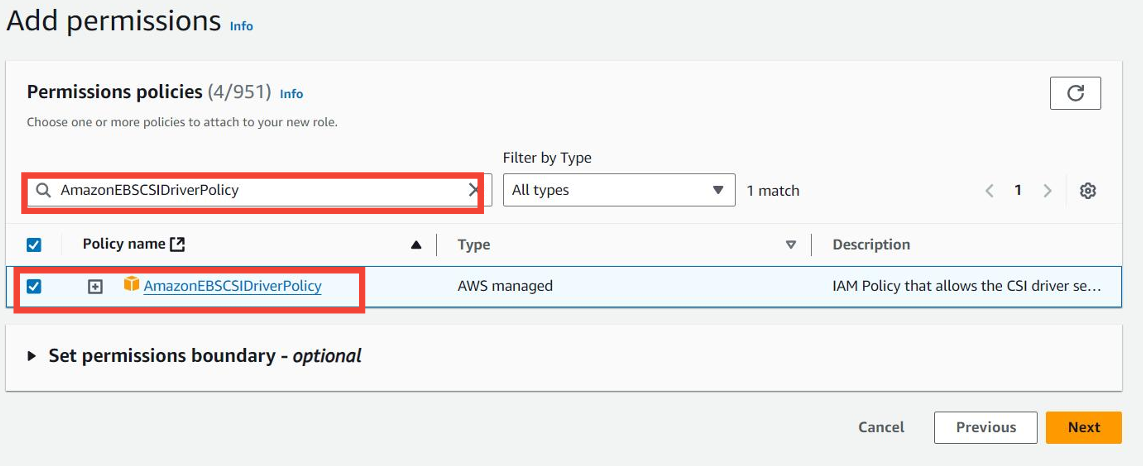
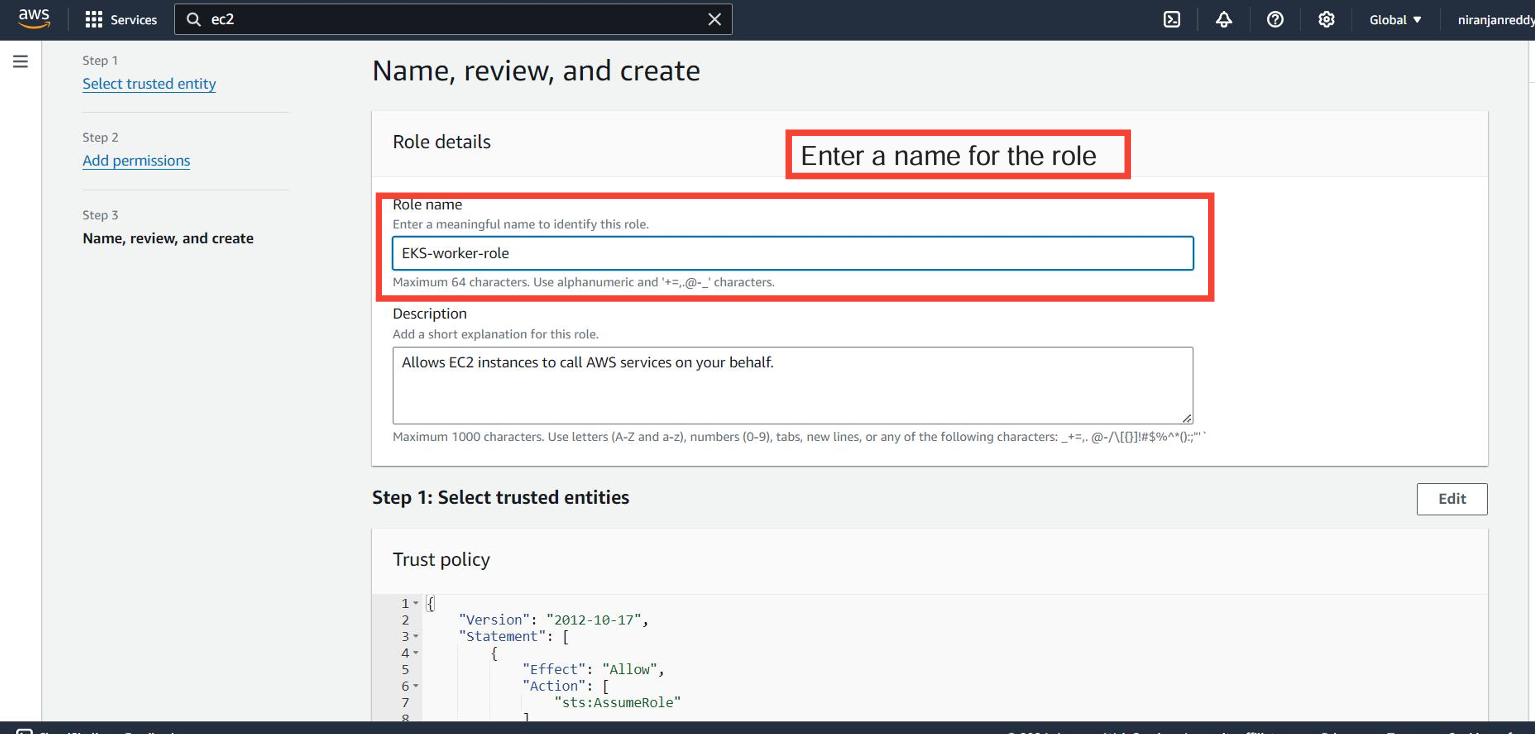
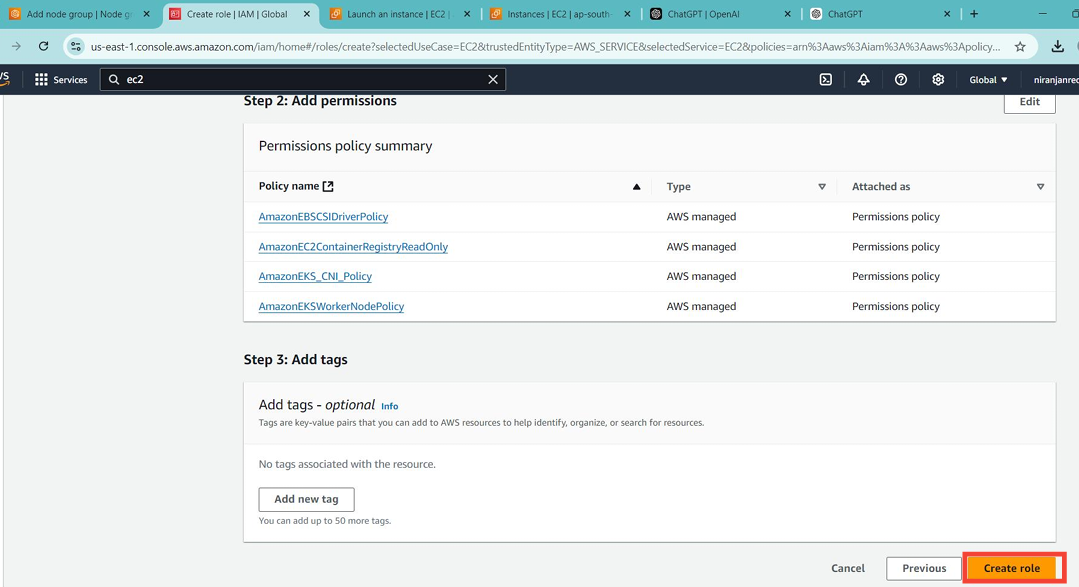
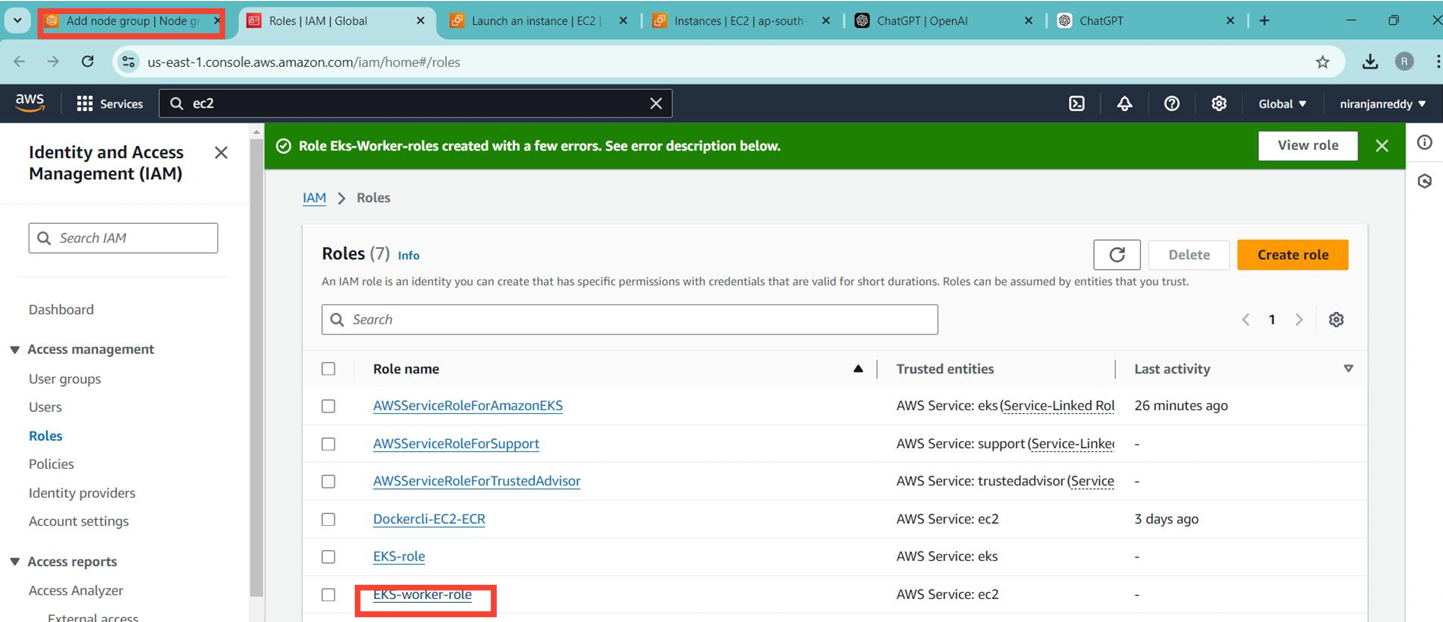
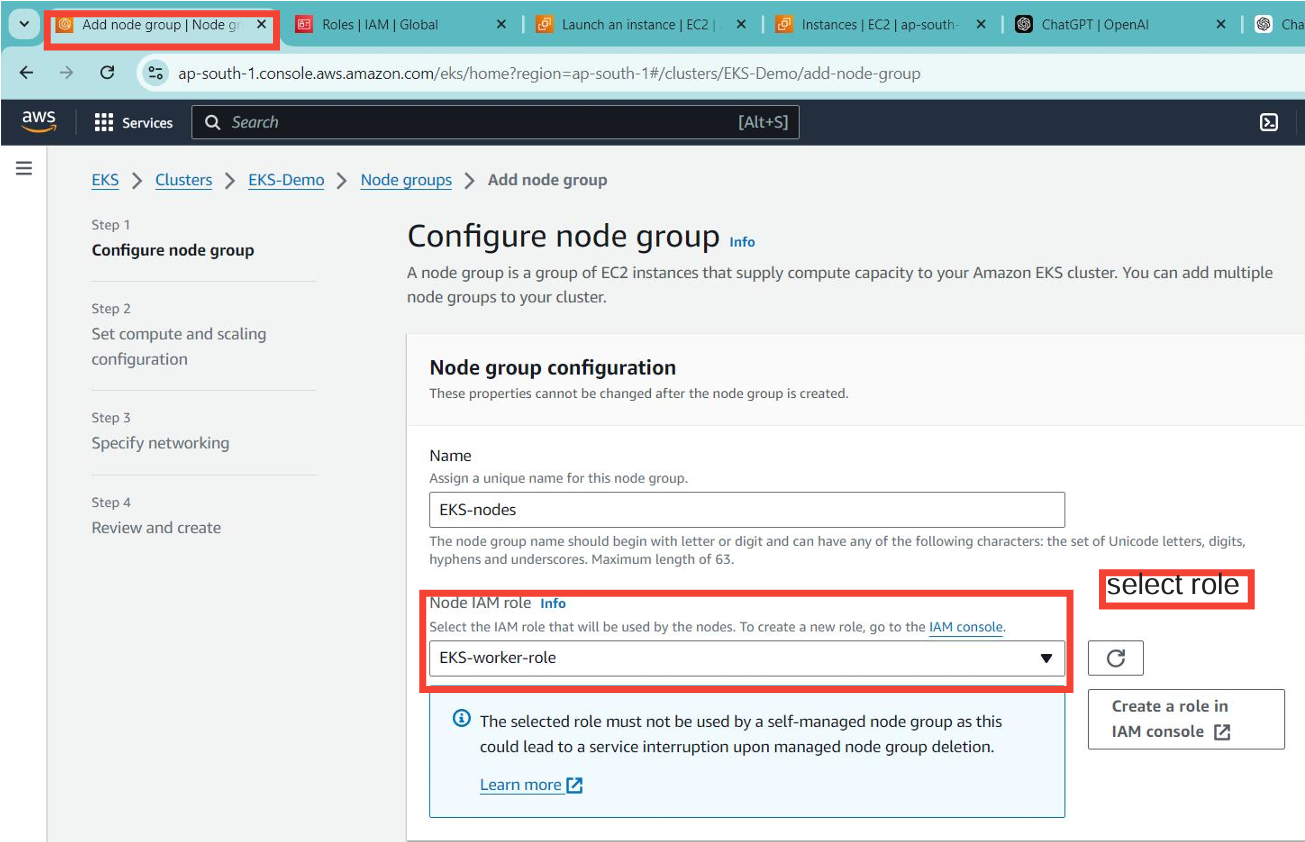
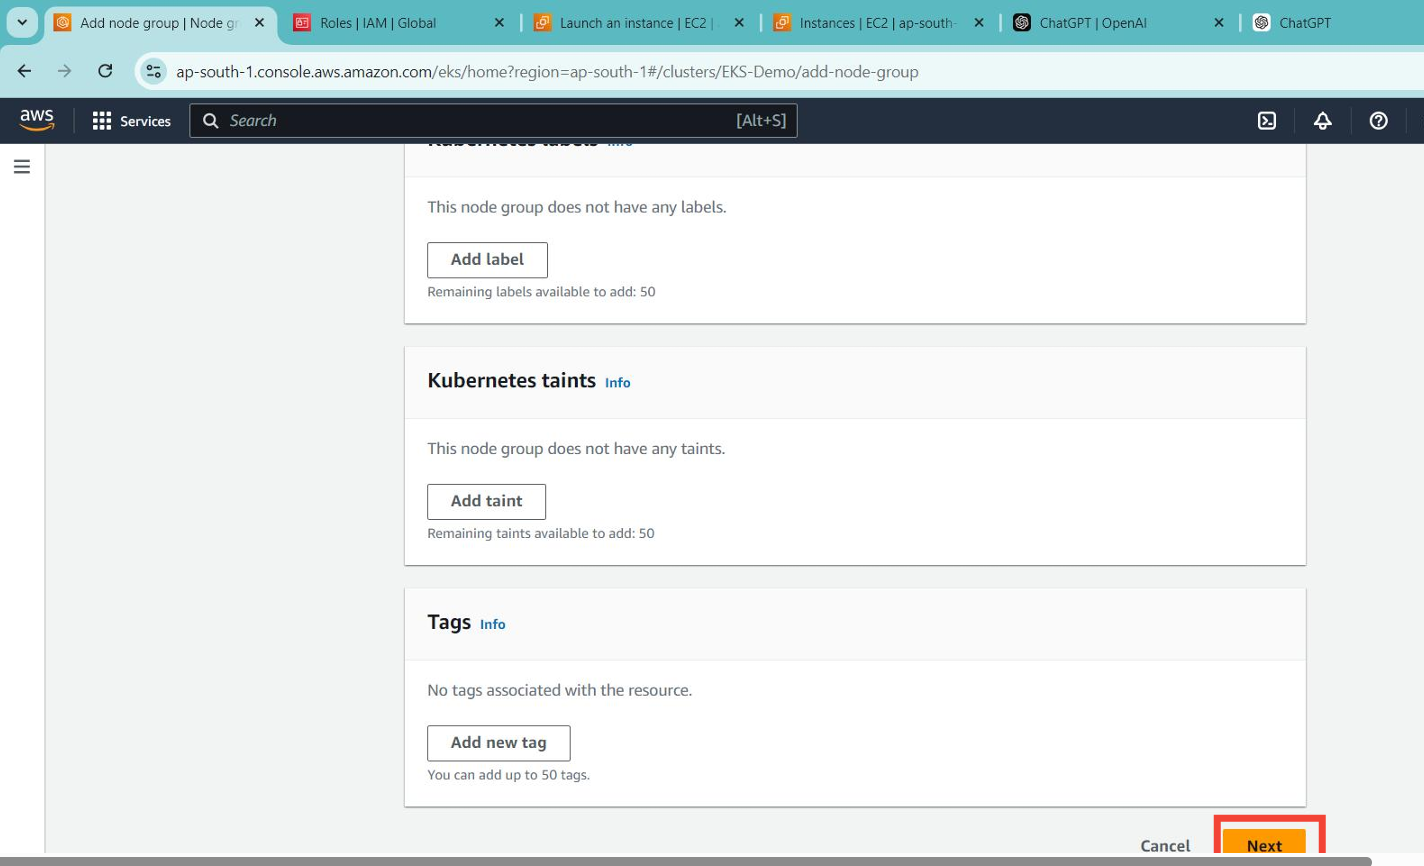
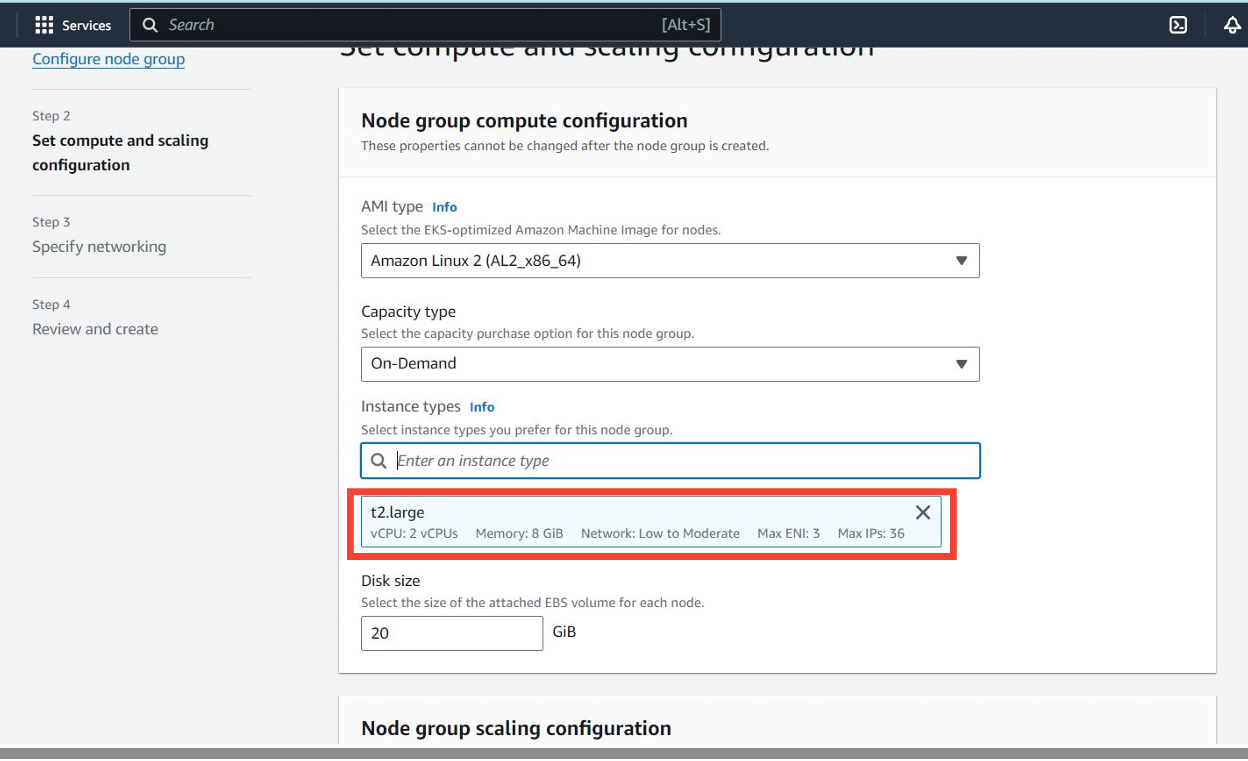
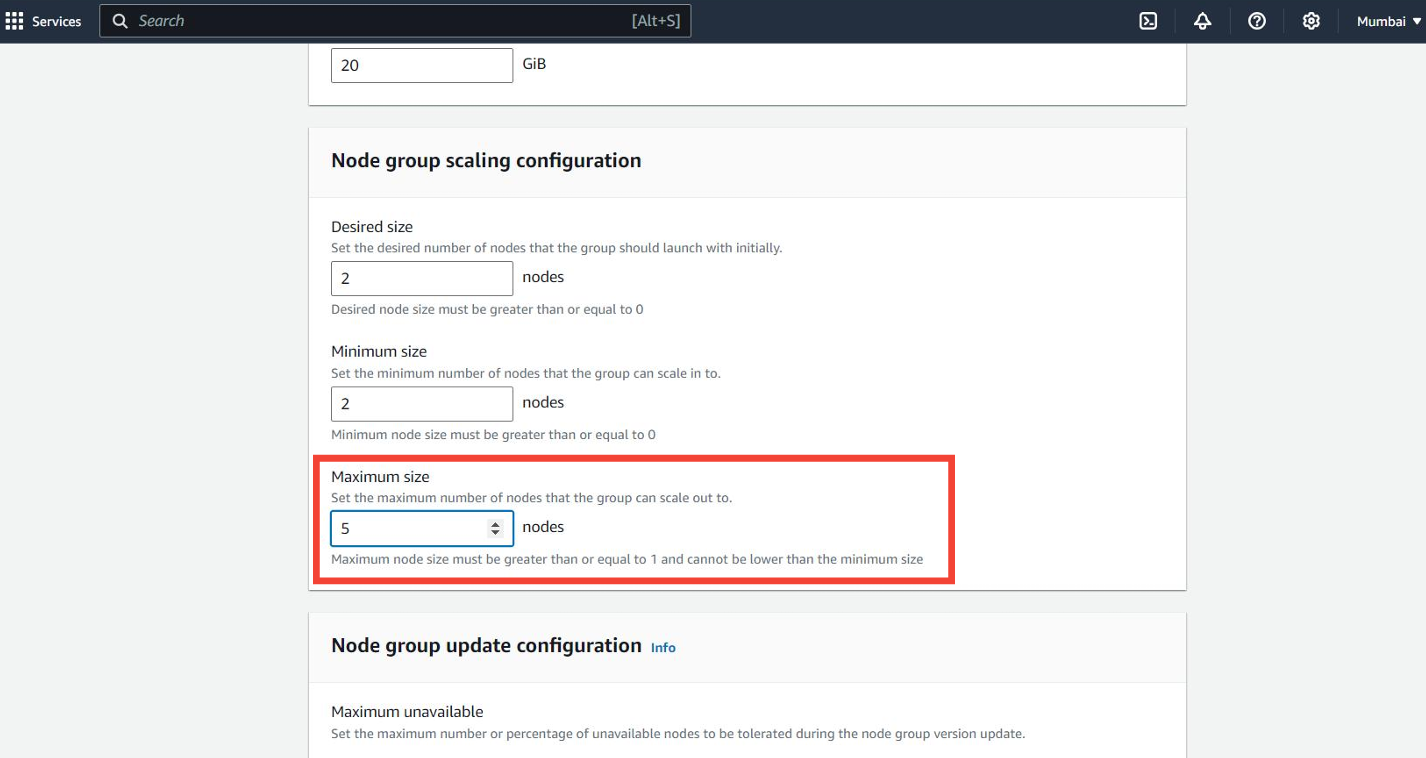
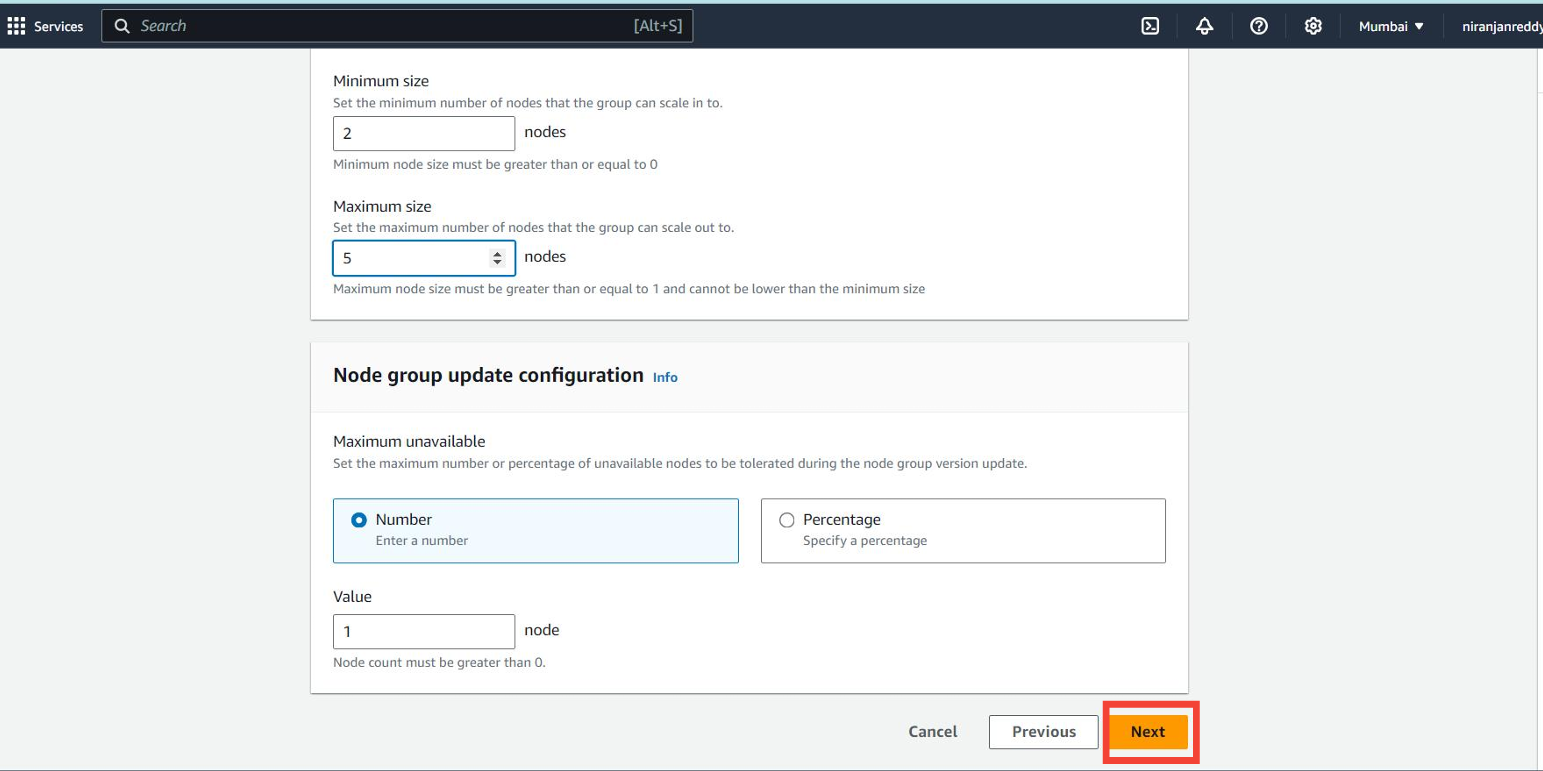
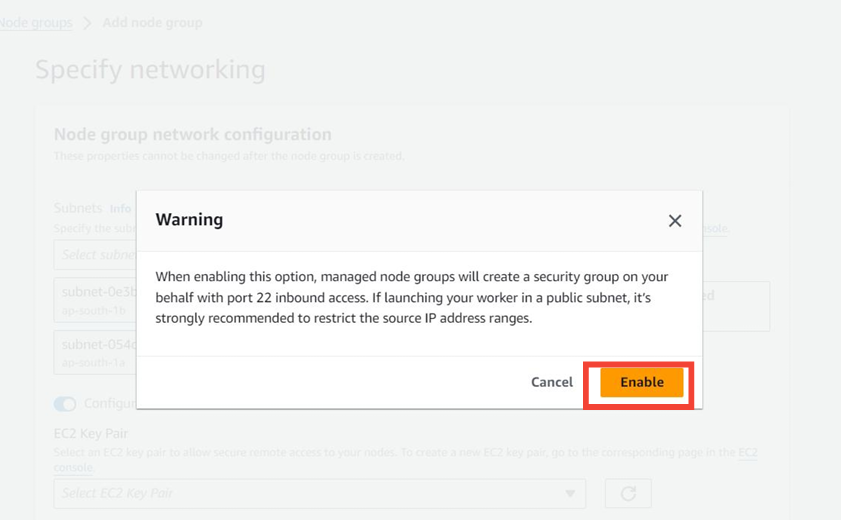
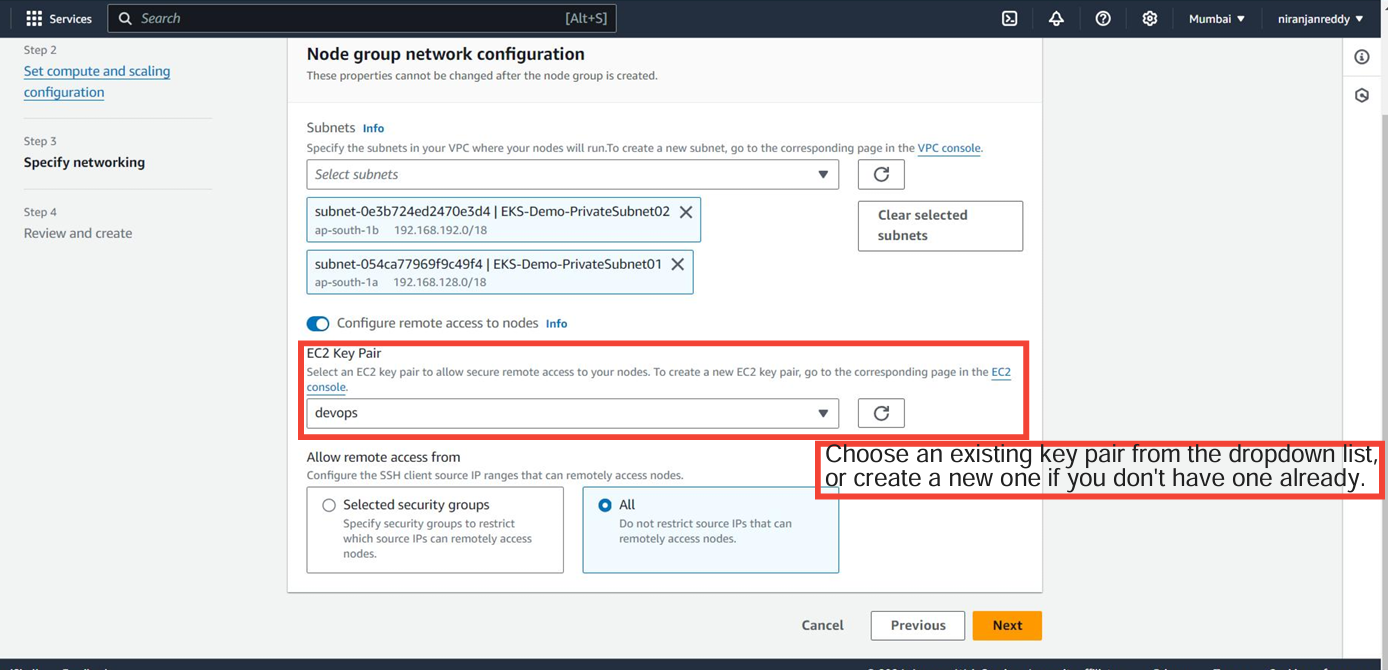
Private Subnets: Recommended for security, as worker nodes won't have direct internet access.
Public Subnets: If you want your worker nodes to be accessible from the internet (which is generally less secure), you can select public subnets
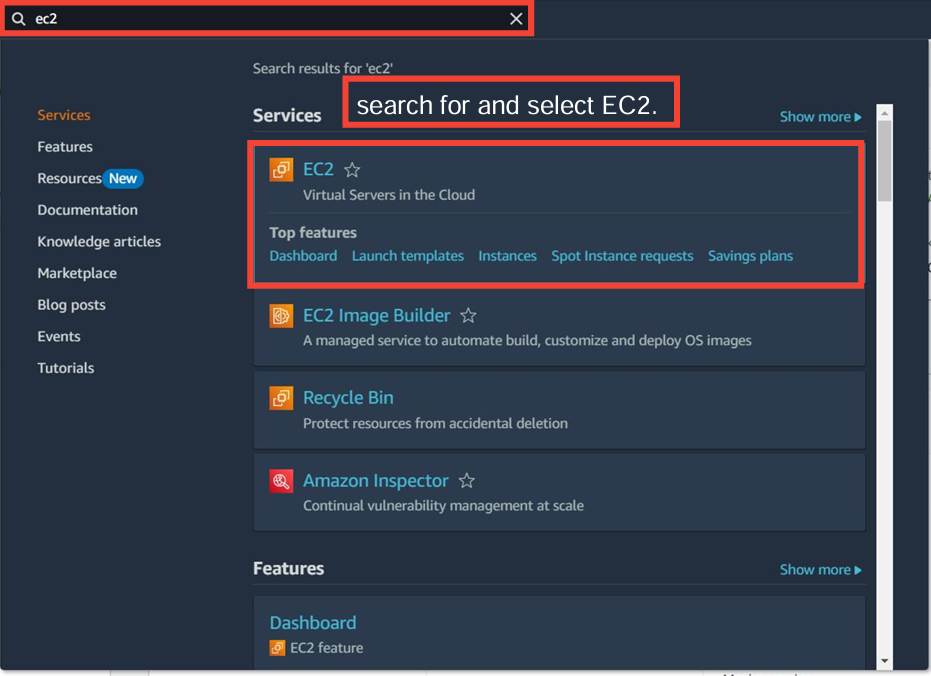
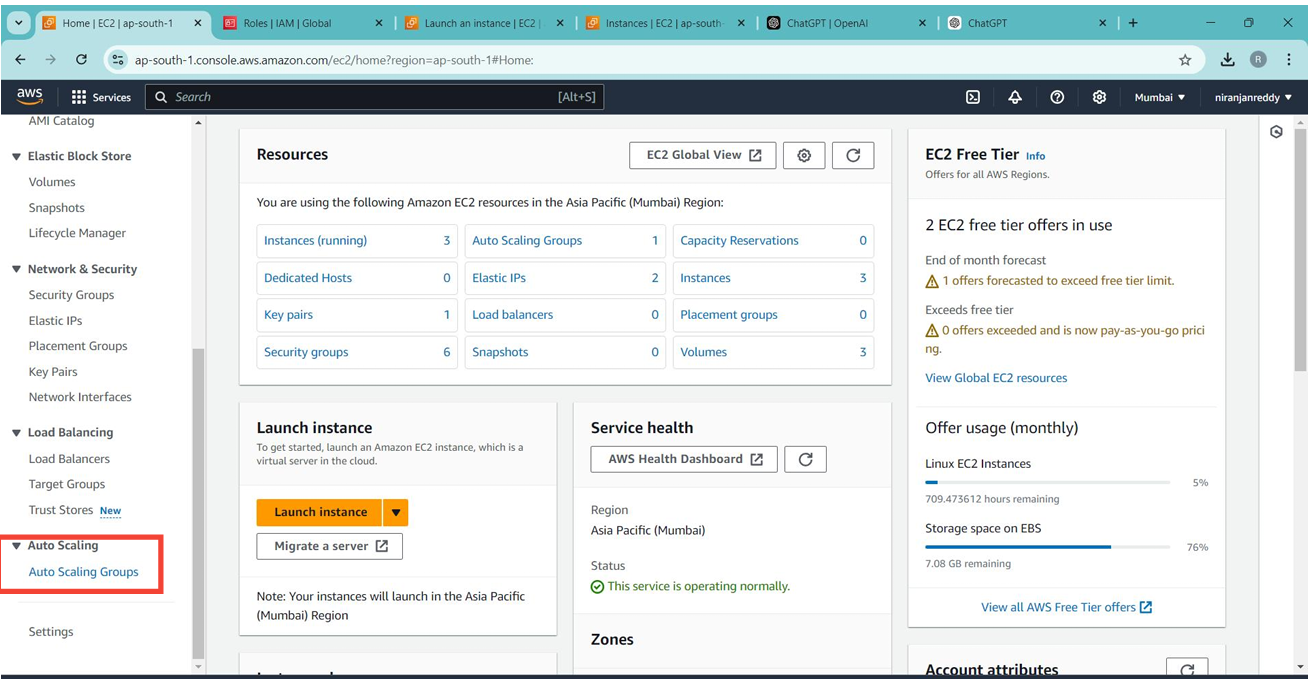
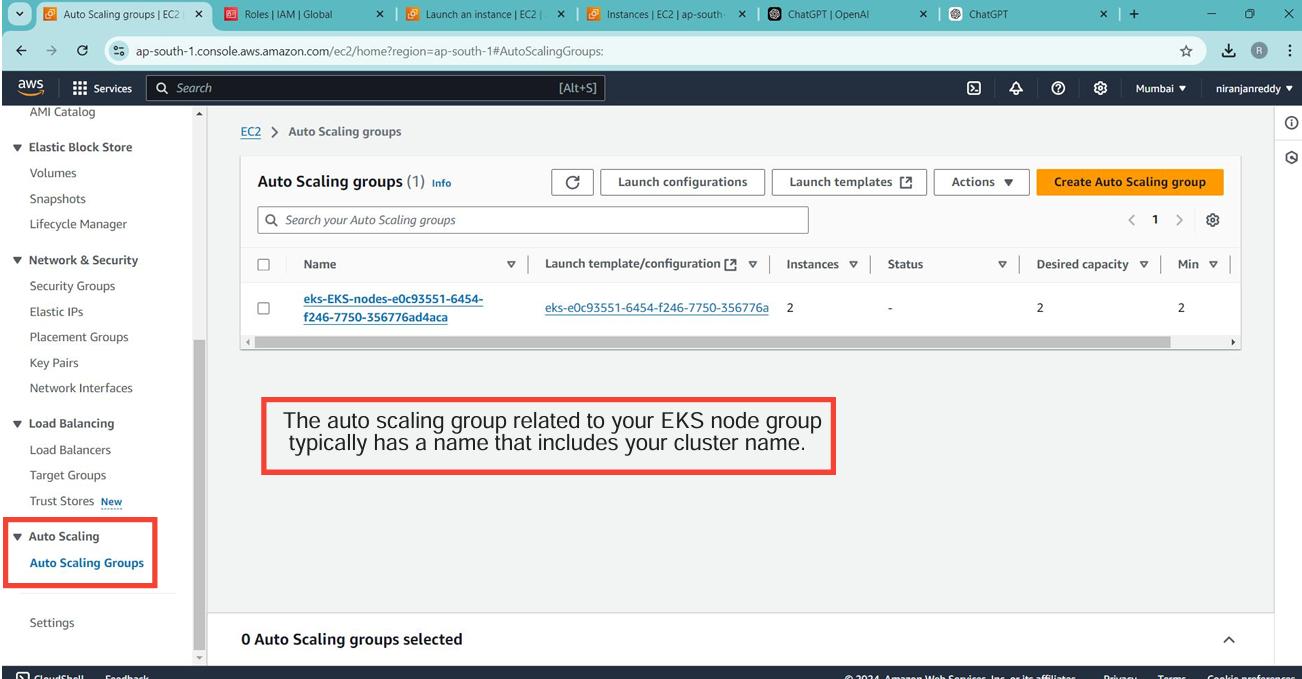
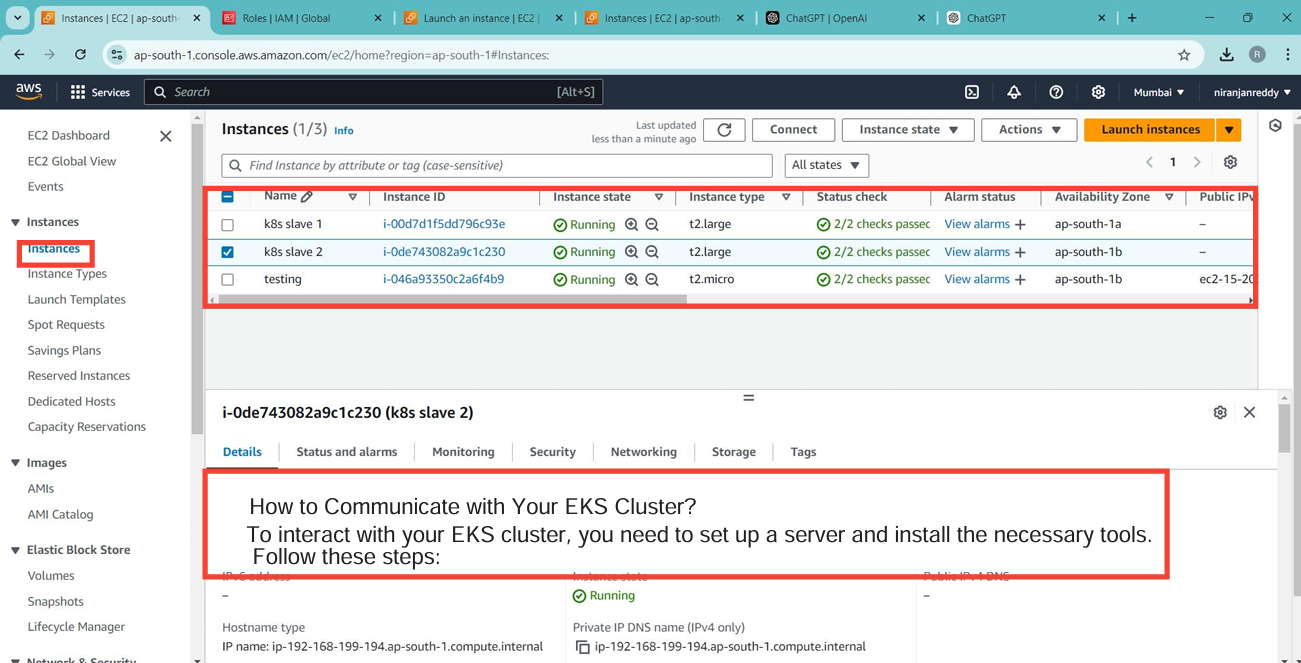
To interact with your EKS cluster, you need to set up an EC2 instance running and install the necessary tools. (which named below testing)
Install kubectl
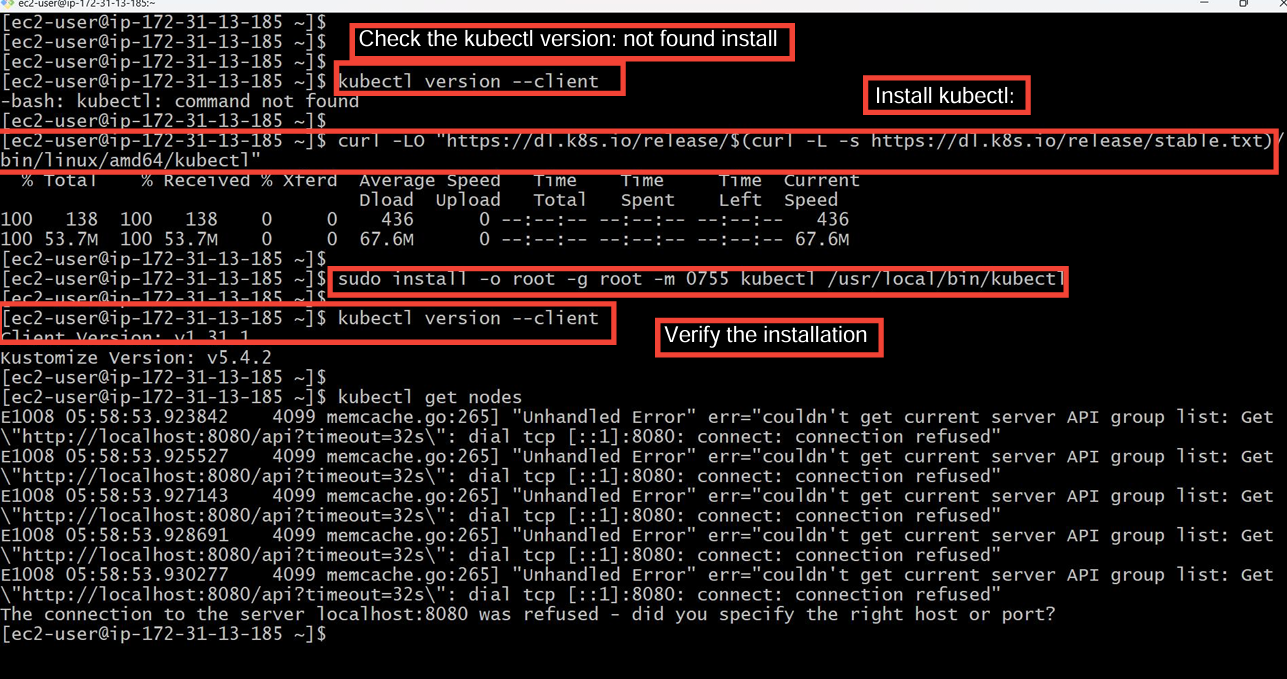
kubectl is the command-line tool used to interact with Kubernetes clusters.
To Install kubectl on Linux:
Download the latest version of
kubectl:curl -LO "https://dl.k8s.io/release/$(curl -L -s https://dl.k8s.io/release/stable.txt)/bin/linux/amd64/kubectl"Install
kubectlto/usr/local/bin:sudo install -o root -g root -m 0755 kubectl /usr/local/bin/kubectlVerify the installation:
kubectl version --client
Install AWS CLI:
curl "https://awscli.amazonaws.com/awscli-exe-linux-x86_64.zip" -o "awscliv2.zip"
sudo yum install unzip -y  # Or `apt install unzip` for Ubuntu
unzip awscliv2.zip
sudo ./aws/install
aws --version


Configure AWS CLI
To use AWS CLI with your credentials, configure the CLI with your Access Key ID and Secret Access Key.
Run the following command:
aws configureEnter the following details:
AWS Access Key ID
AWS Secret Access Key
Default region name (e.g.,
us-west-2)Default output format (choose
jsonor another format)
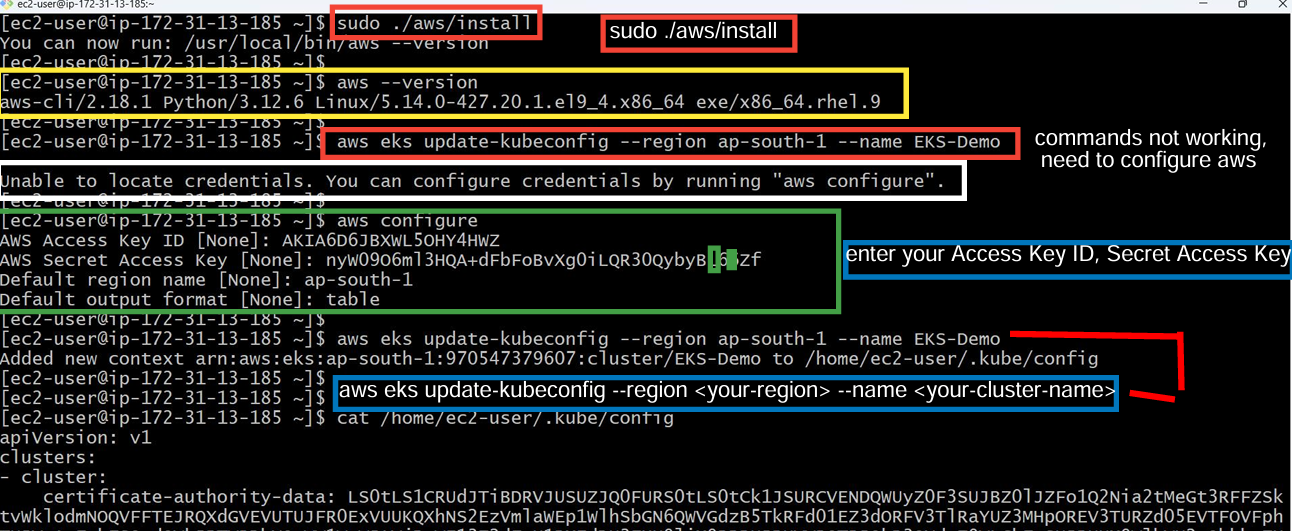
Update kubeconfig for EKS Cluster
To communicate with your EKS cluster using kubectl, you need to update your kubeconfig file.
Run the following command to update your kubeconfig:
aws eks update-kubeconfig --region <your-region> --name <your-cluster-name>Replace
<your-region>with the AWS region where your EKS cluster is located (e.g.,ap-south-1) and<your-cluster-name>with the name of your EKS cluster.
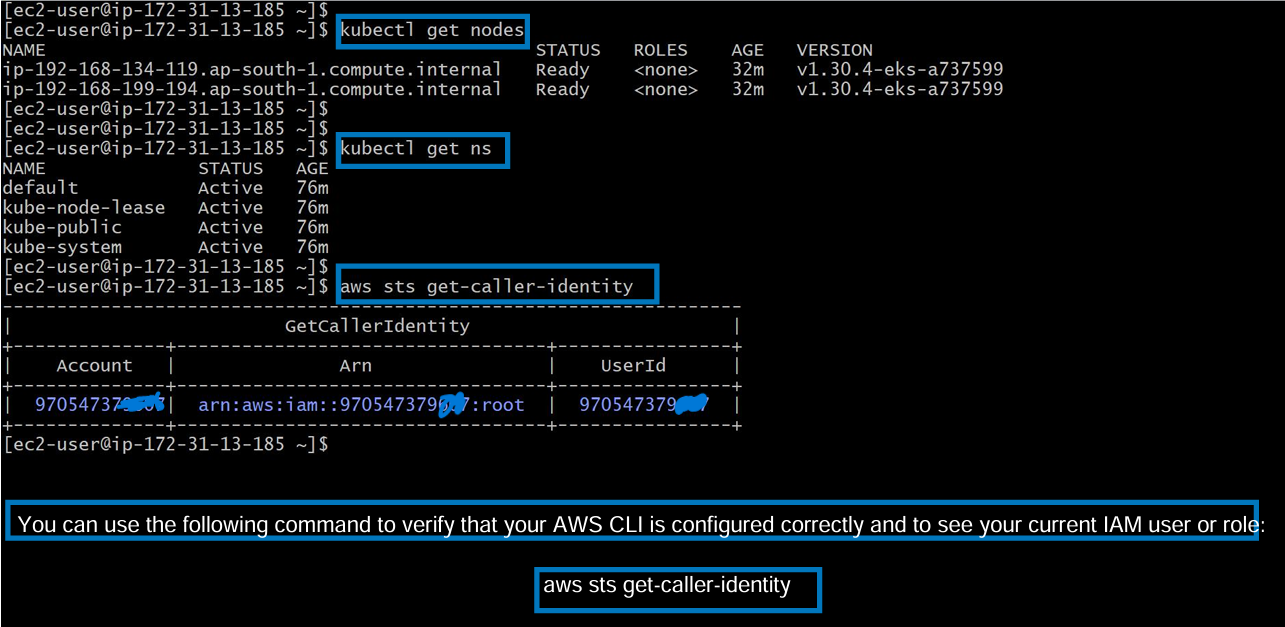
Verify your configuration:
aws sts get-caller-identity
This command should return your IAM user/role's ARN, confirming that AWS CLI is properly configured.
Storage Class in EKS (Before Applying EBS CSI Driver)
In an EKS cluster, AWS automatically creates a default storage class when the cluster is launched.

Deploy AWS EBS CSI Driver (Optional)
If you're using AWS EBS (Elastic Block Store) for persistent storage in your EKS cluster, you’ll need the EBS CSI Driver.
Install the EBS CSI Driver by running:
kubectl apply -k "github.com/kubernetes-sigs/aws-ebs-csi-driver/deploy/kubernetes/overlays/stable/?ref=release-1.35"This command will pull the necessary configurations from the AWS EBS CSI Driver repository and deploy the driver into your Kubernetes cluster.
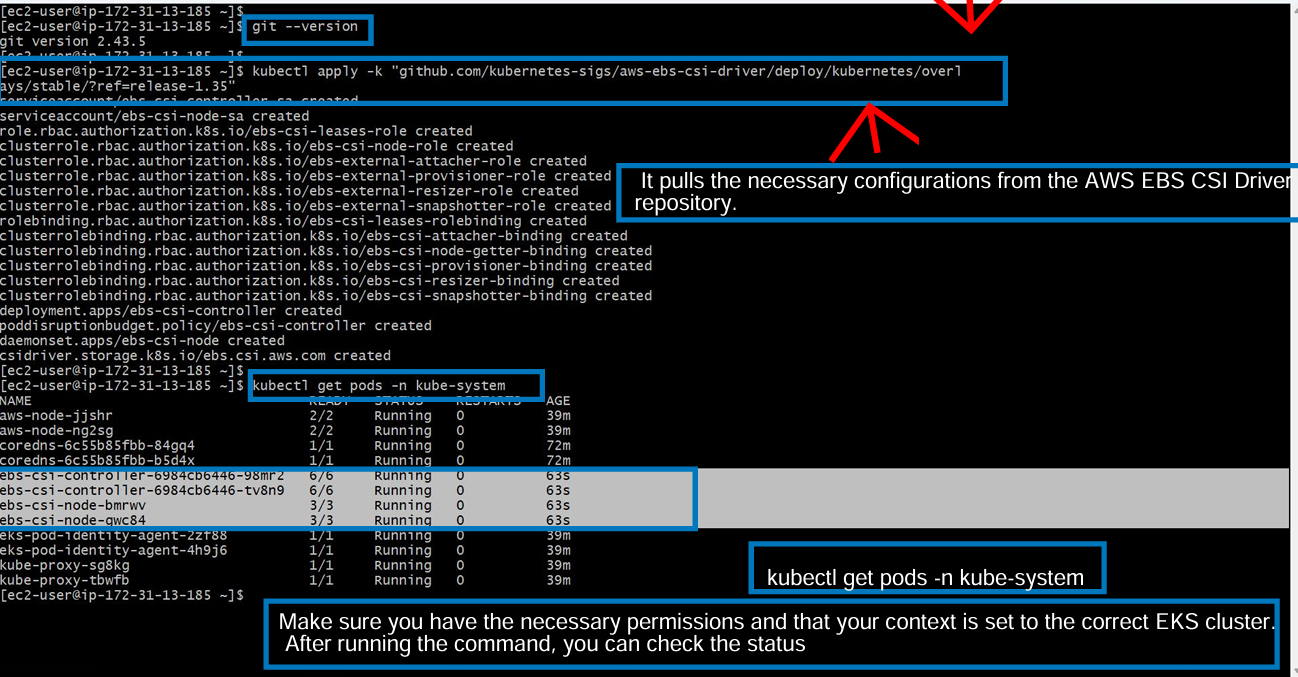
Verify the deployment:
kubectl get pods -n kube-system
Subscribe to my newsletter
Read articles from Kandlagunta Venkata Siva Niranjan Reddy directly inside your inbox. Subscribe to the newsletter, and don't miss out.
Written by
