Tracing Appwrite’s Authentication Feature
 Asigri Shamsu-Deen Al-Heyr
A debugger is a tool that helps you see if your code is functioning as intended. It allows you to pause and inspect your code during execution. Think of it as freezing time to examine what's happening inside your program.
Xdebug is one such debugger that helps you understand how different functions and methods work together in a feature.
How Xdebug Works
Xdebug allows you to slow down code execution. If your code were a train, Xdebug would let you stop it at specific stations (breakpoints) to see what’s happening, then continue or make changes before moving on.
Debuggers are vital tools for developers. They help trace implementations and understand how features function.
With Xdebug and Postman, I will explore how Appwrite handles authentication by tracing the flow from login requests to session token issuance.
Step 1: Identify an Entry in the Codebase
To trace Appwrite's user authentication flow, we need to locate the entry point in the code. Based on Appwrite’s documentation, user actions interact with the /v1/users endpoint.
With the Appwrite codebase open in Visual Studio Code, we use the following grep command in the terminal:
grep -r "/v1/users"
This searches recursively for any lines containing the endpoint and returns all matches. The results show three main directories:
docs/examples
vendor/appwrite
app/controllers/api
We can ignore the first two and focus on app/controllers/api, where we find the users.php controller, which is likely responsible for user requests.
Step 2: Setting Breakpoints in the Code
Inside the users.php controller, we identify a function called createUser() and two important endpoint definitions:
App::post('v1/users/')
App::get('v1/users/:userId')
We go ahead and set breakpoints on these 3. The function and the endpoint definitions.
By setting breakpoints at these locations and initiating request from Postman, we’ll be able to first verify that we have correctly identified the entry point, and then we can observe how Appwrite processes a user creation request.
Step 3: Sending a User Creation Request Using Postman
To trigger the authentication process, we need to send a user creation request using Postman. Open Postman and create a new request with the following details:
Method:
POSTURL:
http://localhost/v1/users
Headers:
The following headers will be set. These can be acquired from the Appwrite console.
X-Appwrite-Project: {PROJECT_ID}X-Appwrite-Key: {PROJECT_ID}
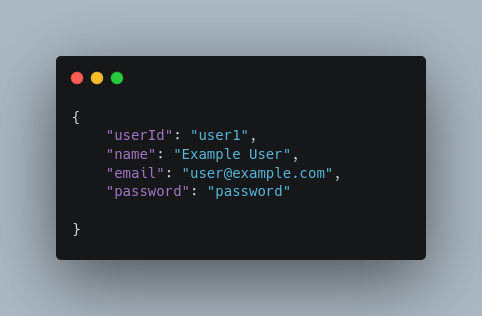
Body (JSON):

Once request is sent, Appwrite will attempt to authenticate the user with the provided credentials. If we have set the breakpoints correctly, Xdebug will pause execution at the first breakpoint in the controller.
Step 4: Tracing the Flow/Implementation with Xdebug
As the request is sent, Xdebug stops at the first breakpoint, allowing us to step through the authentication process and inspect what happens behind the scenes.
1. Handling the Login Request
We see that Xdebug first pauses at the
App::post('/v1/users')endpoint definition. Looking into it, we see that it stops right where the definition triggers thecreateUser()method in theusers.php.Using the step into feature of the debugger, we are taken to the
createUser()method. Stepping further into it, we see that the method first assigns the original unencrypted password we provided in the request to a variable.It then checks a hashing parameter to ensure consistent format.
We step further into the method where we see that it retrieves a
passwordHistoryattribute to track any password changes for the user.From there, the method converts the email we provided to lowercase to ensure case-insentitive comparison, and then queries the database to see if the email has already been used before and exists in the system.
The method then extracts the
userIdprovided in the request and checks if it is unique and doesn’t already exist. It then checks if a personal data check is required.If it is not empty and the hash type is plaintext, the method stores the password in a variable, and then a new object representing the user is created with various attributes.
If the hash type is plaintext, it triggers a password validation hook, after which the user object created earlier is saved to a user collection in the DB.
The code then handles the creation of target documents for email and phone. If an email is provided, a new target document is created in the 'targets' collection with the email as the identifier. If a target with the same email already exists, the existing target is appended to the user's targets attribute. The same process is repeated for the phone number if it is provided.
Finally, the cached user document is purged from the database to ensure that any subsequent queries retrieve the most up-to-date information. If any duplicate entries are encountered during the process, an exception is thrown with the message
Step 5: Returning the User Data
Once all that is complete, Appwrite then returns the user data in the response.
Step 6: Verifying the Output in Postman
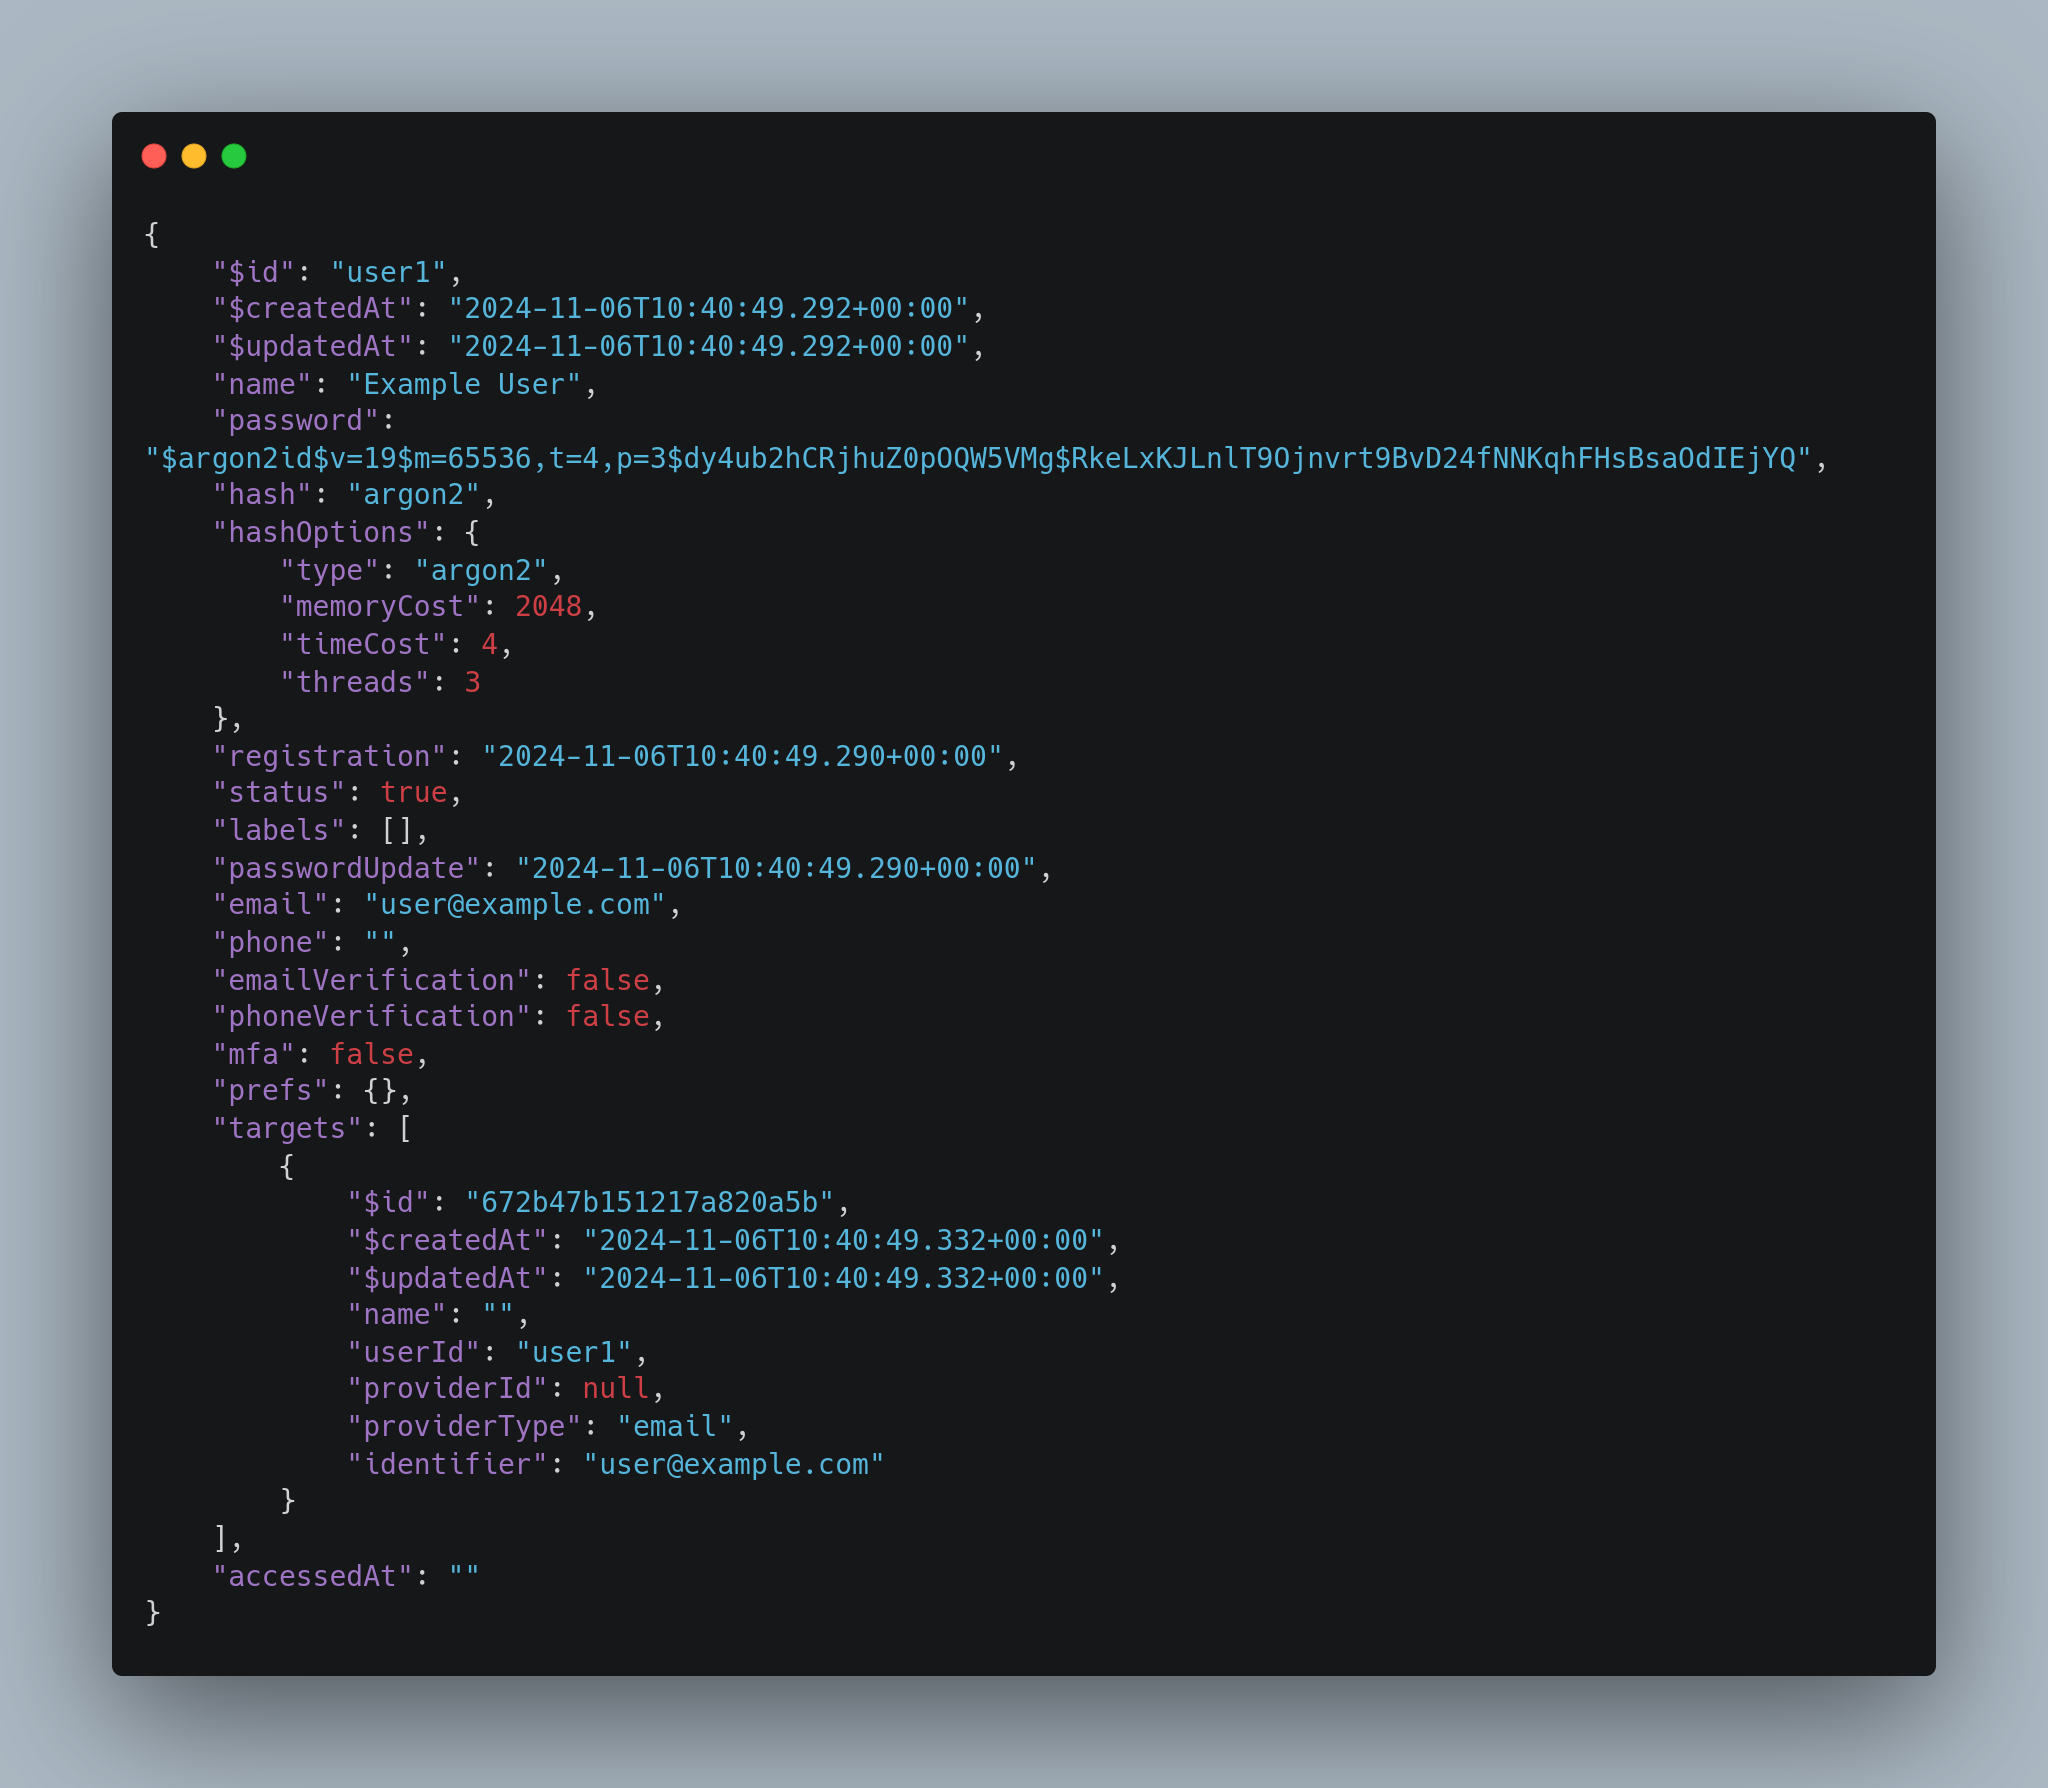
After stepping through the user creation process, Xdebug will eventually allow the program to continue, and the final response will be returned to Postman. The response should contain the session token, along with any relevant user data.
Sample Response:

Conclusion
Tracing the implementation of Appwrite’s user creation feature using Xdebug provides valuable insights into the inner workings of the system. By identifying entry points, setting breakpoints, and sending requests via Postman, we can systematically observe the flow of data and how various components interact during user authentication.
Through this process, we’ve seen how Appwrite handles the user creation requests, validates request data, and creates the user. Debugging tools like Xdebug not only help clarify complex code flows but also enhance our understanding of the application’s architecture and functionality. This knowledge is essential for developers looking to maintain or extend the capabilities of Appwrite or similar frameworks, ensuring robust and secure user authentication in their applications.
Subscribe to my newsletter
Read articles from Asigri Shamsu-Deen Al-Heyr directly inside your inbox. Subscribe to the newsletter, and don't miss out.
Written by

Asigri Shamsu-Deen Al-Heyr
Asigri Shamsu-Deen Al-Heyr
Hi there! I'm Deen, a Backend Developer and Support Engineer based in Accra, Ghana. I'm passionate about technology and believe it has the power to transform industries and improve lives. When I'm not coding or troubleshooting, you can find me tinkering with my 3D printers, diving into the world of anime, or losing myself in a good game. I'm currently running a 3D printing farm and have big plans for its future. I enjoy sharing my knowledge and experiences through this blog. So, join me on this journey of discovery and innovation!