Mastering Docker Compose: From Basics to Advanced Deployment
 shubham Saini
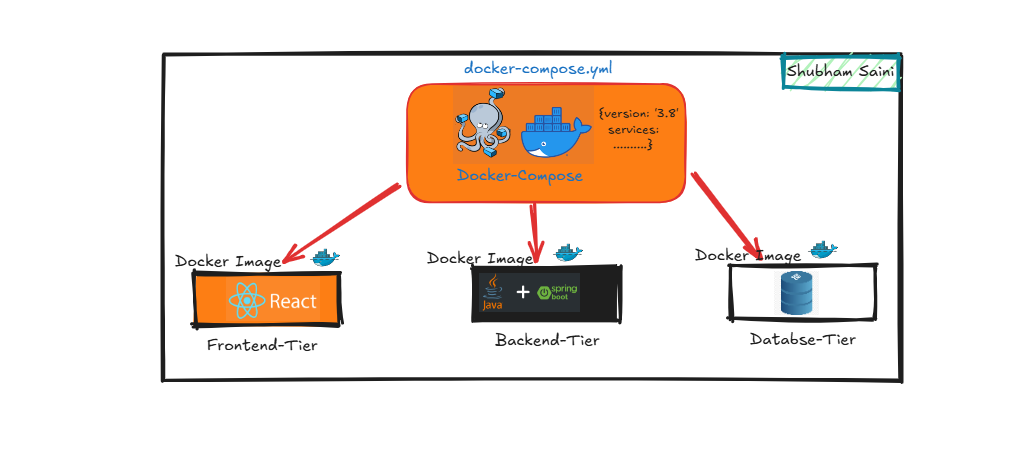
Docker Compose is a powerful tool for managing multi-container applications. Whether you're setting up a simple web server or a full 3-tier application, Compose simplifies everything into a single docker-compose.yml file. Today, we’ll explore Docker Compose basics and then move on to deploying a React frontend, Java Spring Boot backend, and MySQL database with Docker Compose.
What’s Docker Compose, and Why Should You Care?
Imagine this: you’re building an app, and it needs multiple services running—say, a frontend, backend, and database. Docker Compose lets you organize all these services with one file. Instead of setting them up one by one, just define them in docker-compose.yml and launch everything with one command! No more juggling multiple docker run commands; just set it and forget it (well, kind of).
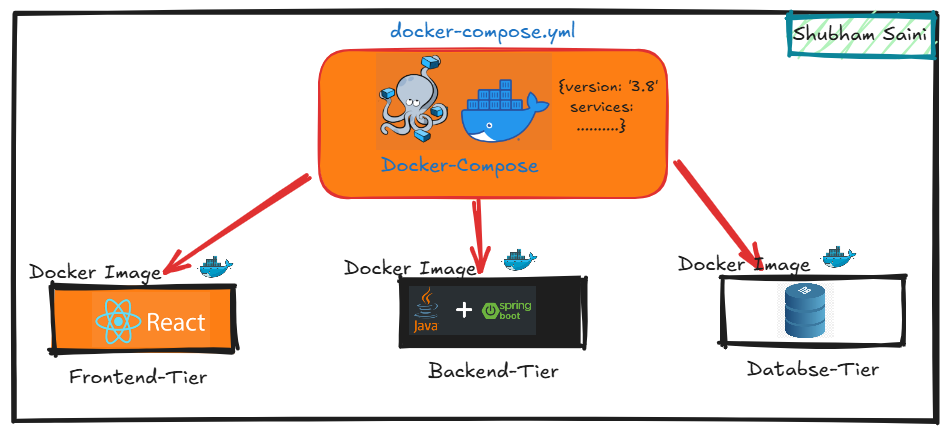
Getting Started with Docker Compose: Let’s Build a Simple Web Server
Let’s kick things off with a basic NGINX web server to get a feel for Docker Compose.
Create a project folder and move into it:
 mkdir my-simple-app
 cd my-simple-app
Create a
docker-compose.ymlfile with the following content:version: '3' services: web: image: nginx ports: - "8080:80"Run Docker Compose:
docker-compose up
Check out http://localhost:8080, and you’ll see the NGINX welcome page. Easy, right?

Leveling Up: Building a 3-Tier App with Docker Compose
Let’s dive into creating a full 3-tier application. We’ll start by cloning your GitHub repository, then create a Dockerfile for each service (frontend, backend, and database), and finally set up the docker-compose.yml file to run them together.
Step 1: Clone the Repository
Start by cloning your GitHub repository where your project files are hosted. Open your terminal and run:
git clone https://github.com/shubham-saini18/3TierApp-with-DockerCompose.git
cd 3TierApp-DockerCompose/
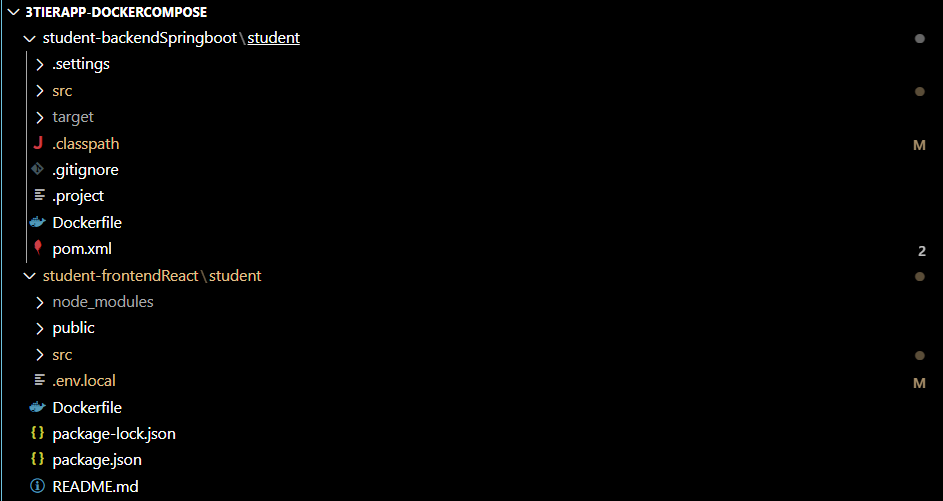
Step 2: Dockerfile for the React Frontend
In the student-frontendReact/student/ folder, create a Dockerfile that builds and serves the React app.
Navigate to the
frontendfolder:cd student-frontendReact/student/Create a Dockerfile with the following content:
 # Use a base image with Node.js installed
 FROM node:16-alpine AS build
 # Set working directory
 WORKDIR /app
 # Copy package.json and package-lock.json files
 COPY package*.json ./
 # Install dependencies
 RUN npm install
 # Copy the rest of the application code
 COPY . .
 # Build the Application
 RUN npm run build
 # Use a lightweight Node.js base image for runtime
 FROM node:16-alpine
 # Set the working directory
 WORKDIR /app
 # Copy the build output from the previous stage
 COPY --from=build /app/build ./build
 # Install a simple static file server
 RUN npm install -g serve
 # Expose port
 EXPOSE 3000
 # Command to start the server
 CMD ["serve", "-s", "build"]
This Dockerfile installs dependencies, builds the React app, and serves it on port 3000.
Step 3: Dockerfile for the Java Spring Boot Backend
Next, create a Dockerfile for the backend service, which will be built with Maven and run as a Java Spring Boot application.
Navigate to the
student-backendSpringboot/student/folder:cd student-backendSpringboot/student/Create a Dockerfile with the following content:
 # Use a base image with maven and java installed.
 FROM maven:3.8.4-openjdk-17 AS build
 # Set Working Directory
 WORKDIR /app
 #Copy the Maven project file
 COPY pom.xml .
 # Download Maven dependencies (only is the pom.xml file has changed)
 RUN mvn dependency:go-offline -B
 # Copy the application source code
 COPY src ./src
 # Build the application
 RUN mvn package -DskipTests
 # Use a lightweight JDK base image for runtime
 FROM openjdk:17-jdk-alpine
 # Set working directory
 WORKDIR /app
 # Copy the packaged JAR file from the previos stage
 COPY --from=build /app/target/*.jar student-backend.jar
 # Expose the port of the applicationruns on
 EXPOSE 8081
 # Command to run the application
 CMD [ "java", "-jar", "student-backend.jar" ]
This Dockerfile builds the Spring Boot application and runs it on port 8081.
Step 4: Set Up MySQL Database
The MySQL service doesn’t need a Dockerfile since we’ll use the official MySQL image. The database will be configured directly within the docker-compose.yml file in the next step.
Step 5: Define the Docker Compose File
Now that each service has its own Dockerfile, let’s create a docker-compose.yml file to bring everything together.
In the main 3TierApp-DockerCompose folder, create a docker-compose.yml file:
version: '3.8'
services:
  database:
    image: mysql
    container_name: mysql
    environment:
      MYSQL_ROOT_PASSWORD: "Test@123"
      MYSQL_DATABASE: "StudentDB"
    volumes:
      - db_data:/var/lib/mysql
    ports:
      - "3306:3306"
    networks:
      - 3TierApp-Network
  backend:
    build:
      context: ./student-backendSpringboot/student/
      dockerfile: Dockerfile
    container_name: student-backend
    environment:
      SPRING_DATASOURCE_URL: "jdbc:mysql://mysql:3306/StudentDB?useSSL=false&allowPublicKeyRetrieval=true&serverTimezone=UTC"
      SPRING_DATASOURCE_USERNAME: "root"
      SPRING_DATASOURCE_PASSWORD: "Test@123"
      CORS_ALLOWED_ORIGINS: "http://student-frontend:3000"
    ports:
      - "8081:8081"
    depends_on:
      - database
    networks:
      - 3TierApp-Network
  frontend:
    build:
      context: ./student-frontendReact/student/
    container_name: student-frontend
    environment:
      REACT_APP_BACKEND_URL: "http://student-backend:8081"
    ports:
      - "3000:3000"
    networks:
      - 3TierApp-Network
volumes:
  db_data:
networks:
  3TierApp-Network:
This file tells Docker Compose to:
Build the frontend and backend services from their Dockerfiles.
Set up a MySQL container using the official MySQL image.
Connect all the services so the frontend and backend can communicate with the database.
Step 6: Running the 3-Tier Application
Now that everything is set up, it’s time to run the whole app.
In the main folder of your cloned repository, run:
docker-compose up --build
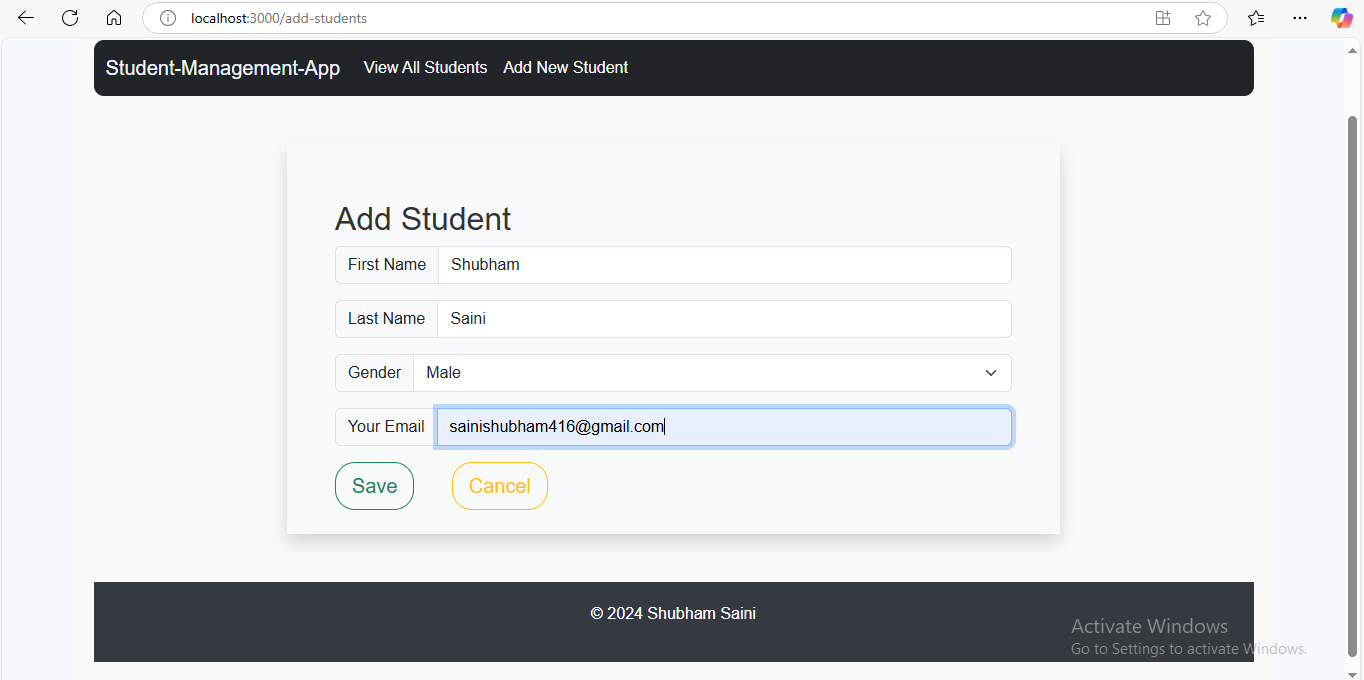
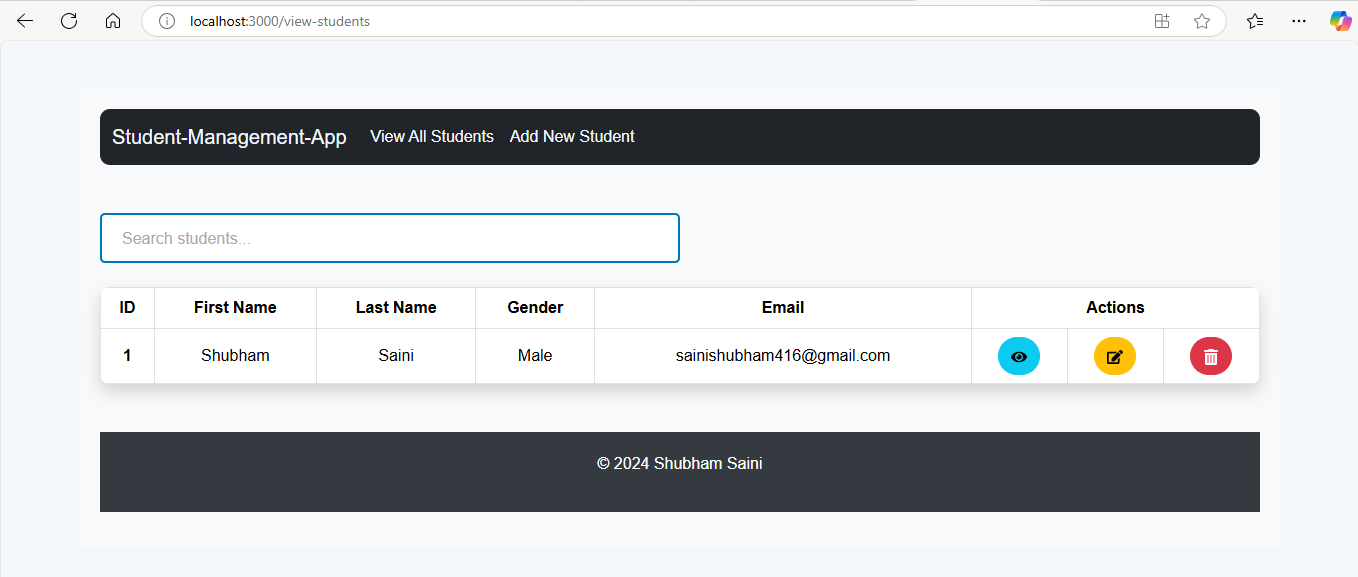
Docker Compose will build each service and start the containers. Here’s where you can access each part of the app:
docker pscommand to see all running containersFrontend: http://localhost:3000
Backend: http://localhost:8081/students


Conclusion
Using Docker Compose for multi-container applications, like this 3-tier setup, simplifies deployment and management. With just one docker-compose.yml file, you can define, build, and connect all your services, making complex deployments much easier to handle.
Once you’ve tried it out, remember to clean up any resources that were created. To delete all containers, images, and volumes associated with this project, you can run
docker-compose down --rmi all --volumes
This command stops and removes all containers, deletes the associated images, and clears any volumes created by Docker Compose, ensuring your system remains clutter-free.
Feel free to fork this project from my GitHub repository, make modifications, add features, or customize it to suit your needs. Your feedback is valuable and helps improve future projects, so let me know how this guide worked for you! Happy coding, and enjoy the streamlined power of Docker Compose! 🚀
Subscribe to my newsletter
Read articles from shubham Saini directly inside your inbox. Subscribe to the newsletter, and don't miss out.
Written by

shubham Saini
shubham Saini
Hi there! I’m Shubham Saini, a DevOps Engineer on a quest to revolutionize the way we connect code to cloud. With a love for automation and a flair for crafting scalable solutions, I thrive on turning challenges into opportunities. On this platform, I’ll be sharing my journey through the exciting world of DevOps—think cutting-edge tools, smart automation hacks, and strategies for deploying with flair. Let’s break down silos, innovate together, and make DevOps an adventure rather than just a process. Join me, and let’s create something amazing!