Building a Real-Time Chat App with React js and Appwrite Cloud Realtime
 Aman Raj
Create a Real-Time Chat App Without Servers or WebSockets – A Simple Guide
Learn to build a lightweight real-time chat app without a backend server or WebSockets! This guide covers frontend-only techniques to create an interactive chat experience.
In today's tech landscape, building a real-time chat app often means setting up complex backend infrastructure or using WebSockets to maintain fast, two-way communication. But what if you could skip the backend altogether and still deliver a chat experience that feels “real-time”?
Creating a chat app without backend dependencies has several advantages. For one, it cuts down on hosting and maintenance costs, making it an affordable choice for personal projects, prototypes, or hobby apps. Plus, this approach is simpler to deploy, as it’s entirely contained within the browser, which means users can interact with it right away, with no need to connect to a server.
Let’s dive into how you can bring this concept to life step-by-step. Whether you’re a developer looking to build a quick chat feature or a beginner learning JavaScript, this guide will give you all you need to create a working chat app without a backend or WebSockets!
In this tutorial, we’ll create a real-time chat app using Appwrite—a powerful, open-source backend as a service (BaaS). Appwrite simplifies app development by providing essential backend services like database management, user authentication, and storage, all without the need to set up your own server. Instead of building a backend from scratch, Appwrite lets us handle everything directly in the cloud, streamlining development and allowing us to focus on our app’s features.
By the end of this guide, you’ll have a working chat app that utilizes Appwrite’s database to store and retrieve messages. We’ll simulate “real-time” messaging using polling—a method that checks for new messages at set intervals. Although not as instantaneous as WebSockets, polling is a practical approach that works seamlessly with Appwrite’s database, making it a lightweight solution for many applications.
Why Choose Appwrite for Your Real-Time Chat App?
Managed Database: Store and retrieve messages effortlessly with Appwrite’s database, no server maintenance needed.
Real-Time API: Instantly push and receive messages, enabling smooth, live interactions for users.
Secure User Authentication: Easily set up secure, multi-method authentication for users.
Scalable and Simple: Appwrite’s cloud services scale with your app, making it easy to grow without complexity.
Let’s get started with building our chat app using Appwrite as our backend!
Step 1: Setting Up Vite with React
First, create a Vite project if you haven’t already:
 npm create vite@latest chat-app --template react
 cd chat-app
 npm install
Install the Appwrite SDK:
npm install appwriteInstall other required dependencies (optional)
TailwindReact Router DOMFramer Motionetc..
Step 2: Setting Up Appwrite Cloud
Create an Appwrite Cloud Account: Go to appwrite.io and sign up. Create a new project called "ChatApp."
Set Up a Database:
In your Appwrite Cloud dashboard, go to Database and create a new database.
Create a collection called
Messagesto store each message sent in the chat.Inside this collection, add these attributes:
userId(String): The ID of the user sending the message.text(String): The content of the message.createdAt(String): When the message was sent.
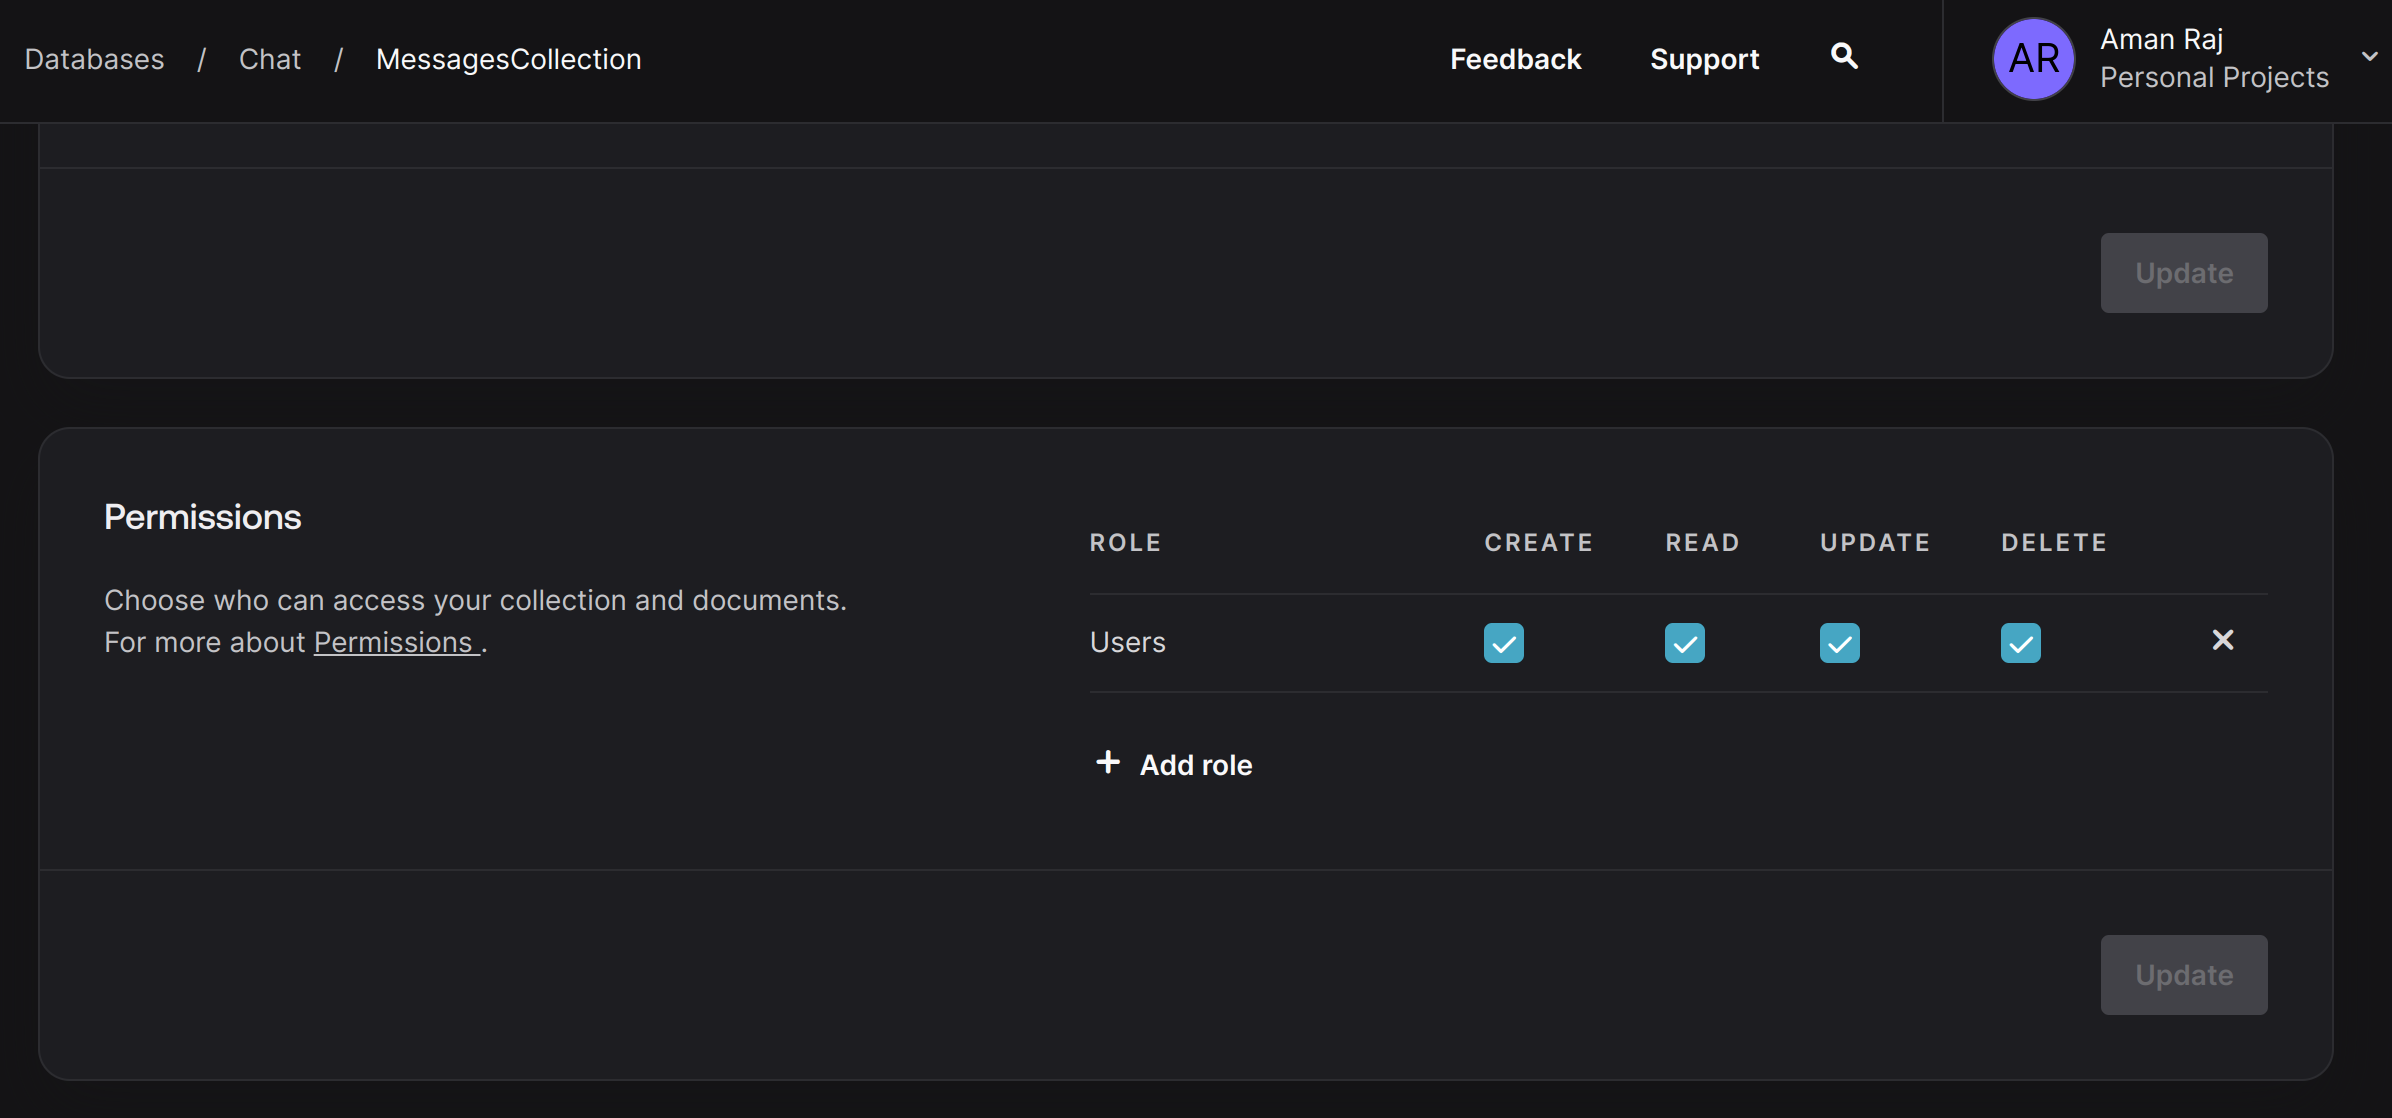
Configure API Permissions:
In the collection got to settings
Set permissions on the
Messagescollection to allow reading and writing as needed for authenticated users.(select role as Any for no auth applications.)
Step 3: Setting Up Appwrite SDK in Vite
Now that we have the backend ready, we need to set up the Appwrite client in our Vite app.
Create AppwriteService.js in your
srcfolder to handle Appwrite setup:import { Client, Account, Databases, Query } from 'appwrite'; const client = new Client() .setEndpoint('APPWRITE_ENDPOINT') .setProject('APPWRITE_PROJECT_ID') // Your project ID .setEndpointRealtime('wss://cloud.appwrite.io/v1/realtime'); export const account = new Account(client); export const databases = new Databases(client); export { client};
~Use .env files in production
Step 4: Building the Chat Interface
1. Create ChatWindow Component
The ChatWindow component will be responsible for fetching and displaying messages.
Real-time subscription for new messages:
    const unsubscribe = client.subscribe(
      [`databases.VITE_APPWRITE_DATABASE_ID.collections.VITE_APPWRITE_COLLECTION_ID.documents`],
      (response) => {
        if (response.events.includes('databases.*.collections.*.documents.*.create')) {
          setMessages((prevMessages) => {
            const newMessages = [...prevMessages, response.payload];
            return newMessages.filter(
              (message, index, self) => index === self.findIndex((m) => m.$id === message.$id)
            );
          });
        }
        if (response.events.includes('databases.*.collections.*.documents.*.delete')) {
          setMessages((prevMessages) =>
            prevMessages.filter((message) => message.$id !== response.payload.$id)
          );
        }
      }
    );

    return () => unsubscribe();
Complete ChatWindow component will be responsible for fetching and displaying messages.(with design and animation )
import { useState, useEffect, useRef } from 'react';
import { databases, account, client } from './appwrite';
import { ID, Query } from 'appwrite';
import { AnimatePresence, motion } from 'framer-motion';
import Linkify from 'react-linkify';


const ChatMessageList = () => {
  const [messages, setMessages] = useState([]);
  const [currentUser, setCurrentUser] = useState(null);
  const initialLoadCount = 20;
  const chatContainerRef = useRef(null);

  const handleInitialScroll = () => {
    if (chatContainerRef.current) {
      chatContainerRef.current.scrollTop = chatContainerRef.current.scrollHeight;
    }
  };

  useEffect(() => {
    const fetchMessages = async (limit = initialLoadCount, offset = 0) => {
      try {
        const response = await databases.listDocuments(
          import.meta.env.VITE_APPWRITE_DATABASE_ID,
          import.meta.env.VITE_APPWRITE_COLLECTION_ID,
          [
            Query.orderDesc('$createdAt'),
            Query.limit(limit),
            Query.offset(offset),
          ]
        );

        const uniqueMessages = response.documents
          .reverse() // Reverse for bottom-to-top loading
          .filter((message, index, self) =>
            index === self.findIndex((m) => m.$id === message.$id)
          );

        setMessages(uniqueMessages);
        handleInitialScroll(); // Scroll to bottom after loading
      } catch (error) {
        console.error('Error fetching messages:', error);
      }
    };
    // auth from appwrite (optional)
    const getCurrentUser = async () => {
      try {
        const user = await account.get();
        setCurrentUser(user);
      } catch (error) {
        console.error('Error getting current user:', error);
      }
    };

    fetchMessages();
    getCurrentUser();

    // Real-time subscription for new messages
    const unsubscribe = client.subscribe(
      [`databases.${import.meta.env.VITE_APPWRITE_DATABASE_ID}.collections.${import.meta.env.VITE_APPWRITE_COLLECTION_ID}.documents`],
      (response) => {
        if (response.events.includes('databases.*.collections.*.documents.*.create')) {
          setMessages((prevMessages) => {
            const newMessages = [...prevMessages, response.payload];
            return newMessages.filter(
              (message, index, self) => index === self.findIndex((m) => m.$id === message.$id)
            );
          });
        }
        if (response.events.includes('databases.*.collections.*.documents.*.delete')) {
          setMessages((prevMessages) =>
            prevMessages.filter((message) => message.$id !== response.payload.$id)
          );
        }
      }
    );

    return () => unsubscribe();
  }, []);

  useEffect(() => {
    handleInitialScroll();
  }, [messages]);


  const formatTime = (dateString) => {
    const date = new Date(dateString);
    return date.toLocaleTimeString([], { hour: '2-digit', minute: '2-digit' });
  };

  return (
    <div ref={chatContainerRef} className="flex-1 p-4 overflow-y-auto bg-[#111b21]">
      <div className="max-w-3xl mx-auto space-y-4">
        <AnimatePresence initial={false}>
          {messages.map((message, index) => {
            const isCurrentUser = message.userId === currentUser?.$id;
            const showSender = index === 0 || messages[index - 1].userId !== message.userId;

            return (
              <motion.div
                key={message.$id}
                initial={{ opacity: 0, y: 10 }}
                animate={{ opacity: 1, y: 0 }}
                exit={{ opacity: 0, y: -10 }}
                transition={{ duration: 0.2 }}
                className={`flex flex-col ${isCurrentUser ? 'items-end' : 'items-start'}`}
              >
                {showSender && (
                  <span className={`text-xs text-gray-500 mb-1 ${isCurrentUser ? 'mr-2' : 'ml-2'}`}>
                    {message.sender}
                  </span>
                )}

                <div
                  className={`flex items-end gap-2 ${isCurrentUser ? 'flex-row-reverse' : 'flex-row'}`}
                >
                  {showSender && (
                    <div className="w-6 h-6 rounded-full flex items-center justify-center text-xs text-white bg-rose-400">
                      {message.sender.charAt(0).toUpperCase()}
                    </div>
                  )}

                  <div
                    className={`group relative max-w-[90%] px-4 py-2 rounded-xl ${isCurrentUser
                        ? 'bg-[#766ac8] text-white rounded-tr-none'
                        : 'bg-[#202c33] text-white rounded-tl-none shadow-sm'
                      }`}

                  >
                    <p className="text-sm whitespace-pre-wrap ">


                      <Linkify
                        componentDecorator={(decoratedHref, decoratedText, key) => (
                          <a href={decoratedHref} target="_blank" rel="noopener noreferrer" key={key} className="">
                            {decoratedText}
                          </a>
                        )}
                      >
                        {message.text}
                      </Linkify>


                    </p>

                    <span
                      className={`absolute bottom-1 ${isCurrentUser
                          ? 'left-0 -translate-x-[calc(100%+0.5rem)]'
                          : 'right-0 translate-x-[calc(100%+0.5rem)]'
                        } opacity-0 group-hover:opacity-100 transition-opacity text-xs text-gray-400`}
                    >
                      {formatTime(message.createdAt)}
                    </span>
                  </div>
                </div>
              </motion.div>
            );
          })}
        </AnimatePresence>
      </div>
    </div>
  );
};
export default ChatMessageList;
~The code uses appwrite account as auth provider!! (optional you can remove the auth code and user info from code)
2. Create Message Input Component
The MessageInput component handles sending messages to the database.
handling the message sending to DB
const handleSendMessage = async () => {
    try {
      if (message.trim()) {
        await databases.createDocument(
          'APPWRITE_DATABASE_ID', // ids
          'APPWRITE_COLLECTION_ID',  // ids
          'unique()',
          {
            text: message,
            sender: currentUser.name,
            userId: currentUser.$id,
            createdAt: new Date().toISOString(),
          }
        );
        setMessage('');
        setShowEmojiPicker(false);
      }
    } catch (error) {
      console.error('Error sending message:', error);
    }
  };
Complete MessageInput.jsx component!! (includes design and auth user info)
import { useState, useEffect } from 'react';
import { databases, account } from './appwrite';


const ChatMessageInput = () => {
  const [message, setMessage] = useState('');
  const [currentUser, setCurrentUser] = useState(null);

// auth (optinonal to keep)
  useEffect(() => {
    const getCurrentUser = async () => {
      try {
        const user = await account.get();
        setCurrentUser(user);
      } catch (error) {
        console.error('Error getting current user:', error);
      }
    };

    getCurrentUser();
  }, []);

  const handleSendMessage = async () => {
    try {
      if (message.trim()) {
        await databases.createDocument(
          import.meta.env.VITE_APPWRITE_DATABASE_ID,
          import.meta.env.VITE_APPWRITE_COLLECTION_ID,
          'unique()',
          {
            text: message,
            sender: currentUser.name,
            userId: currentUser.$id,
            createdAt: new Date().toISOString(),
          }
        );
        setMessage('');
        setShowEmojiPicker(false);
      }
    } catch (error) {
      console.error('Error sending message:', error);
    }
  };

  const handleKeyPress = (e) => {
    if (e.key === 'Enter' && !e.shiftKey) {
      e.preventDefault();
      handleSendMessage();
    }
  };

  return (
    <div className="fixed bottom-0 left-0 right-0 bg-[#202c33]  p-4">
      <div className="max-w-7xl mx-auto relative">
        <div className="flex items-end space-x-2">
          {/* Message Input */}
          <div className="flex-grow relative bg-[#2a3942] rounded-lg shadow-sm border border-[#3d5360] focus-within:border-[#557080] focus-within:ring-1 focus-within:ring-[#3d5360]">
            <textarea
              value={message}
              onChange={(e) => setMessage(e.target.value)}
              onKeyPress={handleKeyPress}
              placeholder="Write a message..."
              className="block w-full resize-none px-4 py-3 bg-transparent text-gray-100 placeholder-gray-400 focus:outline-none min-h-[50px] max-h-[150px] rounded-lg"
              style={{ scrollbarWidth: 'none' }}
              rows={1}
            />
          </div>

          {/* Send Button */}
          <button
            onClick={handleSendMessage}
            className="inline-flex items-center px-8 p-4 border border-transparent text-base font-medium rounded-lg shadow-sm text-white bg-[#8774e1] hover:bg-[#6051aa] focus:outline-none focus:ring-2 focus:ring-offset-2 transition-colors duration-200"
          >
            <svg
              className="w-5 h-5 "
              fill="none"
              stroke="currentColor"
              viewBox="0 0 24 24"
            >
              <path
                strokeLinecap="round"
                strokeLinejoin="round"
                strokeWidth={2}
                d="M12 19l9 2-9-18-9 18 9-2zm0 0v-8"
              />
            </svg>

          </button>
        </div>


            </div>
          </div>
        )}
      </div>
    </div>
  );
};

export default ChatMessageInput;
3. Integrate Components in App.js
In App.js, bring everything together (without auth):
import React from "react";
import ChatWindow from "./ChatWindow";
import MessageInput from "./MessageInput";

const App = () => {
  return (
    <div className="chat-app">
      <ChatWindow />
      <MessageInput />
    </div>
  );
};

export default App;
~ App.js, (with auth provider and protected route! make changes in code to run):
import { BrowserRouter as Router, Route, Routes } from 'react-router-dom';
import LoginForm from './components/LoginForm';
import ChatroomPage from './pages/ChatroomPage';
import ErrorPage from './pages/ErrorPage';
import { AuthProvider } from './utils/AuthContext.jsx'; // Import the AuthProvider
import ProtectedRoute from './utils/ProtectedRoute.jsx'; // Import the ProtectedRoute component

const App = () => {
  return (
    <AuthProvider>
      <Router>
        <Routes>

          <Route path="/login" element={<LoginForm />} />
           <Route path="/signup" element={<SignupForm />} />
          <Route
            path="/chatroom"
            element={<ProtectedRoute element={<ChatroomPage />} />}
          />
          <Route path="*" element={<ErrorPage />} />
        </Routes>
      </Router>
    </AuthProvider>
  );
};

export default App;
Step 5: Testing the Chat App
Run your Vite application:
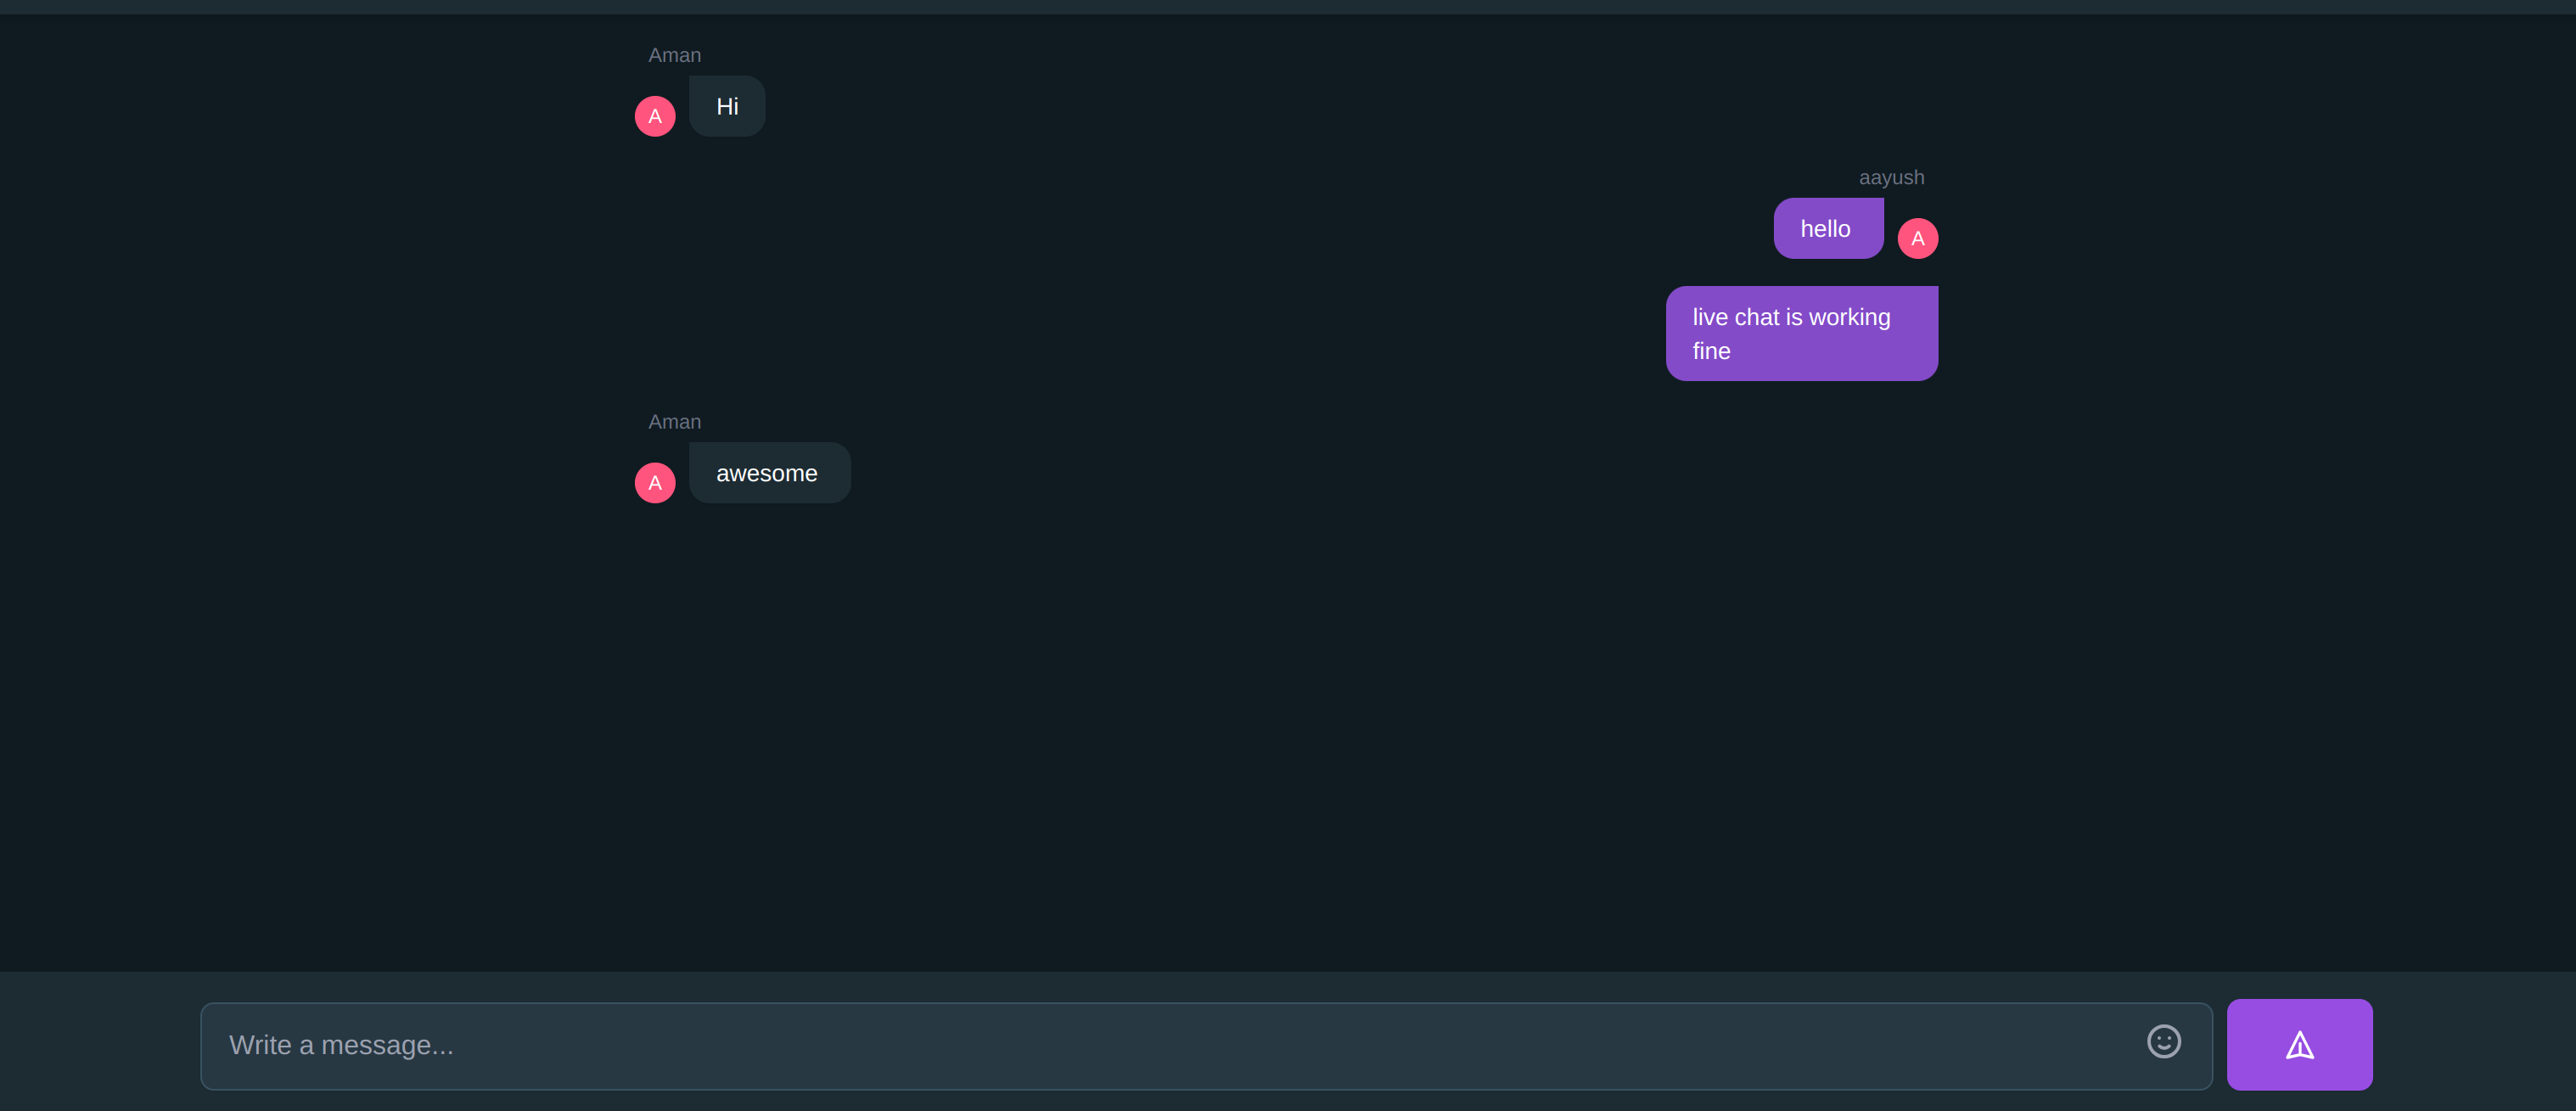
npm run devOpen two browser tabs and type messages. Messages should appear instantly in both tabs.
complete code : https://github.com/huamanraj/BuzzSphere
Wrapping Up
This setup demonstrates how Appwrite Cloud can power a real-time chat experience with a React and Vite frontend. You can expand this by adding features like authentication, emojis, and typing indicators to make it even more interactive.
Sources:
Thanks for reading! If you enjoyed this article, consider following to my Hashnode blog account for more updates and insightful content. Feel free to leave a comment below sharing your thoughts, questions, or feedback. Let's stay connected!
Follow me on X | Connect on LinkedIn | Visit my GitHub \
( I am currently available for paid freelance work. Feel free to reach out for web development, custom solutions, or any other projects you might need help with! : portfolio: aman-raj.xyz )
Happy Coding🎉
Copyright ©2024 Aman Raj. All rights reserved.
Subscribe to my newsletter
Read articles from Aman Raj directly inside your inbox. Subscribe to the newsletter, and don't miss out.
Written by

Aman Raj
Aman Raj
I’m a full-stack developer and open-source contributor pursuing B.Tech in CSE at SKIT, Jaipur. I specialize in building scalable web apps and AI-driven tools. With internship experience and a strong portfolio, I’m actively open to freelance projects and remote job opportunities. Let’s build something impactful!
