Setting up a productive development environment for Rails 8 with tmux
 Arthur Ariza
This guide provides a tmux script for setting up a Rails development environment, complete with multiple windows for common tasks. Follow along to configure it, customize it, and streamline your workflow.
TLDR
Here’s the final script for those in a hurry. Feel free to modify it as needed. If you want more context on using tmux and setting up a productive, reusable development environment for Rails, keep reading.
SESSION=$(basename "$PWD")

# Check if the session already exists; if so, attach and exit early
if tmux has-session -t "$SESSION" 2>/dev/null; then
  # Attach to the session
  tmux attach -t "$SESSION"
  exit 0
fi

# Create a new session with the console window, open the project directory and start the Rails console
tmux new-session -s "$SESSION" -n console -d
tmux send-keys -t "$SESSION":1 'code .' C-m

# Logs window
tmux new-window -n logs -t "$SESSION"
tmux send-keys -t "$SESSION":2 'tail -f log/development.log ' C-m

# Rails server window
tmux new-window -n server -t "$SESSION"
tmux send-keys -t "$SESSION":3 'rm -f tmp/pids/server.pid' C-m # Remove server.pid if it exists
tmux send-keys -t "$SESSION":3 'bin/dev' C-m

# Lazy Git window
tmux new-window -n lazygit -t "$SESSION"
tmux send-keys -t "$SESSION":4 "lazygit" C-m

# Development database window
tmux new-window -n database -t "$SESSION"
tmux send-keys -t "$SESSION":5 "sqlite3 storage/development.sqlite3" C-m

# Switch back to the first window
tmux select-window -t "$SESSION":1

# Attach to the session
tmux attach -t "$SESSION"
Assumptions
You should have tmux already set up and have basic understanding of tmux, this article will not cover these steps.
For this development environment we are going to be using Rails 8 with SQLite3 as our database, to take advantage of the new Solid Trifecta Gems (Solid Cable, Solid Cache, and Solid Queue).
My personal editor of choice is VsCode, but you can easily change the command to open your favorite editor. If you use something inside the terminal like vim, I suggest you to create a new tmux window and open your editor directly from the terminal.
LazyGit is my personal choice for a terminal UI for git commands, I would say that this is an optional window but I highly recommend giving LazyGit a try.
The Script Step By Step
Session Name and Attaching To It
SESSION=$(basename "$PWD")

# Check if the session already exists; if so, attach and exit early
if tmux has-session -t "$SESSION" 2>/dev/null; then
  # Attach to the session
  tmux attach -t "$SESSION"
  exit 0
fi
Here we set up the session name using the basename function and the pwd command, so if your pwd result is something like:
/Users/user/Dev/Rails-8/beta
The session name will be beta, and if it already exists, we’ll simply reattach to it.
Console Window and Opening Your Editor
# Create a new session with the console window and open VsCode in the project directory
tmux new-session -s "$SESSION" -n console -d
tmux send-keys -t "$SESSION":1 'code .' C-m
The console window will be a general purpose window to run commands like:
rails generaterails consolerake tasksrails test
We also open our editor here, so if you’re not using VSCode, modify the command to open your preferred editor.
Logs Window
# Logs window
tmux new-window -n logs -t "$SESSION"
tmux send-keys -t "$SESSION":2 'tail -f log/development.log ' C-m
The logs window helps with debugging and troubleshooting development issues.
Rails Server Window
# Rails server window
tmux new-window -n server -t "$SESSION"
# Remove server.pid if it exists
tmux send-keys -t "$SESSION":3 'rm -f tmp/pids/server.pid' C-m
tmux send-keys -t "$SESSION":3 'bin/dev' C-m
Here we are gonna run our development server, we will do a check to see if a server.pid was left behind and remove it. Now we can execute bin/dev to run the rails server according to the Procfile. If you use a different command, modify it here.
LazyGit Window
# Lazy Git window
tmux new-window -n lazygit -t "$SESSION"
tmux send-keys -t "$SESSION":4 "lazygit" C-m
Here is a window for all things Git related, using a Simple terminal UI for git commands.
Development Database Window
# Development database window
tmux new-window -n database -t "$SESSION"
tmux send-keys -t "$SESSION":5 "sqlite3 storage/development.sqlite3" C-m
Last but not least, there’s the SQLite3 database window for executing commands directly on the database, for example:
.help
.tables
PRAGMA pragma_list;
How To Use The Script
First, create the file in your root directory (e.g., named rails-dev, though any name works). Paste the script contents and save the file. Then, save and make the file executable with chmod +x ~/rails-dev. To launch the tmux environment, navigate to your Rails project directory and run:
~/rails-dev
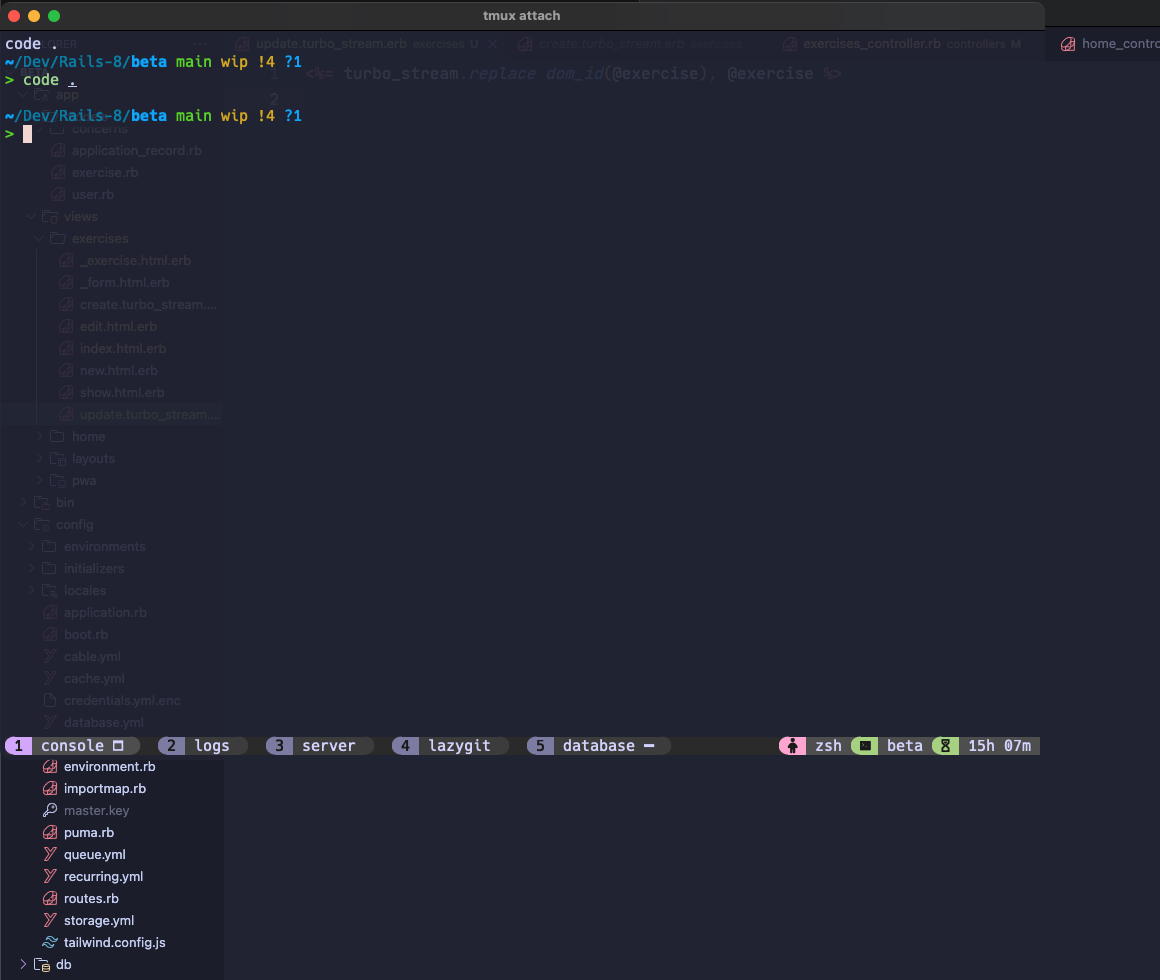
Your editor and the specified tmux windows should now open. Since the session name is set dynamically, you can run this script in multiple Rails apps.
Below is an example of the tmux environment with the open windows created by this script.

Subscribe to my newsletter
Read articles from Arthur Ariza directly inside your inbox. Subscribe to the newsletter, and don't miss out.
Written by
