How to add custom fonts in bubble.io?
 Anish Gandhi
Table of contents
- Why use Custom Fonts?
- Step 1: Download the font file
- Step 2: Upload the font file
- Step 3: Create a CSS script I have mentioned below on Notepad
- Step 5: Download the CSS font file
- Step 6: Upload the CSS font file
- Step 7: Add CSS Path in the bubble.io
- Step 8: Test the font in the application bubble.io editor
Why use Custom Fonts?
Typography plays a crucial role in application development, influencing an app's user interface and user experience.
While bubble.io provides many font options, sometimes your project needs a specific style not found in their library. Custom fonts allow you to stay on-brand with unique typography, create a visually distinct experience, and meet client specifications if you're working on a branded project.
Here is the step-by-step guide on how to add custom fonts:
Step 1: Download the font file
For this article, I am going to use a custom font named ‘Taylor Sans’ which is not part of the bubble.io editor. It has an ‘OFL (SIL Open Font License’ so I can use it here in this blog freely.
I have downloaded this font from here. This font family has 6 font files with different font weights. Here are the 6 font file names:
TaylorSans-Bold - 700
TaylorSans-ExtraBold - 800
TaylorSans-Light - 300
TaylorSans-Regular - 400
TaylorSans-SemiBold - 600
TaylorSans-Thin - 100
For this font family, you need to set up each font file independently. Here in this article, I will upload only one file ‘TaylorSans-Bold.ttf’. You can replicate the same for other files.
Step 2: Upload the font file
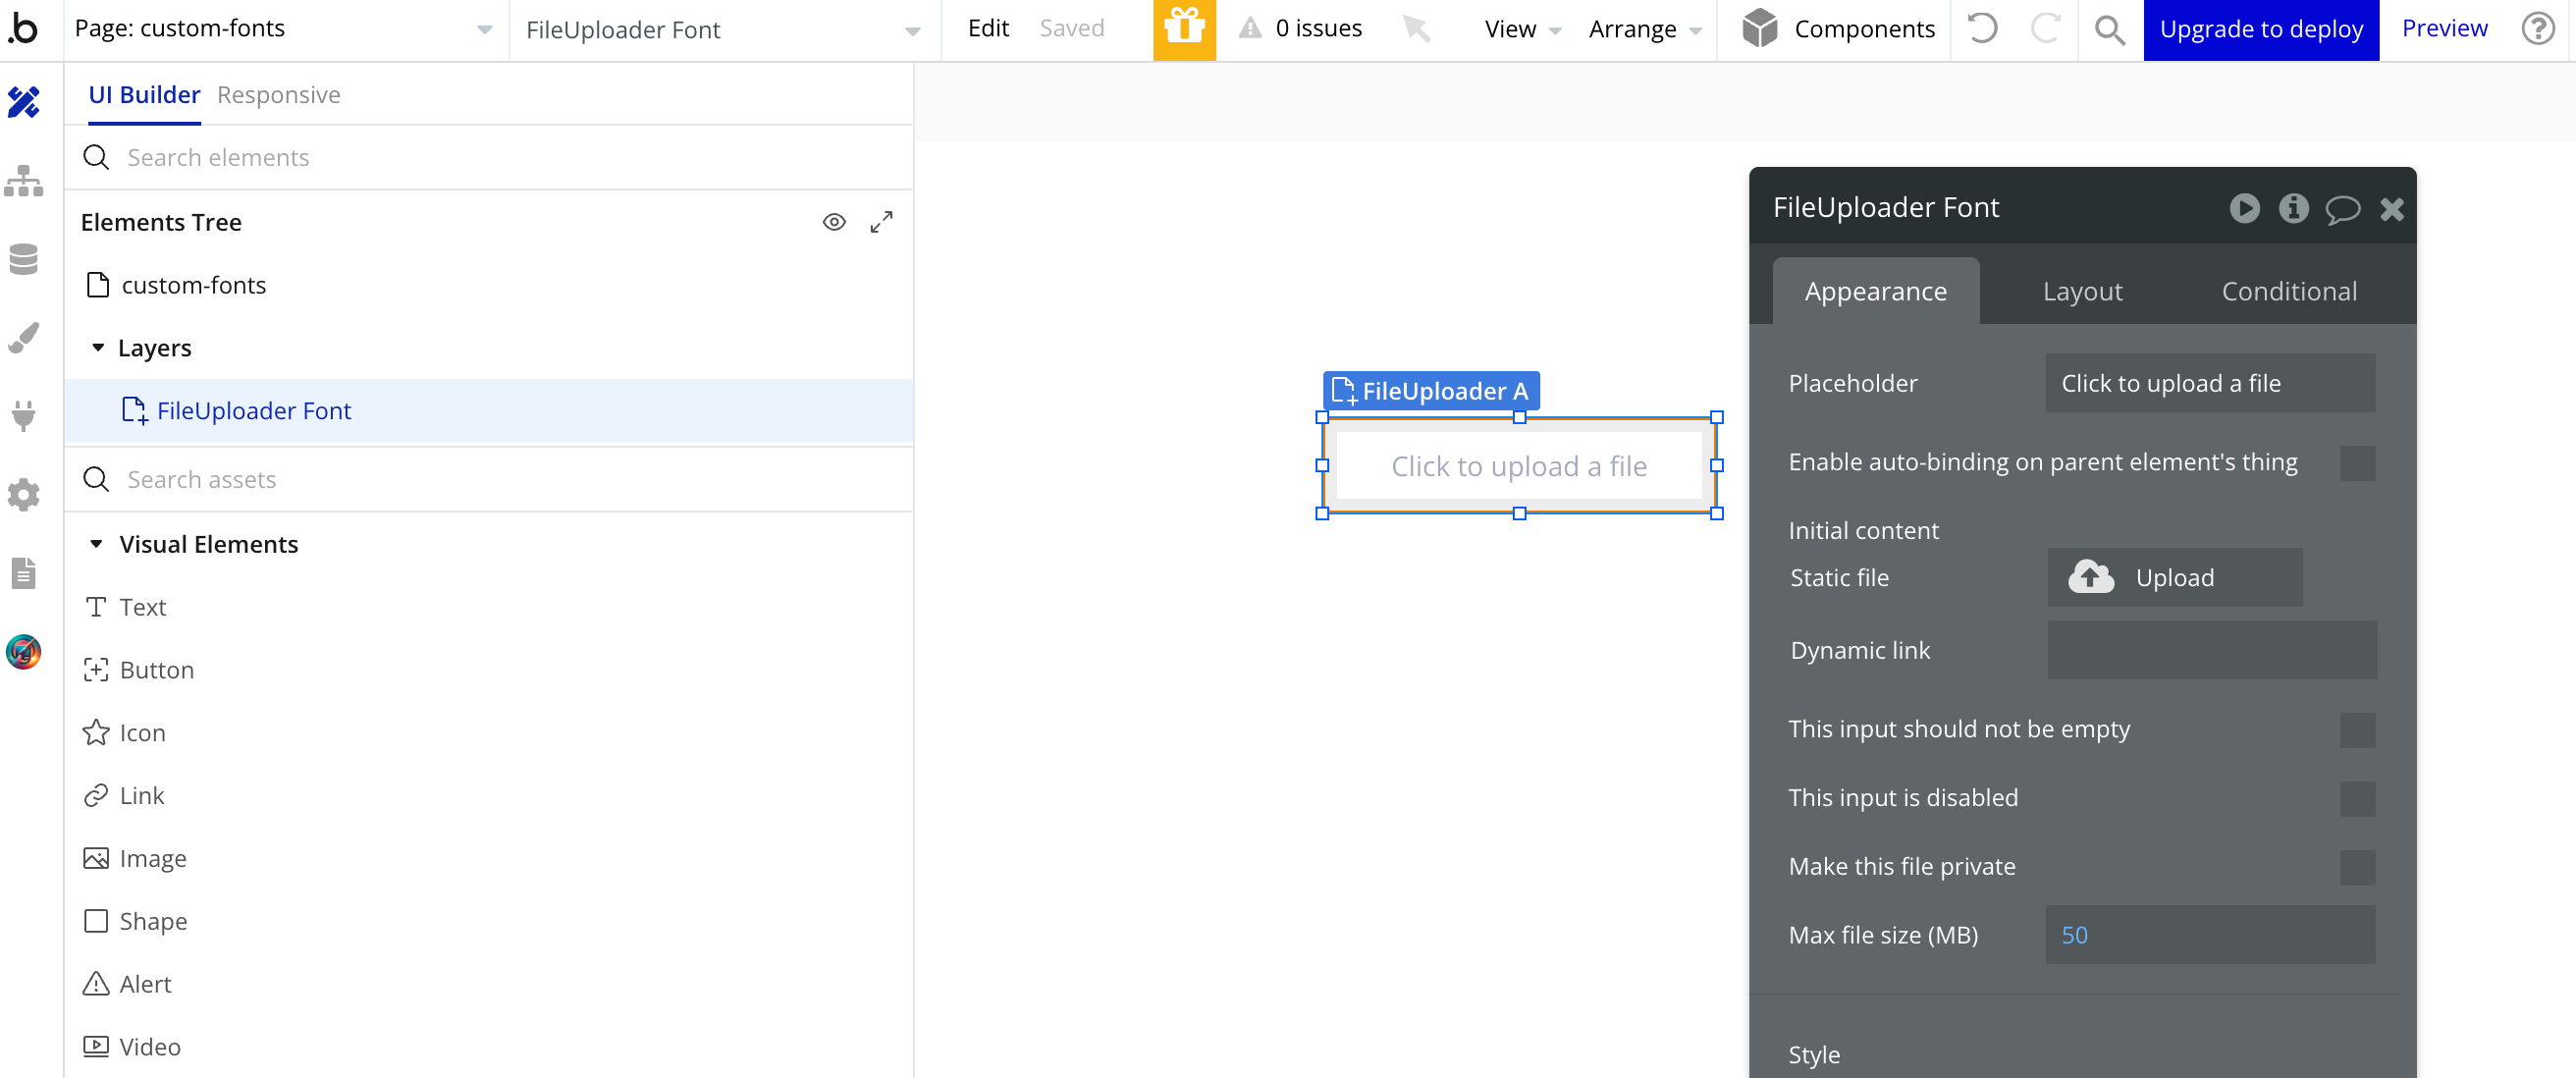
All the font files will have the ‘.ttf’ extension so I will call it a ttf font file. Now open the bubble editor and place the file editor element on the dummy/test page.
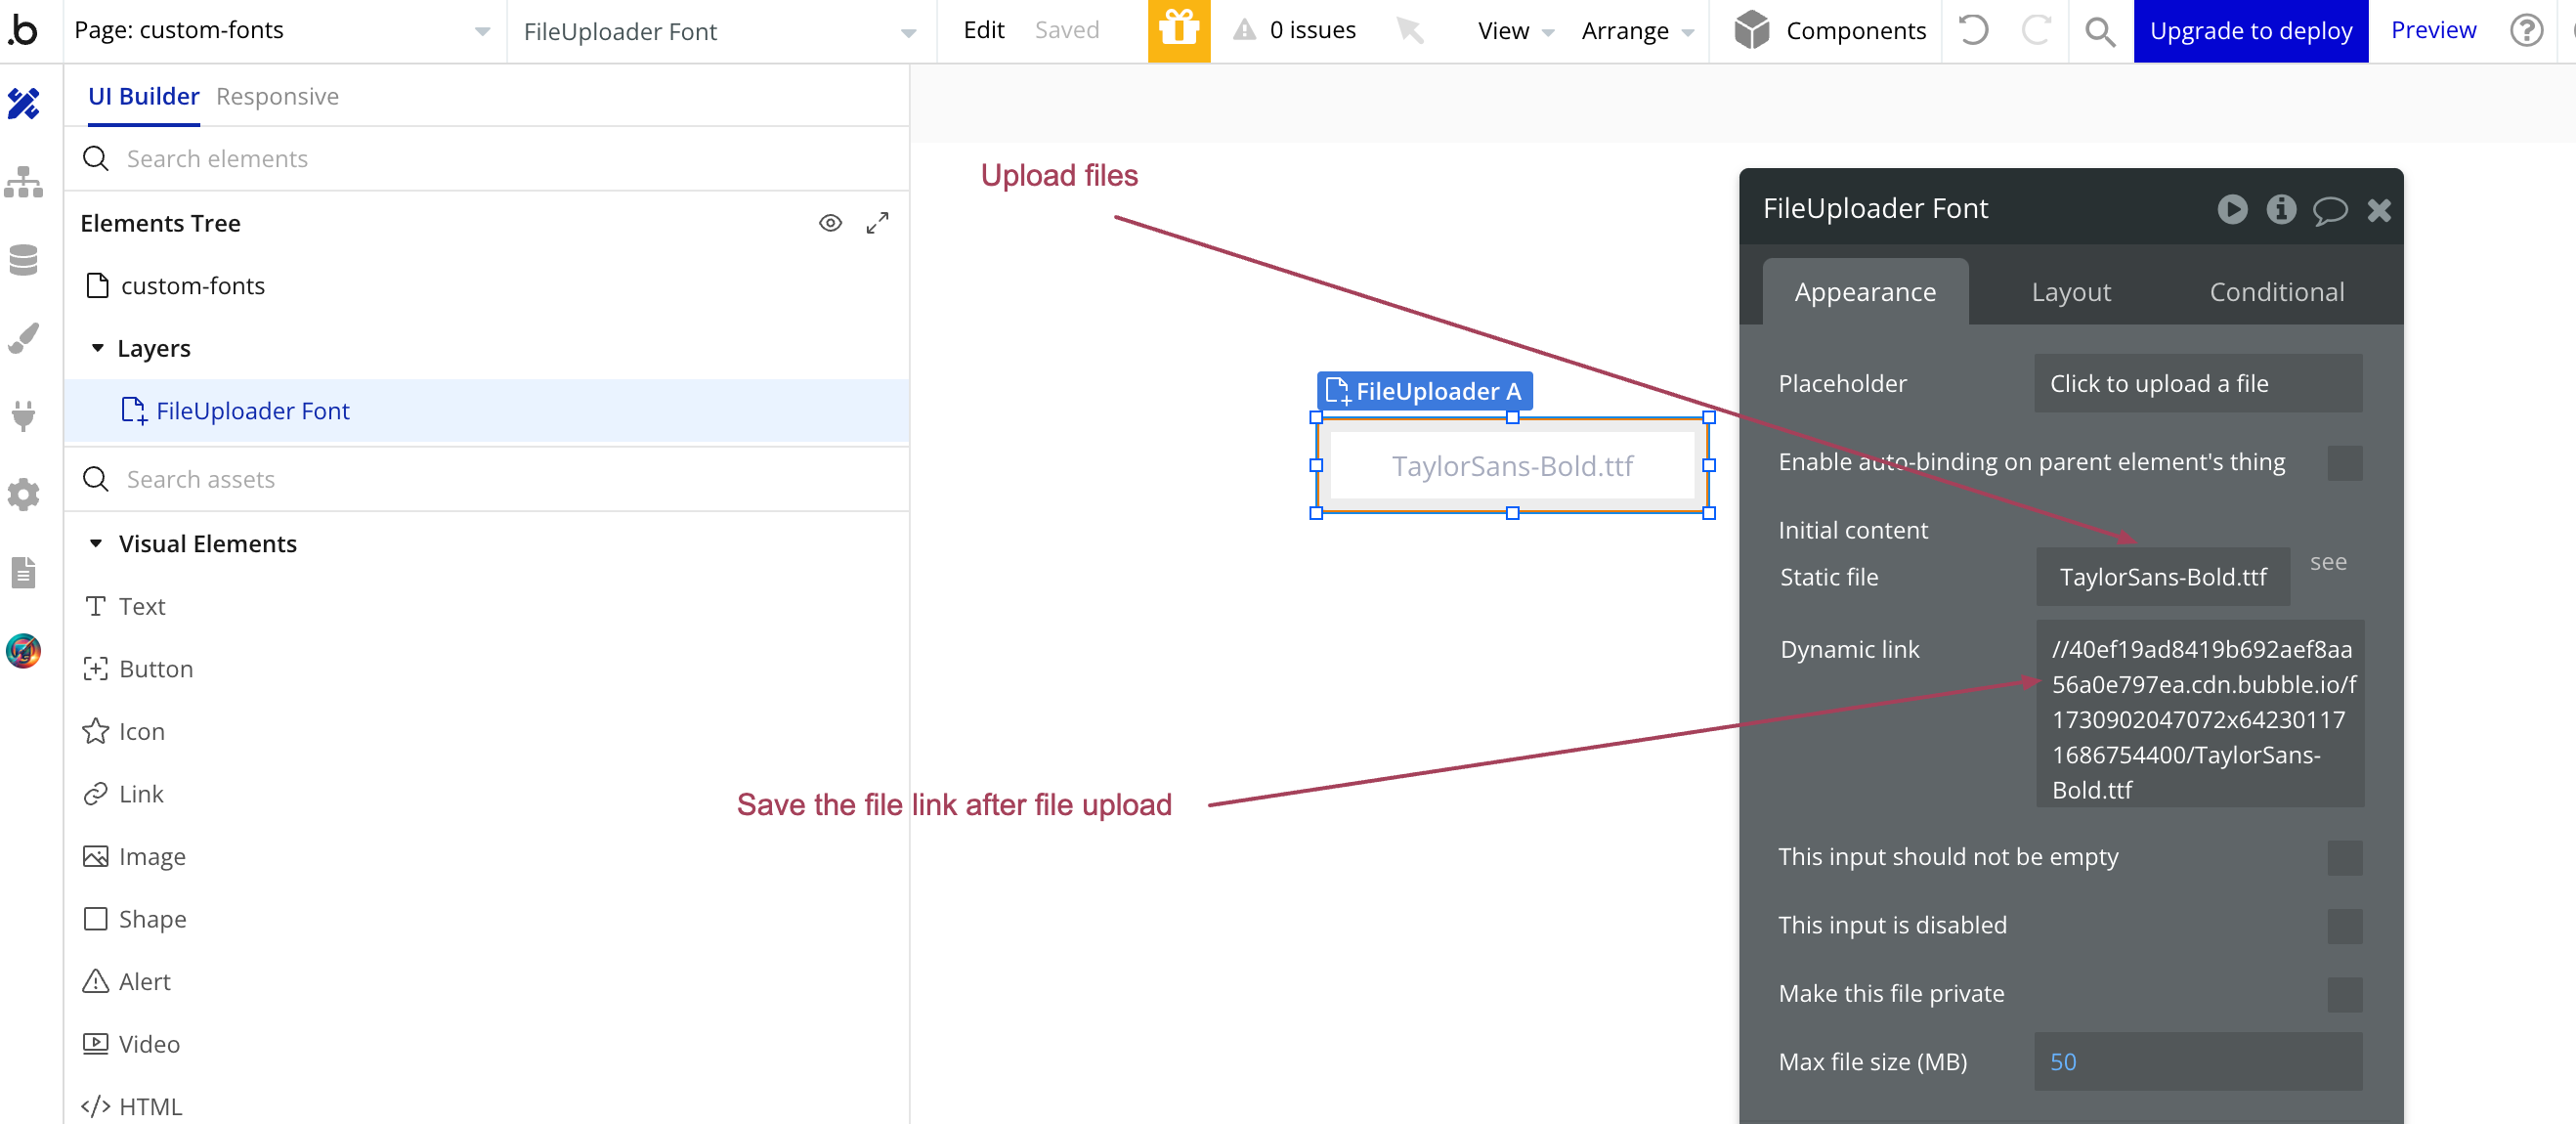
Upload the ‘TaylorSans-Bold.ttf‘ file as a static file and copy the link generated in the dynamic link section once the file is uploaded.
Step 3: Create a CSS script I have mentioned below on Notepad
Copy the CSS I mentioned below and paste it on Notepad. I am using an online notepad for this article.
@font-face {
font-family: 'Font-title';
src: url('file-upoader-url');
}
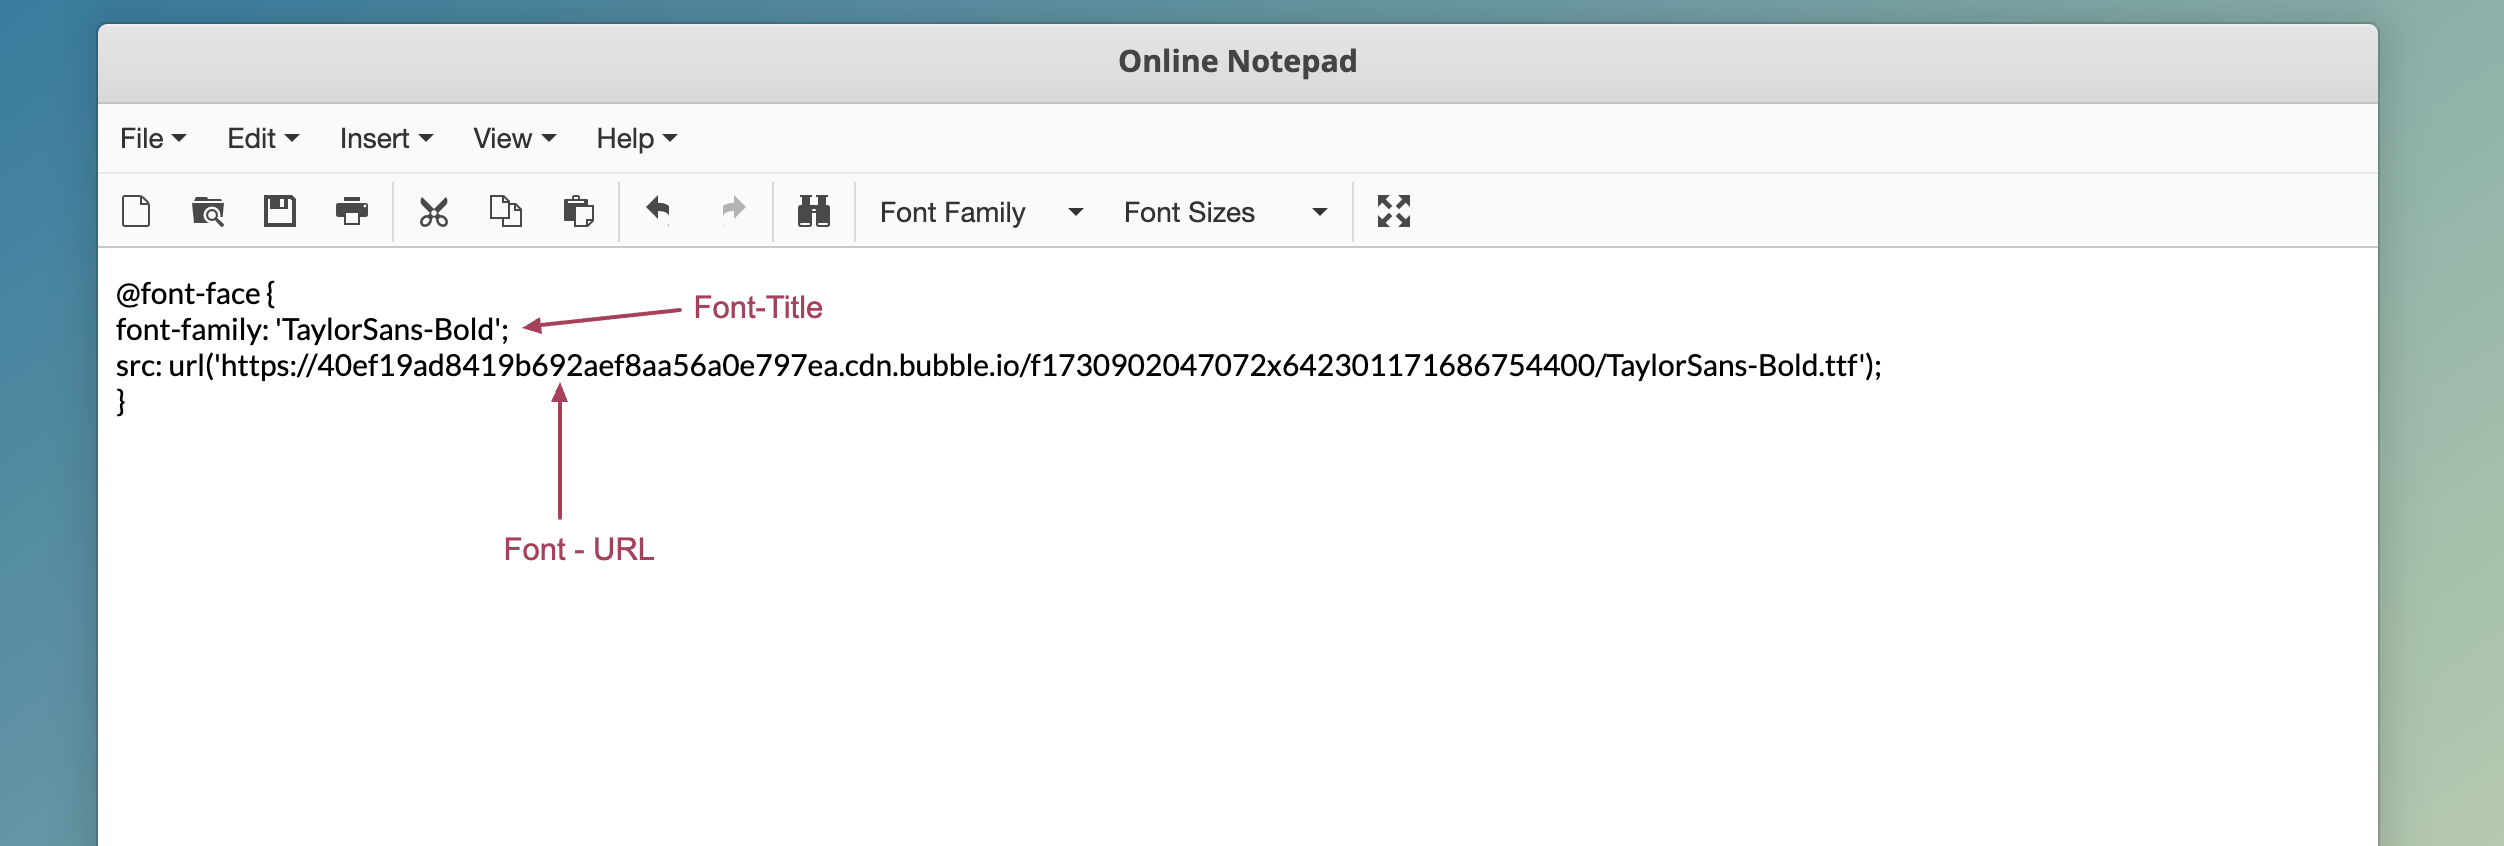
After pasting the CSS script on Notepad, change the Font-tile (In this case, it will be ‘TaylorSans-Bold’) and use the saved URL from step 2 which you got after uploading the .ttfl file
In the URL, add ‘https:’ before // and the CSS script in Notepad will look like the image provided below:
Step 5: Download the CSS font file
From Notepad, save this file and make sure to give the file name the same as font-title and give it a .css extension at the end.
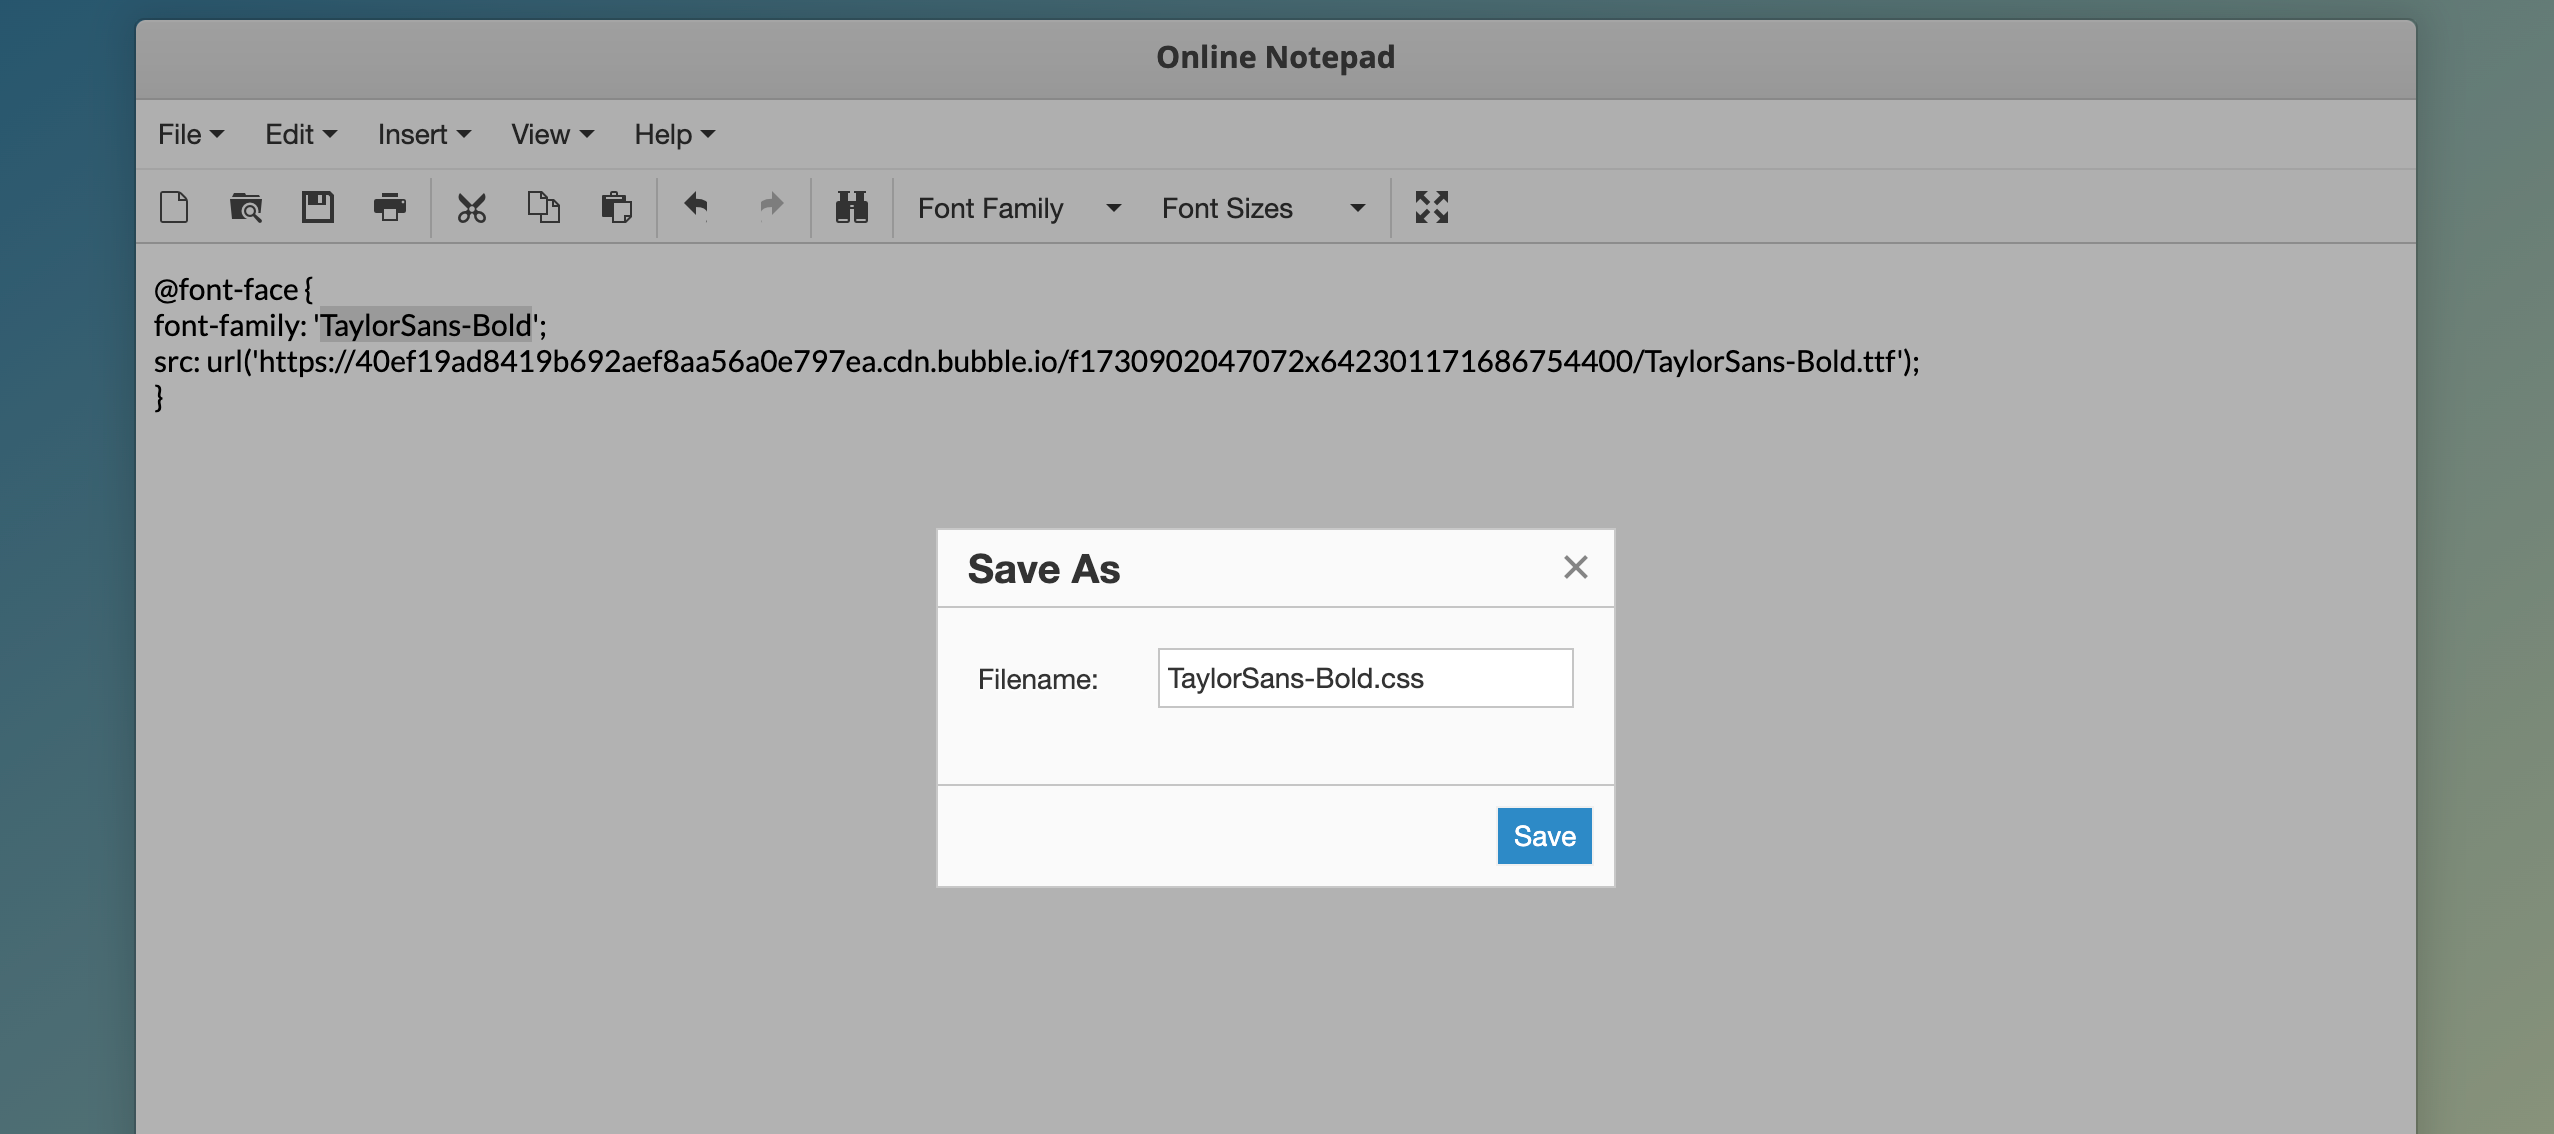
When you save it, it will be saved in the device as a ‘TaylorSans-Bold.css.txt’ file. Rename this file in your device as ‘TaylorSans-Bold.css’. Remove .txt from the file name.
Step 6: Upload the CSS font file
Now let’s come to the editor again and upload this .css file on file-uploader. Once uploaded, save the URL of css file as well.
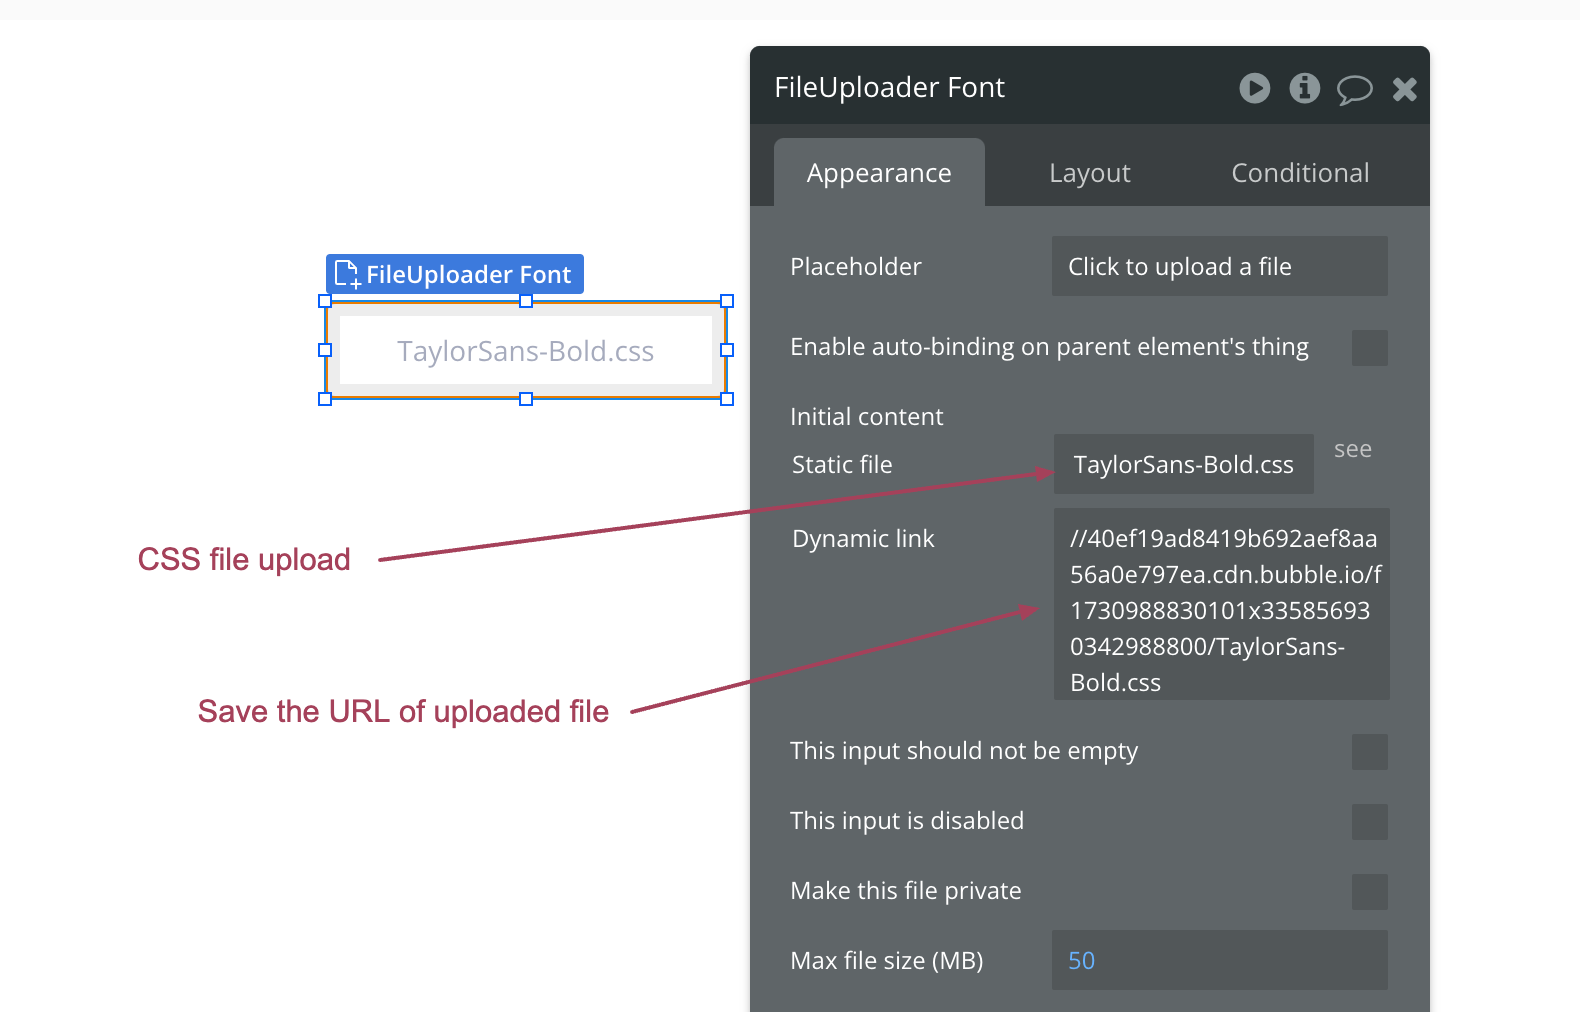
Step 7: Add CSS Path in the bubble.io
Go to Settings → General → Custom fonts
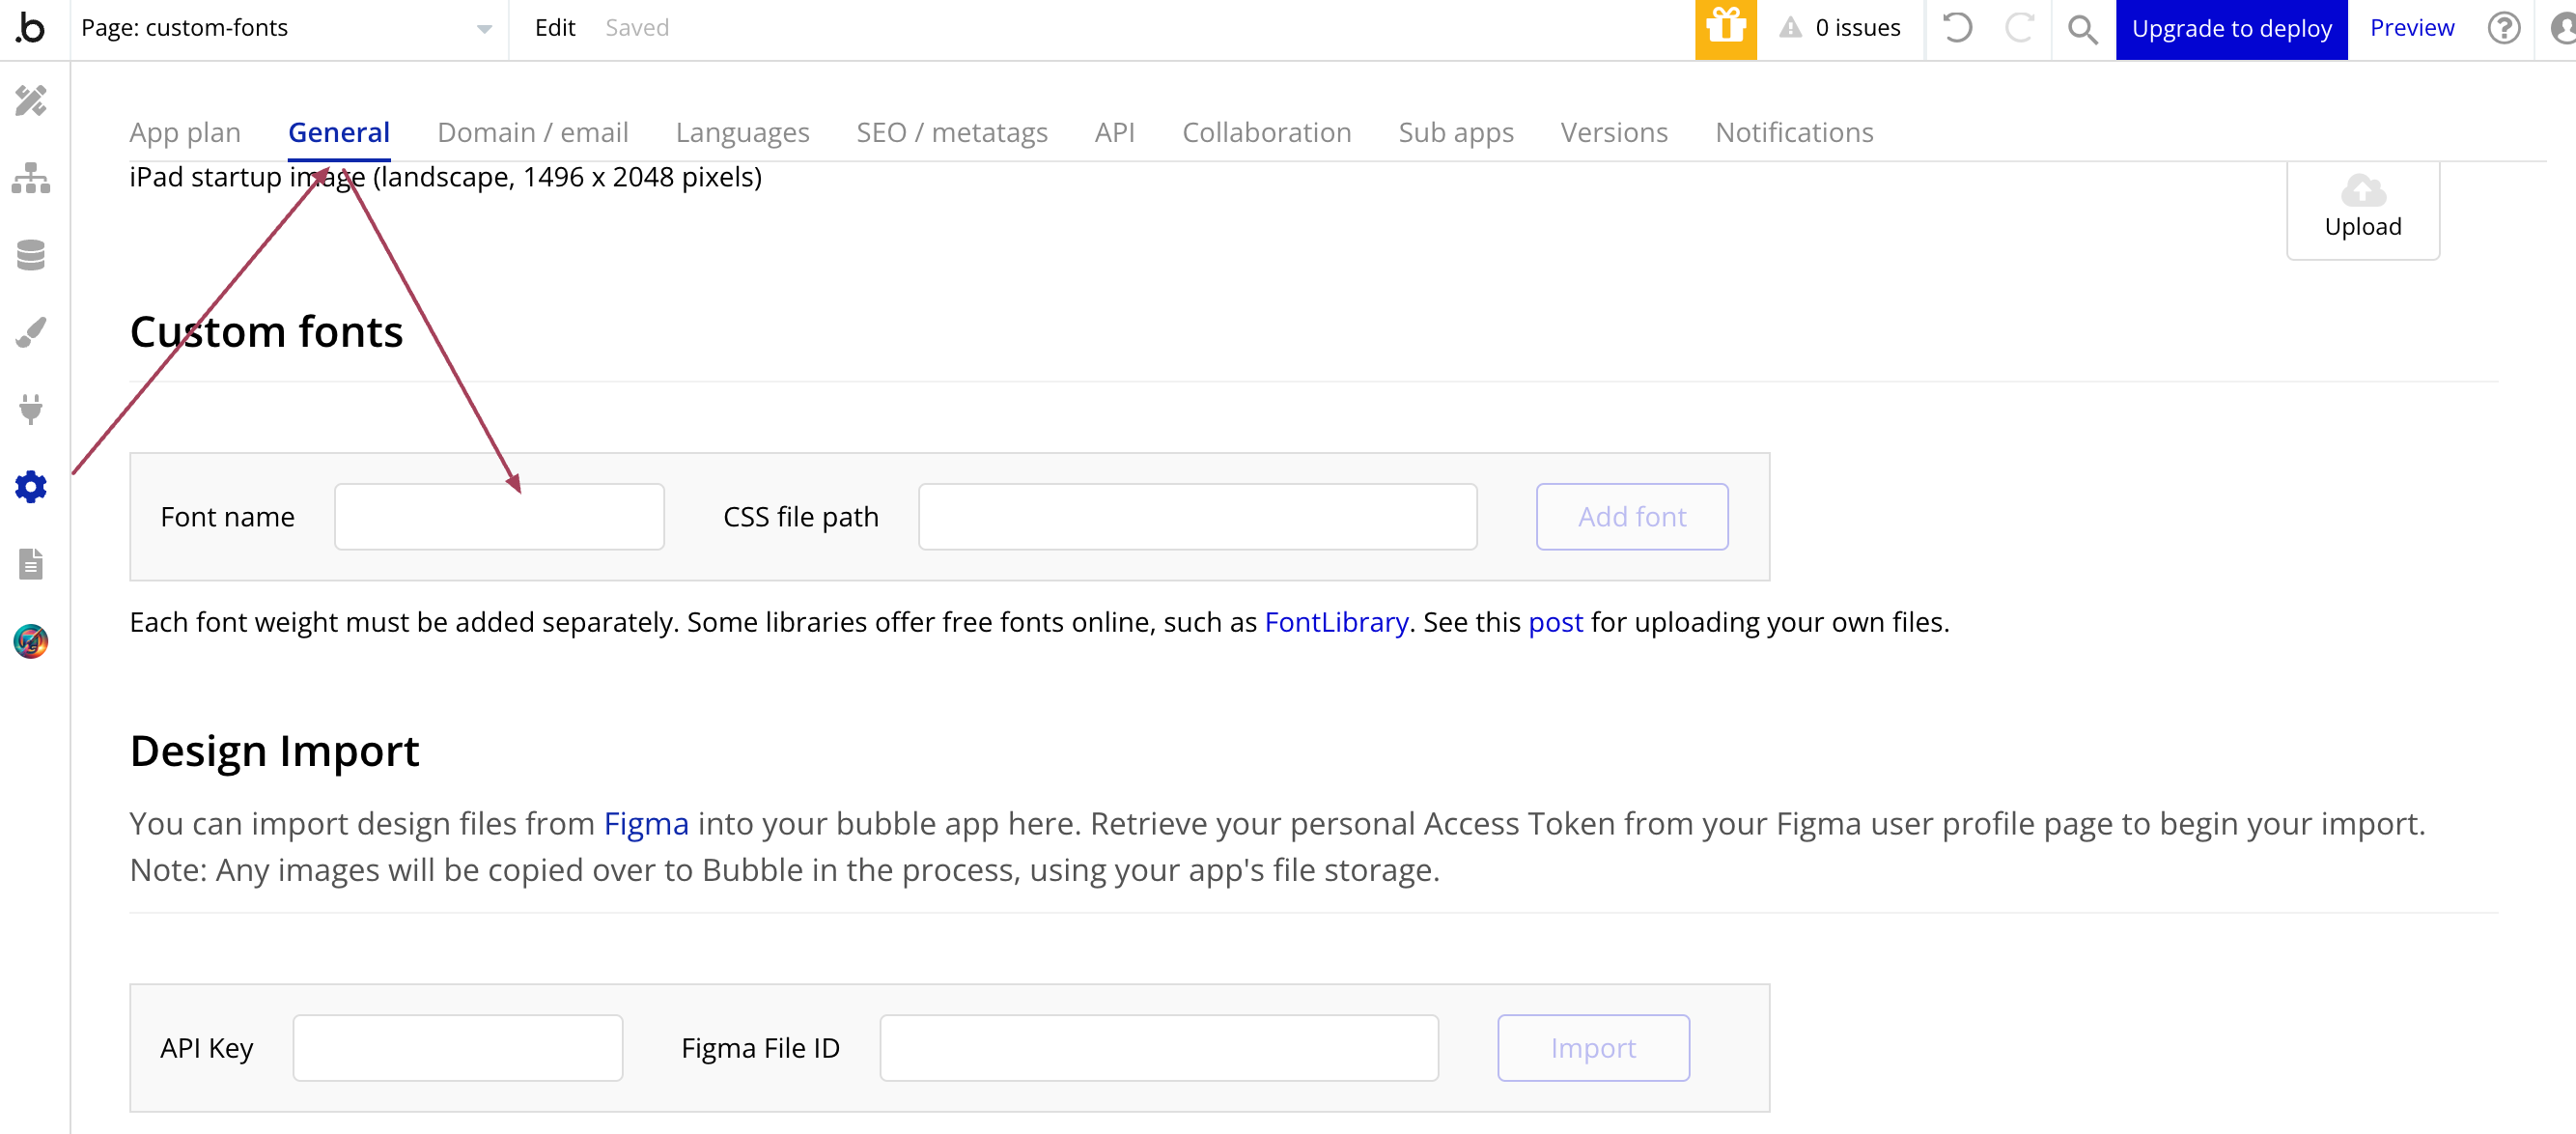
Here make sure that the Font name value is the same as the font title, In our case it will be ‘TaylorSans-Bold’. Add CSS file path as URL saved in step 6 and add ‘https:’ before ‘//’ so it will look like the image below:
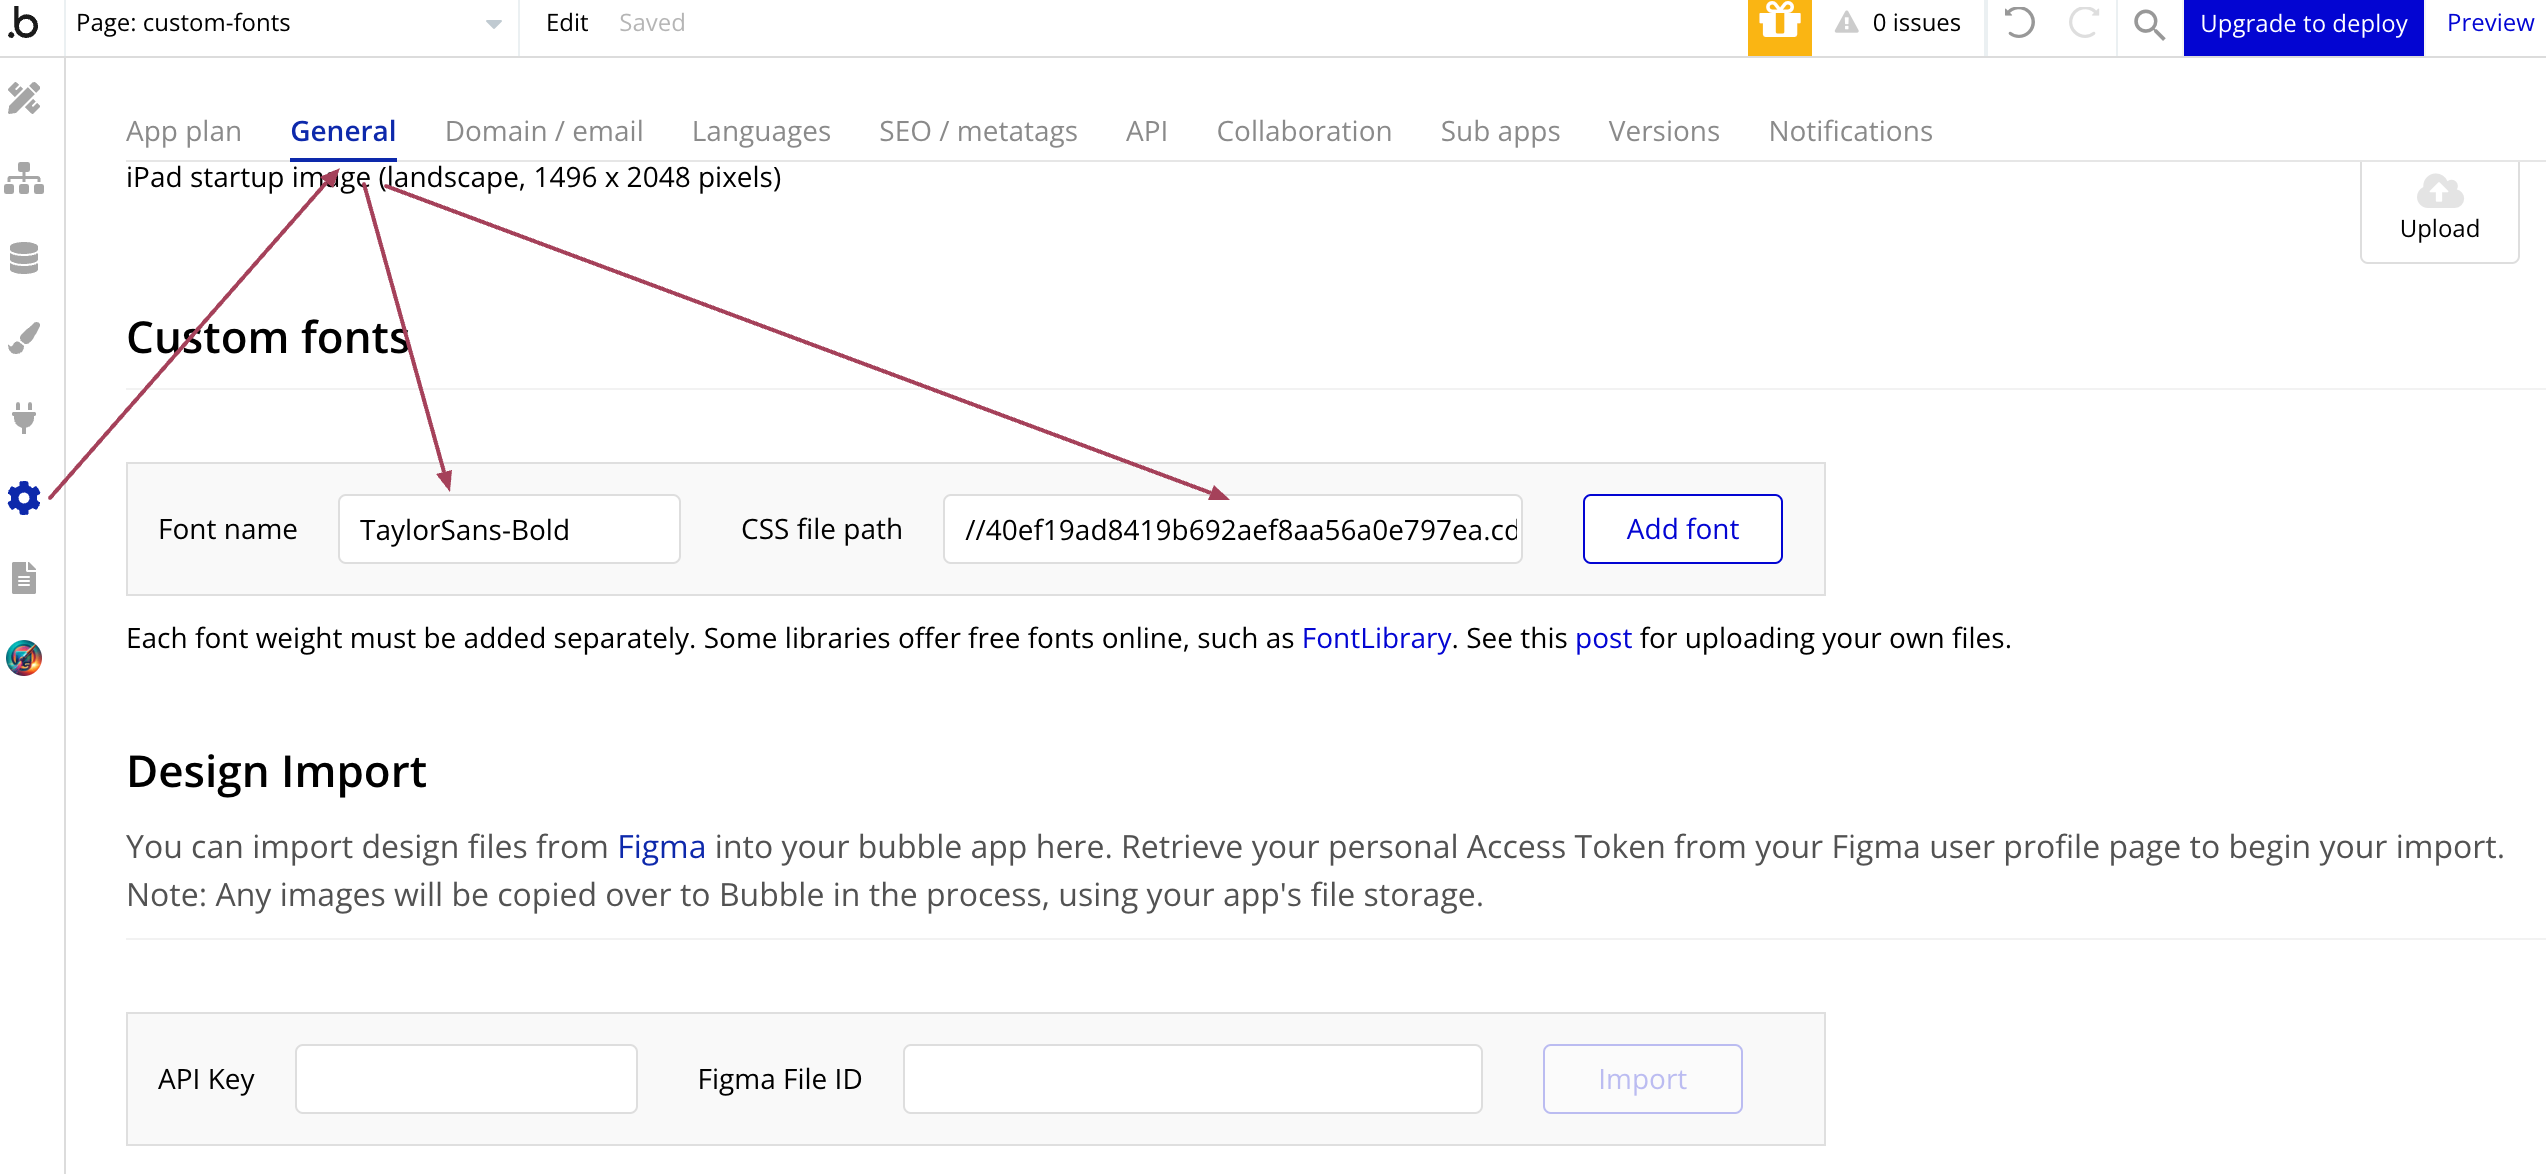
Now click on Add Font and give it some time to load. It will look like the image below after added.

Step 8: Test the font in the application bubble.io editor
Add a text element in the editor and check the font where you will find ‘TaylorSans-Bold’ as an option for the text element.
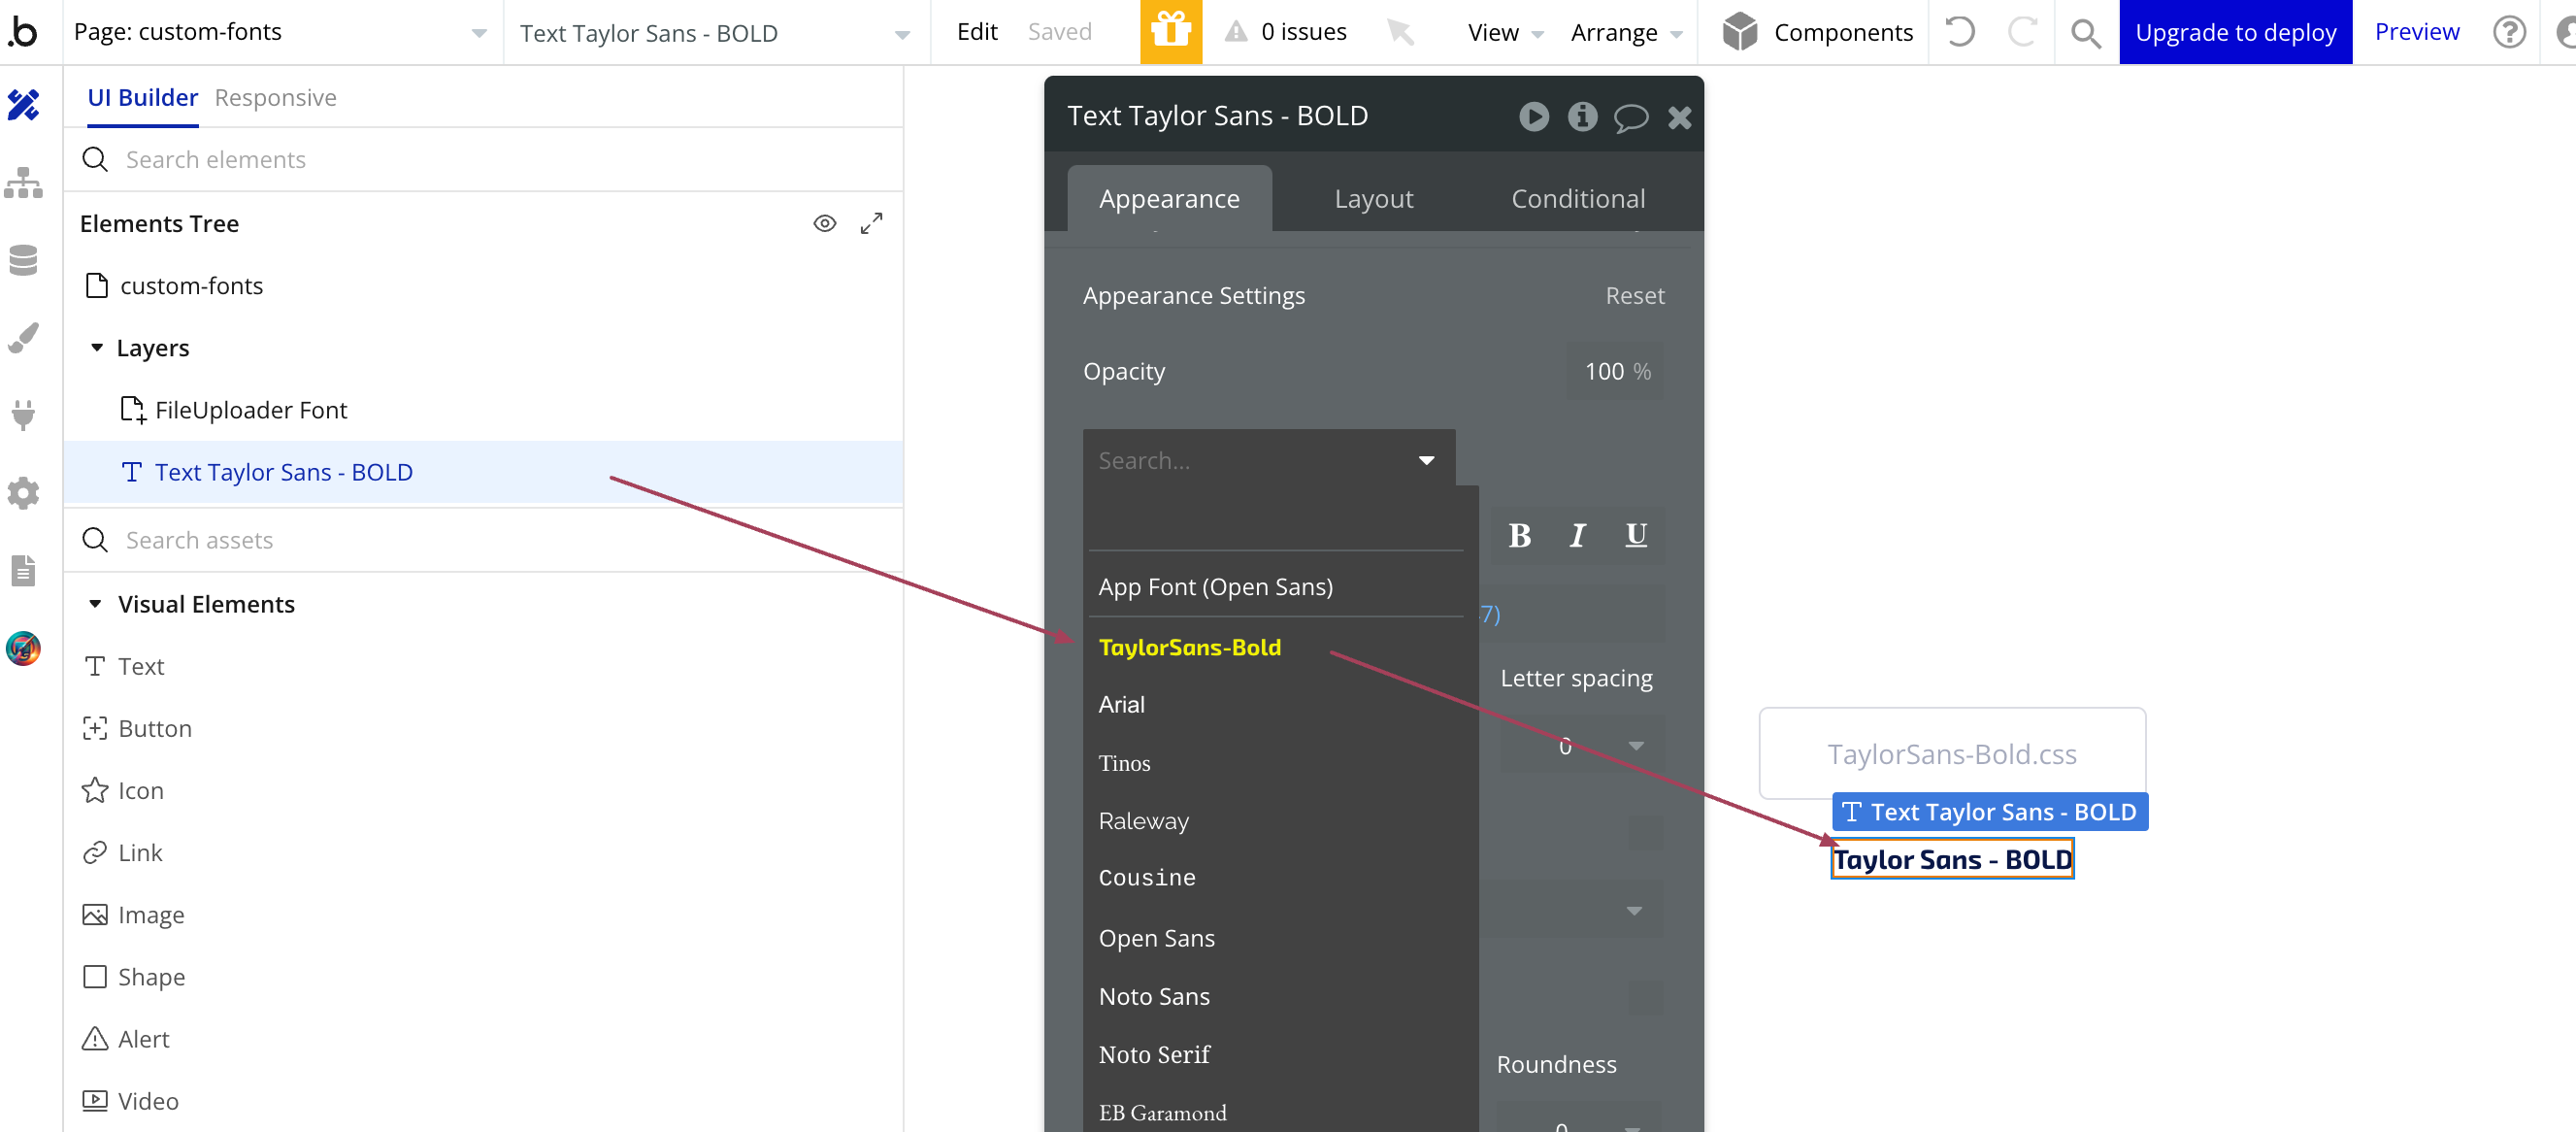
Follow the same steps for all the files of font-family.
This is how you add custom fonts with just a URL link and a few settings, you can elevate your app’s design to a whole new level. It’s fun, right? 😉
Subscribe to my newsletter
Read articles from Anish Gandhi directly inside your inbox. Subscribe to the newsletter, and don't miss out.
Written by

Anish Gandhi
Anish Gandhi
✔️ Certified Bubble.io Developer with 2+ Years of experience in creating scalable responsive web applications. ✔️ Top Rated Plus Upwork Freelancer ✔️ Canvas framework expert