Step By Step Guide On How To Create And Connect To A Linux Virtual Machine Using A Public Key
 ISAAC DIVINE
Creating and Connecting to a Linux VM Using a Public Key
In today's digital age, virtual machines (VMs) play a pivotal role in enhancing flexibility and efficiency. In this blog, we'll delve into the steps required to create a Linux VM and connect to it using SSH public key authentication.
Step 1: Setting Up the Virtual Machine
Sign In to Azure Portal Begin by signing in to your Azure Portal. Open your web browser and navigate to Azure Portal. Use your Microsoft account credentials to log in.
Create a Virtual Machine
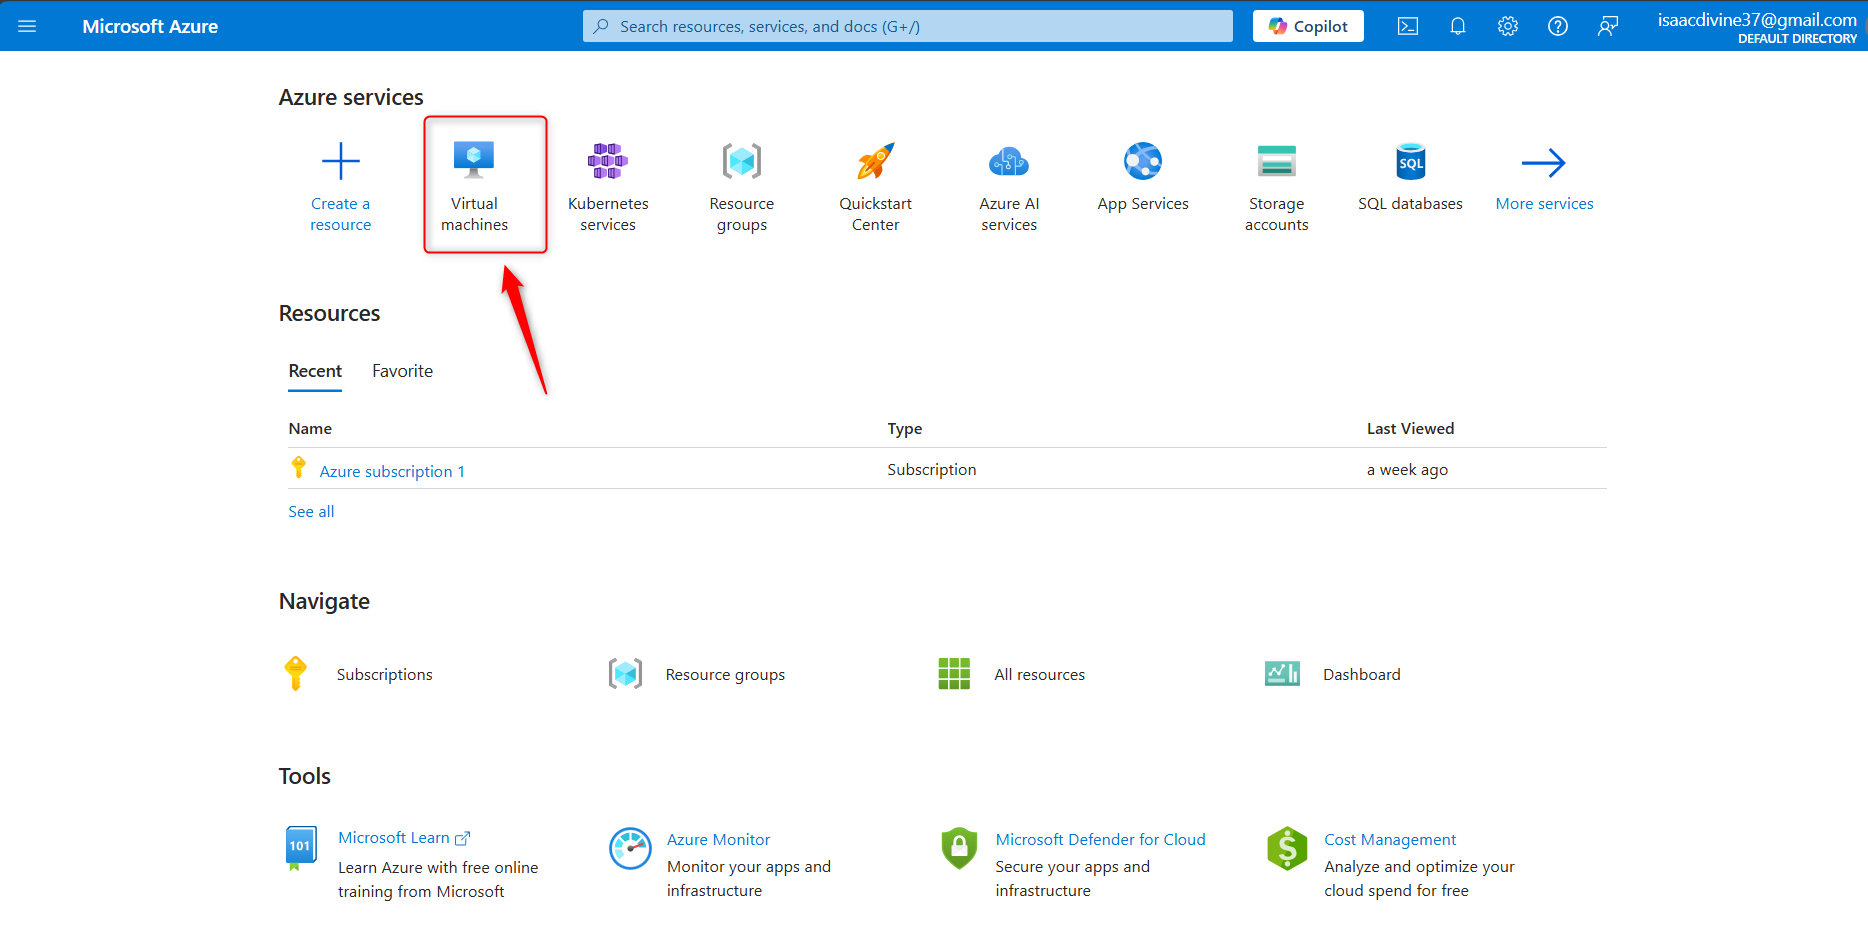
On the Azure Portal dashboard, click on "Virtual Machine."
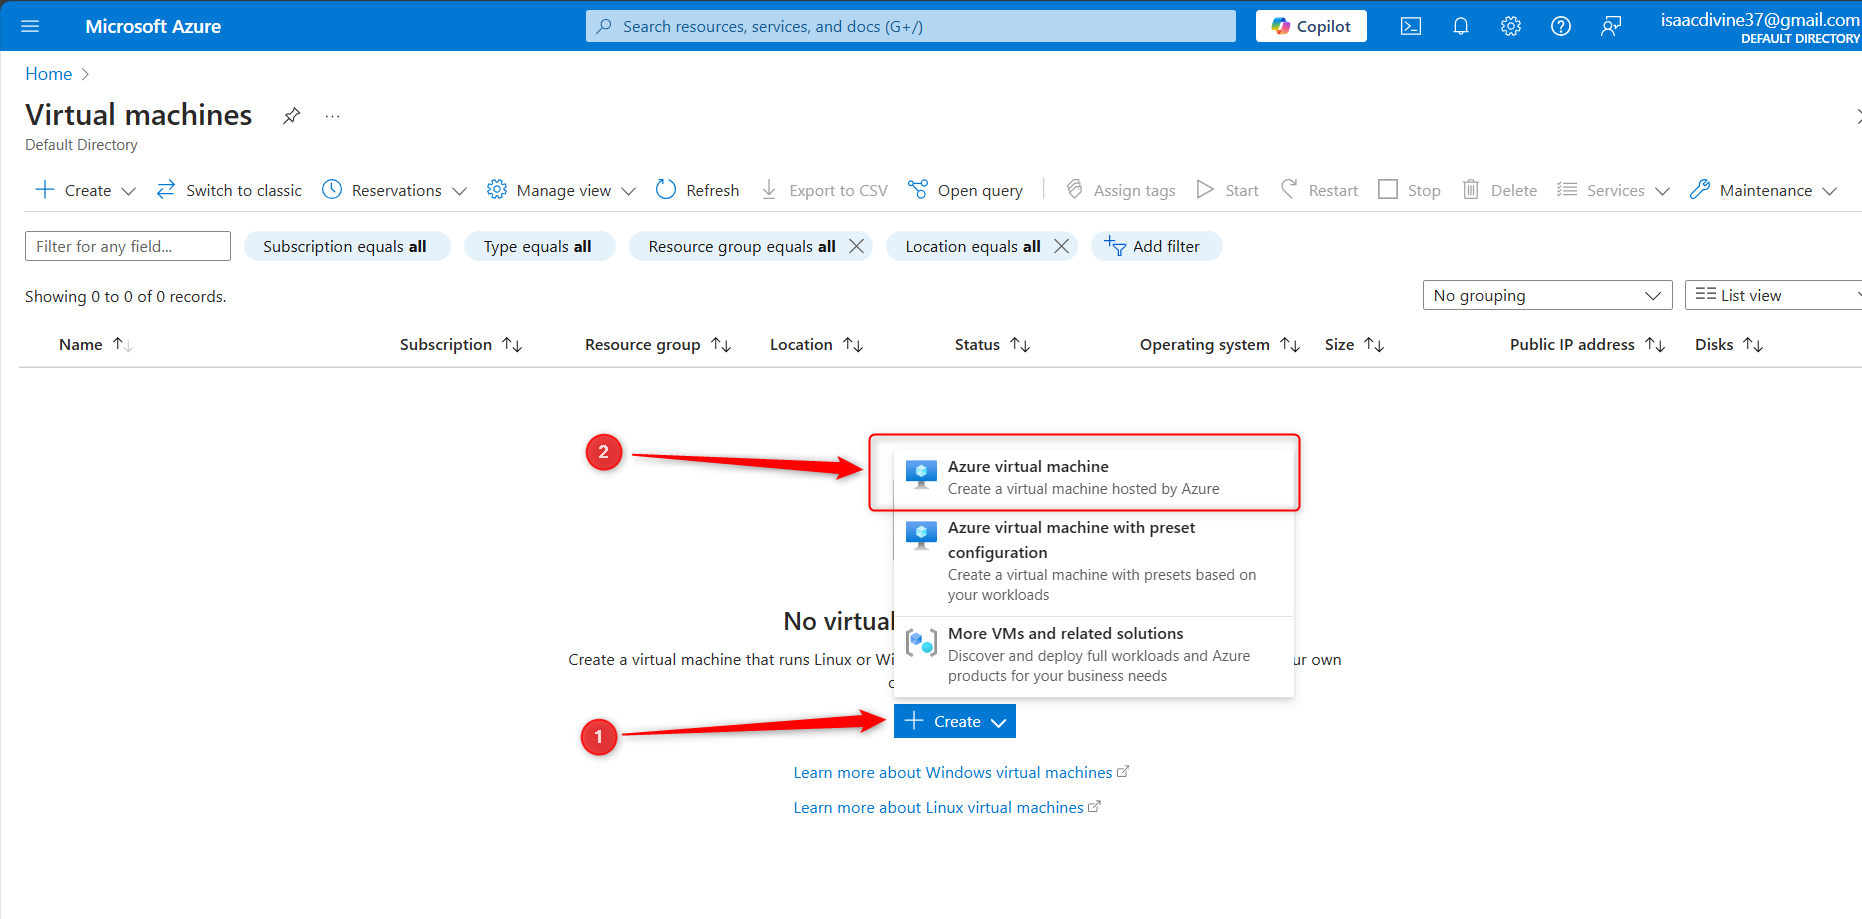
In the "Search the Marketplace" field, type "Virtual machine" and select it from the dropdown.
Click on "Create" to start the VM creation process
Basic Configuration
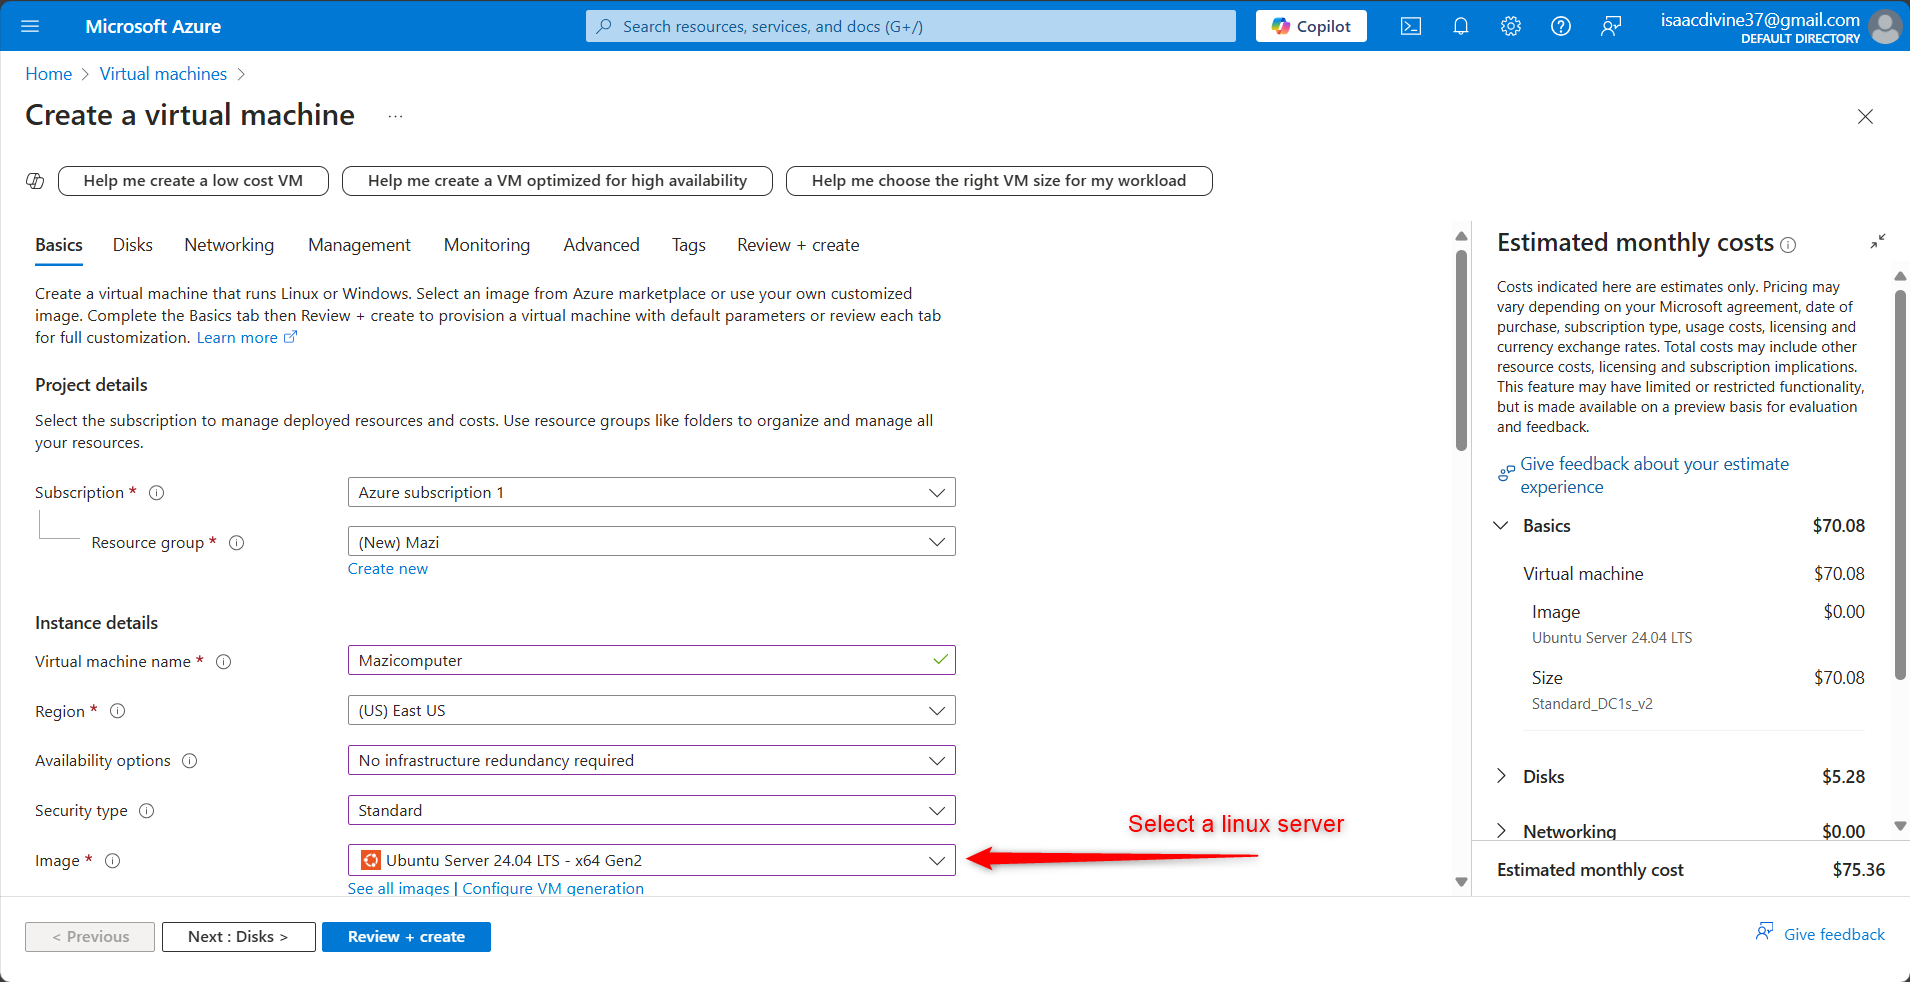
Subscription: Select your Azure subscription.
Resource Group: Choose an existing resource group or create a new one.
Virtual Machine Name: Provide a unique name for your VM.
Region: Select the region where you want to deploy your VM.
Image: Choose your preferred Linux distribution (e.g., Ubuntu Server 22.04 LTS).
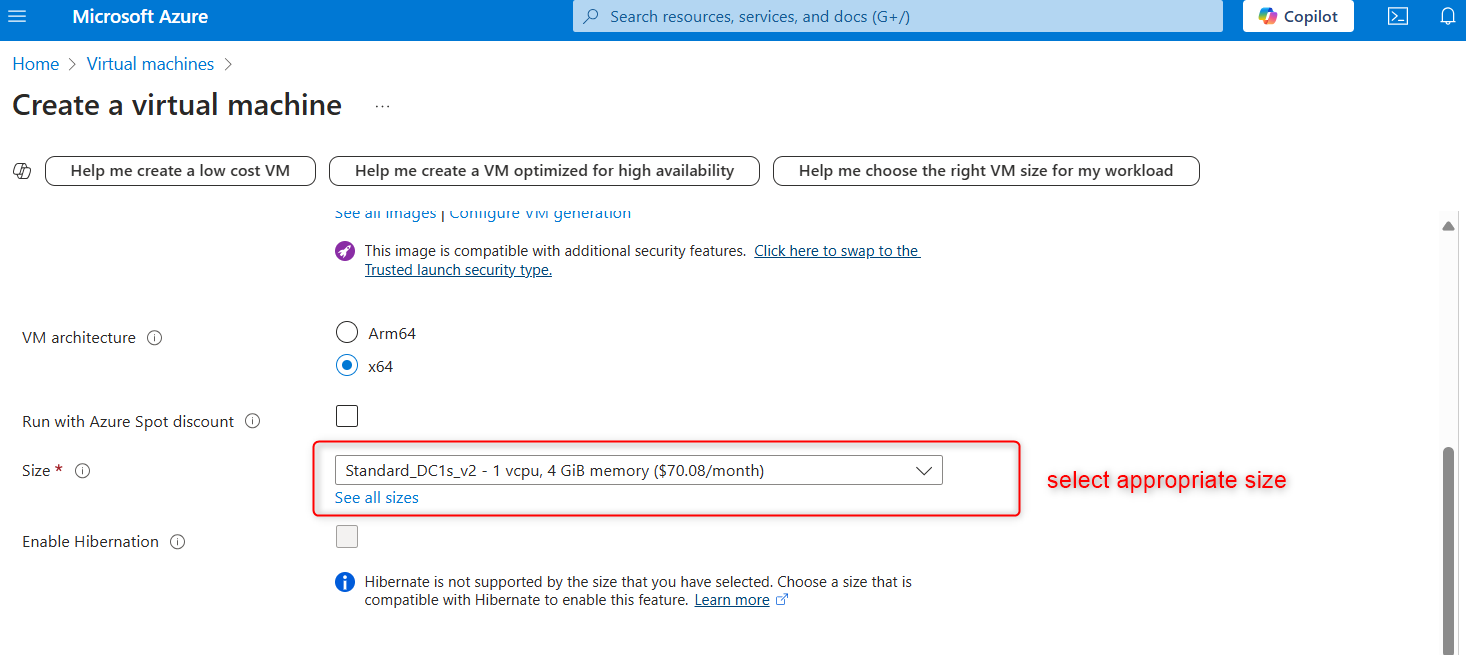
Select preferred size
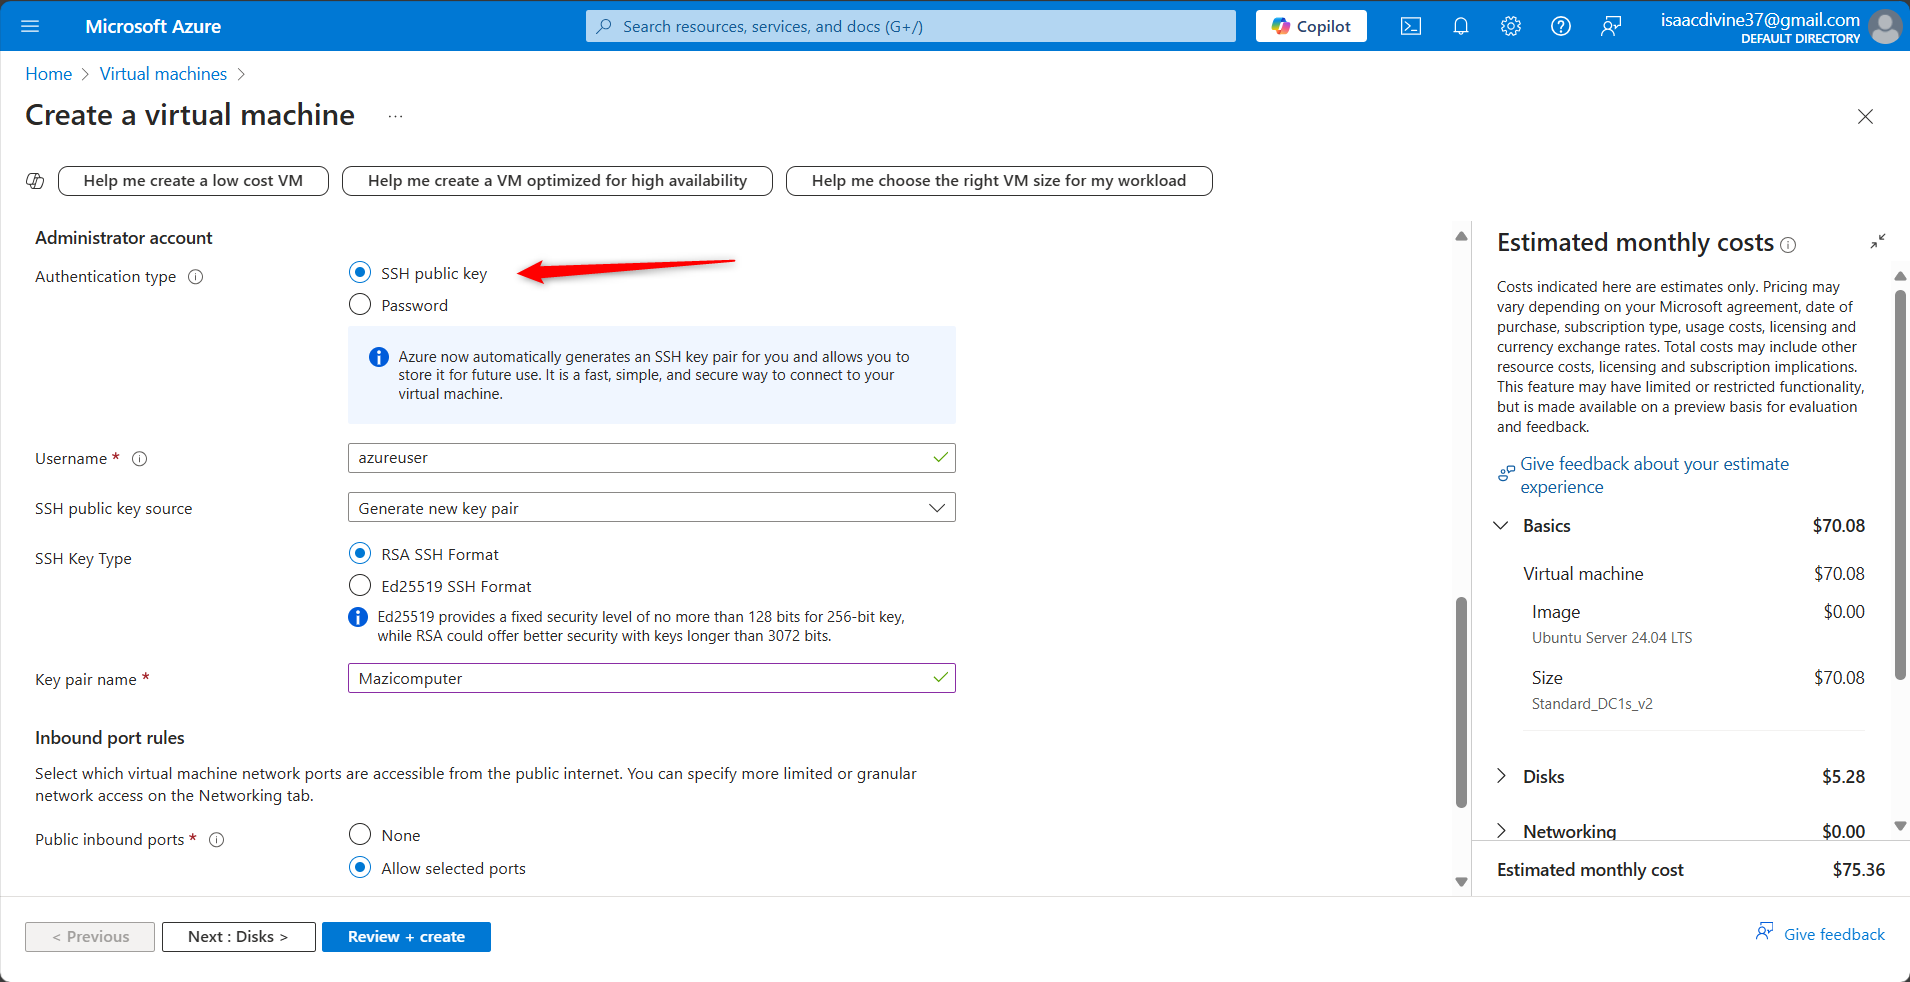
Administrator Account
Authentication Type: Select "SSH public key."
Username: Enter a username for the VM.
SSH Public Key: Paste your SSH public key into the field provided.
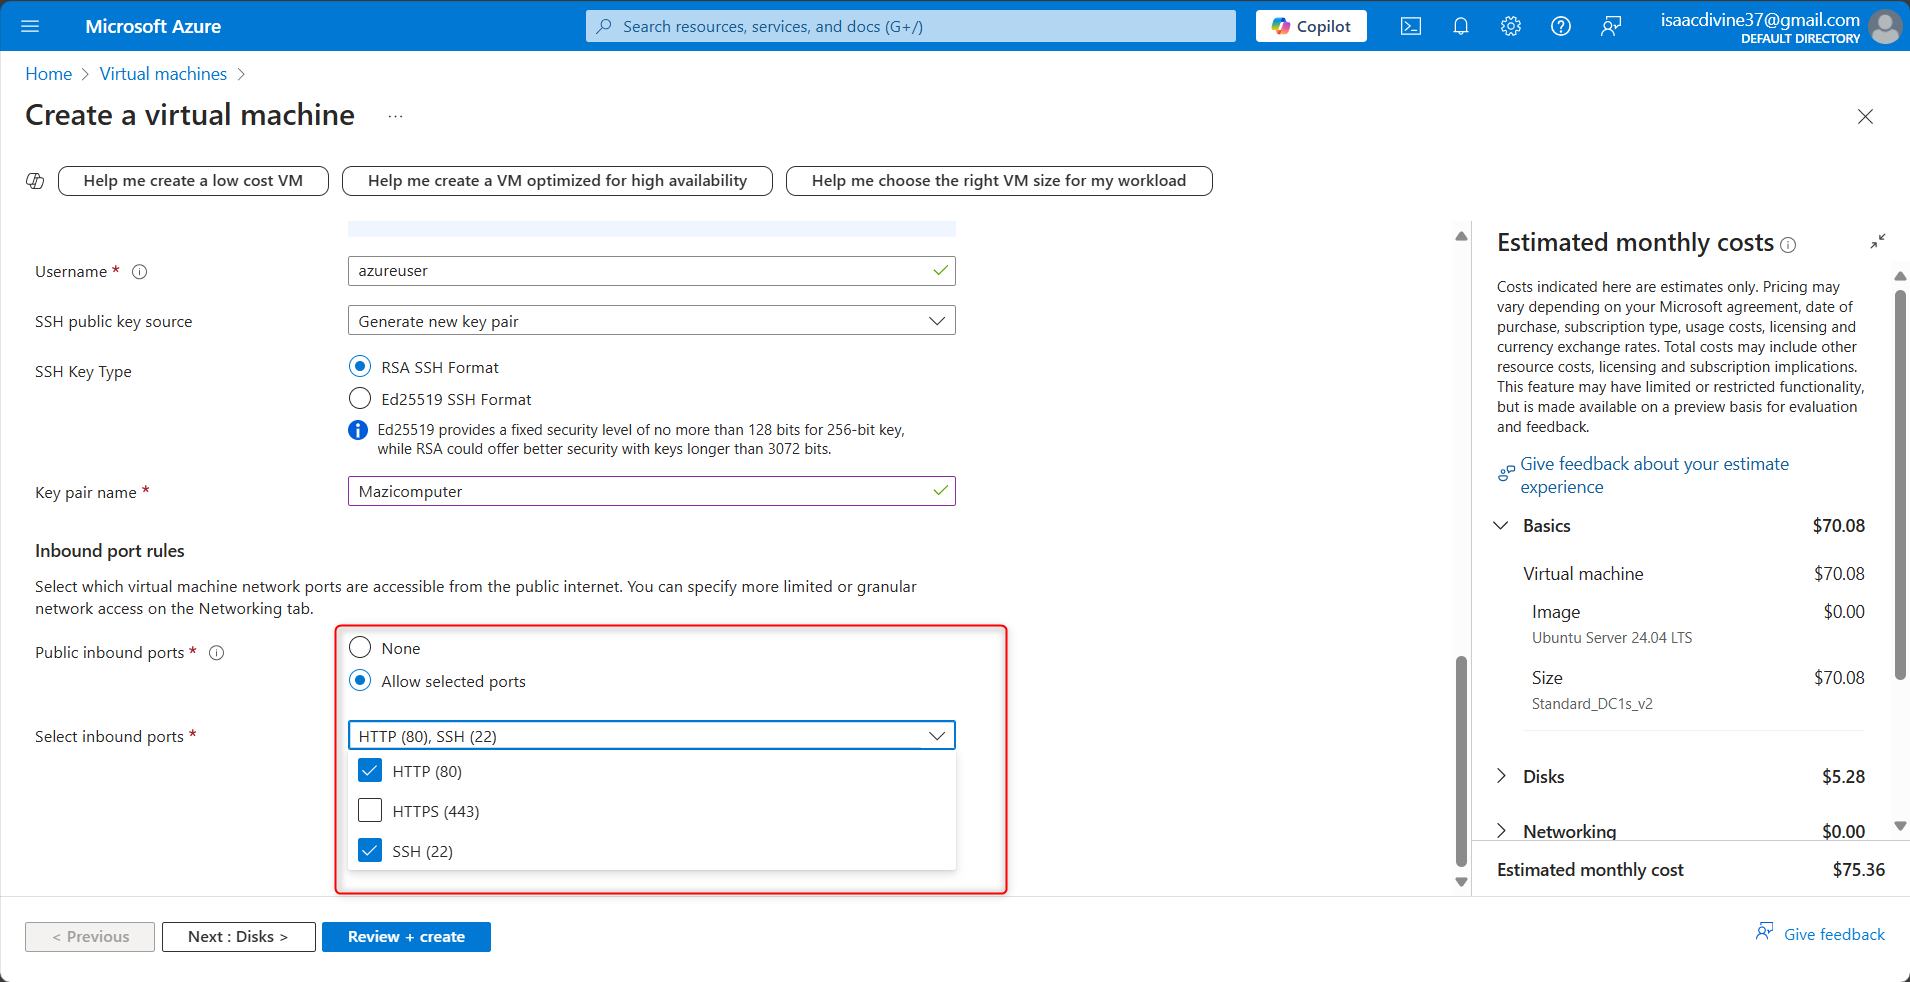
Configure Inbound Port Rules
- Allow SSH (port 22) to connect to your VM.
Review + Create
Review your configurations and click "Create." This will start the deployment of your VM.
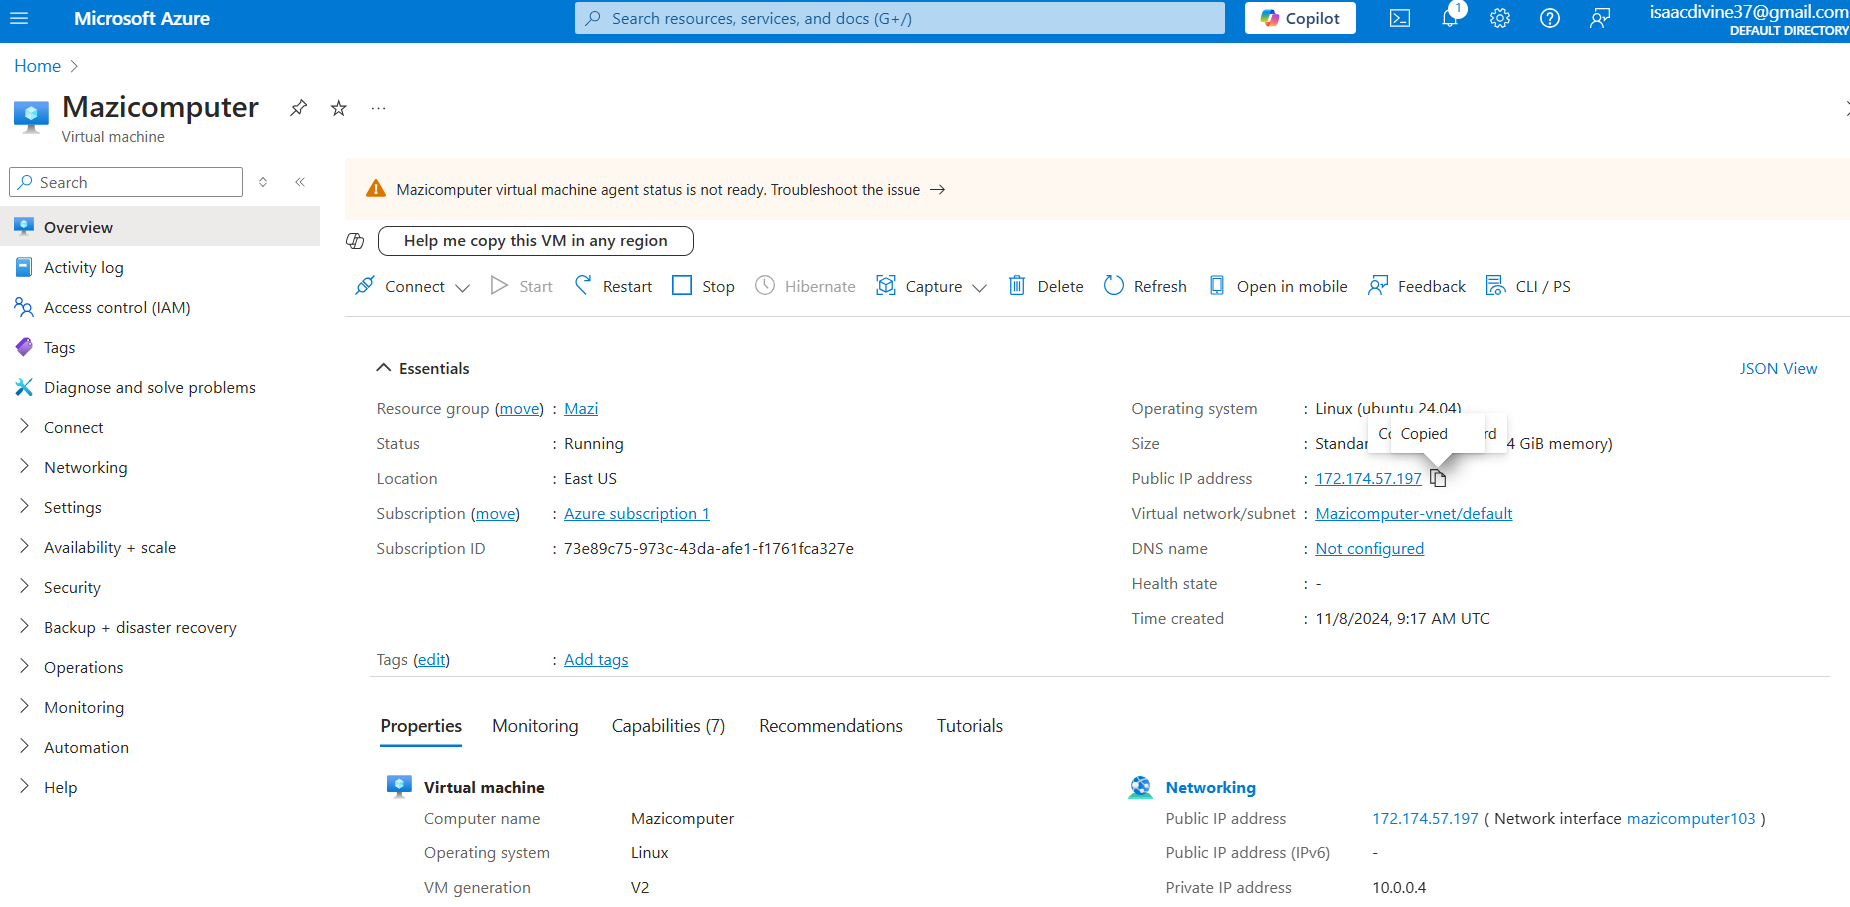
Resource page after deployment below;
Step 2: Connecting to the Linux VM
Download Private Key After the VM is deployed, you can download the private key if you opted to generate a new key pair during the creation process. Store this key securely on your local machine.
Retrieve Public IP Address Navigate to the "Virtual Machines" section in the Azure Portal. Select your VM and copy the public IP address listed under the "Overview" tab.
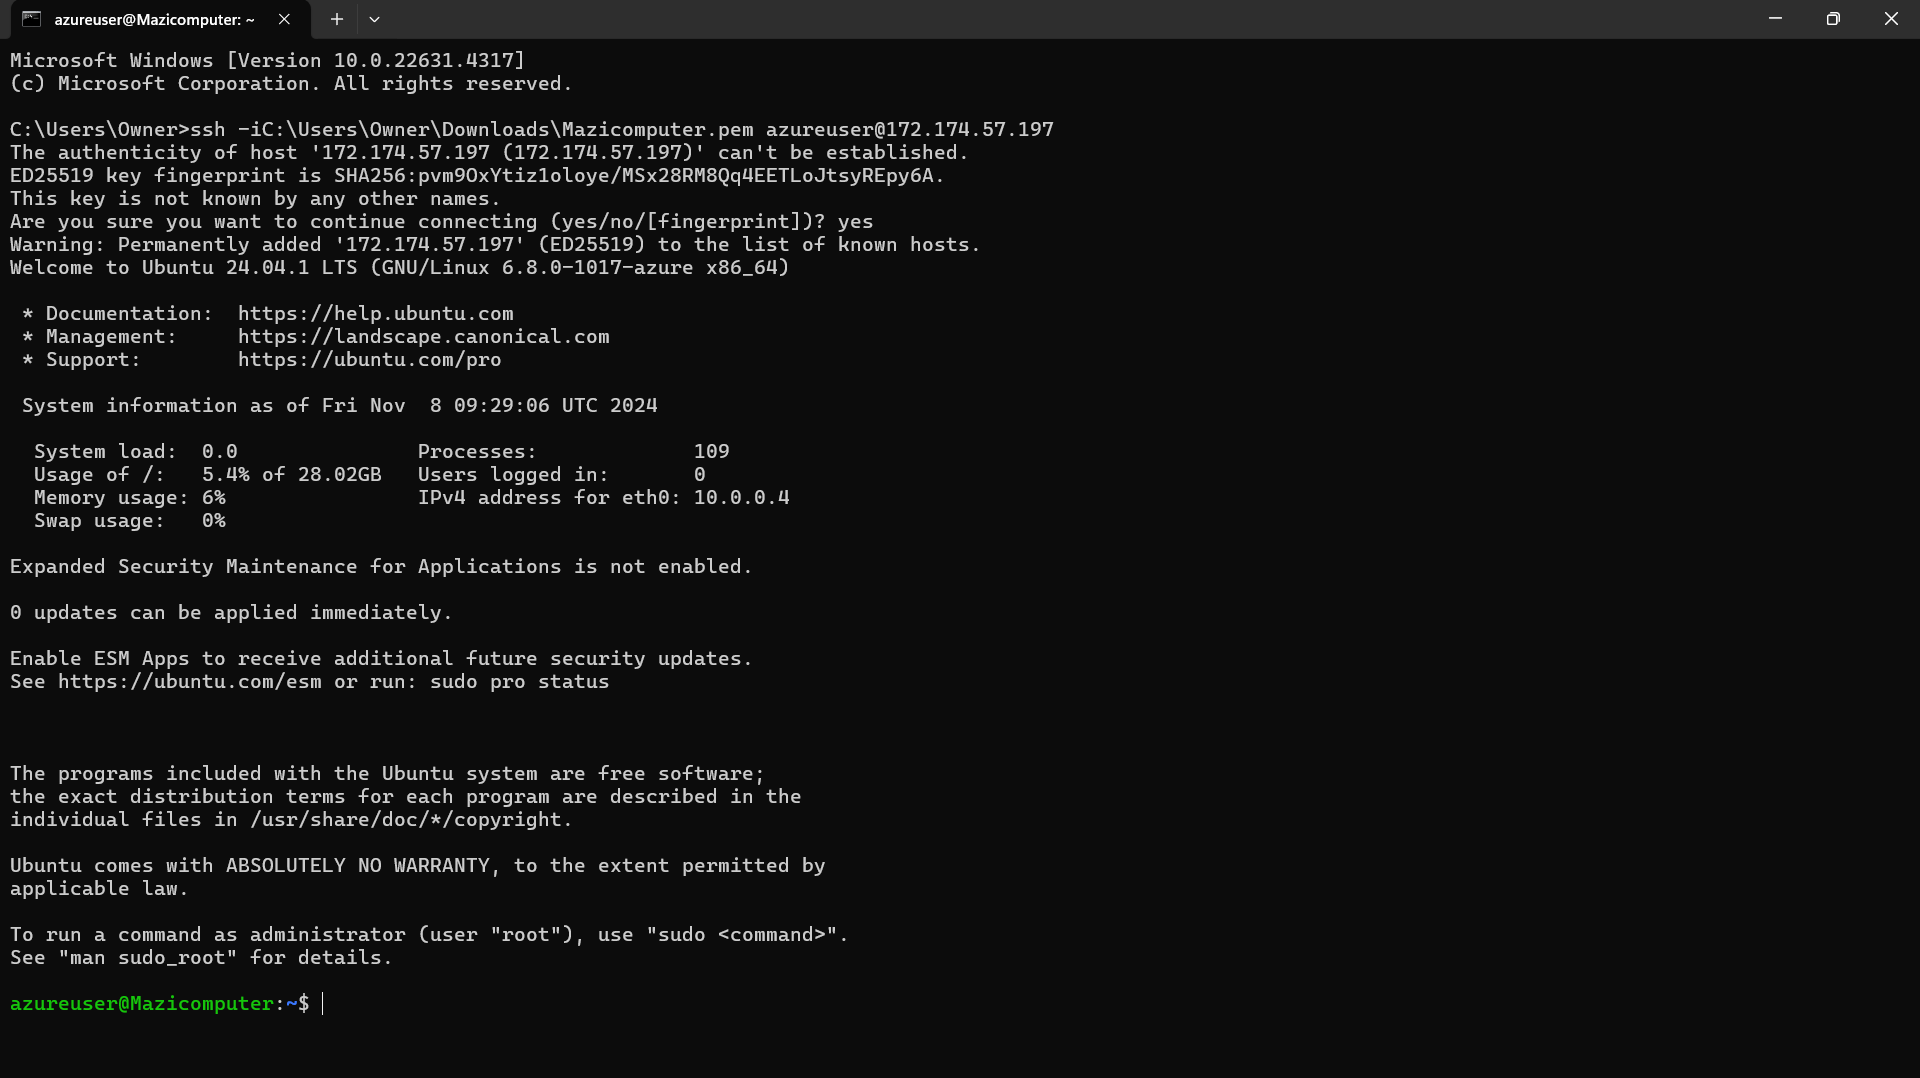
Connecting Using SSH Open your terminal (Linux/Mac) or PowerShell (Windows) and use the following command to connect to your VM:
sh
ssh -i /path/to/your/private-key.pem azureuser@your-vm-public-ip-addressReplace
/path/to/your/private-key.pemwith the path to your downloaded private key andazureuserwith your VM username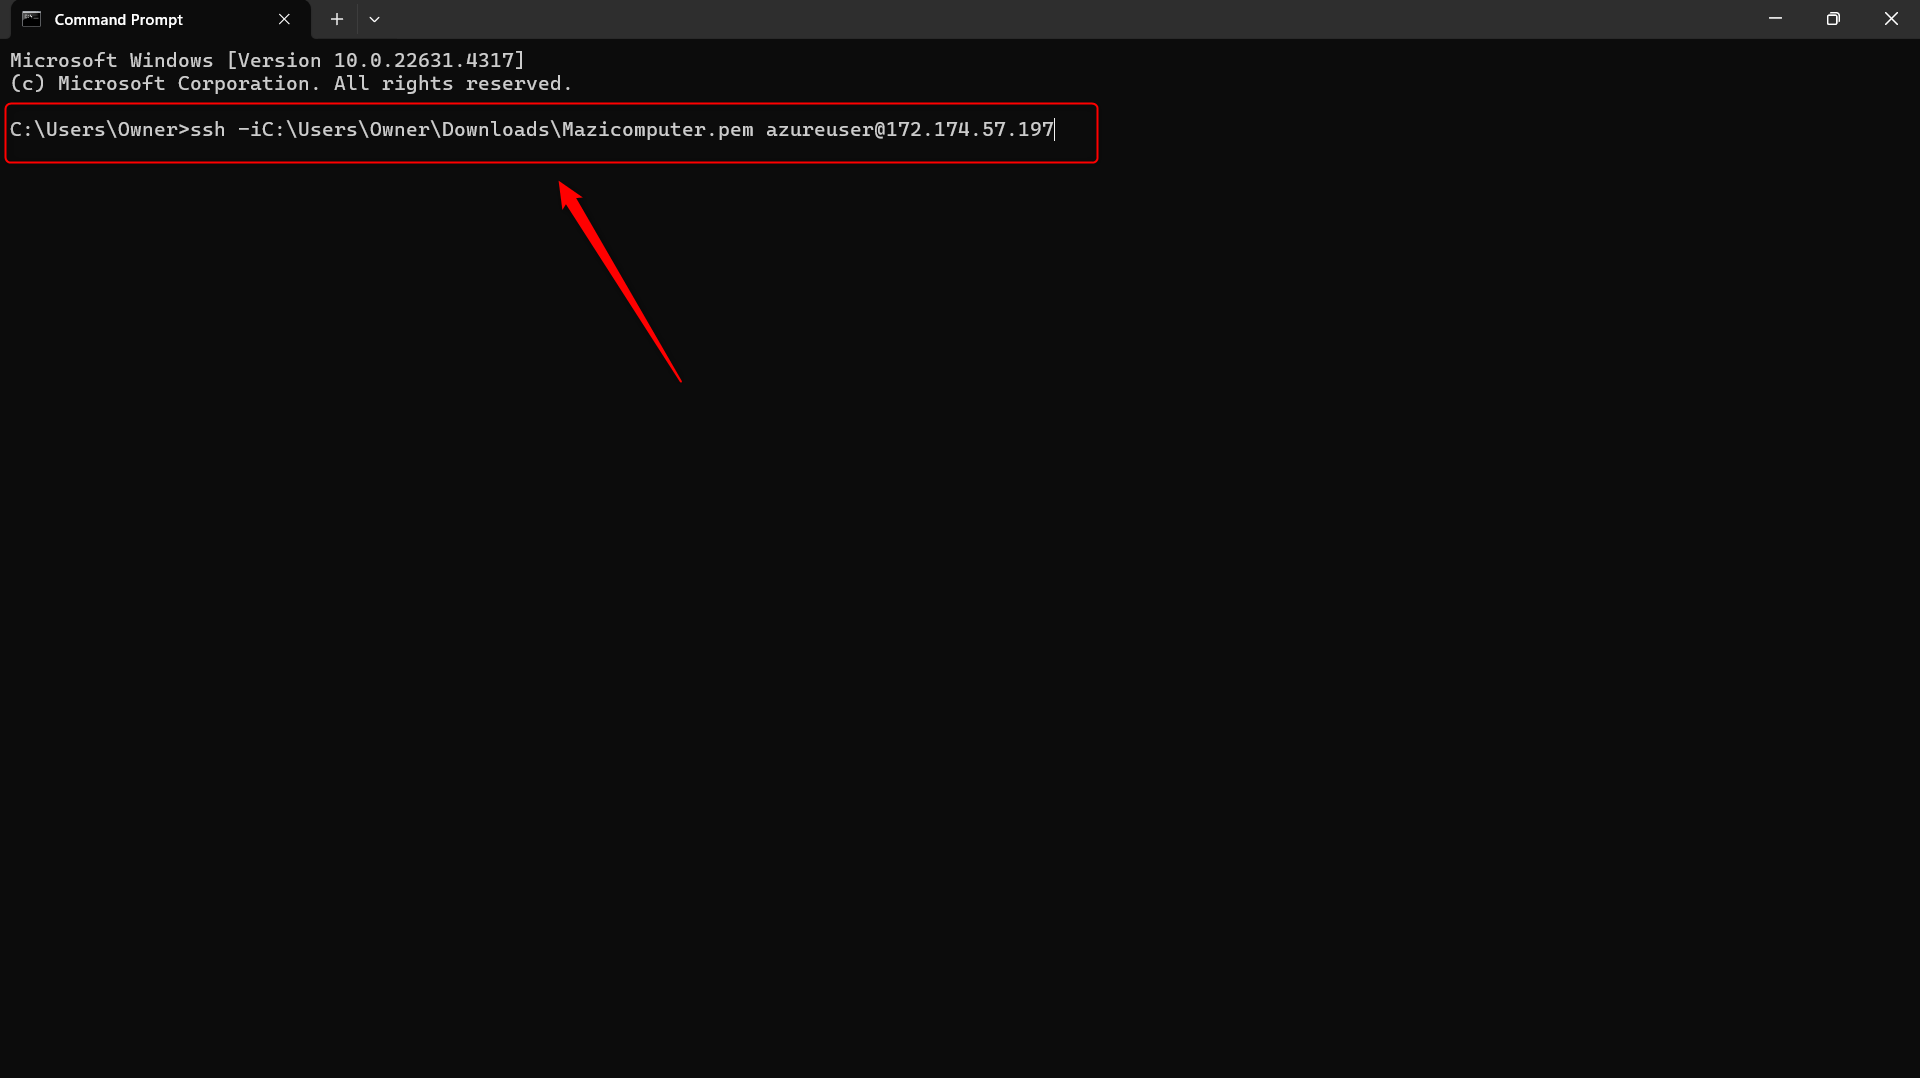
Step 3: Installing a Web Server (Optional)
To verify your connection and further use your VM, you might want to install a web server:
Update Package Lists After connecting to your VM, update your package lists:
sh
sudo apt-get update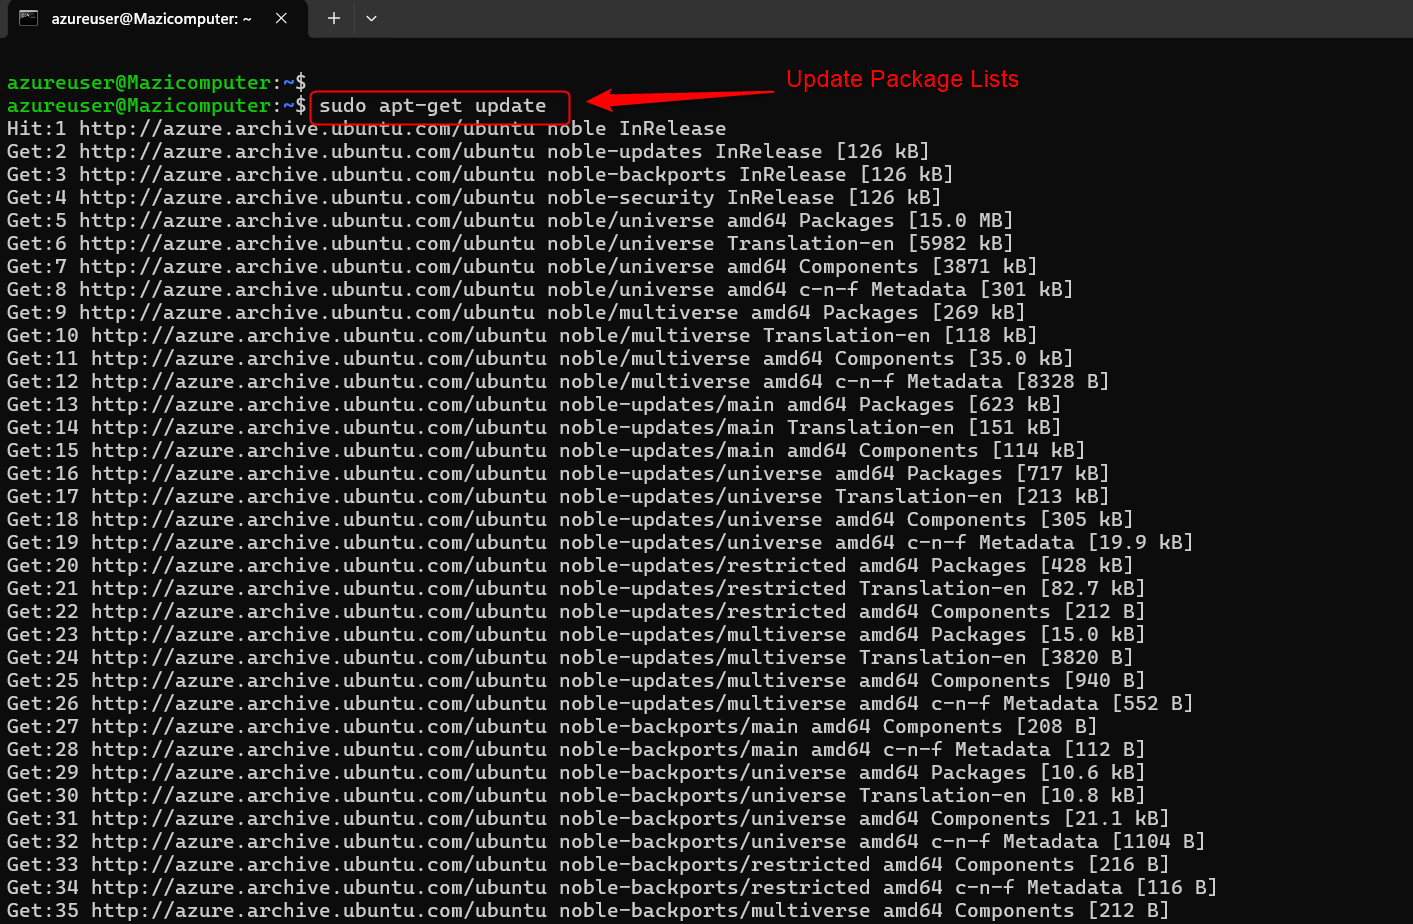
Install NGINX Install the NGINX web server: sh
sudo apt-get install nginx -y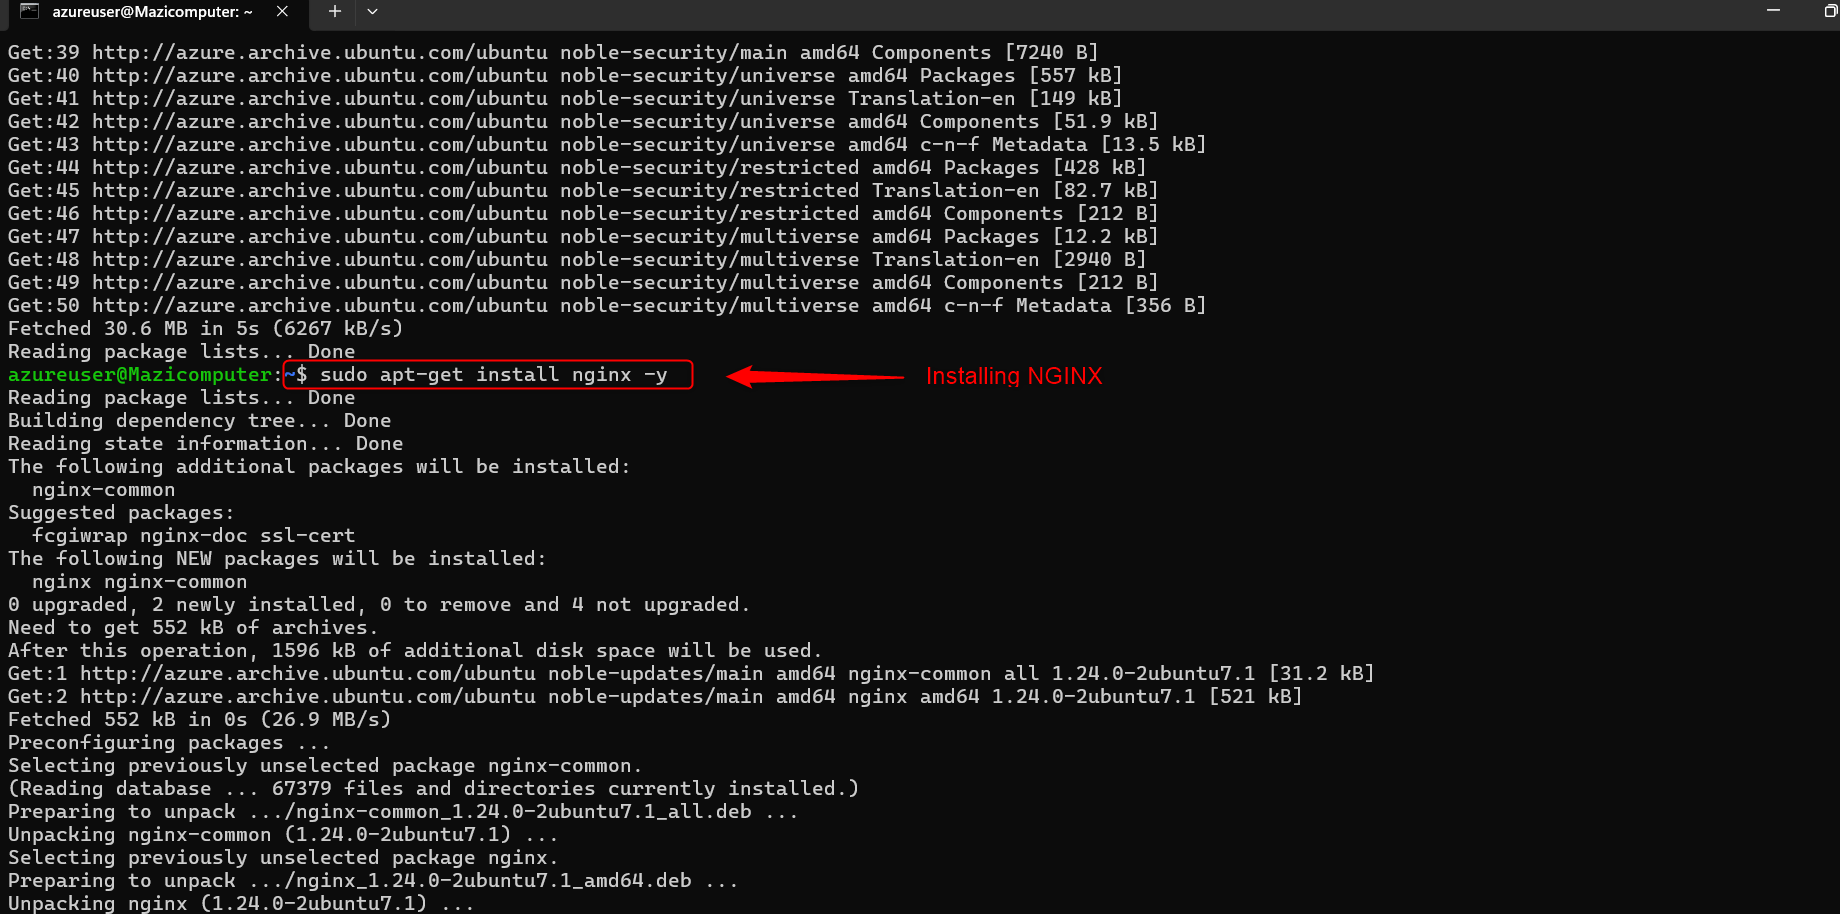
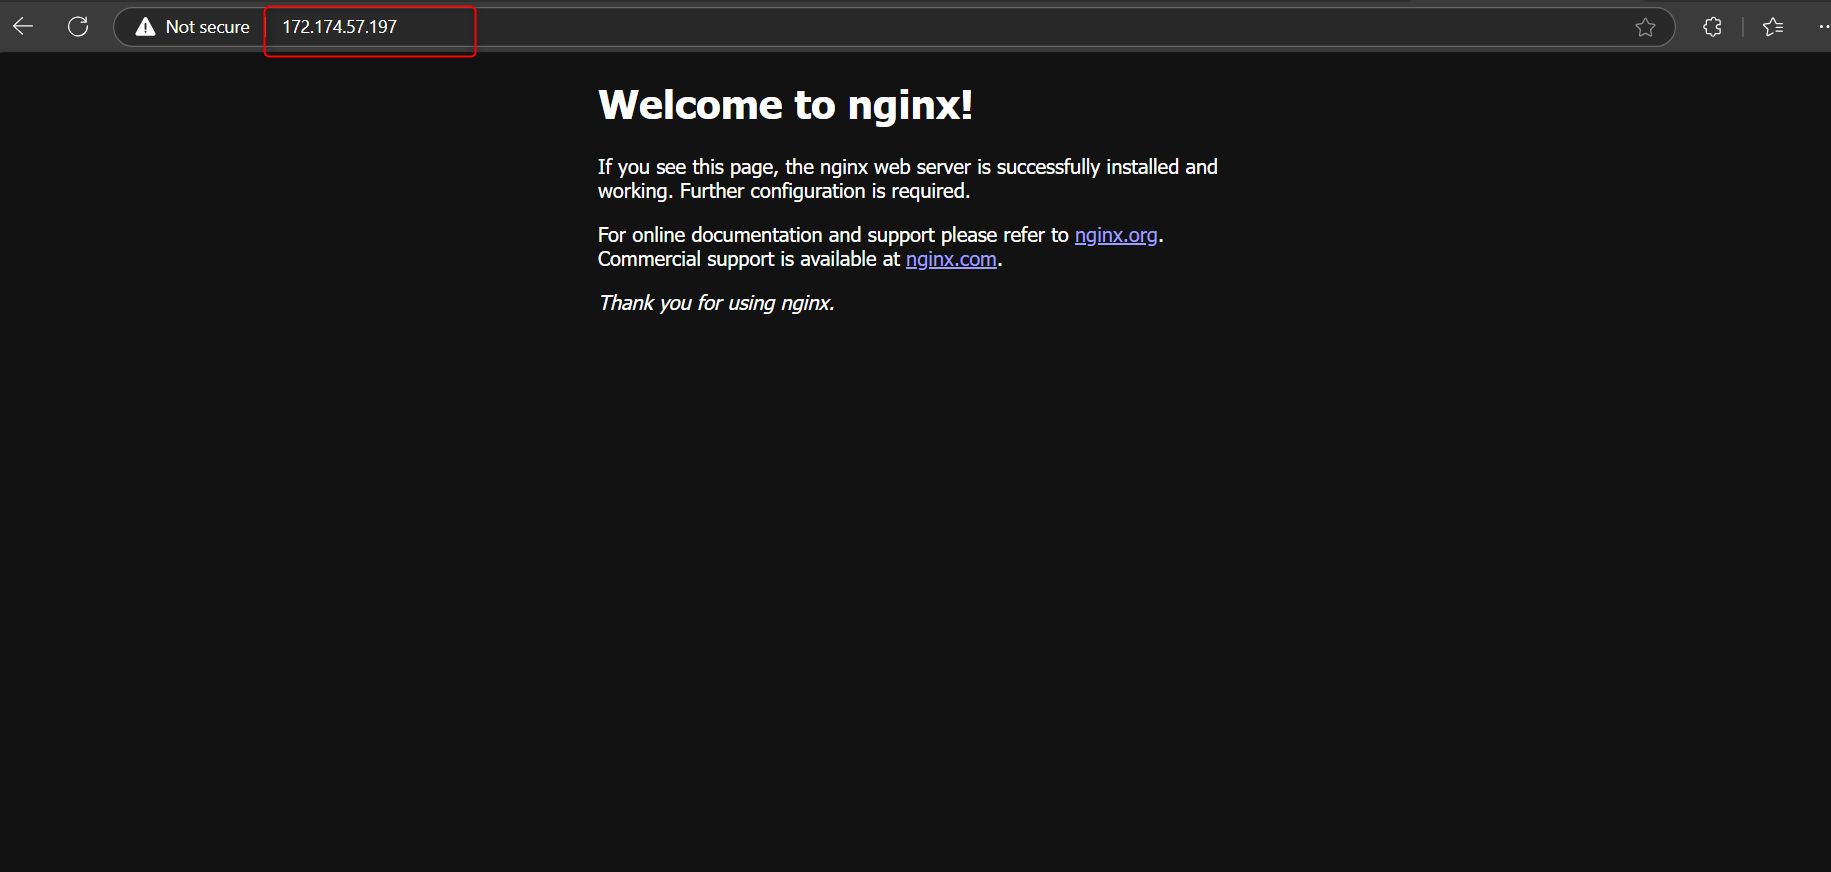
Verify Installation Open your web browser and navigate to your VM's public IP address. You should see the NGINX welcome page, confirming that the server is running correctly.
Conclusion
And there you have it! With these simple steps, you've successfully created and connected to a Linux VM using a public key. This secure method ensures that your VM is accessible only by those with the correct key, enhancing the overall security of your deployment.
Subscribe to my newsletter
Read articles from ISAAC DIVINE directly inside your inbox. Subscribe to the newsletter, and don't miss out.
Written by

ISAAC DIVINE
ISAAC DIVINE
🚀 Cloud Enthusiast | Turning ideas into scalable solutions ☁️ | Passionate about shaping the future of tech with cloud computing 🌐 | Always exploring the next big thing in the digital sky ✨"