Developing iOS & Android Home Screen Widgets in Flutter 🪄
 Nicole Park
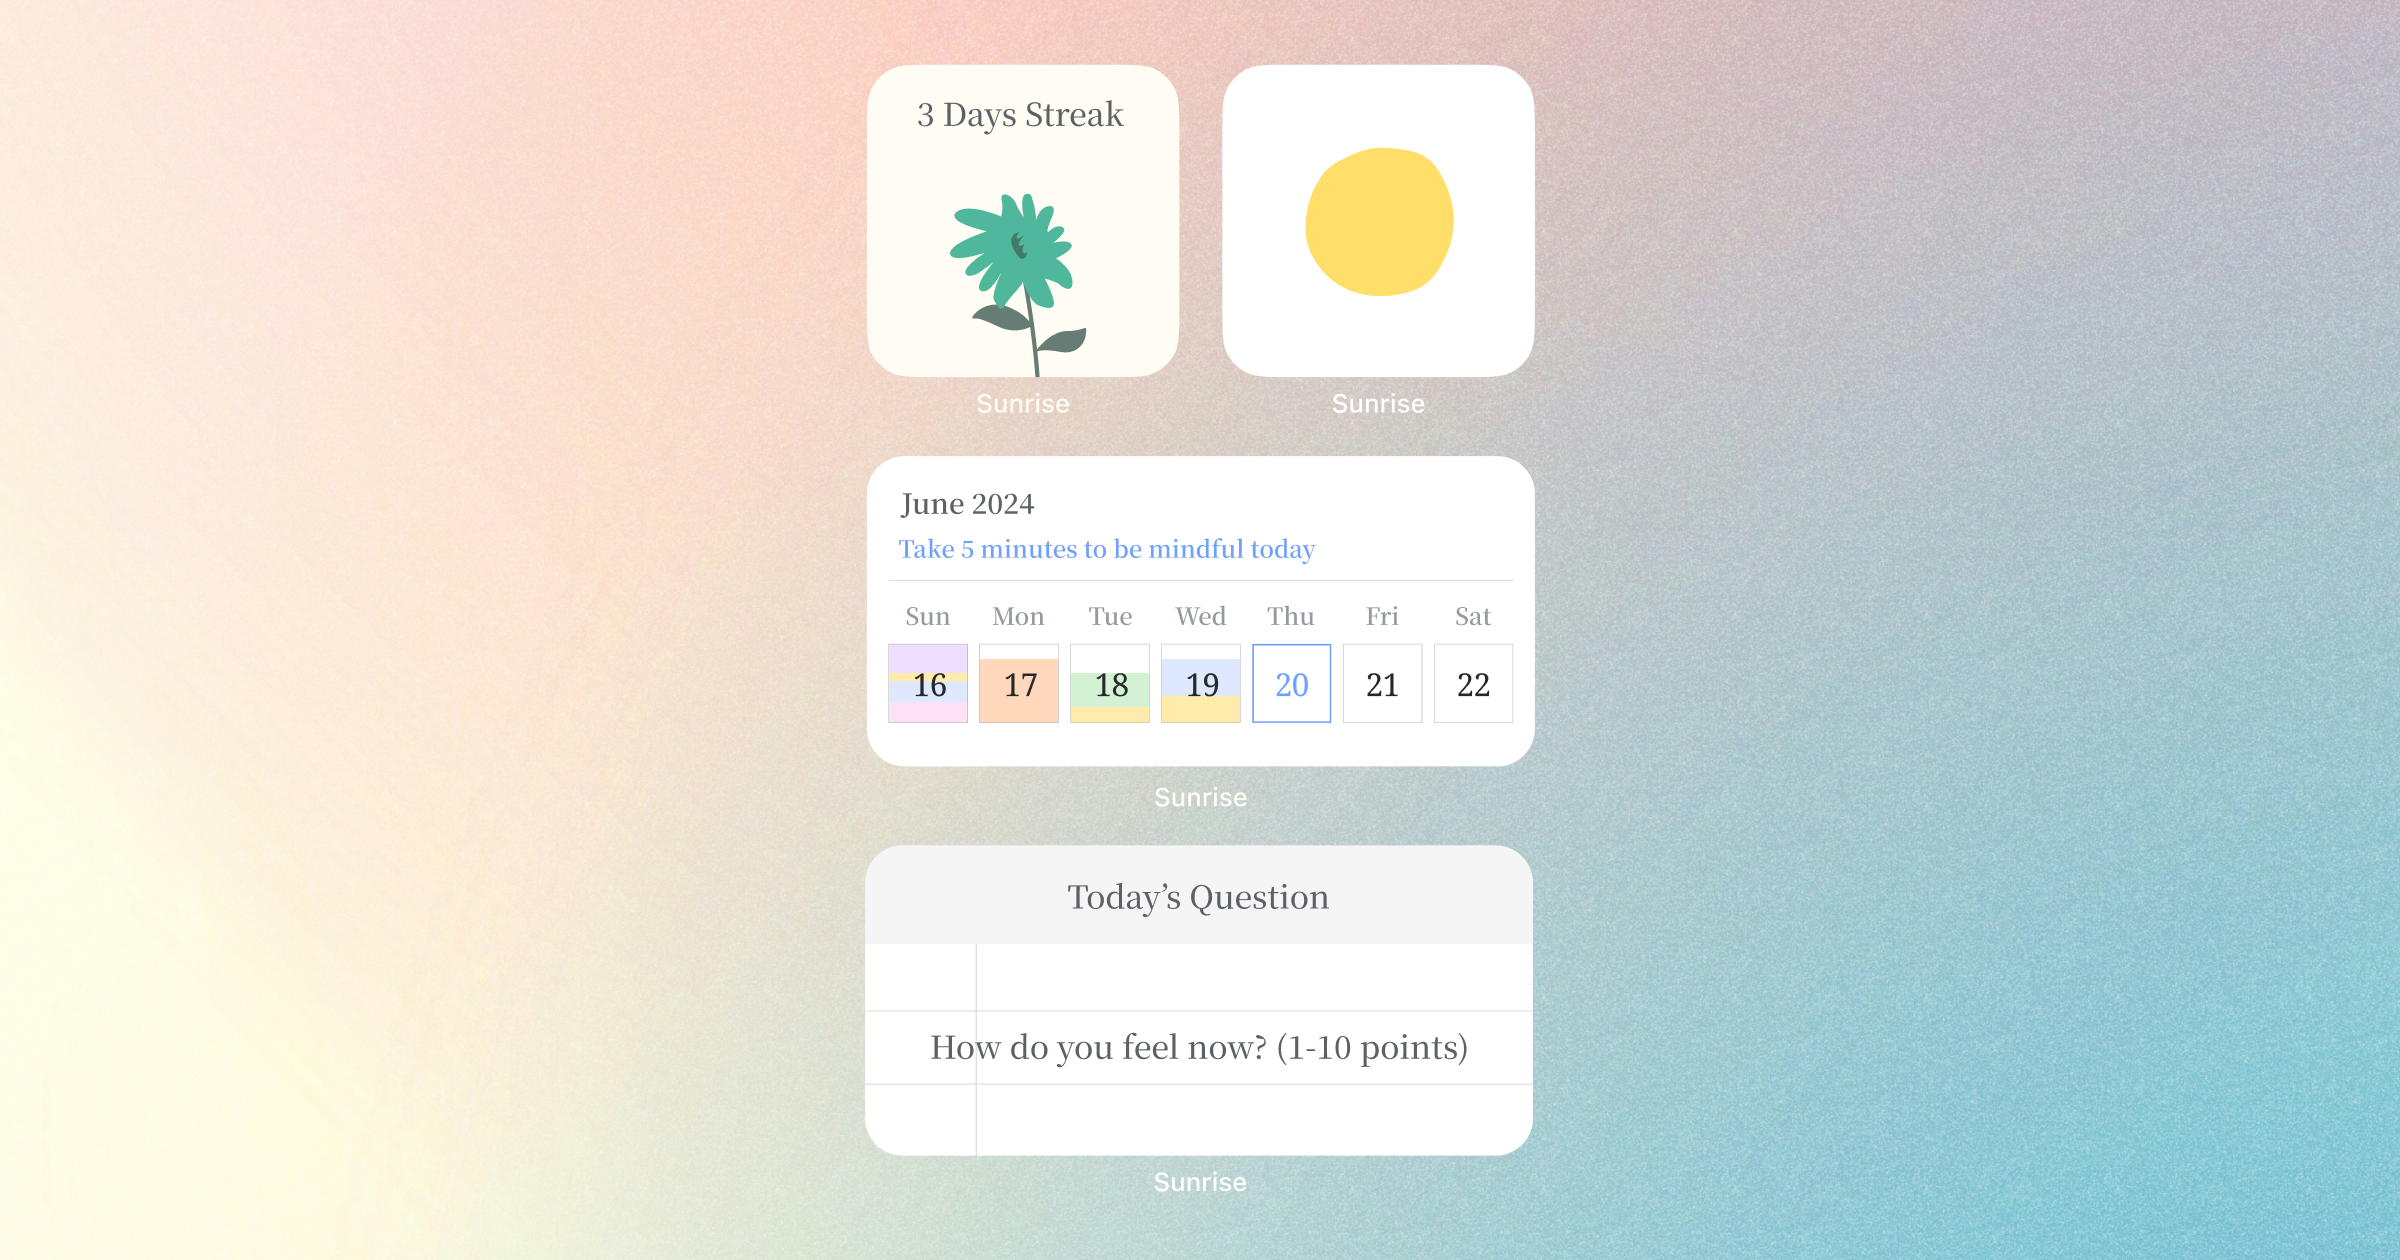
I’m currently developing a healing journaling app called Sunrise ☀️ using Flutter. Since it’s my first time building an app, I’ve encountered numerous challenges and moments of trial and error throughout the process.
Among all the features, developing the home screen widgets for both iOS and Android was especially memorable (because it was tough). In this post, I wanted to share my experience to hopefully help others trying to create widgets in Flutter.
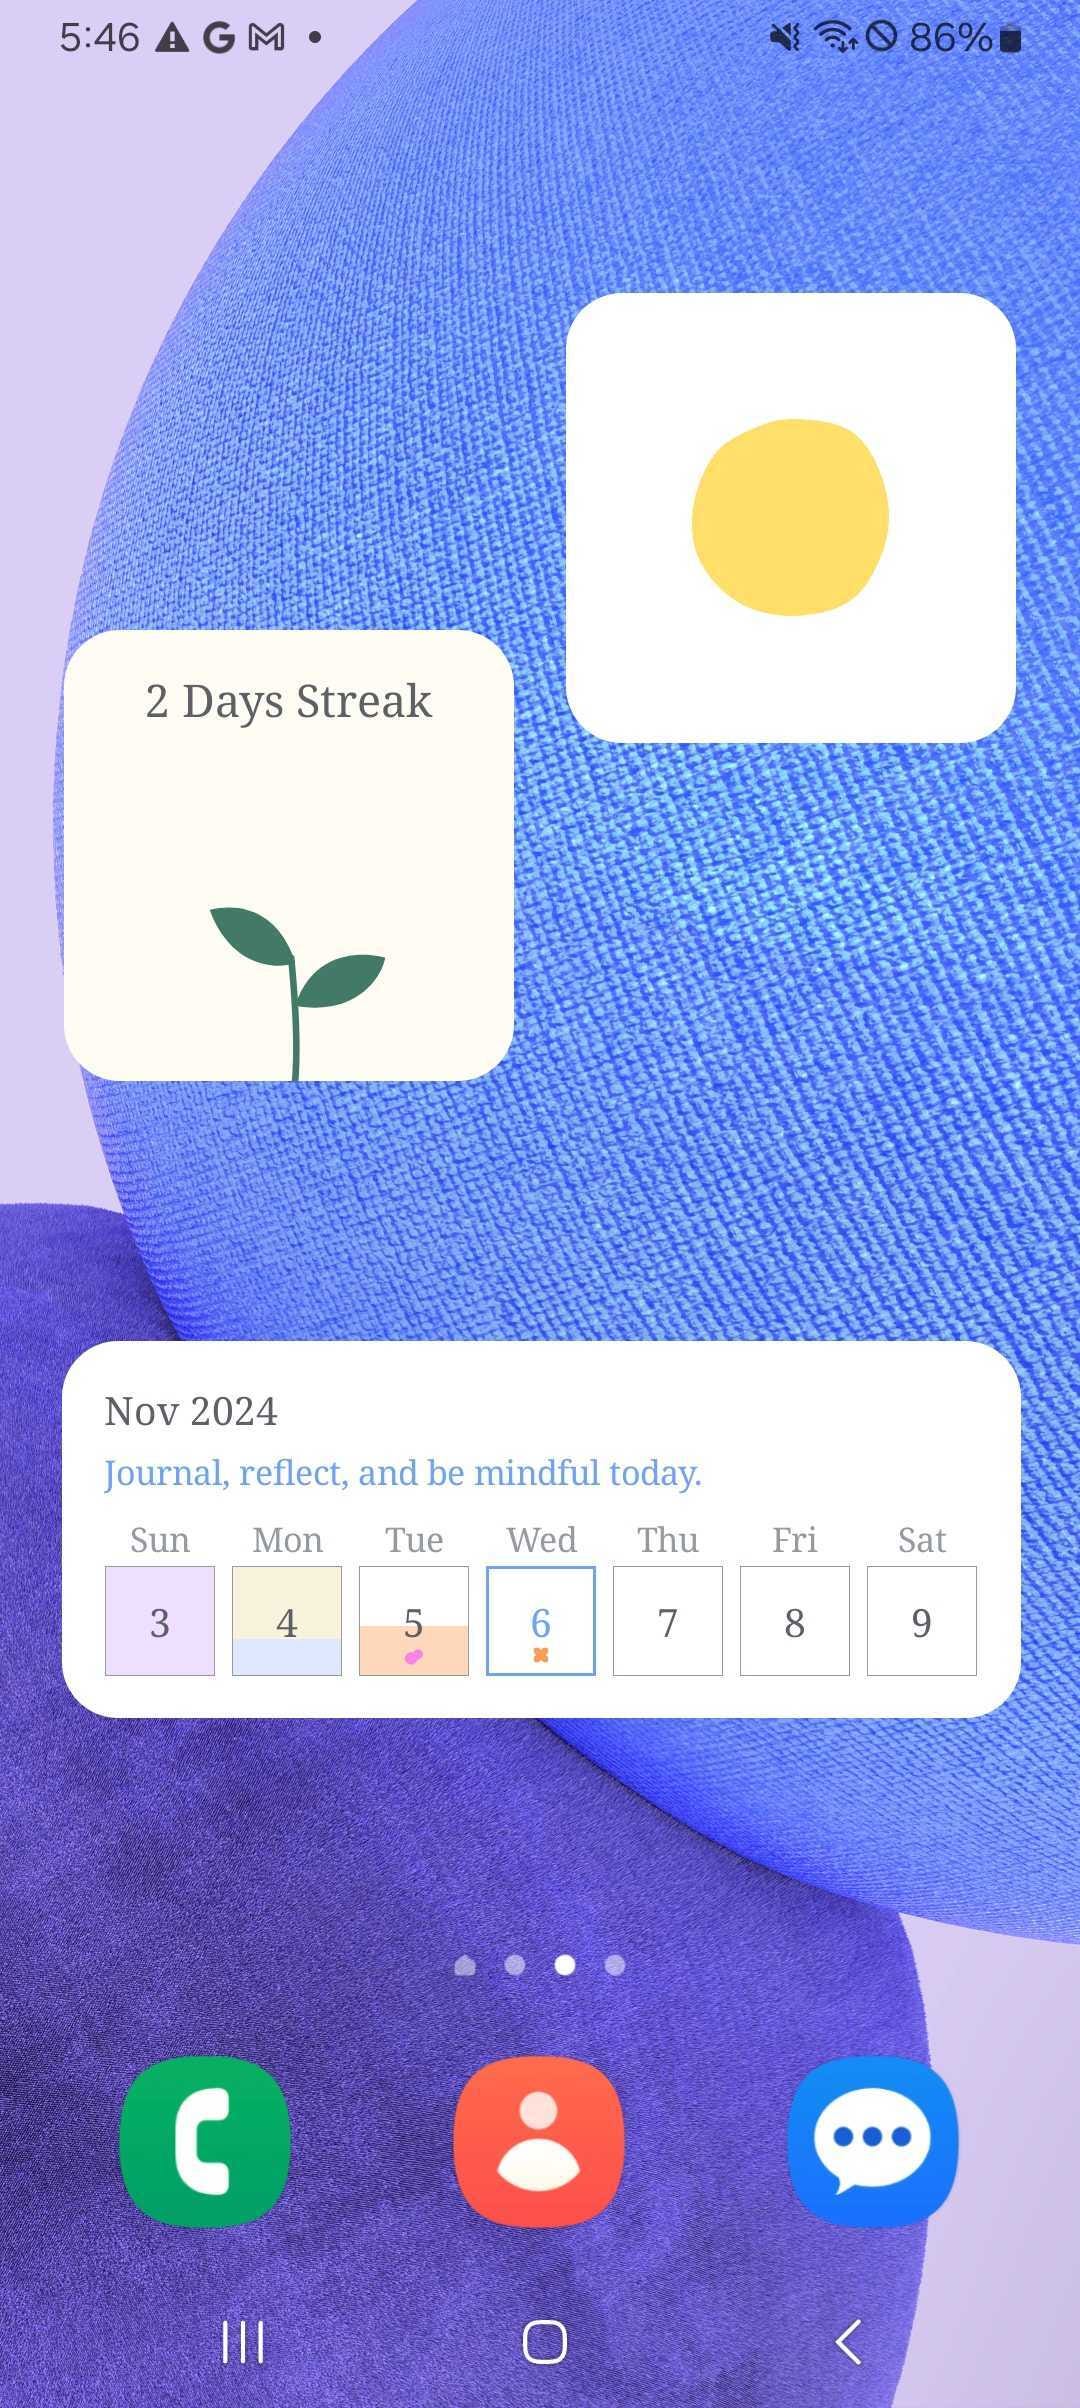
Sunrise has a total of five widgets, and here I’ll be focusing on explaining the streak widget. If you’re curious about the other widgets, feel free to download Sunrise from the App Store or Play Store and check them out! (˶ᵔ ᵕ ᵔ˶)
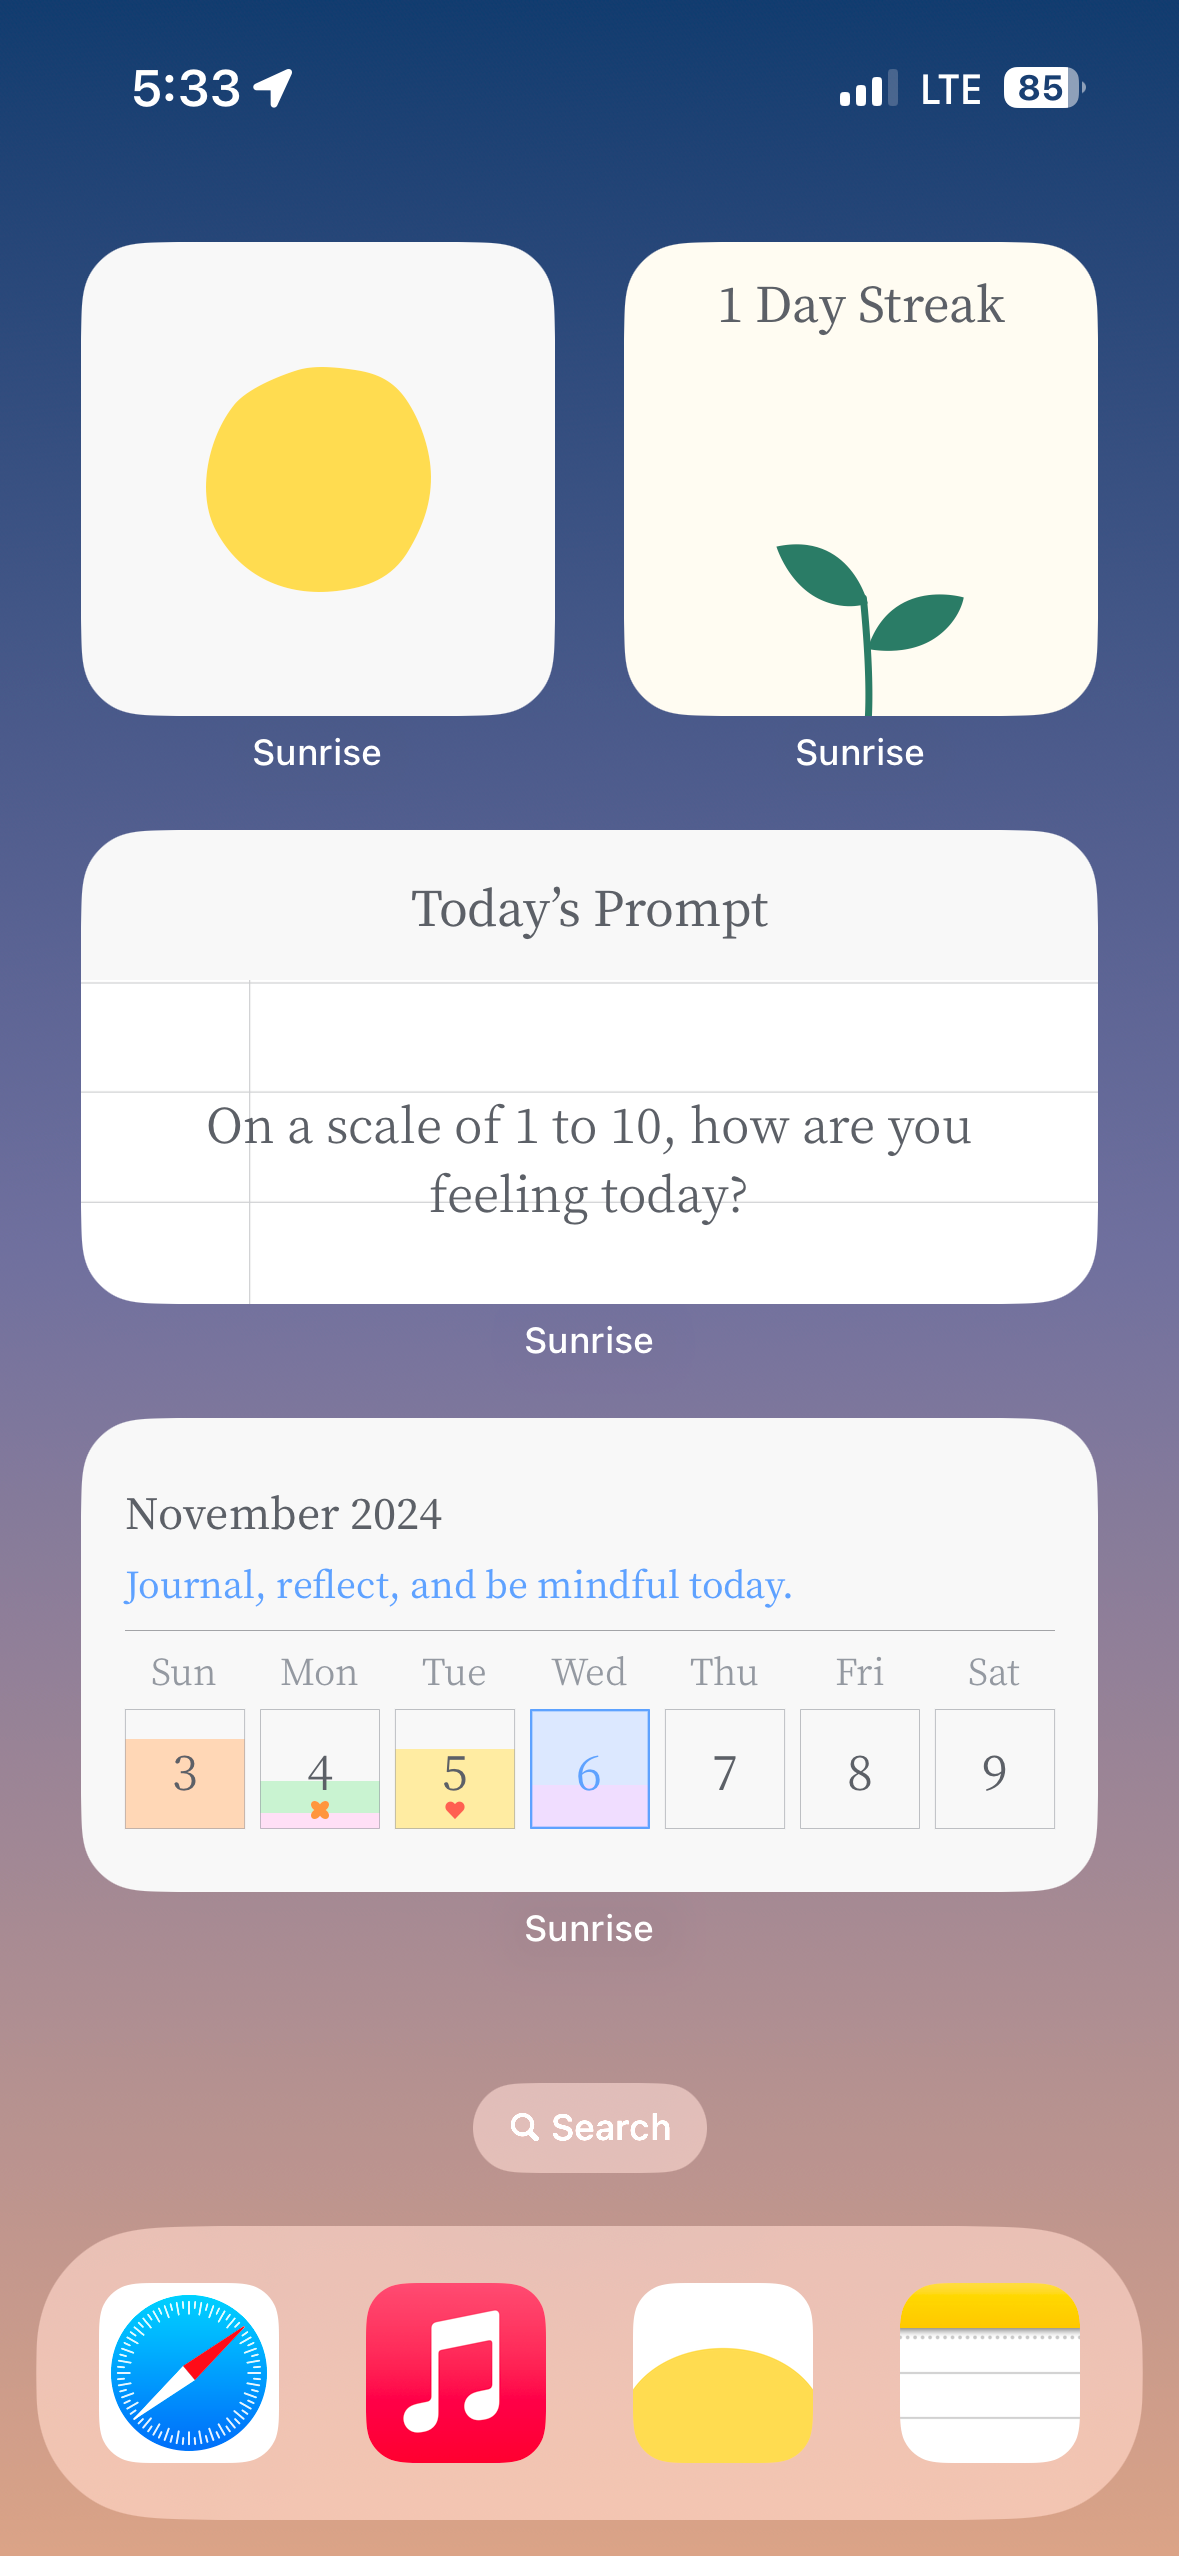
1. The home_widget Package: Supporting Communication Between Flutter and Native Code
Before jumping into development, I started by googling "flutter home screen widget" and discovered the home_widget package.
At first glance, I thought, “Does this mean I can create both iOS and Android widgets using just Flutter code?” But, of course, life isn’t that easy.
HomeWidget is a plugin to make it easier to create HomeScreen Widgets on Android and iOS. HomeWidget does not allow writing Widgets with Flutter itself. It still requires writing the Widgets with native code. However, it provides a unified interface for sending data, retrieving data, and updating the Widgets.
The home_widget package provides Flutter with a consistent interface for easily exchanging data with native widgets or updating the widgets. However, the actual widget implementation must be written in each platform’s native code. 🥲
To get started, I went through the following two documents. Reviewing these documents will help you set up the basic configurations for each platform and give you a general idea of how to proceed with development.
Additionally, I created a dedicated class to handle widget-related tasks, which I found quite useful.
class WidgetService {
  /// iOS
  static const iOSWidgetAppGroupId = 'group.com.example.foo';
  static const streakWidgetiOSName = 'StreakWidget';

  /// Android
  static const androidPackagePrefix = 'com.example.foo';
  static const streakWidgetAndroidName =
      '$androidPackagePrefix.receivers.StreakWidgetReceiver';

  /// Called in main.dart
  static Future<void> initialize() async {
    await HomeWidget.setAppGroupId(iOSWidgetAppGroupId);
  }

  /// Save data to Shared Preferences
  static Future<void> _saveData<T>(String key, T data) async {
    await HomeWidget.saveWidgetData<T>(key, data);
  }

  /// Retrieve data from Shared Preferences
  static Future<T?> _getData<T>(String key) async {
    return await HomeWidget.getWidgetData<T>(key);
  }

  /// Request to update widgets on both iOS and Android
  static Future<void> _updateWidget({
    String? iOSWidgetName,
    String? qualifiedAndroidName,
  }) async {
    final result = await HomeWidget.updateWidget(
      name: iOSWidgetName,
      iOSName: iOSWidgetName,
      qualifiedAndroidName: qualifiedAndroidName,
    );
    debugPrint(
        '[WidgetService.updateWidget] iOSWidgetName: $iOSWidgetName, qualifiedAndroidName: $qualifiedAndroidName, result: $result');
  }
}
2. Developing the iOS Widget: WidgetKit + SwiftUI
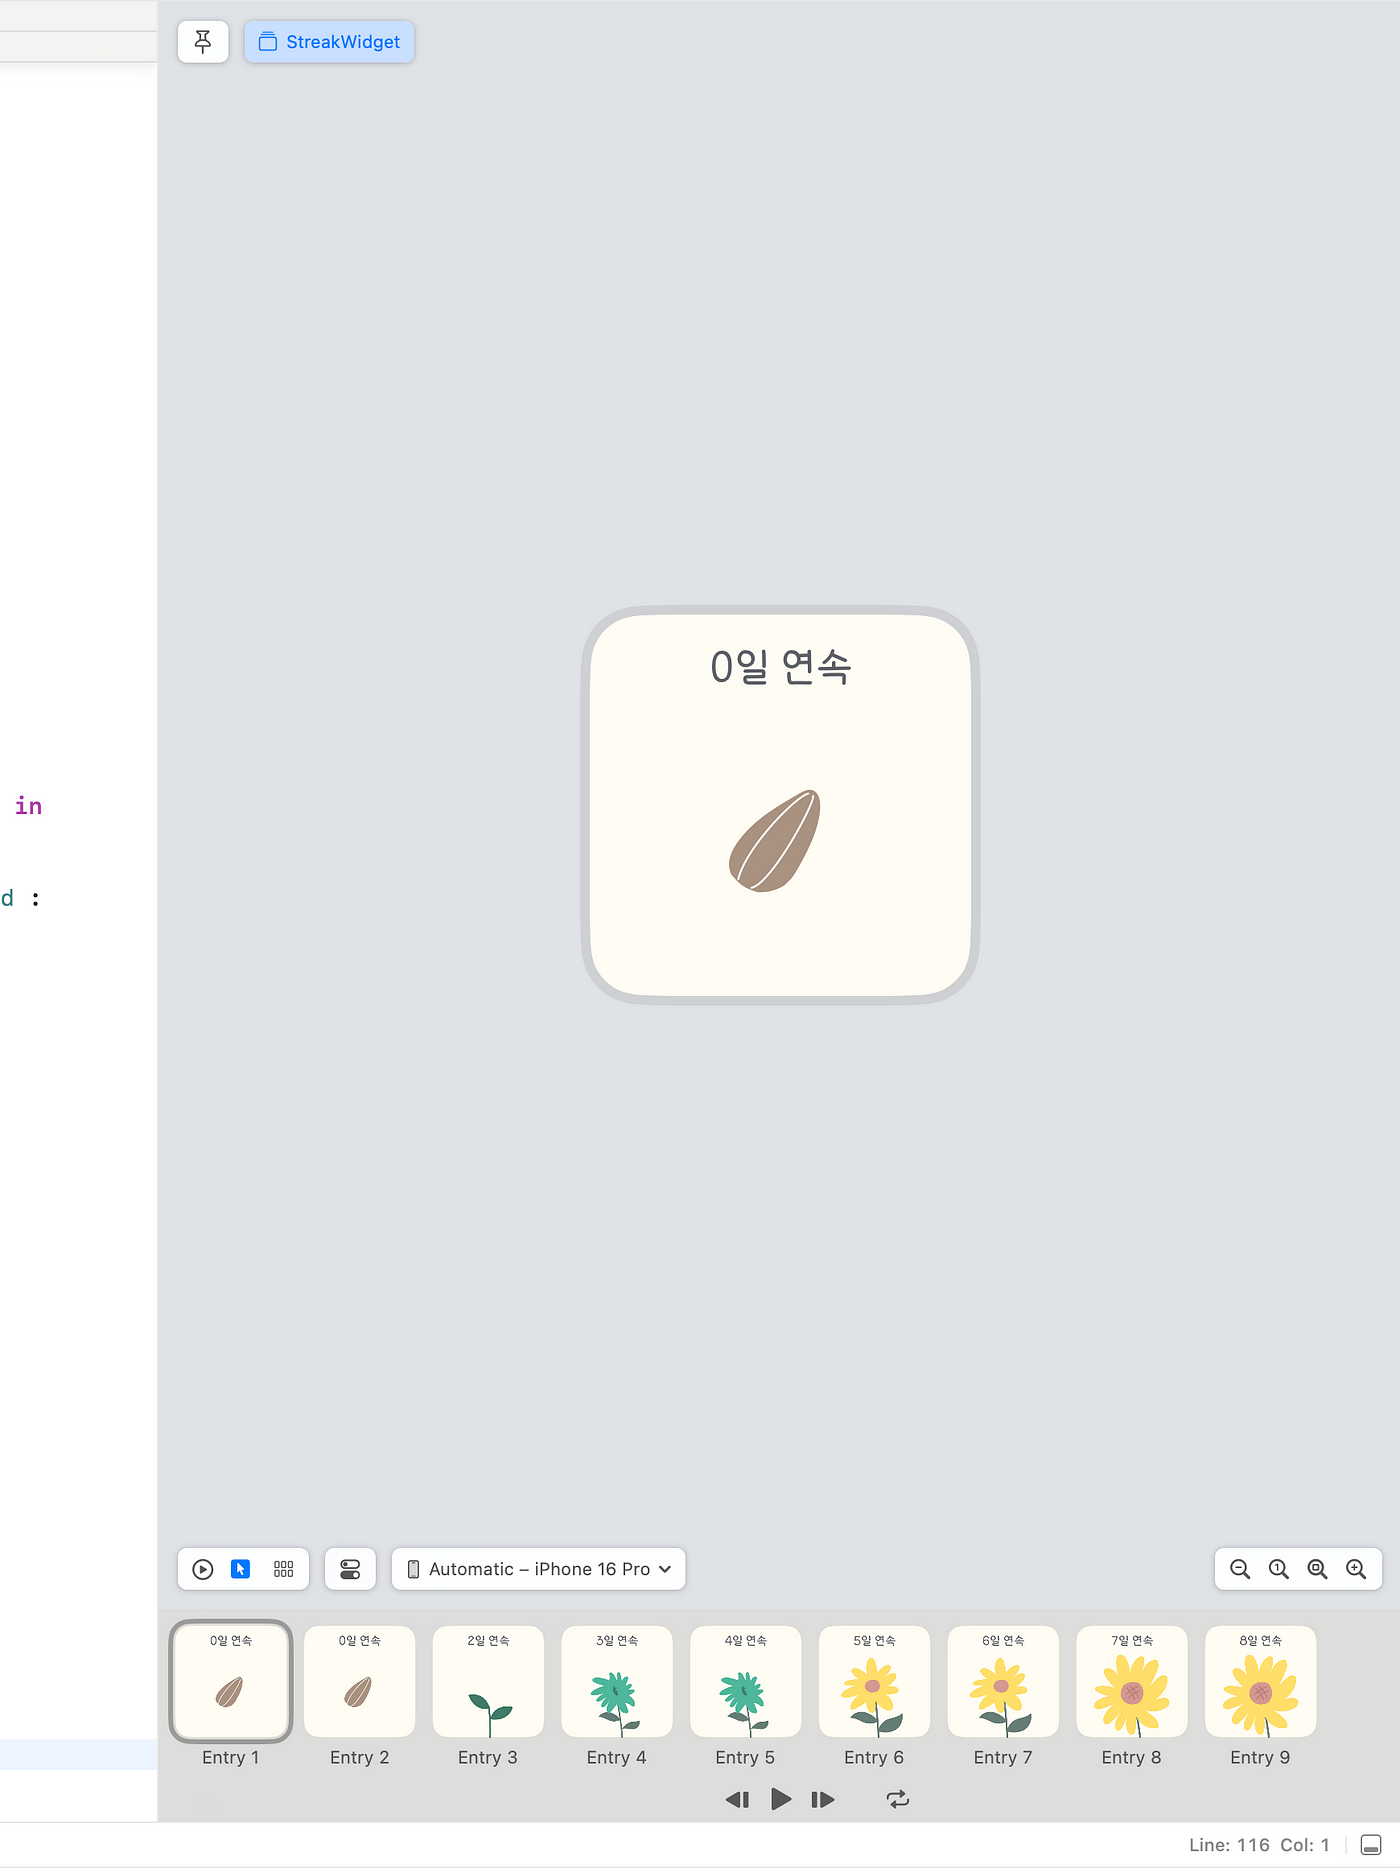
Developing the iOS widget was much easier compared to the Android widget. Xcode allows you to view the Preview of your widget in real time, and SwiftUI itself feels somewhat similar to Flutter code, which made the process smoother for me.
WidgetBundle — The Entry Point for Widgets
// SunriseWidgetsBundle.swift
import WidgetKit
import SwiftUI

@main
struct SunriseWidgetsBundle: WidgetBundle {
    var body: some Widget {
        StreakWidget()
        WeeklyWidget()
        MonthlyWidget()
        PromptWidget()
        MungWidget()
    }
}
Since I developed a total of five widgets, I defined all of them under the WidgetBundle. You can think of WidgetBundle as a way to group multiple widgets into a single extension and as the entry point for all the widgets provided by the app.
Now, let’s take a look at the code for one of the simpler widgets I developed, the streak widget, as I walk you through the development process.
The streak widget changes its image based on the number of consecutive days a user has written entries. It starts from a seed and eventually transforms into a sunflower.

To develop an iOS widget, you need to understand a few key concepts.
Simply put, an iOS widget works by having WidgetKit update the widget’s view (UI) on the user’s home screen according to the schedule (date) we provide for widget updates.
There are three main concepts to understand here. For further details, please refer to Apple’s official WidgetKit documentation.
TimelineEntry: Defines the date on which the widget should display and the data that should be included in the widget. The
dateproperty (the schedule for rendering the widget) is required.TimelineProvider: Tells WidgetKit when to update the widget with the appropriate data (TimelineEntry). The Timeline is an array that contains the widget’s update schedule (
date).View: The widget’s display, which is written in SwiftUI.
TimelineProvider, TimelineEntry — Widget’s Data
// StreakWidget.swift
import WidgetKit
import SwiftUI

private let prefsKeyStreak = "streak"
private let prefsKeyDarkMode = "dark_mode"
private let widgetGroupId = "group.com.example.foo"

struct StreakWidgetProvider: TimelineProvider {
    func placeholder(in context: Context) -> StreakEntry {
        let prefs = UserDefaults(suiteName: widgetGroupId)
        let darkMode = prefs?.bool(forKey: prefsKeyDarkMode) ?? false
        return StreakEntry(date: Date(), streak: 0, darkMode: darkMode)
    }

    func getSnapshot(in context: Context, completion: @escaping (StreakEntry) -> ()) {
        let prefs = UserDefaults(suiteName: widgetGroupId)
        let streak = prefs?.integer(forKey: prefsKeyStreak) ?? 0
        let darkMode = prefs?.bool(forKey: prefsKeyDarkMode) ?? false

        let entry = StreakEntry(date: .now, streak: streak, darkMode: darkMode)
        completion(entry)
    }

    func getTimeline(in context: Context, completion: @escaping (Timeline<Entry>) -> ()) {
        getSnapshot(in: context) { (entry) in
            let timeline = Timeline(entries: [entry], policy: .never)
            completion(timeline)
        }
    }
}

struct StreakEntry: TimelineEntry {
    let date: Date
    let streak: Int
    let darkMode: Bool
}
In the TimelineProvider, you need to define three methods:
getPlaceholder: Displays a temporary view when the widget is first added or while it’s loading. It’s best to return this quickly, so dummy data is usually used.getSnapshot: Used to display a preview in the widget gallery (where users select widgets on iPhone). Sunrise shows actual widget data for this.getTimeline: Provides the actual widget data and update schedule. It can return multiple TimelineEntry items and allows you to set the update policy here.
In Sunrise, since the widget is updated explicitly whenever the user performs a specific action by calling HomeWidget.updateWidget from Flutter, we set the update policy in getTimeline to .never.
An important concept here is UserDefaults. If Flutter saves a value in Shared Preferences, the iOS widget can read this value through UserDefaults. You need to pass the same App Group ID as the one provided in HomeWidget.setAppGroupId in Flutter to the suiteName.
For the streak widget, we use streak, which holds the user’s consecutive writing days, and darkMode, indicating whether dark mode is enabled in the app. Both are retrieved from UserDefaults.
View — Widget’s Screen (UI)
// StreakWidget.swift
// ...
struct StreakWidgetEntryView: View {
    var entry: StreakWidgetProvider.Entry

    init(entry: StreakWidgetProvider.Entry) {
        self.entry = entry
        // Apply custom font
        registerCustomFont()
    }

    private func getImage(streak: Int) -> UIImage {
        // Return image based on streak days
        switch streak {
        case 0:
            return UIImage.level1
        case 1...2:
            return UIImage.level2
        case 2...4:
            return UIImage.level3
        case 5...6:
            return UIImage.level4
        case 7...:
            return UIImage.level5
        default:
            return UIImage.level1
        }
    }

    var body: some View {
        // Set colors based on dark mode
        let backgroundColor = entry.darkMode ? Color.darkModeBackground : Color.streakBackground
        let textColor = entry.darkMode ? Color.gray20 : Color.black70

        VStack(alignment: .center, content: {
            Text("\(entry.streak) streak.info")
                .font(customFont(size: 16))
                .fontWeight(.medium)
                .foregroundStyle(textColor)
            Image(uiImage: getImage(streak: entry.streak)).frame(height: 115)
        })
        .padding(.top, 10)
        .background(backgroundColor)
    }
}

// Code for preview in Xcode during development
#Preview(as: .systemSmall) {
    StreakWidget()
} timeline: {
    StreakEntry(date: .now, streak: 1, darkMode: false)
}
In the View, you simply take the data from the TimelineEntry provided by the TimelineProvider and create the screen layout with SwiftUI. Although I’m not very familiar with Swift, I was able to develop this quickly with the help of ChatGPT and Claude.
The images used in the widget are stored in Assets and loaded in the form of UIImage.level1, etc.
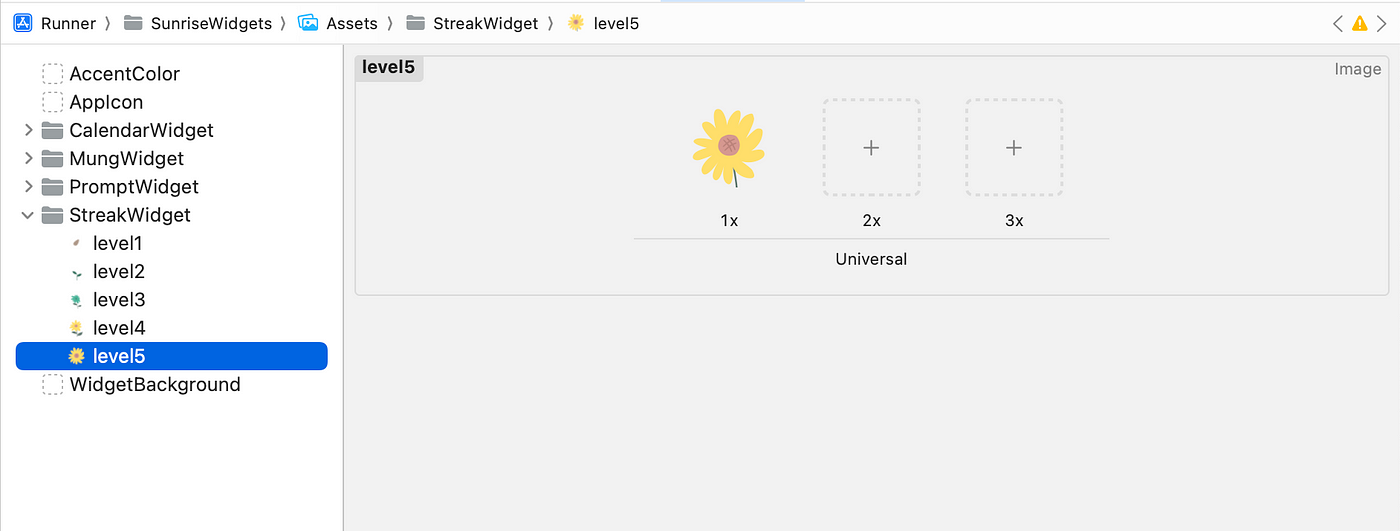
Additionally, since the Sunrise app supports both Korean and English, I defined text phrases as Localizable strings.

One somewhat tricky part was applying a custom font, which I recently learned how to do and implemented.
I wanted to use the same font used in the app in the widget, so I loaded the font files located in the Flutter project path. In the init method of the View, I called the registerCustomFont function defined below.
func registerCustomFont() {
    CTFontManagerRegisterFontsForURL(bundle.appending(path: "/assets/fonts/NotoSerifKR/NotoSerifKR-Regular.otf") as CFURL, CTFontManagerScope.process, nil)
    CTFontManagerRegisterFontsForURL(bundle.appending(path: "/assets/fonts/NotoSerifKR/NotoSerifKR-Medium.otf") as CFURL, CTFontManagerScope.process, nil)
}
Next, to actually apply the loaded font, I defined and used a customFont function:
func customFont(size: CGFloat) -> Font {
    return Font.custom("Noto Serif KR", fixedSize: size)
}
Text("\(entry.streak) streak.info")
    .font(customFont(size: 16))
The issue I faced initially was that trying to apply the font with Font.custom("NotoSerifKR") or Font.custom("NotoSerifKR-Regular") didn’t work. After some research, I found that you need to output the font name in Xcode and use the family name displayed in the output to access it. You can insert the following code somewhere in your project, run it, and check the console for the family name output:
for family: String in UIFont.familyNames {
    print(family) // "Noto Serif KR"
    for names: String in UIFont.fontNames(forFamilyName: family) {
        print("== \(names)")
    }
}
This code will print the available font family and font names, allowing you to identify the correct family name to use for the custom font.
Widget — Widget Configuration
// StreakWidget.swift
// ...
struct StreakWidget: Widget {
    let kind: String = "StreakWidget" // Widget identifier

    var body: some WidgetConfiguration {
        StaticConfiguration(kind: kind, provider: StreakWidgetProvider()) { entry in
            if #available(iOS 17.0, *) {
                StreakWidgetEntryView(entry: entry)
                    .containerBackground(entry.darkMode ? Color.darkModeBackground : Color.streakBackground, for: .widget)
            } else {
                StreakWidgetEntryView(entry: entry)
                    .padding()
                    .background(entry.darkMode ? Color.darkModeBackground : Color.streakBackground)
            }
        }
        .configurationDisplayName("widget.streak.name")
        .description("widget.streak.description")
        .supportedFamilies([.systemSmall])
    }
}
Finally, the Widget defines the widget’s metadata and connects the TimelineProvider with the View.
supportedFamilies specifies the widget sizes that are supported. The streak widget only supports the smallest size, systemSmall.
configurationDisplayName and description are the name and description displayed in the widget gallery. These are defined as localized strings to support both Korean and English.
3. Developing the Android Widget: Jetpack Glance
I encountered significant challenges while developing the Android widget. First, I was surprised to learn that XML is used as one of the ways to render layouts in Android.
There are two ways to create UIs in Android. One is the classic approach, where you design the layout in XML and define logic in Java or Kotlin code. The other is the modern, declarative UI method known as Jetpack Compose.
Google’s Codelab provides an example of Android widgets using XML, which left me feeling somewhat discouraged. I tried creating the layout with XML, but there were many limitations in achieving what I wanted, and throughout the coding process, I honestly felt like crying.

Fortunately, while I was developing the widget, a toolkit called Jetpack Glance, based on Jetpack Compose for widgets, had just been released.
I discovered that with Jetpack Glance, I could write UI code declaratively, similar to SwiftUI and Flutter. The developer of the home_widget package had even written documentation on how to use Jetpack Glance, which made me feel relieved, thinking, “I can make this work!”
So, I began Android development with Jetpack Glance. However, compared to iOS widget development, there were two main challenges.
First, there were significantly fewer references available compared to iOS. Even ChatGPT and Claude seemed to struggle with Glance, often giving me Compose code instead. While Glance and Compose are similar, many features that work in Compose don’t work in Glance, which was frustrating.
Second, there was no way to preview the widget in real-time while developing in Android Studio (or at least, I couldn’t find one). This meant I had to keep running the app on an emulator to check the widget repeatedly, which was quite tiring. I’m not sure if this has changed recently.
In any case, Jetpack Glance was undoubtedly much more convenient than using XML. Now, I’ll explain how I developed the Android widget using it.
When developing an Android widget with Glance, you need to understand two main concepts:
GlanceAppWidgetReceiver: Acts as a bridge connecting the Android system and the widget, providing an instance of GlanceAppWidget.
GlanceAppWidget: Defines the actual widget’s UI and behavior.
Now, as with iOS, I’ll show you the code for the streak widget as an example.
GlanceAppWidgetReceiver
When developing each widget, there are four main tasks you need to complete:
Create the Receiver class.
Create the Widget class.
Register the Receiver in
AndroidManifest.xml.Define widget metadata in an XML file.
Write the Receiver class and register it in the AndroidManifest.xml file.
// StreakWidgetReceiver.kt
package com.example.foo.receivers

import HomeWidgetGlanceWidgetReceiver
import com.example.foo.widgets.StreakWidget

class StreakWidgetReceiver : HomeWidgetGlanceWidgetReceiver<StreakWidget>() {
    override val glanceAppWidget = StreakWidget()
}
<!-- AndroidManifest.xml -->
<manifest xmlns:android="http://schemas.android.com/apk/res/android"
    xmlns:tools="http://schemas.android.com/tools">
  <application
    android:label="@string/app_name"
    android:name="${applicationName}"
    android:icon="@mipmap/ic_launcher">
    <!-- Other application configurations -->
    <receiver
        android:name=".receivers.StreakWidgetReceiver"
        android:label="@string/widget_streak_name"
        android:exported="false">
        <intent-filter>
            <action android:name="android.appwidget.action.APPWIDGET_UPDATE" />
        </intent-filter>
        <meta-data
            android:name="android.appwidget.provider"
            android:resource="@xml/streak_widget" />
    </receiver>
     <!-- Other manifest entries -->
  </application>
</manifest>
In the XML file (@xml/streak_widget), you define the widget’s size, whether it can be resized, and its description.
<!-- res/xml/streak_widget.xml -->
<?xml version="1.0" encoding="utf-8"?>
<appwidget-provider xmlns:android="http://schemas.android.com/apk/res/android"
    android:initialLayout="@layout/glance_default_loading_layout"
    android:description="@string/widget_streak_description"
    android:minWidth="110dp"
    android:minHeight="110dp"
    android:targetCellWidth="2"
    android:targetCellHeight="2"
    android:resizeMode="none"
    android:widgetCategory="home_screen"
    android:updatePeriodMillis="86400000"
    android:previewImage="@drawable/streak_widget_preview">
</appwidget-provider>
GlanceAppWidget
// StreakWidget.kt
class StreakWidget : GlanceAppWidget() {
    override val sizeMode = SizeMode.Single

    /**
     * Needed for Updating
     */
    override val stateDefinition = HomeWidgetGlanceStateDefinition()

    override suspend fun provideGlance(context: Context, id: GlanceId) {
        provideContent {
            GlanceContent(context, currentState())
        }
    }

    @Composable
    private fun GlanceContent(context: Context, currentState: HomeWidgetGlanceState) {
        val data = currentState.preferences
        val streak = data.getInt("streak", 0)
        val imageId = getImage(streak)
        val isDarkMode = data.getBoolean("dark_mode", false)
        val textSizeAdjustment = context.resources.configuration.fontScale

        Box(contentAlignment = Alignment.Center,
            modifier = GlanceModifier.clickable(
                onClick = actionStartActivity<MainActivity>(
                    context,
                    Uri.parse(defaultAppLaunchUri)
                )
            )
        ){
            Column(
                modifier = GlanceModifier
                    .wrapContentHeight()
                    .width(160.dp)
                    .background(if (isDarkMode) AppColors.backgroundDark else AppColors.streakBackground)
                    .padding(top = 14.dp),
                horizontalAlignment = Alignment.CenterHorizontally
            ) {
                Text(
                    text = context.resources.getQuantityString(
                        R.plurals.streak_info,
                        streak, streak
                    ),
                    style = TextStyle(
                        fontSize = 16.sp / textSizeAdjustment,
                        fontWeight = FontWeight.Medium,
                        color = ColorProvider(if (isDarkMode) AppColors.gray20 else AppColors.black70),
                        fontFamily = FontFamily.Serif
                    )
                )
                Spacer(modifier = GlanceModifier.height(5.dp))
                Image(
                    provider = ImageProvider(
                        resId = imageId
                    ),
                    contentDescription = null,
                    modifier = GlanceModifier
                        .height(120.dp)
                )
            }
        }
    }

    private fun getImage(streak: Int): Int {
        return when (streak) {
            0 -> R.drawable.level1
            in 1..2 -> R.drawable.level2
            in 2..4 -> R.drawable.level3
            in 5..6 -> R.drawable.level4
            in 7..Int.MAX_VALUE -> R.drawable.level5
            else -> R.drawable.level1
        }
    }
}
If you compare it to the View code for the iOS widget written in SwiftUI, you’ll see they feel almost the same, right?
For Android widgets, you can access Shared Preference data using currentState.preferences. I defined the text displayed on the screen in res/values/strings/strings.xml to support multiple languages.
I looked into applying a custom font, but it seemed impossible, so I couldn’t implement it. However, applying FontFamily.Serif appears to use the Noto Serif font for English text, so I went with that!
4. Final Steps
Updating Each Widget from Flutter
Lastly, here’s the Flutter code. Now, each time the user writes an entry, the streak widget on both iOS and Android is updated by calling WidgetService.incrementStreak.
Remember that you need to call HomeWidget.updateWidget to trigger the widget update!
class WidgetService {
  /// iOS
  static const iOSWidgetAppGroupId = 'group.com.example.foo';
  static const streakWidgetiOSName = 'StreakWidget';

  /// Android
  static const androidPackagePrefix = 'com.example.foo';
  static const streakWidgetAndroidName =
      '$androidPackagePrefix.receivers.StreakWidgetReceiver';

  /// Keys for storing data
  static const streakKey = 'streak';
  static const darkModeKey = 'dark_mode';

  /// Called in main.dart
  static Future<void> initialize() async {
    await HomeWidget.setAppGroupId(iOSWidgetAppGroupId);
  }

  /// Update dark mode
  static Future<void> updateDarkMode(bool isDarkMode) async {
    await _saveData<bool>(darkModeKey, isDarkMode);
    _updateWidget(
      iOSWidgetName: streakWidgetiOSName,
      qualifiedAndroidName: streakWidgetAndroidName,
    );
  }

  /// Increase streak each time a new entry is written today
  static Future<void> incrementStreak() async {
    int streak = await _getData<int>(streakKey) ?? 0;
    // ... detailed logic omitted ...
    await _saveData<int>(streakKey, streak);
    _updateWidget(
      iOSWidgetName: streakWidgetiOSName,
      qualifiedAndroidName: streakWidgetAndroidName,
    );
  }

  /// Save data to Shared Preferences
  static Future<void> _saveData<T>(String key, T data) async {
    await HomeWidget.saveWidgetData<T>(key, data);
  }

  /// Retrieve data from Shared Preferences
  static Future<T?> _getData<T>(String key) async {
    return await HomeWidget.getWidgetData<T>(key);
  }

  /// Request to update widgets on both iOS and Android
  static Future<void> _updateWidget({
    String? iOSWidgetName,
    String? qualifiedAndroidName,
  }) async {
    final result = await HomeWidget.updateWidget(
      name: iOSWidgetName,
      iOSName: iOSWidgetName,
      qualifiedAndroidName: qualifiedAndroidName,
    );
    debugPrint(
        '[WidgetService.updateWidget] iOSWidgetName: $iOSWidgetName, qualifiedAndroidName: $qualifiedAndroidName, result: $result');
  }
}
Reflection
Developing widgets in Flutter was initially intimidating because I had to write native code, but this experience allowed me to better understand the development methods for both iOS and Android.
I’d like to share four insights I gained while developing widgets 💭:
While it’s not possible to create widgets solely with Flutter code, using the home_widget package makes data communication between Flutter and native widgets relatively easy.
SwiftUI for iOS and Jetpack Glance for Android provide a declarative UI style similar to Flutter, making it easier for Flutter developers to adapt to these platforms.
It’s essential to maintain consistency between the widget and the app, especially for things like multilingual support and dark mode.
As many of you probably know, it’s helpful to use tools like ChatGPT or Claude when writing native code.
I hope my experience can be of some help to your widget development. If you know of any better methods or have questions, please feel free to share them in the comments. And if there’s anything you’d like to know, don’t hesitate to reach out!
Reference Documents
For home_widget
Google CodeLab — Adding a Home Screen Widget to Your Flutter App
Jetpack Glance Home Screen Widgets with Flutter by the home_widget Developer — This article is by the developer of home_widget, so it’s worth checking out their other articles too.
For iOS Widgets
For Android Widgets
Subscribe to my newsletter
Read articles from Nicole Park directly inside your inbox. Subscribe to the newsletter, and don't miss out.
Written by

Nicole Park
Nicole Park
Building a journal app, Sunrise 💛