Advance Git & GitHub for DevOps Engineers
 Vanshika Sharma
Git Branching

Git branching enables you to establish distinct lines of development within a project. You can create feature branches for new functionalities and hotfix branches for urgent repairs while maintaining a stable main branch. This approach allows you to work on various tasks without impacting the main codebase.
Basic commands:
Create a branch:
git branch <branch-name>Switch to a branch:
git checkout <branch-name>orgit switch <branch-name>Merge into main:
git merge <branch-name>Delete a branch:
git branch -d <branch-name>
Branching isolates work, enables collaboration, and allows easy experimentation in Git.
Git Revert and Reset

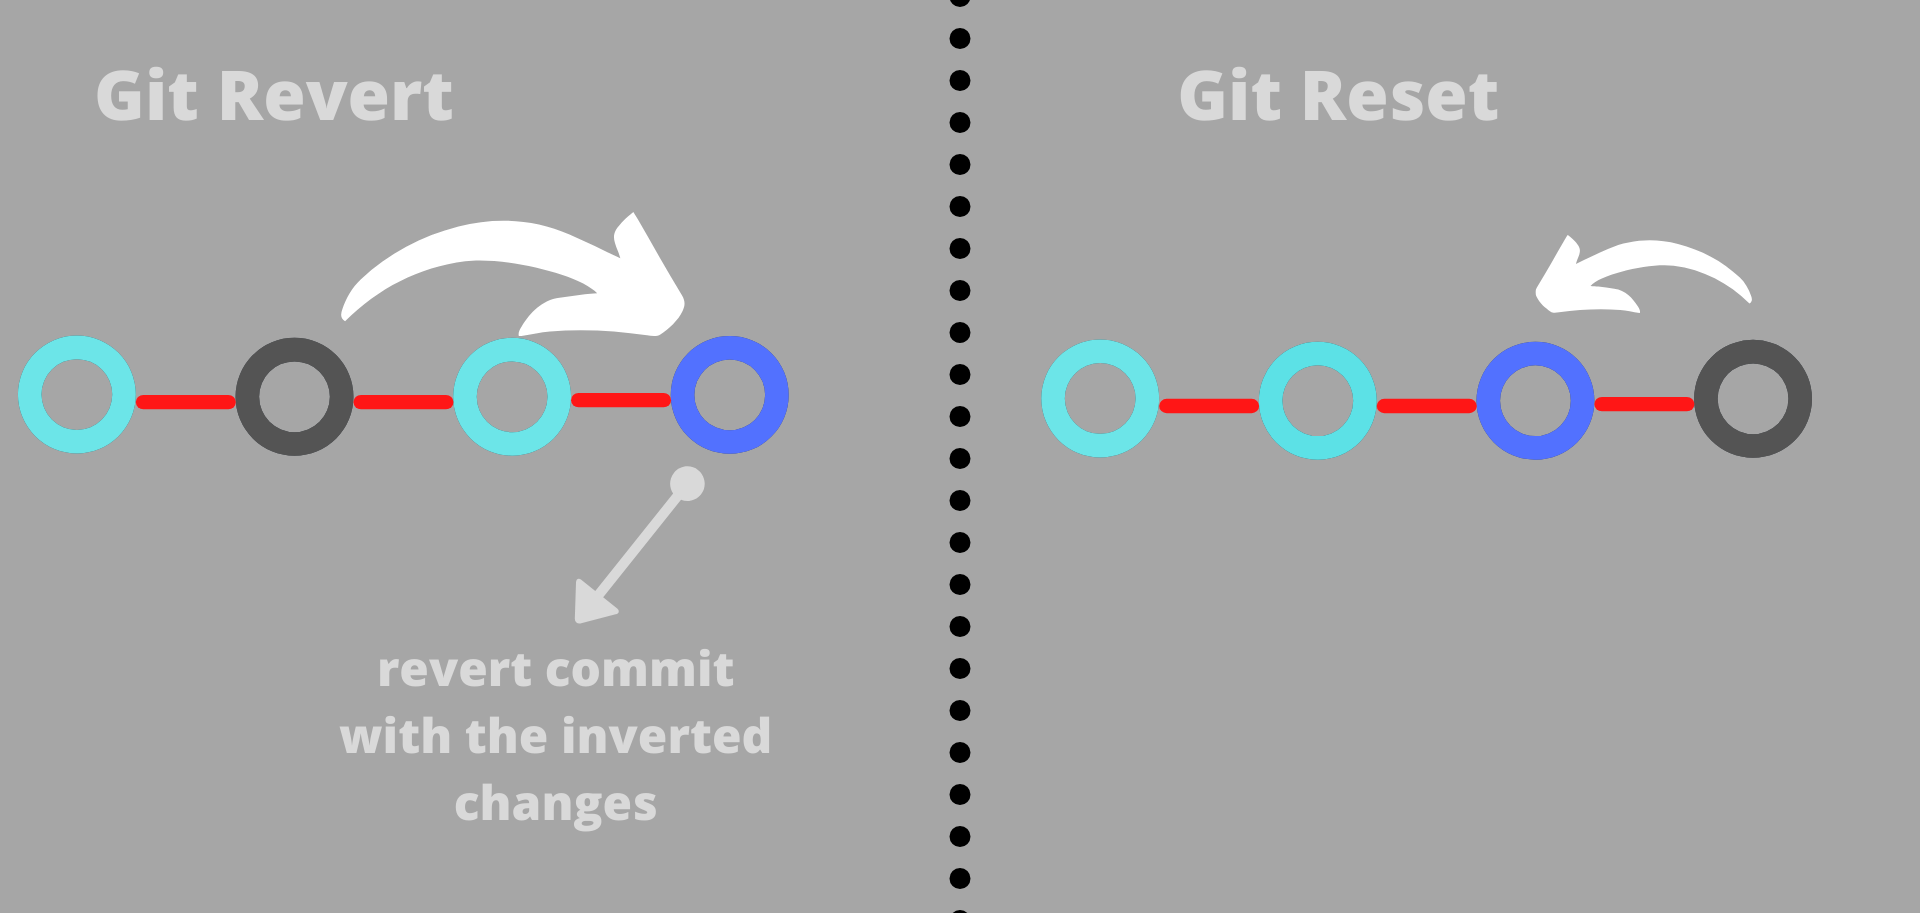
Git provides two primary commands for undoing changes: git revert and git reset. Both have different purposes and effects on the project history.
1. Git Reset
Purpose: Moves the current branch's HEAD to a specific commit, removing or modifying the commits that came after it.
Types:
--soft: Moves the HEAD to a previous commit but keeps your changes staged.--mixed(default): Moves the HEAD and un-stages the changes but keeps the modified files.--hard: Moves the HEAD and deletes the changes, effectively discarding them from the working directory.
Usage:
  git reset --soft <commit>
  git reset --mixed <commit>
  git reset --hard <commit>
Best for: Removing unwanted commits locally or making temporary adjustments to commits before pushing.
2. Git Revert
Purpose: Creates a new commit that undoes the changes of a specific previous commit without changing the commit history.
Usage:
git revert <commit>It is best for public branches, as it maintains the history and adds a new commitment to undo changes.
Git Rebase and Merge

Both git rebase and git merge are used to integrate changes from one branch into another, but they work differently:
1. Git Merge
Purpose: Combines the histories of two branches by creating a new "merge commit" that keeps the branch history intact.
Usage:
git checkout main git merge feature-branchPros: Preserves the full history and is simpler, especially for collaborative projects.
Cons: Can make the history "messy" with multiple merge commits, especially in long-running branches.
2. Git Rebase
Purpose: Moves (or "replays") the commits of one branch on top of another, creating a linear history without merging commits.
Usage:
git checkout feature-branch git rebase mainPros: Creates a cleaner, linear history without extra merge commits, which is easier to read.
Cons: Can rewrite history, making it risky for shared branches. Should generally only be used on local branches.
Concept of branches with two or more branches
Suppose you're working on a project and need to develop two separate features:
Initialize the repository and create the main branch:
 git init
 git checkout -b main
 echo "Initial code" > project.txt
 git add project.txt
 git commit -m "Initial commit on main branch"
Create and work on
feature-abranch:- Start a new branch for the first feature.
git checkout -b feature-a
- Add some code for
feature-a.
    echo "Code for feature A" >> project.txt
    git add project.txt
    git commit -m "Add code for feature A"
Create and work on
feature-bbranch:- Switch back to
main, then create another branch forfeature-b.
- Switch back to
    git checkout main
    git checkout -b feature-b
- Add some code for
feature-b.
    echo "Code for feature B" >> project.txt
    git add project.txt
    git commit -m "Add code for feature B"
View the branches:
- You now have three branches:
main,feature-a, andfeature-b. You can see the branches by running:
- You now have three branches:
git branch
Merging the branches back to the main:
After completing the work on both branches, merge them back into
main.First, merge
feature-a:git checkout main git merge feature-aNext, merge
feature-b:git merge feature-b
Final Result:
Now
mainhas the changes from bothfeature-aandfeature-b. You can delete the feature branches if they’re no longer needed:git branch -d feature-a git branch -d feature-b
Adding some changes to dev branch and merge that branch in master
Create the
devbranch frommain:- Switch to
mainand create a new branch calleddev.
- Switch to
    git checkout main
    git checkout -b dev
Make changes to the
devbranch:- Add some new code or changes in
dev.
- Add some new code or changes in
    echo "Some new changes in the dev branch" >> project.txt
    git add project.txt
    git commit -m "Add changes in dev branch"
Switch back to
mainand mergedev:- Once the changes in
devare complete, switch back tomainand mergedevinto it.
- Once the changes in
    git checkout main
    git merge dev
Verify the merge:
- Now,
maincontains the changes fromdev. You can check the file to see that the updates are present.
- Now,
(Optional) Delete the
devbranch:- If the work in
devis complete, you can delete the branch:
- If the work in
git branch -d dev
Git Stash

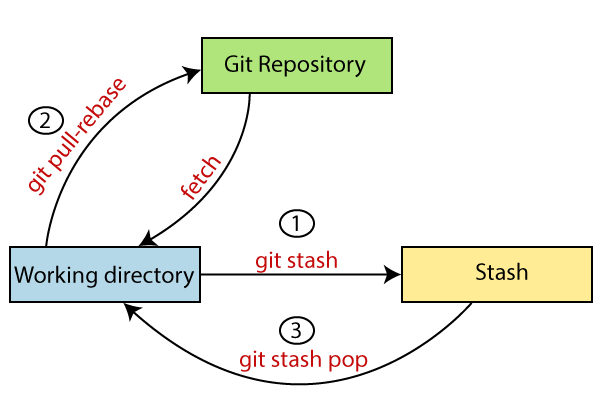
git stash is a Git command used to temporarily save changes that you’re not ready to commit yet. It’s like a “pause button” for your work, allowing you to switch branches, pull changes, or perform other tasks without losing progress on your current work.
When you use git stash, it saves your modified and staged changes to a stack and reverts your working directory to match the last commit. You can return to these changes later by "applying" or "popping" the stash.
Common Commands:
git stash: Save your local changes temporarily and revert the working directory to the last commit.git stash list: Show a list of all stashed changes.git stash apply: Apply the stashed changes back to your working directory while keeping the stash.git stash pop: Apply the stashed changes and remove them from the stash list.git stash drop: Remove a specific stash from the list.git stash clear: Remove all stashes.
Example:
# Stash current changes
git stash

# List stashes
git stash list

# Apply the last stash
git stash apply

# Apply and remove the last stash
git stash pop
Cherry-pick

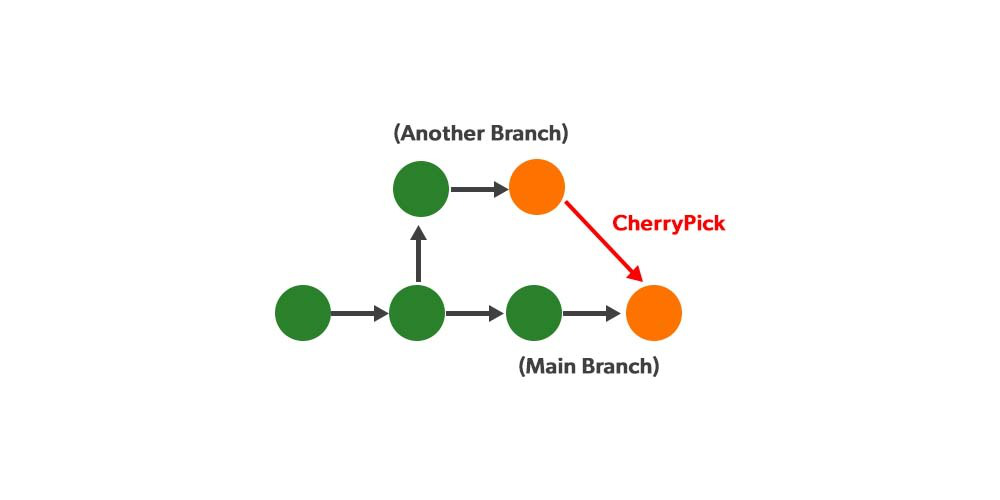
git cherry-pick is a Git command that allows you to apply a specific commit from one branch to another. This is useful when bringing over changes from a particular commit without merging the entire branch.
Usage:
git cherry-pick <commit-hash>
It copies the changes introduced by the specified commit and creates a new commit on the current branch. This helps you selectively move changes across branches.
Resolving Conflicts
Resolving conflicts in Git occurs when changes in branches you're trying to merge, rebase, or cherry-pick affect the same part of a file, making it unclear how to combine them. Git pauses the operation and lets you manually fix the conflicts before continuing.
How to Resolve Conflicts:
Identify conflicts: Git will highlight conflicting files with messages like
CONFLICTin the terminal.Open the conflicting files: You’ll see conflict markers like:
 <<<<<<< HEAD
 Your changes
 =======
 Incoming changes
 >>>>>>> commit-hash
Manually edit the files: Choose which changes to keep or combine both parts as needed, and remove the conflict markers.
Mark the conflict as resolved:
git add <file>Continue the operation (e.g., merge, rebase):
 git commit  # for merge
 # or
 git rebase --continue  # for rebase
Tips:
Use a merge tool: Many IDEs have built-in tools to help resolve conflicts visually.
Review the context: Carefully consider what changes are most appropriate to keep or combine.
Task-01
Create a new branch and make some changes to it.
Use git stash to save the changes without committing them.
Switch to a different branch, make some changes, and commit them.
Use git stash pop to bring the changes back and apply them on top of the new commits.
Steps:
Create a new branch and make changes:
 # Create and switch to a new branch
 git checkout -b new-branch

 # Make some changes to your files
 echo "Changes in new-branch" >> file.txt

 # View the status
 git status
Stash the changes:
 # Save your changes without committing them
 git stash
Switch to a different branch and make changes:
 # Switch to another branch (e.g., `main`)
 git checkout main

 # Make and commit changes in this branch
 echo "Changes in main branch" >> anotherfile.txt
 git add anotherfile.txt
 git commit -m "Commit changes in main branch"
Apply stashed changes using
git stash pop:# Switch back to the original branch git checkout new-branch # Apply the stashed changes git stash pop
The git stash pop command will apply the stashed changes and remove them from the stash list. If there are any conflicts with the new changes in the branch, you'll need to resolve them manually.
Task-02
In version01.txt of the development branch add the below lines after “This is the bug fix in development branch” that you added in Day10 and reverted to this commit.
Line2>> After bug fixing, this is the new feature with minor alterations”
Commit this with the message “ Added feature2.1 in development branch”
Line3>> This is the advancement of the previous feature
Commit this with the message “ Added feature2.2 in development branch”
Line4>> Feature 2 is completed and ready for release
Commit this with the message “ Feature2 completed”
All these commit messages should be reflected in the Production branch too which will come out from the Master branch (Hint: try rebase).
Steps:
Switch to the
developmentbranch:git checkout developmentMake changes in
version01.txt:Add the first line and commit:
  echo "Line2>> After bug fixing, this is the new feature with minor alteration" >> version01.txt
  git add version01.txt
  git commit -m "Added feature2.1 in development branch"
Add the second line and commit:
  echo "Line3>> This is the advancement of previous feature" >> version01.txt
  git add version01.txt
  git commit -m "Added feature2.2 in development branch"
Add the third line and commit:
  echo "Line4>> Feature 2 is completed and ready for release" >> version01.txt
  git add version01.txt
  git commit -m "Feature2 completed"
Create and switch to the
productionbranch frommaster:# Ensure you're on the `master` branch git checkout master # Create and switch to the `production` branch git checkout -b productionRebase the
productionbranch onto thedevelopmentbranch:# Rebase `production` with the changes from `development` git rebase development
Explanation:
The
git rebasethe command applies all commits fromdevelopmentonto theproductionbranch, maintaining the same commit messages.If any conflicts occur during the rebase, Git will pause and prompt you to resolve them before continuing with:
  git add <resolved-file>
  git rebase --continue
This ensures that the history and commit messages are consistent between the
developmentandproductionbranches.
Task-03
In the Production branch Cherry-picked Commit “Added feature2.2 in development branch” and added the below lines in it:
The line to be added after Line3>> This is the advancement of the previous feature
Line 4>>Added a few more changes to make it more optimized.
Commit: Optimized the feature
Steps:
Switch to the
productionbranch:git checkout productionIdentify the commit hash for "Added feature2.2 in development branch":
Switch to the
developmentbranch:git checkout developmentUse
git logto find the commit hash:git log --onelineLocate the commit with the message "Added feature2.2 in development branch" and copy its commit hash (let’s call it
<commit-hash>).
Switch back to the
productionbranch and cherry-pick the commit:git checkout production git cherry-pick <commit-hash>Edit
version01.txtto add the optimization line:Open
version01.txtand add:Line4>> Added few more changes to make it more optimized.Save the file.
Stage and commit the changes:
 git add version01.txt
 git commit --amend -m "Optimized the feature"
Explanation:
git cherry-pick <commit-hash>applies the specified commit fromdevelopmenttoproduction.git commit --amendallows you to modify the previous commit (adding the optimization line) while keeping the message consistent with your new changes.
Subscribe to my newsletter
Read articles from Vanshika Sharma directly inside your inbox. Subscribe to the newsletter, and don't miss out.
Written by

Vanshika Sharma
Vanshika Sharma
I am currently a B.Tech student pursuing Computer Science with a specialization in Data Science at I.T.S Engineering College. I am always excited to learn and explore new things to increase my knowledge. I have good knowledge of programming languages such as C, Python, Java, and web development.