Understanding Kubernetes Pods: A Beginner’s Guide
 Kandlagunta Venkata Siva Niranjan Reddy
Kubernetes has revolutionized the way we deploy, scale, and manage containerized applications. At the heart of Kubernetes is the concept of the Pod, the smallest and most fundamental building block in the Kubernetes architecture. In this blog, we’ll dive deep into Pods, their types, communication methods, storage options, lifecycle phases, and essential commands to manage them.
What is a Pod?
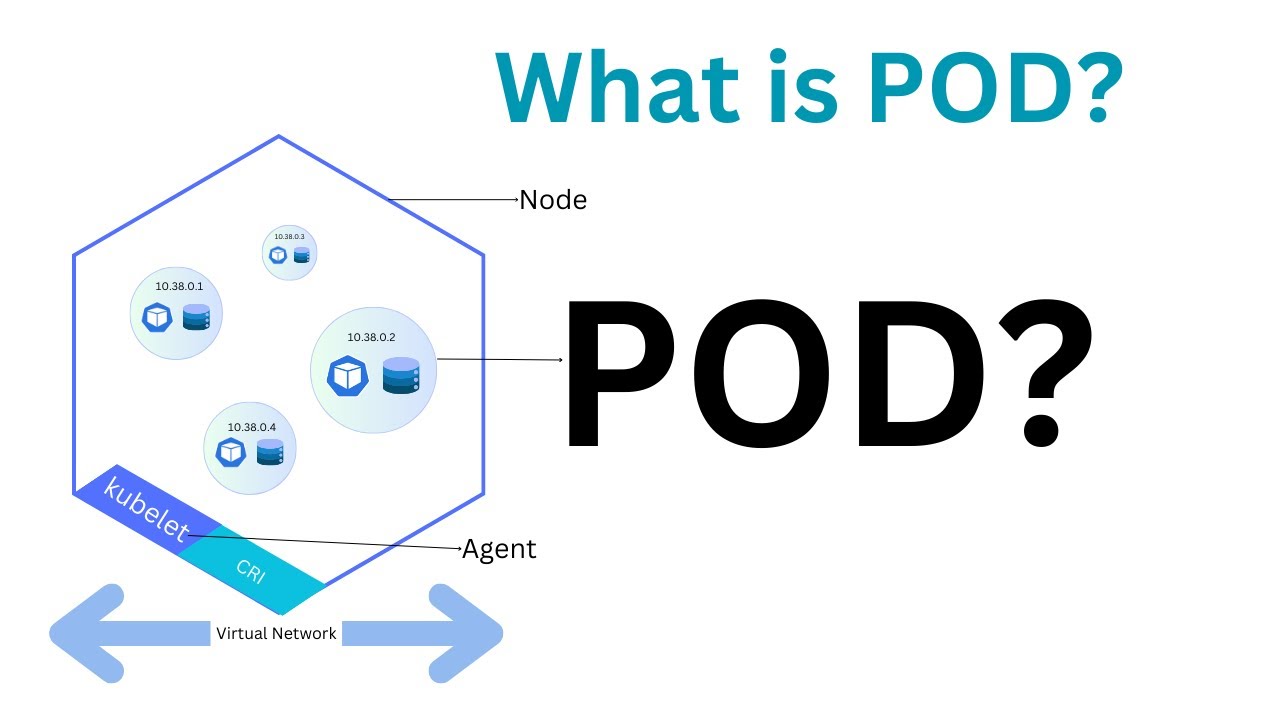
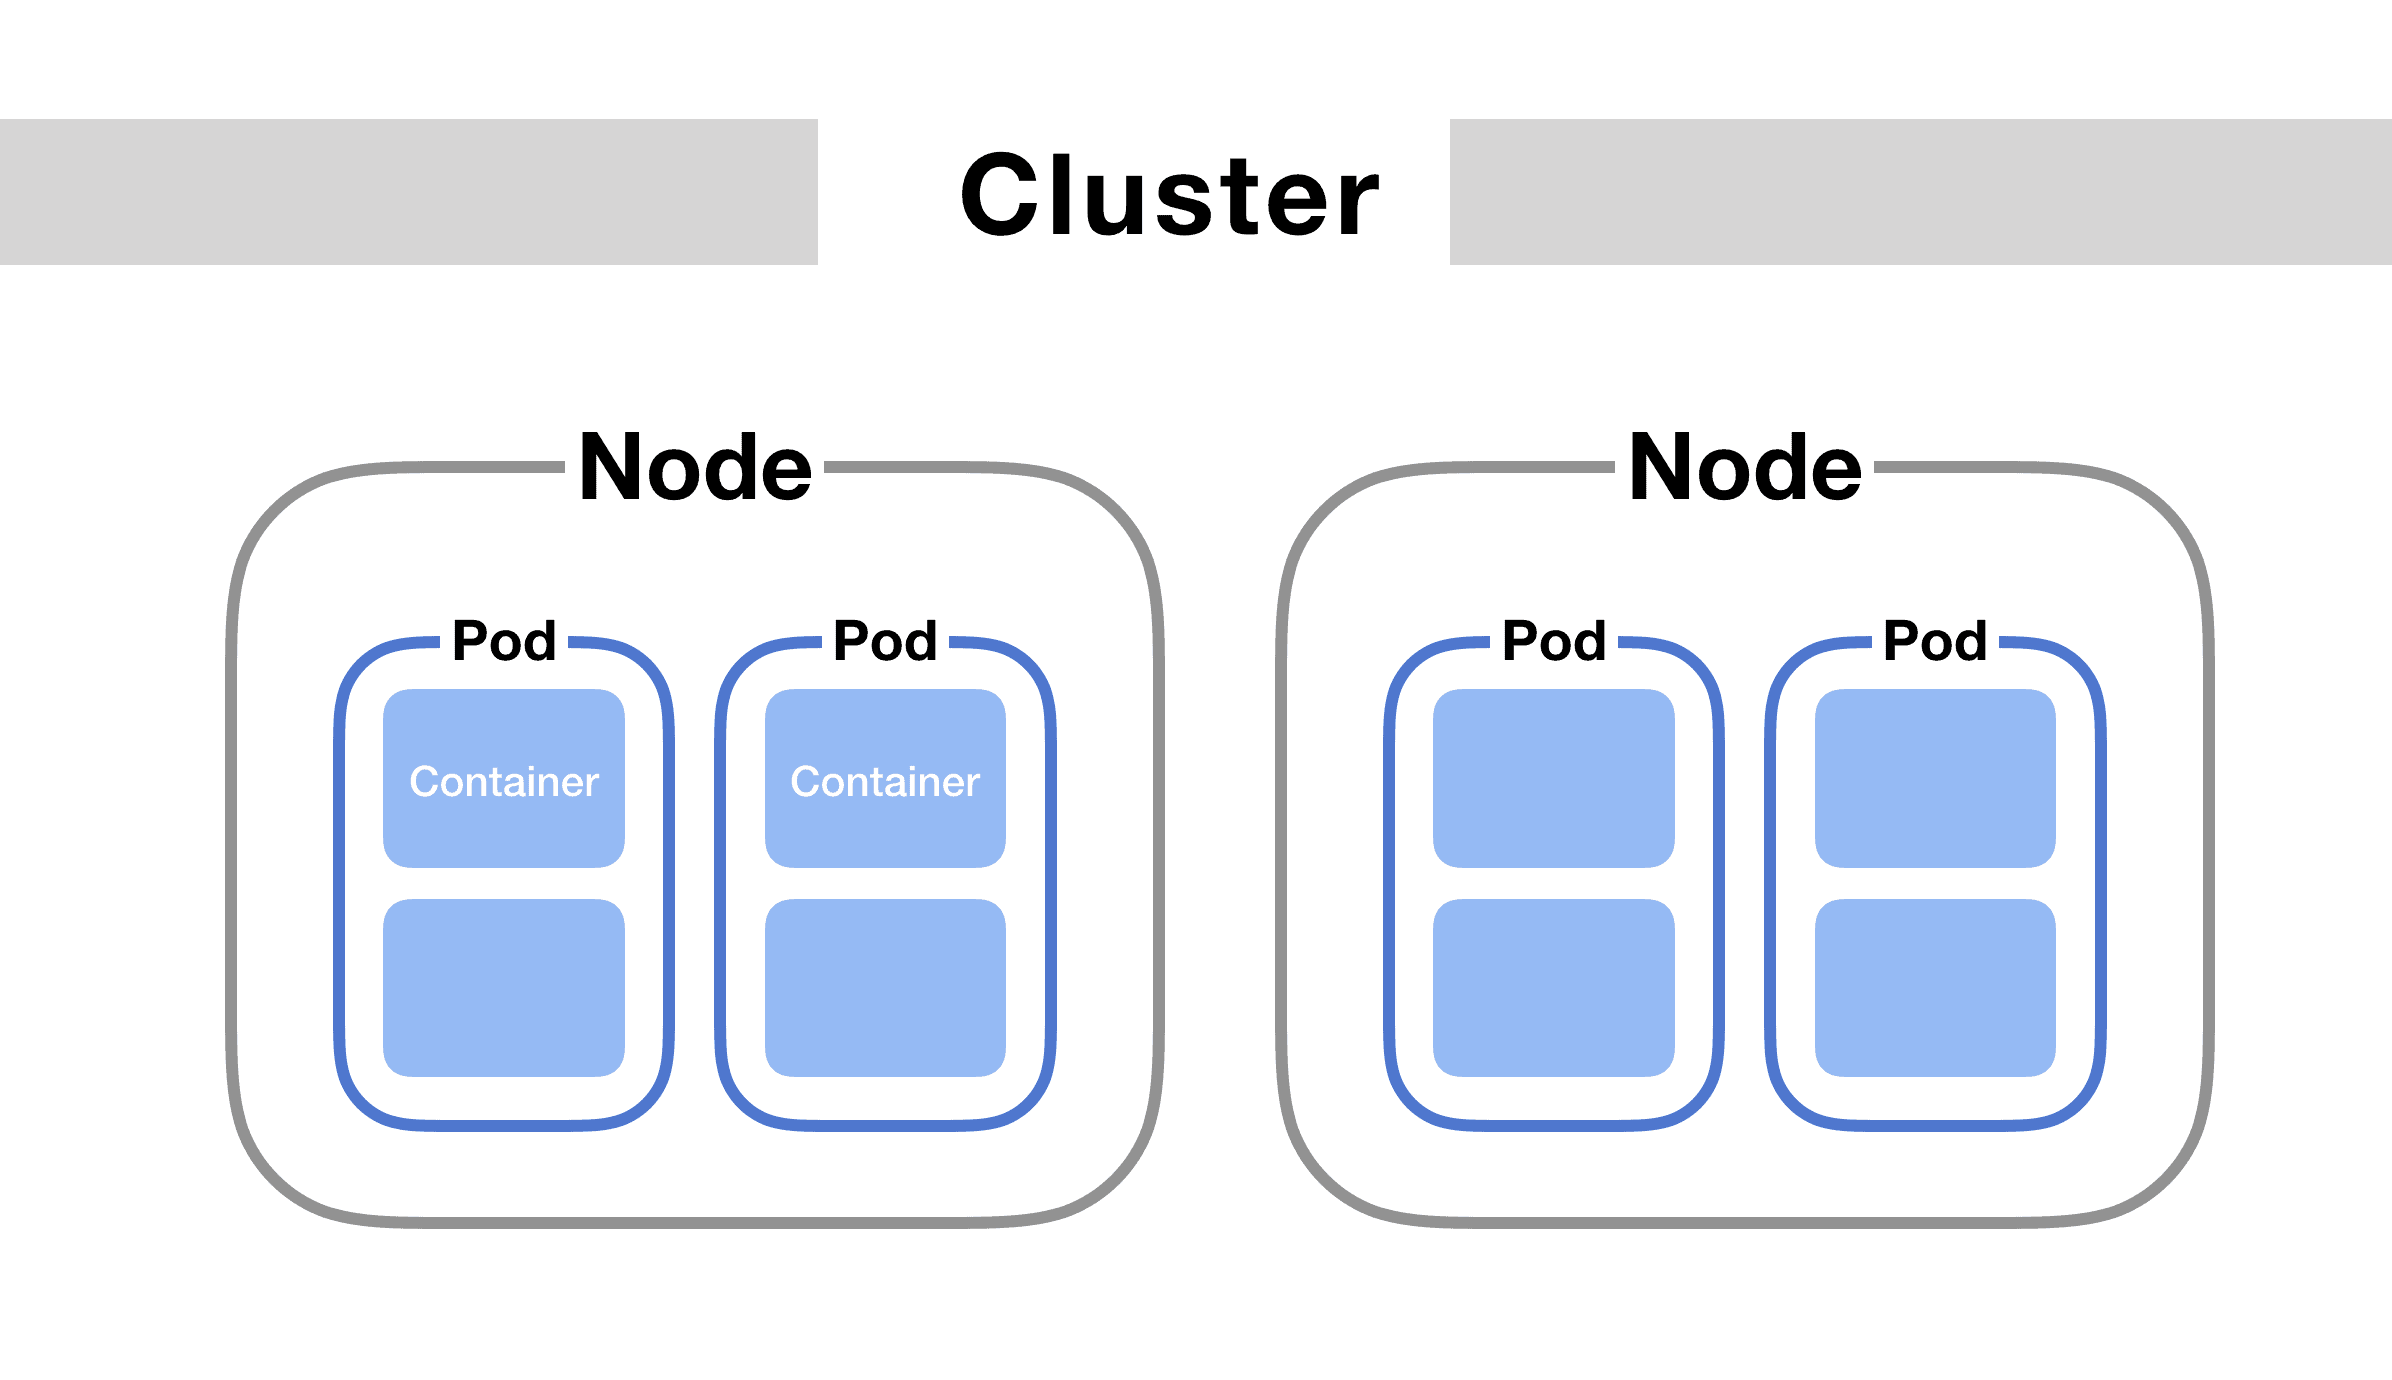
A Pod in Kubernetes represents a running instance of your application and is the smallest deployable unit that you can create and manage in the Kubernetes ecosystem. A Pod can contain one or more containers, typically sharing the same resources, like storage and networking, and are always run on worker nodes (or slave nodes).

Key Features of a Pod:
Namespace Isolation: Pods are logically grouped within namespaces to separate resources in a Kubernetes cluster.
Unique IP Address: Every Pod has its own IP address within the cluster. All containers inside a Pod share this IP address and can communicate with each other using
localhost.
Types of Pods
1. Single-Container Pod
The most common use case is a Pod with only one container. This is usually sufficient for simple applications that do not need to share resources.
Example:
apiVersion: v1
kind: Pod
metadata:
  name: my-pod
spec:
  containers:
  - name: my-container
    image: nginx
    ports:
    - containerPort: 80
2. Multi-Container Pod
In some cases, you may need multiple containers to work closely together. These containers share the same Pod resources (networking and storage) but perform separate processes. A popular pattern for multi-container Pods is the sidecar pattern, where one container enhances or supports the functionality of the main container.
Example:
apiVersion: v1
kind: Pod
metadata:
  name: tomcat-nginx-pod
spec:
  containers:
  - name: tomcat-container
    image: tomcat
    ports:
    - containerPort: 8080
  - name: nginx-container
    image: nginx
    ports:
    - containerPort: 80
Pod-to-Pod Communication
1. Pods on the Same Node
Pods running on the same node can communicate directly using their IP addresses.
2. Pods on Different Nodes
When Pods are running on different nodes, they use the cluster network to communicate. This network setup ensures that your application components can easily connect, no matter where they are deployed in the cluster.
Example: If you create 5 replicas of a Deployment in Kubernetes, those Pods can be scheduled to run on any node in the cluster, making efficient networking crucial.
Pod Lifecycle Phases
Understanding Pod phases helps in troubleshooting and monitoring:
Pending: The Pod is waiting to be scheduled onto a node.
Running: The Pod has been successfully bound to a node, and the containers are running.
Succeeded: All containers in the Pod have successfully terminated.
Failed: All containers have terminated, but at least one has failed.
CrashLoopBackOff: Containers are repeatedly failing and restarting.
Essential kubectl Commands for Managing Pods
1. Creating a Pod
Apply your Pod definition using:
kubectl apply -f my-pod.yaml
2. Listing Pods
Get a list of all running Pods:
kubectl get pods
kubectl get pods -n <namespace>
3. Describing a Pod
View detailed information about a Pod:
kubectl describe pod <pod-name>
kubectl describe pod <pod-name> -n <namespace>
4. Accessing a Pod's Shell
To open a shell session inside a container:
kubectl exec -it <pod-name> -- /bin/bash
For multiple containers, specify the container name:
kubectl exec -it <pod-name> -c <container-name> -- /bin/bash
kubectl exec -it <pod-name> -n <namespace> -c <container-name> -- /bin/bash
5. Listing Pods with Wide Output
Get more detailed information, such as Pod IPs and node locations:
kubectl get pods -o wide
kubectl get pods -n <namespace> -o wide --show-labels
6. Viewing Pod Logs
Check the logs of a specific Pod:
kubectl logs <pod-name>
kubectl logs <pod-name> -n <namespace>
7. Checking Pod Status in YAML Format
kubectl get pod <pod-name> -o yaml
Conclusion
Understanding Kubernetes Pods is crucial for efficiently deploying and managing containerized applications. By mastering Pod configurations, communication methods, and storage options, you’ll be well-equipped to build robust applications. With the kubectl commands listed above, you can effectively manage Pods and ensure your applications run smoothly in a Kubernetes environment.
Subscribe to my newsletter
Read articles from Kandlagunta Venkata Siva Niranjan Reddy directly inside your inbox. Subscribe to the newsletter, and don't miss out.
Written by

