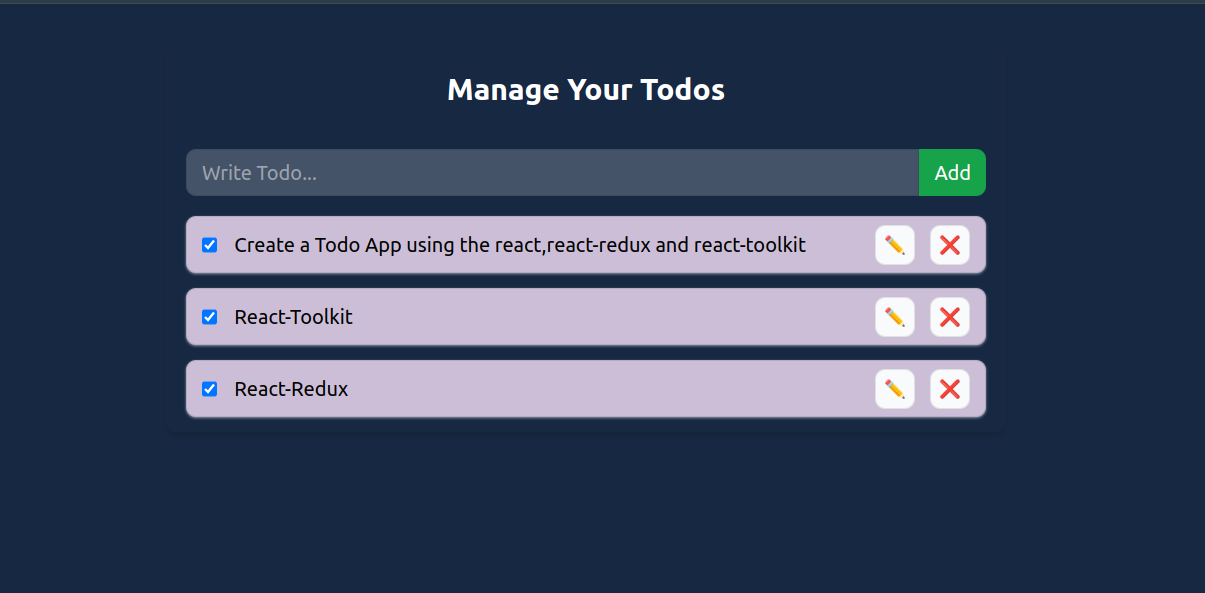
Building a Todo App with React-Redux and Redux Toolkit
 Prathamesh Pichkate
Introduction
In this blog, we’ll explore how to build a simple Todo application with React-Redux and Redux Toolkit. Redux is a popular state management library, and Redux Toolkit provides a more efficient way to work with Redux in modern React applications. By the end of this blog, you’ll understand how to set up a Redux store, create actions and reducers, and connect it all to a React app.
Setting Up Your Project
Initialize the Project
Start with a fresh React app:
  npx create-react-app redux-toolkit-todo
  cd redux-toolkit-todo
Install Redux and Redux Toolkit
Install the required packages:
npm install @reduxjs/toolkit react-redux
Understanding the Redux Structure
Redux primarily revolves around three key components:
Store - The global state container.
Reducers - Functions that define how state changes in response to actions.
Actions - Objects that describe events that modify the state.
Creating the Redux Store
To manage global state, we create a store using Redux Toolkit. This is done in the store.js file.
// src/app/store.js
import { configureStore } from "@reduxjs/toolkit";
import todoReducer from "../features/todo/todoSlice";

export const store = configureStore({
  reducer: todoReducer,
});
Explanation:
configureStore: A method from Redux Toolkit that simplifies the setup of a Redux store. It automatically adds commonly needed middleware.
todoReducer: This reducer is imported from
todoSlice.jsand handles changes to the todo state.
Defining Actions and Reducers with createSlice
In todoSlice.js, we define the initial state, reducers, and actions.
// src/features/todo/todoSlice.js
import { createSlice, nanoid } from "@reduxjs/toolkit";

const initialState = {
  todos: [{ id: 1, text: "hello world" }],
};

export const todoSlice = createSlice({
  name: "todo",
  initialState,
  reducers: {
    addTodo: (state, action) => {
      const todo = {
        id: nanoid(),
        text: action.payload,
      };
      state.todos.push(todo);
    },
    removeTodo: (state, action) => {
      state.todos = state.todos.filter((todo) => todo.id !== action.payload);
    },
  },
});

export const { addTodo, removeTodo } = todoSlice.actions;
export default todoSlice.reducer;
Explanation:
createSlice: This function simplifies creating a slice of the Redux state by automatically generating action creators and action types.
name: The slice name, which will be used as a prefix for action types.
initialState: The initial state of our slice. Here,
todosstarts with one item.reducers: Defines how the state is updated. Each function in
reducersautomatically has access to the state.addTodo: Takes a
payloadwith the todo text and appends a new todo item.removeTodo: Filters out the todo item with the specified
id.
Creating Components
Now that we have our store and reducers set up, we’ll create two components: AddTodoCreate and Todos.
1. AddTodoCreate Component
// src/components/AddTodoCreate.js
import { useState } from "react";
import { useDispatch } from "react-redux";
import { addTodo } from "../features/todo/todoSlice";

function AddTodoCreate() {
  const [input, setInput] = useState("");
  const dispatch = useDispatch();

  const addTodoHandler = (e) => {
    e.preventDefault();
    dispatch(addTodo(input));
    setInput("");
  };

  return (
    <form onSubmit={addTodoHandler} className="space-x-3 mt-12">
      <input
        type="text"
        placeholder="Enter a Todo..."
        value={input}
        onChange={(e) => setInput(e.target.value)}
      />
      <button type="submit">Add Todo</button>
    </form>
  );
}

export default AddTodoCreate;
Explanation:
useDispatch: A hook that returns the dispatch function, used to send actions to the store.
addTodoHandler: A function to handle form submission. It dispatches
addTodo, which adds the new item to the Redux store.
2. Todos Component
// src/components/Todos.js
import { useSelector, useDispatch } from "react-redux";
import { removeTodo } from "../features/todo/todoSlice";

function Todos() {
  const todos = useSelector((state) => state.todos);
  const dispatch = useDispatch();

  return (
    <ul>
      {todos.map((todo) => (
        <li key={todo.id}>
          <span>{todo.text}</span>
          <button onClick={() => dispatch(removeTodo(todo.id))}>Delete</button>
        </li>
      ))}
    </ul>
  );
}

export default Todos;
Explanation:
useSelector: A hook that selects a value from the Redux state. Here, it retrieves the
todosarray from the store.removeTodo: This action removes the todo with the specific
id.
Setting Up App and Main Files
In App.js, we bring everything together and render both AddTodoCreate and Todos components.
// src/App.js
import AddTodoCreate from "./components/AddTodoCreate";
import Todos from "./components/Todos";

function App() {
  return (
    <>
      <h1>Redux Toolkit Todo App</h1>
      <AddTodoCreate />
      <Todos />
    </>
  );
}

export default App;
In main.js, we wrap the entire app in a Provider component to make the Redux store accessible throughout the app.
// src/main.js
import React from "react";
import { createRoot } from "react-dom/client";
import "./index.css";
import App from "./App";
import { Provider } from "react-redux";
import { store } from "./app/store";

createRoot(document.getElementById("root")).render(
  <Provider store={store}>
    <App />
  </Provider>
);
Conclusion
This blog has covered:
Setting up Redux Toolkit in a React app.
Creating actions, reducers, and slices.
Dispatching actions to manage a global Todo state.
By following these steps, you now have a working Todo app with Redux Toolkit. With Redux Toolkit’s simplified syntax, managing state in React has never been easier. Try experimenting with more features to further deepen your understanding!
Happy Coding!
Subscribe to my newsletter
Read articles from Prathamesh Pichkate directly inside your inbox. Subscribe to the newsletter, and don't miss out.
Written by

Prathamesh Pichkate
Prathamesh Pichkate
MERN STACK DEVELOPER