RUN Moodle LMS as a Container with Docker Compose
 OLUWASEUN
Moodle is a widely adopted open-source Learning Management System (LMS) known for its flexibility, extensive customization options, and significant community support. Used by educational institutions, corporations, and government organizations worldwide, Moodle provides a robust platform for online learning and training. Its open-source nature allows organizations to tailor the system to fit their educational needs, from customizing the appearance and structure to integrating specialized tools and plugins.
Moodle can be installed on most Linux and Windows servers as a PHP-based application with a MySQL or PostgreSQL backend. However, managing Moodle on traditional servers requires manual setup, updates, and monitoring. This can be time-consuming and challenging, particularly when scaling to meet increasing demand or managing instances across multiple environments.
Why Run Moodle as a Docker Container?
Running Moodle as a Docker container introduces several benefits, especially in today’s cloud-centric environments. Here are some key reasons to consider containerizing Moodle:
Simplified Deployment and Setup
Docker containers package Moodle with all its dependencies, making setup fast and repeatable. With a pre-built Docker image, you can deploy Moodle in minutes rather than manually configuring a server, web server, Database, and PHP environment.Consistency Across Environments
Containers provide a consistent environment, meaning the Moodle instance you run on your local machine will behave the same in staging and production environments. This consistency reduces “it works on my machine” issues and simplifies testing and debugging.Scalability and Load Balancing
With Docker, it’s easier to scale Moodle horizontally by running multiple instances behind a load balancer. This is particularly helpful for institutions experiencing high traffic or managing multiple classes and users. Each container can scale independently, improving the overall responsiveness of the LMS.Improved Resource Management
Docker containers are lightweight compared to virtual machines. This efficiency can lead to lower resource usage and costs, as containers share the host OS kernel rather than running separate operating systems, making them ideal for cloud deployments and environments with limited resources.Efficient Updates and Rollbacks
With Docker, updating Moodle can be as simple as pulling a new image version and restarting the container. If an update causes issues, you can quickly roll back to a previous version, ensuring minimal downtime and improved reliability.Enhanced Security and Isolation
Docker containers run in isolated environments, limiting potential vulnerabilities within Moodle to the container itself. This isolation can be beneficial if you run multiple instances of Moodle or other applications on the same server.
Containerizing Moodle LMS Application
Based on the Moodle Documentation, some software requirements are essential to Installing Moodle Successfully.
The Latest version of Moodle requires the following:
| Requirement | Details |
| Moodle Upgrade | Moodle 4.1.2 or later. |
| PHP Version | Minimum PHP 8.1.0 (Minimum version has increased since Moodle 4.3). PHP 8.3.x is also supported. |
| PHP Extension | sodium extension is required. |
| PHP Setting | max_input_vars must be ≥ 5000. |
| PHP Variants | Only 64-bit versions of PHP are supported (Changed since Moodle 4.1). |
| Database Requirements | Moodle supports the following databases (minimum versions shown, latest version recommended): |
| PostgreSQL | 13 (increased since Moodle 4.1) |
| MySQL | 8.0 (increased since Moodle 4.1) |
| MariaDB | 10.6.7 (increased since Moodle 4.1) |
| Microsoft SQL Server | 2017 |
| Oracle Database | 19c (increased since Moodle 4.3) |
| Client Requirements | Moodle is compatible with any standards-compliant web browser. Tested with the following: |
| Desktop Browsers | Chrome, Firefox, Safari, Edge |
| Mobile Browsers | MobileSafari, Google Chrome |
Based on the above requirement, it is clear that Moodle works on the LAMP Stack Model: Linux, Apache, MySQL/MariaDB, and PHP. That means all these tools needed to be installed for Moodle to run. The requirement remains the same whether you’re running Moodle directly on a server or as a container.
Environment Setup and Pre-requisite
AWS Account
Docker Install on EC2 Instance (t2.micro)
VPC and Internet Gateway setup
Security Group configuration with Port 80 and 8080
Setup
Login to your AWS Account and choose any region of your choice
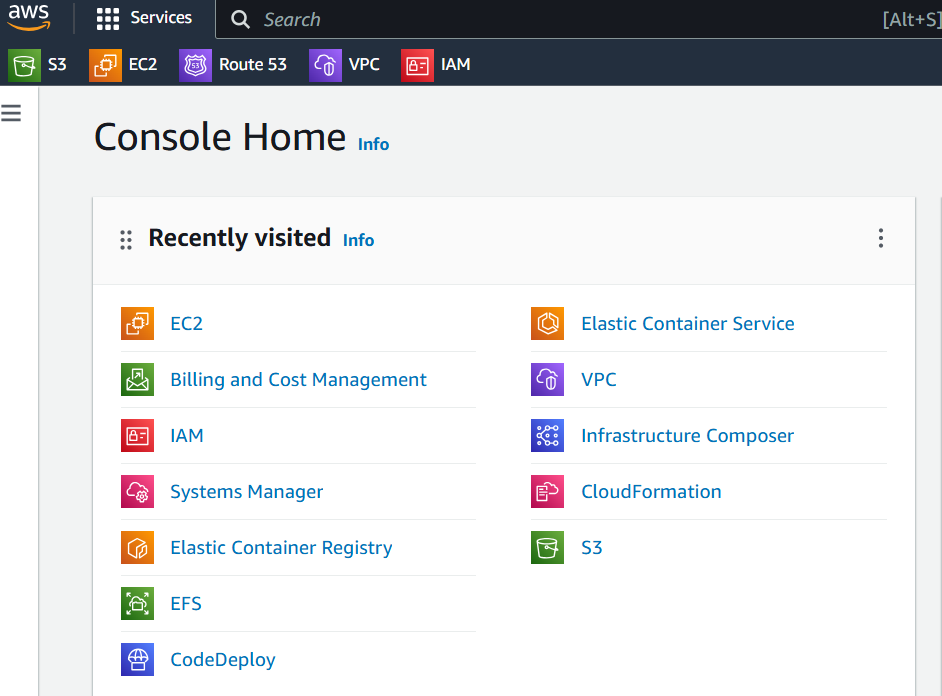
Navigate to the EC2 Instance Page and Spin up a t2.micro instance with Ubuntu 24.04 Image
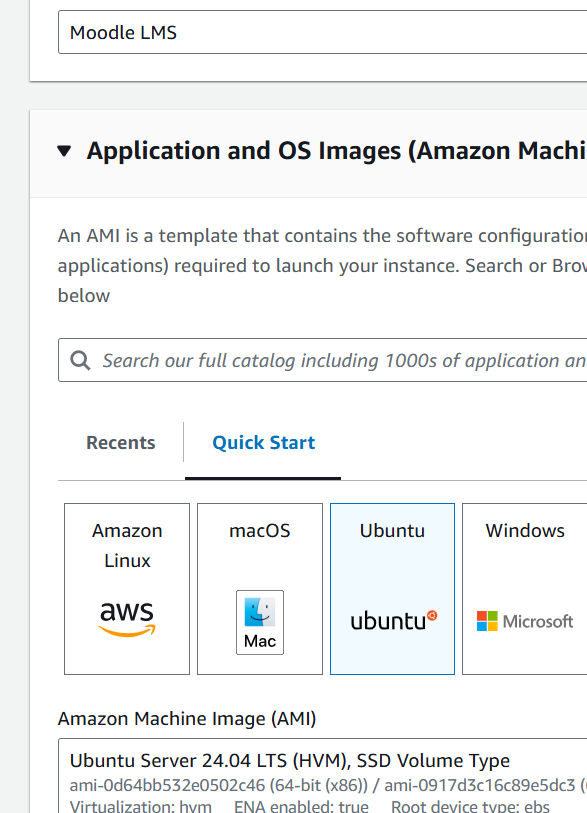
To speed up the docker installation, scroll down to the Advanced details section, navigate to userdata and paste the shell script below to install Docker.
  #!/bin/bash

  # Add Docker's official GPG key:
  sudo apt update -y
  sudo apt install -y ca-certificates curl
  sudo install -m 0755 -d /etc/apt/keyrings -y
  sudo curl -fsSL https://download.docker.com/linux/ubuntu/gpg -o /etc/apt/keyrings/docker.asc
  sudo chmod a+r /etc/apt/keyrings/docker.asc

  # Add the repository to Apt sources:
  echo \
    "deb [arch=$(dpkg --print-architecture) signed-by=/etc/apt/keyrings/docker.asc] https://download.docker.com/linux/ubuntu \
    $(. /etc/os-release && echo "$VERSION_CODENAME") stable" | \
    sudo tee /etc/apt/sources.list.d/docker.list > /dev/null
  sudo apt update -y

  sudo apt install -y docker-ce docker-ce-cli containerd.io docker-buildx-plugin docker-compose-plugin
  sudo usermod -aG docker ubuntu
  sudo systemctl restart docker
Check again to ensure all the necessary options have been selected: Security Group, Key Pair and all other essentials. Then, click on the launch instance button.

SSH into your instance and check if Docker was installed correctly

Moodle Dockerfile and Docker Compose file
Since Moodle is running as a container and has other dependencies like Database that need to run as a container, then docker-compose would be an ideal choice for this use case.
Moodle Dockerfile
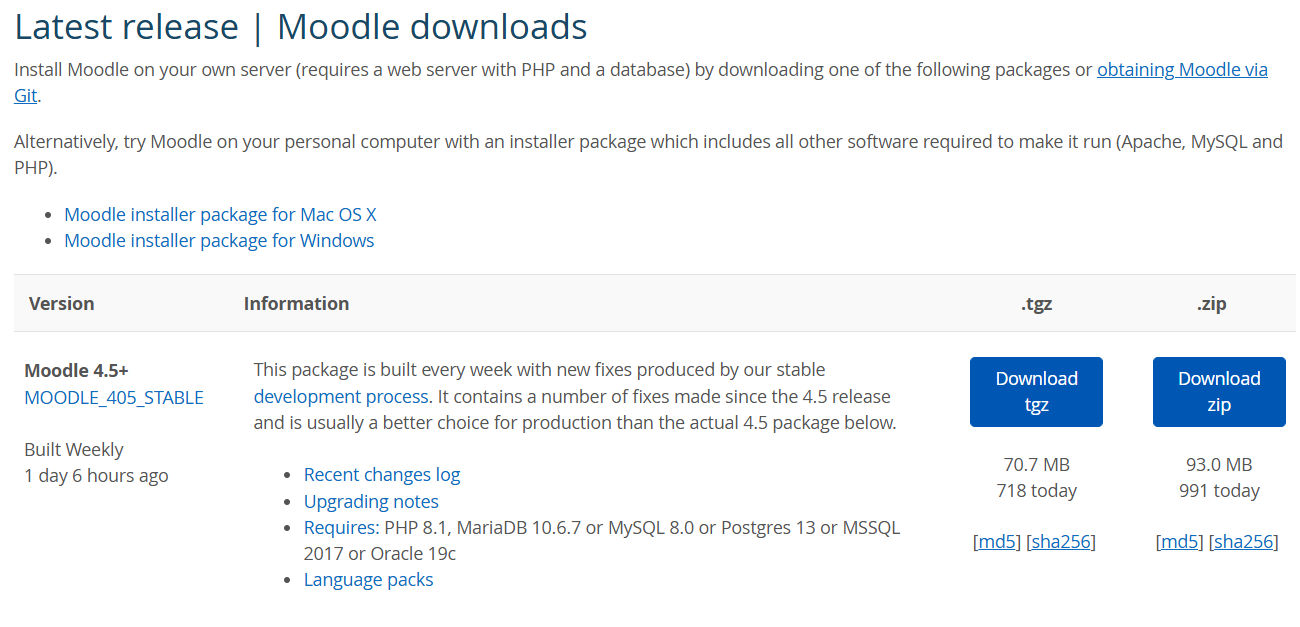
There are two primary ways to install Moodle on the Moodle Installation page.
Download the .tgz or.zip file
Obtain via Git
For our use case, we will go with Obtaining via Git since we’re running Moodle as a Docker Container. Below is the Moodle Single Stage Dockerfile with a detailed explanation.
# Use the official PHP 8.3 image as a base
FROM php:8.3-apache

# Install necessary packages and extensions
RUN apt-get update && \
    apt-get install -y --no-install-recommends unzip git curl libzip-dev libjpeg-dev libpng-dev libfreetype6-dev libicu-dev libxml2-dev

# Configure PHP extensions
RUN docker-php-ext-configure gd --with-freetype --with-jpeg && \
    docker-php-ext-install mysqli zip gd intl soap exif && \
    docker-php-ext-enable mysqli zip gd intl soap exif

# Clean up to reduce image size
RUN apt-get clean && rm -rf /var/lib/apt/lists/*

# Clone the Moodle repository and check out the desired branch
RUN git clone git://git.moodle.org/moodle.git && \
    cd moodle && \
    git branch --track MOODLE_405_STABLE origin/MOODLE_405_STABLE && \
    git checkout MOODLE_405_STABLE && \
    cp -rf ./* /var/www/html/

# Set PHP configurations
RUN echo "max_input_vars=5000" >> /usr/local/etc/php/conf.d/docker-php-moodle.ini && \
    echo "opcache.enable=1" >> /usr/local/etc/php/conf.d/docker-php-moodle.ini

# Create the moodledata directory
RUN mkdir -p /var/www/moodledata

# Set working directory
WORKDIR /var/www/html

# Set correct permissions
RUN chown -R www-data:www-data /var/www/ && \
    chmod -R 755 /var/www

# Expose port 80
EXPOSE 80
Base Image Selection
FROM php:8.3-apache- Uses the official PHP 8.3 image with Apache as the base image. This image includes PHP 8.3 and the Apache web server.
Install Necessary Packages and Extensions
 RUN apt-get update && \
     apt-get install -y --no-install-recommends unzip git curl libzip-dev libjpeg-dev libpng-dev libfreetype6-dev libicu-dev libxml2-dev
Updates the package lists and installs essential packages for Moodle and PHP extensions.
unzip,git,curl: Utilities to manage files and repositories.libzip-dev,libjpeg-dev,libpng-dev,libfreetype6-dev,libicu-dev,libxml2-dev: Libraries PHP extensions are required for file handling, image processing, internationalization, and XML processing.
Configure and Install PHP Extensions
 RUN docker-php-ext-configure gd --with-freetype --with-jpeg && \
     docker-php-ext-install mysqli zip gd intl soap exif && \
     docker-php-ext-enable mysqli zip gd intl soap exif
Configures and installs several PHP extensions needed by Moodle:
gd(with FreeType and JPEG support) for image processing.mysqliFor MySQL database support.zipFor handling zip archives.intlFor internationalization.soapFor SOAP protocol.exifFor reading metadata from images.
The extensions are enabled after installation.
Clean Up
RUN apt-get clean && rm -rf /var/lib/apt/lists/*- Cleans up the
aptcache and remove unnecessary package list files to reduce the final image size.
- Cleans up the
Clone the Moodle Repository
 RUN git clone git://git.moodle.org/moodle.git && \
     cd moodle && \
     git branch --track MOODLE_405_STABLE origin/MOODLE_405_STABLE && \
     git checkout MOODLE_405_STABLE && \
     cp -rf ./* /var/www/html/
Clones the Moodle Git repository.
Creates a new branch
MOODLE_405_STABLEand checks it out to use Moodle’s stable version 4.0.5.Copies Moodle files to
/var/www/htmlthe Apache image's default directory for web files.
Set PHP Configurations
 RUN echo "max_input_vars=5000" >> /usr/local/etc/php/conf.d/docker-php-moodle.ini && \
     echo "opcache.enable=1" >> /usr/local/etc/php/conf.d/docker-php-moodle.ini
Configures PHP settings needed for Moodle:
Sets
max_input_varsto 5000 to support larger forms.Enables
opcachefor improved PHP performance.
Create the Moodle Data Directory
RUN mkdir -p /var/www/moodledata- Creates the
moodledatadirectory, where Moodle stores uploaded files and other generated data.
- Creates the
Set Working Directory
WORKDIR /var/www/html- Sets the working directory to
/var/www/htmlso any following commands will be executed within this directory.
- Sets the working directory to
Set Correct Permissions
 RUN chown -R www-data:www-data /var/www/ && \
     chmod -R 755 /var/www
Sets ownership of
/var/www/to thewww-datauser and group (the default user for Apache).Sets the permissions to allow the
www-datauser to read and execute permissions, improving security.
Expose Port 80
EXPOSE 80- Exposes port 80, the default port for HTTP, so that the container can serve the Moodle application over this port.
Docker Compose file
Since Moodle is not a standalone container, docker-compose is the right tool to start multiple containers simultaneously. Below is the Docker compose file with a detailed explanation:
services:
  moodleapp:
    build:
      context: .
    image: moodleapp:1.0
    container_name: moodleapp
    ports:
      - 80:80
    volumes:
      - moodledata:/var/www/moodledata
    depends_on:
      - moodledb
  # MySQL DB Service
  moodledb:
    image: mysql:8.0.36
    container_name: clouddb
    environment:
      MYSQL_ROOT_PASSWORD: ${MYSQL_ROOT_PASSWORD}
      MYSQL_DATABASE: ${MYSQL_DATABASE}
      MYSQL_USER: ${MYSQL_USER}
      MYSQL_PASSWORD: ${MYSQL_PASSWORD}
    volumes:
      - clouddbdata:/var/lib/mysql

  # phpmyadmin to Manage MySQL DB
  phpmyadmin:
    image: phpmyadmin
    container_name: phpmyadmin
    restart: always
    ports:
      - "8081:80"
    environment:
      PMA_HOST: clouddb
      PMA_PORT: 3306
      PMA_USER: ${MYSQL_USER}
      PMA_PASSWORD: ${MYSQL_PASSWORD}
    depends_on:
      - moodledb

volumes:
  clouddbdata:
  moodledata:
Services
moodleapp(Moodle Application Service)moodleapp: build: context: . image: moodleapp:1.0 container_name: moodleapp ports: - 80:80 volumes: - moodledata:/var/www/moodledata depends_on: - moodledbBuild: The
buildcontext is set to the current directory (.), indicating that a Dockerfile in this directory will be used to build the image.Image: Names the image
moodleapp:1.0for easy identification and reusability.Container Name: Names the container
moodleappfor consistent reference in other configurations.Ports: Maps port
80on the host to port80on the container, enabling access to Moodle viahttp://localhost.Volumes: Mounts a Docker volume
moodledatato/var/www/moodledatainside the container, allowing Moodle’s data to persist outside the container lifecycle.Depends On: Ensures
moodledb(database service) starts beforemoodleapp, as the application relies on the Database to function correctly.
moodledb(MySQL Database Service)moodledb: image: mysql:8.0.36 container_name: clouddb environment: MYSQL_ROOT_PASSWORD: ${MYSQL_ROOT_PASSWORD} MYSQL_DATABASE: ${MYSQL_DATABASE} MYSQL_USER: ${MYSQL_USER} MYSQL_PASSWORD: ${MYSQL_PASSWORD} volumes: - clouddbdata:/var/lib/mysqlImage: Specify the
mysql:8.0.36image using version 8.0.36 for compatibility with Moodle.Container Name: Names the container
clouddb, making it easier to reference in other services.Environment Variables: Defines MySQL environment variables:
MYSQL_ROOT_PASSWORD,MYSQL_DATABASE,MYSQL_USER, andMYSQL_PASSWORDare set through environment variables, allowing the values to be configured outside this file for security and flexibility.
Volumes: Attaches a Docker volume
clouddbdatato/var/lib/mysqlto persist MySQL data across container restarts or recreations.
phpmyadmin(phpMyAdmin Service for Database Management)phpmyadmin: image: phpmyadmin container_name: phpmyadmin restart: always ports: - "8081:80" environment: PMA_HOST: clouddb PMA_PORT: 3306 PMA_USER: ${MYSQL_USER} PMA_PASSWORD: ${MYSQL_PASSWORD} depends_on: - moodledbImage: This is the official image used to manage MySQL databases via a web interface.
Container Name: Names the container
phpmyadminfor easier reference.Restart: Set the restart policy to
alwaysEnsure phpMyAdmin restarts if it crashes or the server reboots.Ports: Maps port
8081on the host to port80on the container, allowing access to phpMyAdmin athttp://localhost:8081.Environment Variables:
PMA_HOST: Connects phpMyAdmin to theclouddbMySQL database container.PMA_PORT,PMA_USER, andPMA_PASSWORD: Configure the MySQL connection details for phpMyAdmin.
Depends On: Ensures that
moodledbstarts beforephpmyadmin, as phpMyAdmin requires the Database to run.
Volumes
volumes:
  clouddbdata:
  moodledata:
clouddbdata: Persistent volume for MySQL data storage, ensuring data is retained across container recreations.
moodledata: Persistent volume for Moodle data storage, ensuring uploaded files and generated content are preserved.
Starting Moodle LMS and MySQL with Docker Compose
Now that we have Moodle Dockerfile and Compose.yml file ready, let’s clone the repo and RUN the docker-compose file
git clone -b docker-projects https://github.com/seunayolu/docker-project.git
cd docker-project/moodle/moodle-run

Since the docker-compose environment variable is parameterized, we need to have an environment variable file that docker can read to get the values of the defined variable in the compose.yml file. Below is an example .env file for docker-compose
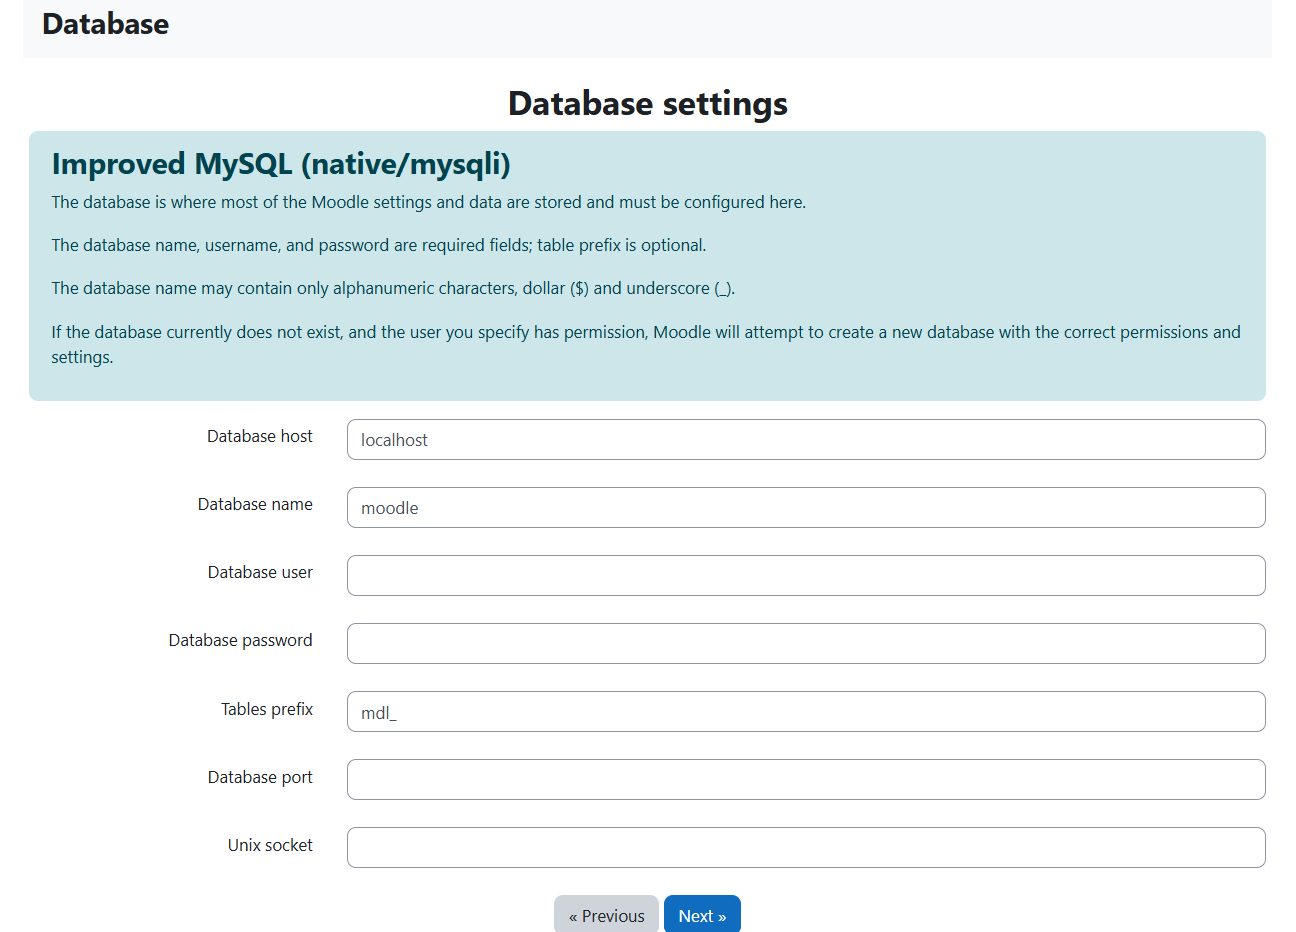
MYSQL_ROOT_PASSWORD=mysql-rootpass
MYSQL_DATABASE=moodlelms
MYSQL_USER=moodle-admin
MYSQL_PASSWORD=moodle-dbpass
PMA_PASSWORD=moodle-dbpass
PMA_USER=moodle-admin
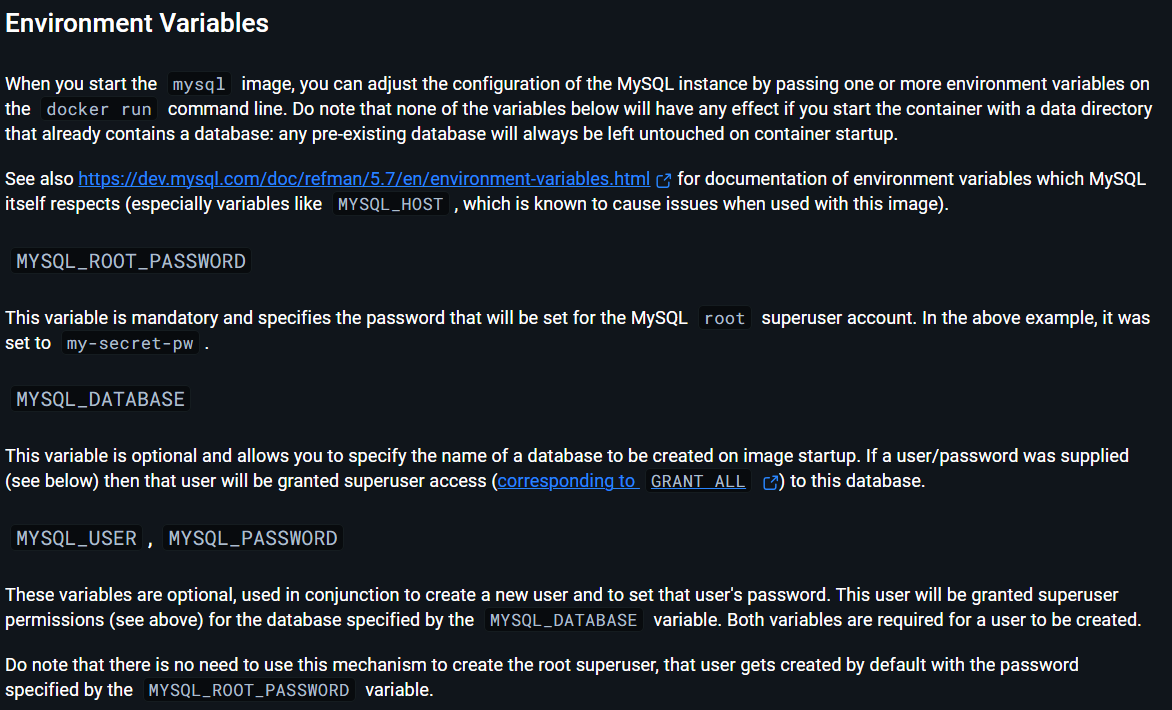
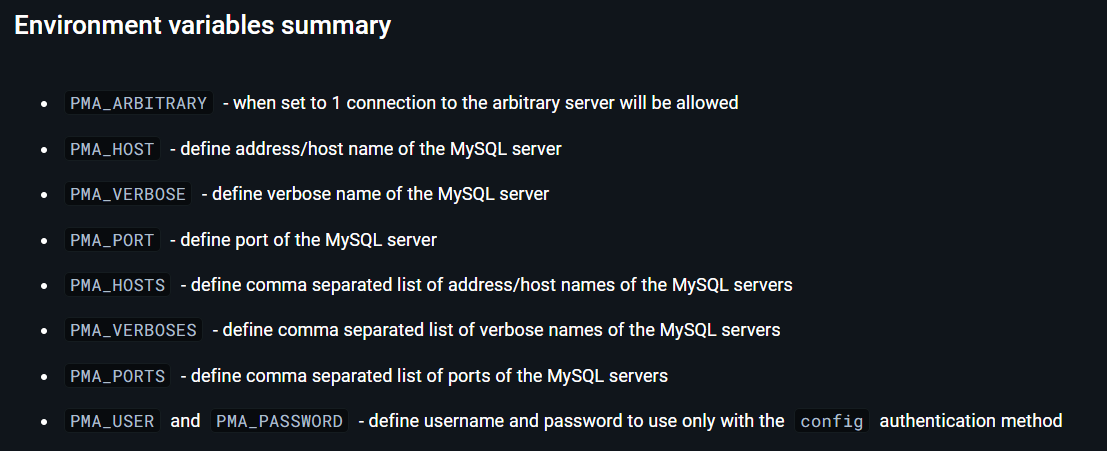
Kindly note that the variables used here can be found on the Docker Hub Website for each Docker image used here.
MYSQL
PHP MYADMIN
Copy the .env file and create a docker-compose.env file on your EC2 instance and paste the content, and then save.

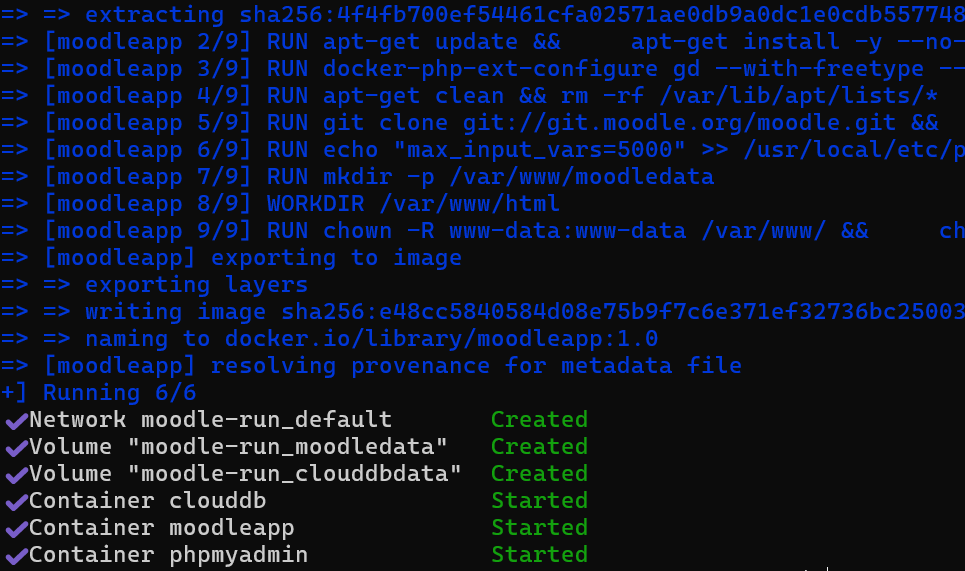
Now that we have all we need, let’s build and run our container using docker-compose. Here is the command:
# Build an Image from Dockerfile in the current working Directory then start all
# The Services defined in the compose file as a container
docker compose --env-file docker-compose.env up --build -d
Install Moodle LMS and Access Phpmyadmin
Access the docker container using the below command:
docker ps

CONTAINER ID   IMAGE           COMMAND                  CREATED          STATUS          PORTS
   NAMES
6f3d88e7184a   moodleapp:1.0   "docker-php-entrypoi…"   27 seconds ago   Up 25 seconds   0.0.0.0:80->80/tcp     moodleapp
32edce1756be   phpmyadmin      "/docker-entrypoint.…"   27 seconds ago   Up 25 seconds   0.0.0.0:8081->80/tcp   phpmyadmin
66565cab87c2   mysql:8.0.36    "docker-entrypoint.s…"   28 seconds ago   Up 26 seconds   3306/tcp, 33060/tcp    clouddb
Let’s access the phpmyadmin:

Let’s access Moodle LMS and Install:
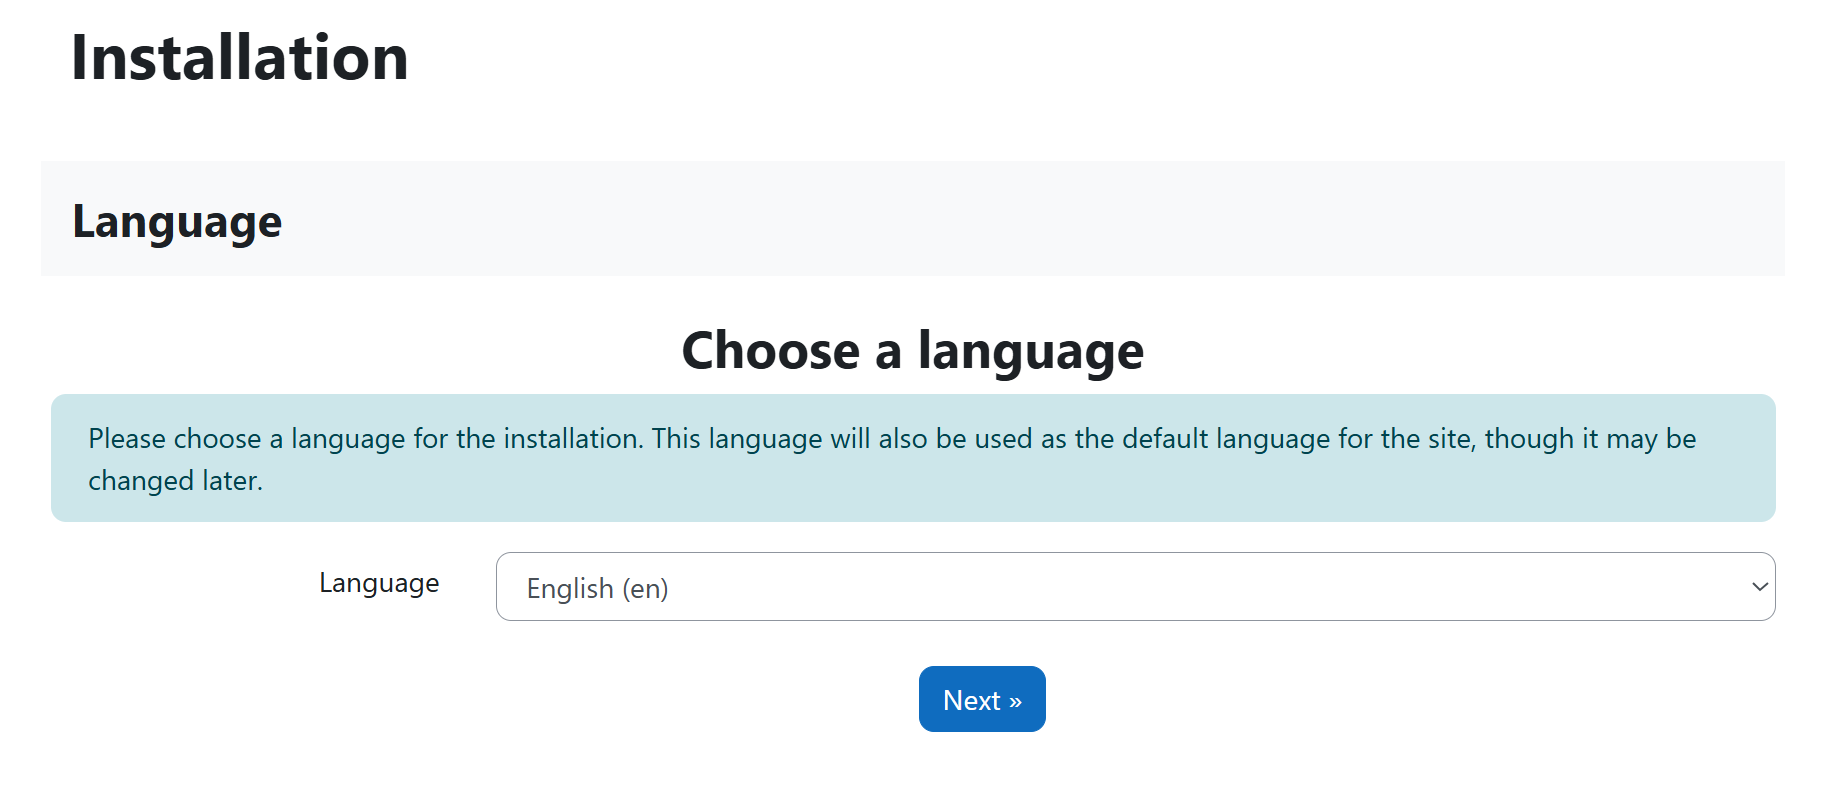
The Next Page:
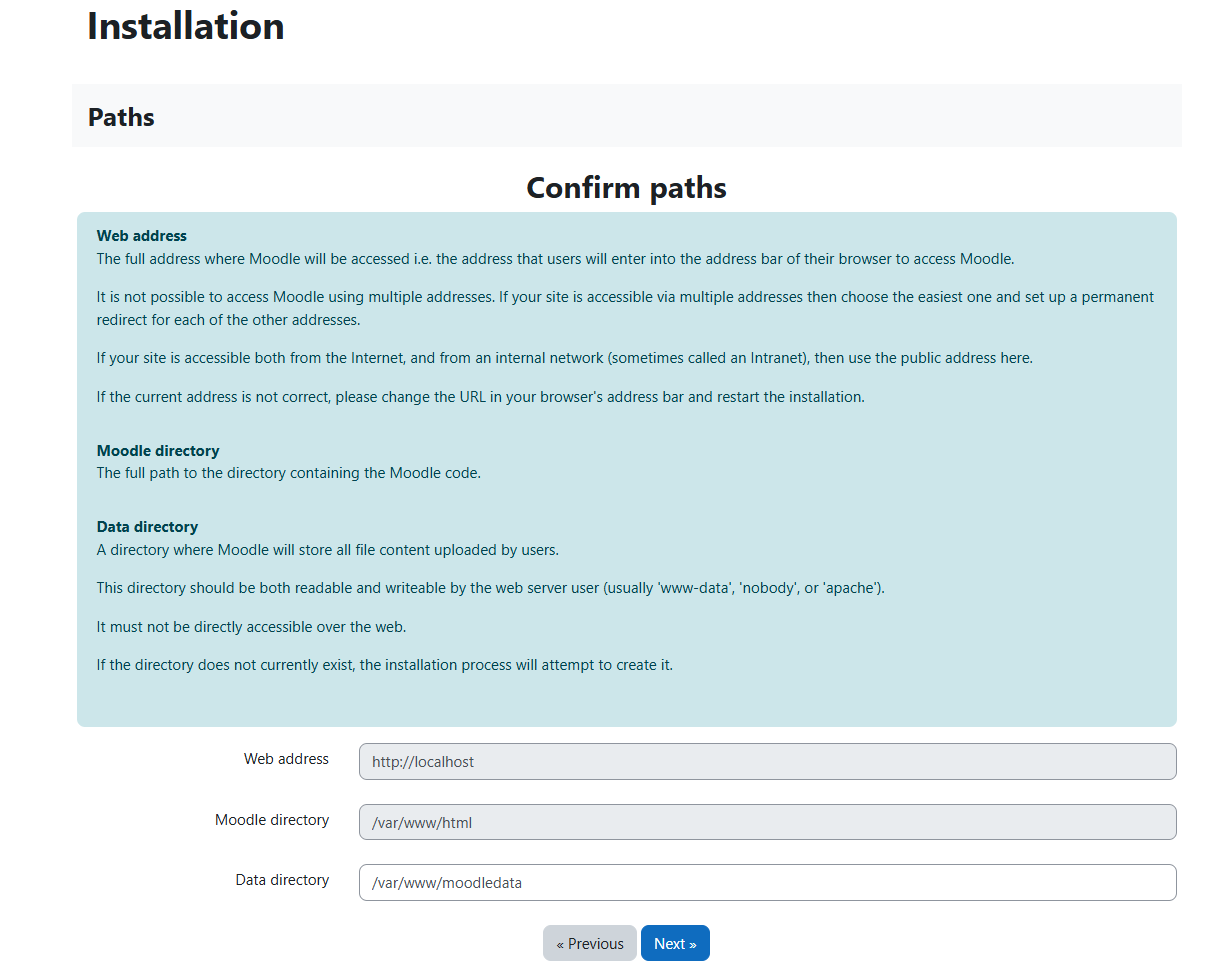
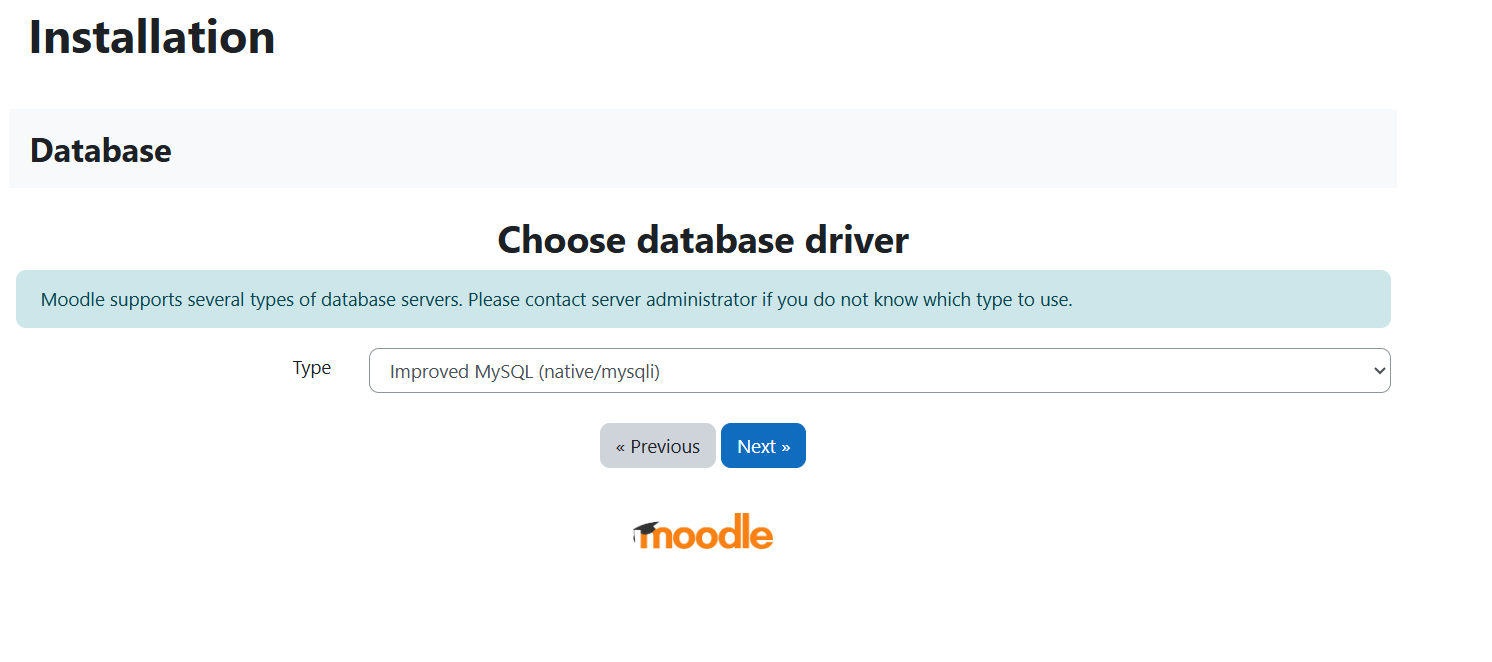
Let’s select the MySQL Database Engine:
Enter the Database Credentials:
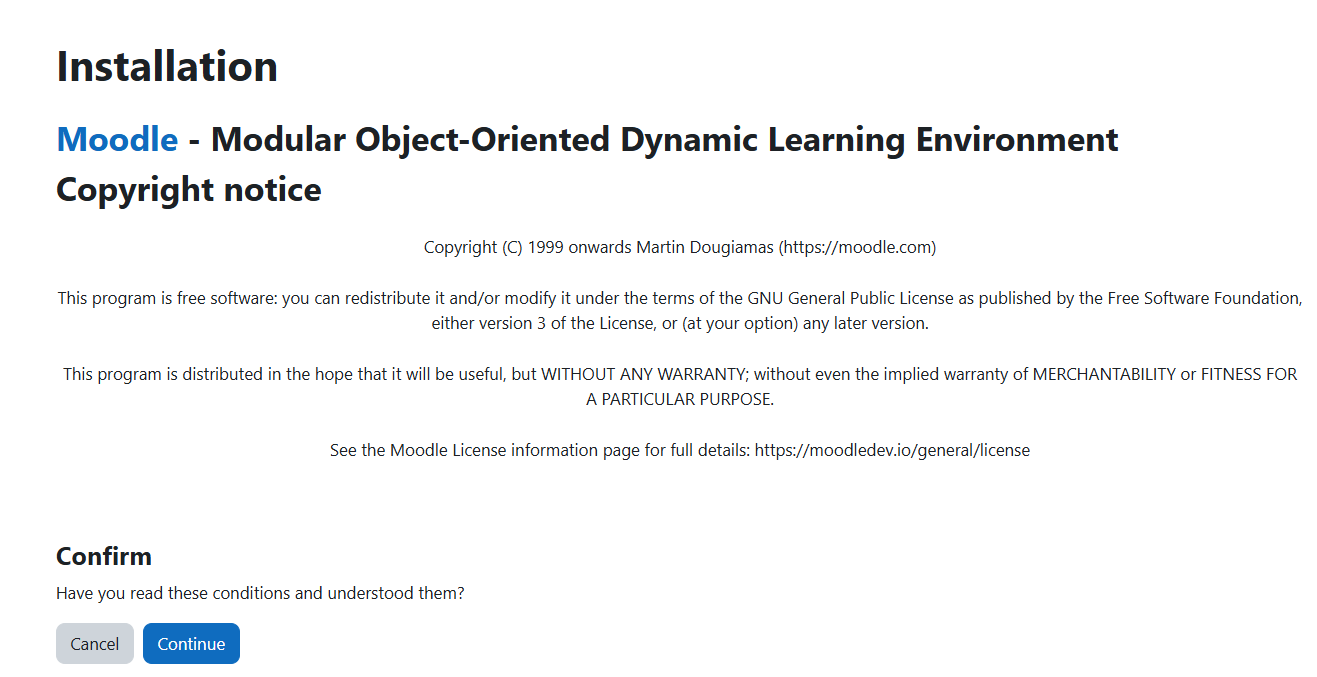
Read and Accept the license agreement:
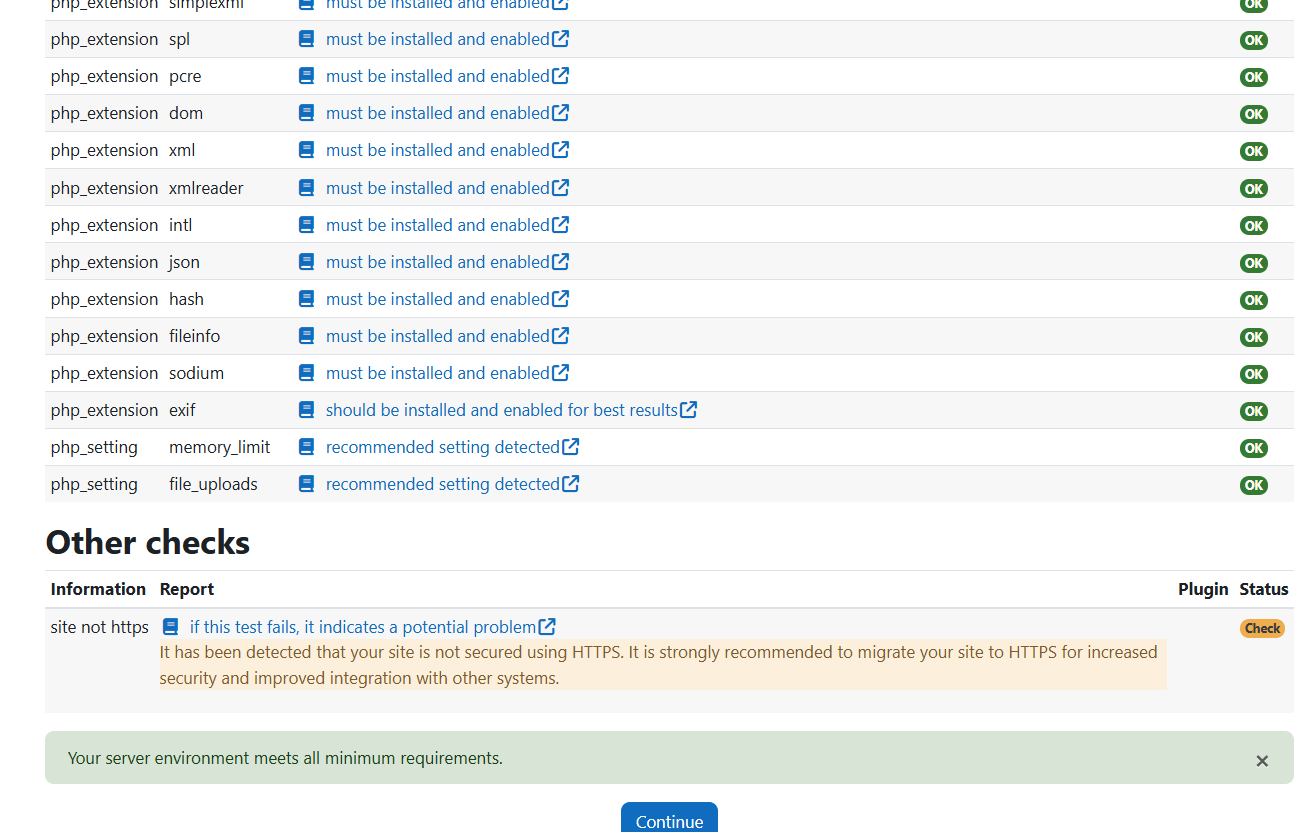
Sever Check: Scroll down and Continue:
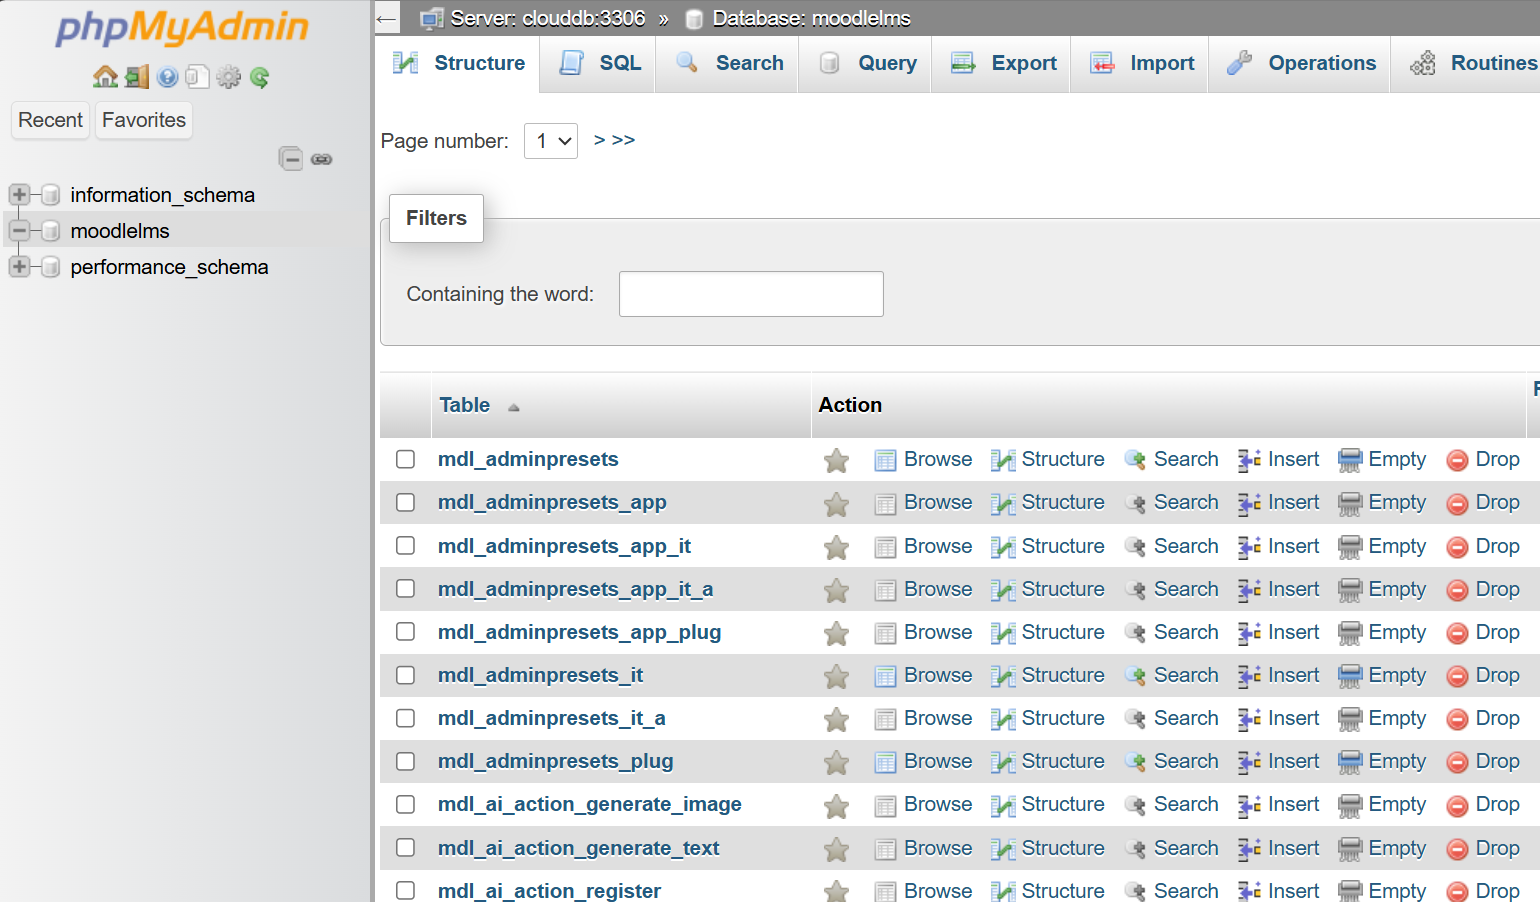
After the above stage, the database will be populated with Moodle LMS tables for each component of the application:
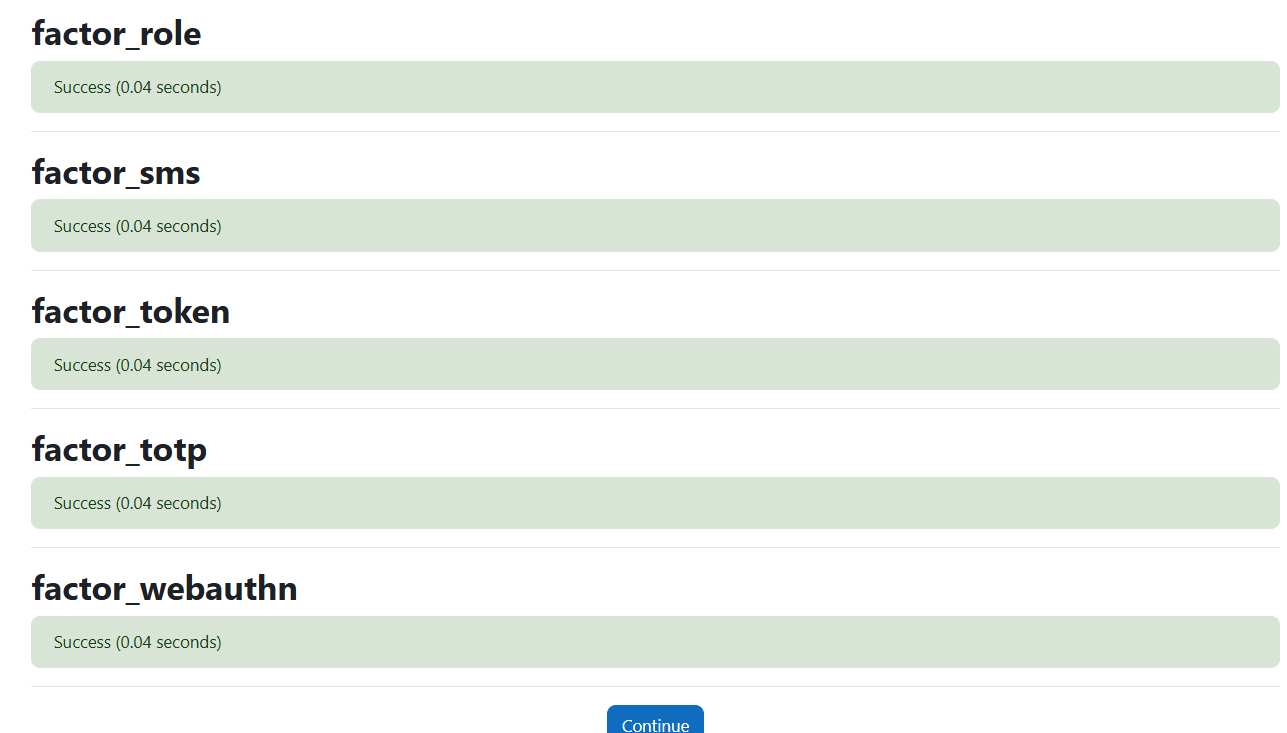
After the Installation, click on continue:
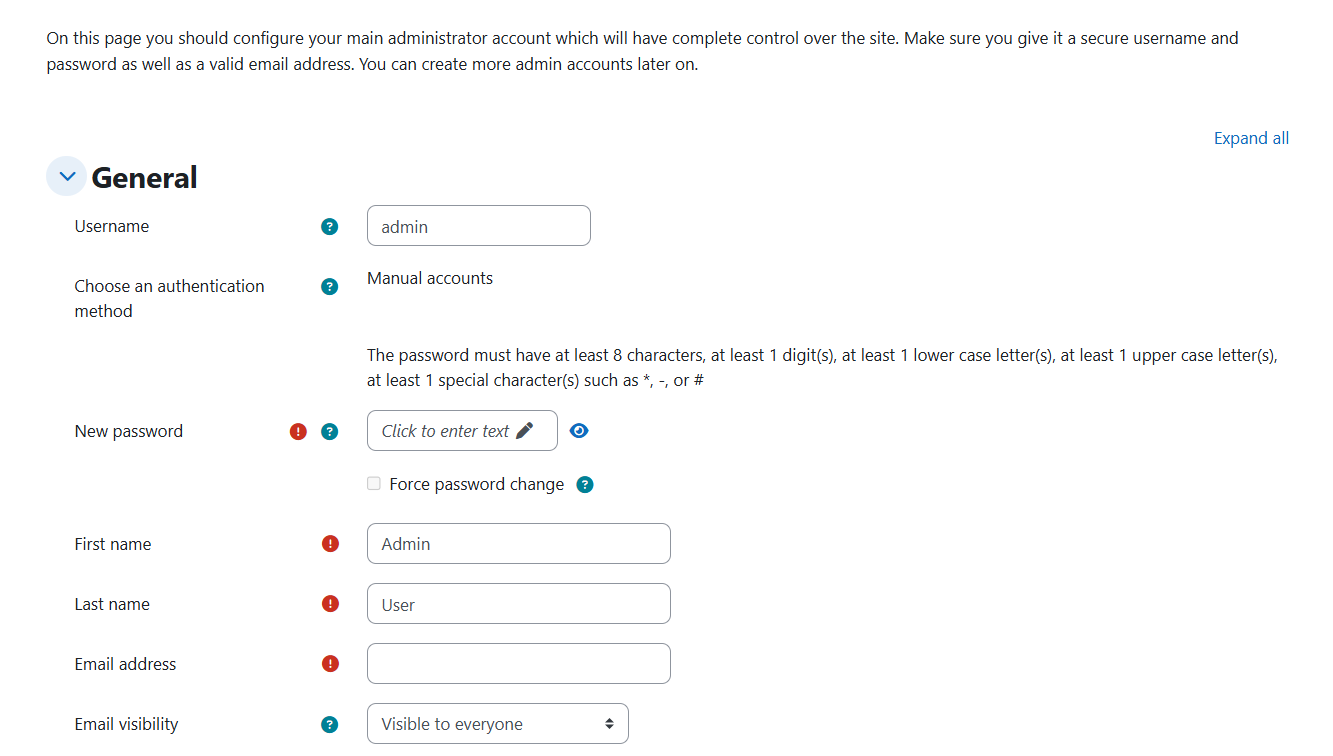
At this point, the Moodle LMS Installation has been completed. Set up the admin Username and Password.
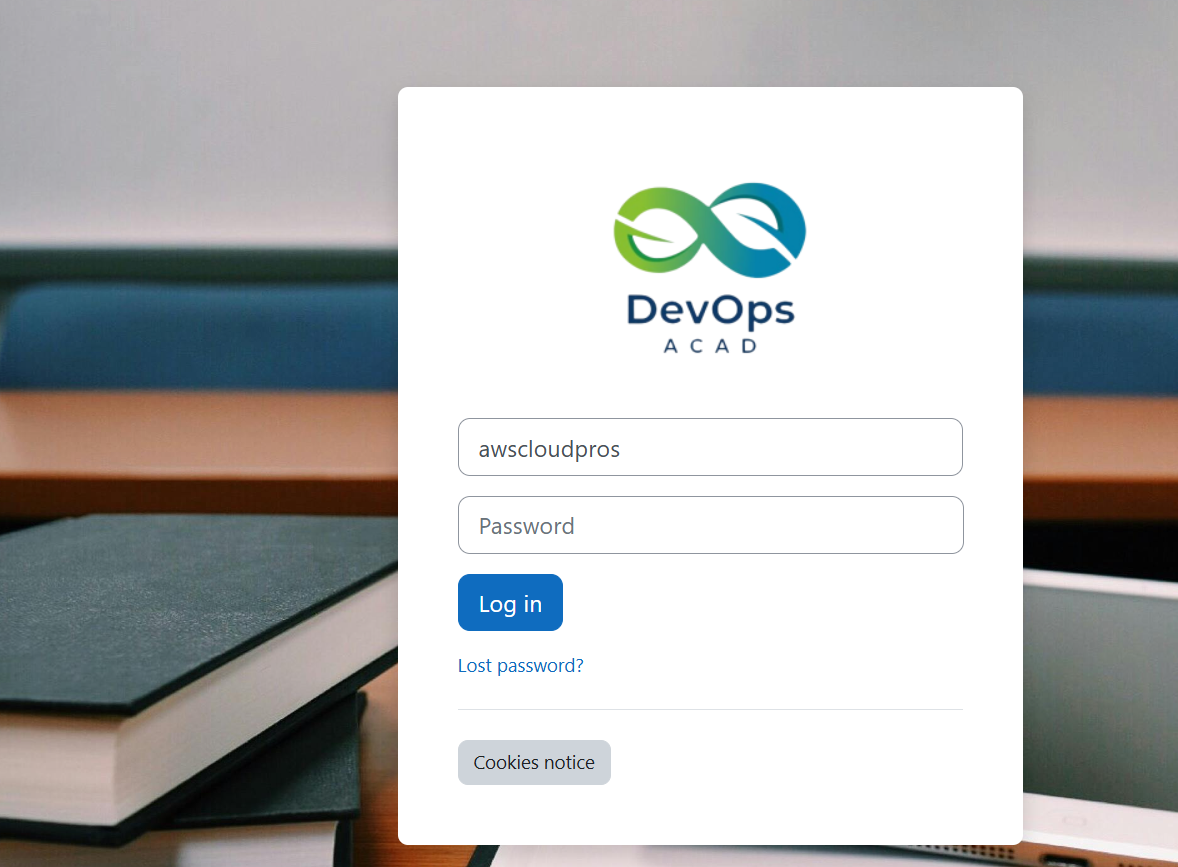
Here is what a Moodle LMS Login Page looks like after the necessary tweaking and customization:
For a visual walkthrough of the processes, watch the video down below:
Subscribe to my newsletter
Read articles from OLUWASEUN directly inside your inbox. Subscribe to the newsletter, and don't miss out.
Written by

OLUWASEUN
OLUWASEUN
Oluwaseun is a versatile Network, Cloud, and DevOps Engineer with over six years of experience. He also possesses DevOps and DevSecOps expertise, ensuring efficient and secure solutions in cloud environments. With over two years of experience as a trainer, he has trained over 200 participants in Cloud and DevOps and manages a YouTube channel dedicated to sharing his knowledge. Oluwaseun has a proven reputation for delivering flexible, scalable, and secure cloud solutions using the AWS Well-Architected Framework. He collaborates seamlessly with business stakeholders to achieve project objectives on time. A visionary professional, he excels in researching and adopting new technologies aligned with strategic business needs. He is meticulous, creative, and adaptable to diverse work cultures.
