Learn How to Deploy Scalable 3-Tier Applications with AWS ECS
 Amit Maurya
In the previous article, we deployed the 3-tier architecture on GKE (Google Kubernetes Engine) using Jenkins (CI/CD). In this article, we will deploy the same application, Wanderlust, on AWS ECS (Elastic Container Service) with ALB (Application Load Balancer).
GitHub Terraform Code : https://github.com/amitmaurya07/AWS-Terraform/tree/master
GitHub Application Code : https://github.com/amitmaurya07/wanderlust-devsecops/tree/aws-ecs-deployment
Overview of 3-Tier Architecture
As we had already discussed the 3 tier architecture in previous article so let’s again discuss this.
A three-tier application is a software architecture pattern which includes the Application Layer, Data Layer, and Presentation Layer. It enhances the maintainability, scalability, and flexibility.
1) Presentation Layer: When we open the web browser and then opens any website it means we are interacting with the website that will take inputs from client side. In simple the frontend part, or GUI (Graphical User Interface) is the presentation layer.
2) Application Layer: We have heard the term business logic in the tech industry a lot. The application layer contains the logic part, i.e., the backend. When we give any input on the frontend, this layer processes some logic against that input and provides the result.
3) Data Layer: As we had heard the data word that means it consists the information which is stored in database that is connected to Presentation Layer and Application Layer.
AWS ECS (Elastic Container Service)
Before diving into benefits of AWS ECS, let’s first understand or take the overview of ECS (Elastic Container Service).
ECS (Elastic Container Service) is one of the container services that is used to deploy your application code, binaries, dependencies in a container like docker does. In ECS there are three components -
Capacity : Decide the Infrastructure on which you want to deploy the container (EC2, or AWS Fargate)
Controller : Here, ECS Scheduler comes in place that deploys the application.
Provisioning : After deploying containers on ECS, from this we can manage the containers.
ECS provides scalability that will automatically scale containers based on the demand.
Prerequisites
AWS Account: AWS account with permissions to use ECS, ECR, DocumentDB (MongoDb), VPC. For now we will assign Administrative permissions to user.
Docker: Ensure Docker is installed locally to build and push container images.
Terraform: Install Terraform CLI in your terminal. (Terraform For Windows)
Setting Up AWS Environment
Creating IAM User with Required Permissions for Terraform
Navigate to Search Bar of AWS Console and search IAM (Identity Access and Management)

Click on IAM, in left side go to Users section and click on Create User.


After naming the user “terraform“, assign permissions for now Administrator Access.

Now, click on terraform user go to Security Credentials and scroll down for Access Key.

As we can see there is no Access Keys so let’s create access key, choose CLI for usecase and click on Next provide Description and then Next you will get Access and Secret Key.


Download the CSV file and now copy the Secret and Access Key for usage in terraform.

Networking Creation with Terraform
Let’s create the infrastructure on AWS by creating VPC, Subnets, Route Tables, Internet Gateway by Terraform Modules.
Create the directory structure for module VPC creation
vpc-modulein which it contains the VPC Creation, Subnets, Interet Gateway and Route Table.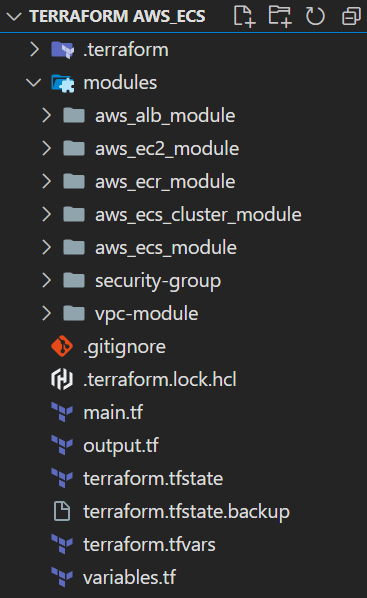
Inside the VPC module we have main.tf, variables.tf and output.tf. In the main.tf file we are going to create VPC, then Public and Private Subnet, then Internet Gateway and Route Table for Private and Public and then attach it with Subnets and Internet gateway.
vpc-module/main.tf:resource "aws_vpc" "three-tier" { cidr_block = "10.0.0.0/16" instance_tenancy = "default" tags = { Name = "three-tier" } } data "aws_availability_zones" "available" { } resource "aws_subnet" "public" { vpc_id = aws_vpc.three-tier.id cidr_block = cidrsubnet(aws_vpc.three-tier.cidr_block, 8, count.index + 1) count = 2 availability_zone = element(data.aws_availability_zones.available.names, count.index) map_public_ip_on_launch = true tags = { Name = "three-tier-public" } } resource "aws_subnet" "private" { vpc_id = aws_vpc.three-tier.id cidr_block = cidrsubnet(aws_vpc.three-tier.cidr_block, 8, count.index + 4) count = 2 tags = { Name = "three-tier-private" } } resource "aws_internet_gateway" "three-tier-igw" { vpc_id = aws_vpc.three-tier.id tags = { "Name" = "three-tier-igw" } } resource "aws_route_table" "public-rt" { vpc_id = aws_vpc.three-tier.id route { cidr_block = "0.0.0.0/0" gateway_id = aws_internet_gateway.three-tier-igw.id } tags = { "Name" = "three-tier-public-rt" } } resource "aws_route_table" "private-rt" { vpc_id = aws_vpc.three-tier.id tags = { "Name" = "three-tier-private-rt" } } resource "aws_route_table_association" "public-rt-association" { count = length(aws_subnet.public) subnet_id = aws_subnet.public[count.index].id route_table_id = aws_route_table.public-rt.id } resource "aws_route_table_association" "private-rt-association" { count = length(aws_subnet.private) subnet_id = aws_subnet.private[count.index].id route_table_id = aws_route_table.private-rt.id }Let’s break each resource block to proper understand what each resource block is going to create on AWS.
 resource "aws_vpc" "three-tier" {
   cidr_block       = "10.0.0.0/16"
   instance_tenancy = "default"

   tags = {
     Name = "three-tier"
   }
 }

 data "aws_availability_zones" "available" {
 }
There are 2 blocks in main.tf file of VPC Module:
Resource Block name three-tier is going to create VPC (Virtual Private Cloud) of CIDR (Classless-InterDomain Routing) “10.0.0.0/16“.
Data block is going to fetch the availaiblity zones.

    resource "aws_subnet" "public" {
      vpc_id = aws_vpc.three-tier.id
      cidr_block = cidrsubnet(aws_vpc.three-tier.cidr_block, 8, count.index + 1)
      count = 2
      availability_zone = element(data.aws_availability_zones.available.names, count.index)
      map_public_ip_on_launch = true

      tags = {
        Name = "three-tier-public"
      }
    }

    resource "aws_subnet" "private" {
      vpc_id = aws_vpc.three-tier.id
      cidr_block = cidrsubnet(aws_vpc.three-tier.cidr_block, 8, count.index + 4)
      count = 2

      tags = {
        Name = "three-tier-private"
      }
    }
In this snippet of terraform code there are 2 resource blocks that will create Public and Private Subnet.
Resource Block of Public Subnet has the VPC ID that will attach the VPC which will be created next is cidr_block which contains cidrsubnet function that will calculate the subnets in the given network address and subnet mask in CIDR format.
aws_vpc.three-tier.cidr_blockwill picks the CIDR block of created VPC.8is the to add subnets in the CIDR block like I have “10.0.0.0/16“ now it will add 8 in subnet mask/16+8it will become/24bits.count.index + 1is used to create multiple subnets in AWS with Terraform. In the CIDR block10.0.0.0/24is created on index[0] and on index[1] the new CIDR block is there10.0.1.0/24Now next is count which will create 2 resources of Public Subnet in AWS.
In availability zone there is element function which will take the value from the data block of availability zone
["us-east-1a", "us-east-1b", "us-east-1c"]after this it will select the availability zone on basis ofcount.indexmap_public_ip_on_launchis true means in the Public Subnet the resources that are in this subnet will have Public IP that is automatically assigned on launch.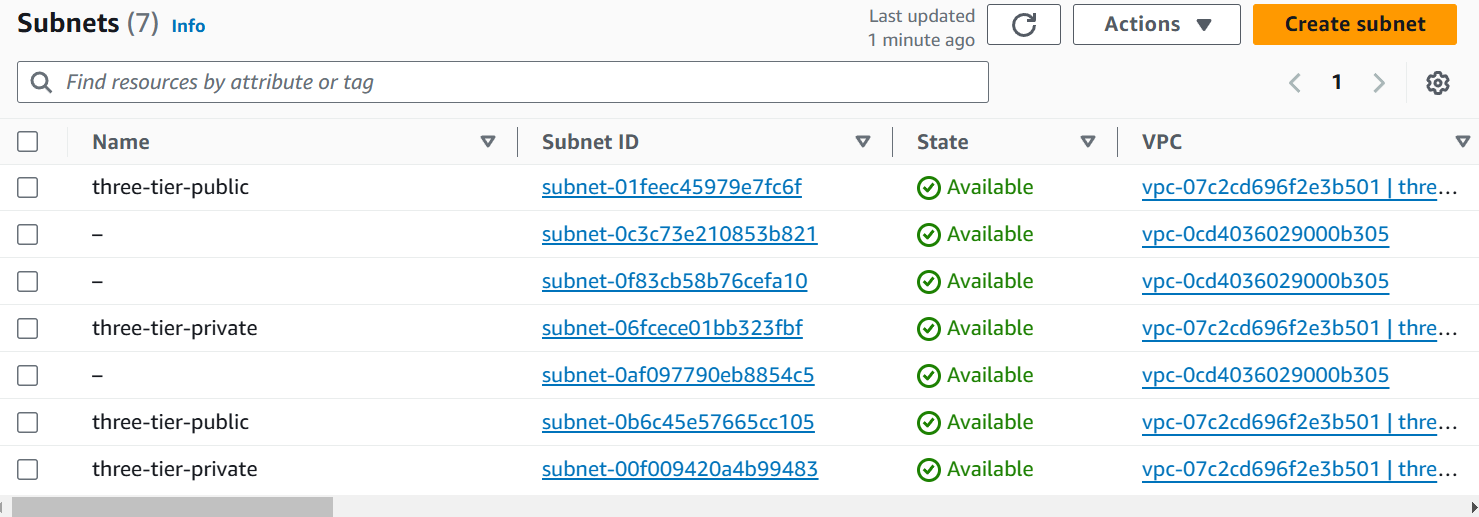
  resource "aws_internet_gateway" "three-tier-igw" {
    vpc_id = aws_vpc.three-tier.id
    tags = {
      "Name" = "three-tier-igw"
    }
  }
In this resource we are going to create Internet Gateway with the name
three-tier-igwthat is attached with VPC ID (vpc_id).
  resource "aws_route_table" "public-rt" {
    vpc_id = aws_vpc.three-tier.id
    route {
      cidr_block = "0.0.0.0/0"
      gateway_id = aws_internet_gateway.three-tier-igw.id
    }
    tags = {
      "Name" = "three-tier-public-rt"
    }
  }

  resource "aws_route_table" "private-rt" {
    vpc_id = aws_vpc.three-tier.id
    tags = {
      "Name" = "three-tier-private-rt"
    }
  }
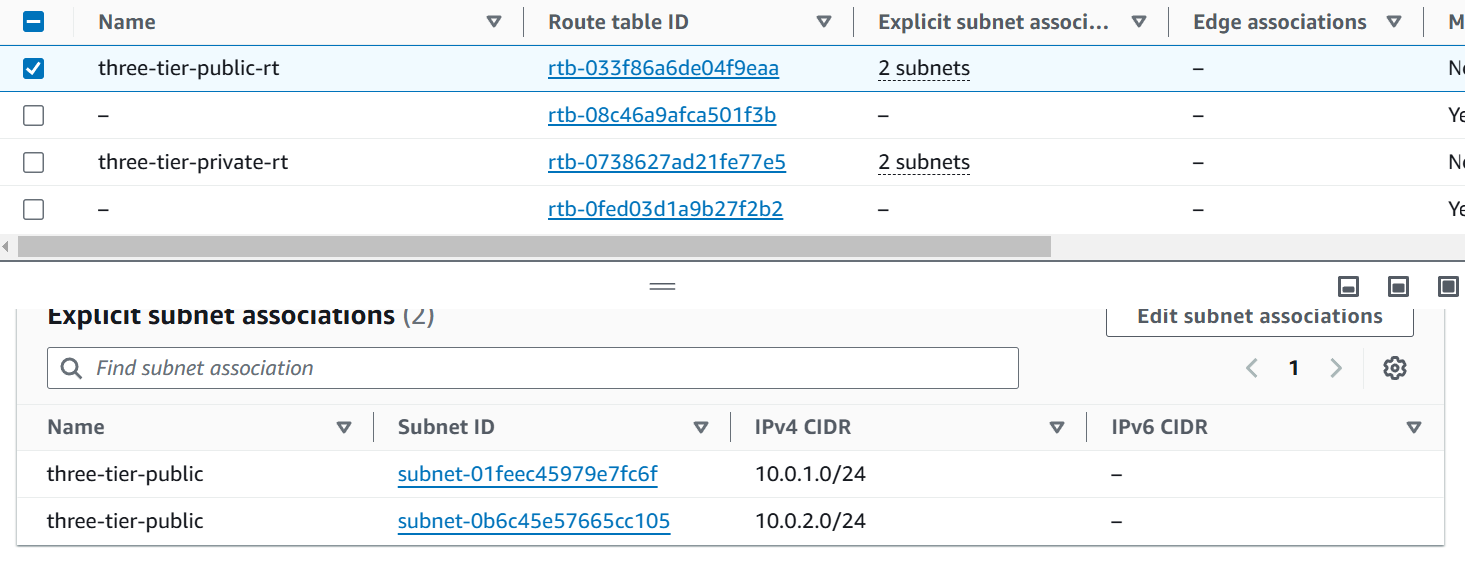
Now, there are 2 resources in which Public and Private Route Table is created that is used to route the traffic for the resources lying in Subnets.
In the Public Route Table (public-rt) as we can see there is a route block that contains the CIDR block of 0.0.0.0/0 which means allowing all traffic and next is gateway ID where Internet Gateway is attached. In the Public Subnet we would attach the IGw (Internet Gateway) to access the resources from Internet.

  resource "aws_route_table_association" "public-rt-association" {
    count = length(aws_subnet.public)
    subnet_id = aws_subnet.public[count.index].id
    route_table_id = aws_route_table.public-rt.id
  }

  resource "aws_route_table_association" "private-rt-association" {
    count = length(aws_subnet.private)
    subnet_id = aws_subnet.private[count.index].id
    route_table_id = aws_route_table.private-rt.id
  }
In these 2 resource blocks we are attaching the Subnets (Public Subnet in Public Route Table and Private Subnet in Private Route Table).
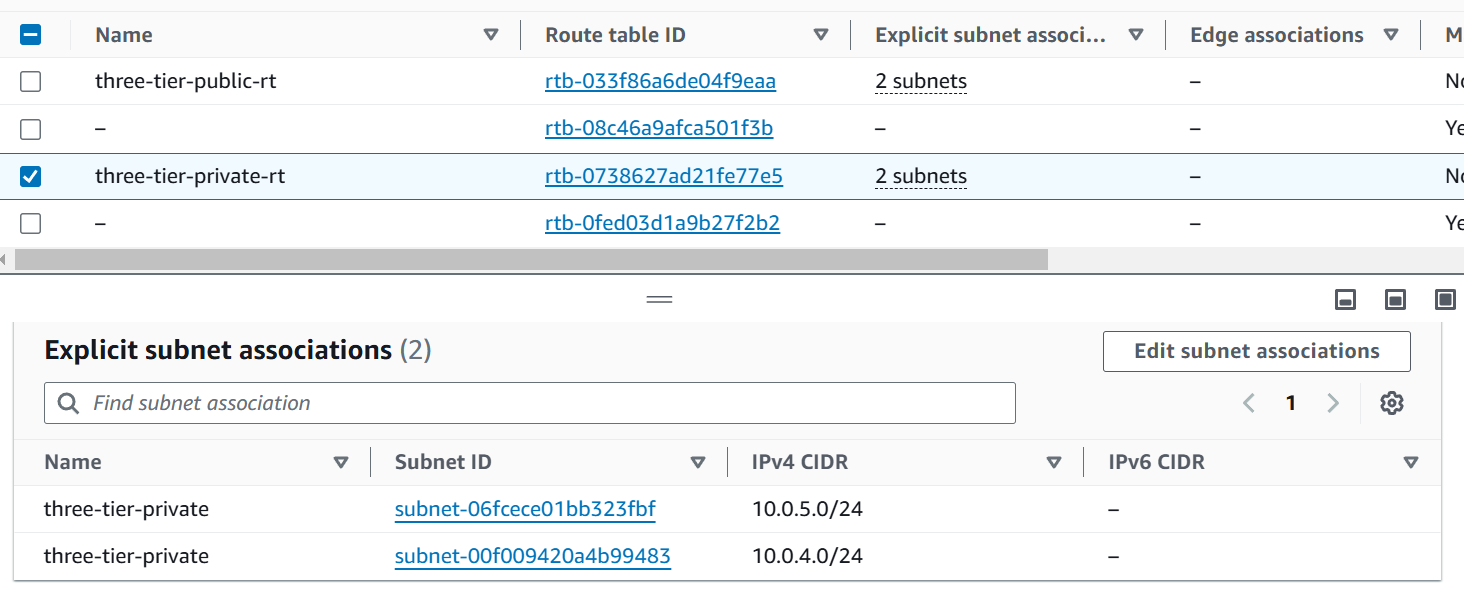
/vpc-module/variables.tfvariable "public_subnet_cidrs" { description = "List of CIDR blocks for public subnets" type = list(string) } variable "private_subnet_cidrs" { description = "List of CIDR blocks for private subnets" type = list(string) }We had declared two variables for CIDR’s where the type is list.
/vpc-module/output.tf:output "vpc_id" { value = aws_vpc.three-tier.id } output "public_subnet_id" { value = aws_subnet.public[*].id } output "subnet_id" { value = aws_subnet.private[*].id }In the output.tf file we are printing the output of vpc_id, public and private Subnet ID.
Now here comes the parent main.tf file in which we call this vpc-module and the required parameters.
module "vpc" {
  source = "./modules/vpc-module"
  public_subnet_cidrs = var.public_subnet_cidrs
  private_subnet_cidrs = var.private_subnet_cidrs
}
Okay, we have automated the VPC creation on AWS with Terraform now, let’s break down the parent main.tf file.
If we will going to break all the modules main.tf the blog will become lengthier so we will cover the modules with its proper understanding in the next blog.
main.tf:
provider "aws" {
  region = var.region
}

module "ec2_db" {
  source = "./modules/aws_ec2_module"
  security_group_ids = [module.aws_security_group.security_group_id]
  name = "${var.name}-mogodb"
  ami = "ami-09b0a86a2c84101e1"
  instance_type = "t2.micro"
  subnet_id = module.vpc.public_subnet_id[0]
}

module "vpc" {
  source = "./modules/vpc-module"
  public_subnet_cidrs = var.public_subnet_cidrs
  private_subnet_cidrs = var.private_subnet_cidrs
}

module "aws_security_group" {
  source = "./modules/security-group"
  sg_name = "${var.name}-sg"
  vpc_id = module.vpc.vpc_id
}

module "aws_lb" {
  source = "./modules/aws_alb_module"
  name = "${var.name}-alb"
  security_group_id = module.aws_security_group.security_group_id
  subnet_id = module.vpc.public_subnet_id
  vpc_id = module.vpc.vpc_id
}

module "frontend-aws_ecr" {
  source = "./modules/aws_ecr_module"
  name = "${var.name}-frontend"
}

module "backend-aws_ecr" {
  source = "./modules/aws_ecr_module"
  name = "${var.name}-backend"
}

module "aws_ecs_cluster" {
  source = "./modules/aws_ecs_cluster_module"
  name = var.name
}

module "frontend-ecs" {
  source = "./modules/aws_ecs_module"
  name = "${var.name}-frontend-ecs"
  ecr_repo_url = module.frontend-aws_ecr.frontend-repository_url
  image_tag = "3"
  ecs_cluster_id = module.aws_ecs_cluster.ecs_cluster_id
  port = 5173
  vpc_id = module.vpc.vpc_id
  subnet_id = module.vpc.public_subnet_id
  security_group_id = module.aws_security_group.security_group_id
  target_group_arn = module.aws_lb.tg-arn
}

module "backend-ecs" {
  source = "./modules/aws_ecs_module"
  name = "${var.name}-backend-ecs"
  ecr_repo_url = module.backend-aws_ecr.frontend-repository_url
  port = 5000
  ecs_cluster_id = module.aws_ecs_cluster.ecs_cluster_id
  image_tag = "2"
  vpc_id = module.vpc.vpc_id
  subnet_id = module.vpc.public_subnet_id
  security_group_id = module.aws_security_group.security_group_id
  target_group_arn = module.aws_lb.tg-arn-backend
}
This looks so big but not to worry we will understand each module block and how we are taking values from output.tf file and variables.tf file.
provider "aws" {
  region = var.region
}
This is the provider block which contains on which cloud platform we are going to deploy whether it’s AWS, Azure or GCP. So , we are with AWS and defined the region in which var.region is the value where region variable is declared in variables.tf file.
module "ec2_db" {
  source = "./modules/aws_ec2_module"
  security_group_ids = [module.aws_security_group.security_group_id]
  name = "${var.name}-mogodb"
  ami = "ami-09b0a86a2c84101e1"
  instance_type = "t2.micro"
  subnet_id = module.vpc.public_subnet_id[0]
}
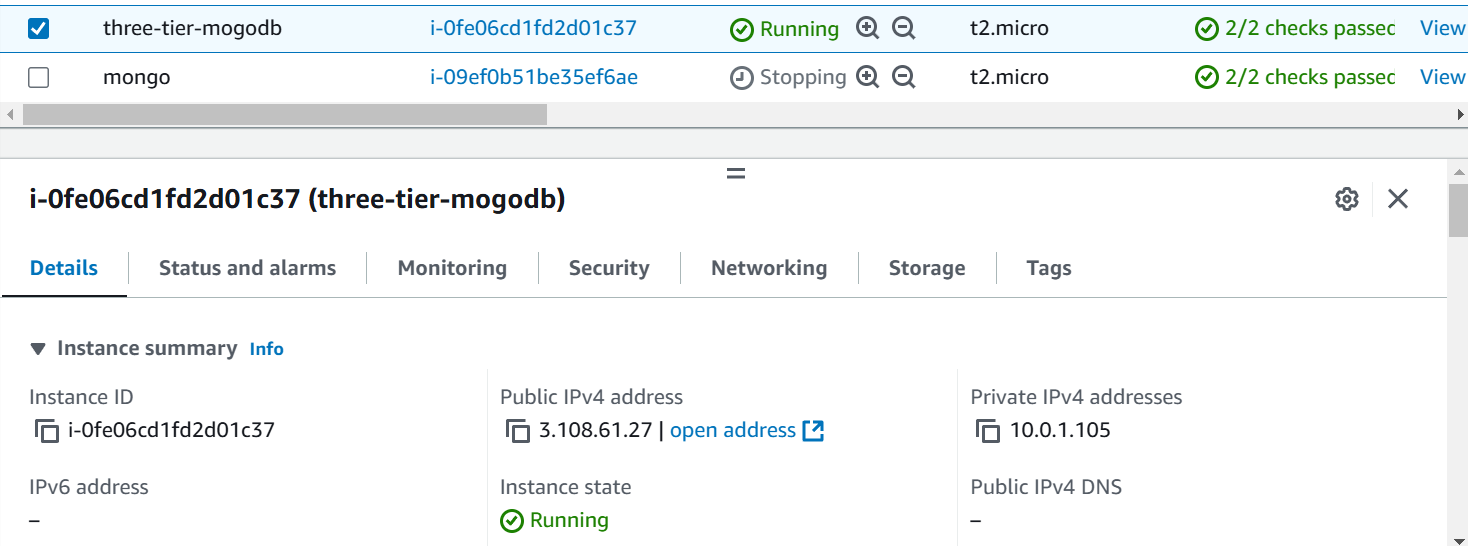
This module creates the EC2 instance for the database server where MongoDB is deployed on Docker. In this block, source indicates where our EC2 module is stored; in our case, it's locally under the modules folder. Next is security_group_ids, which contains a list []. Within this list, another module is called, specifically the security group module, which outputs the security group id, an attribute of the security group.
In name the value is "${var.name}-mogodb" which means when we do terraform apply or plan we will give the input for the name variable means if the input is “three-tier“ it will give the name “three-tier-mongodb“ for the EC2 instance.
In the ami we had given the AMI ID of Ubuntu to create the Ubuntu Operating System.
Instance Type will be t2.micro that is free-tier in AWS. Now, we are attaching the subnet in which subnet this resource is going to lie this subnet_id will decide for this we are creating in Public Subnet.
module "vpc" {
  source = "./modules/vpc-module"
  public_subnet_cidrs = var.public_subnet_cidrs
  private_subnet_cidrs = var.private_subnet_cidrs
}
This module will create VPC where public and private subnet CIDR’s variables are used.

module "aws_security_group" {
  source = "./modules/security-group"
  sg_name = "${var.name}-sg"
  vpc_id = module.vpc.vpc_id
}
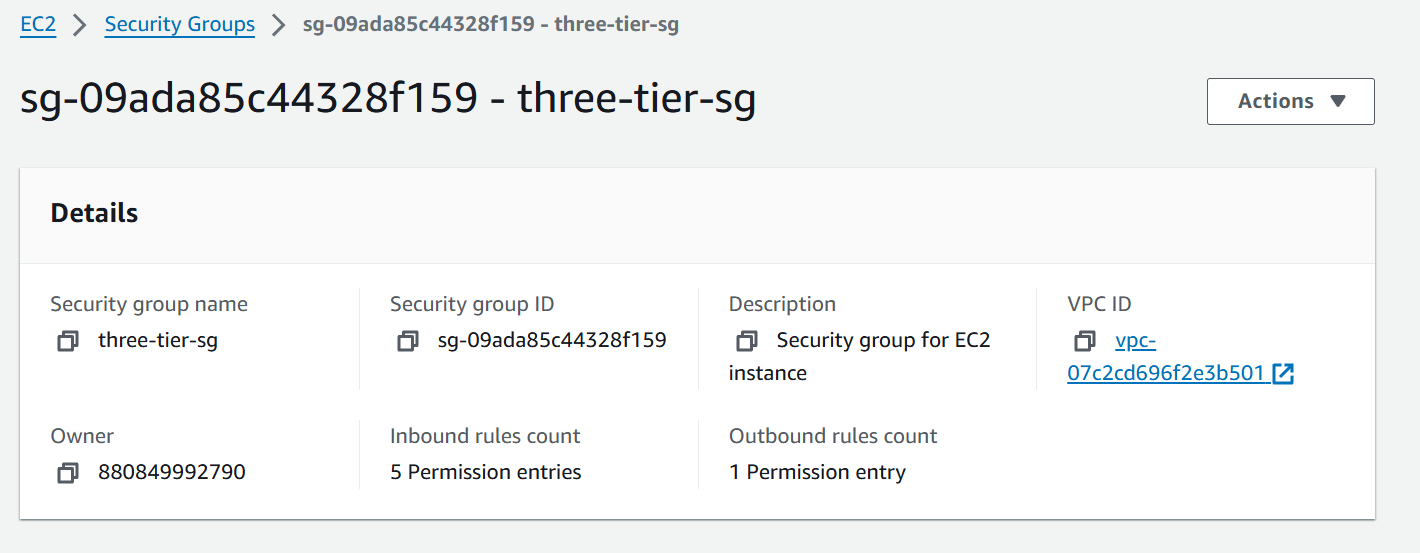
This module will create the security group for the EC2 instance and ECS Cluster in which we will use further.
module "aws_lb" {
  source = "./modules/aws_alb_module"
  name = "${var.name}-alb"
  security_group_id = module.aws_security_group.security_group_id
  subnet_id = module.vpc.public_subnet_id
  vpc_id = module.vpc.vpc_id
}
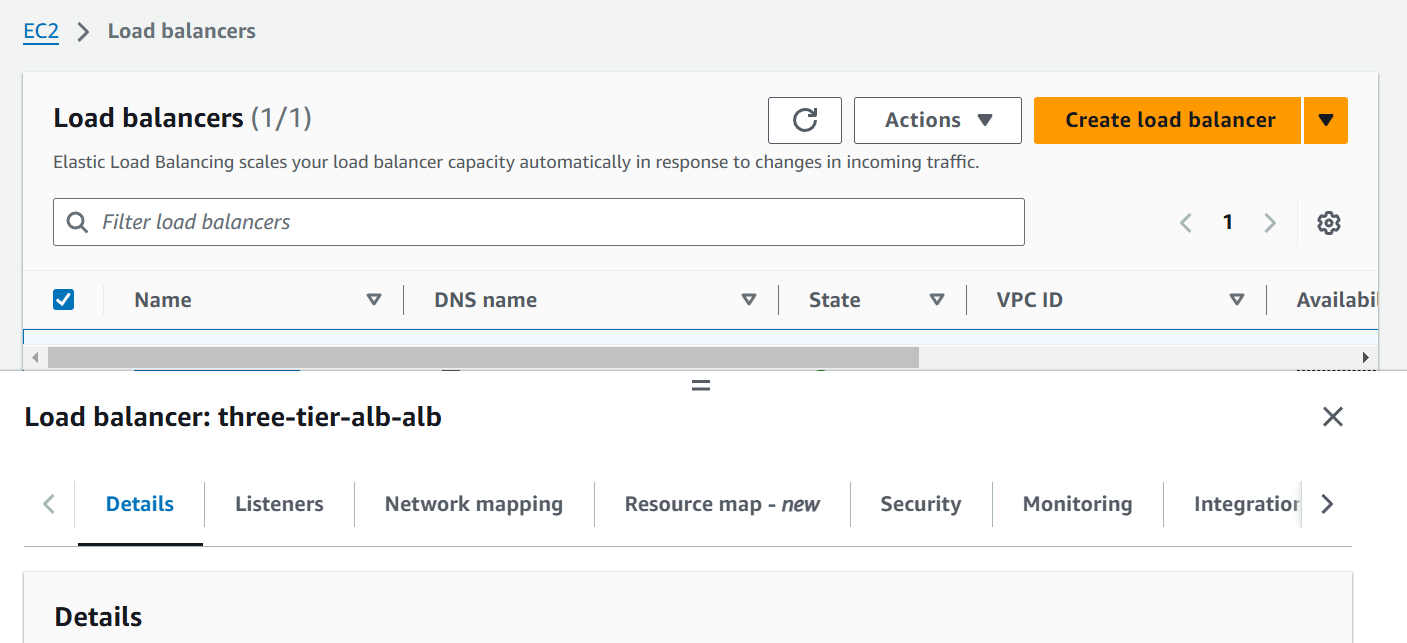
This module will create loadbalancer which will be used to access the application through the DNS of Network Load Balancer where Subnet ID, security group ID and vpc_id is attached. In Subnet_ID we are calling the module of vpc which prints the attribute of public_subnet_id.

module "frontend-aws_ecr" {
  source = "./modules/aws_ecr_module"
  name = "${var.name}-frontend"
}

module "backend-aws_ecr" {
  source = "./modules/aws_ecr_module"
  name = "${var.name}-backend"
}
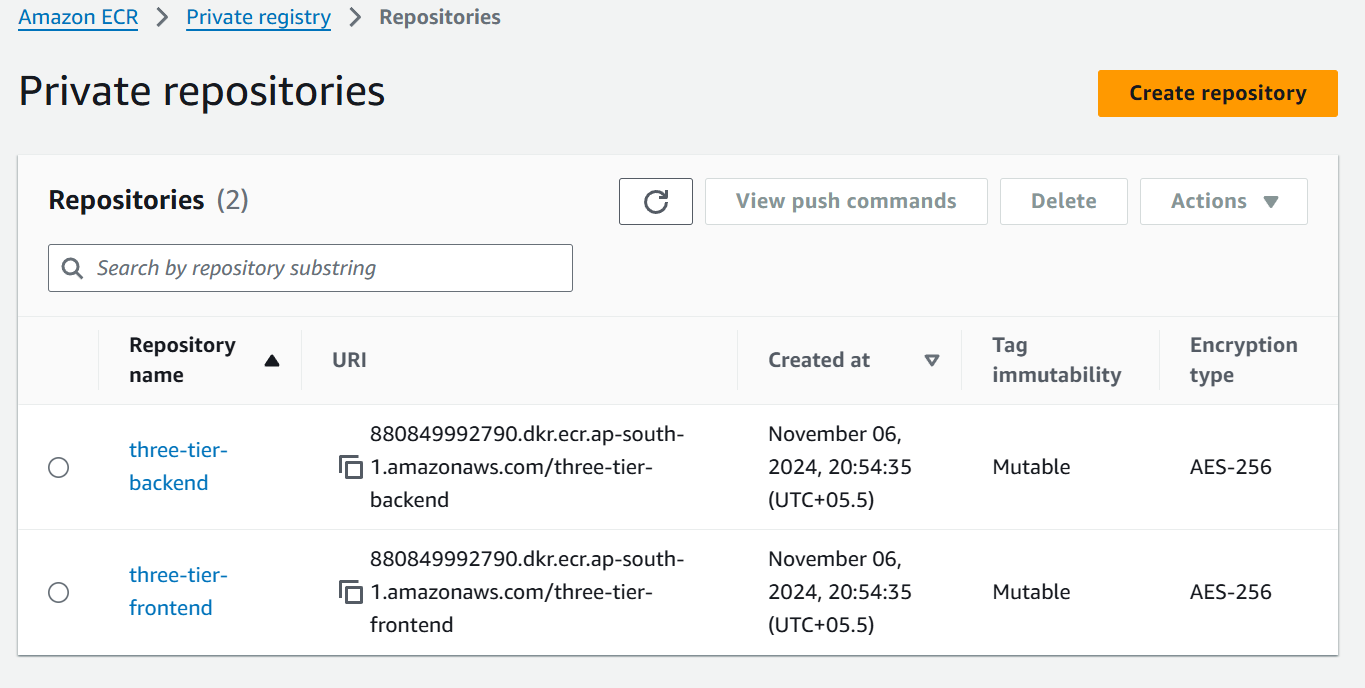
Now, this is ECR (Elastic Container Registry) creation for frontend and backend images, we had just changed the name here with -frontend and -backend.
module "aws_ecs_cluster" {
  source = "./modules/aws_ecs_cluster_module"
  name = var.name
}
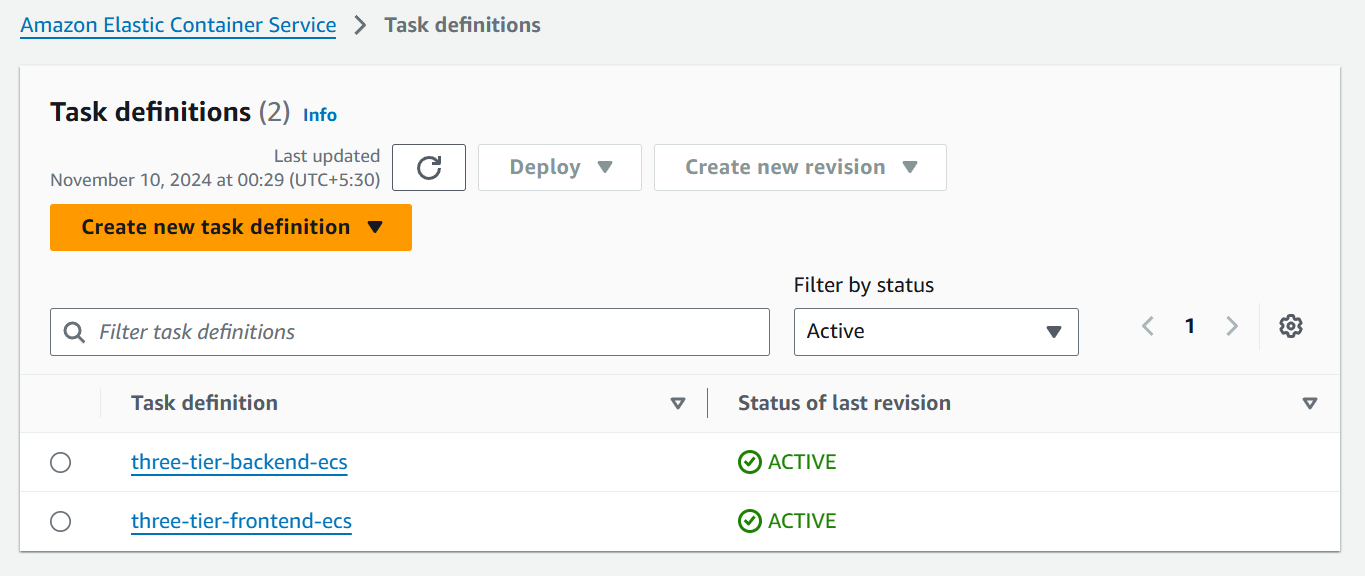
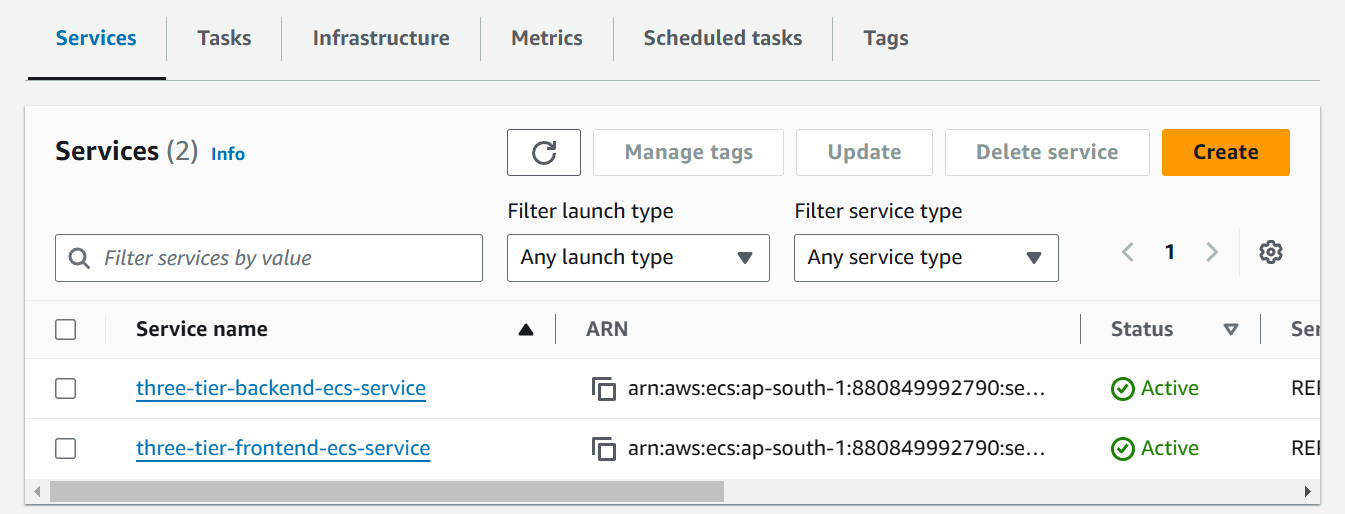
Now the AWS ECS (Elastic Container Service) comes in the picture where we deploy the ECS cluster in which 2 services are created for frontend and backend.

module "frontend-ecs" {
  source = "./modules/aws_ecs_module"
  name = "${var.name}-frontend-ecs"
  ecr_repo_url = module.frontend-aws_ecr.frontend-repository_url
  image_tag = "3"
  ecs_cluster_id = module.aws_ecs_cluster.ecs_cluster_id
  port = 5173
  vpc_id = module.vpc.vpc_id
  subnet_id = module.vpc.public_subnet_id
  security_group_id = module.aws_security_group.security_group_id
  target_group_arn = module.aws_lb.tg-arn
}

module "backend-ecs" {
  source = "./modules/aws_ecs_module"
  name = "${var.name}-backend-ecs"
  ecr_repo_url = module.backend-aws_ecr.frontend-repository_url
  port = 5000
  ecs_cluster_id = module.aws_ecs_cluster.ecs_cluster_id
  image_tag = "2"
  vpc_id = module.vpc.vpc_id
  subnet_id = module.vpc.public_subnet_id
  security_group_id = module.aws_security_group.security_group_id
  target_group_arn = module.aws_lb.tg-arn-backend
}
In these 2 modules we are creating 2 ECS services for frontend and backend which contains ecr_repo_url where the value is taking from backend AWS ECR module which will take the output of frontend repository URL which is defined in parent output.tf file.
output "backend-repository_url" {
  value = module.backend-aws_ecr.frontend-repository_url
}
Next is image tag which we are declaring, then the ECS cluster ID in which we want to deploy our services the cluster ID is defined in output.tf file and used to call with module of AWS ECS cluster with cluster ID attribute.
output "ecs_cluster_id" {
  value = module.aws_ecs_cluster.ecs_cluster_id
}
Next is port, vpc_id, subnet_id and security_group_id and in last target group arn that will be taken from load balancer target group which is defined parent output.tf file.
output "tg-arn" {
  value = module.aws_lb.tg-arn
}

output "tg-arn-backend" {
  value = module.aws_lb.tg-arn-backend
}
Build Docker Images for Each Tier
Dockerfile Build
GitHub Code : https://github.com/amitmaurya07/wanderlust-devsecops.git
Let’s build the Dockerfile for frontend and push it to ECR (Elastic Container Registry) then deploy it to ECS (Elastic Container Service).
When the ECR Repository is created go to ECR repository for frontend and click on View Push Commands which will give the commands to build and push the Dockerfile in ECR frontend repository.
 aws ecr get-login-password --region ap-south-1 | docker login --username AWS --password-stdin 880849992790.dkr.ecr.ap-south-1.amazonaws.com
 docker build -f .\backend\Dockerfile -t backend:1 .
 docker tag backend:1 880849992790.dkr.ecr.ap-south-1.amazonaws.com/three-tier-backend:1
 docker push 880849992790.dkr.ecr.ap-south-1.amazonaws.com/three-tier-backend:1
The first line means aws ecr get-login will login with the AWS Access Key and Secret Key then it is building the backend Dockerfile and then tagging the Dockerfile then pushed to the ECR Registry.
Now paste the commands in the in VS Code (IDE).

aws sts get-caller-identityIf you recieve this error that the user is not authenticated to perform GetAuthorizationToken then grant the permission to the user. For now, I am adding the permission of “AmazonElasticContainerRegistryPublicFullAccess” to the user.
Set Up Database MongoDB on Amazon EC2
For cost optimization and we are building this project for article purpose so we will install the MongoDB on EC2 instance otherwise for production environment use DocumentDB that is managed AWS service for mongoDB.
We had discussed earlier in the main.tf file we are creating EC2 instance with the Terraform module
 resource "aws_instance" "ec2_instance" {
   ami = var.ami
   instance_type = var.instance_type
   subnet_id = var.subnet_id
   vpc_security_group_ids = var.security_group_ids

   user_data = <<-EOF
     #!/bin/bash
     sudo apt-get update -y
     curl -fsSL https://get.docker.com -o get-docker.sh
     sudo sh get-docker.sh
     sudo systemctl start docker
     sudo systemctl enable docker
     sudo docker run -d --name mongodb -p 27017:27017 mongo:4.4
   EOF
   tags = {
     Name = var.name
   }
 }
This will install the MongoDB in the EC2 instance from the User Data Script.

Apply the Terraform Modules:
As we had discussed about Terraform Modules earlier of parent main.tf file now let’s do the terraform CLI execution.
Download the AWS dependencies that are in provider section. As we had defined in provider block. It initializes the modules folder and create .terraform directory and module.json file which contains about modules.
terraform init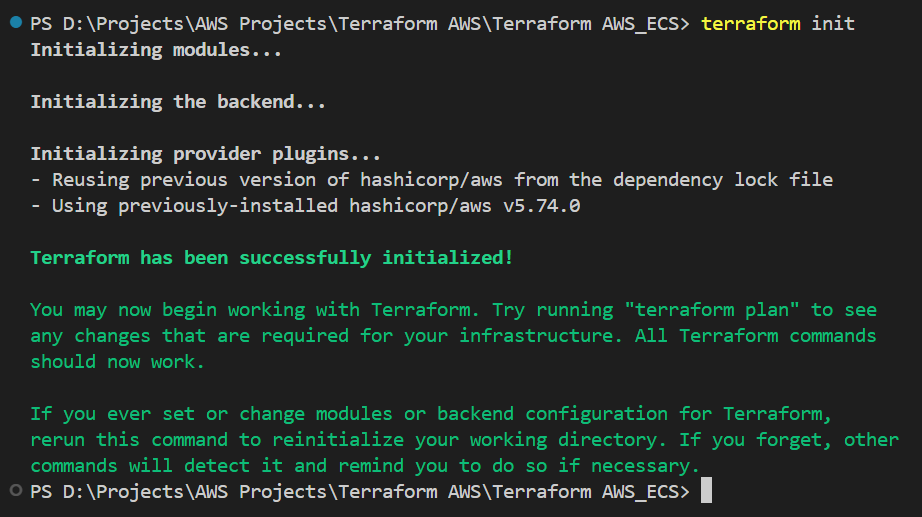
Now do the terraform plan to check that the infrastructure that is going to create on AWS has right values or not.
terraform planWhen we execute this command it will ask for the input from the user i.e. it is asking for the name.

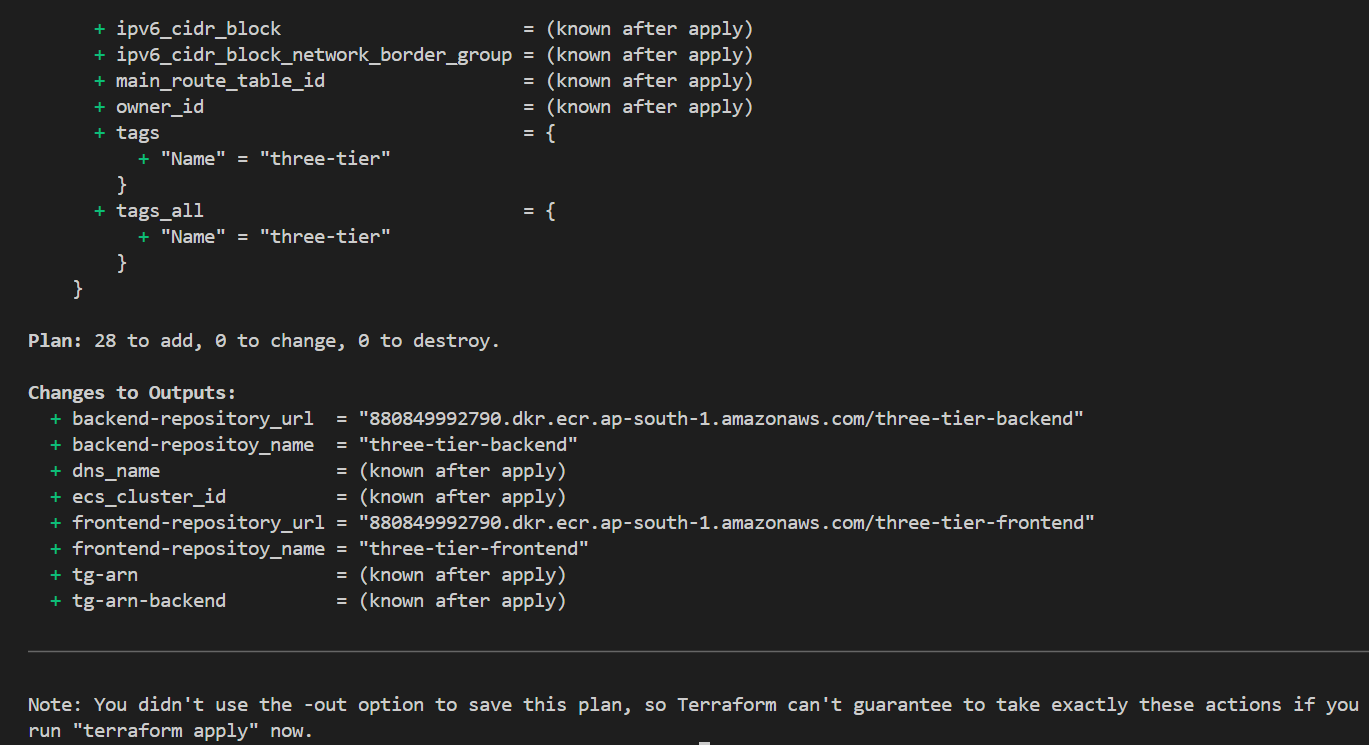
As we can see it prints the output which we had defined in the output.tf file.
It’s the time to create the infrastructure on AWS when we execute Apply command.
terraform apply --auto-approve

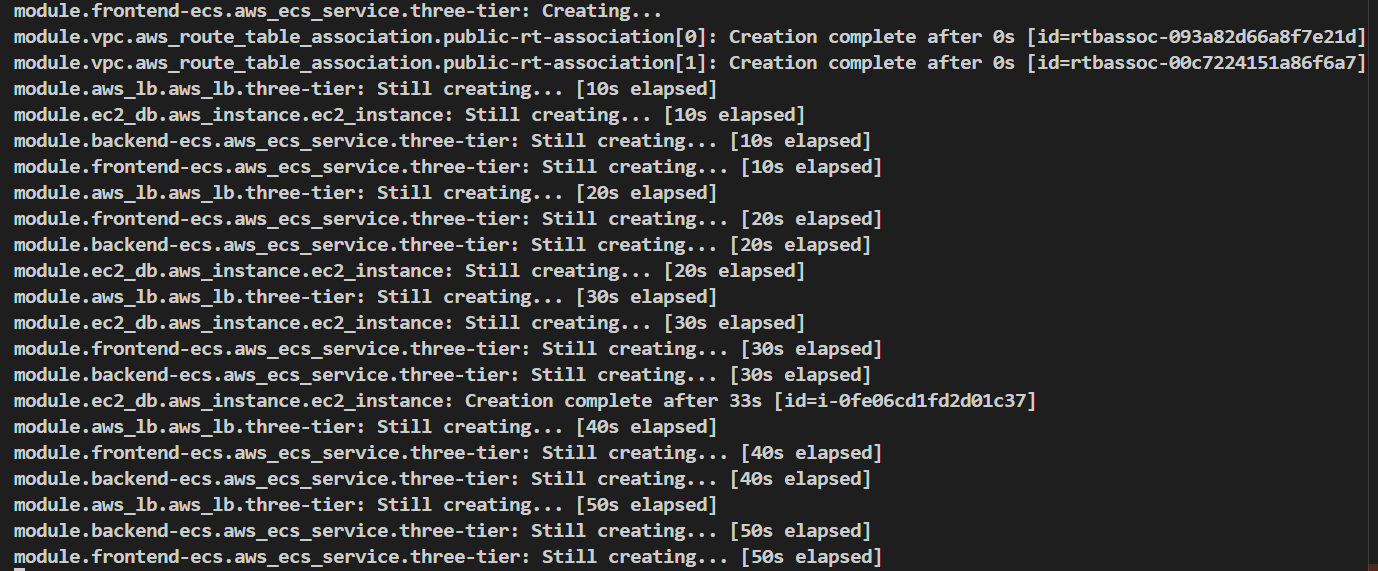
Here it is saying we have 28 resources to add in AWS (Automation) and it starts to creating the resources on AWS.
When we had seen the Terraform Plan output some of the values are unknown where it has written “known after apply” but when you do terraform apply command it created that infrastructure and prints the outputs.

We got DNS name of ALB, repository URL, cluster ID everything. Now let’s hit the DNS name of ALB and check whether we can access the frontend or not.
http://three-tier-alb-alb-b35382f79712e765.elb.ap-south-1.amazonaws.com:5173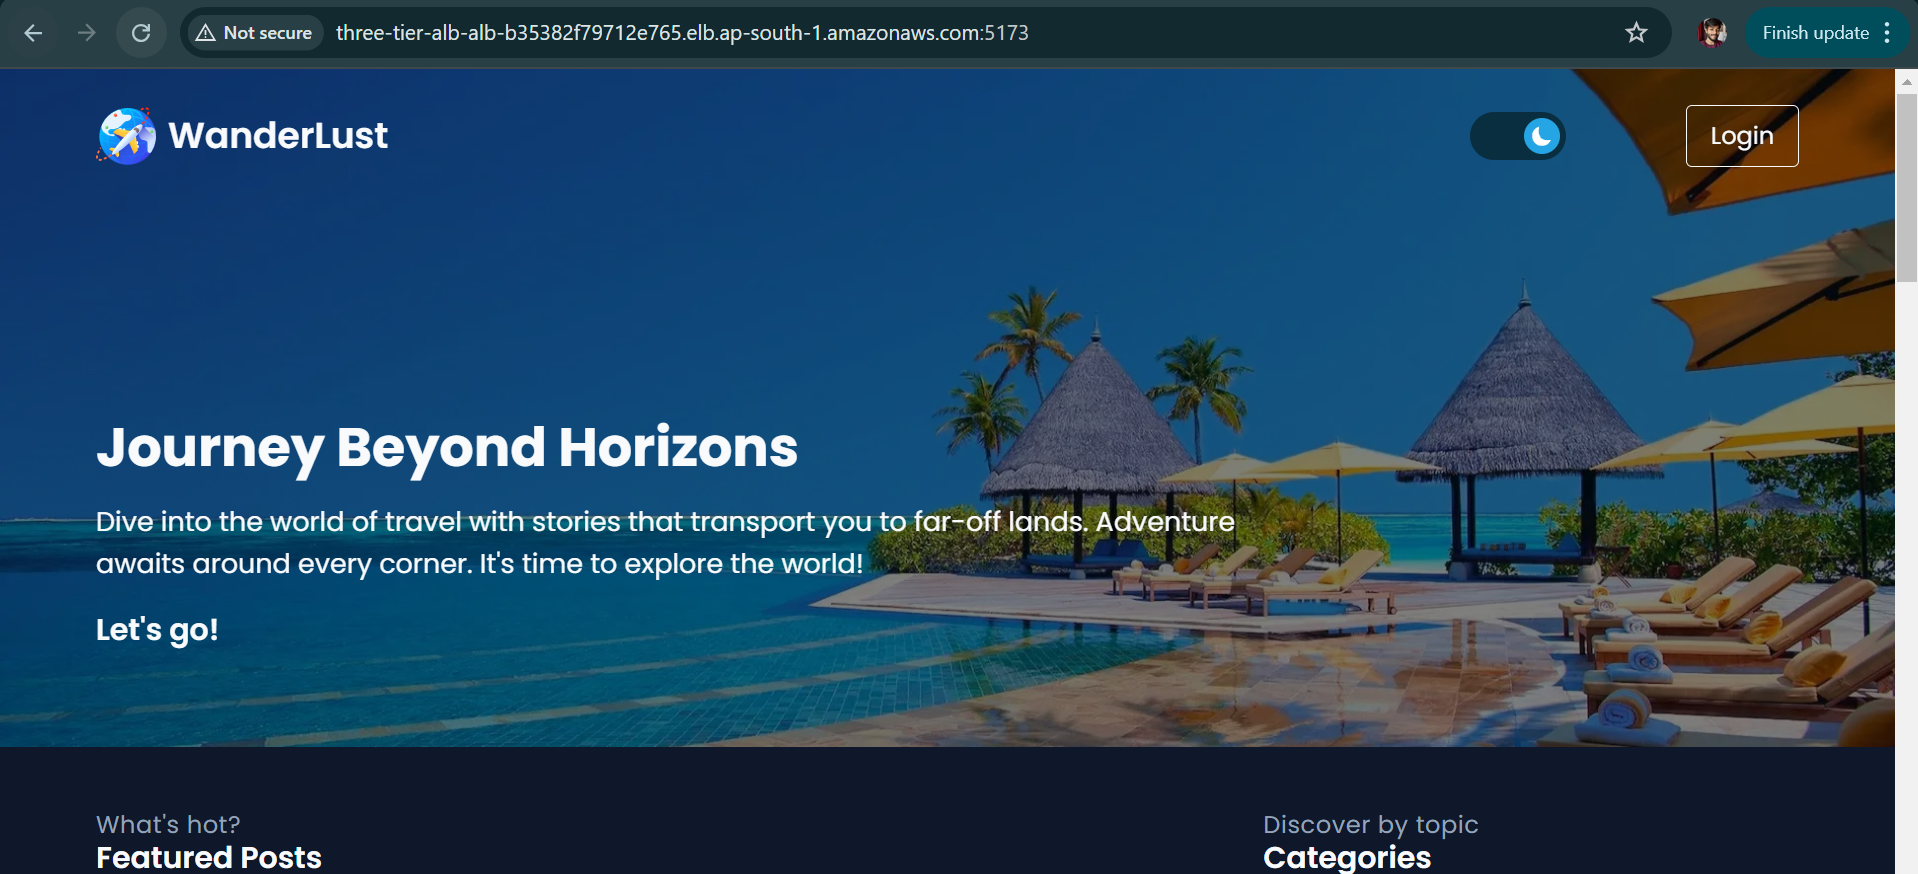
Hurray !!! We had successfully deployed the frontend service, now let’s check the backend service but right now it will not be accessible because we need to change in .env file of backend github repository. After this make changes also in server.js file for CORS ISSUE.

.env file":
 PORT=5000
 MONGODB_URI="mongodb://<Public IP of instance>:27017/wanderlust"
 CORS_ORIGIN="http://<ALB DNS Name>:5173"
After changes has been build Dockerfile again and push and change the image tag in parent main.tf of backend ECS module. As we can see our database MongoDB is connected now let’s check that backend is accessible or not.
http://three-tier-alb-alb-b35382f79712e765.elb.ap-south-1.amazonaws.com:5000
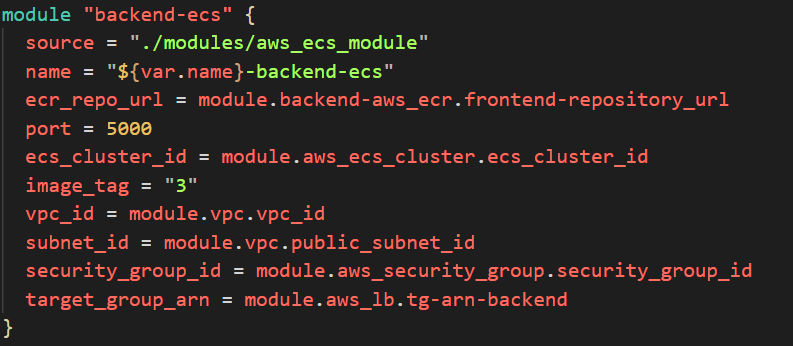

As we can see in ECS Cluster the backend service is updating (1 Pending and 1 Running) after applying terraform apply command.

When the backend is perfectly deployed with the changes, we have to do little changes in .env file of frontend to add VITE_API_PATH which contains the value of Load Balancer:5000 (Backend URL) then build the new frontend image and change the image tag in terraform parent main.tf frontend ECS module.

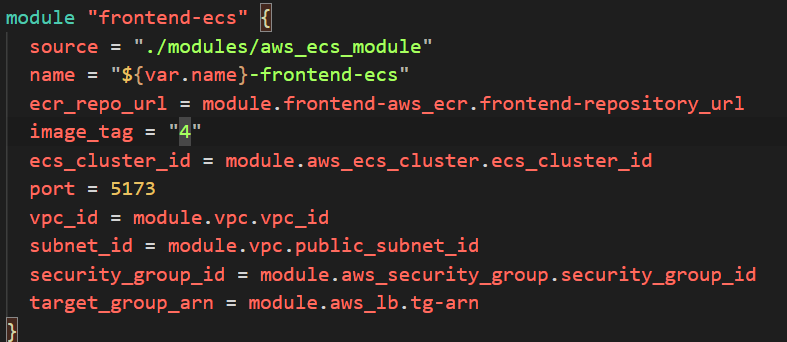
To get the Load Balancer URL from AWS GUI navigate to AWS Cluster
three-tierthen click on any service and go to configuration and networking section scroll down you will get Load Balancer DNS and see the status of Target Group is healthy or not.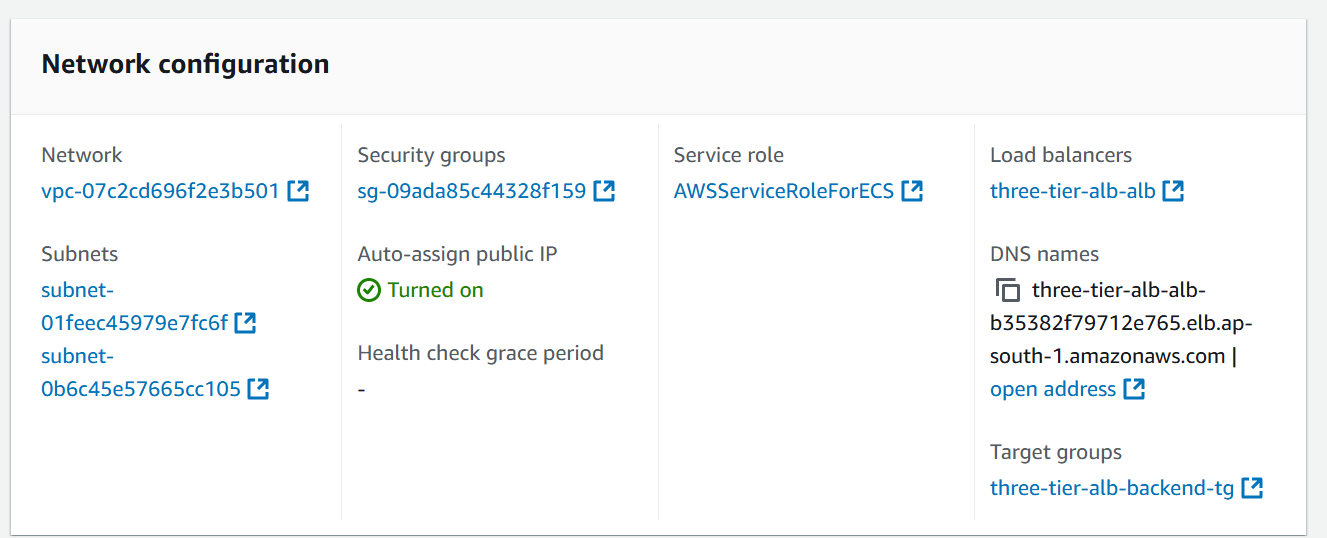
After everything is done, you have done the deployment of 3 tier application now clean the resources on AWS by executing the command.
terraform destroy --auto-approve
Conclusion
In this article, we had learnt the deployment of 3 tier application on AWS ECS with Terraform Modules. Another Project will come soon so stay tuned for the next blog !!!
GitHub Terraform Code : https://github.com/amitmaurya07/AWS-Terraform/tree/master
GitHub Application Code : https://github.com/amitmaurya07/wanderlust-devsecops/tree/aws-ecs-deployment
Twitter : x.com/amitmau07
LinkedIn : linkedin.com/in/amit-maurya07
If you have any queries you can drop the message on LinkedIn and Twitter.
Subscribe to my newsletter
Read articles from Amit Maurya directly inside your inbox. Subscribe to the newsletter, and don't miss out.
Written by

Amit Maurya
Amit Maurya
DevOps Enthusiast, Learning Linux