Building User Interfaces in Flask
 Flask India
Introduction:
Flask is one of the popular choices for building of REST APIs via Python programming. It comes with the bare essentials necessary to facilitate the building of REST APIs yet provides the facility to include additional utilities to extend them. This is in stark contrast to other REST API building frameworks like Django, etc., which follow the more battery-included approach.
Flask may be a barebones framework, but it does include essential stuff like request parsing, simplified response object creation, session and cookie creation and management, configuration management, and an inbuilt debug server to help us run our application.
Let's Get Started:
You can get a quick headstart to create a Sample Flask Application from our tutorial here with a detailed description for our first timers in the link below.
Let's create our first Flask App.
Let’s create a new python file named flask_app.py with the below code.
# Import Modules:

import json
from datetime import datetime
from flask import Flask, request, render_template

app = Flask(__name__)

headers = {'Content-Type': 'application/json'}

@app.route('/', methods=['GET'])
def check_user():
    try:
        return render_template('index.html')

    except Exception as e:
        errors = {
            'message': 'unable to process request',
            'reason': 'internal server error'
        }
        return errors, 500, headers

if __name__ == '__main__':
    app.run(host='0.0.0.0', port=8000, debug=True)
Our directory structure looks like the below along with our virtualenv created for the purpose.
➜  flask_templating ls -lah
total 8
drwxr-xr-x@ 5 flask-india  staff   160B Oct 30 01:25 .
drwxr-xr-x  6 flask-india  staff   192B Oct 22 23:12 ..
-rw-r--r--@ 1 flask-india  staff   605B Nov  9 22:51 flask_app.py
drwxr-xr-x  3 flask-india  staff    96B Oct 30 01:25 templates
drwxr-xr-x  6 flask-india  staff   192B Oct 30 00:12 venv
Note: We have created a templates folder containing the code for the HTML template used in our controller logic.
➜  flask_templating ls -lah templates
total 8
drwxr-xr-x  3 flask-india  staff    96B Oct 30 01:25 .
drwxr-xr-x@ 5 flask-india  staff   160B Oct 30 01:25 ..
-rw-r--r--@ 1 flask-india  staff   261B Nov  3 23:09 index.html
The index.html file contains the below code snippet.
<!DOCTYPE html>
<html>
<head>
    <meta charset="utf-8">
    <meta name="viewport" content="width=device-width, initial-scale=1">
    <title>My Flask App</title>
</head>
<body>
    <h1>Hello World</h1>
    <br>
    <h4>Welcome to my website built using Flask</h4>
</body>
</html>
Let’s activate our virtualenv and run our flask app.
➜  flask_templating . venv/bin/activate
(venv) ➜  flask_templating
(venv) ➜  flask_templating python flask_app.py
 * Serving Flask app 'flask_app'
 * Debug mode: on
WARNING: This is a development server. Do not use it in a production deployment. Use a production WSGI server instead.
 * Running on all addresses (0.0.0.0)
 * Running on http://127.0.0.1:8000
 * Running on http://192.168.0.115:8000
Press CTRL+C to quit
 * Restarting with stat
 * Debugger is active!
 * Debugger PIN: 123-168-419
Let’s open our app URL, http://localhost:8000/, on your internet browser of your choice. You should see a similar webpage below.
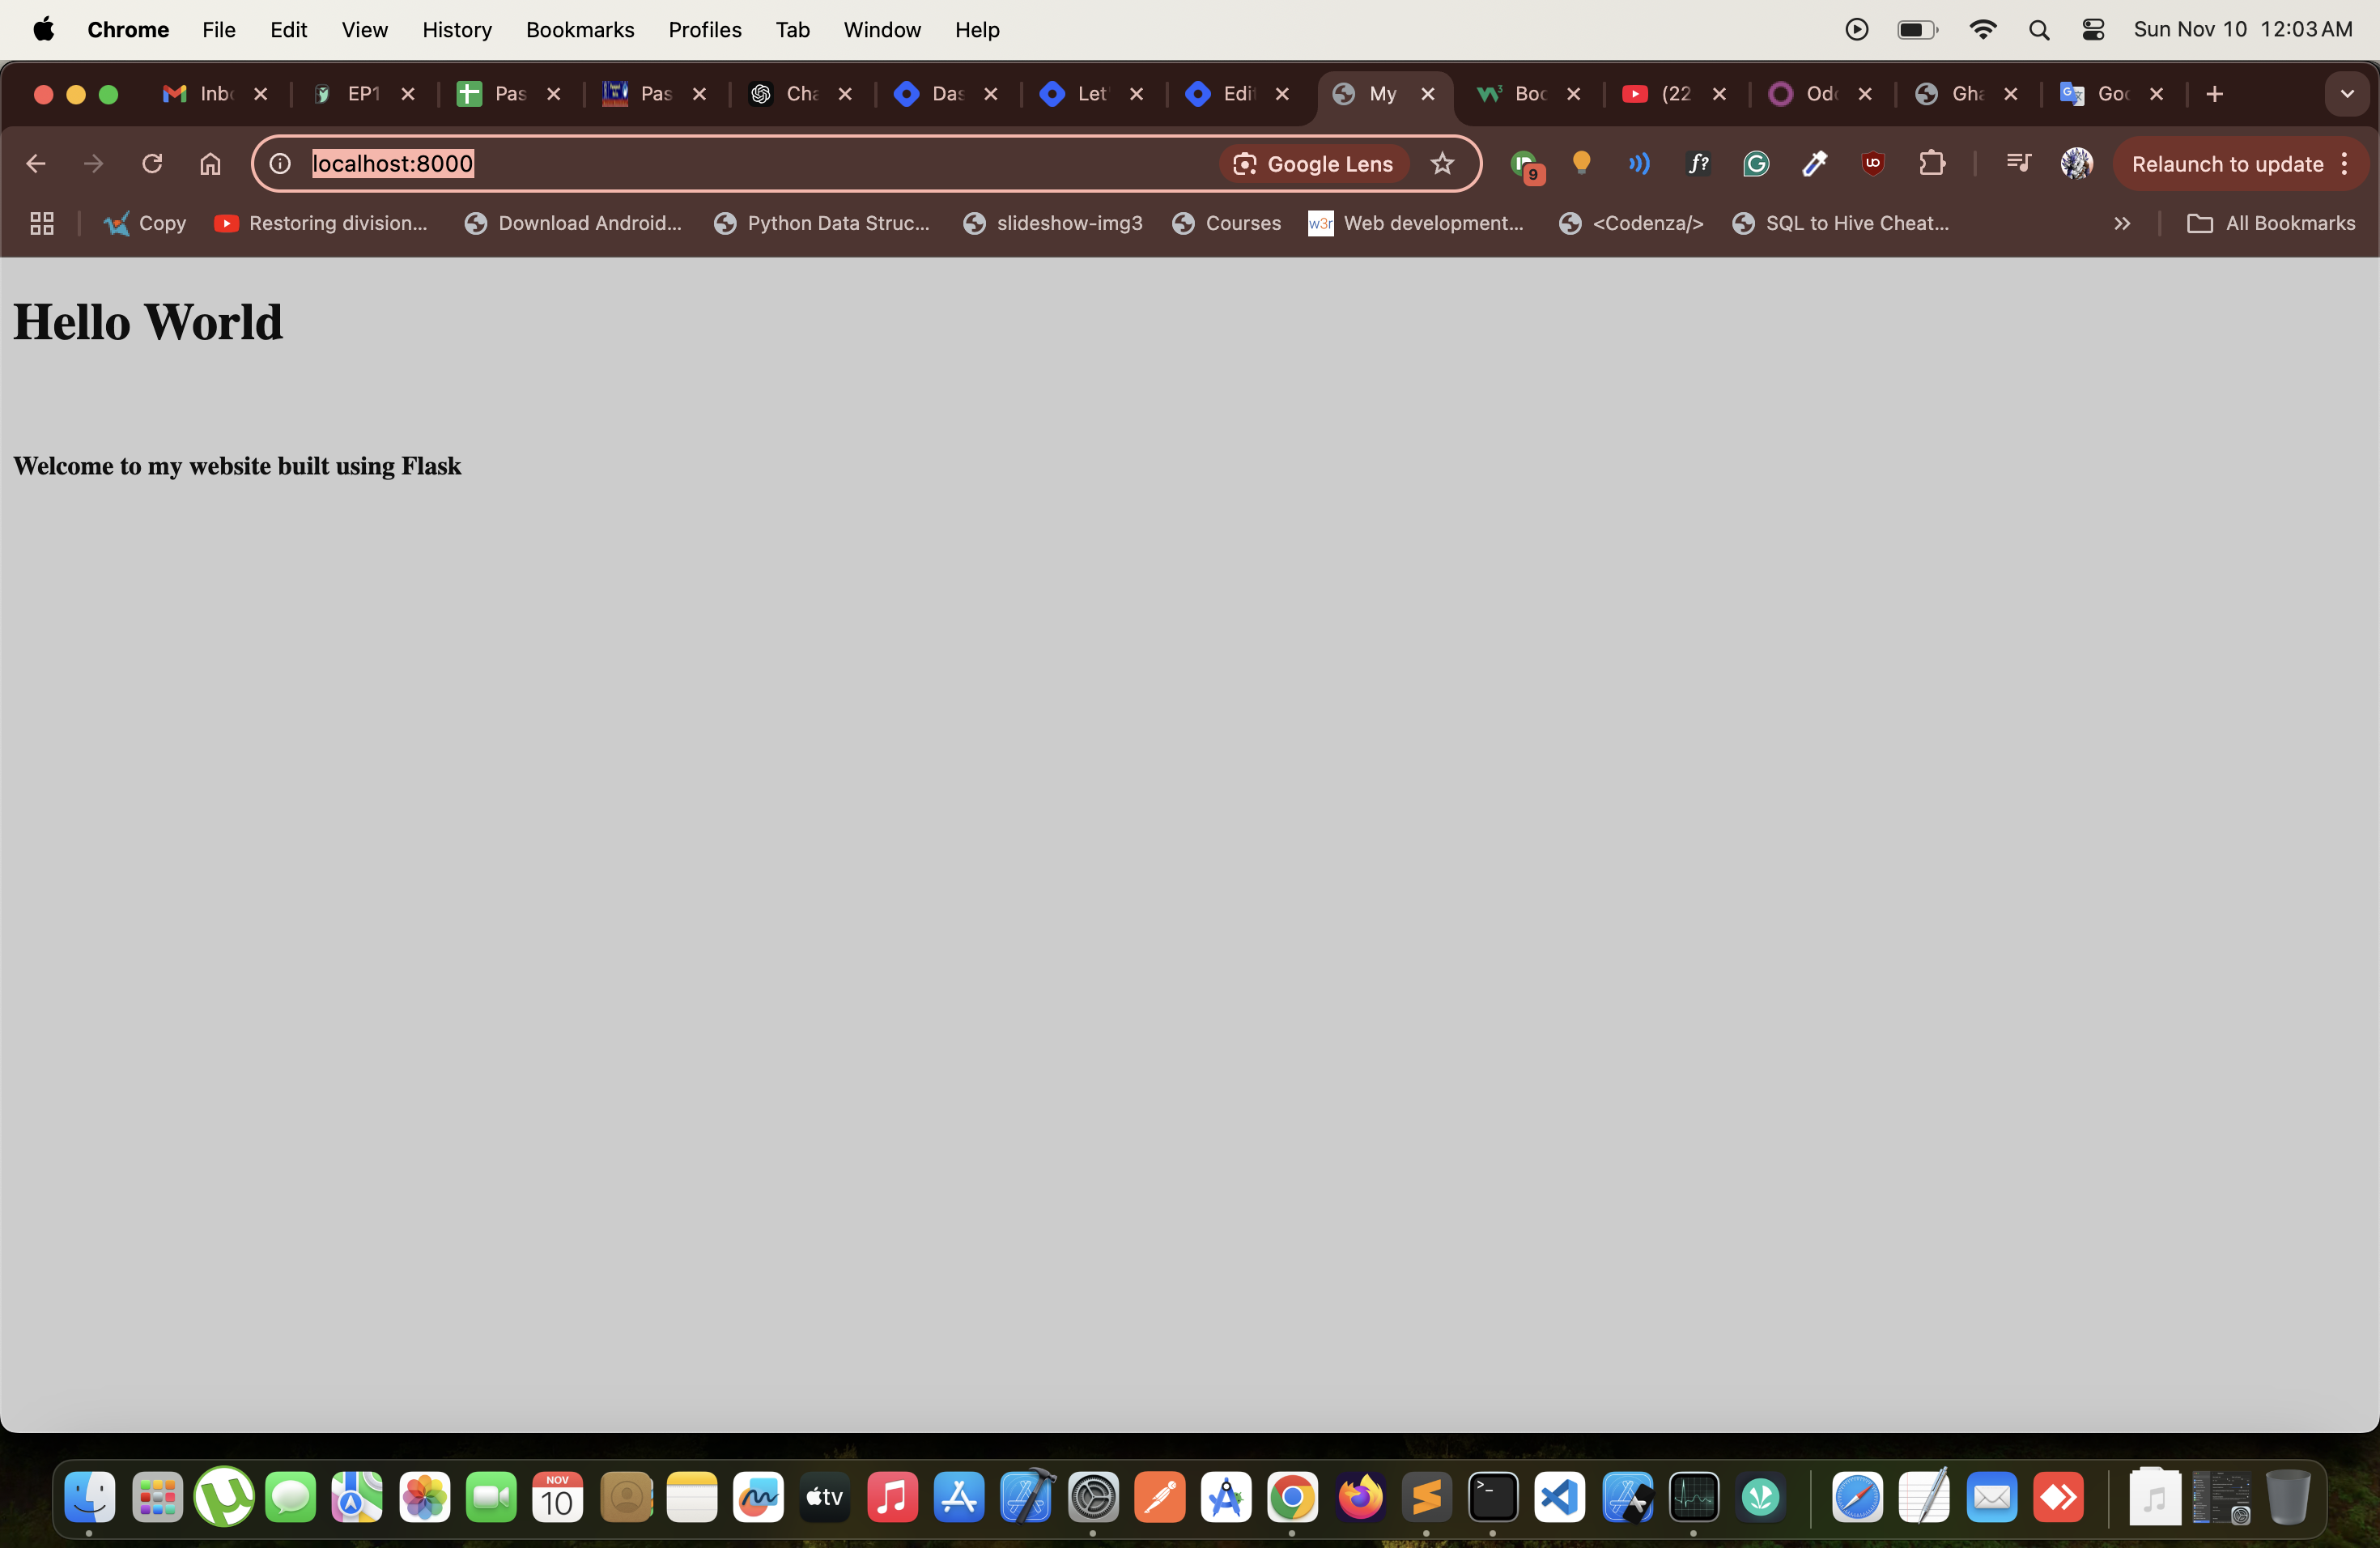
Flask is processing the HTML file content and sending the same as a response which is being rendered by the web browser.
Now let’s pass some static and dynamic variables into our website. Modify the contents of the python and HTML file as below.
# Import Modules:

import json
from datetime import datetime
from flask import Flask, request, render_template

app = Flask(__name__)

headers = {'Content-Type': 'application/json'}

@app.route('/', methods=['GET'])
def check_user():
    try:
        current_timestamp = datetime.utcnow().isoformat()
        return render_template(
            'index.html',
            title = "Home Page",
            message = "Welcome to my Flask App!",
            current_timestamp = current_timestamp
        )

    except Exception as e:
        errors = {
            'message': 'unable to process request',
            'reason': 'internal server error'
        }
        return errors, 500, headers

if __name__ == '__main__':
    app.run(host='0.0.0.0', port=8000, debug=True)
Here, we define two static variables, title, and message, which are then passed to the underlying Jinja templating engine to render them correctly.
<!DOCTYPE html>
<html>
<head>
    <meta charset="utf-8">
    <meta http-equiv="refresh" content="5">
    <meta name="viewport" content="width=device-width, initial-scale=1">
    <title>{{title}}</title>
</head>
<body>
    <h1>Hello World</h1>
    <br>
    <h4>{{message}}</h4>
    <br>
    <h4>Current Time: {{current_timestamp}}</h4>
</body>
</html>
Note:
We have added a Meta HTTP refresh tag so that the webpage refreshes by itself and we can see the magic of our dynamic variable ‘current_timestamp’ being changed automatically on our webpage. The webpage will automatically reload every 5 secs.
The variables are rendered using a special curly brace double-tag, Mustache, or Handlebars style. eg: {{variable_name}}
After we save and run our app again, we should see a similar style below.
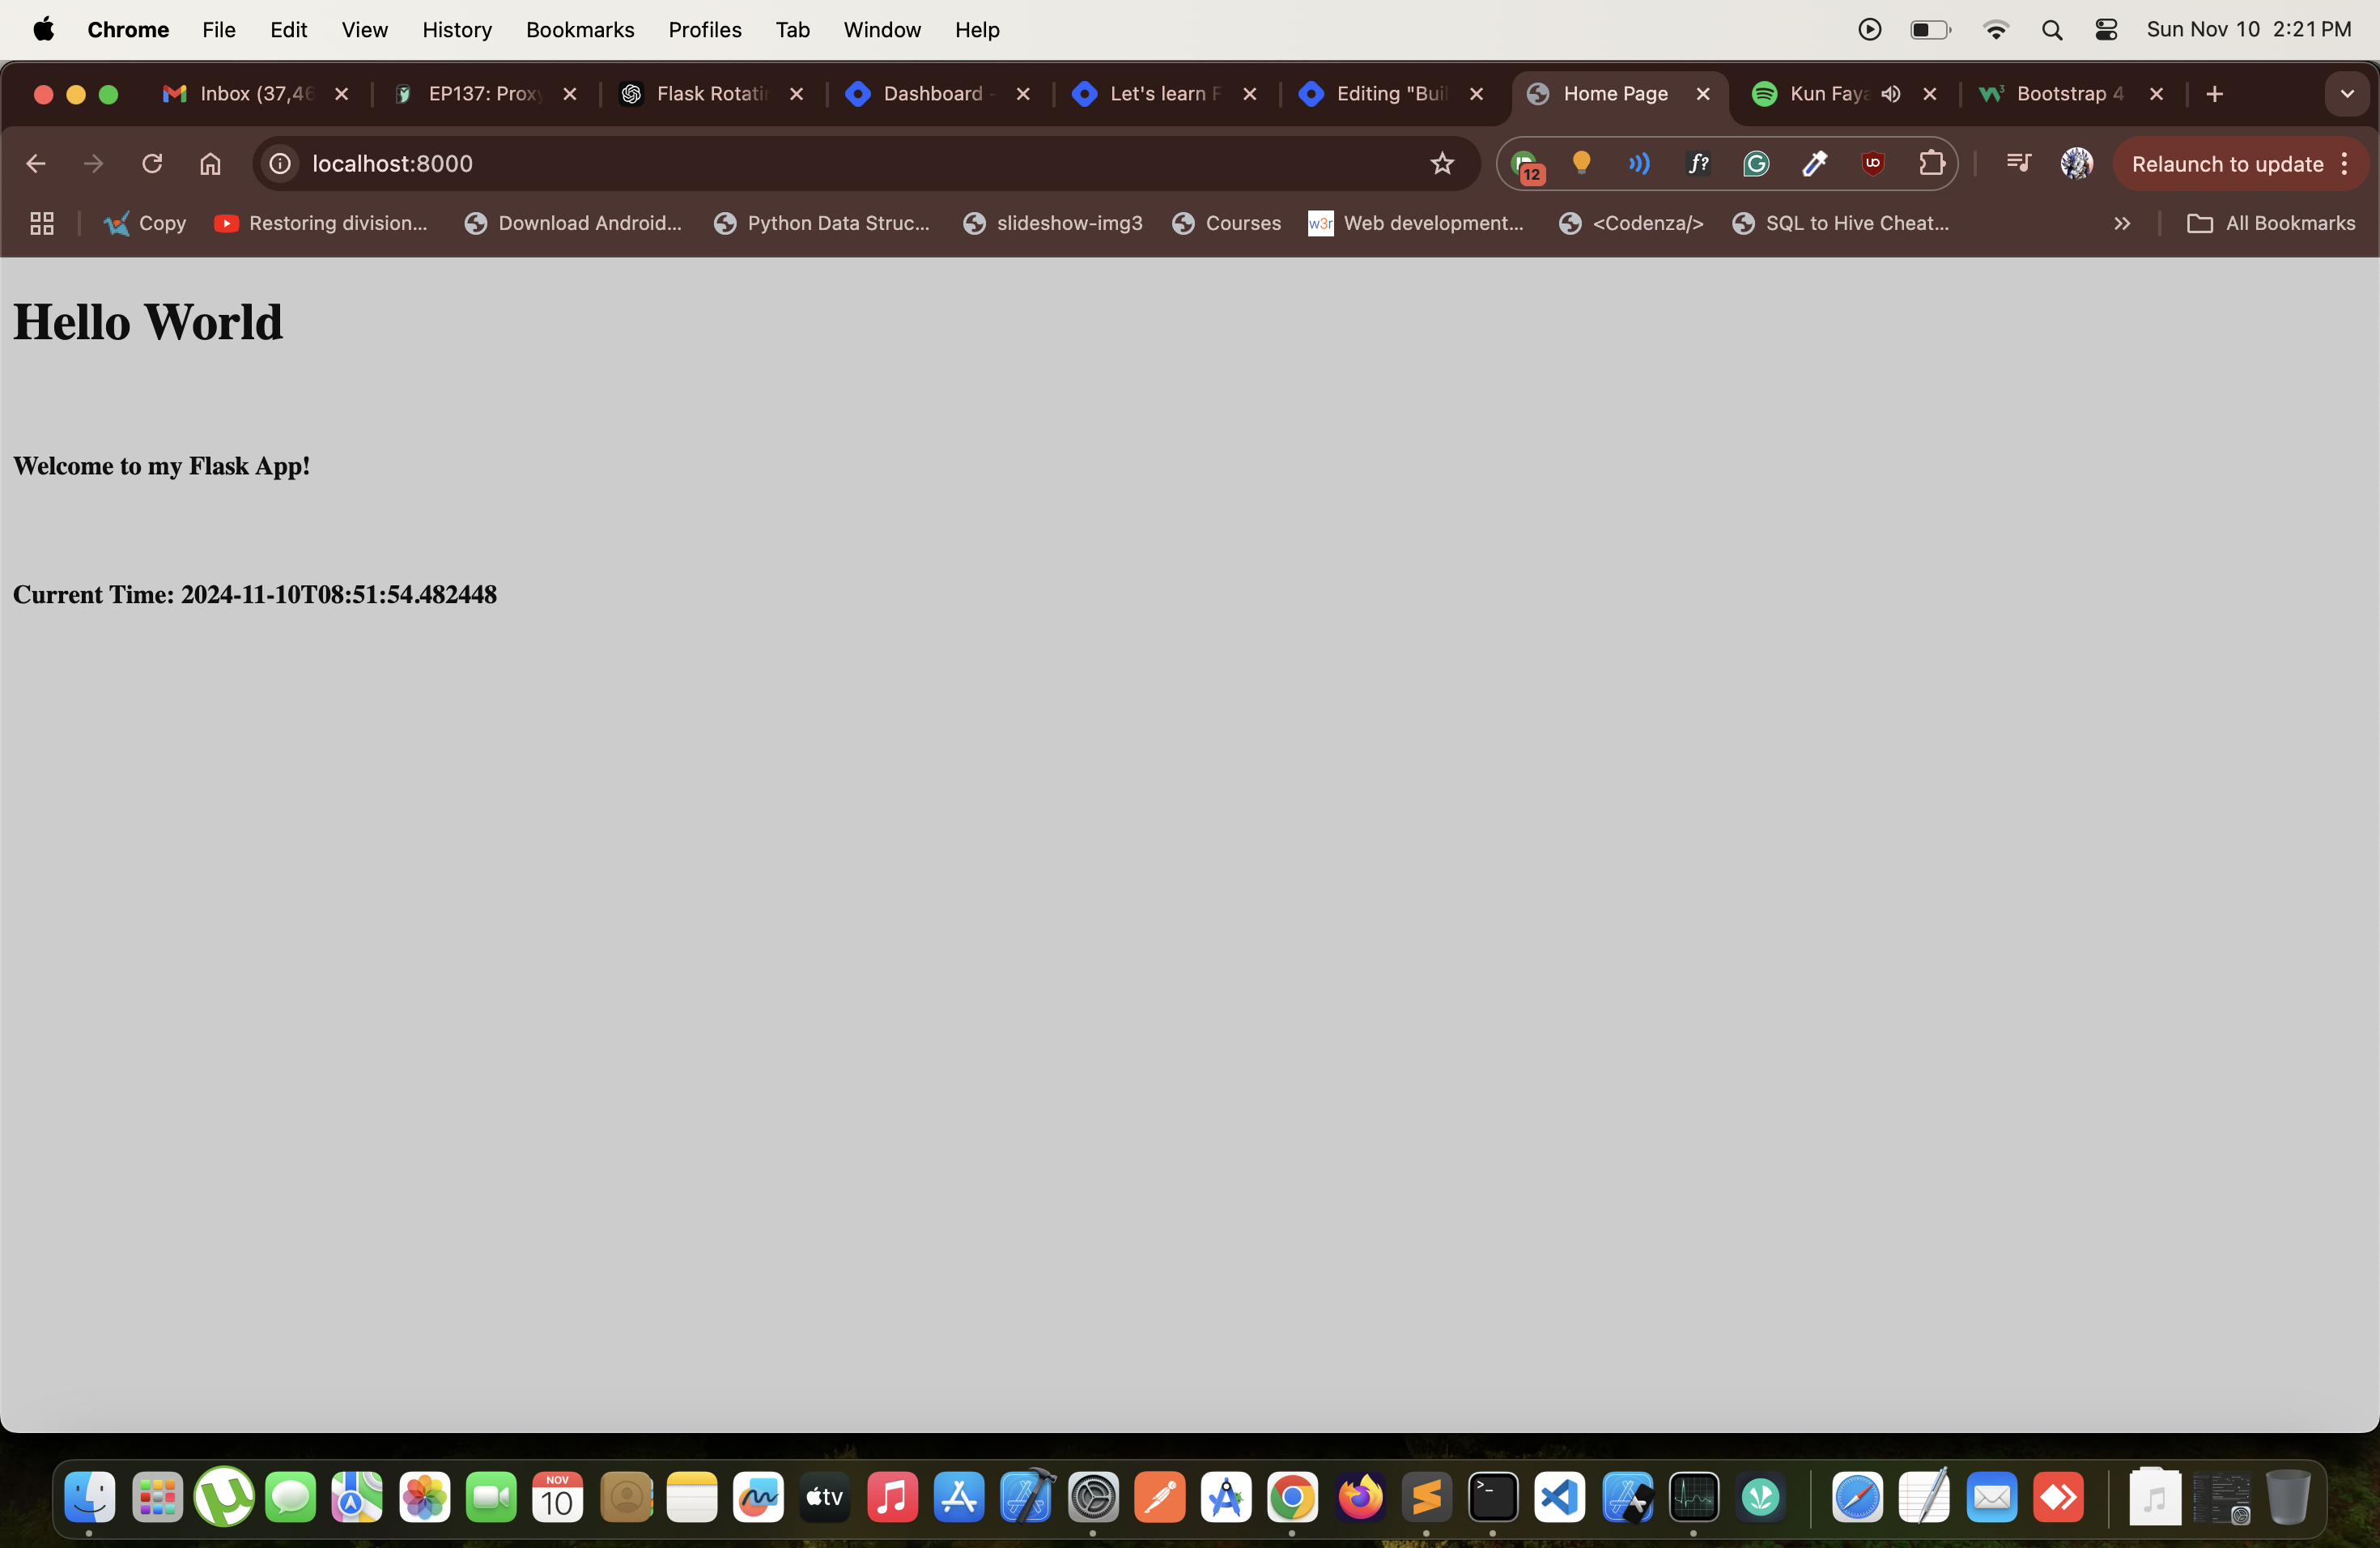
Now that we’re done with the basics, let's get down to more advanced stuff.
Flask Templating Advance Use cases
The basic use cases are covered fairly above and what if we want to proceed a bit further than a simple webpage?
Let’s explore the below scenarios:
A bit of custom styling.
A sprinkle of our javascript.
Using images to mesmerize our users.
Using a bit more advanced library such as Bootstrap 5.
Where’s my CSS?
Let’s create some additional sub-folders inside our current folders as below.
➜  flask_templating ls -lah ./static
total 0
drwxr-xr-x  5 flask-india  staff   160B Nov 10 14:28 .
drwxr-xr-x@ 6 flask-india  staff   192B Nov 10 14:27 ..
drwxr-xr-x  3 flask-india  staff    96B Nov 10 14:33 css

---------------------------------------------------------

➜  flask_templating ls -lah ./static/css
total 0
drwxr-xr-x  3 flask-india  staff    96B Nov 10 14:33 .
drwxr-xr-x  5 flask-india  staff   160B Nov 10 14:28 ..
-rw-r--r--@ 1 flask-india  staff     0B Nov 10 14:33 style.css
We have one static folder and inside same another folder named css which contains the file named style.css. File contents for our html and css files should be as follows.
<!DOCTYPE html>
<html>
<head>
    <meta charset="utf-8">
    <meta name="viewport" content="width=device-width, initial-scale=1">
    <link rel="stylesheet" href="{{ url_for('static', filename='css/style.css') }}">
    <title>{{title}}</title>
</head>
<body>
    <h1>Hello World</h1>
    <br>
    <h4 id="flask-message">{{message}}</h4>
    <br>
    <h4>Current Time: {{current_timestamp}}</h4>
</body>
</html>
file: index.html
Note: We have removed the Meta HTTP refresh tag from here.
#flask-message {
    color: #00cccc;
}
file: style.css
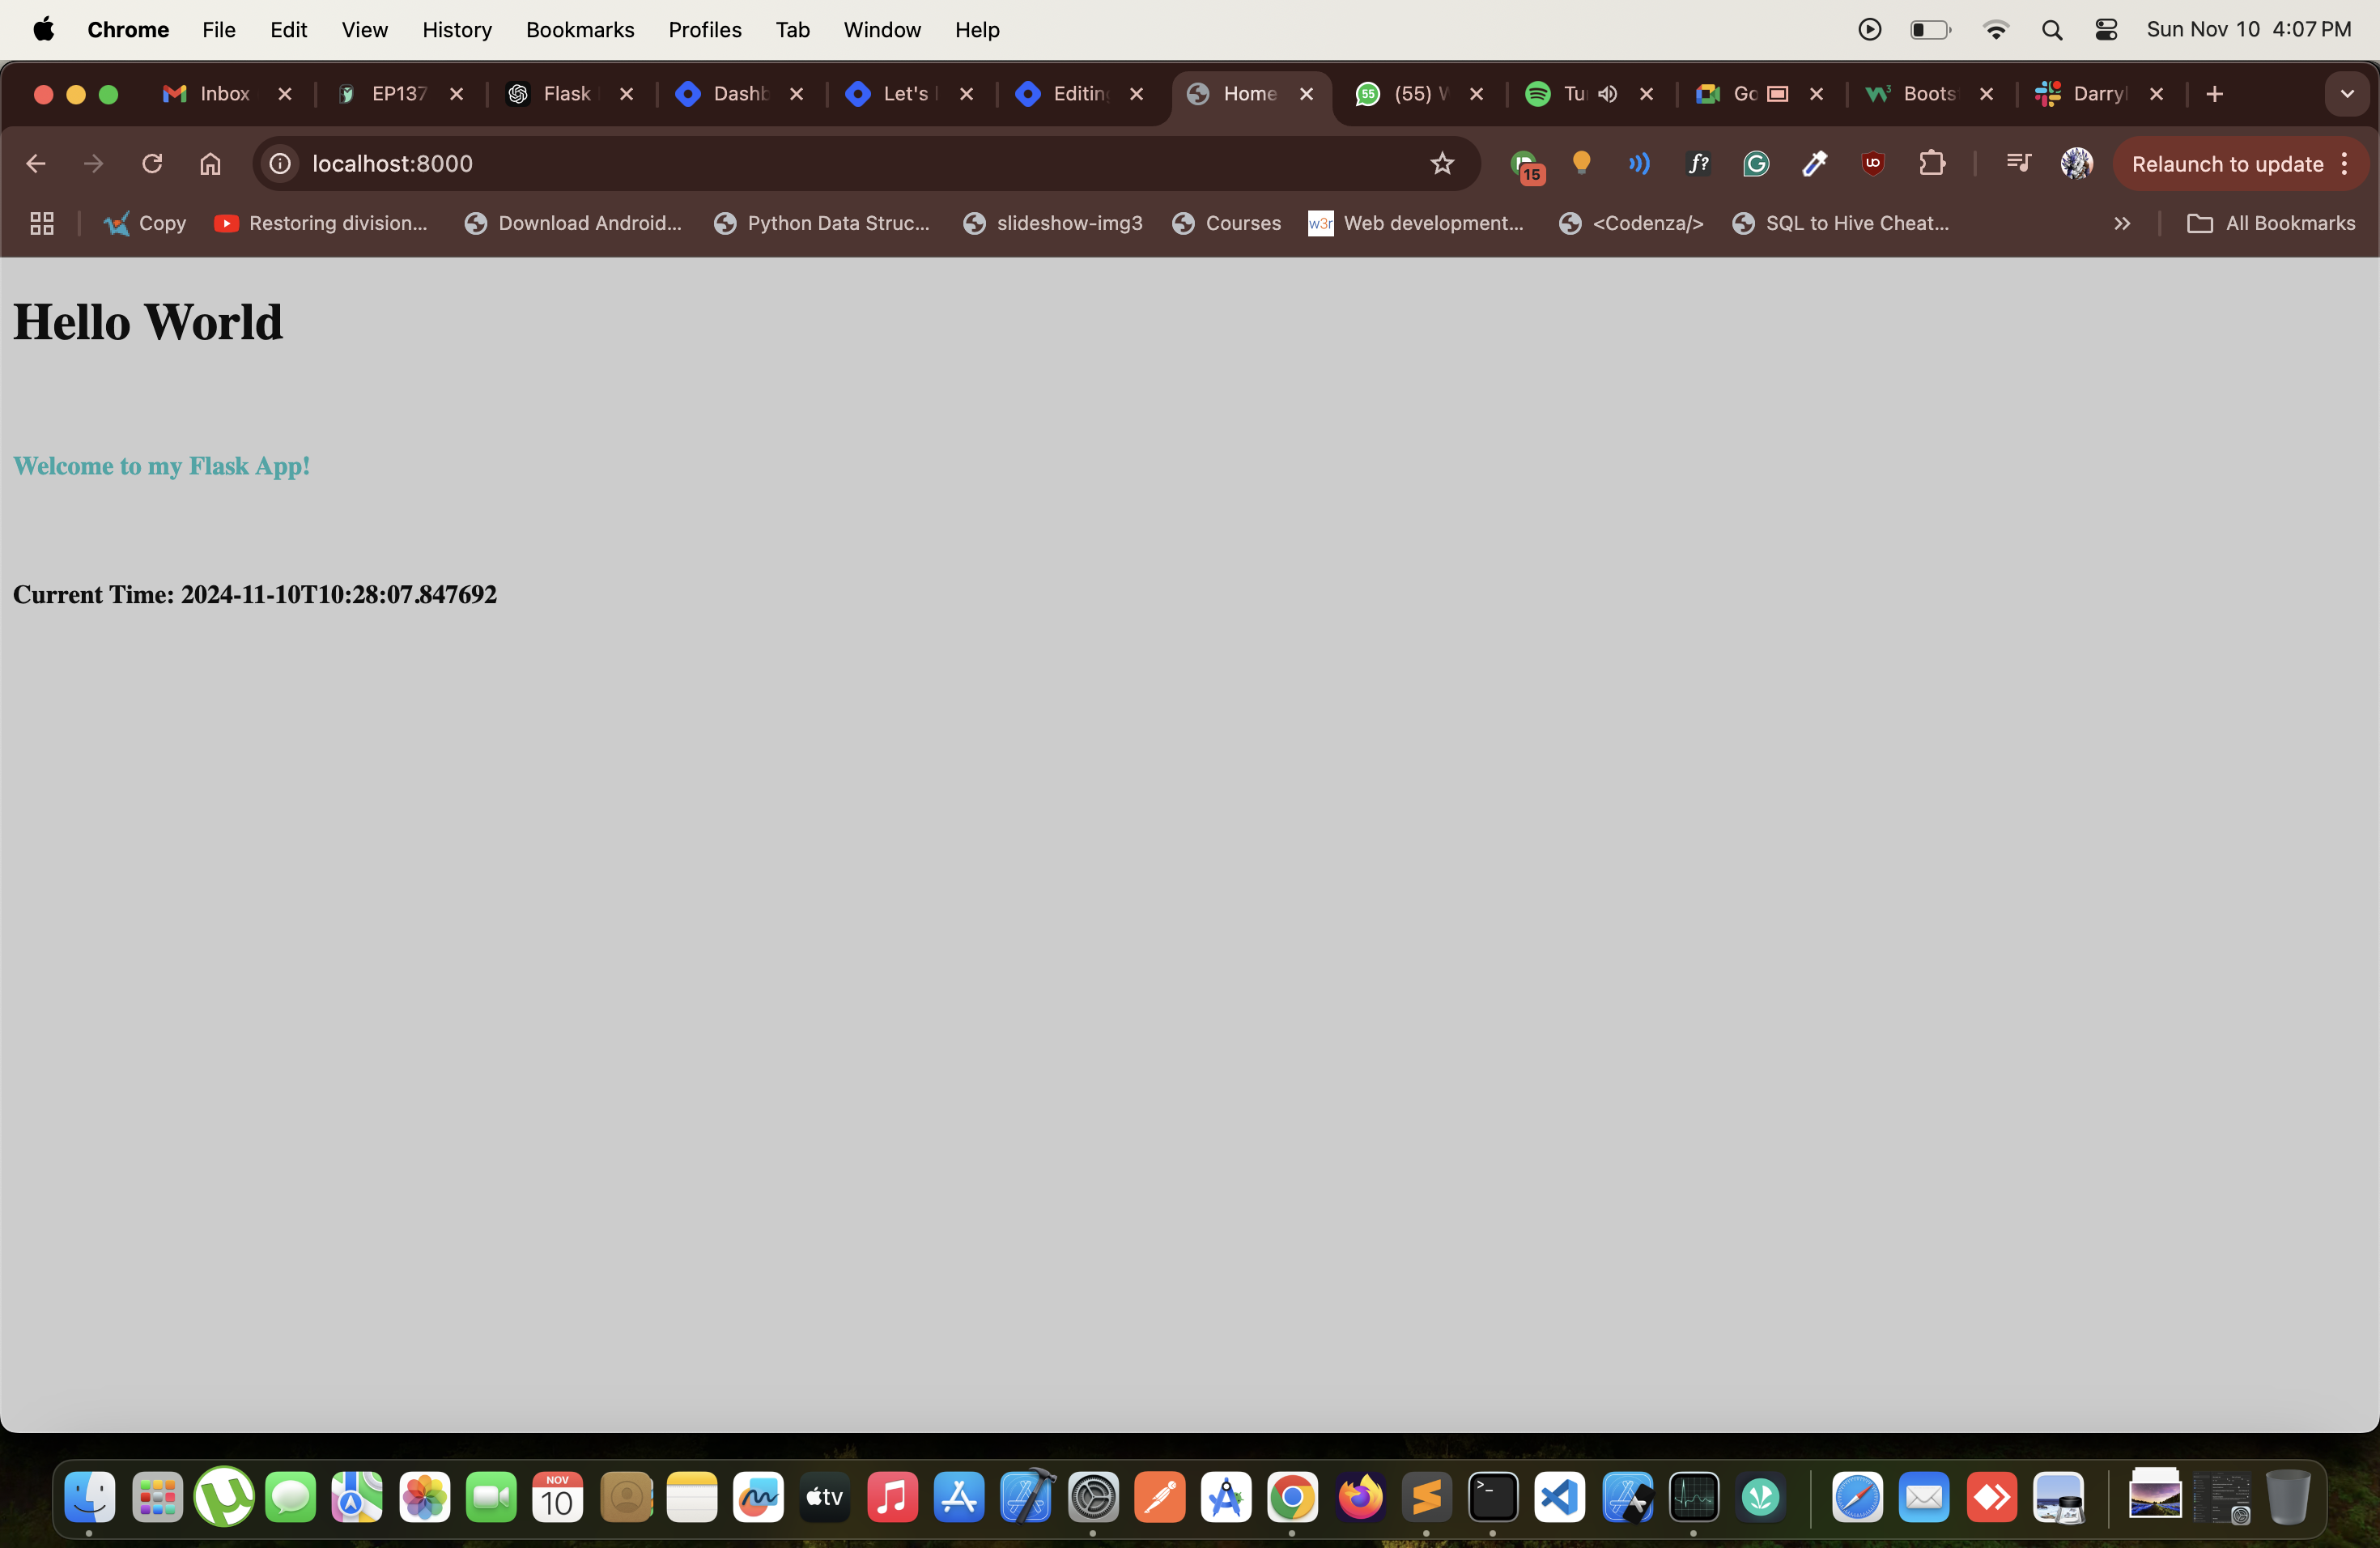
On reloading our webpage you should be able to see the below output.
Where’s my Javascript?
Let’s create some additional sub-folders inside our current folders as below.
➜  flask_templating ls -lah ./static
total 0
drwxr-xr-x  5 flask-india  staff   160B Nov 10 14:28 .
drwxr-xr-x@ 6 flask-india  staff   192B Nov 10 14:27 ..
drwxr-xr-x  3 flask-india  staff    96B Nov 10 14:33 css
drwxr-xr-x  2 flask-india  staff    64B Nov 10 14:27 js

------------------------------------------------------------

➜  flask_templating ls -lah ./static/js
total 0
drwxr-xr-x  3 tanmoykarmokar  staff    96B Nov 10 16:26 .
drwxr-xr-x  5 tanmoykarmokar  staff   160B Nov 10 14:28 ..
-rw-r--r--  1 tanmoykarmokar  staff     0B Nov 10 16:26 script.js
We have one static folder and inside same another folder named js which contains the file named script.js. File contents for our html and js files should be as follows.
<!DOCTYPE html>
<html>
<head>
    <meta charset="utf-8">
    <meta name="viewport" content="width=device-width, initial-scale=1">
    <link rel="stylesheet" href="{{ url_for('static', filename='css/style.css') }}">
    <title>{{title}}</title>
</head>
<body>
    <h1>Hello World</h1>
    <br>
    <h4 id="flask-message">{{message}}</h4>
    <br>
    <h4>Current Time: {{current_timestamp}}</h4>
    <br>
    <button onclick="showAlert();">Click me here</button>
    <br>
    <br>
</body>
<script src="{{ url_for('static', filename='js/script.js') }}"></script>
</html>
file: index.html
const showAlert = () => {
    alert('U clicked a button on Flask App Webpage');
}
file: script.js
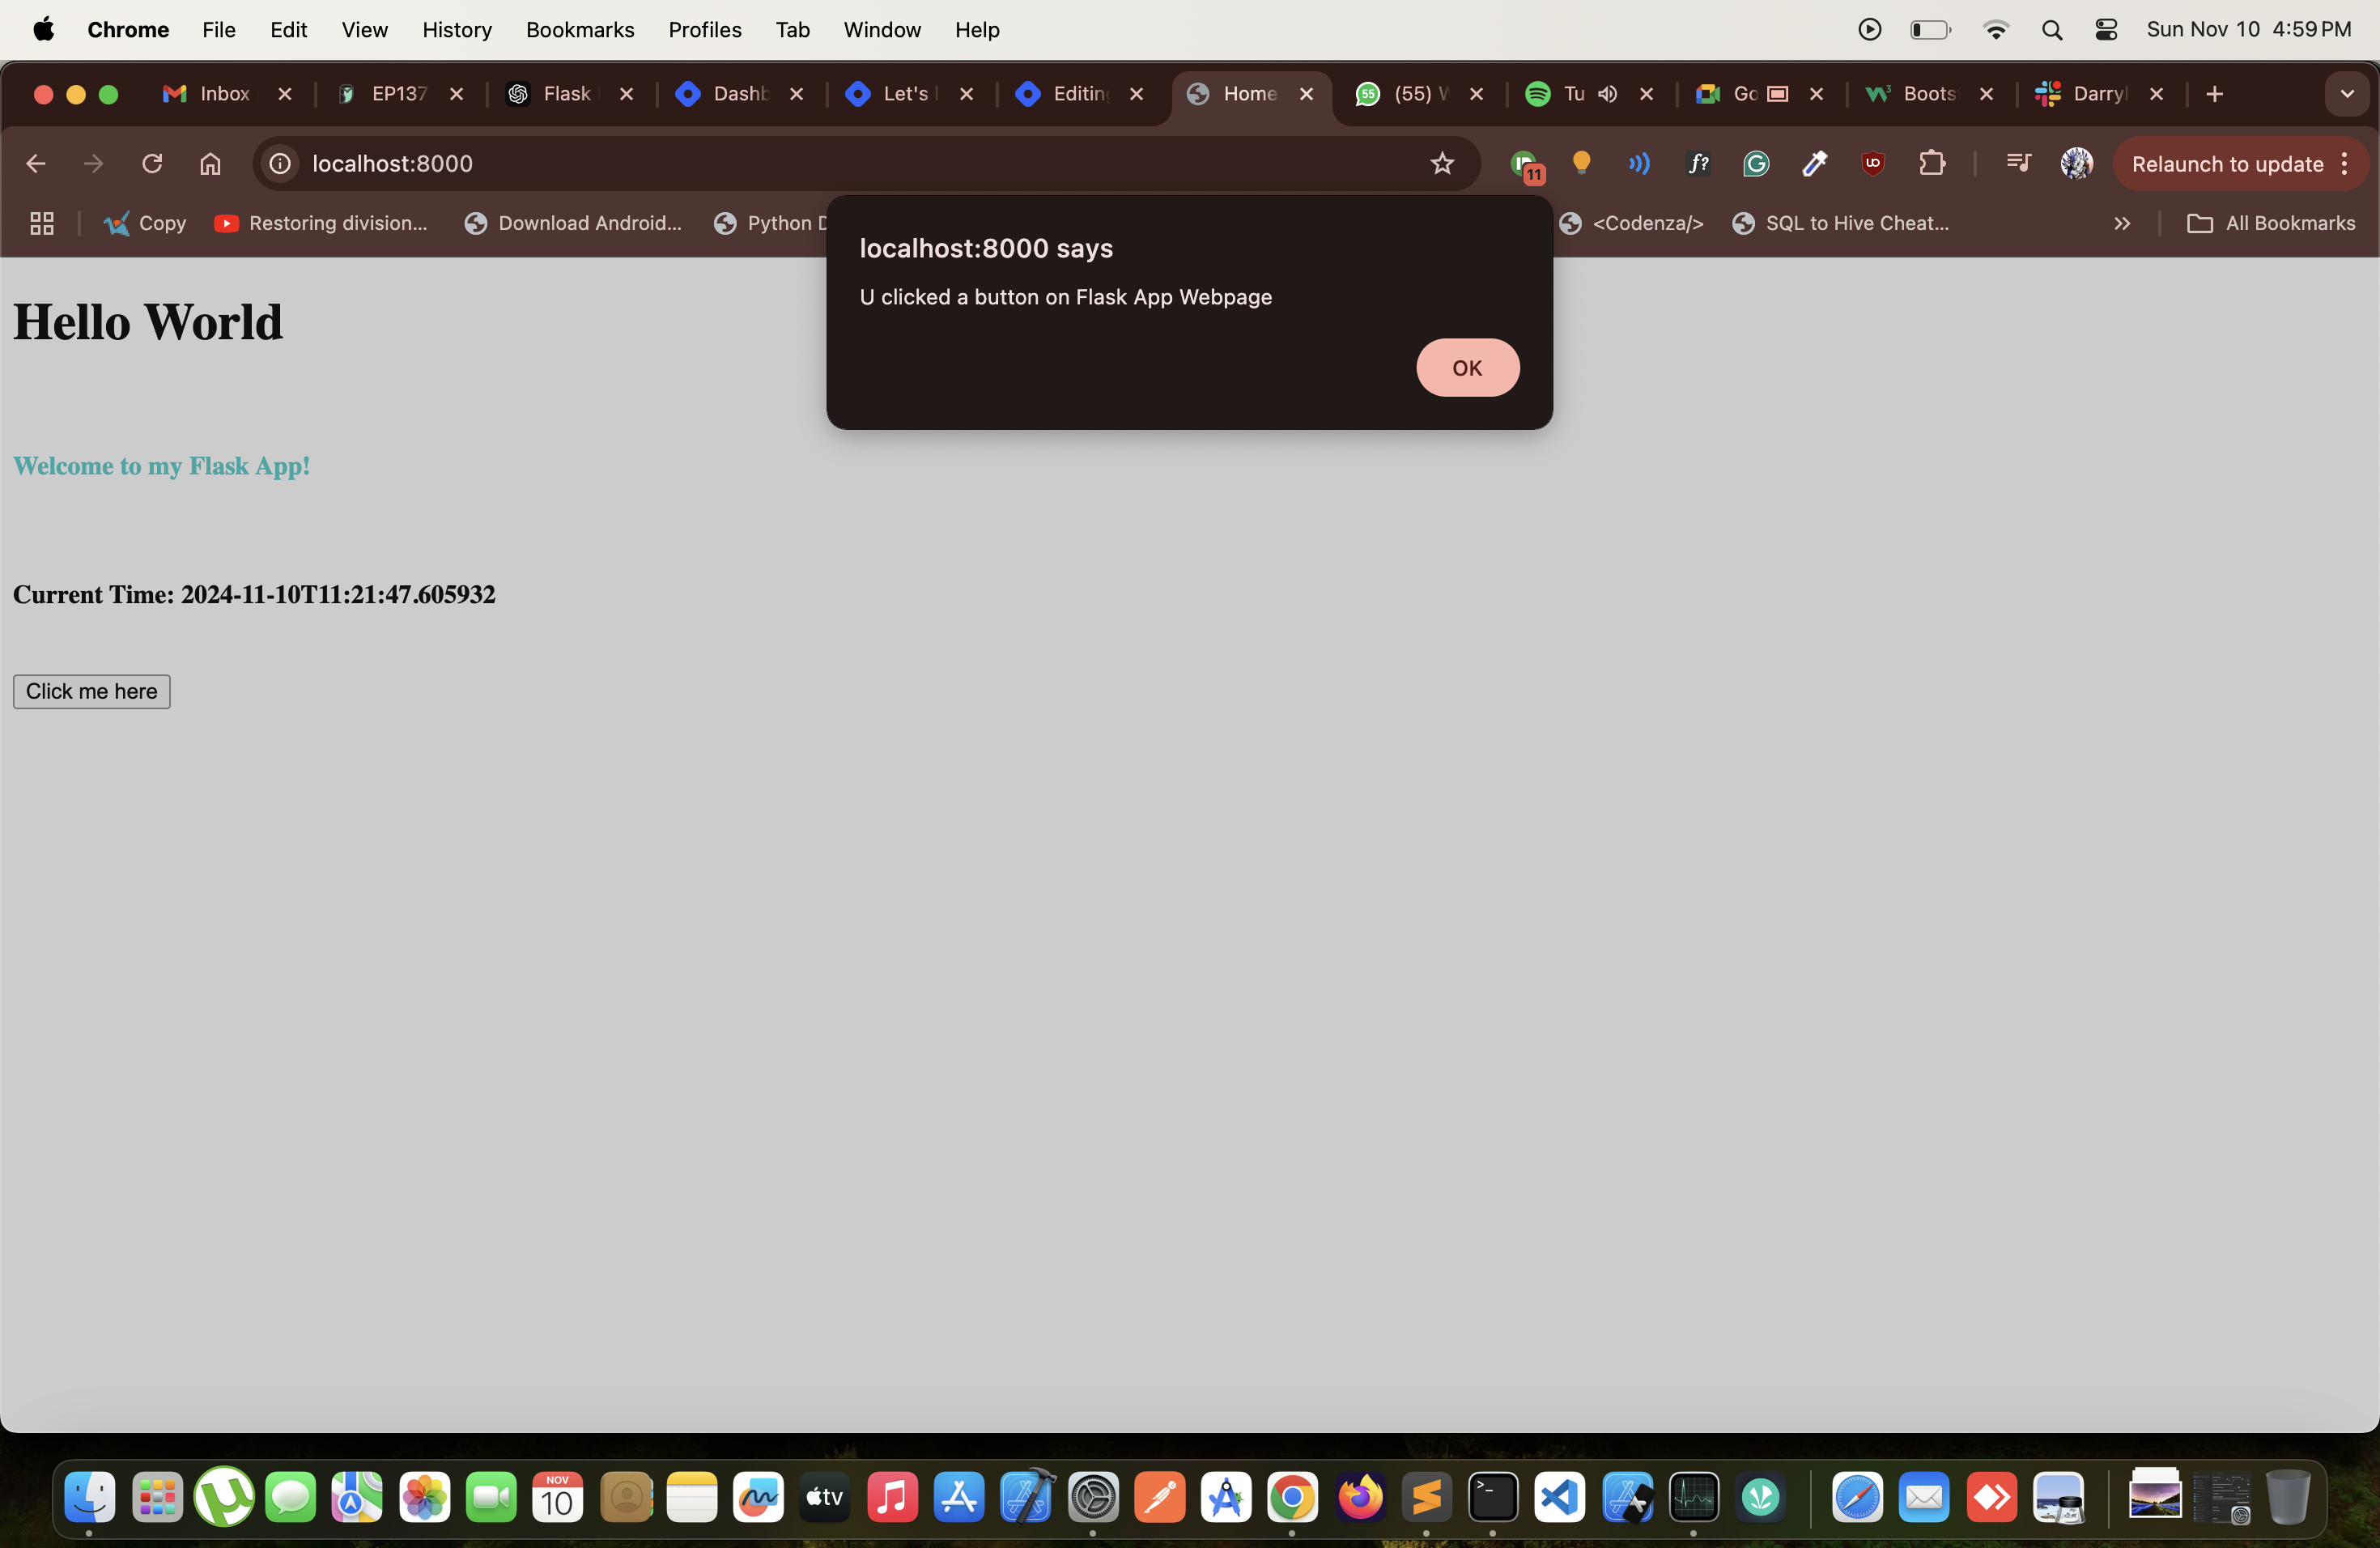
Once we save and reload our app. We should see the below output on the webpage.
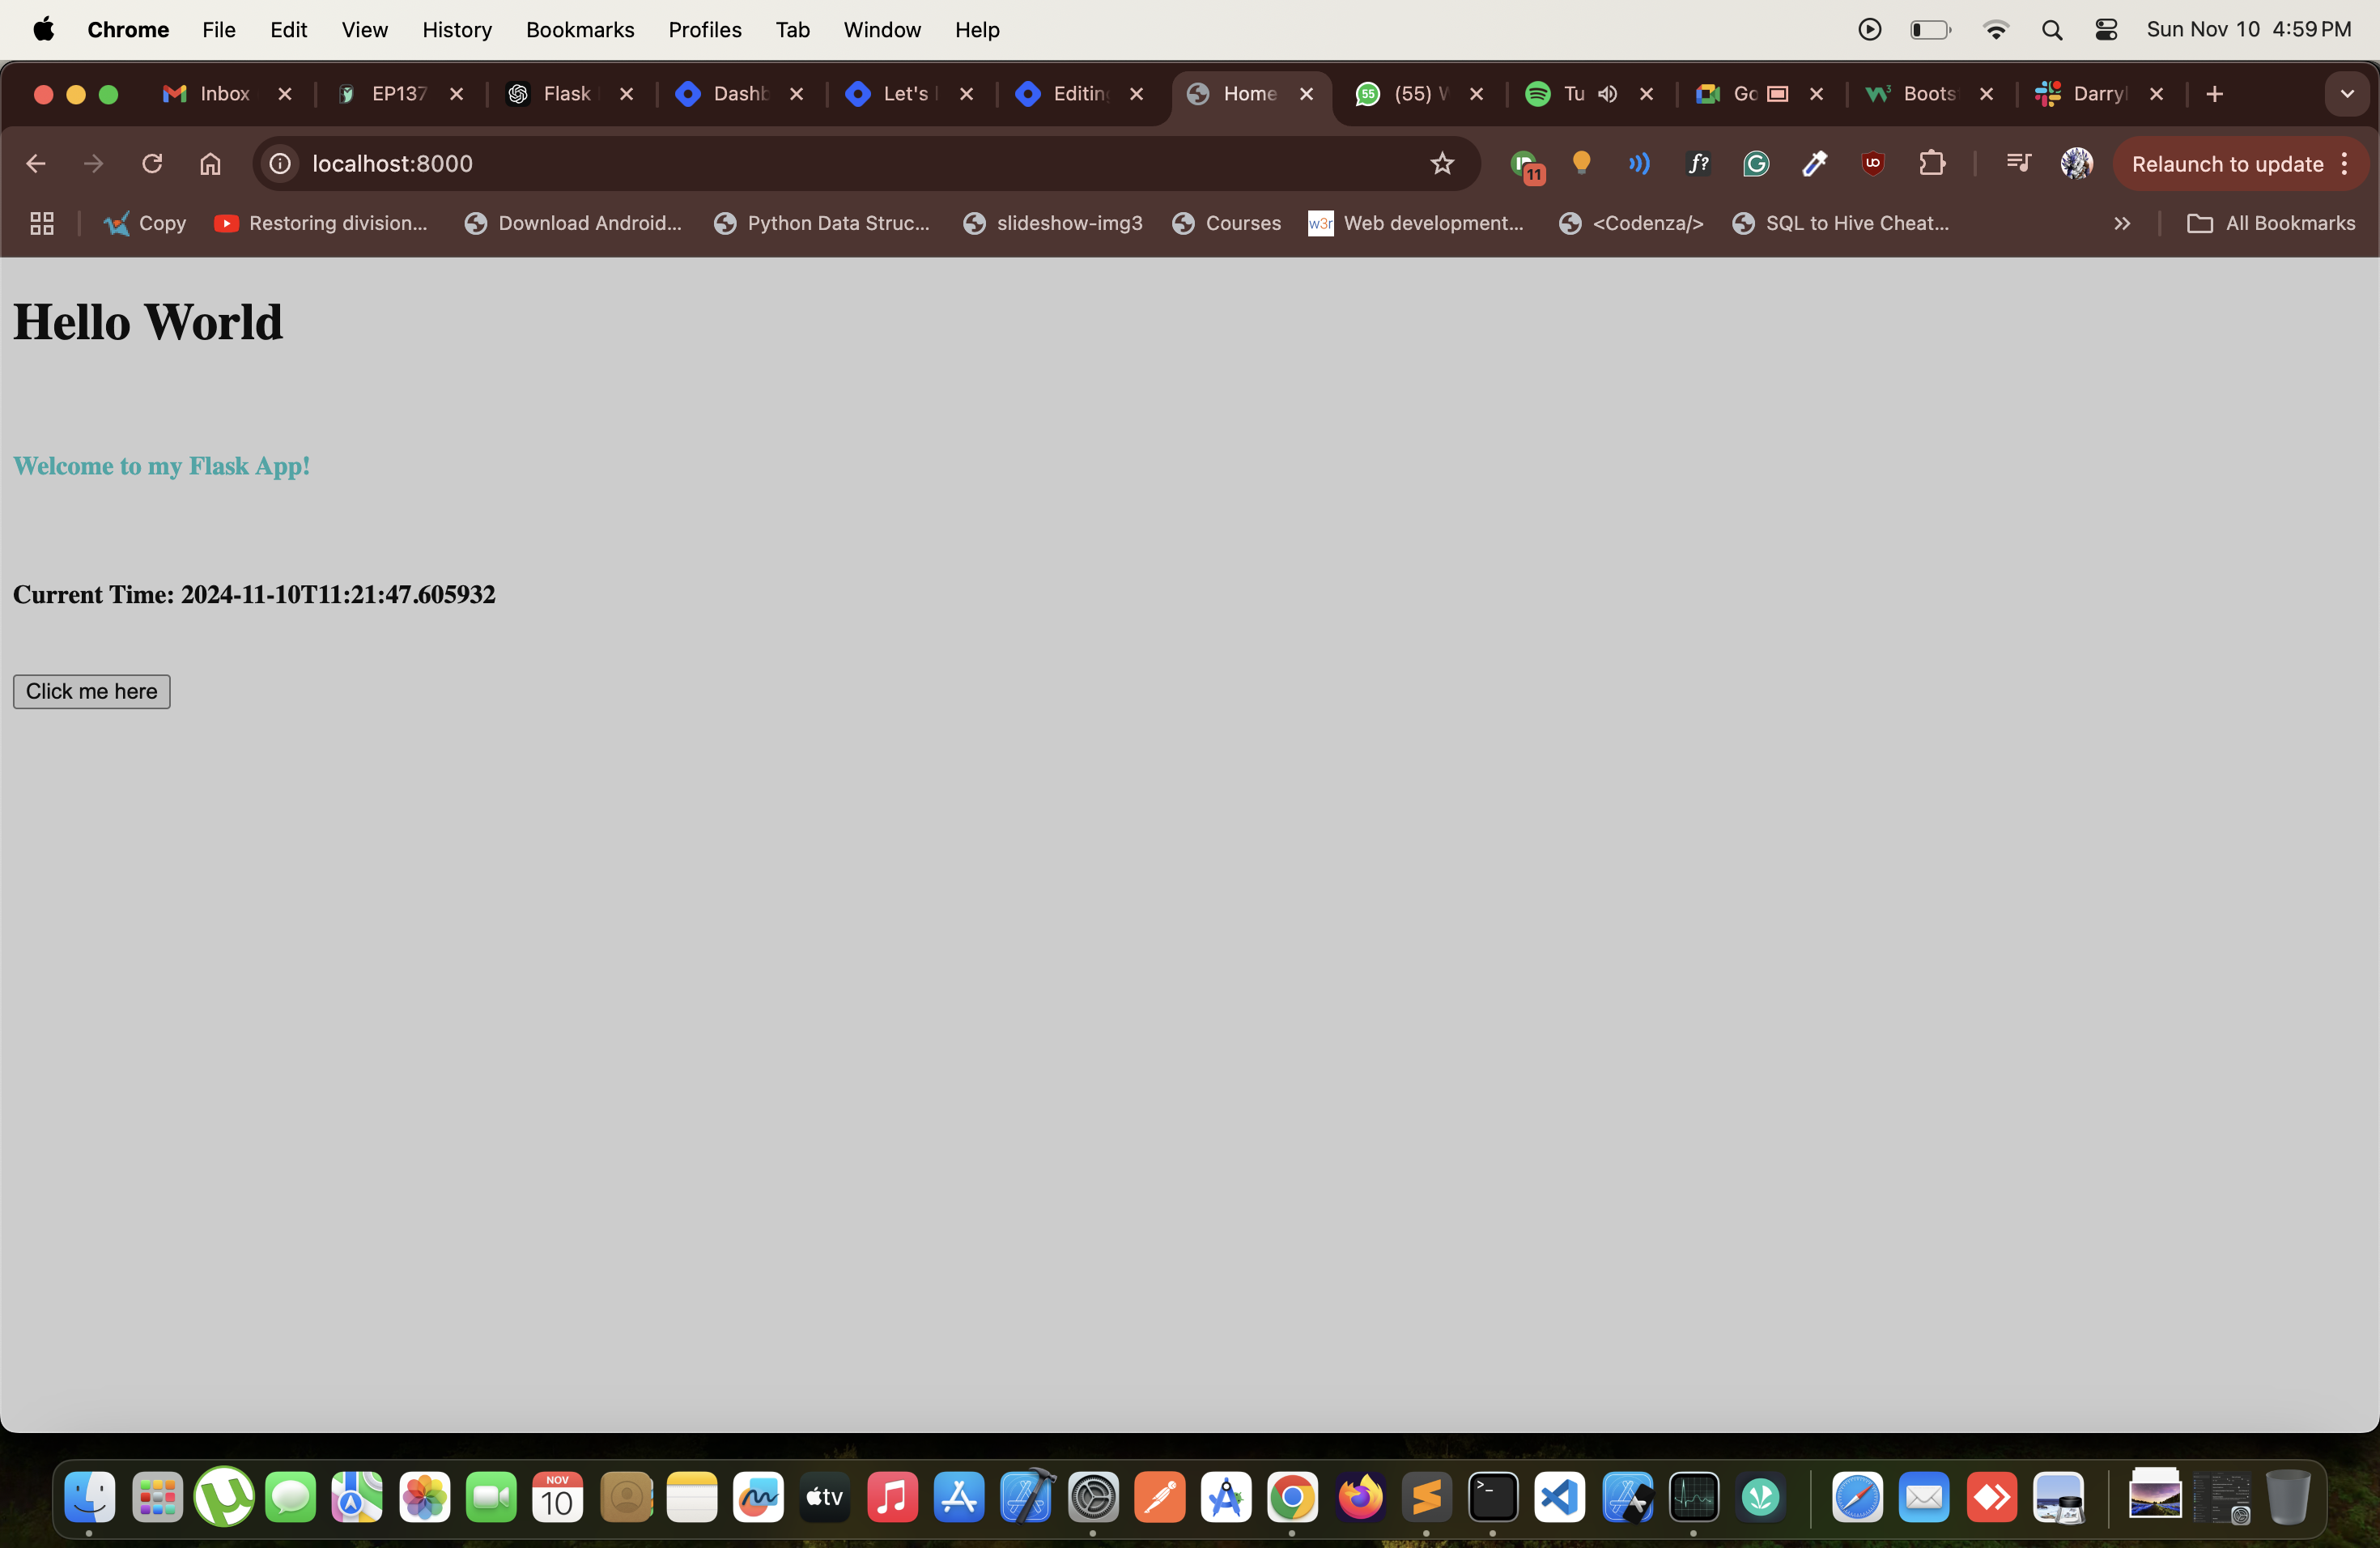
Once we click on the button, we should see a browser alert.
Let’s add some images, shall we?
Let’s create some additional sub-folders inside our current folders as below.
➜  flask_templating ls -lah ./static
total 0
drwxr-xr-x  5 flask-india  staff   160B Nov 10 14:28 .
drwxr-xr-x@ 6 flask-india  staff   192B Nov 10 14:27 ..
drwxr-xr-x  3 flask-india  staff    96B Nov 10 14:33 css
drwxr-xr-x  2 flask-india  staff    64B Nov 10 14:28 images
drwxr-xr-x  2 flask-india  staff    64B Nov 10 14:27 js

------------------------------------------------------------------

➜  flask_templating ls -lah ./static/images
total 656
drwxr-xr-x  3 flask-india  staff    96B Nov 10 17:19 .
drwxr-xr-x  6 flask-india  staff   192B Nov 10 17:19 ..
-rw-r--r--@ 1 flask-india  staff   326K Nov 10 14:28 sample.jpeg
Note: We have created one more sub-folder named images and saved a sample image file in the same under our existing static folder.
Now let’s make some changes in our html file as below.
<!DOCTYPE html>
<html>
<head>
    <meta charset="utf-8">
    <meta name="viewport" content="width=device-width, initial-scale=1">
    <link rel="stylesheet" href="{{ url_for('static', filename='css/style.css') }}">
    <title>{{title}}</title>
</head>
<body>
    <h1>Hello World</h1>
    <br>
    <h4 id="flask-message">{{message}}</h4>
    <br>
    <img id="flask-img" src="{{ url_for('static', filename='images/sample.jpeg') }}" alt="sample">
    <br>
    <h4>Current Time: {{current_timestamp}}</h4>
    <br>
    <button onclick="showAlert();">Click me here</button>
    <br>
    <br>
</body>
<script src="{{ url_for('static', filename='js/script.js') }}"></script>
</html>
file: index.html
#flask-message {
    color: #00cccc;
}

#flask-img {
    width: 100%;
    height: 350px;
}
file: style.css
Note: We adjust our image height and width using css, which we have referenced earlier.
Now let’s save and reload our app, the below output should be seen in our browser.
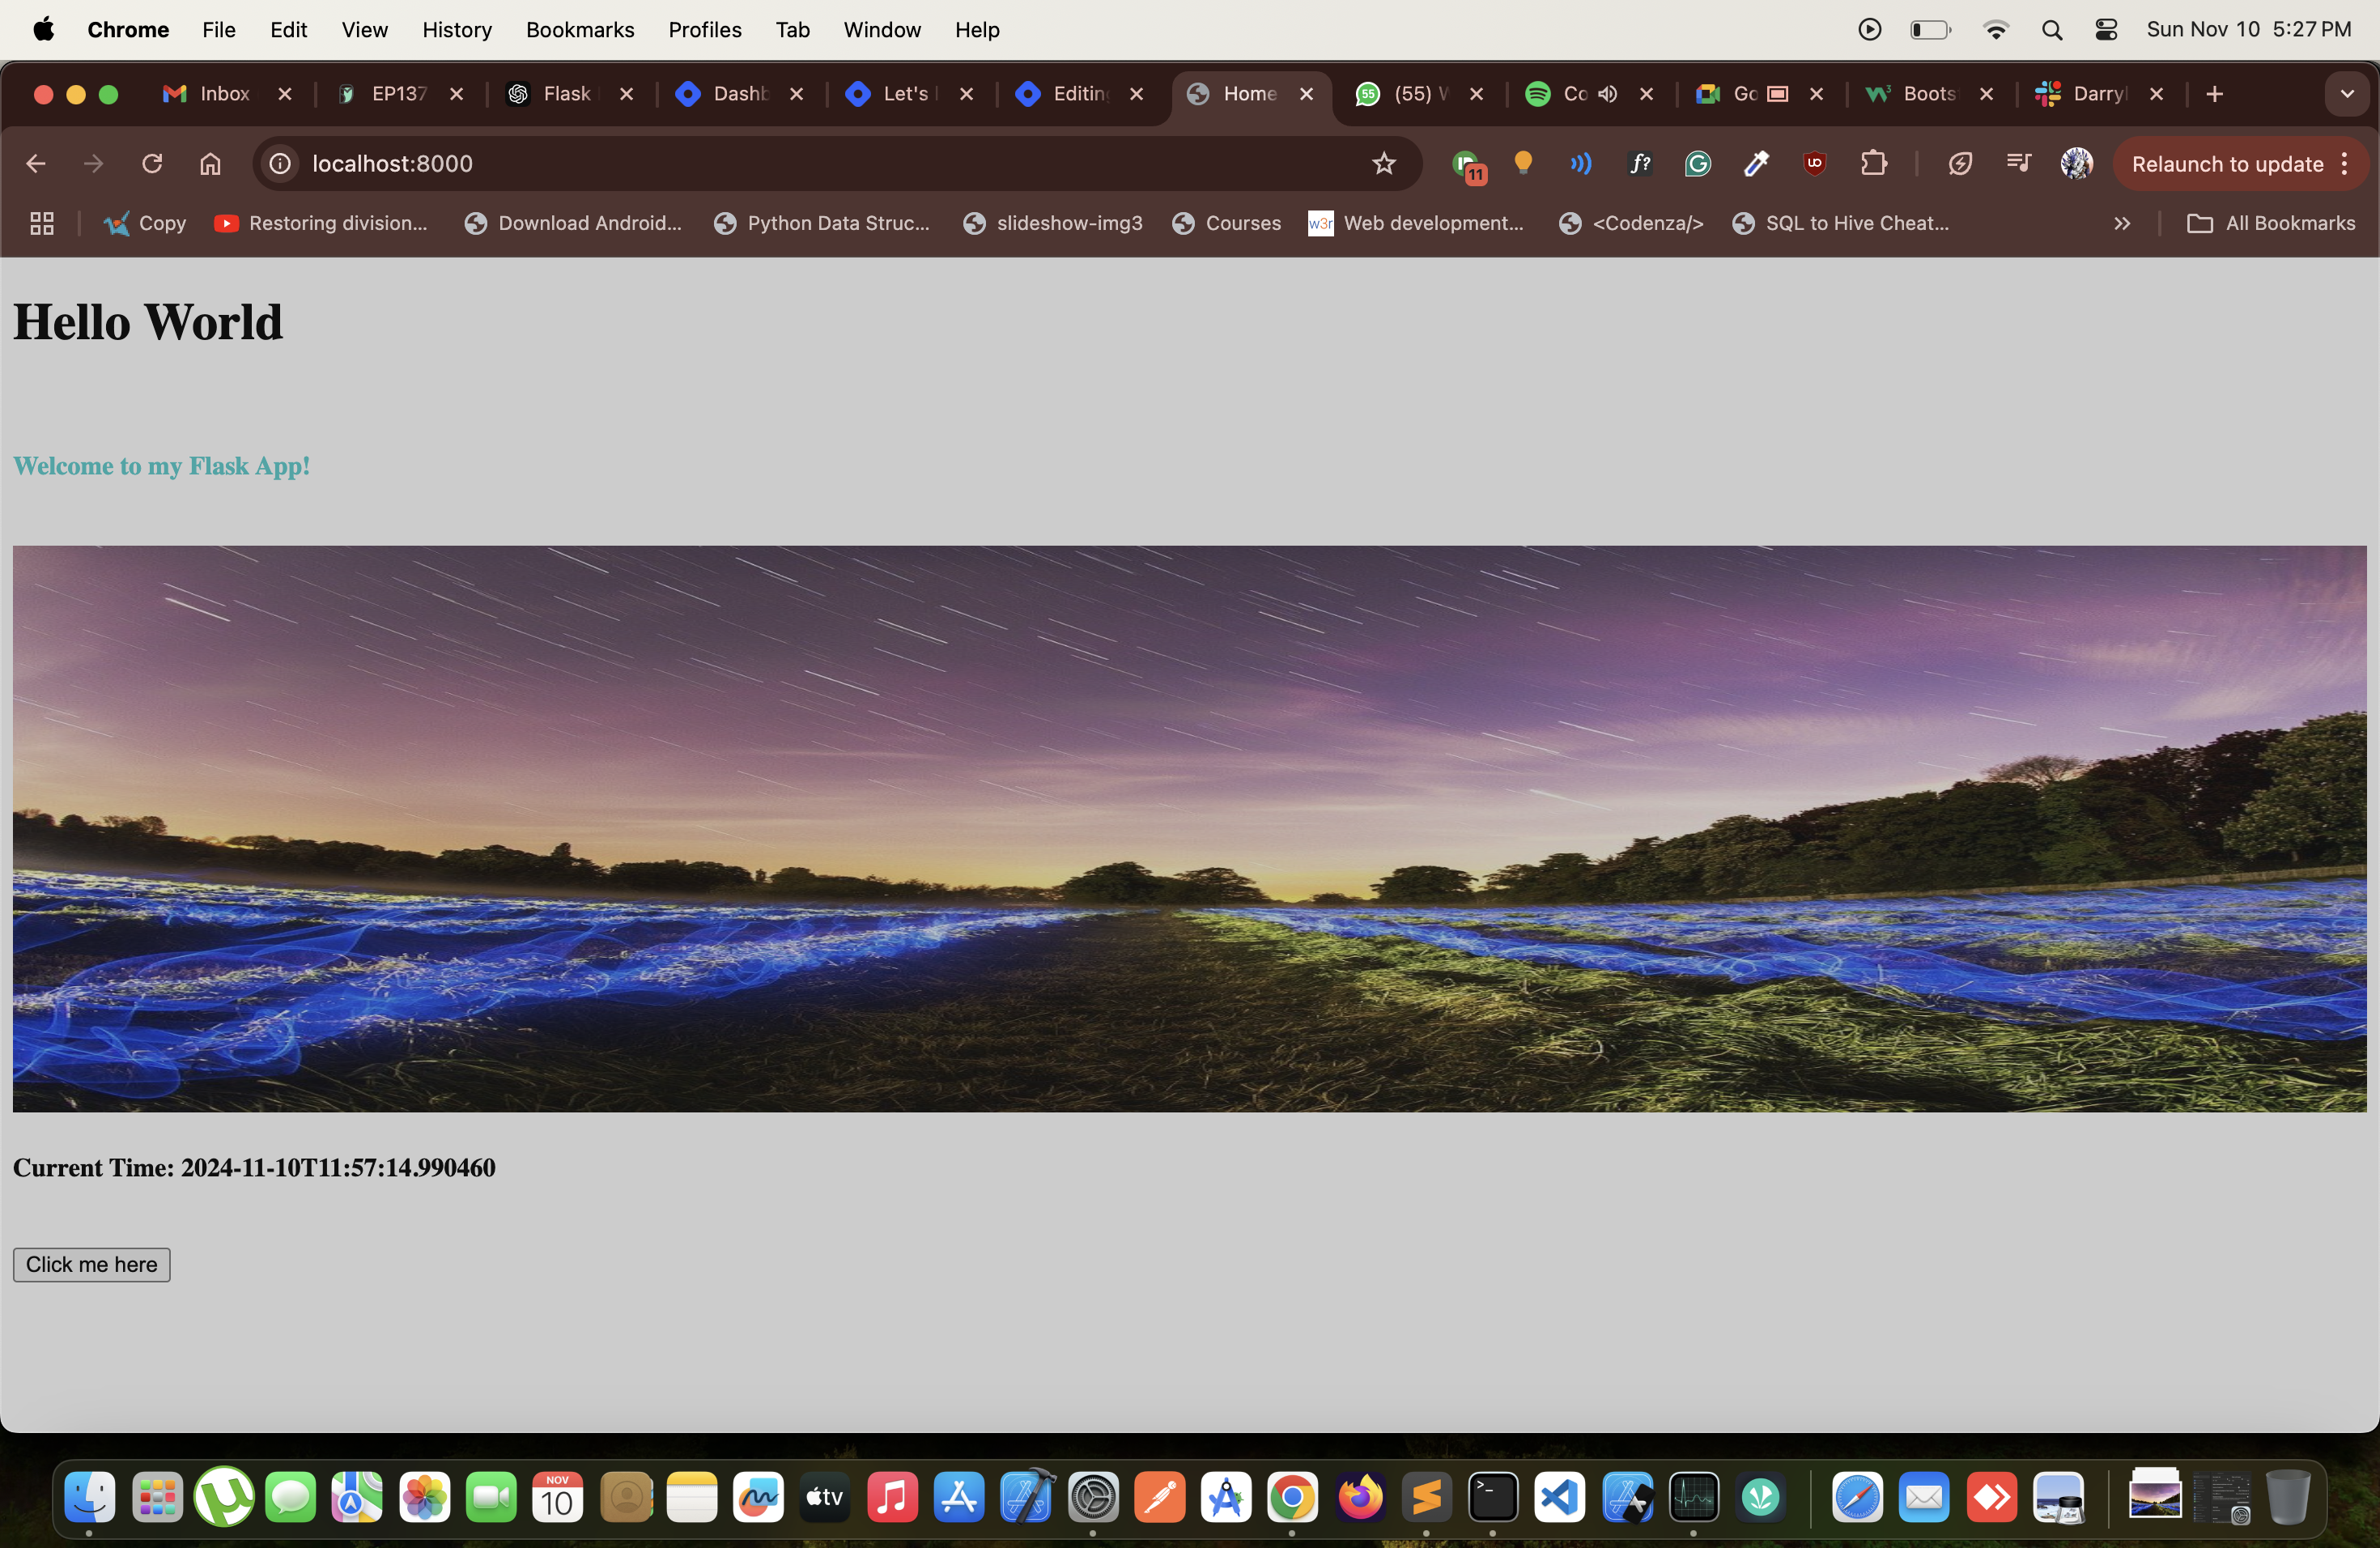
We have fairly created an advanced web page that utilizes images with a bit of css and some JavaScript as well.
Let’s take it up a notch:
How about we integrate some advanced libraries to further enhance our web page? Let’s take a look at Bootstrap 5.
Bootstrap 5 is the newest version of Bootstrap, which is the most popular HTML, CSS, and JavaScript framework for creating responsive, mobile-first websites.
Bootstrap 5 is completely free to download and use!
The above excerpt is from the W3Schools website.
Bootstrap 5 uses a curated list of pre-defined css and javascript utilities that help to enhance the webpage design.
CDN links for the utilities are below:
Let us modify our project files as below to use the same along with a bit of formatting.
<!DOCTYPE html>
<html>
<head>
    <meta charset="utf-8">
    <meta name="viewport" content="width=device-width, initial-scale=1">
    <link href="https://cdn.jsdelivr.net/npm/bootstrap@5.3.3/dist/css/bootstrap.min.css" rel="stylesheet">
    <link rel="stylesheet" href="{{ url_for('static', filename='css/style.css') }}">
    <title>{{title}}</title>
</head>
<body>
    <div class="container-fluid">
        <div class="row">
            <div class="col-md-1"></div>
            <div class="col-md-10">
                <br>
                <h1>Hello World</h1>
                <br>
                <h4 id="flask-message">{{message}}</h4>
                <br>
                <img id="flask-img" src="{{ url_for('static', filename='images/sample.jpeg') }}" alt="sample">
                <br>
                <br>
                <h4>Current Time: {{current_timestamp}}</h4>
                <br>
                <button class="btn btn-primary" onclick="showAlert();">Click me here</button>
                <br>
                <br>
            </div>
            <div class="col-md-1"></div>
        </div>
    </div>
</body>
<script src="https://cdn.jsdelivr.net/npm/bootstrap@5.3.3/dist/js/bootstrap.bundle.min.js"></script>
<script src="{{ url_for('static', filename='js/script.js') }}"></script>
</html>
file: index.html
#flask-message {
    color: #00cccc;
}

#flask-img {
    width: 100%;
    height: 350px;
}
file: style.css (no changes, sharing for reference)
const showAlert = () => {
    alert('U clicked a button on Flask App Webpage');
}
file: script.js (no changes, sharing for reference)
Project Directory Structure:
➜  flask_templating find . -name 'venv' -prune -o -type f -exec ls -lah {} +
-rw-r--r--@ 1 flask-india  staff   6.0K Nov 10 17:19 ./.DS_Store
-rw-r--r--@ 1 flask-india  staff   718B Nov 10 13:58 ./flask_app.py
-rw-r--r--@ 1 flask-india  staff   6.0K Nov 10 17:19 ./static/.DS_Store
-rw-r--r--@ 1 flask-india  staff    82B Nov 10 17:29 ./static/css/style.css
-rw-r--r--@ 1 flask-india  staff   326K Nov 10 14:28 ./static/images/sample.jpeg
-rw-r--r--@ 1 flask-india  staff    79B Nov 10 16:46 ./static/js/script.js
-rw-r--r--@ 1 flask-india  staff   1.1K Nov 10 20:53 ./templates/index.html
Let’s save and reload our app. We should see the following view in our browser for our webpage.
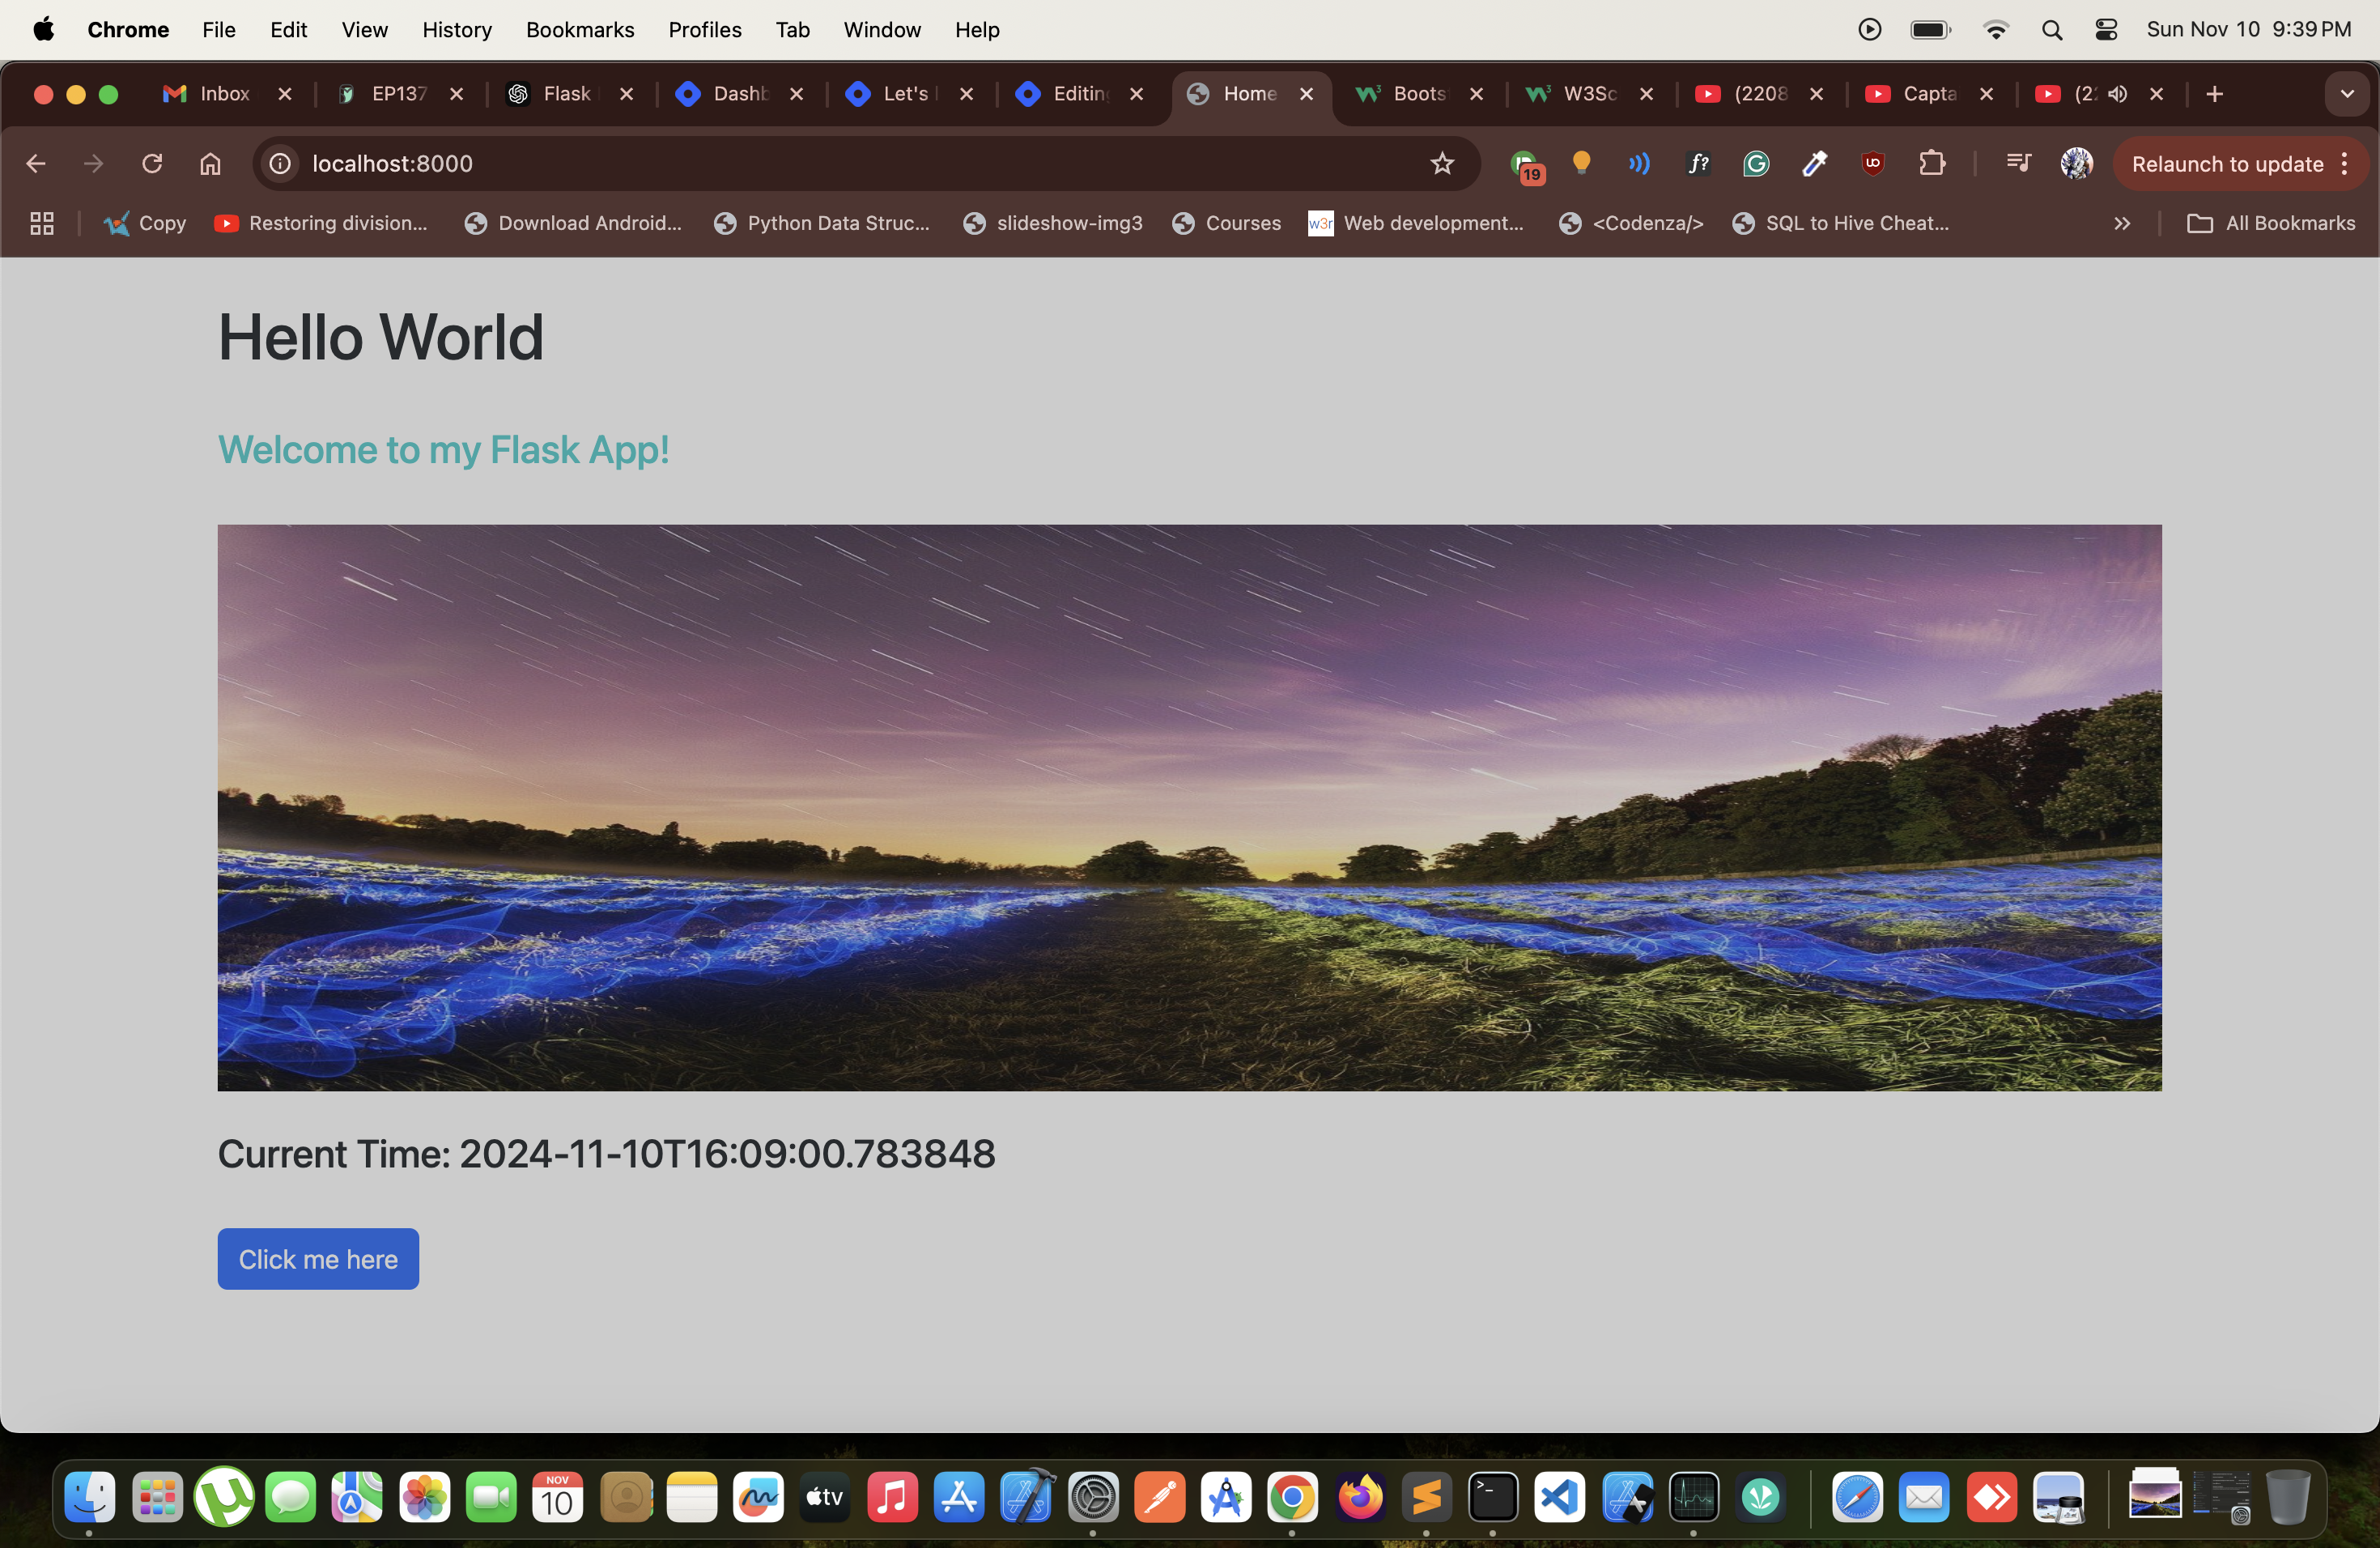
Now our basic webpage looks truly attractive to look at.
Conclusion:
We have now seen how to create a webpage in Flask and how to do advanced styling with Bootstrap 5 along with using our own css and javascript files.
Subscribe to my newsletter
Read articles from Flask India directly inside your inbox. Subscribe to the newsletter, and don't miss out.
Written by

Flask India
Flask India
We are a bunch of Developers who started to mentor beginners who started using Python and Flask in general in the Flask India Telegram Group. So this blog is a way to give it back to the community from where we have received guidance when we started as beginners.