Step-by-Step Guide: Deploying Nginx Server with Docker on AWS EC2
 Kishor Tate
Introduction:
Want to get an Nginx web server up and running on the cloud? In this guide, I’ll show you how to deploy Nginx using Docker on an AWS EC2 instance, a popular choice for hosting web applications. This setup is great for beginners learning about cloud services, Docker, or deploying web servers.
Prerequisites:
Basic knowledge of Docker commands.
An AWS account with permissions to create and manage EC2 instances.
Familiarity with SSH and connecting to remote servers.
Following are the steps to deploy an nginx server:
Step 1: Connect to Your EC2 Instance via SSH
Open your terminal.
Go to the folder where your
.pemkey file is located.Run this command (replace
your-key.pemandyour-public-ipwith your actual key file and public IP):ssh -i "your-key.pem" ec2-user@your-public-ip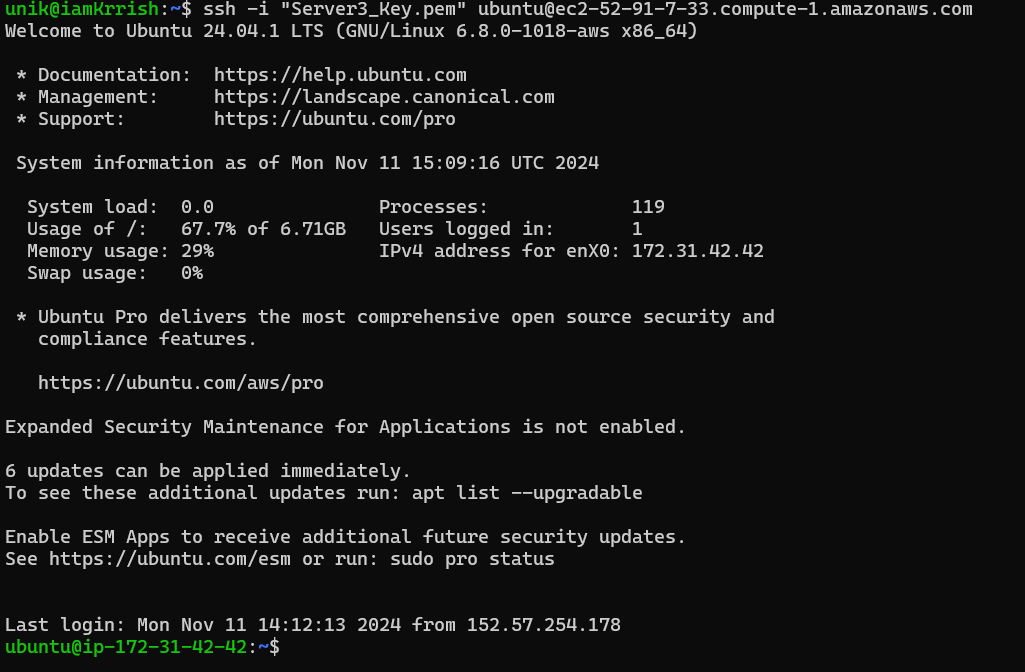
Step 2: Start the Docker Service & check its status
Once you're connected to your EC2 instance, start the Docker service to enable Docker commands and To confirm Docker is running, check its status with following commands:
Run the following command one after one.
 sudo systemctl start docker

 sudo systemctl status docker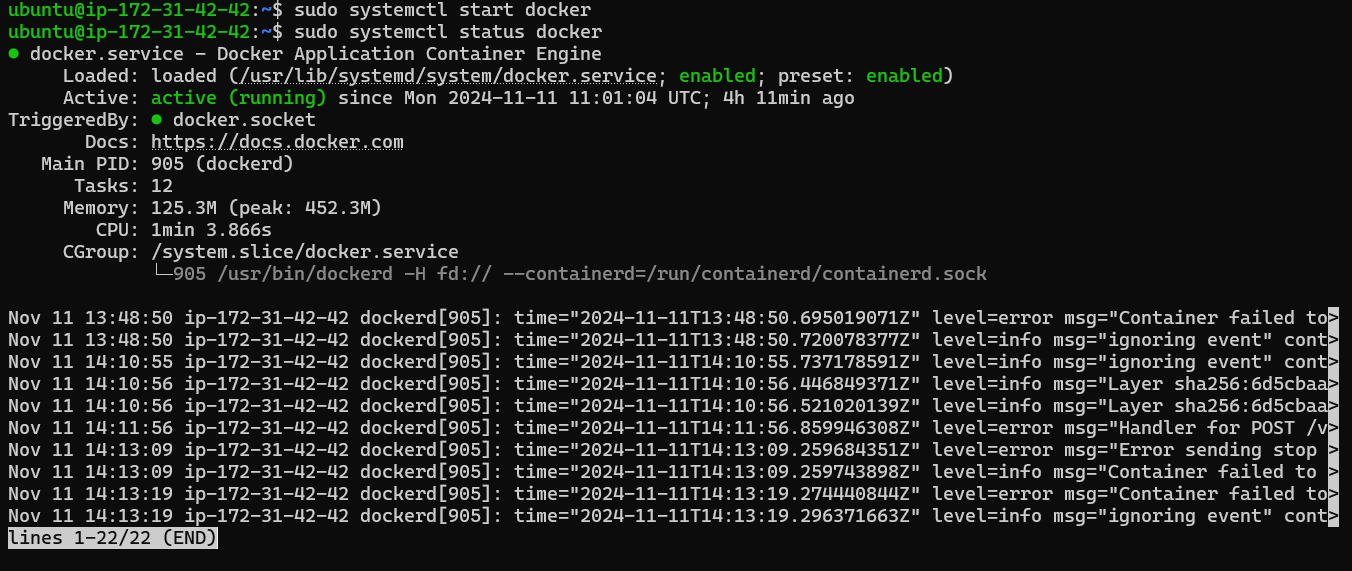
Step 3: Pull the Nginx Image from Docker Hub
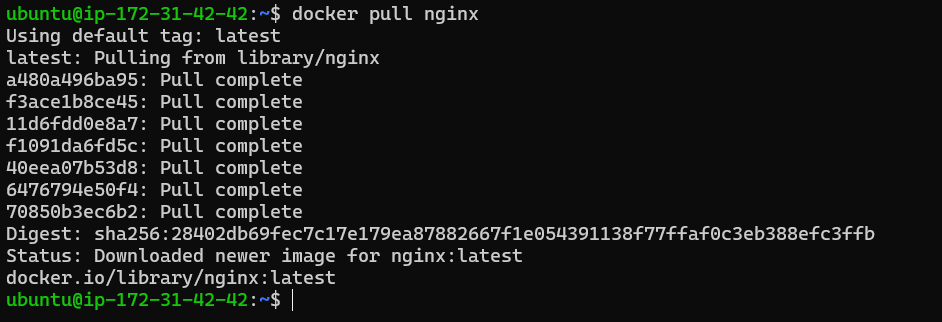
Now that Docker is running, let’s pull the Nginx image from Docker Hub. This image will allow you to run Nginx as a container.
Run the following command:
docker pull nginx
Step 4: Run the Nginx Container
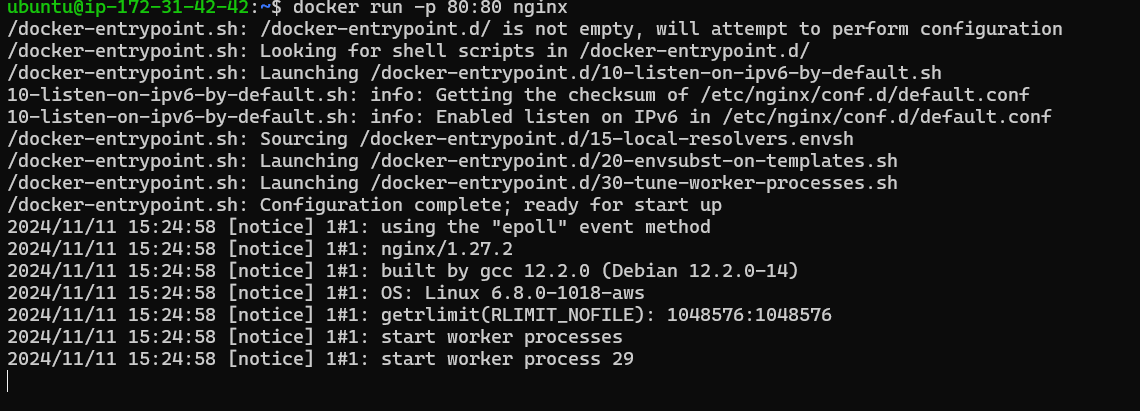
With the Nginx image downloaded, let’s start a container to run the Nginx server.
Use the following command to create and start the container:
docker run -p 80:80 nginx
This command runs the Nginx container and maps port 80 on the EC2 instance to port 80 on the container, allowing you to access the Nginx server through the EC2 instance's public IP address.
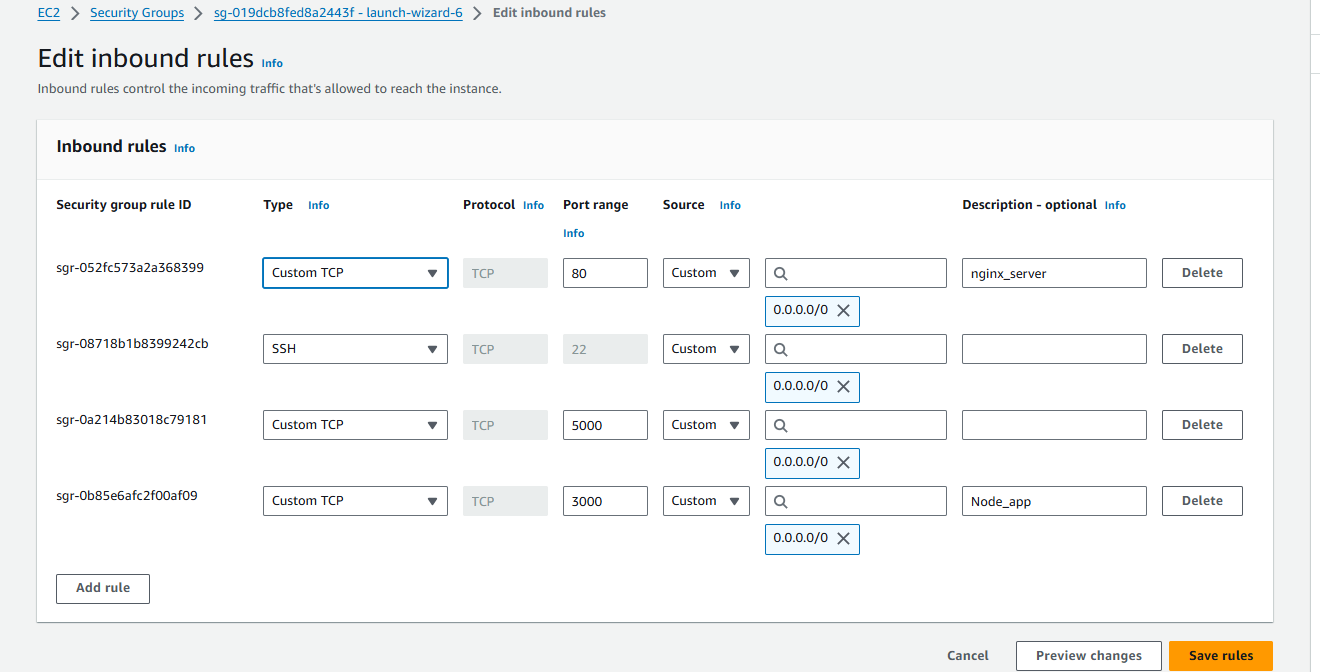
Step 5: Edit the Inbound Rules of Your EC2 Instance
Go to the EC2 Dashboard in AWS.
Select your instance and click on its Security Group.
In the Inbound rules tab, click Edit inbound rules.
Add a rule:
Type: HTTP
Port Range: 80
Source: Anywhere (0.0.0.0/0)
Click Save rules.
Now your EC2 instance can accept web traffic on port 80.
Step 6: Access the Nginx Server in Your Browser
- Open a web browser.
Type your EC2 instance’s public IP address in the address bar, followed by :80. For example:
http://your-public-ip:80
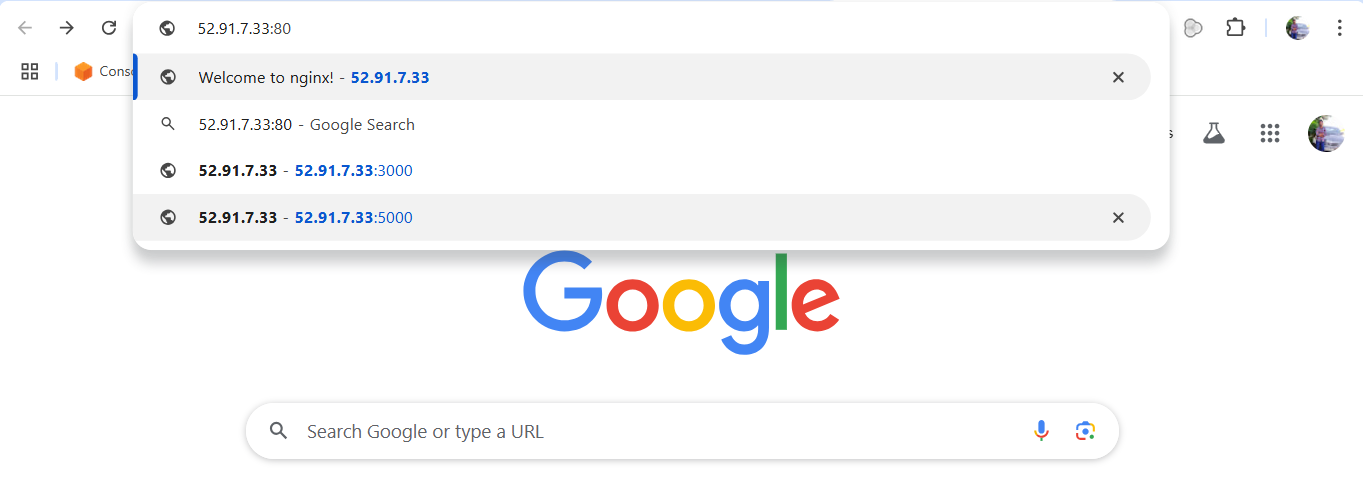
You should see the Nginx welcome page, indicating that the server is up and running!

Conclusion
You’ve now successfully deployed an Nginx server using Docker on AWS EC2! This simple setup lets you quickly run web servers in the cloud, making it a great starting point for more complex applications.
Subscribe to my newsletter
Read articles from Kishor Tate directly inside your inbox. Subscribe to the newsletter, and don't miss out.
Written by
