Creating/Connecting a windows virtual machine : intalling web servers and adding data disks!
 Stanley Udebuani
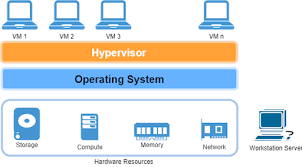
Connecting to a Windows VM in Azure and adding a data disk is simpler than it sounds. Let’s break it down step-by-step, with some fun analogies and straightforward instructions. You’ll have your VM up and running like a pro in no time!
Step 1: RDP (Remote Desktop Protocol) into the VM
Think of RDP as your backstage pass to the Windows VM. By connecting through RDP, you’re logging directly into the VM’s desktop.
How to Connect:
Go to the Azure Portal and find your Windows VM.
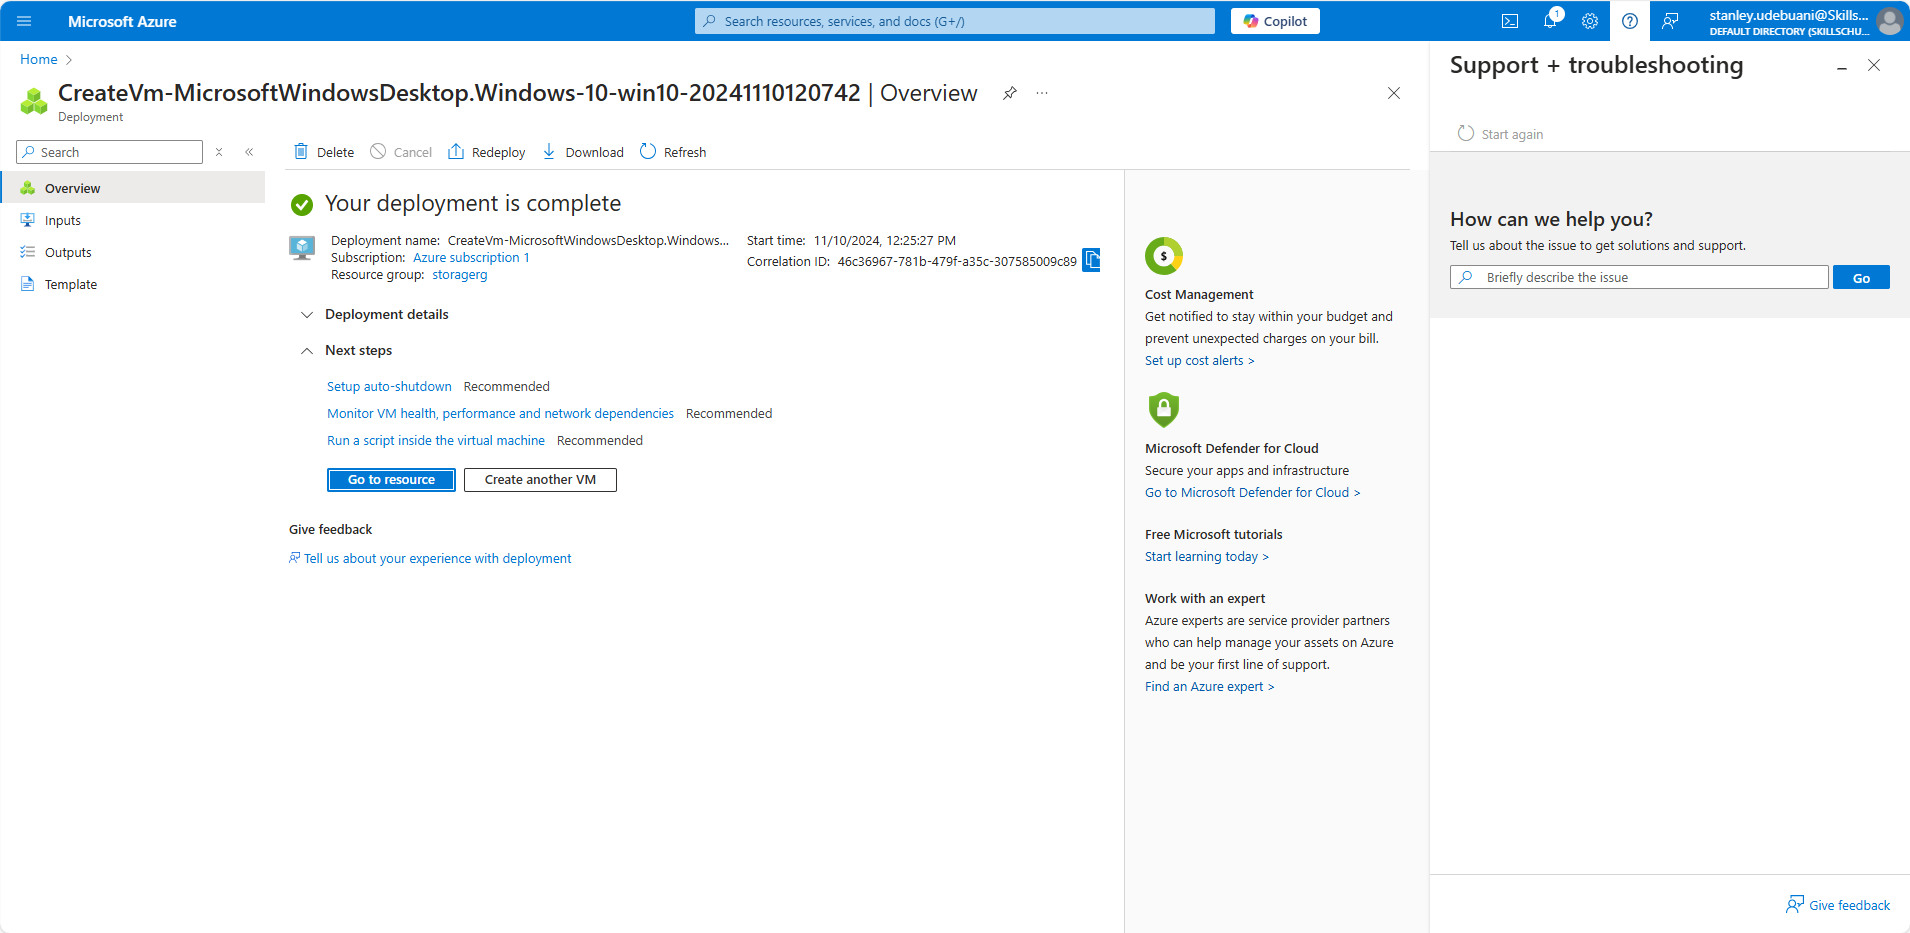
Click on Connect > RDP.
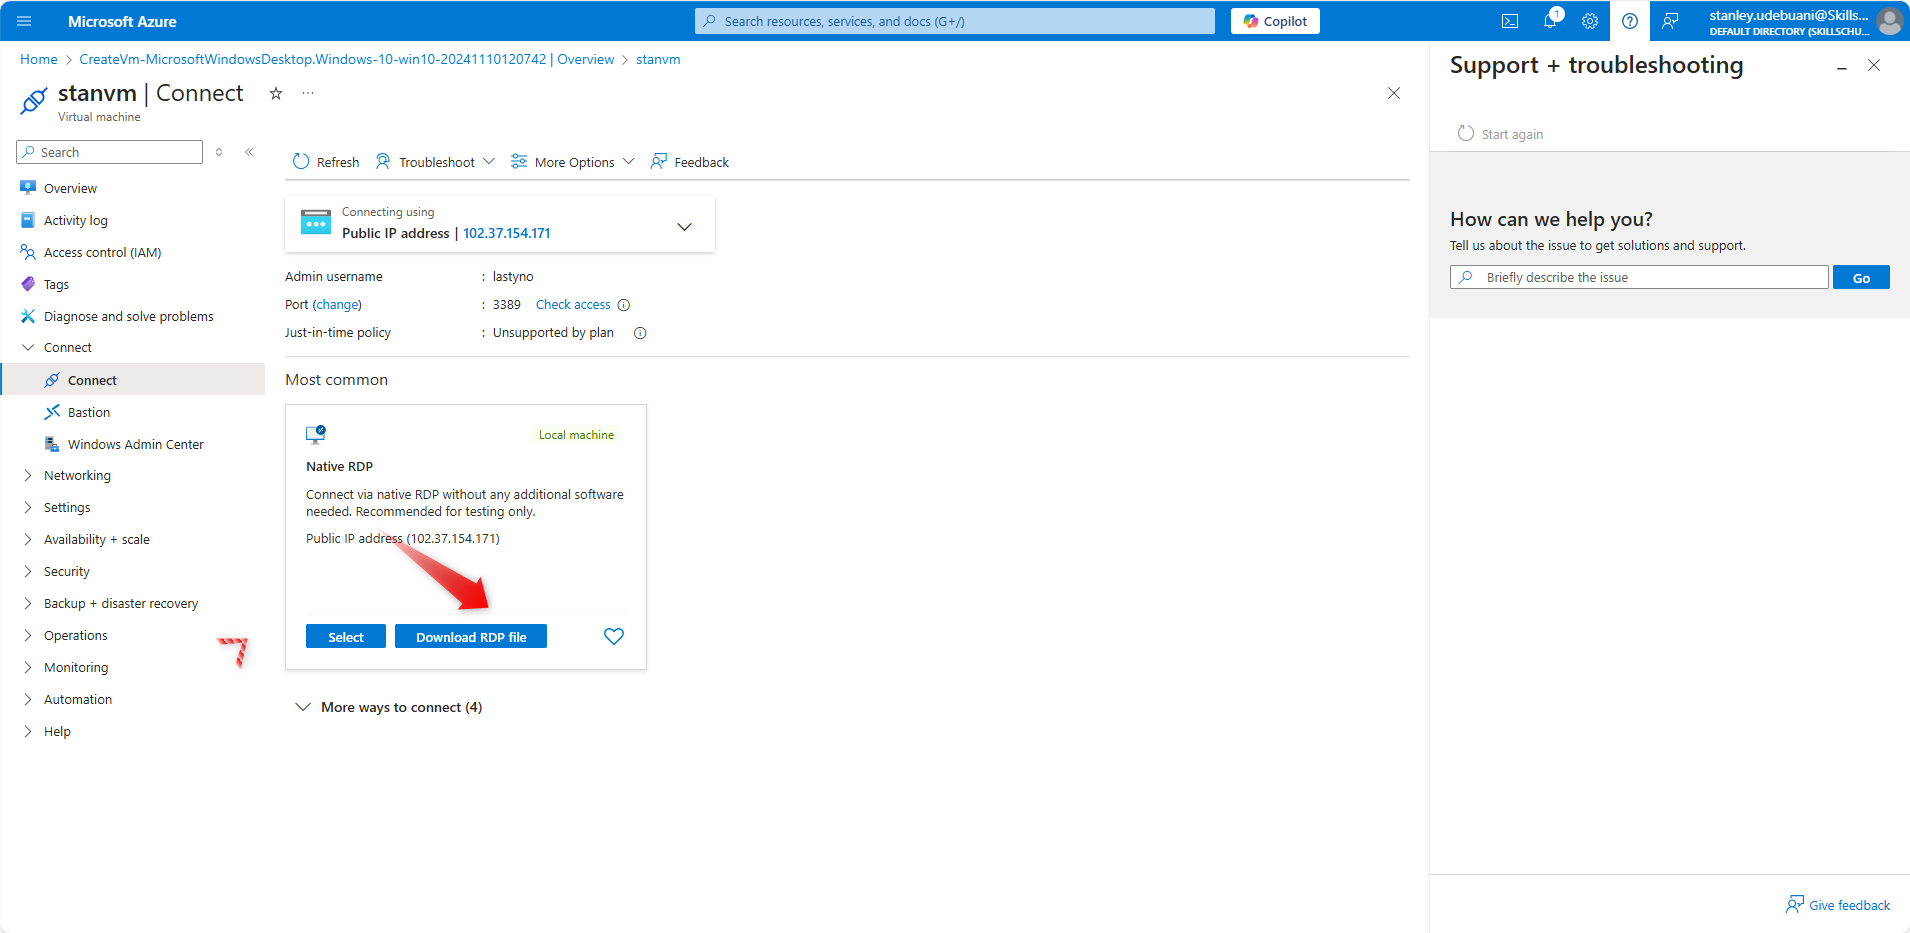
Download the RDP file and open it.
Enter the username and password you created for the VM during setup.
Pro Tip: If you encounter any firewall issues, make sure port 3389 (the default RDP port) is open.
Step 2: Install a Web Server
Now that you’re inside the VM, let’s make it a bit more functional by installing a web server. It’s like setting up a front desk where requests from the internet are received and processed.
Steps to Install a Web Server:
Open Server Manager on the VM.
Go to Manage > Add Roles and Features.
Select Web Server (IIS) and complete the installation
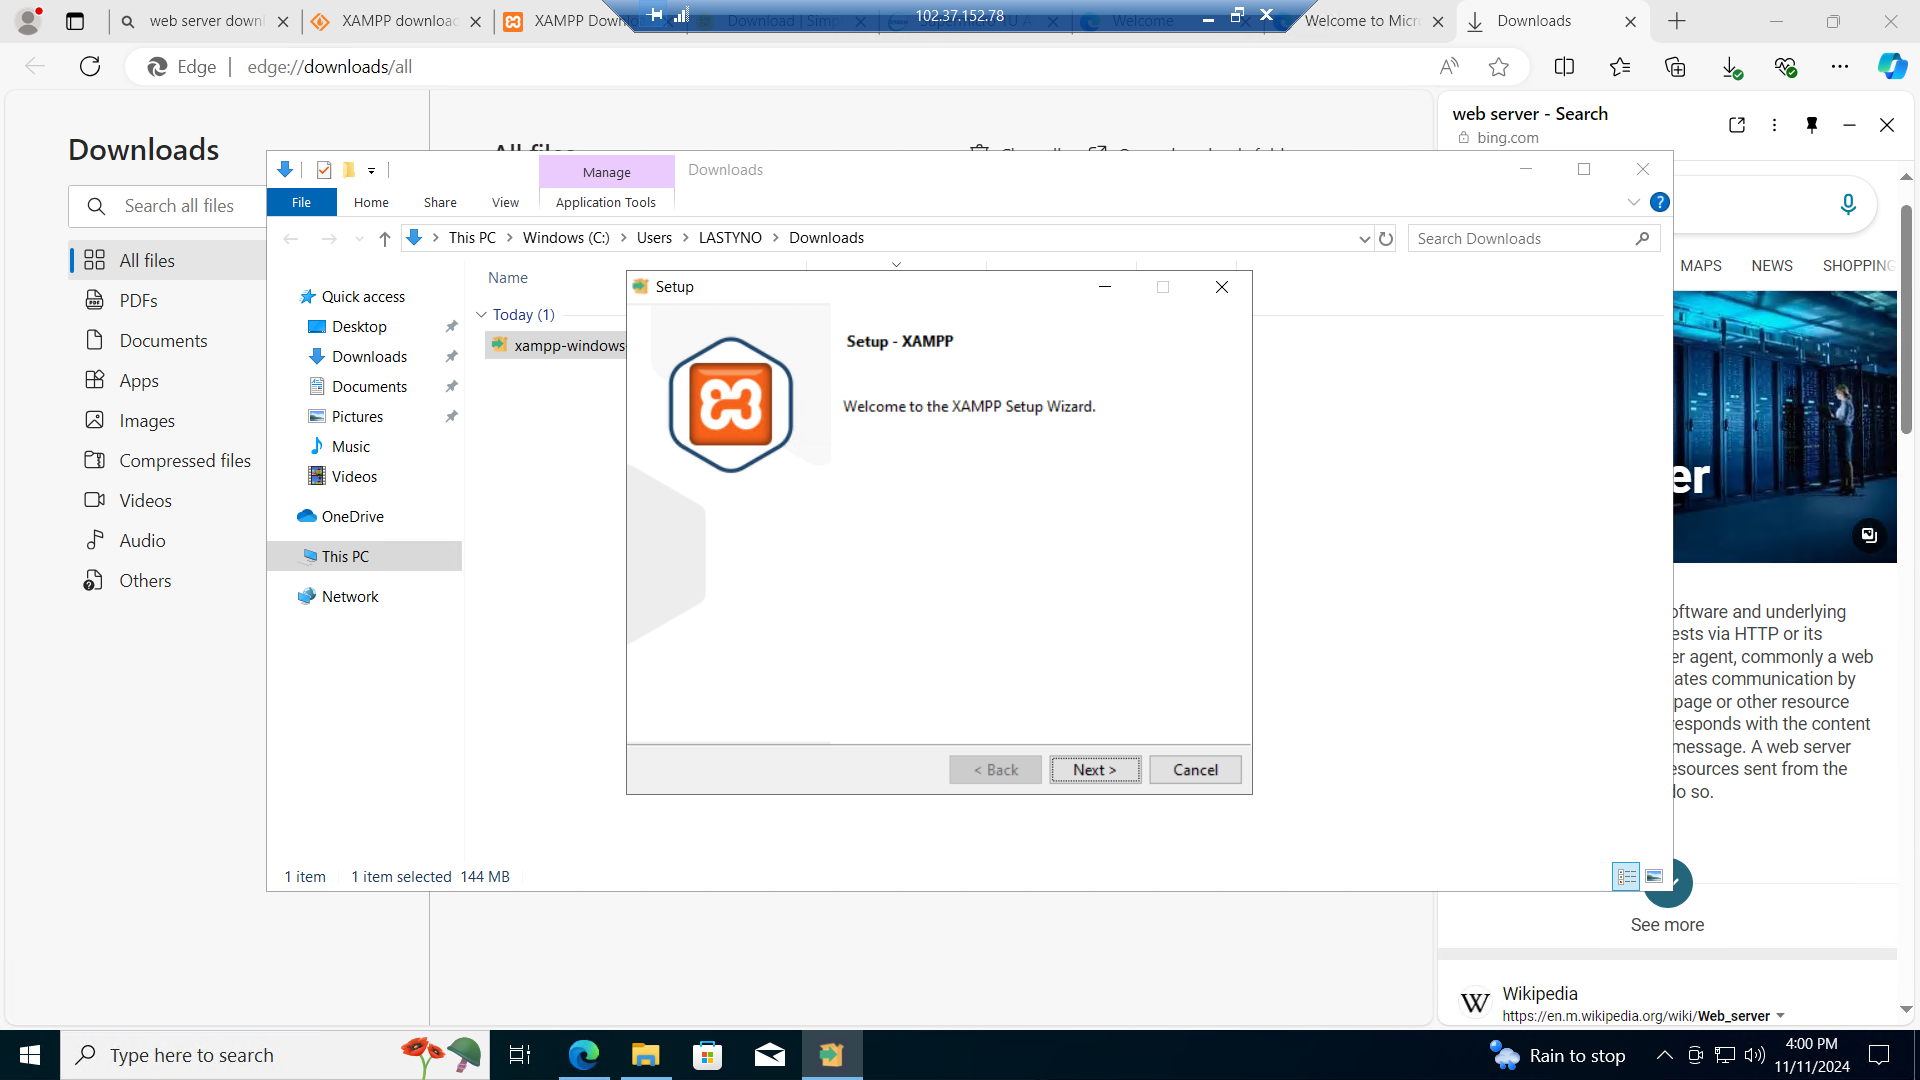
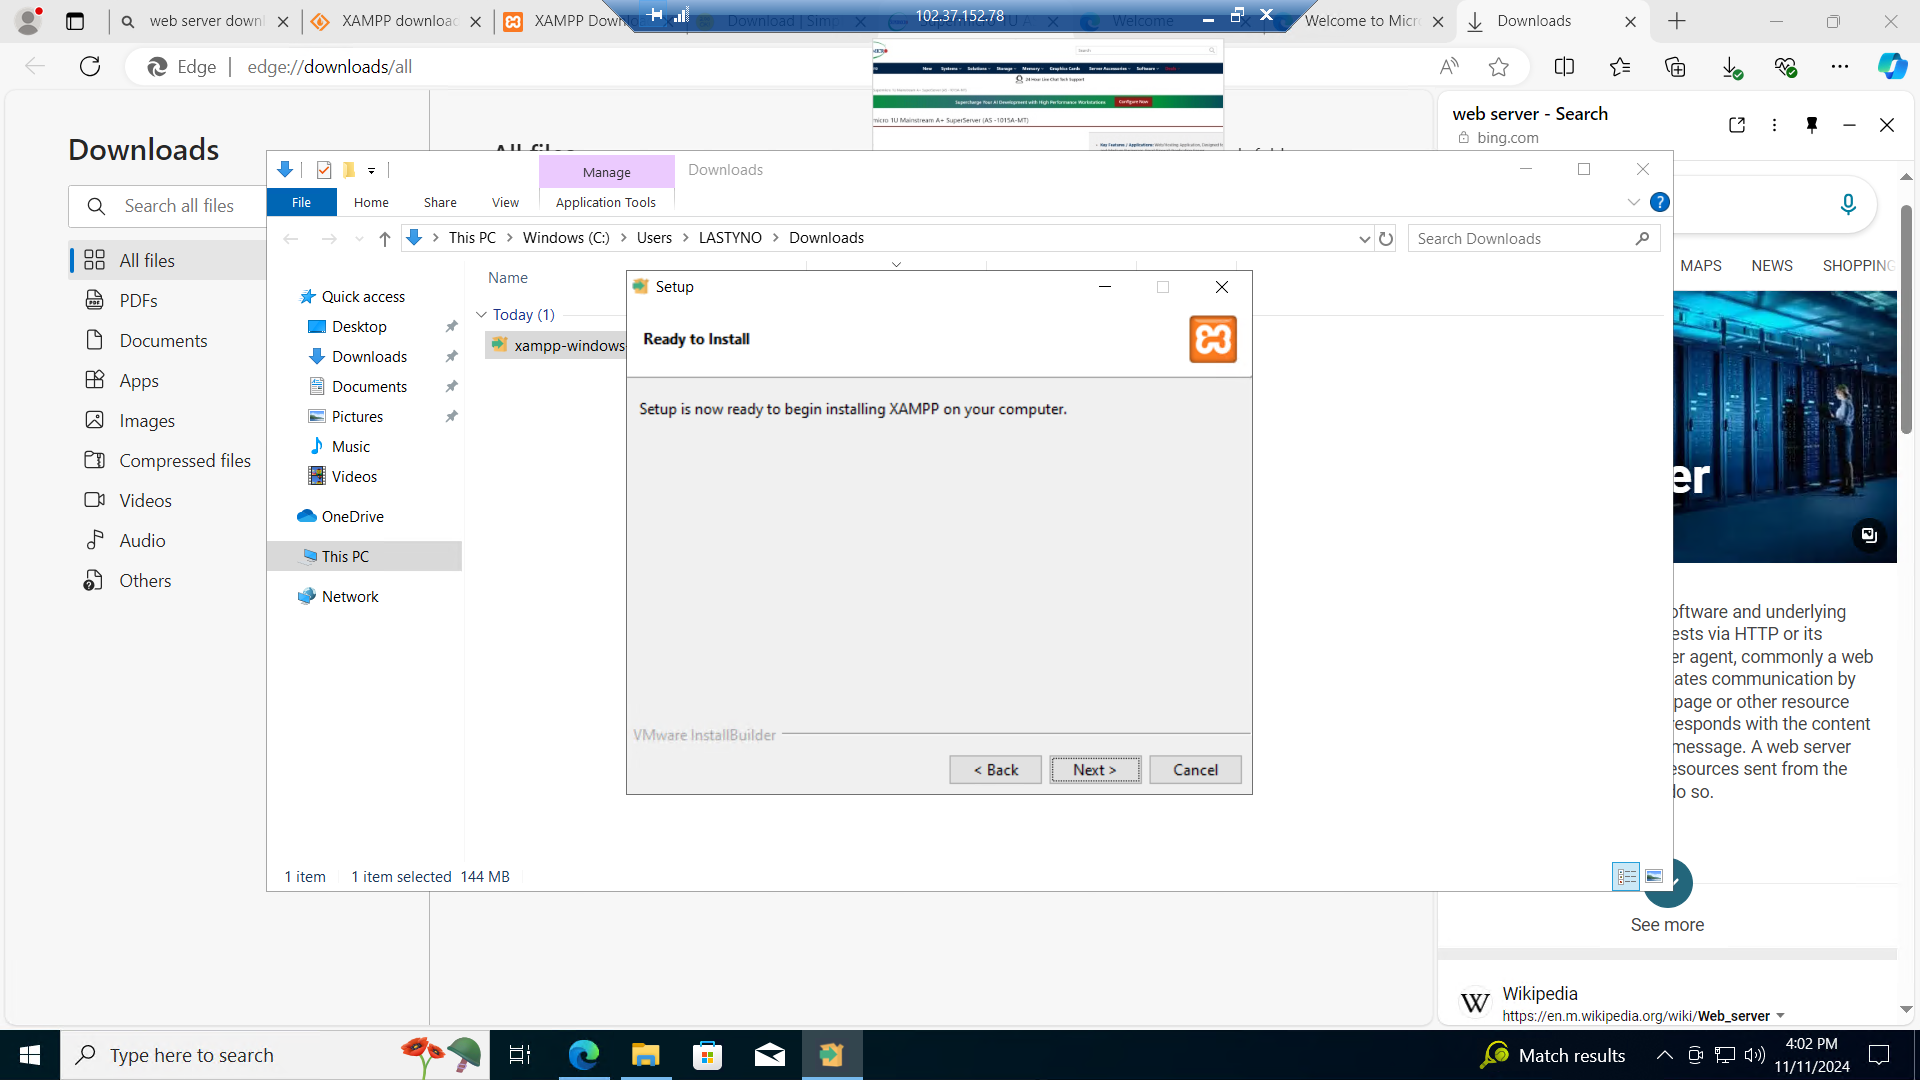
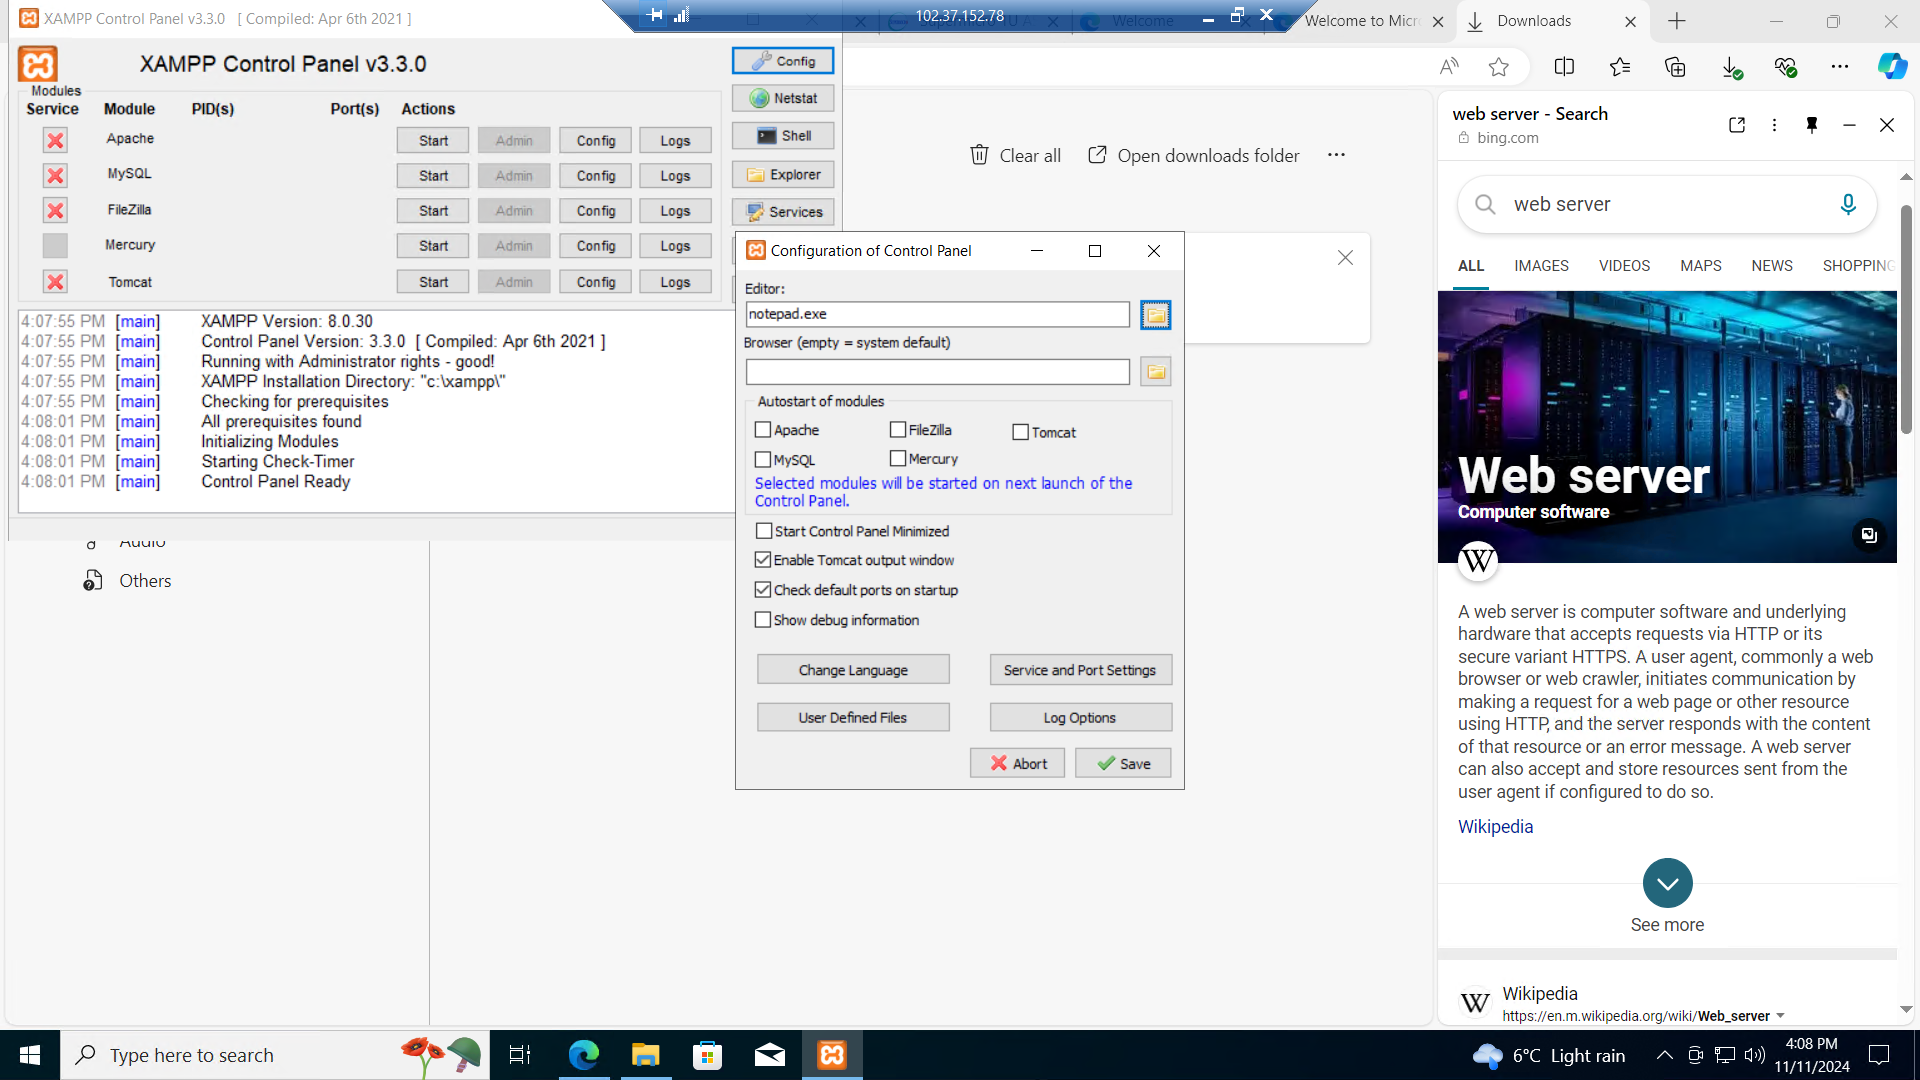
Make sure HTTP traffic is enabled, so the server can communicate with the outside world. If you selected HTTP during VM setup, it should already be good to go
Step 3: Add a Data Disk
Adding a data disk is like adding extra storage to your computer. This disk can be used to store application data, backups, or anything else you want to keep separate from the main OS drive.
Steps to Add a Data Disk:
Go back to the Azure Portal.
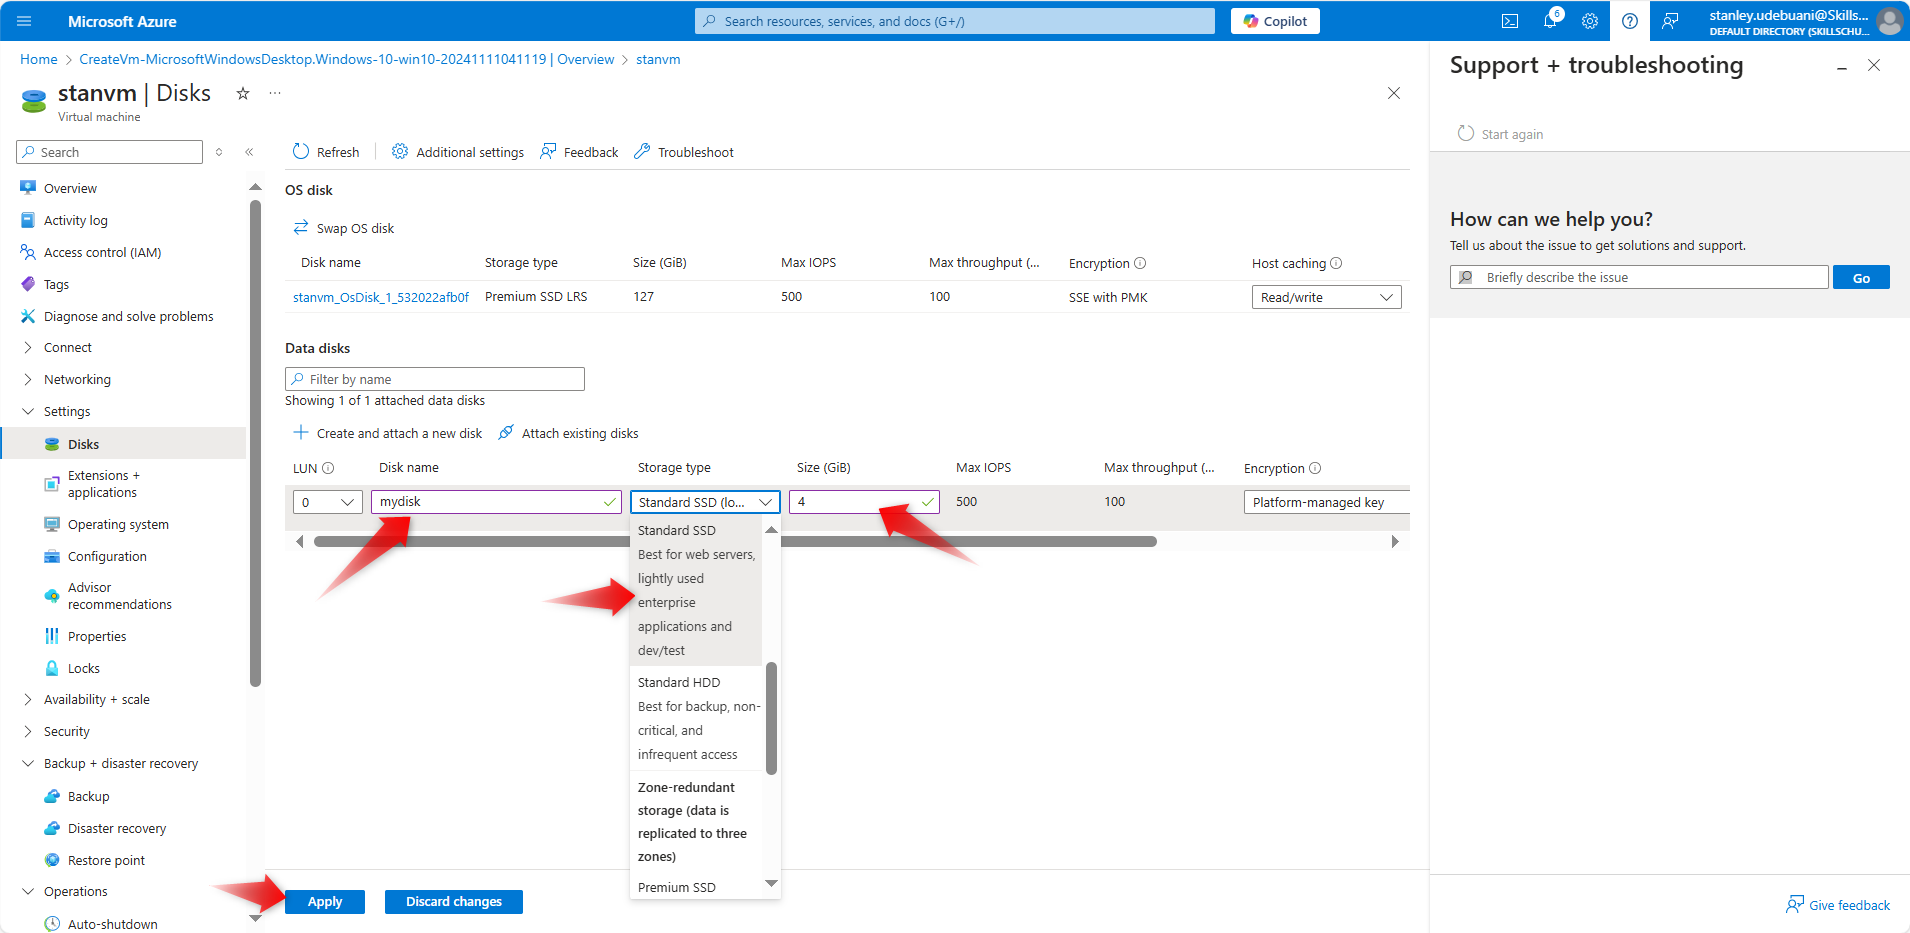
Navigate to your VM’s Settings and select Disks.
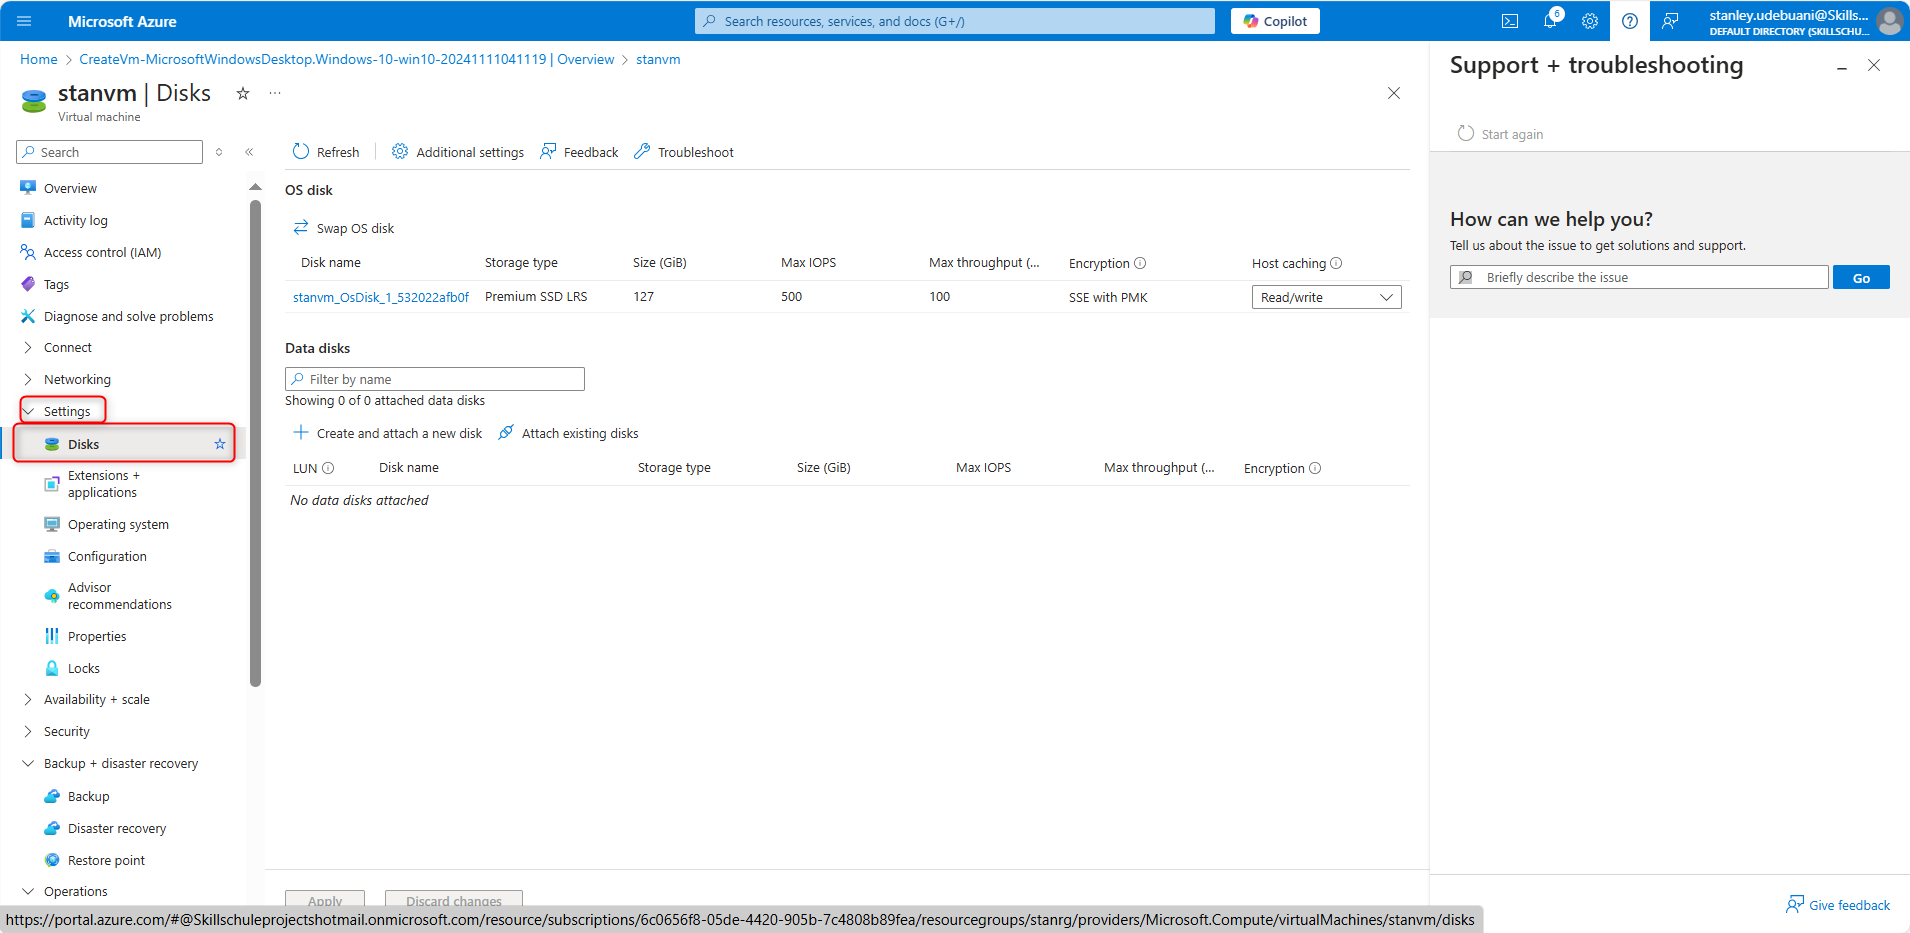
Click + Add data disk.
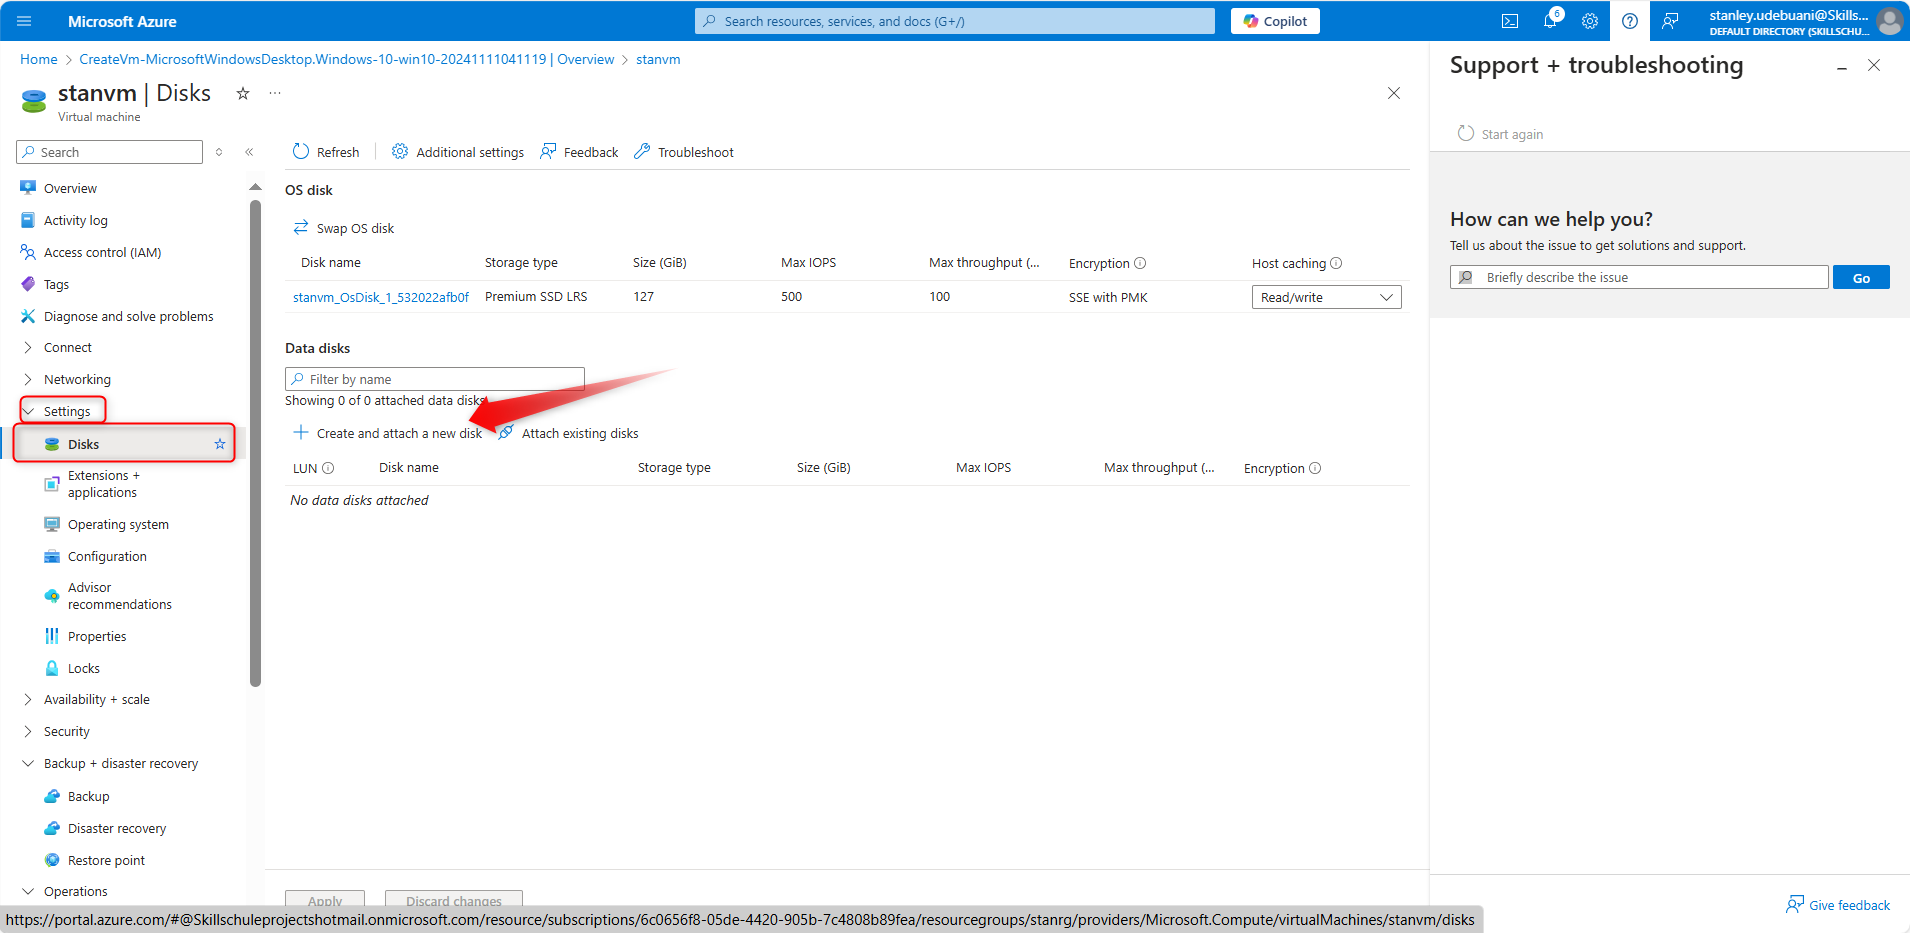
Choose an existing disk or create a new one, specify the size, and save the changes.
Step 4: Initialize the Disk and Make It Usable
After adding the disk, we need to initialize it so the VM recognizes it as usable storage.
Steps to Initialize:
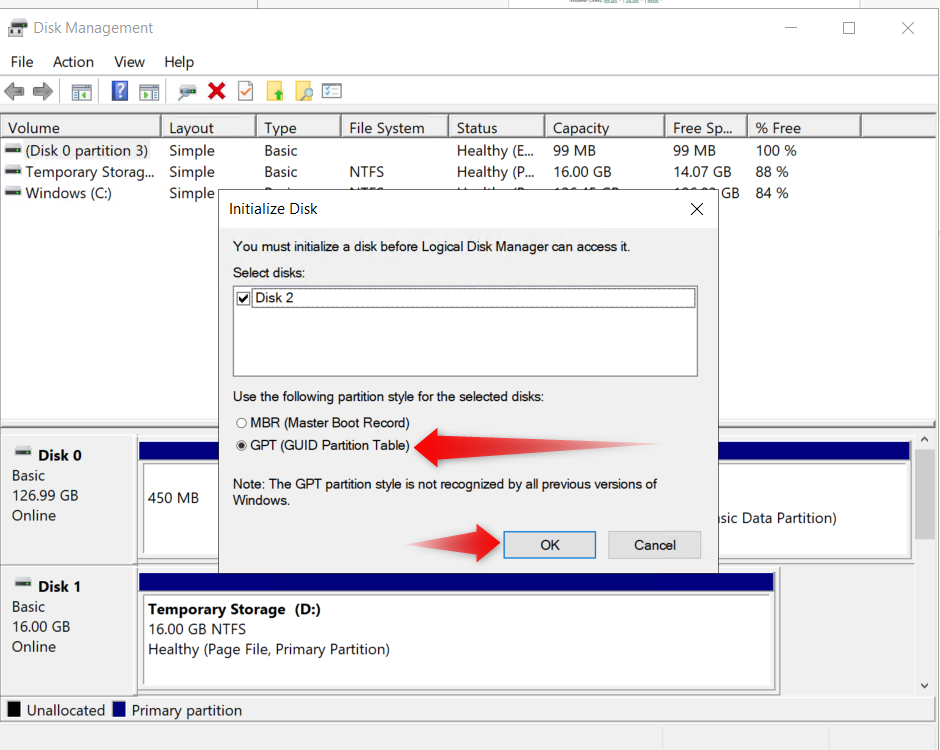
Inside your VM, go to Disk Management (just search for it in the Start Menu).
A prompt should appear to initialize the disk. Choose GPT (GUID Partition Table) and click OK.
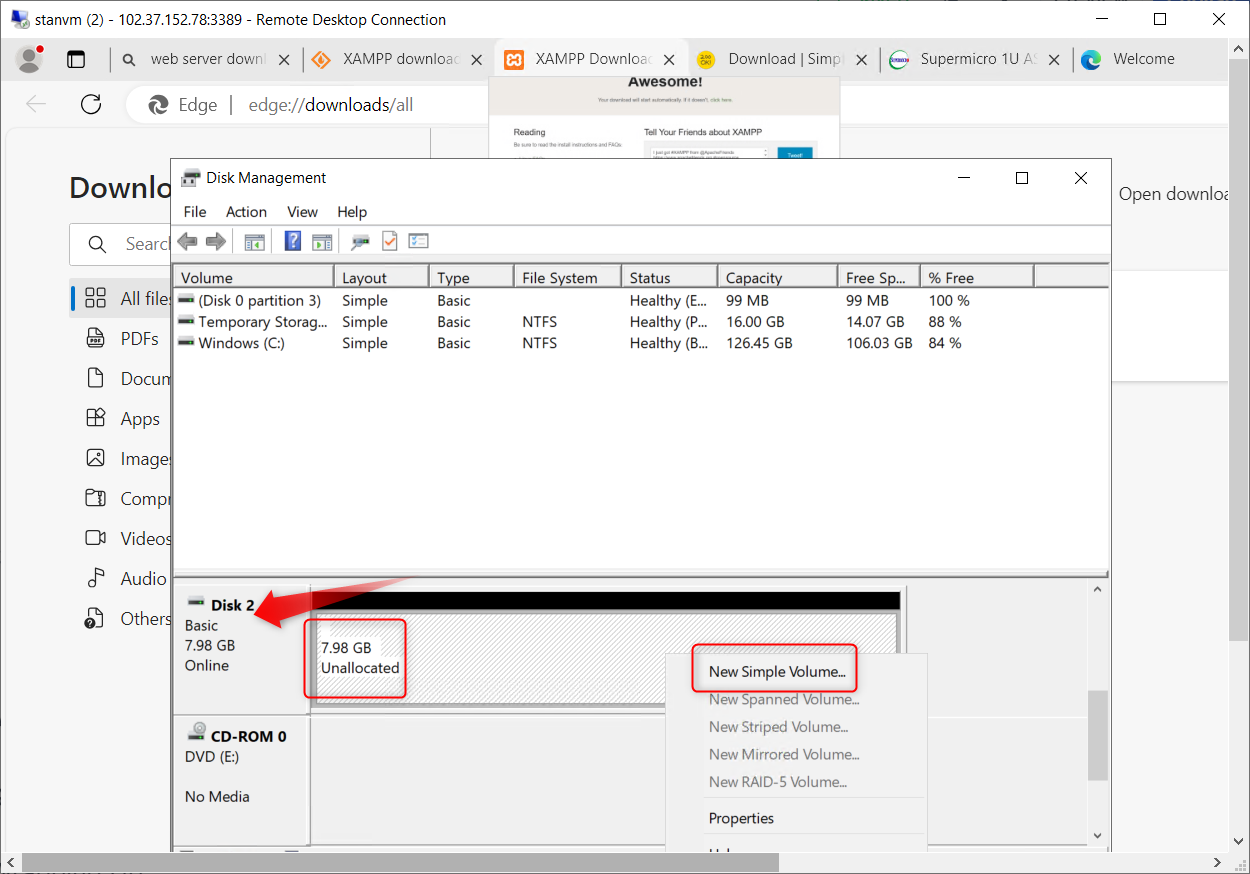
Right-click on the new disk, select New Simple Volume, and follow the wizard to assign a drive letter and format the disk.
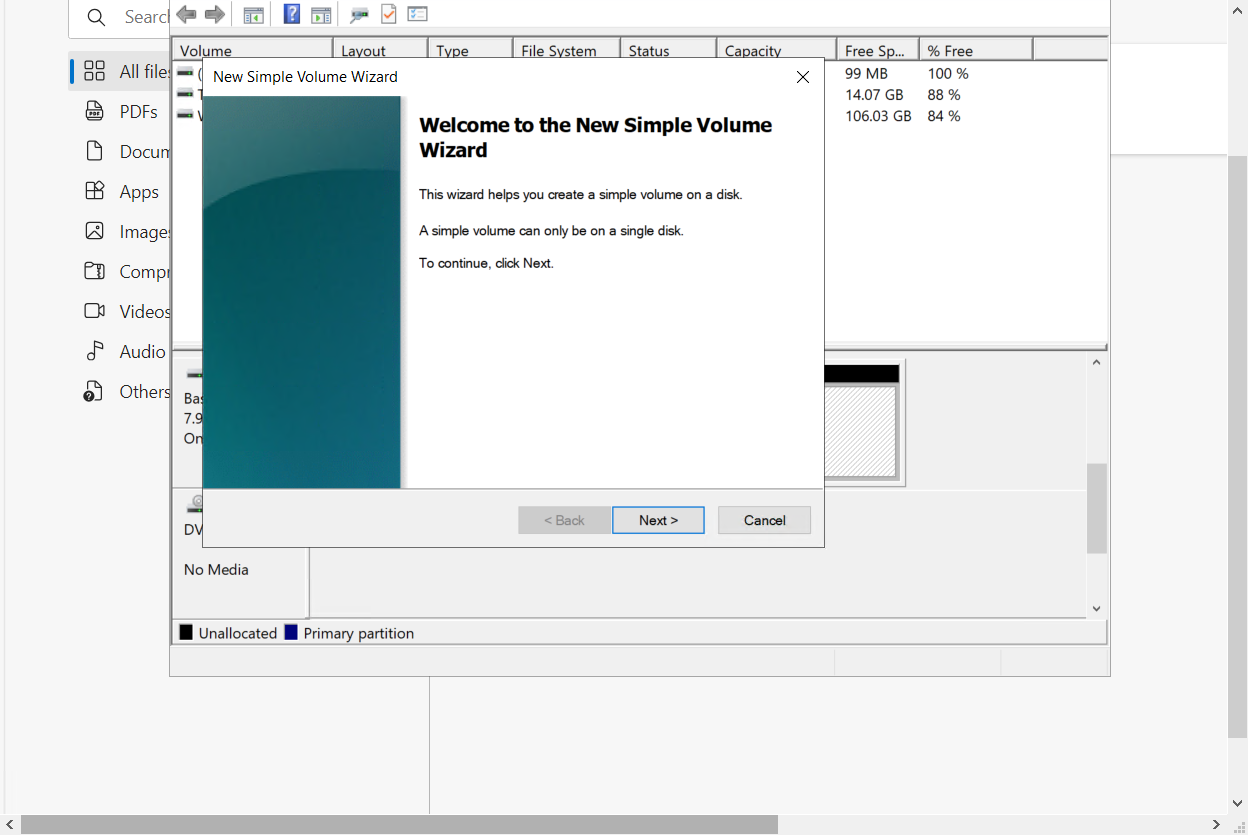
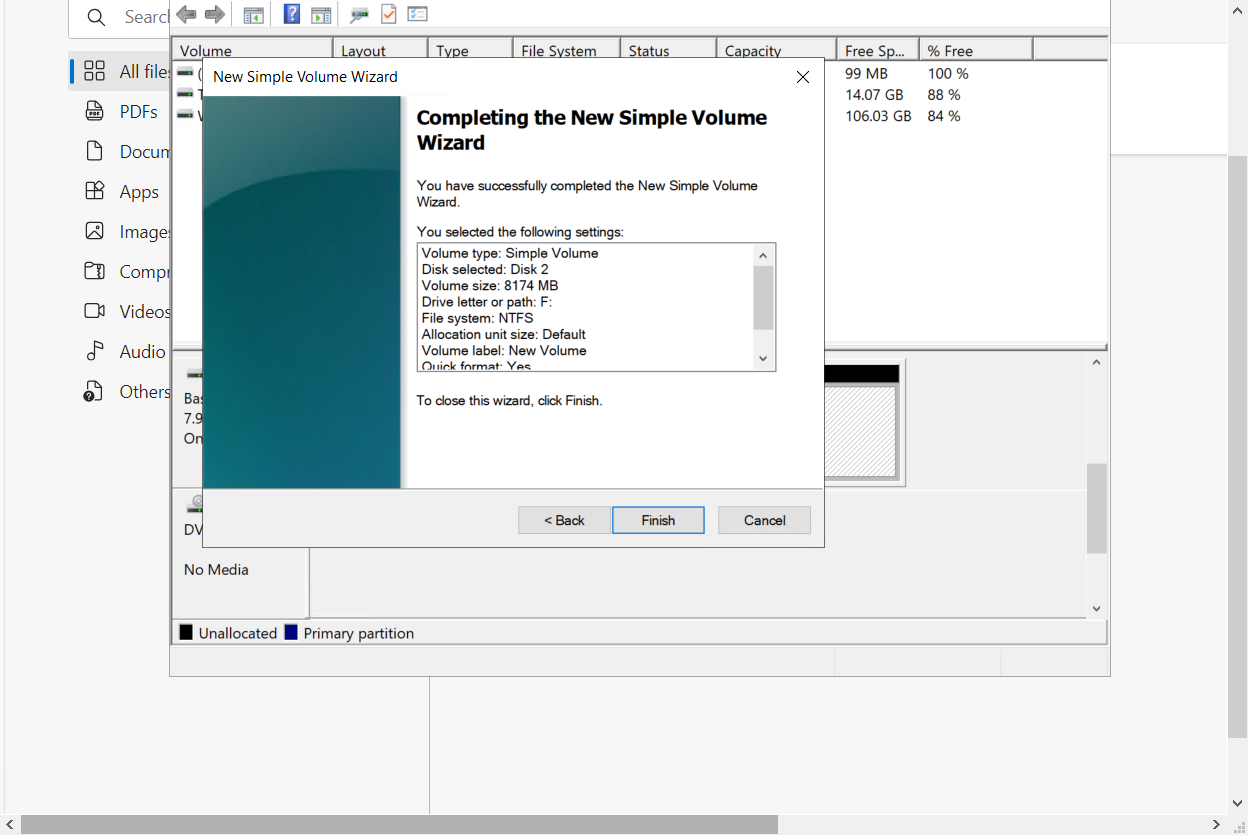
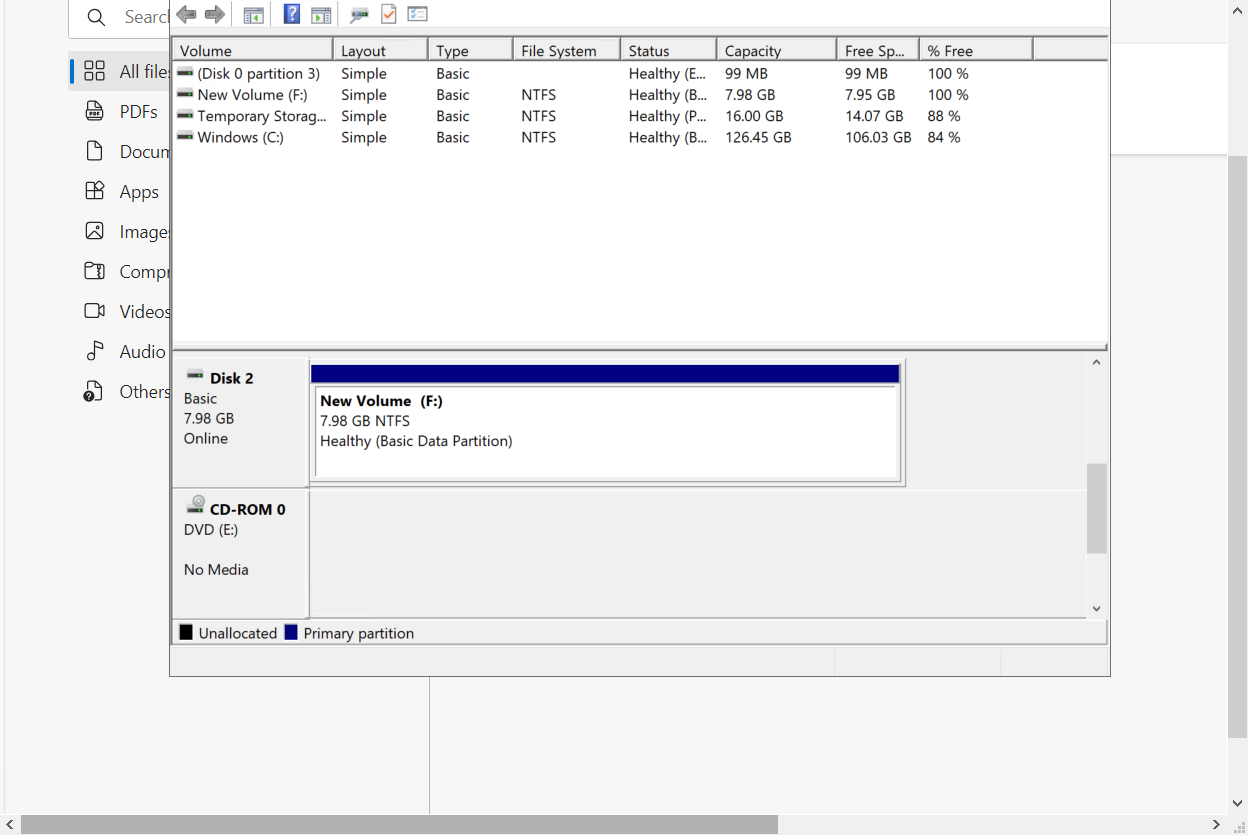
And that’s it! Your new data disk is now ready to store all your extra files and data.
Screenshot Idea: Show the Disk Management screen with the disk initialized.
Wrapping Up
You’ve successfully connected to a Windows VM, installed a web server, added a data disk, and initialized it for use. Now, your VM is all set up for some serious work (or play)!
These steps will give you a solid foundation for managing VMs in Azure.
Subscribe to my newsletter
Read articles from Stanley Udebuani directly inside your inbox. Subscribe to the newsletter, and don't miss out.
Written by
