Deploy in 30 Minutes: Zero-Touch Setup with Jenkins, Docker, and Agent Configuration
 Chetan Mohanrao Mohod
Hey there! If deploying apps feels like a headache, this guide is for you. I’ve shared exactly how to set up Jenkins, Docker, and agents so you can deploy your app with just one click no hassle, no fuss. I also put together a GitHub project you can follow, and for more details, check out my full blog post here. In just 30 minutes, you’ll have a hands free pipeline up and running!
Follow below steps to execute the project with setup of Jenkins, AWS and Docker with pipeline creation.
Go to AWS – Open your AWS Management Console and sign in with your credentials.
Go to Instances – In the AWS Console, locate and click on "EC2" to access your instances.
Click on Launch Instance – Select "Launch Instance" to begin setting up a new instance.

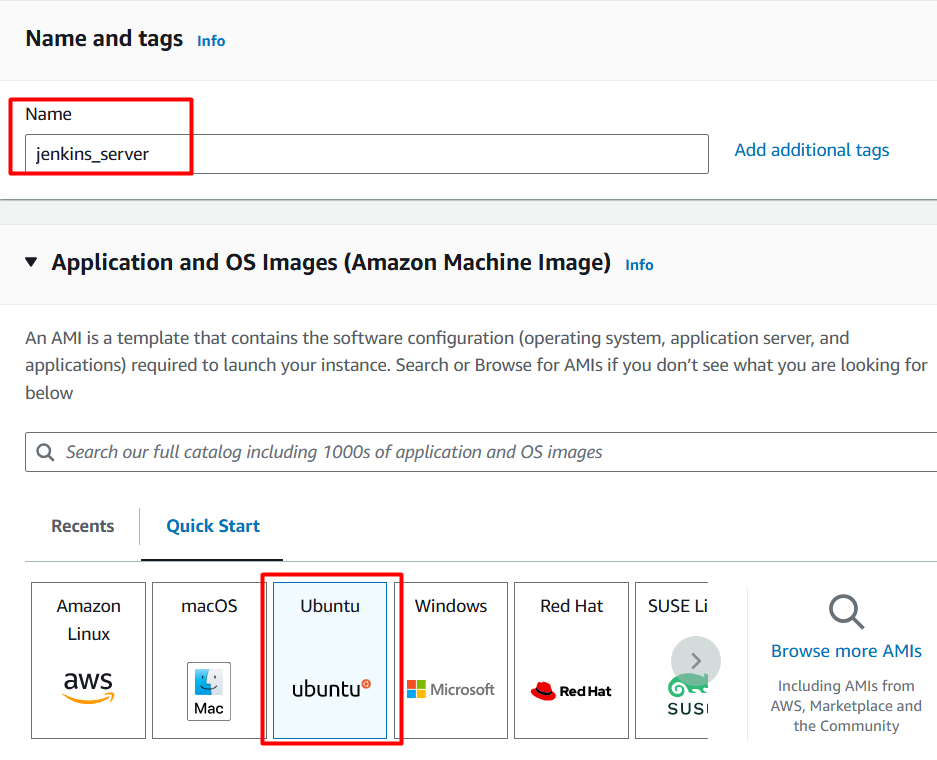
- Name the instance
jenkins_serverand selectUbuntuas the OS image.
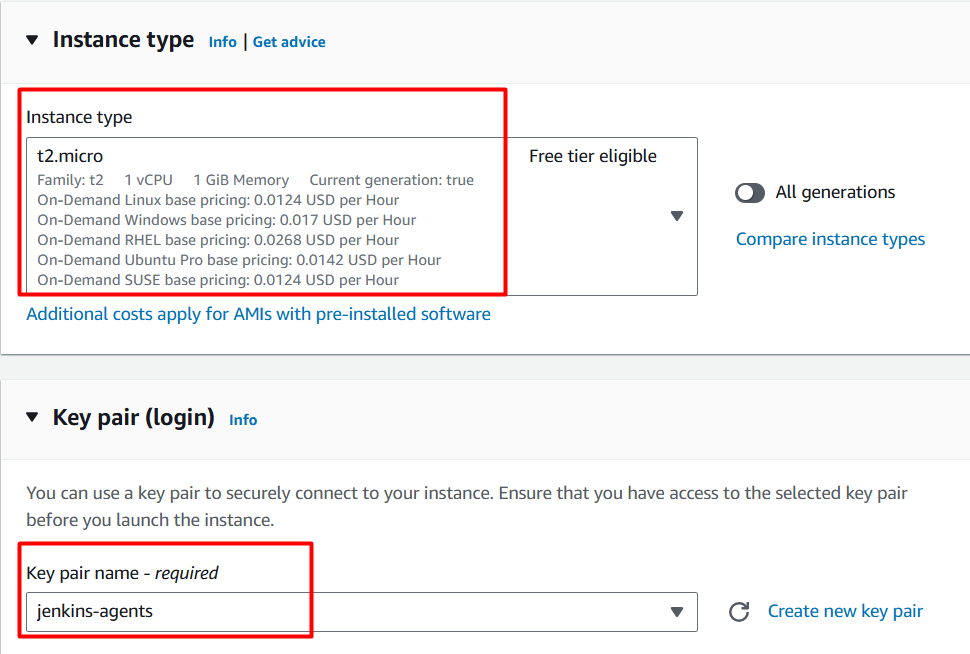
Select the instance type as
t2.micro(choose Free tier only, so it won’t cost you anything).Create a new
.pemkey pair. This will download the key.
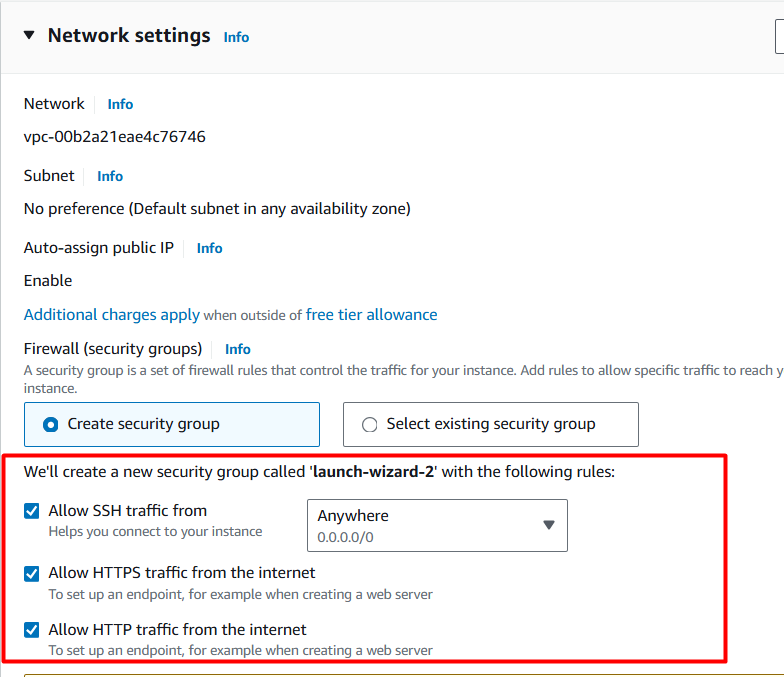
- Enable traffic for
SSH,HTTP, andHTTPS.
- 8 GB of storage is sufficient.

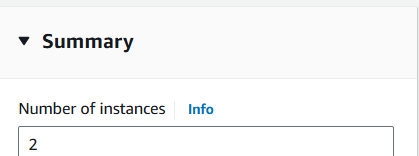
- Add 2 Instance: Master and Worker(Agent).
Now rename the instances as
jenkins-master&jenkins-worker.Note: The
jenkins-workeris simply anagent.Now open each instance in separate tabs and click on
Connect.

Open your terminal. I'm using Mobaxterm (Windows).
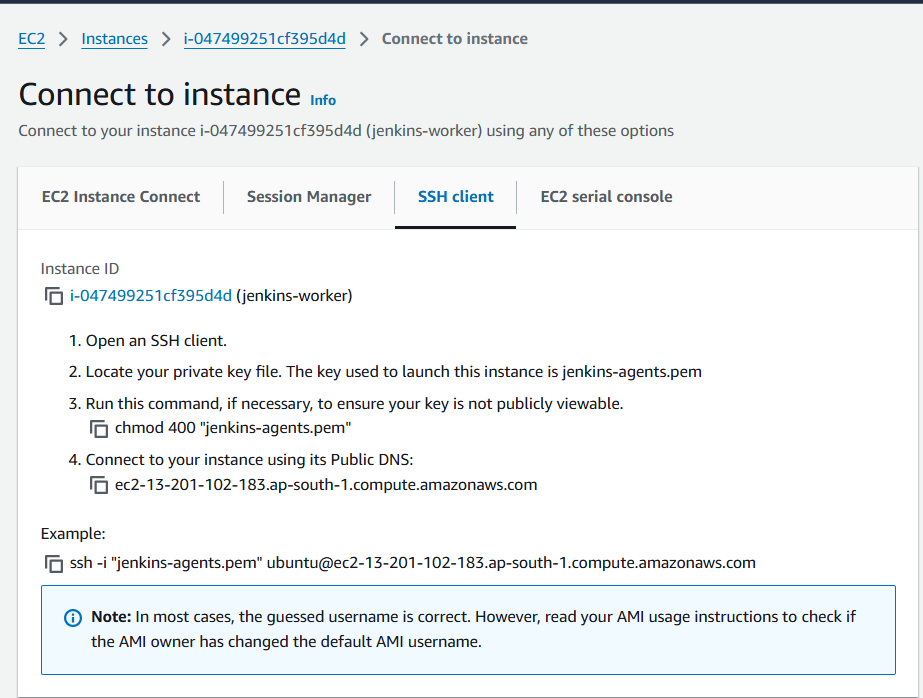
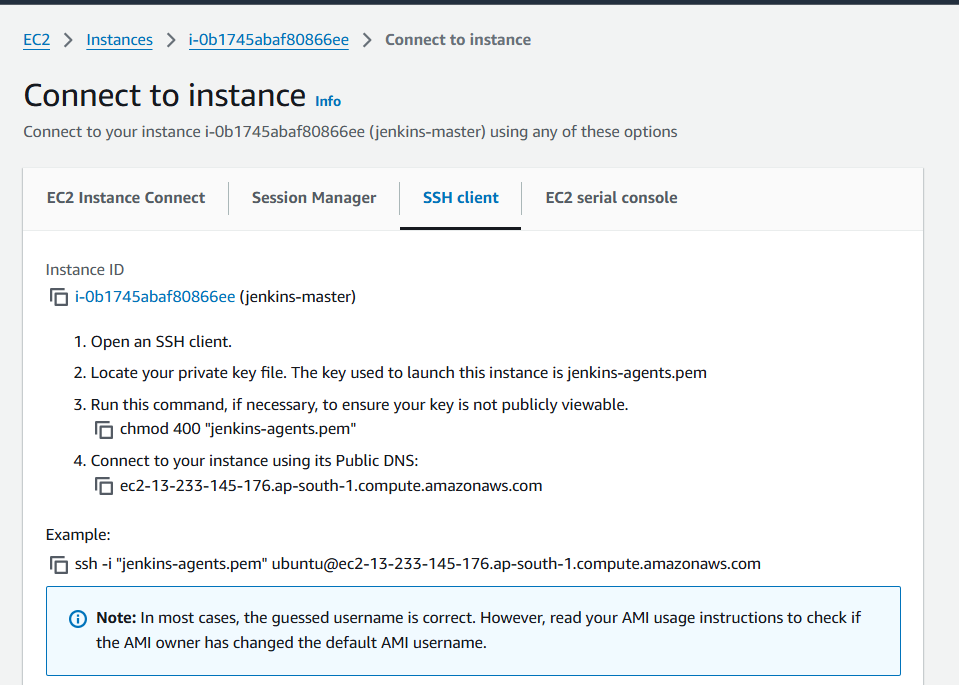
Navigate to the folder where you saved the
.pemkey created during instance setup.Set permissions for the
.pemkey as shown in point number 3 in the screenshot below.Now run the
sshcommand for the master and worker in two separate tabs.
Java should be installed on both instances.
Note: Refer to this documentation
( Jenkis Installation )for the installation of Jenkins.sudo apt update sudo apt install fontconfig openjdk-17-jreNow, we need to install Jenkins only on the Master instance.
WHY install Jenkins on Master Instance only?
- We install Jenkins on the master so it can manage and assign tasks, while agents focus only on running those tasks efficiently.
sudo wget -O /usr/share/keyrings/jenkins-keyring.asc \
  https://pkg.jenkins.io/debian-stable/jenkins.io-2023.key
echo "deb [signed-by=/usr/share/keyrings/jenkins-keyring.asc]" \
  https://pkg.jenkins.io/debian-stable binary/ | sudo tee \
  /etc/apt/sources.list.d/jenkins.list > /dev/null
sudo apt-get update
sudo apt-get install jenkins
- Now install Docker and Docker Compose on both the instances:
sudo apt-get install docker.io docker-compose-v2
- Now, give the
jenkinsuser permission to join thedockergroup on the Master Instance.
sudo usermod -aG docker jenkins
- Now, give the current
$USERpermission to join thedockergroup on the Worker Instance.
sudo usermod -aG docker $USER
Now run
sudo newgrp dockeron both instances to refresh the groups.Now connect to the
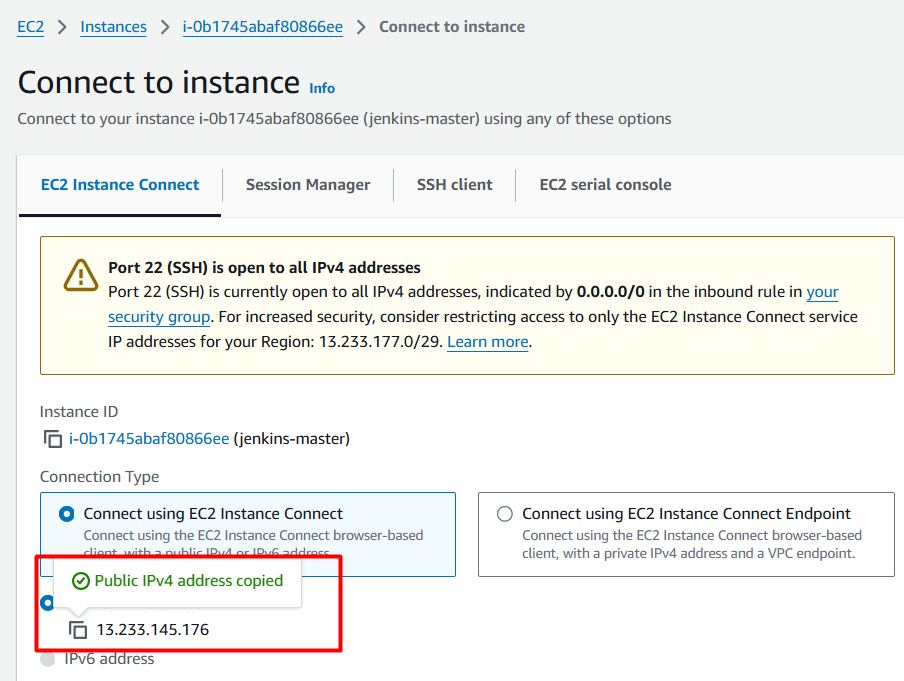
jenkins-master. Copy the IP address and add port8080in the browser.
Note: 8080 is the port number for Jenkins.
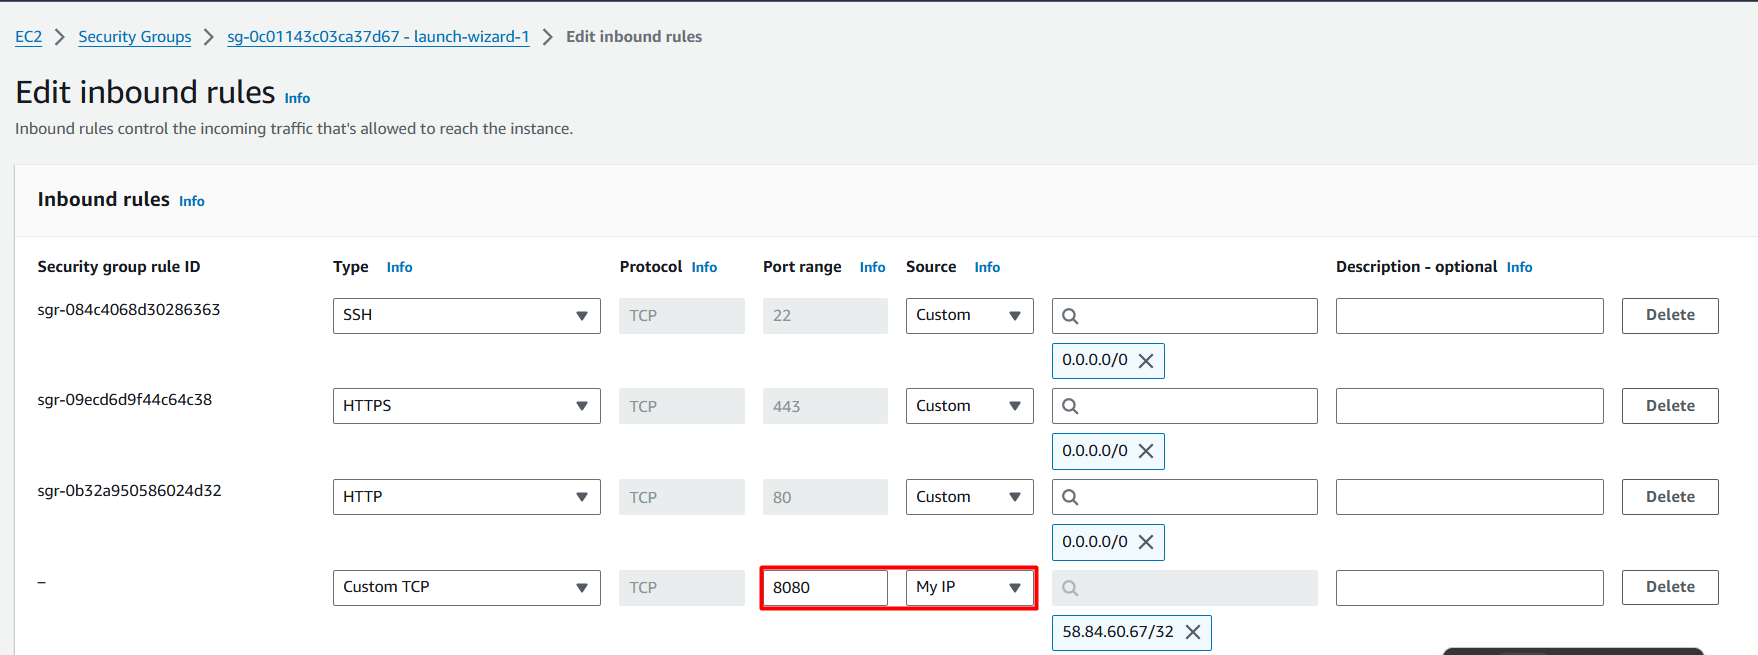
- Before connecting, you need to add an Inbound entry for port range
8080with the source set toMy IPin the jenkins-master instance.
- Now run the command below, so that if our instance reboots, Jenkins will start automatically.
sudo systemctl enable jenkins
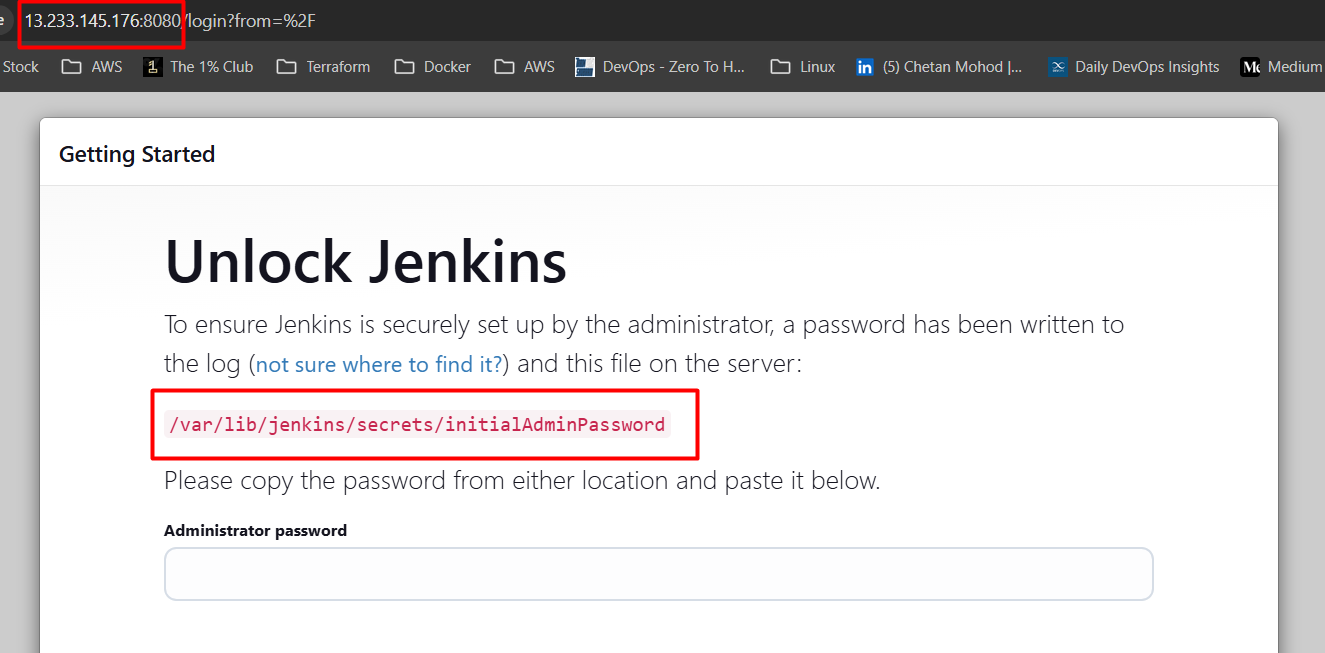
Open your browser, and the window below will appear. You need to unlock Jenkins.
Run
cat /var/lib/jenkins/secrets/initialAdminPasswordon the jenkins-master to get the password.
Always remember, we only need to setup the master once and then send work to the worker.
Agent concepts are based on SSH. If we want to connect from server_a to server_b, we use SSH concepts.
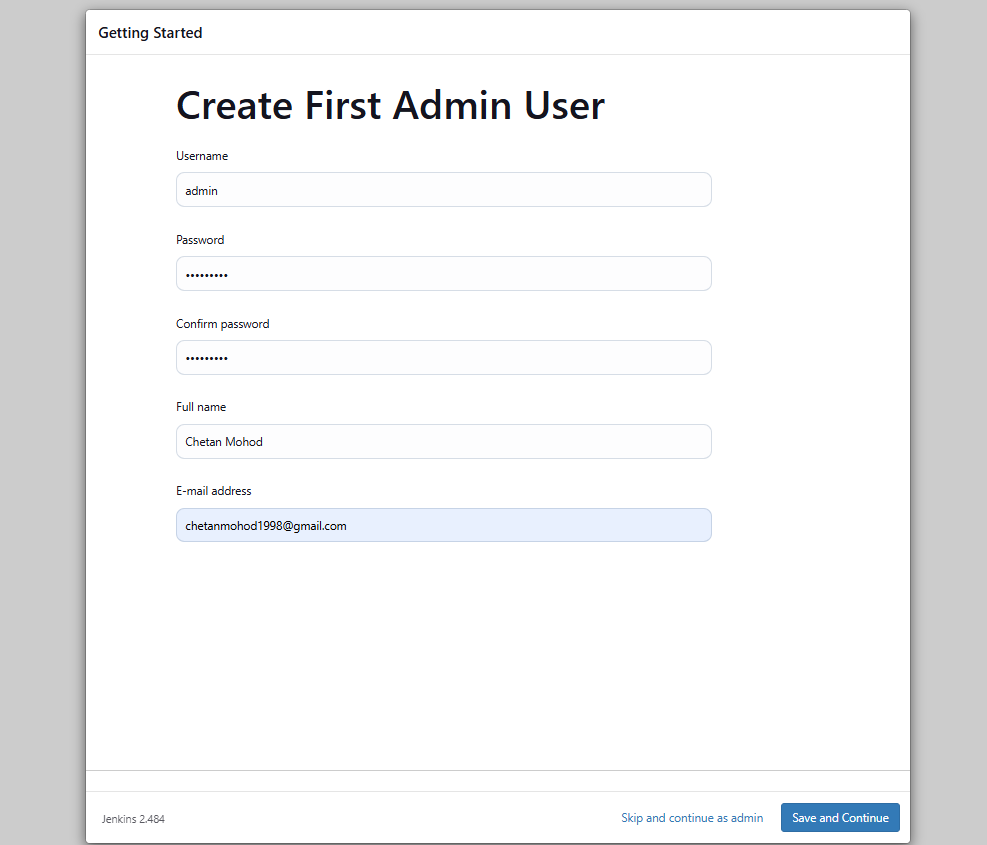
Create
adminuser:
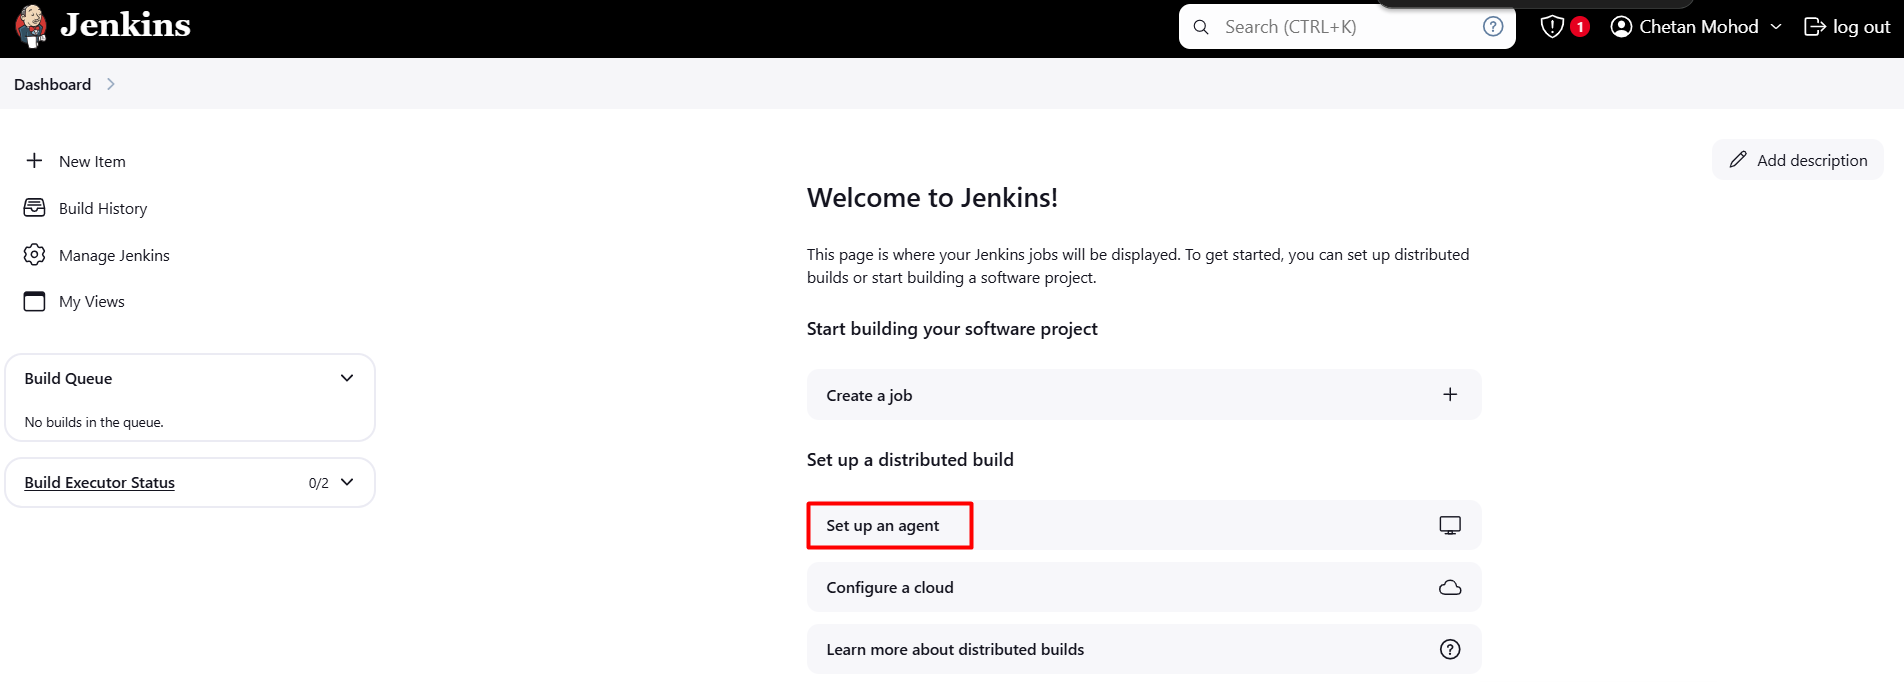
- Once the setup is complete, click on "Set up an agent"
- Create a new node worker (Agent).
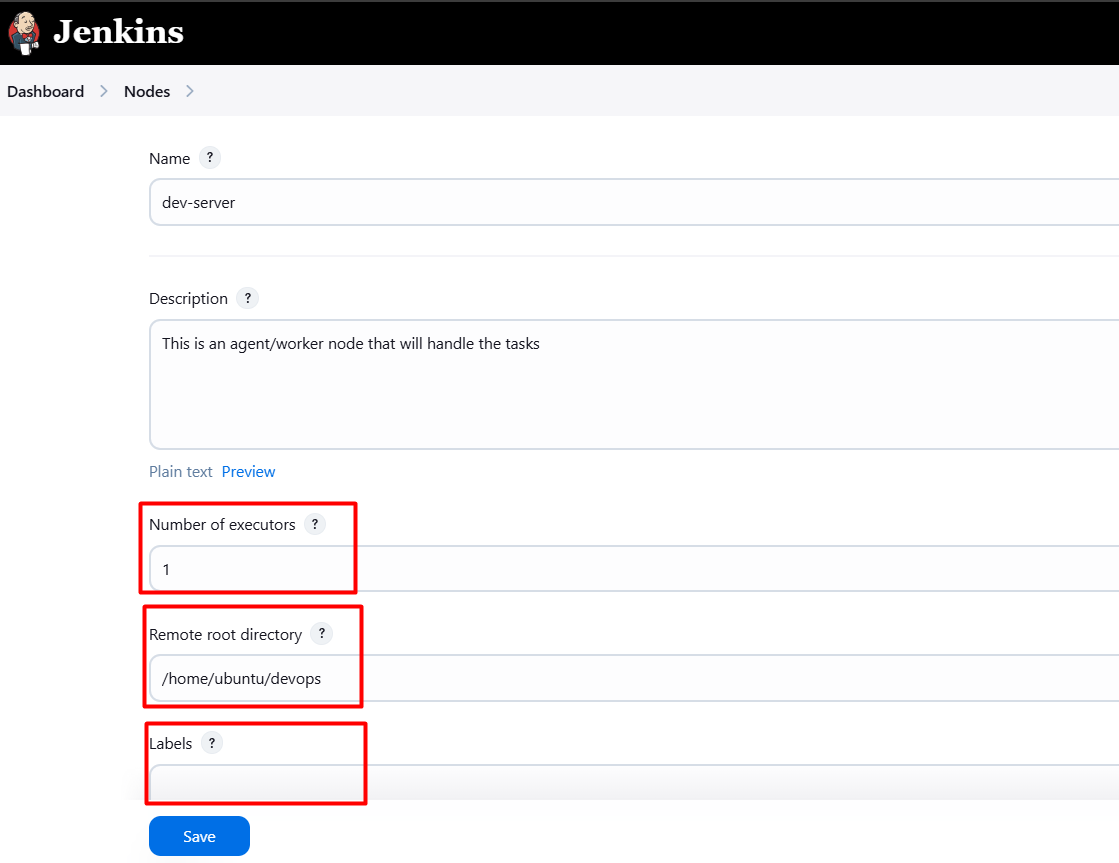
What is the "Number of executors"?
- If you want to perform multitasking or run multiple builds, you can add n number of executors. Here, we are assigning 1 executor.
What is the "Remote Working Directory"?
- This is the directory where you want to store all the Jenkins jobs on the Worker Instance.
What is a "Label"?
When we write
agent anyin a pipeline, it will run tasks on any available agent.But if you want to run tasks on a specific node, you need a specific label name.
What is “Usage“?
- Used for multi-branch pipelines like prod, dev, and stage. It only builds jobs with label expressions that match.
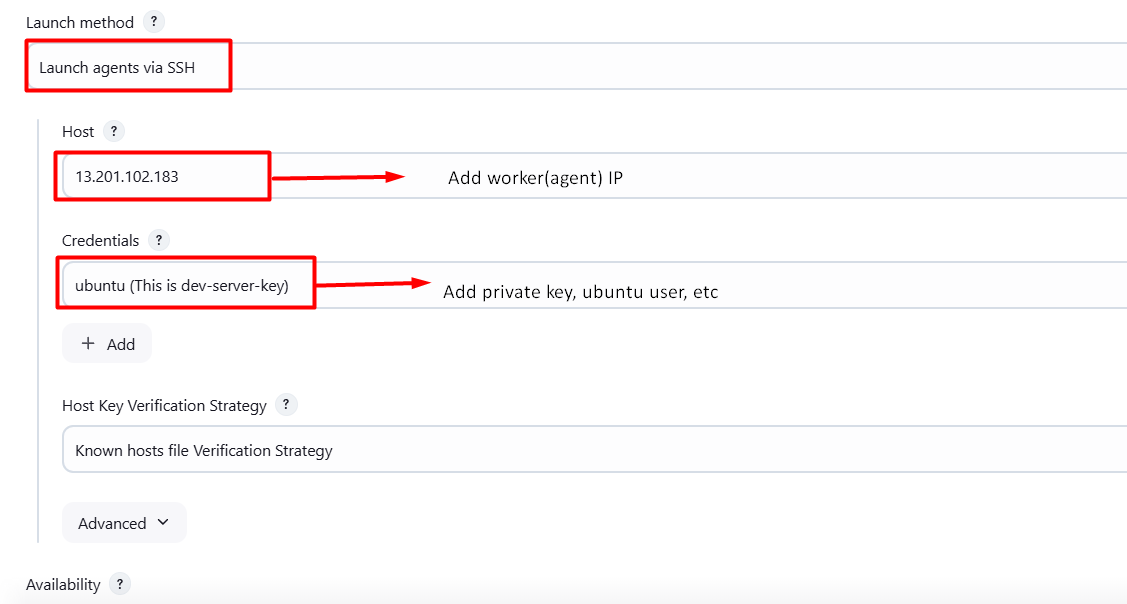
- Worker(Agent) IP:
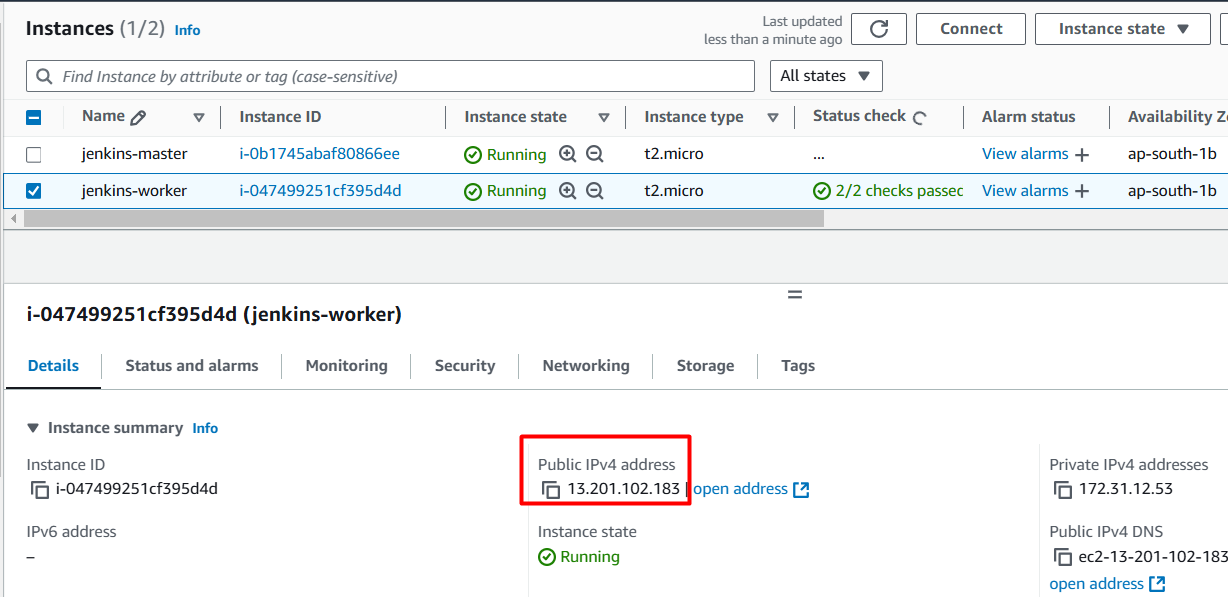
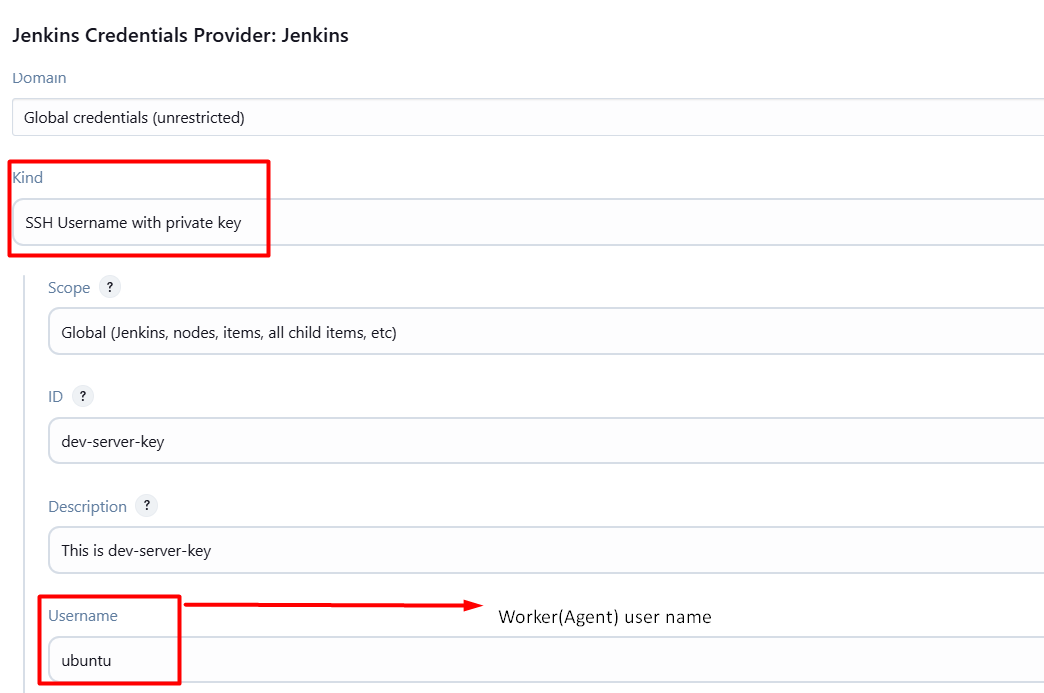
- Credential details:
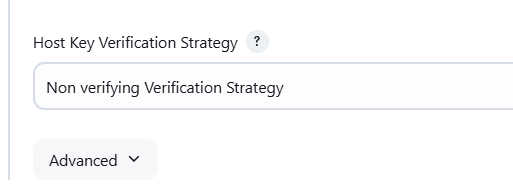
What is the "Host Key Verification Strategy"?
- If your hosts are unknown to each other, use the "Non-verifying Verification Strategy." It will verify using SSH.
- Now save. Your dev-server is in sync.

- Now, if you go to the Jenkins worker (agent instance), you will see some folders and files. These has been created using Jenkins.

- Now we can assigns tasks to our
jenkins-worker.
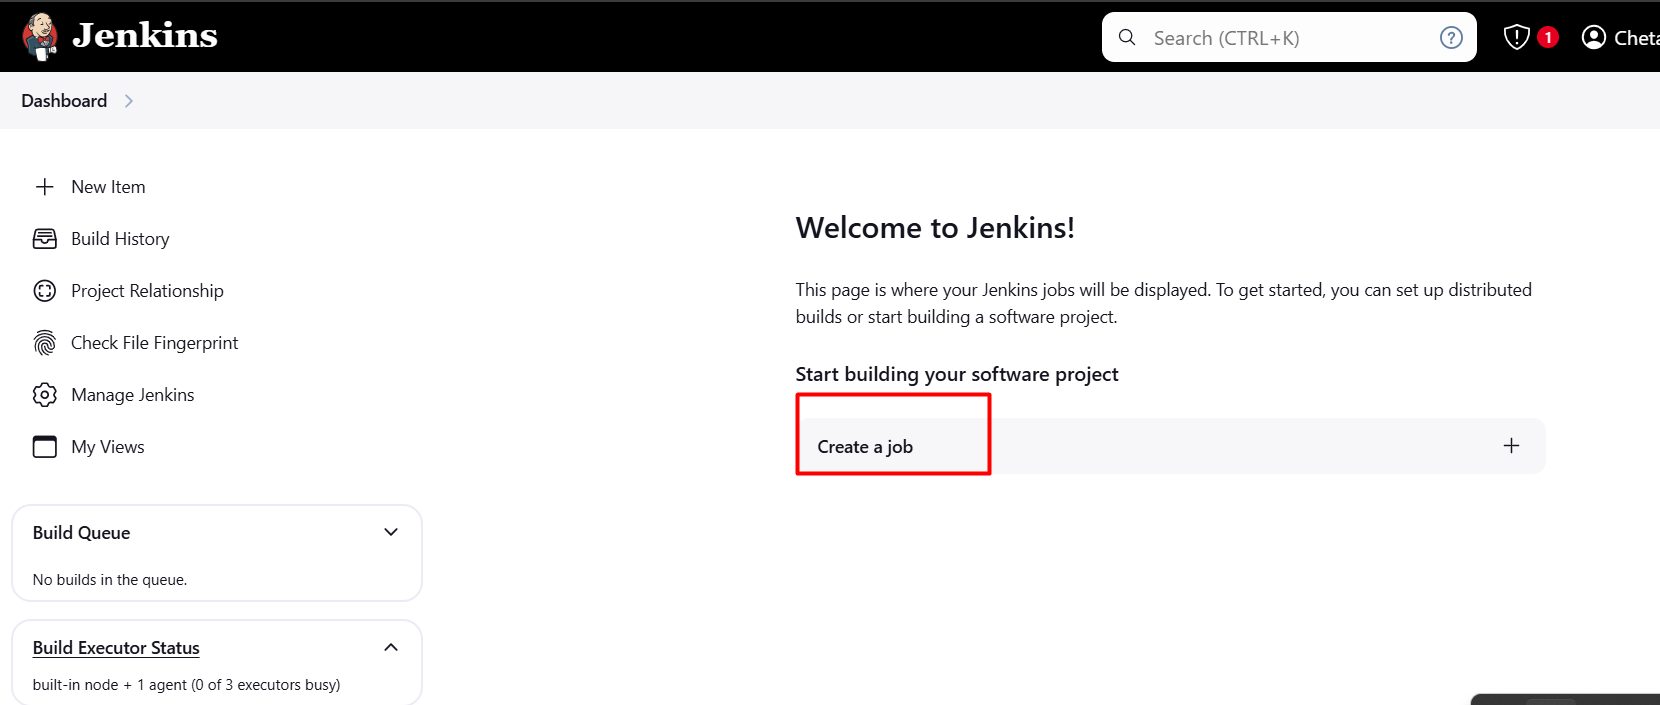
Go to Jenkins Dashboard and click on “Create a job".
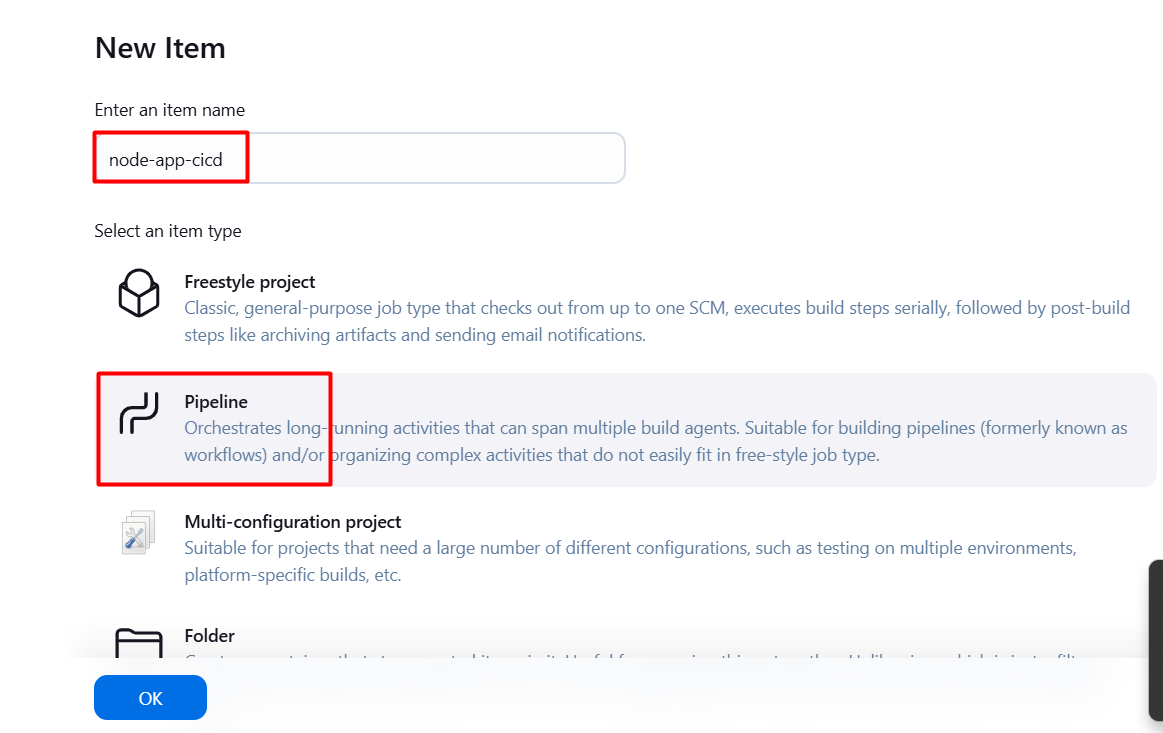
Now add the GitHub project. (I have added the node todo CICD project.)
- You can also refer to this project: https://github.com/Chetan-Mohod/node-todo-cicd
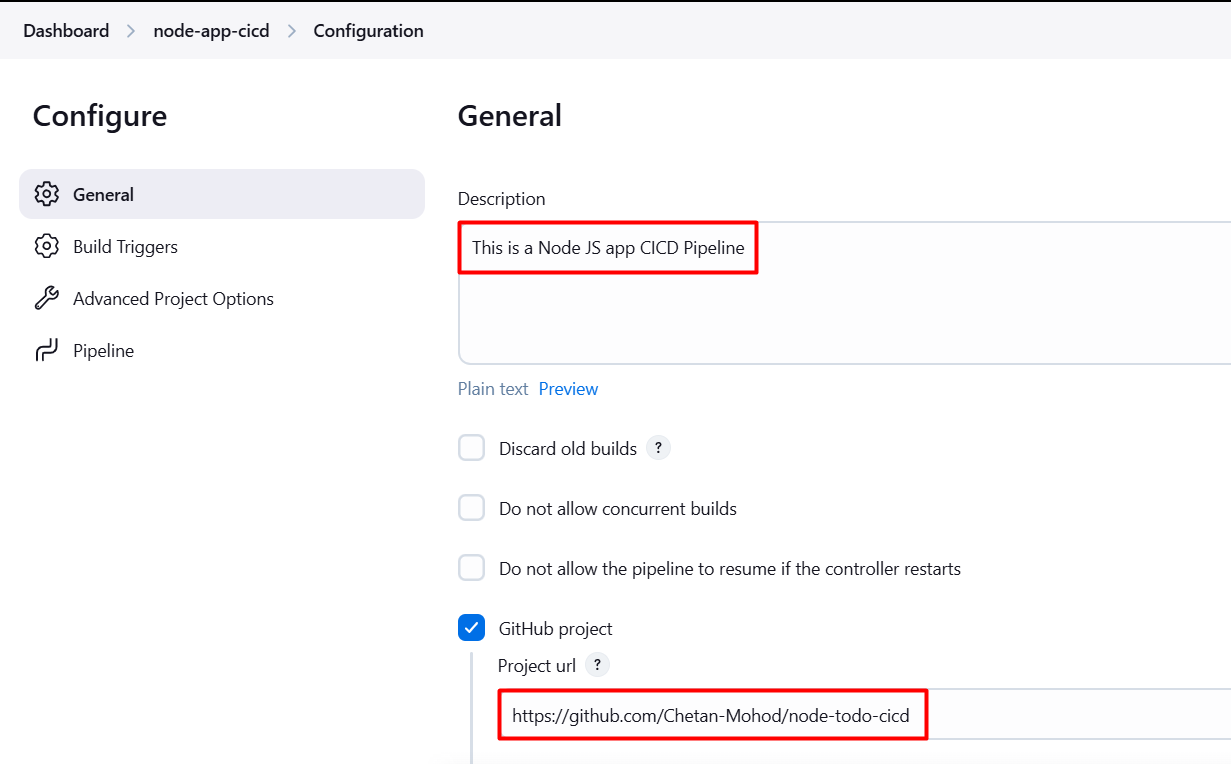
- Now add below groovy code into pipeline block:
pipeline {
    agent { label 'dev-server' }
    stages {
        stage("Code Clone") {
            steps {
                git url: "https://github.com/Chetan-Mohod/node-todo-cicd.git", branch: "master"
            }
        }
        stage("Code Build & Test") {
            steps {
                sh "docker build -t node-app ."
            }
        }
        stage("Deploy") {
            steps {
                sh "docker-compose down && docker-compose up -d --build"
            }
        }
    }
}
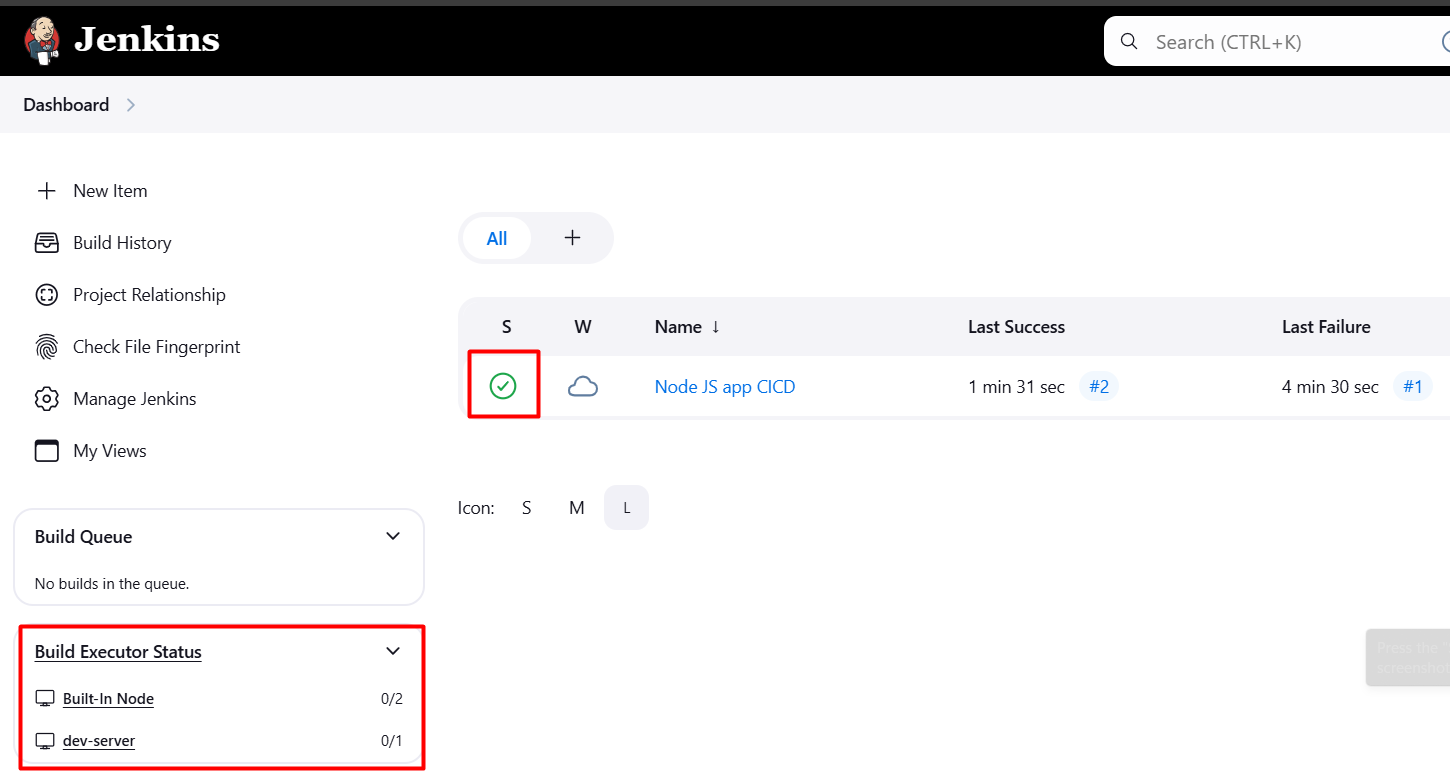
- After saving above code, go to Dashboard and run the Node.

- Now you can see
Built-In-Nodeassigning its task todev-server. It has been deployed, as shown in the image below.
Now to check you’re application is running on jenkins-worker.
- Go to AWS → Instances → select jenkis-worker → Security → Edit Inbound Rules → Add Port 8000 , Anywhere-IPv4 → Save

Now copy the public IP from
jenkins-workerand paste it into the browser with port 8000 to run the application.- http://jenkins_worker_public_ip:8000

Congratulations! Application is running successfully.
Thanks for reading the blog! Happy Learning! :)
Subscribe to my newsletter
Read articles from Chetan Mohanrao Mohod directly inside your inbox. Subscribe to the newsletter, and don't miss out.
Written by

Chetan Mohanrao Mohod
Chetan Mohanrao Mohod
DevOps Engineer focused on automating workflows, optimizing infrastructure, and building scalable efficient solutions.