Develop a Simple Expense Tracker API Locally Using Azure Function
 Freeman Madudili
Introduction
In this guide, I’ll walk you through creating a simple serverless API for tracking expenses using Azure Functions, Cosmos DB, and C#. You’ll learn how Serverless functions make it easy to handle HTTP requests, connect to Cosmos DB without boilerplate code, and scale efficiently. The complete source code is available on GitHub if you'd like to explore as we go.
Setting Up the Local Development Environment
Before diving into coding, make sure Azure Functions Core Tools is installed. It’s the best way to run and test Azure Functions locally. Here’s the setup guide if you need it.
Initialize the Function App Project:
Open your terminal and set up the project:
 func init ExpenseTracker --worker-runtime dotnet-isolated
 cd ExpenseTracker
Adding Cosmos DB Support
To use Cosmos DB as our database for storing expenses, we’ll need to install a specific package that allows Azure Functions to communicate directly with Cosmos DB. Open the project file and add this package:
dotnet add package Microsoft.Azure.Functions.Worker.Extensions.CosmosDB
This package is required for both AddExpense and GetExpenses functions, as it enables Cosmos DB output and input bindings for the dotnet-isolated model.
Implementing the AddExpense Function
The AddExpense function will handle incoming HTTP POST requests, validate expense data, and store it in Cosmos DB using an output binding.
Step 1: Creating and Configuring the Function
Start by creating the AddExpense function:
func new --name AddExpense --template "HTTP trigger"
This command creates a new HTTP-triggered function. Open the generated file, and we’ll update it to handle incoming expense data.
Step 2: Processing the Request
To read and validate JSON data from the HTTP request, use the following code:
var expenseData = await req.ReadAsStringAsync();
if (string.IsNullOrWhiteSpace(expenseData))
    throw new ArgumentException("Invalid request body");

Expense? expense = JsonSerializer.Deserialize<Expense>(expenseData);
if (expense == null)
    throw new ArgumentException("Expense data is invalid");
This snippet reads and deserializes the JSON data from the HTTP request. If required fields like Username, Description, or Amount are missing, the function will return a 400 Bad Request with an error message.
Step 3: Cosmos DB Output Binding
With the Cosmos DB output binding, you don’t need to handle connection details directly. Here’s how the function sends the expense data to Cosmos DB:
[CosmosDBOutput(databaseName: "Spendr", containerName: "Expenses", PartitionKey = "Username", Connection = "CosmosDBConnectionString")]
public Expense? Expense { get; set; }
Using this attribute in the response class AddExpenseResponse, Azure Functions automatically saves Expense data to Cosmos DB.
Step 4: Implementing the Function Logic
The main logic for the AddExpense function, including error handling, looks like this:
public async Task<AddExpenseResponse> Run([HttpTrigger(AuthorizationLevel.Function, "post")] HttpRequestData req)
{
    try
    {
        // Process the request body
        var expenseData = await req.ReadAsStringAsync();
        Expense? expense = JsonSerializer.Deserialize<Expense>(expenseData);

        ValidateExpense(expense);
        _logger.LogInformation($"Expense added for {expense.Username}");

        return new AddExpenseResponse
        {
            Expense = expense,
            HttpResponse = await req.CreateJsonResponseAsync(HttpStatusCode.Created, new
            {
                status = "success",
                message = "Expense created successfully",
                data = expense
            })
        };
    }
    catch (Exception ex)
    {
        _logger.LogError(ex, "Error processing AddExpense function");
        return new AddExpenseResponse
        {
            Expense = null,
            HttpResponse = await req.CreateJsonResponseAsync(HttpStatusCode.BadRequest, new
            {
                status = "error",
                message = "Failed to create expense",
                error = new { details = ex.Message }
            })
        };
    }
}
This code saves the expense data to Cosmos DB if validation passes and returns a success response. On error, it logs the issue and sends a 400 Bad Request response.
Implementing the GetExpenses Function
The GetExpenses function retrieves all expenses from Cosmos DB. Here’s how it works:
Create the Function:
func new --name GetExpenses --template "HTTP trigger"Cosmos DB Input Binding:
Using an input binding simplifies data retrieval. This binding executes a SQL query to retrieve all expenses from the
Expensescontainer:code[CosmosDBInput(databaseName: "Spendr", containerName: "Expenses", Connection = "CosmosDBConnectionString", SqlQuery = "SELECT * FROM c")] IEnumerable<Expense> expensesResponse Handling:
If no expenses are found, the function returns a 404 Not Found message. Otherwise, it returns the list of expenses as JSON:
 public async Task<HttpResponseData> Run(
     [HttpTrigger(AuthorizationLevel.Function, "get")] HttpRequestData req,
     [CosmosDBInput(...)] IEnumerable<Expense> expenses
 )
 {
     if (expenses == null || !expenses.Any())
     {
         return await req.CreateJsonResponseAsync(HttpStatusCode.NotFound, new
         {
             status = "error",
             message = "No expenses found."
         });
     }

     return await req.CreateJsonResponseAsync(HttpStatusCode.OK, new
     {
         status = "success",
         data = expenses
     });
 }
Connecting to Cosmos DB Locally
To run these functions, you’ll need a Cosmos DB instance. Azure offers a free-tier Cosmos DB that’s perfect for development.
Create a Free Cosmos DB Instance: Sign up here for a free instance.
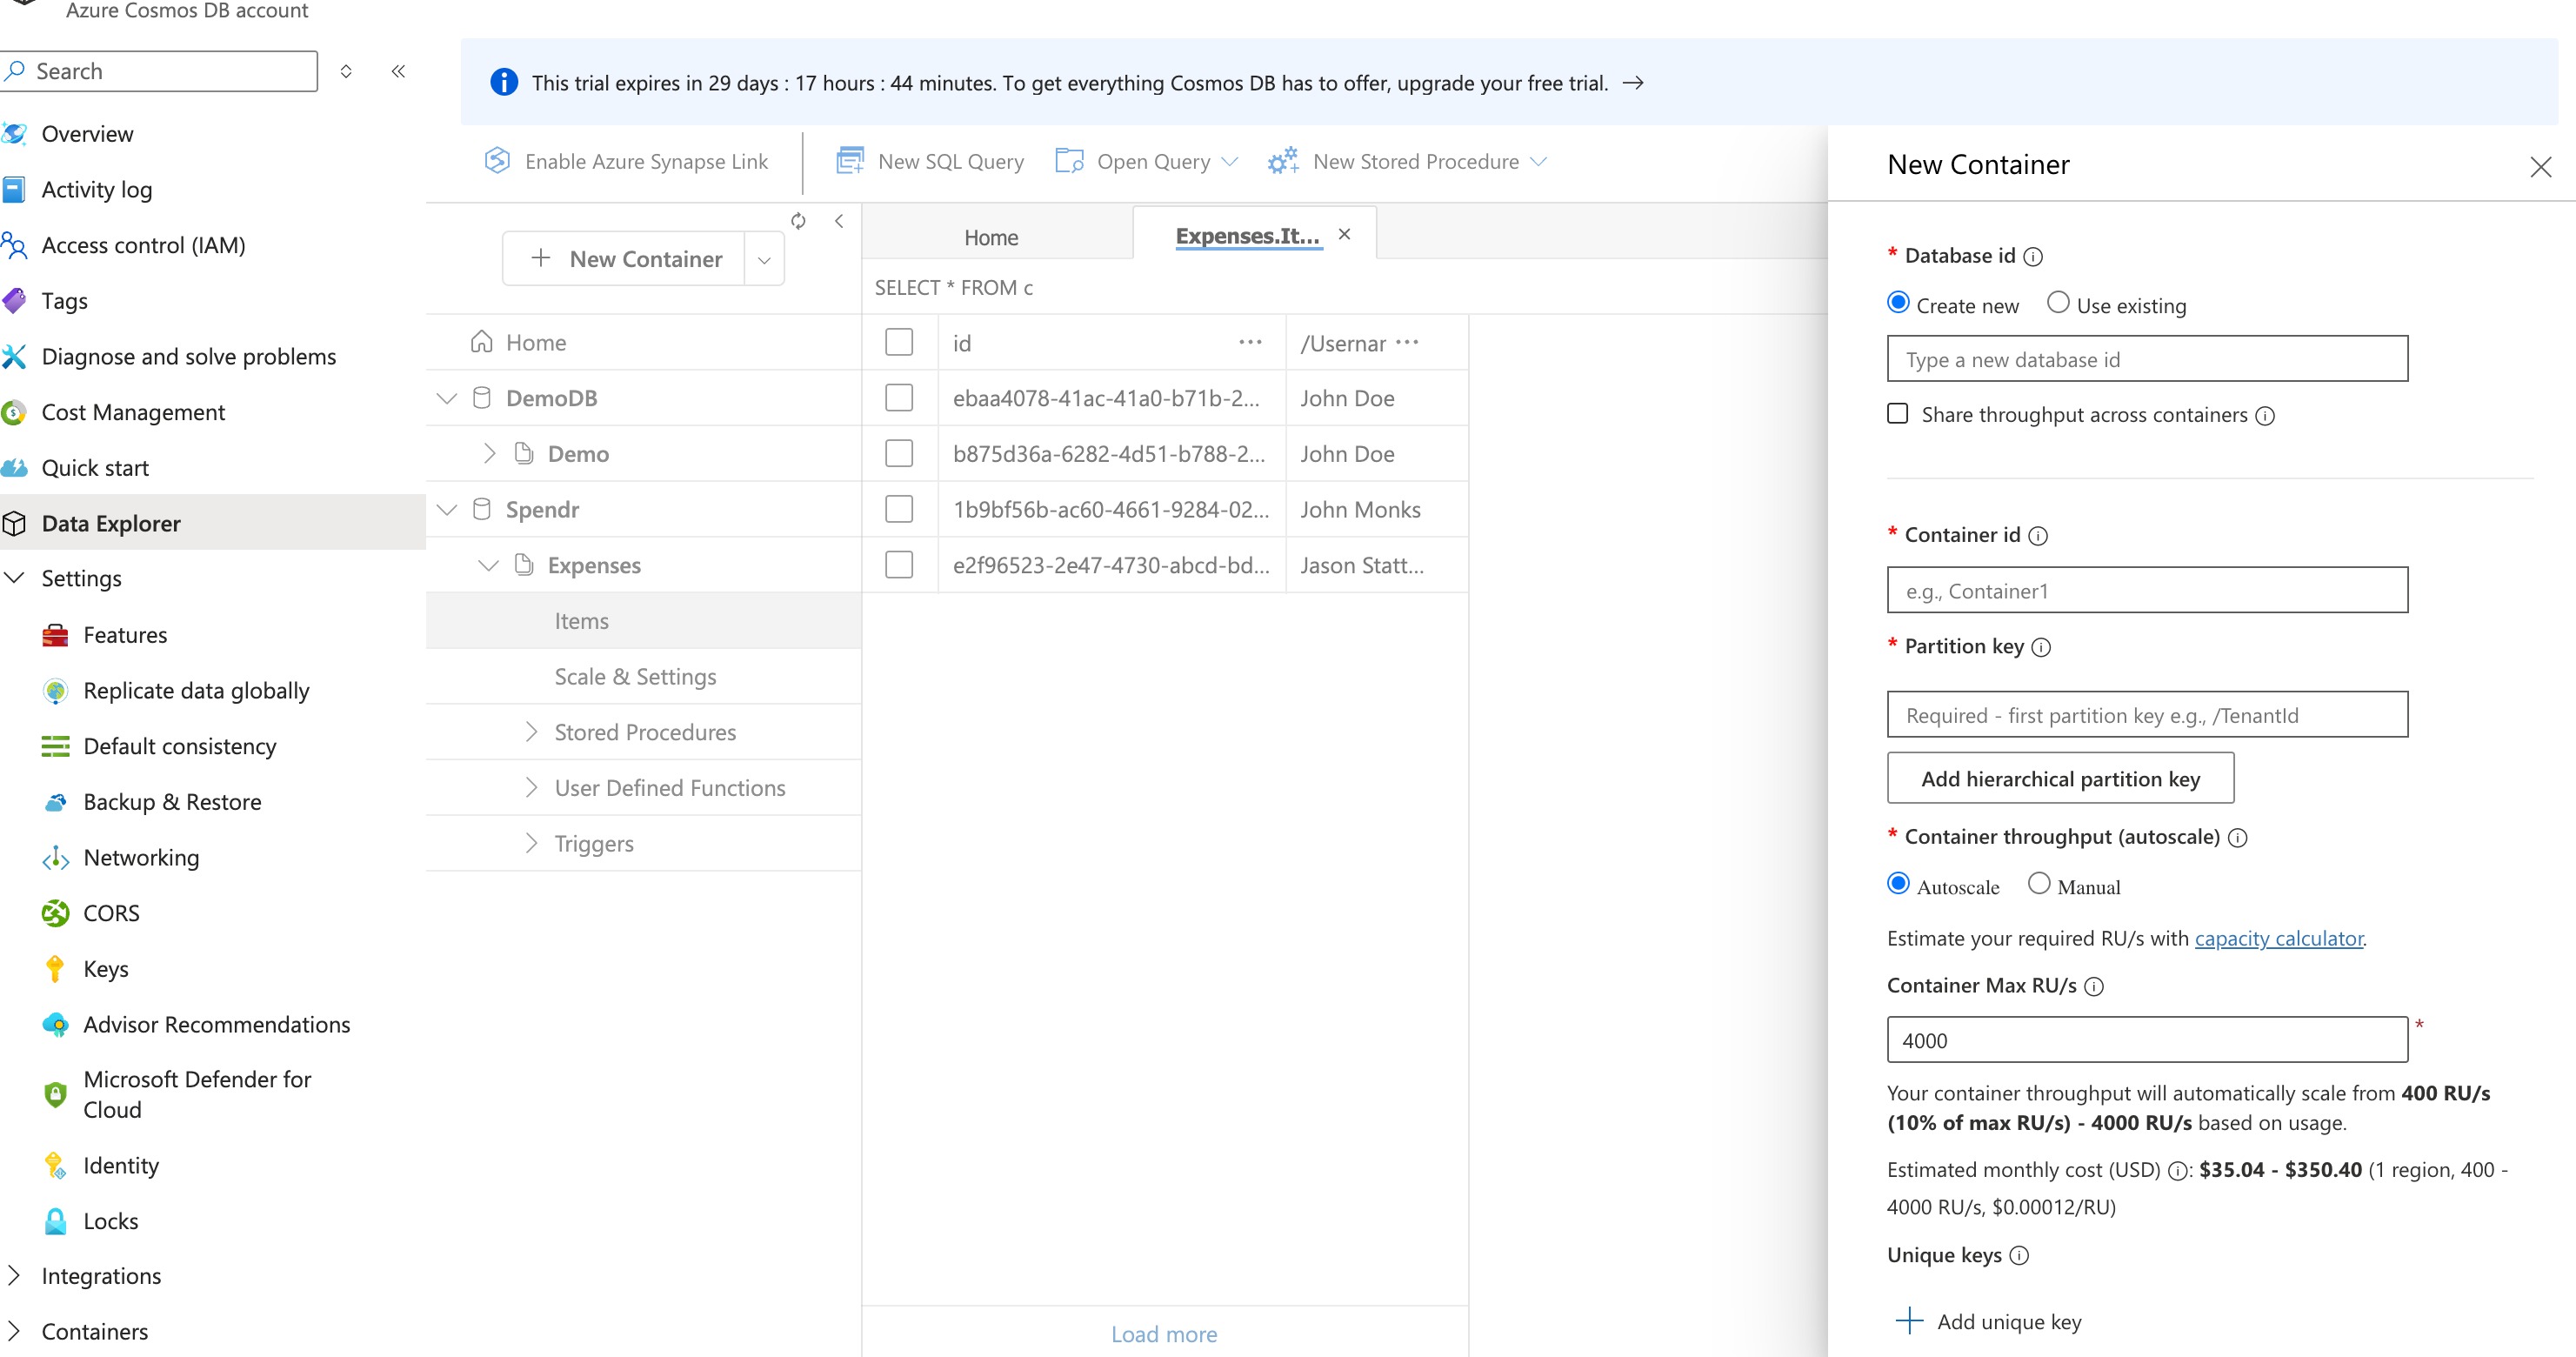
Create a Cosmos DB Database and Container with Partition Key
In the Azure portal, go to your Cosmos DB account.
Under Data Explorer, click New Container.
Enter a Database ID (e.g., Spendr).
Enter a Container ID (e.g., Expenses).
Set the Partition Key to /Username for optimized querying and scalability.
Choose Autoscale or manually set throughput based on your needs.
Click OK to create the container.

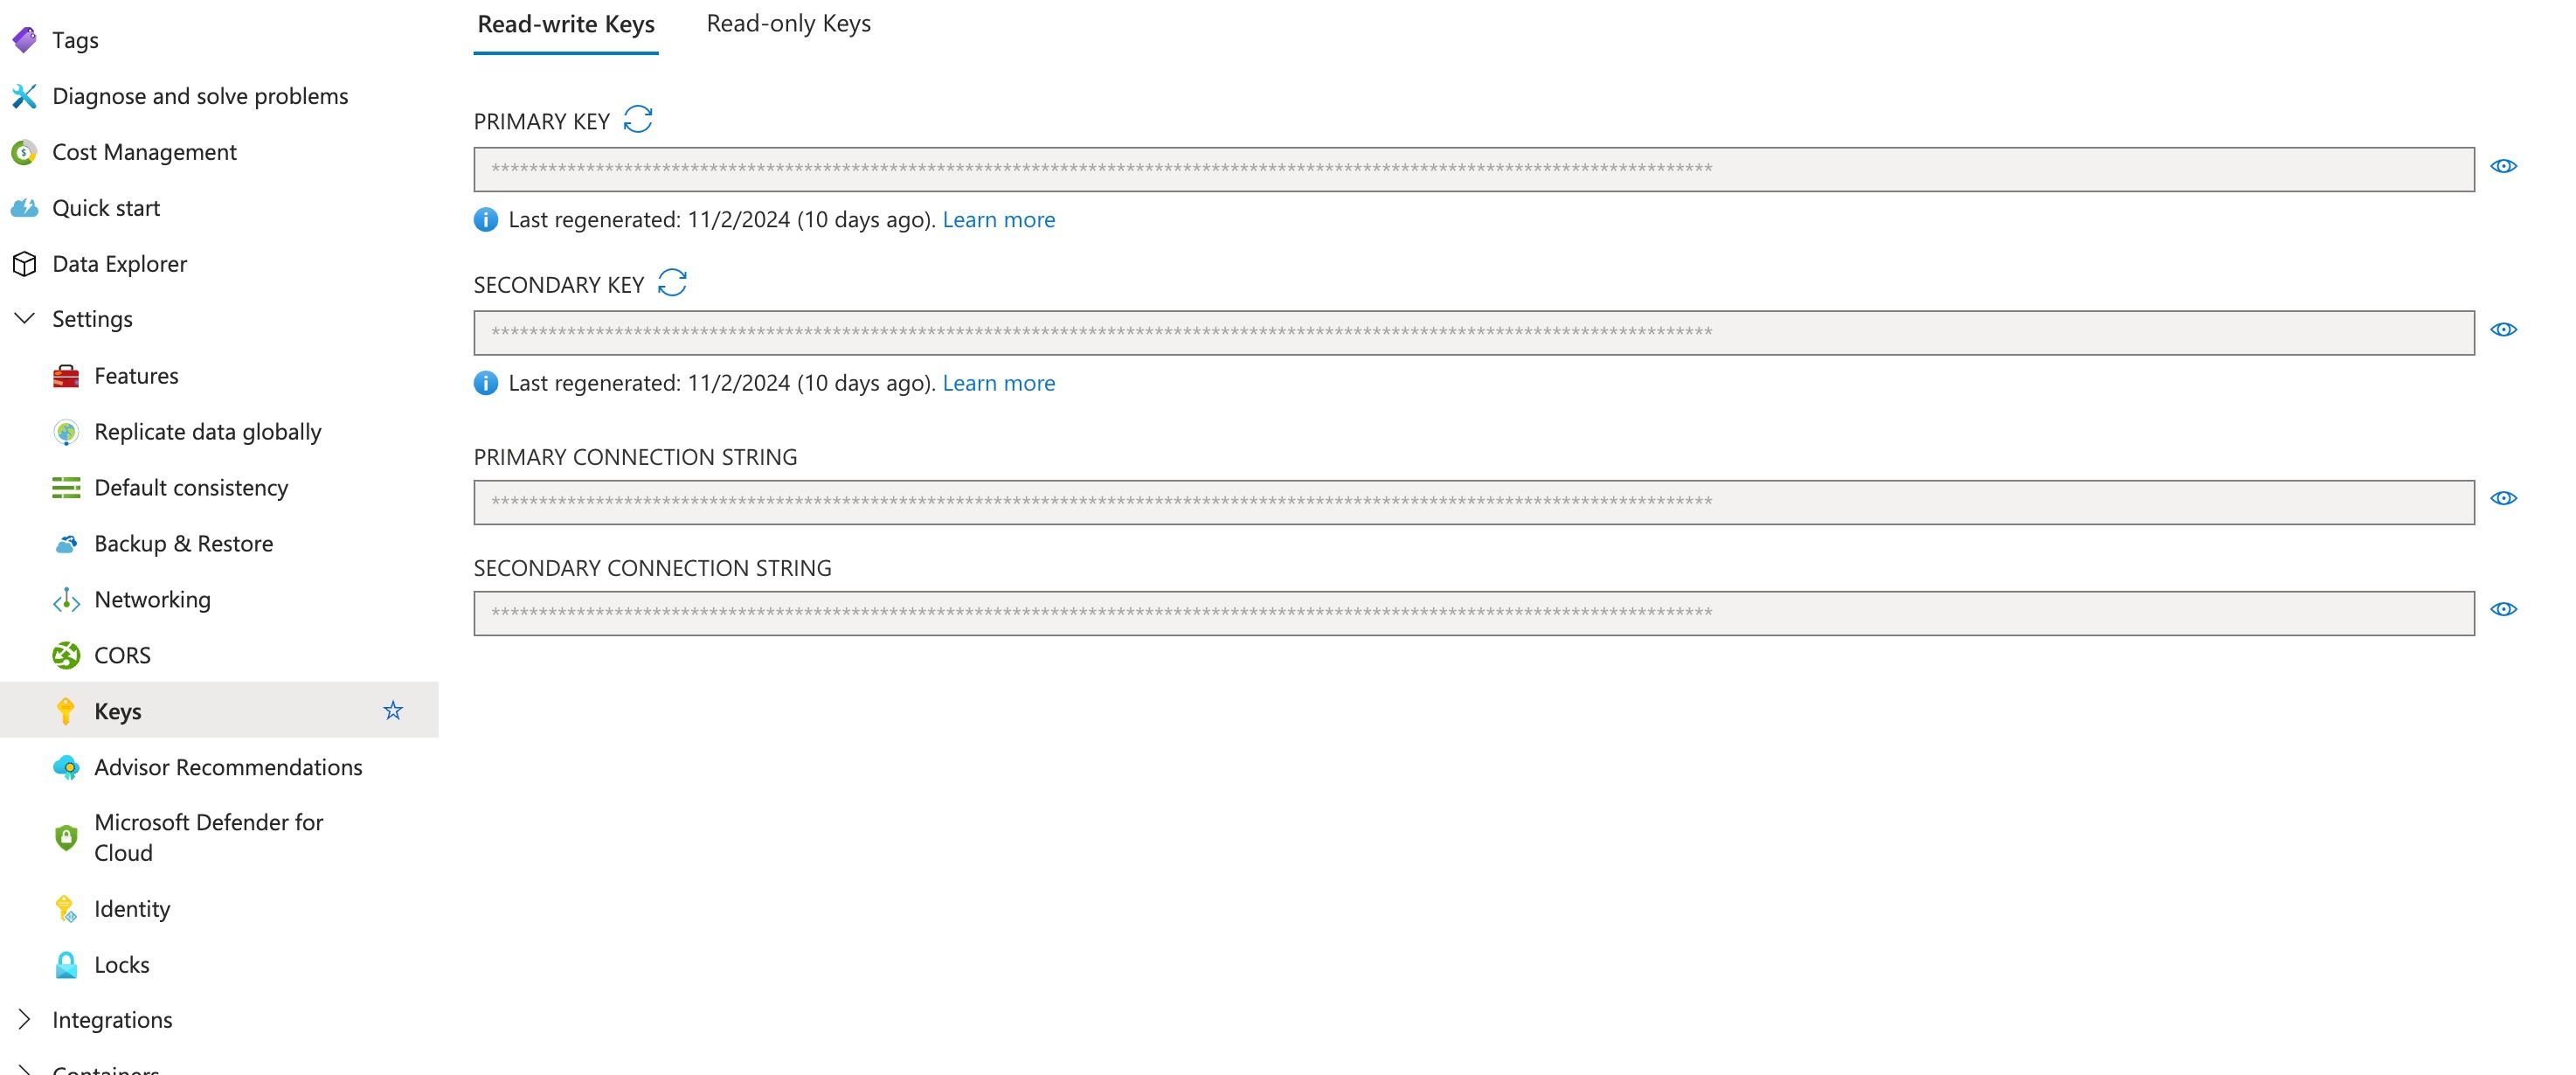
Retrieve the Connection String
Navigate to Settings > Keys in your Cosmos DB account.
Copy the PRIMARY CONNECTION STRING under Read-write Keys for local testing.

Add the Cosmos DB Connection String:
In
local.settings.json, add the connection string from the Azure Portal:{ "IsEncrypted": false, "Values": { "AzureWebJobsStorage": "UseDevelopmentStorage=true", "CosmosDBConnectionString": "<YourCosmosDbConnectionString>" } }This allows your local environment to securely connect to Cosmos DB.
Running the Project Locally:
To start the project, run:
func startTest the endpoints with tools like Postman:
POST to
/AddExpense: Sends a JSON payload forUsername,Description, andAmount.GET from
/GetExpenses: Fetches all stored expenses.
Next Steps
We’ve built and tested a simple expense tracker API locally using Azure Functions. The next step is deploying it to Azure using Azure CLI, where we’ll cover creating, configuring and deploying a Function App in the cloud. Check out this post to move to production!
Subscribe to my newsletter
Read articles from Freeman Madudili directly inside your inbox. Subscribe to the newsletter, and don't miss out.
Written by

Freeman Madudili
Freeman Madudili
Hi, I’m Freeman, a Software Developer specializing in C#, .NET, and Azure. With a passion for creating seamless web and cloud solutions, I’ve built and deployed apps that solve real-world problems. Follow along as I share insights, projects, and tips from my journey in tech!