Day 39: AWS and IAM Basics ☁️ - A Beginner’s Guide
 Dhruv Moradiya
Welcome! Today, we’re diving into the basics of AWS (Amazon Web Services) and IAM (Identity and Access Management). Don’t worry if you’re new to cloud computing or don’t have an IT background—this guide is for you!
By now, you’ve probably heard of the cloud, which is simply a way of storing and accessing data, applications, and services over the internet rather than on your own computer. Let’s explore some AWS basics and then walk through a couple of easy tasks to get you started.
What is AWS?
Amazon Web Services (AWS) is a cloud platform that offers a variety of services for computing, storage, and networking, among many others. Think of AWS as a one-stop-shop where you can:
Run applications without needing to buy and manage hardware.
Store data safely and access it from anywhere.
Use automation to save time and make complex processes easier.
And the best part? AWS has a free tier, which means you can start using some services at no cost—perfect for learning! Sign up here for a free AWS account.
Task Overview
Now that you know a bit about AWS, let’s dive into two beginner-friendly tasks that’ll help you get hands-on experience with the cloud.
Task 1: Launch an AWS EC2 Instance with Jenkins Installed
In this task, you’ll be using EC2 (Elastic Compute Cloud), a service in AWS that lets you create a virtual computer (or "instance") to run applications.
Normally, setting up a server requires several steps:
Launch the server.
Connect to it.
Install any software you need, like Jenkins (a tool used for automating software development tasks).
But with AWS, you can skip some of these steps by using User Data—a feature that lets you pass a set of instructions to the instance when it starts. These instructions, or scripts, run automatically, which means software like Jenkins can be installed without you having to do it manually.
Step-by-Step Guide for Task 1:
Sign in to AWS and Go to EC2 Console:
- After logging into AWS, find EC2 under the Services menu. This is where you’ll create and manage your virtual servers.
Launch a New Instance:
- In the EC2 Console, click on Launch Instance. Choose a Linux-based server (such as Ubuntu or Amazon Linux), which is commonly used for this kind of setup.
Enter User Data for Automation:
Scroll down to the Advanced Details section, where you’ll see a box labeled User Data.
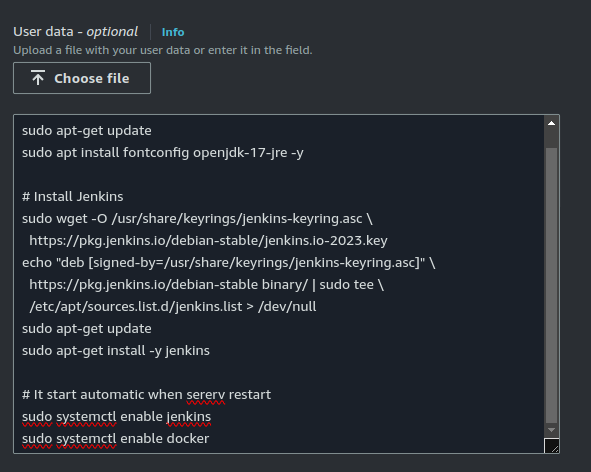
Copy and paste the following script in this box. This script tells your instance to install Jenkins automatically when it starts:
  #!/bin/bash
  sudo apt-get update
  sudo apt install fontconfig openjdk-17-jre -y

  # Install Jenkins
  sudo wget -O /usr/share/keyrings/jenkins-keyring.asc \
    https://pkg.jenkins.io/debian-stable/jenkins.io-2023.key
  echo "deb [signed-by=/usr/share/keyrings/jenkins-keyring.asc]" \
    https://pkg.jenkins.io/debian-stable binary/ | sudo tee \
    /etc/apt/sources.list.d/jenkins.list > /dev/null
  sudo apt-get update
  sudo apt-get install -y jenkins

  # It start automatic when sererv restart
  sudo systemctl enable jenkins
  sudo systemctl enable docker
Finish Setup and Launch the Instance:
- Continue with the rest of the settings, such as instance type, storage, and security settings. Finally, click Launch.
Access Jenkins in Your Browser:
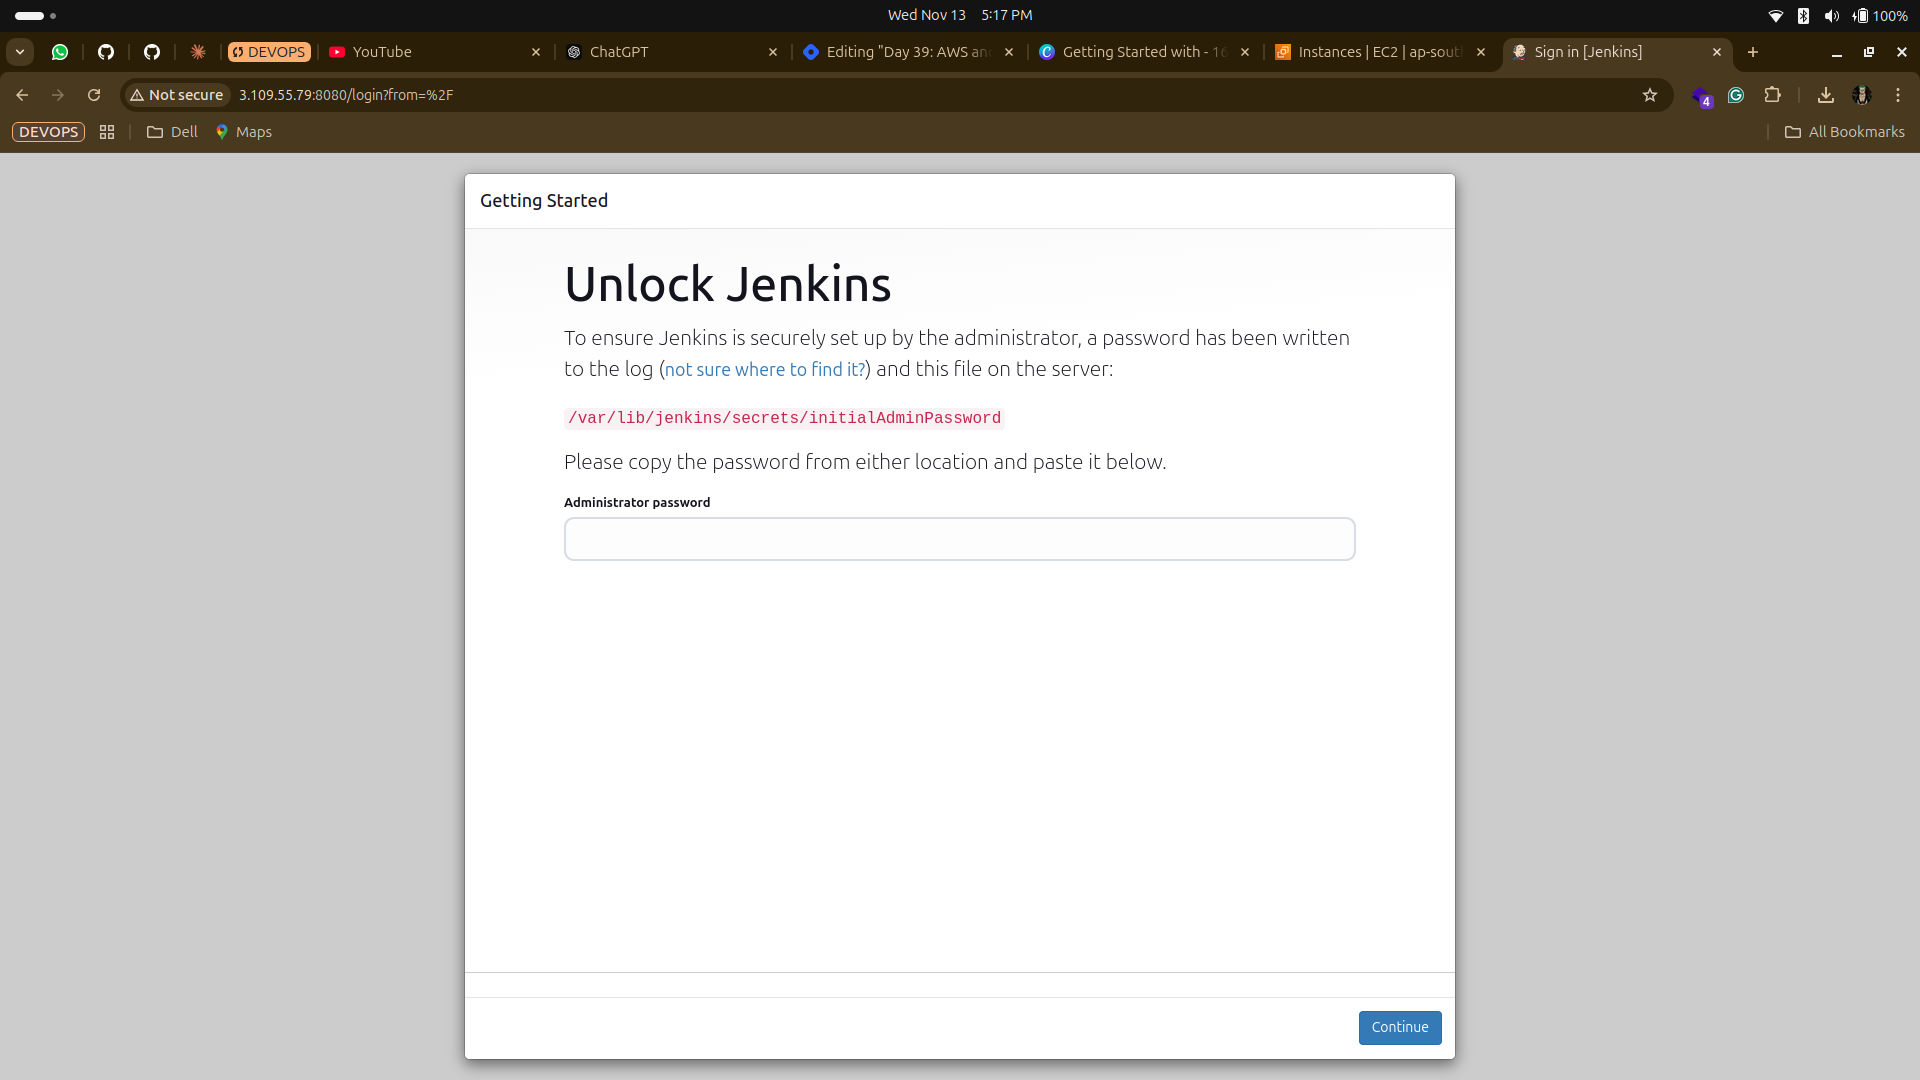
After the instance is up and running, go to the EC2 Dashboard to find its public IP address. Paste this IP into your browser.
You should see the Jenkins setup page, which confirms that the installation worked. Take a screenshot of this page, along with the User Data you entered, to verify your task completion.
Adding Security Group Rules
When setting up your EC2 instance, AWS requires you to specify a security group—a virtual firewall that controls inbound and outbound traffic. Follow these steps to make sure your Jenkins instance is accessible:
Go to the EC2 Console in AWS.
Select Your Instance: After launching your EC2 instance, go to the Security tab of your instance details.
Edit Inbound Rules:
In the Security Groups section, find your security group and click on it.
Click Edit Inbound Rules to add new rules.
Add the Following Rules:
HTTP (port 80): Allows HTTP access.
HTTPS (port 443): Allows HTTPS access.
Custom TCP Rule for Jenkins (port 8080):
Type: Custom TCP
Protocol: TCP
Port Range: 8080
Source: Anywhere (or a specific IP range if you want restricted access)
Save the Rules: Click Save to apply the rules.
These rules ensure that your EC2 instance is open to web traffic (HTTP/HTTPS) and accessible on port 8080 for Jenkins. After this, you should be able to access Jenkins by entering the instance’s public IP address and specifying port 8080 in your browser (e.g., http://<your-public-ip>:8080).

Task 2: Set Up IAM Users, Groups, and Roles
Now let’s talk about IAM (Identity and Access Management). IAM is a security feature in AWS that lets you control access to different parts of your account. Imagine you have a team working on different tasks; IAM allows you to:
Create users and groups to represent team members and their roles.
Assign permissions so each person only has access to the resources they need.
Step-by-Step Guide for Task 2:
Go to the IAM Console:
- From the AWS main menu, find IAM under Security, Identity, and Compliance.
Understand the IAM Concepts:
Users: Individuals who need access to your AWS account.
Groups: Collections of users who have similar access needs. For example, all developers might go in a "DevOps" group.
Roles: Sets of permissions that can be assigned to users, groups, or even applications, which can help manage access without assigning specific permissions to individual users.
Create Three IAM Roles:
Go to Roles in the IAM Console.
Create a role for each type of user:
DevOps-User: A role for users who work on development and deployment tasks.
Test-User: A role for testers who may need limited access.
Admin: A role with full permissions for managing AWS resources.
Assign Policies to Each Role:
- Each role should have policies (permission sets) that match the needs of each type of user. For example, DevOps-User might have access to EC2 and S3, while Admin has full access.
Use the Roles:
- Once roles are created, they can be assigned to users or groups, making access management easier and more secure.
Why These Tasks Matter
Completing these tasks will give you a basic understanding of:
Cloud automation with User Data.
Access management using IAM to secure your AWS environment.
These are foundational skills in cloud computing, and as you continue learning, you’ll be able to apply these concepts to more advanced projects. Keep experimenting, and enjoy your journey in the cloud!
Subscribe to my newsletter
Read articles from Dhruv Moradiya directly inside your inbox. Subscribe to the newsletter, and don't miss out.
Written by
