Building a Scalable Microservices Application on AWS EKS with GitHub CI/CD Automation
 Keerthi Ravilla Subramanyam
In this project, we will build a cloud-based microservices application on AWS using Elastic Kubernetes Service (EKS). The application will consist of a frontend, backend, and database, each containerized and deployed on EKS. We will also set up a CI/CD pipeline to automate the deployment process from GitHub.
By the end of this guide, you will have a fully deployed microservices application on AWS and a solid understanding of how to work with these key cloud technologies. Let’s begin by exploring the key concepts that will form the foundation of this project.
Key Concepts
Let's begin by exploring the key concepts that form the foundation of this project. These technologies are essential for building and deploying a cloud-based microservices application on AWS. They define how each component will be developed, containerized, deployed, and managed, with Kubernetes orchestrating containers, Docker ensuring portability, and CI/CD automating deployments to maintain scalability and efficiency.
Kubernetes is an open-source platform for managing and orchestrating containers. It automates tasks such as load balancing, scaling, and container management, ensuring that your applications run reliably and efficiently across clusters of machines.
AWS Elastic Kubernetes Service (EKS) is a powerful managed service that simplifies running Kubernetes on AWS. Kubernetes efficiently automates the deployment, scaling, and management of containerized applications, enabling you to concentrate on your app without worrying about the infrastructure. EKS expertly handles the complex setup and management of Kubernetes.
Elastic Container Registry (ECR) is a fully managed container registry that makes it easy to store, manage, and deploy Docker container images. We will use ECR to store the Docker images for our microservices and integrate them with the CI/CD pipeline to automate the deployment process.
Microservices Architecture breaks down an application into smaller, independent services, each responsible for a specific function. This approach makes it easier to develop, deploy, and scale parts of the application independently, improving flexibility and scalability.
Docker allows you to package an application and its dependencies into a container, ensuring consistency across different environments. Containers are lightweight and portable, making them ideal for deploying microservices. In this project, each component will be containerized for efficient deployment.
CI/CD Pipeline stands for Continuous Integration and Continuous Deployment. It automates the process of integrating code changes, testing, and deploying them to production. By setting up a CI/CD pipeline, changes to the code are automatically built, tested, and deployed, speeding up the development cycle and ensuring up-to-date application versions.
Prerequisites
Before we begin building the microservices application, ensure that you have the following:
AWS Account: You'll need an AWS account to access services like EKS and other cloud resources. If you don't have one, you can create it here.
AWS CLI: Ensure the AWS CLI is installed and configured on your local machine. This allows you to interact with AWS services from the command line. Install guide.
Docker: Docker is required to containerize your application. Download and install it from here.
kubectl: You'll need
kubectlto interact with your Kubernetes clusters on EKS. Install it following the guide.GitHub Account: A GitHub account is necessary to store your code and enable CI/CD integration. Sign up here.
IAM User with Permissions: Set up an IAM user with permissions to manage AWS services like EKS, EC2, and ECR.
Basic Knowledge of Docker, Kubernetes, and CI/CD: While not essential, a basic understanding of these tools will help you navigate the setup process more easily.
Once you’ve met these prerequisites, you’re ready to start setting up the environment and deploying your application.
Setting Up the Environment
Let's go ahead and set up the necessary environment on both AWS and your local machine before starting the actual project to make things easier. This involves configuring AWS CLI, creating an EKS cluster, setting up Docker for containerization, and preparing a GitHub repository for version control. Follow the steps below to prepare your environment
Step 1: Set Up AWS CLI
Before working with any AWS services, it’s essential to configure the AWS CLI on your machine.
If you haven't installed the AWS CLI yet, you can do so by following the instructions here.
Once installed, open your terminal and run the following command to configure the AWS CLI with your credentials:
aws configure
You will be prompted to provide your AWS Access Key ID, Secret Access Key, Region, and Output format. These credentials can be obtained from the IAM section in the AWS Management Console.
Step2: Create the EKS Cluster
For this project, we’ll create the EKS cluster using eksctl for simplicity and automation. However, you can also use the AWS CLI or the AWS Management Console. Each method is explained below, so you can choose the one that suits your setup best.
Option 1: Using eksctl
To set up your Kubernetes environment, create an EKS cluster using eksctl. This tool simplifies the process by automatically creating necessary resources like IAM roles, VPCs, and subnets.
Install
eksctl(if not already installed):Check the version of
eksctlto ensure it is installed correctly.eksctl version
Run the
eksctl create clustercommand:eksctl create cluster --name <cluster-name> --region <region> --nodegroup-name <nodegroup-name> --nodes 3 --nodes-min 1 --nodes-max 4 --managedReplace
<cluster-name>with your desired name.Specify the
<region>, such asap-south-1.Provide a
<nodegroup-name>to label the node group.
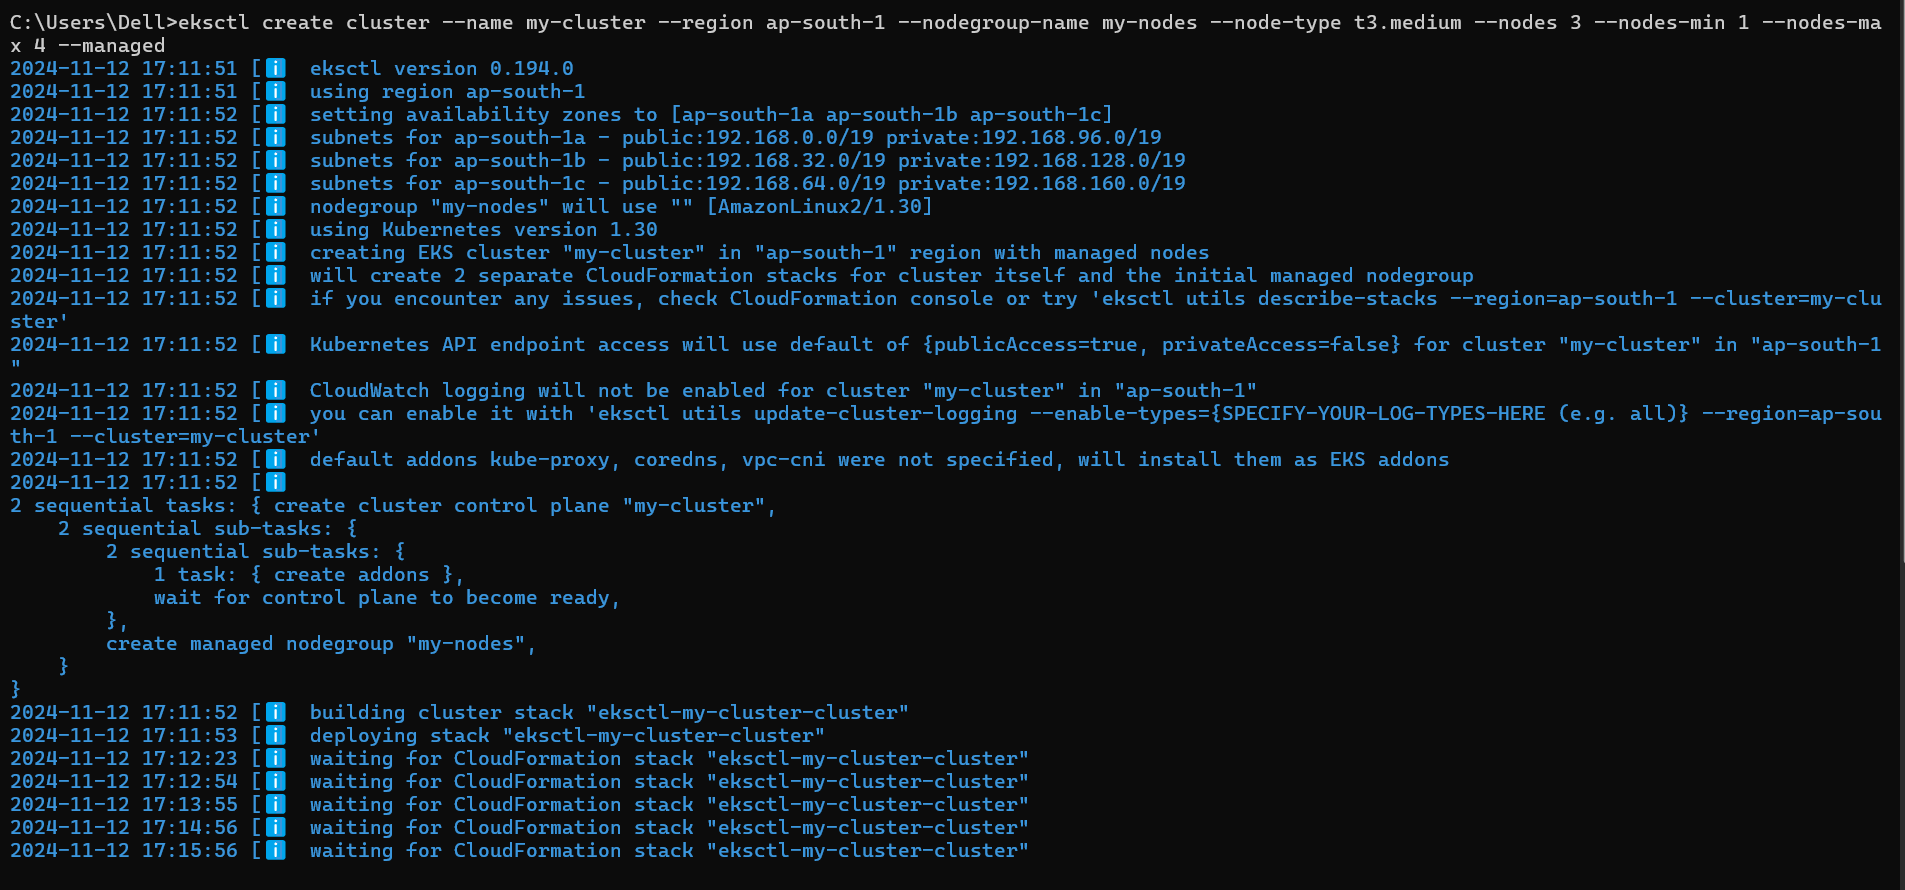

This command creates two CloudFormation stacks in your AWS console, setting up the node group, IAM roles, VPCs, security groups, EC2 instances, and all necessary resources.
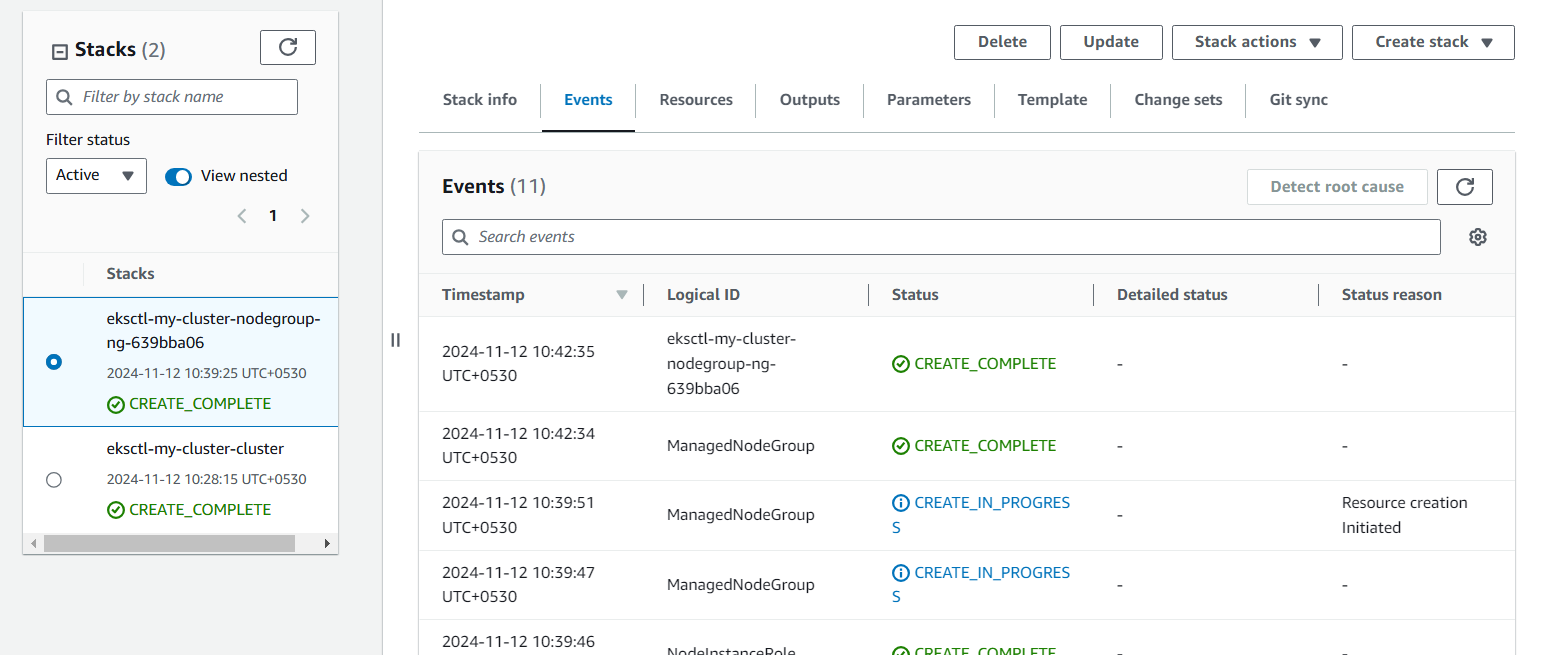
Verify the cluster by listing Kubernetes services:
kubectl get svc
Option 2: Using AWS CLI
For those who prefer to configure each step manually, the AWS CLI offers more detailed control over creating the EKS cluster. Here are the steps to create one:
Create the EKS Cluster with the following command, replacing placeholder values with your specific information:
aws eks create-cluster \ --name <cluster-name> \ --region <region> \ --role-arn arn:aws:iam::<account-id>:role/<eks-service-role> \ --resources-vpc-config subnetIds=<subnet-ids>,securityGroupIds=<security-group-ids><cluster-name>: Choose a name for the cluster.<region>: Set the AWS region, likeap-south-1.<account-id>: Your AWS account ID.<eks-service-role>: IAM role for EKS.<subnet-ids>and<security-group-ids>: IDs for your subnets and security groups within the VPC.
Create a Node Group to provision EC2 instances for the cluster nodes:
  aws eks create-nodegroup \
    --cluster-name <cluster-name> \
    --nodegroup-name <nodegroup-name> \
    --scaling-config minSize=1,maxSize=4,desiredSize=3 \
    --disk-size 20 \
    --subnets <subnet-ids> \
    --instance-types t3.medium \
    --ami-type AL2_x86_64 \
    --node-role <node-role-arn>
Verify the Cluster:
kubectl get svc
Option 3: Using AWS Management Console
If you prefer a visual setup, the AWS Management Console is a user-friendly way to create an EKS cluster:
Open the AWS Management Console and go to EKS.
Create the Cluster:
Click Create Cluster.
Enter the cluster name, region, and Kubernetes version.
Choose an IAM role with EKS permissions.
Configure networking by selecting or creating a VPC, subnets, and security groups.
Click Create to initiate the cluster creation process.
Add a Node Group:
Go to Node Group in the cluster dashboard and click Add Node Group.
Set a name, select instance type, and configure scaling.
Provide the IAM role, subnets, and other details.
Click Create to finish adding the node group.
Verify the Cluster using
kubectl:kubectl get svc
Each method provides a different way to set up your EKS cluster on AWS: eksctl is ideal for automation, the AWS CLI offers more customization, and the AWS Console is user-friendly for those who prefer a visual interface. For this project, I recommend using eksctl.
Step 3: Set Up Directories and Dockerfiles
In this step, we'll organize our code by creating separate directories for the frontend, backend, and database services, and set up Dockerfiles for each directory.
Frontend
This step ensures that your frontend components are modular, making it easier to develop, test, and maintain them independently from other parts of your project, like the backend or database services.
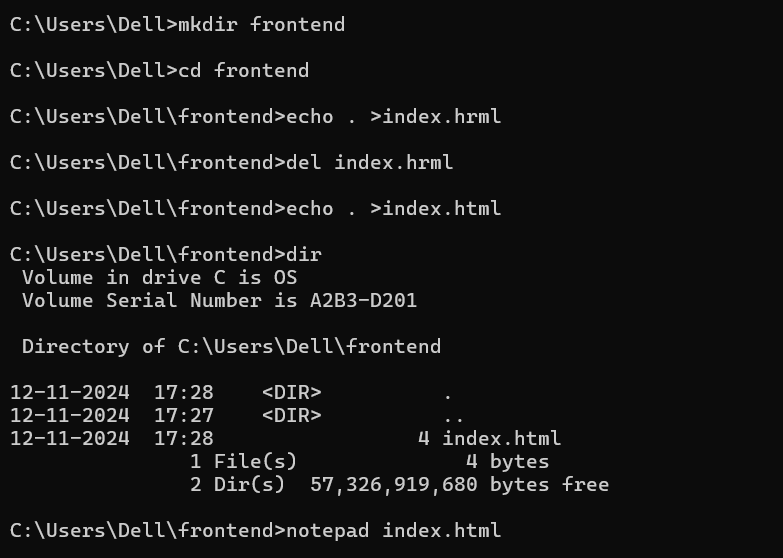
create a frontend directory
mkdir frontendCreate a sample index.html file in the frontend, using the following commands
  cd frontend
  notepad index.html
This will open up new index.html file, you can draft a sample HTML code or use the following
  <!-- frontend/index.html -->
  <html>
      <body>
          <h1>Hello, Welcome!! Our frontend is working!</h1>
      </body>
  </html>
Save and close the index.html file.
Now, let's create a Dockerfile in the frontend directory to containerize the service.
Notepad DockerfileThis will open up new Dockerfile notepad, here is a sample dockerfile for frontend service.
  # frontend/Dockerfile
  FROM nginx:alpine
  COPY . /usr/share/nginx/html
Save and close the notepad.
Backend
This step makes your backend components modular, so you can develop, test, and maintain them separately from other parts of your project, like the frontend or database services.
create a backend directory and install npm in it.
  mkdir backend
  npm install
Create an
index.jsfile using the following command:notepad index.js. This will open a newindex.jsfile in Notepad. You can either draft or copy and paste the sample JavaScript code provided here.// backend/index.js const express = require('express'); const app = express(); const port = 3000; app.get('/', (req, res) => { res.send('Hello from the Backend!'); }); app.listen(port, () => { console.log(`Backend listening at http://localhost:${port}`); });Save the file. This file sets up a basic backend script, enabling you to develop, test, and maintain backend functionalities independently.
Create a
package.jsonfile by running the commandnotepad package.json. This will open a new file in Notepad. Copy and paste the code below, then save the file. This file is necessary to manage the backend project's dependencies and scripts.{ "name": "backend", "version": "1.0.0", "main": "index.js", "dependencies": { "express": "^4.17.1" } }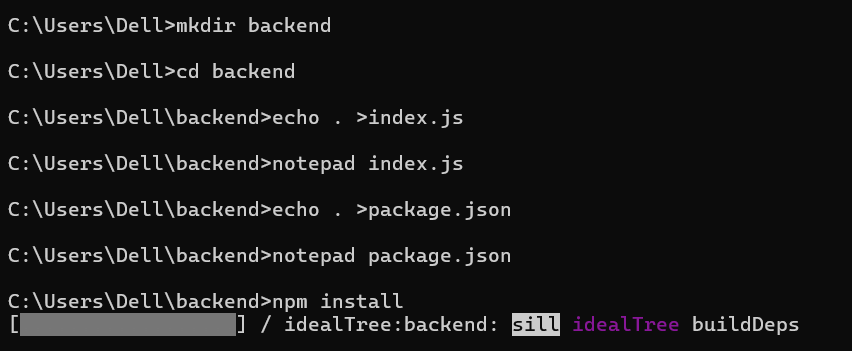
Create a
Dockerfileby running the commandnotepad Dockerfile. You can either write your own code or use the sample code below, then save the file.# backend/Dockerfile FROM node:14 WORKDIR /app COPY package.json . RUN npm install COPY . . CMD ["node", "index.js"] EXPOSE 3000
Step4:Set Up AWS ECR Repositories
Use AWS ECR to store Docker images for each microservice. This will allow you to push your built Docker images to ECR for deployment on EKS. By setting up these ECR repositories, you will have dedicated storage for each of our microservice images, ensuring they are ready for deployment on AWS.
Creating ECR repositories
Navigate to the AWS ECR service in the AWS console and click
create repository.In the namespace, enter the name as "backend".
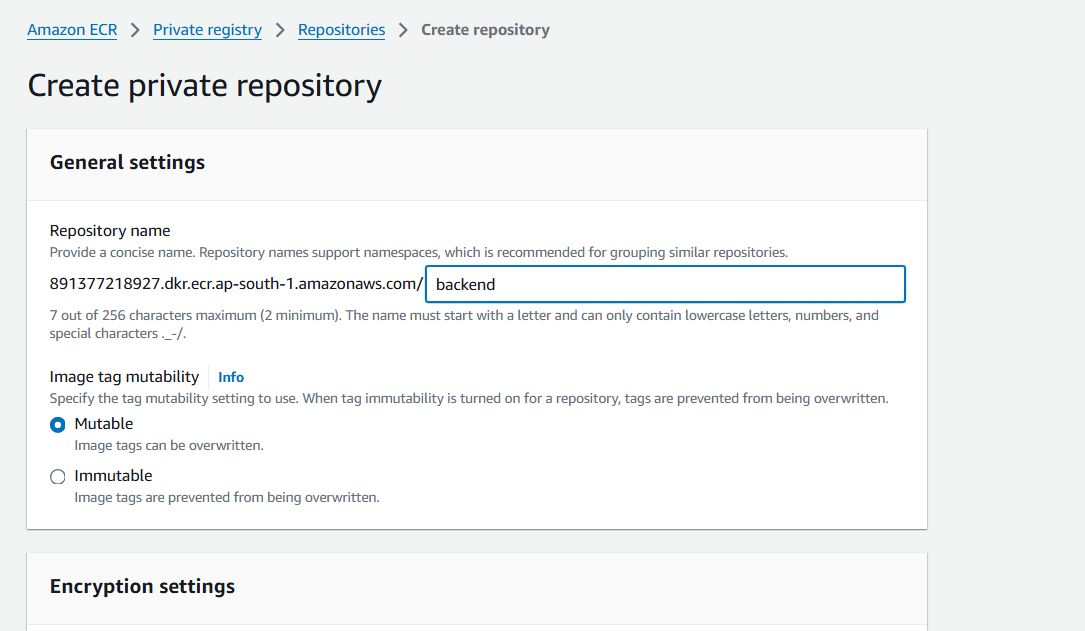
Click on "Create".
Repeat these steps to create repositories for the frontend and database.
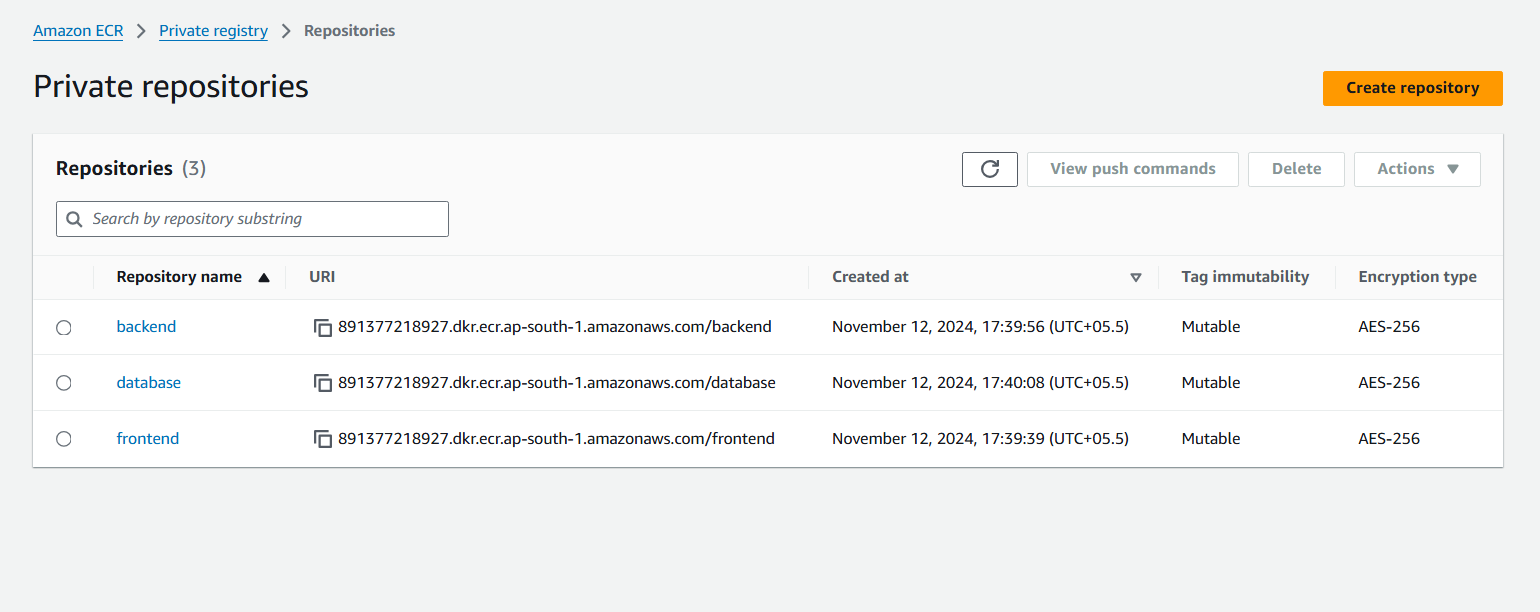
Authenticate Docker to access our ECR repositories by running this command
aws ecr get-login-password --region <region> | docker login --username AWS --password-stdin <aws_account_id>.dkr.ecr.<region>.amazonaws.comReplace
<aws_account_id>with your AWS account ID.Replace
<region>with the region of your ECR repositories.Upon successful login, you will see the prompt “Login succeeded”.

If you run into any errors, double-check your credentials and make sure Docker is correctly installed and running on your local machine.
Step5: Build and Push Docker Images to ECR
Now that you have Dockerfiles and ECR repositories, build Docker images for the frontend and backend microservices, and push them to ECR. By pushing the images to ECR, we store them in a central repository, ready to be deployed on AWS using Kubernetes.
Run the command below to build Docker images for each microservice (frontend, backend, and database).
  cd frontend
  docker build -t frontend .
  cd ../backend
  docker build -t backend .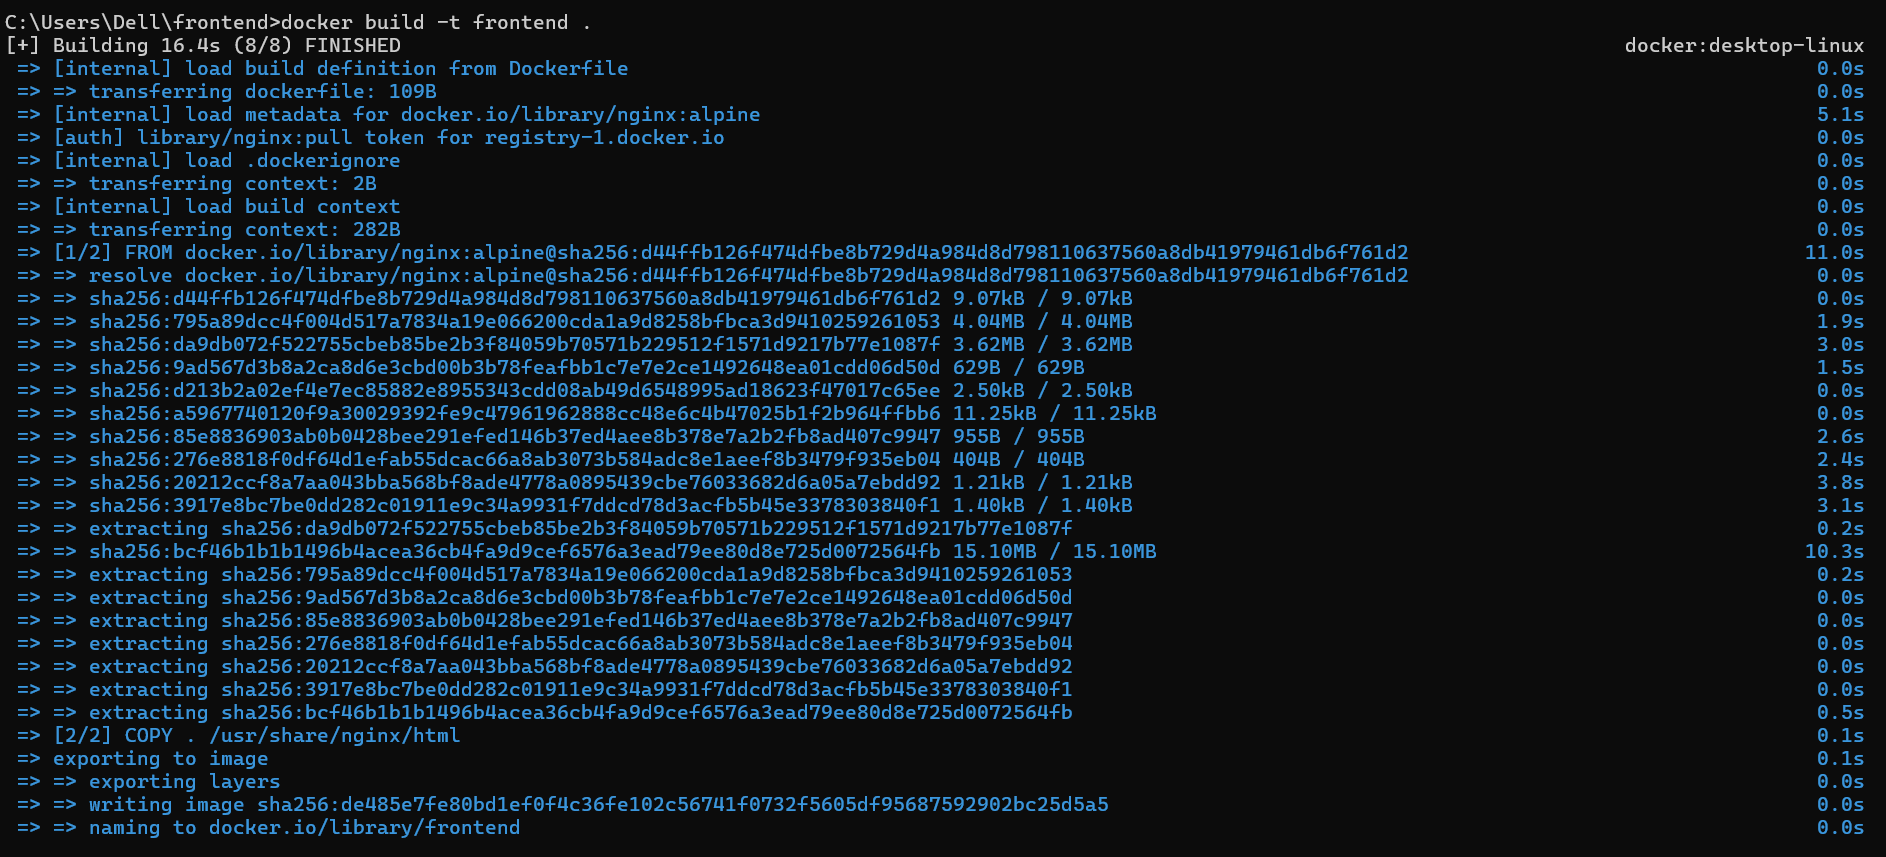
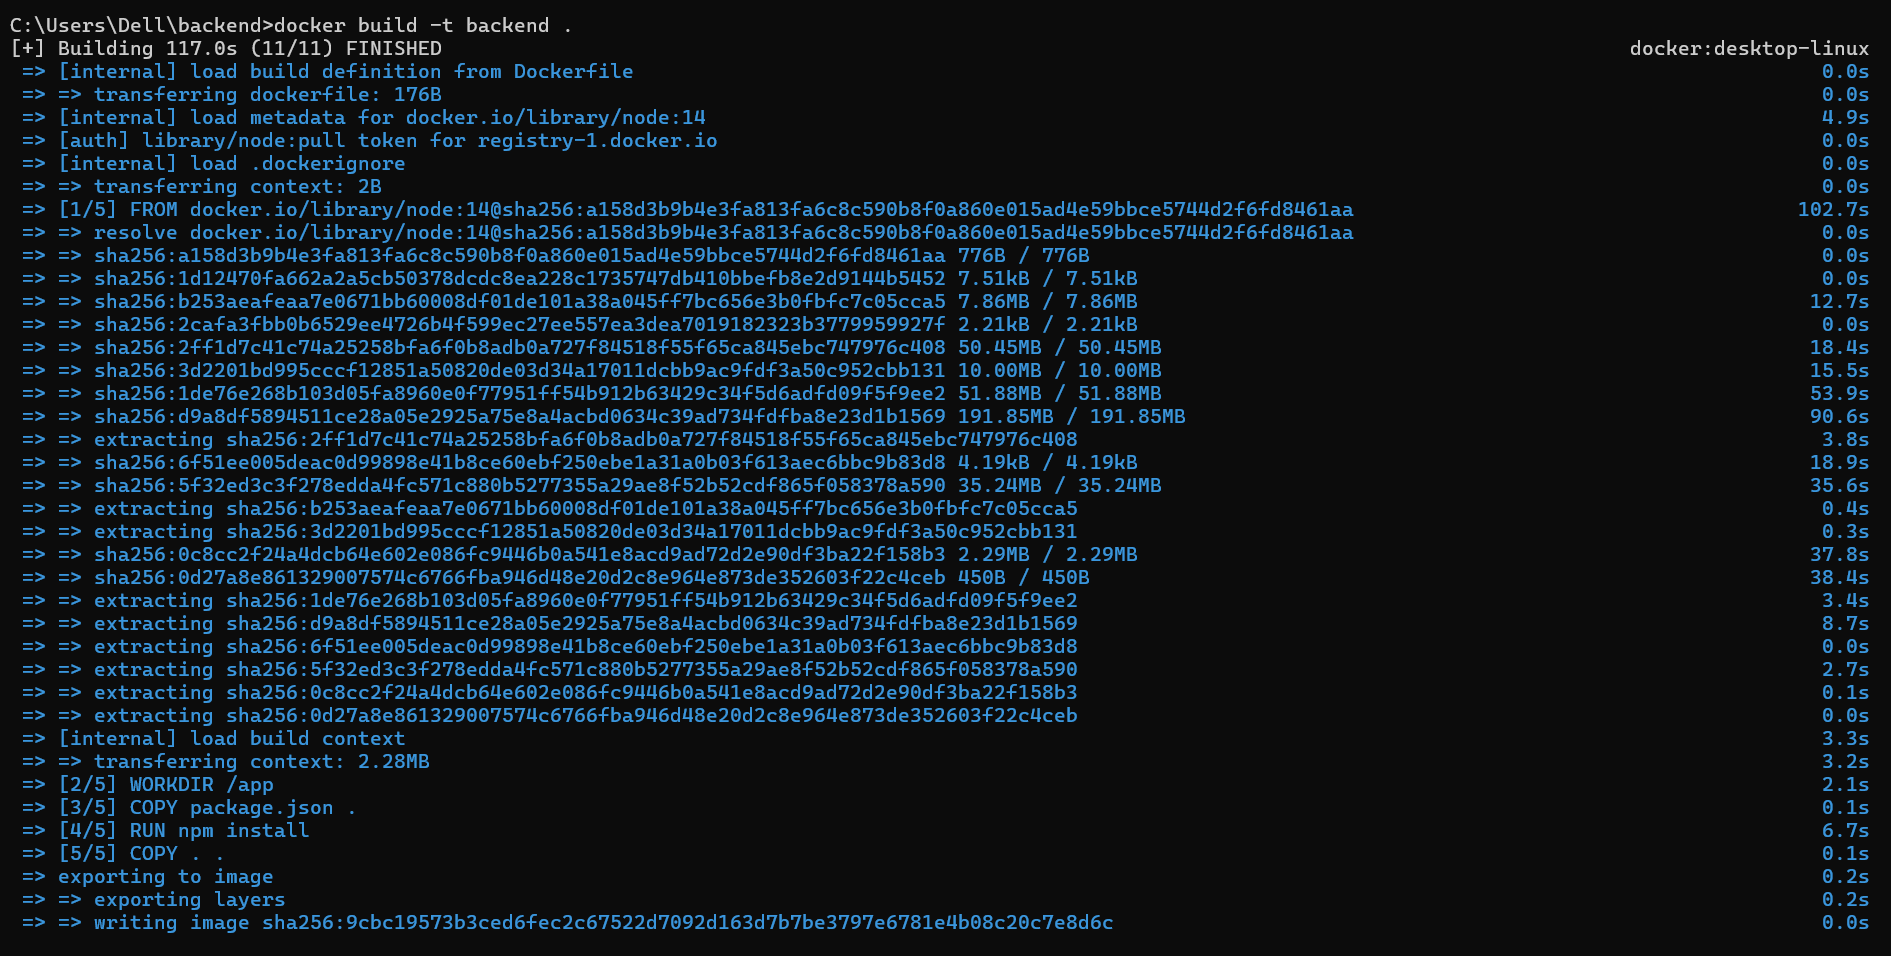
After building the images locally, you’ll need to tag them with the ECR repository URL. Tagging is the process of assigning a name to the image that will identify where it should be stored in ECR.
  docker tag frontend <aws_account_id>.dkr.ecr.<region>.amazonaws.com/frontend:latest
  docker tag backend <aws_account_id>.dkr.ecr.<region>.amazonaws.com/backend:latest
Replace
<aws_account_id>with your AWS account ID and<region>with the region of your ECR repository.
Now, push the tagged images to your ECR repository by running the below command.
  docker push <aws_account_id>.dkr.ecr.<region>.amazonaws.com/frontend:latest
  docker push <aws_account_id>.dkr.ecr.<region>.amazonaws.com/backend:latest
Replace
<aws_account_id>with your AWS account ID and<region>with the region of your ECR repository.

By completing these steps, you’ll have the frontend and backend Docker images stored in AWS ECR, ready for deployment in your EKS cluster.
Step6: Pull MySQL Image for the Database
In this project, we use the official MySQL Docker image instead of creating a separate database directory, this simplifys the setup by integrating the pre-configured MySQL container into our application.
Even though we didn’t build a custom image for the database, we can still store the MySQL image in AWS ECR for more streamlined management and deployment. Here are the steps to pull the MySQL image from Docker Hub and, if needed, push it to your ECR repository:
Pull the official MySQL image from Docker Hub using the command below. This will download the latest version of the MySQL image to our local machine and this is a ready to use and pre-configured image:
docker pull mysql:latestThis image saves us from setting up the database manually
Tag the MySQL image with your ECR repository URL by using the below command. This tagging ensures that the image is properly associated with your AWS account for storage and deployment.
docker tag mysql:latest <aws_account_id>.dkr.ecr.<region>.amazonaws.com/database:latestReplace
<aws_account_id>with your AWS account ID and<region>with the region of your ECR repository.Finally, push the tagged image to your AWS ECR repository. This uploads the image to your ECR, allowing you to use it in your Kubernetes cluster later.
docker push <aws_account_id>.dkr.ecr.<region>.amazonaws.com/database:latest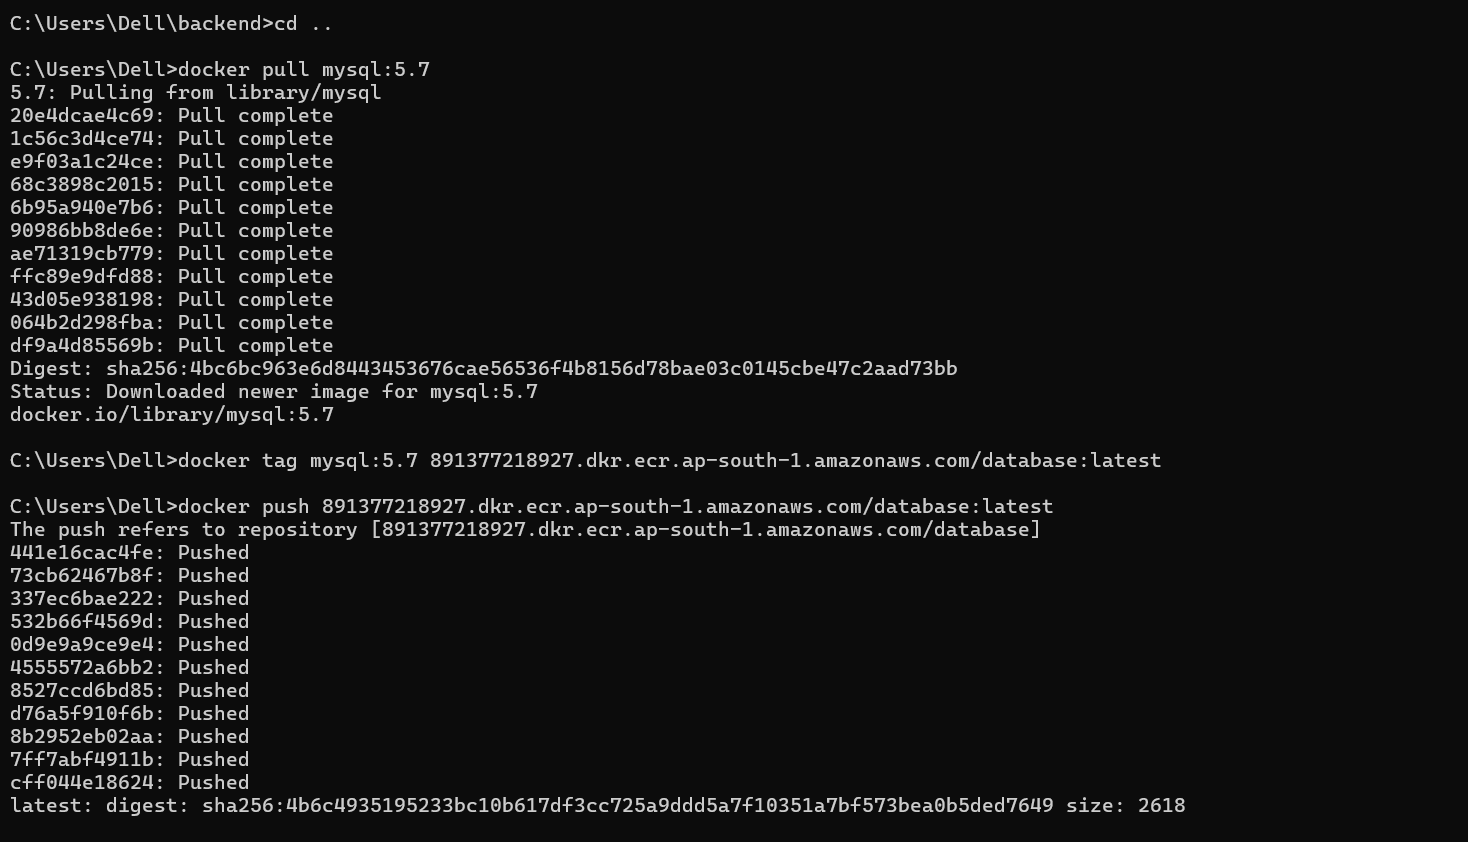
Once the image is pushed, it will be available in ECR and ready to be used for your application's database.
Deploying Microservices on Amazon EKS
We have stored our Docker images in Amazon ECR, and now it’s time to deploy the frontend, backend, and database microservices to Amazon EKS. Using YAML configuration files in the k8s-config directory, we’ll define how each service should run in the cluster. The following steps cover verifying your EKS connection, configuring each deployment, and applying these files to launch the services, allowing Kubernetes to handle scaling and networking across AWS.
Step 1: Verify EKS Cluster Connection
To ensure you’re connected to your EKS cluster, use kubectl, the Kubernetes command-line tool. If you set up the cluster with eksctl, kubectl should already be configured to connect to it. Run the following command to verify
kubectl get svc
This command lists the services currently running in the cluster. If you see output, it confirms that kubectl is connected to EKS and ready to manage deployments.
Step2: Configure YAML Files in k8s-config Directory
Create a directory named
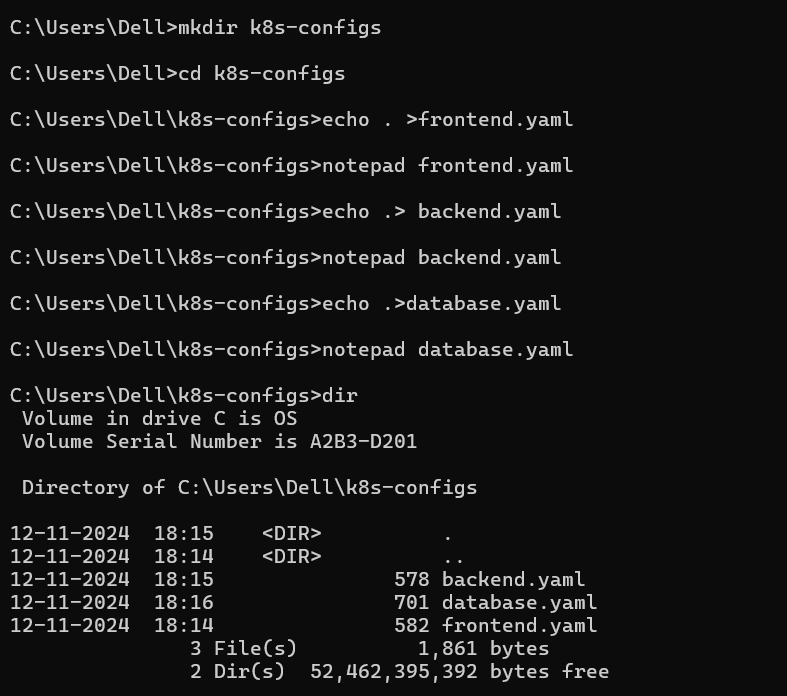
k8s-configusing this command.mkdir k8s-config cd k8s-configIn this directory, create a YAML file for each microservice(frontend, backend, and database). Each file should contain a Deployment and a Service configuration, specifying details like the Docker image path in ECR, the number of replicas, and any necessary ports.
Create a
frontend.ymlfile using the commandnotepad frontend.yml. You can find a sample frontend YAML file for reference here.Create a
backend.ymlfile. You can find a sample backend YAML file for reference here.Create a
database.ymlfile. You can find a sample database YAML file here.When using this sample YAML file, remember to change the following:
Image: Replace
<aws_account_id>and<region>with your AWS account ID and the AWS region. Make sure the image path matches the one in ECR for the backend service.Replicas: Set the number of replicas according to your needs; this example uses 2 for load balancing and reliability.
Step3:Apply the YAML Files to Deploy Microservices
With the YAML files configured and placed in k8s-config, you can now deploy the services by applying each YAML file to the EKS cluster. Use kubectl to apply all files within k8s-config
kubectl apply -f k8s-config/frontend.yaml
kubectl apply -f k8s-config/backend.yaml
kubectl apply -f k8s-config/database.yaml
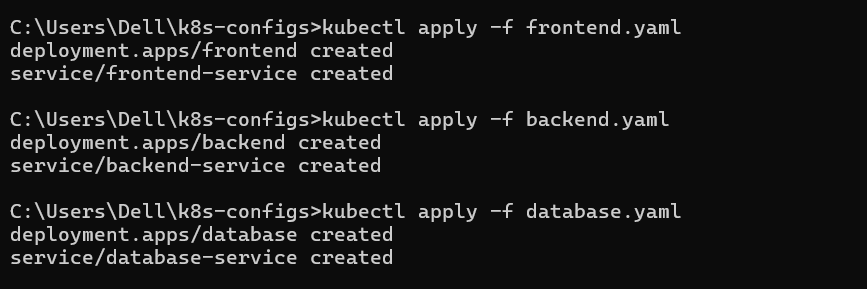
These commands instruct Kubernetes to deploy each microservice on EKS based on the configurations in the YAML files. Kubernetes will handle scaling, load balancing, and internal networking for each service.
Managing, Testing, and Automating with Git
After deploying your microservices on EKS, ensure they run smoothly and are accessible. Automate the deployment process with GitHub to make future updates easier and maintain consistency.
Step1: Verify the Deployment Status
To confirm that all services have been successfully deployed, you can check the status of the deployments and pods using
kubectl. This command shows whether the desired number of replicas is running for each service:kubectl get deployments
This will list the deployments in your EKS cluster, showing the number of replicas and their current status.
To check the status of individual pods, which represent the running containers for each service, use:
kubectl get podsIf any pods are not running, Kubernetes will attempt to restart them, but you can view detailed logs using:
kubectl logs <pod-name>
Step2: Automating Deployments with GitHub Actions
To automate the deployment of your microservices to Amazon EKS using GitHub Actions, we’ll use a GitHub Actions workflow defined in the deploy.yaml file. This will trigger whenever changes are pushed to the repository, building Docker images, pushing them to ECR, and deploying them to EKS.
Clone the Repository
Before proceeding with setting up the GitHub Actions workflow, clone the repository containing the project code by running the clone command in your desired directory.
git clone https://github.com/your-username/your-repository-name.git
Set Up the GitHub Actions Workflow
Navigate to the cloned reposiory.
cd your-repository-nameCreate or Modify the Workflow File: The GitHub Actions workflow is configured in the
deploy.yamlfile, located in the.github/workflowsdirectory of your repository. This file contains the necessary steps for building Docker images, pushing them to ECR, and deploying to EKS. Make use of these basicdeploy.yamlavailable here.Commit the Changes: Once all the changes (files) are in place, commit them to your local Git repository using the following command.
  git add .
  git commit -m "Add Dockerfiles, Kubernetes configurations, and GitHub Actions workflow"
  git push origin main  # Or the branch you're working on
Trigger GitHub Actions: When you push your changes to GitHub, the GitHub Actions workflow (
deploy.yaml) will be triggered, and the build and deployment process will start automatically.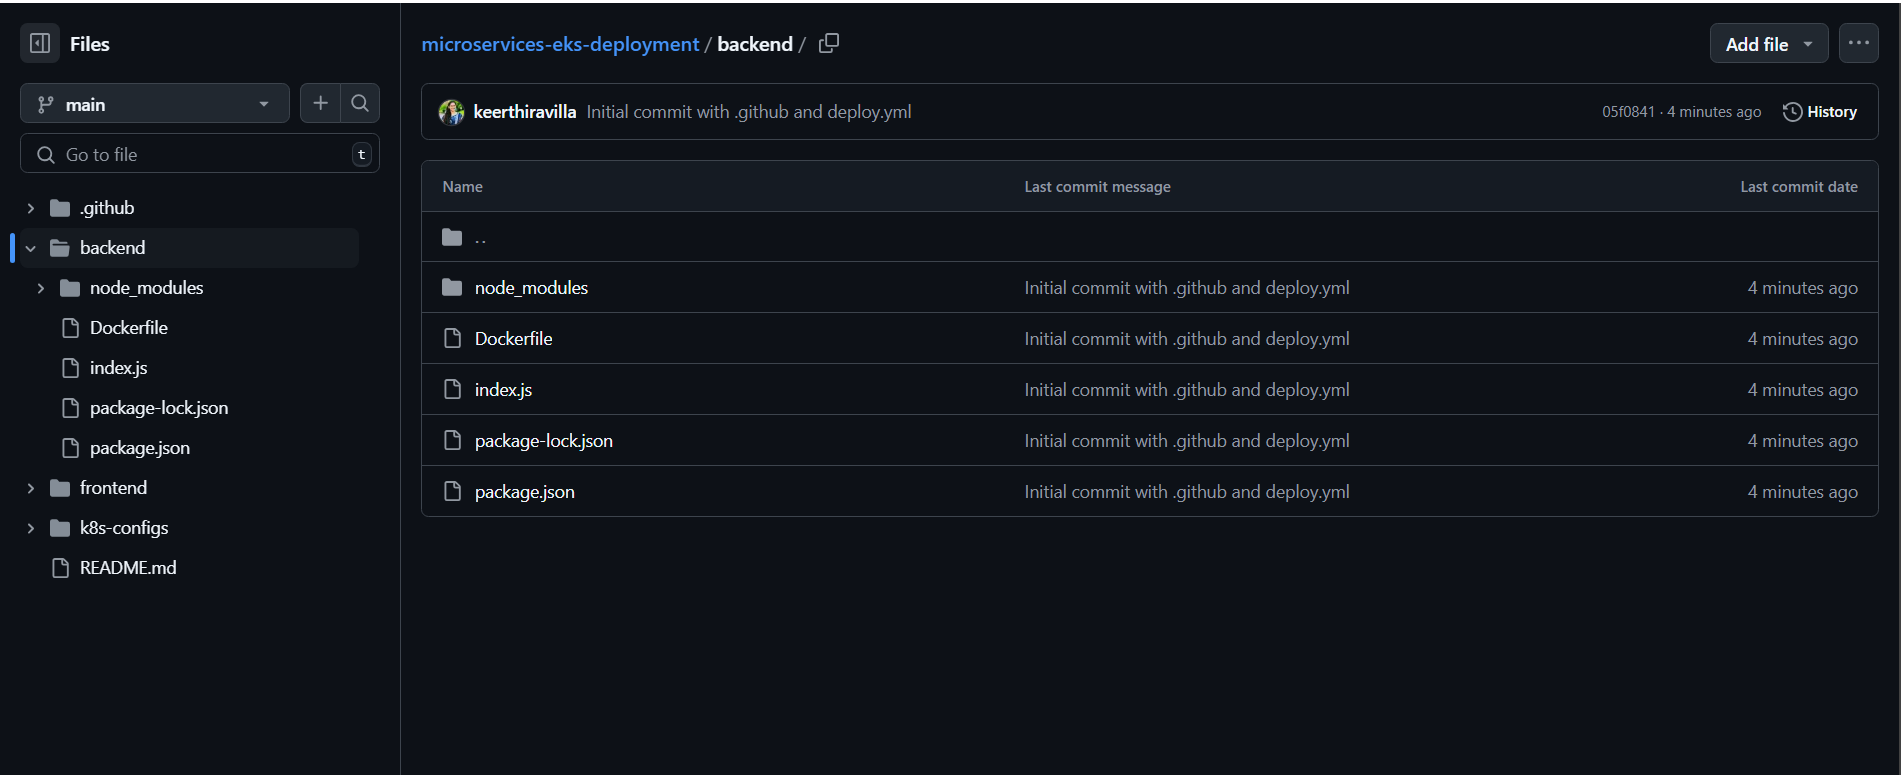
Verify the GitHub Actions Workflow and Deployment
After pushing your code changes to GitHub, it’s important to monitor and verify that the deployment process happens smoothly. Follow these steps to ensure everything is working as expected.
Step1. Monitor the Workflow in GitHub Actions
Once you push your changes to GitHub, navigate to the Actions tab of your GitHub repository. Here, you can see the status of the workflow run. The workflow will execute the steps defined in the deploy.yaml file.
If everything is configured correctly, the workflow will run successfully and show green checkmarks for each step.
If there are issues with any step, the workflow will display an error, which can help you troubleshoot.
Step2: Check the Status of Your Deployment on AWS EKS
After the GitHub Actions workflow completes, it's time to verify that the microservices were correctly deployed to AWS EKS.
Use the
kubectlcommand to interact with your EKS cluster. First, make sure yourkubeconfigis set up correctly by following the setup provided in the GitHub workflow.aws eks --region <region> update-kubeconfig --name <eks-cluster-name>Verify that your pods are up and running by executing the following command
kubectl get podsTo ensure that your services are exposed correctly, use the following command to list the services:
kubectl get svc
Step3: Access Your Application
If your services are exposed through an AWS Load Balancer (for example, for the frontend), you can access the application by navigating to the external IP or URL provided by the kubectl get svc command.
For example, if your frontend service is exposed via a LoadBalancer, the command will show an external IP that you can use to access your application in a browser.

Step4: Troubleshoot Any Issues
If there are any issues with the deployment:
Use the following command to view the logs for any failing pods:
kubectl logs <pod-name>If the workflow failed, review the logs in GitHub Actions to identify any issues with the Docker build, push, or Kubernetes deployment steps.
Scaling and Managing Microservices
Ensure your microservices are scalable by setting up Horizontal Pod Autoscaling (HPA) based on resource usage. Define resource requests and limits in your Kubernetes YAML files to manage CPU and memory consumption effectively. Use monitoring tools like Amazon CloudWatch and Kubernetes Dashboard to track service health, and document how to update or rollback deployments for maintenance.
1. Enable Horizontal Pod Autoscaling (HPA)
Horizontal Pod Autoscaling (HPA) allows Kubernetes to automatically scale the number of pods in a deployment based on resource usage like CPU or memory. To enable HPA:
First, ensure your cluster has the metrics-server installed. If not, install it using the following command:
kubectl apply -f https://github.com/kubernetes-sigs/metrics-server/releases/latest/download/components.yaml
Navigate to k8s-config and create a new file called
frontend-hpa.yaml. Add the HPA configuration to the newly created file (frontend-hpa.yaml), like this:apiVersion: autoscaling/v2beta2 kind: HorizontalPodAutoscaler metadata: name: frontend-hpa spec: scaleTargetRef: apiVersion: apps/v1 kind: Deployment name: frontend minReplicas: 2 maxReplicas: 10 metrics: - type: Resource resource: name: cpu target: type: AverageUtilization averageUtilization: 50Once the file is created and the configuration is added, apply it to the Kubernetes cluster:
kubectl apply -f k8s-config/frontend-hpa.yamlCheck the scaling status:
kubectl get hpaThis command will provide information about the autoscaling status of your deployed microservices.This helps you monitor whether your application is scaling as expected based on the resource usage and how Kubernetes is handling your microservices.
Congratulations! 🎉 You've successfully built, deployed, and managed a scalable cloud-based microservices application on AWS using EKS, Docker, and Kubernetes. By automating your deployment with GitHub Actions and ensuring dynamic scaling with Horizontal Pod Autoscalers (HPA), you've gained hands-on experience in modern cloud-native development. Keep exploring, and stay tuned for more cloud-based projects and resources. Happy coding! 💻🎉
Subscribe to my newsletter
Read articles from Keerthi Ravilla Subramanyam directly inside your inbox. Subscribe to the newsletter, and don't miss out.
Written by

Keerthi Ravilla Subramanyam
Keerthi Ravilla Subramanyam
Hi, I'm Keerthi Ravilla Subramanyam, a passionate tech enthusiast with a Master's in Computer Science. I love diving deep into topics like Data Structures, Algorithms, and Machine Learning. With a background in cloud engineering and experience working with AWS and Python, I enjoy solving complex problems and sharing what I learn along the way. On this blog, you’ll find articles focused on breaking down DSA concepts, exploring AI, and practical coding tips for aspiring developers. I’m also on a journey to apply my skills in real-world projects like predictive maintenance and data analysis. Follow along for insightful discussions, tutorials, and code snippets to sharpen your technical skills.