Web development: Multi Page Website
 Eusuf Khan
Table of contents
Welcome to web development. In this blog i will teach you the concept of web pages and we will learn how to build multi page websites. Lets start!!
What are webpages?
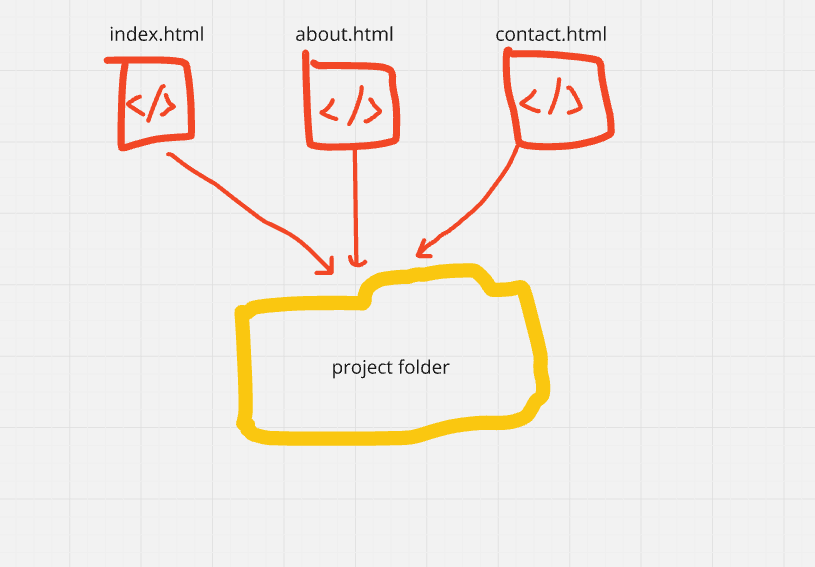
In order to create a multipage website we will need multi web pages. For example we have a multi page website where we have:
index.html
about.html
contact.html
All of these web pages are placed in the same project folder, creating our multi-page website. It might look something like this:
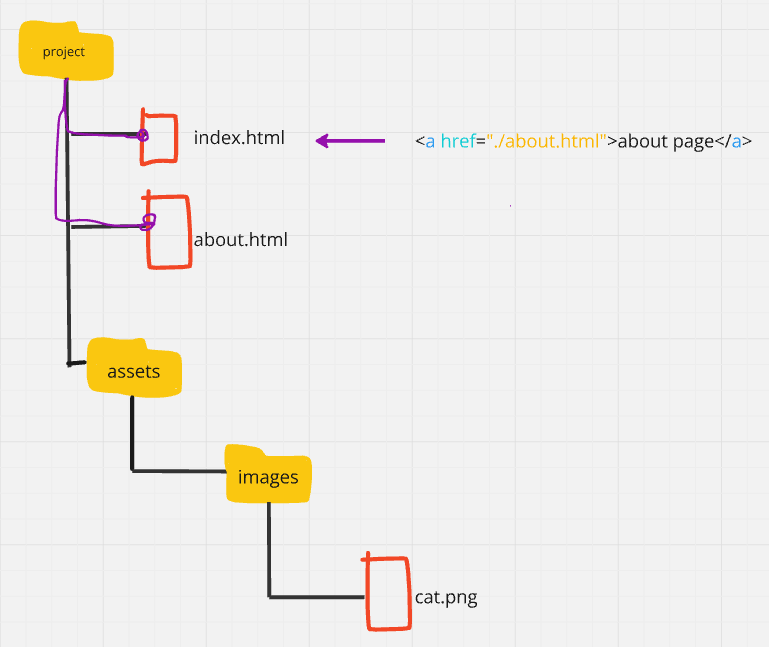
To show a link to the "about page" on our home page ("index.html"), we use the file path.
The path for the anchor tag in "index.html" looks like this:
Set the
hrefto./, which means look inside the current directory.Inside our project folder, go to the file called "about.html."
When the user clicks this link to the "about page," it redirects to that web page.
<a href="./about.html">about page</a>
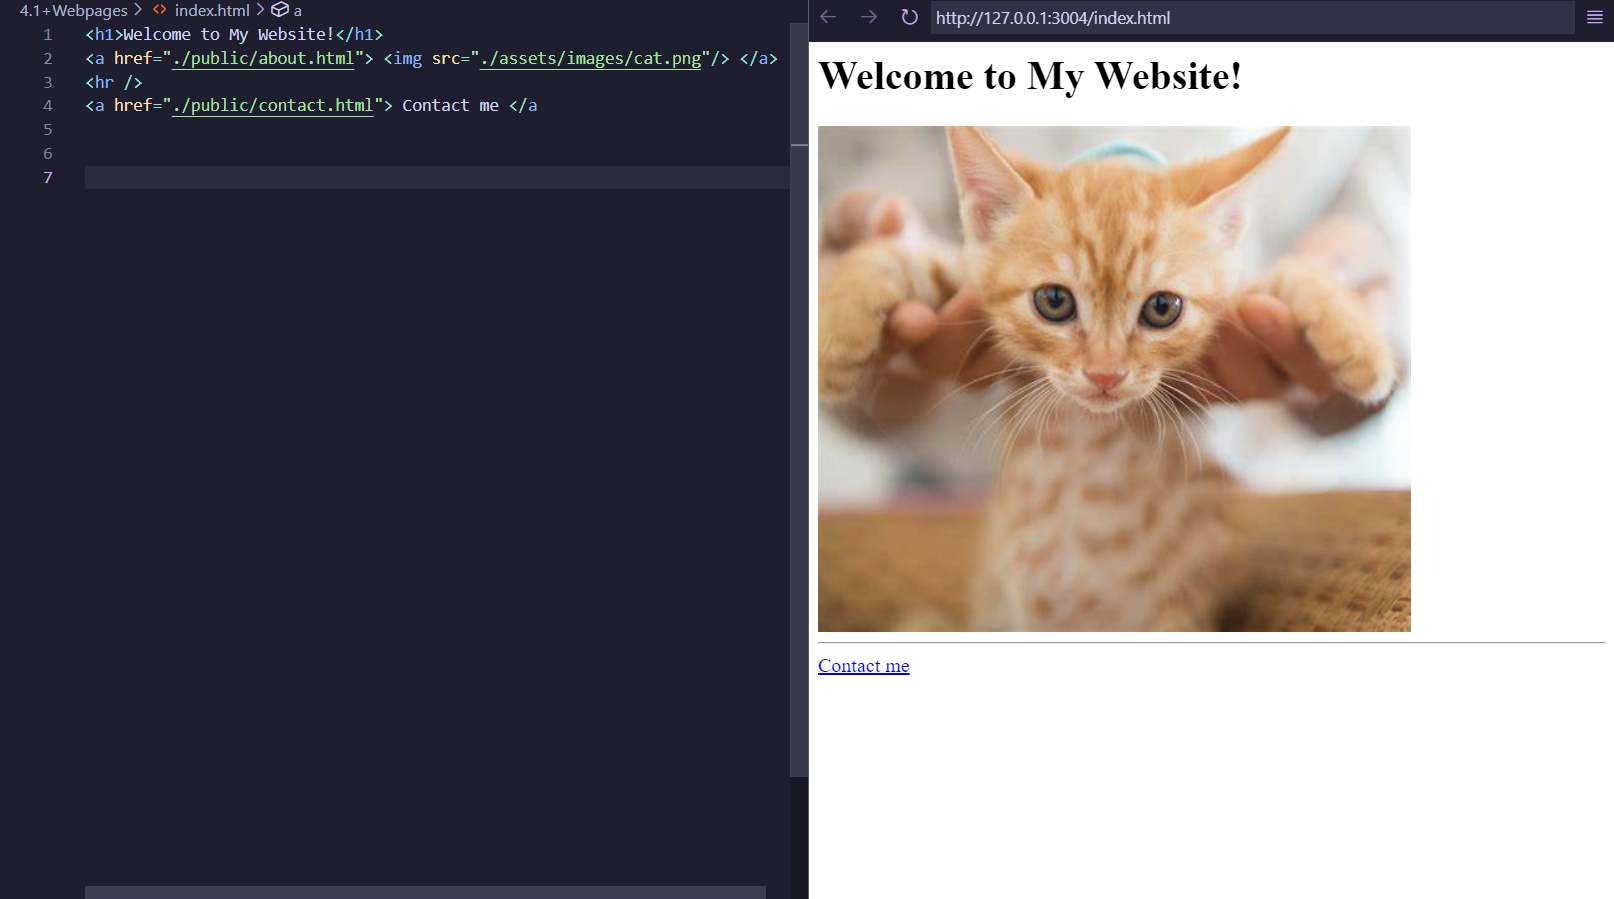
<a> </a> is called an anchor tag. This tag links the URL you provide to your text, allowing it to function as a clickable link. I have used image source as the anchor content. If you click on the click picture it takes you to the about me page because i anchored an image source. On the other hand contact me is a text link.
The HTML Boilerplate
We are done with tags now we will explore boilerplate to understand the structure of html. We all know that the letter always has a specific structures for example: Address, header, body, ending. Similarly, there is a structure to our HTML files and it looks something like this. And this is called a boilerplate
<!DOCTYPE html>
<html lang="en">
  <head>
     <meta charset="UTF-8">
     <title>My website</title>
  </head>

  <body>
    <h1>Hello World!</h1>
  </body>
</html>
<!DOCTYPE html>: The Doctype tells the browser which version of HTML the document is written in. The latest version is HTML5.<html> </html>:This tag is the root of the document. Everything you code will go inside this element.lang=”en”: this attribute defines the language of the content in the element. Basically this helps with the users who use screen readers.<head> </head>:This contains the important information of the website. It is not going to be displayed to the users. It includes things that will help the website render in the browser correctly. There is never any sort of content like text or images or anything.<meta>: One of the important, must have tag. This setup ensures that whatever symbol you are using is getting displayed correctly, cause not every setup can render emojis, images, symbols etc. UTF-8 is the common default setting so don’t think about it.<title>: The title is what is going to be shown in the tab bar.<body> </body>: This is where all of the content of websites goes. So the text, titles, images, links, everything you can do with HTML. Creating the content and structure goes in between the opening and closing tags of this body element.
[Project] Portfolio website
I have created a portfolio showcasing all the projects I have completed so far.
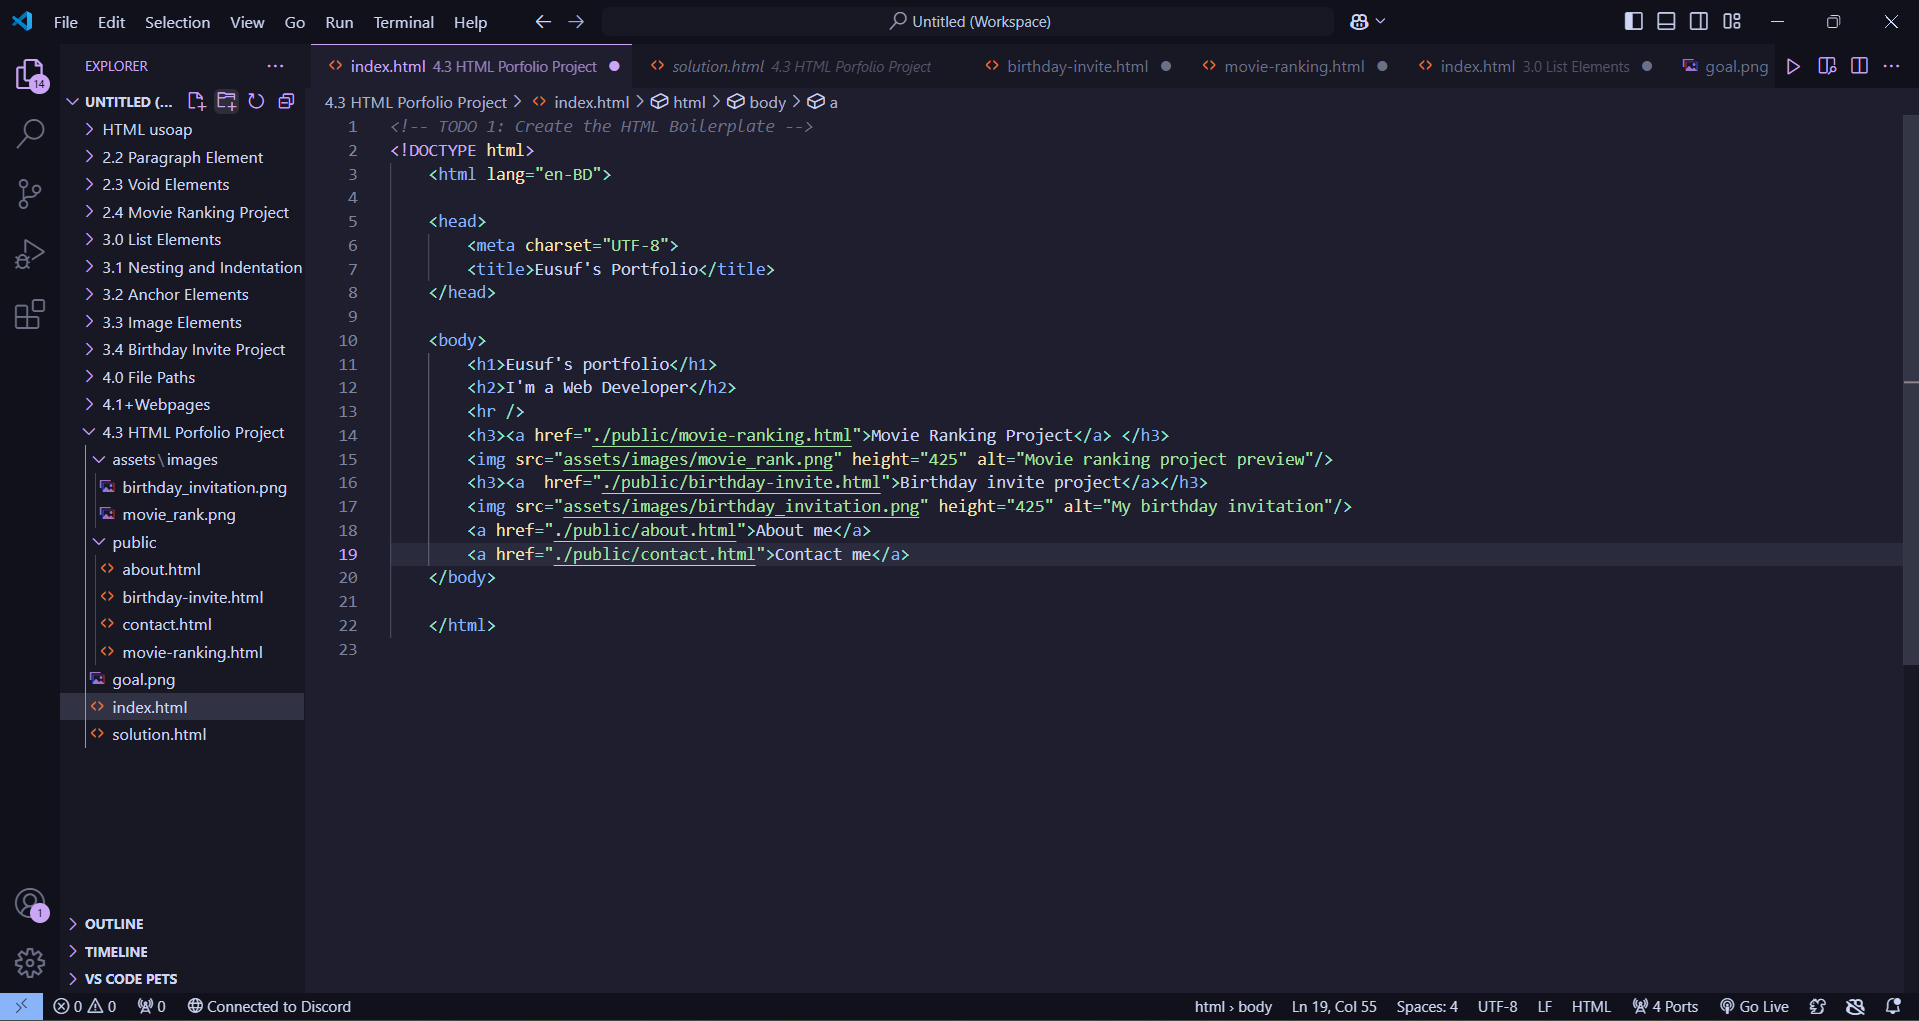
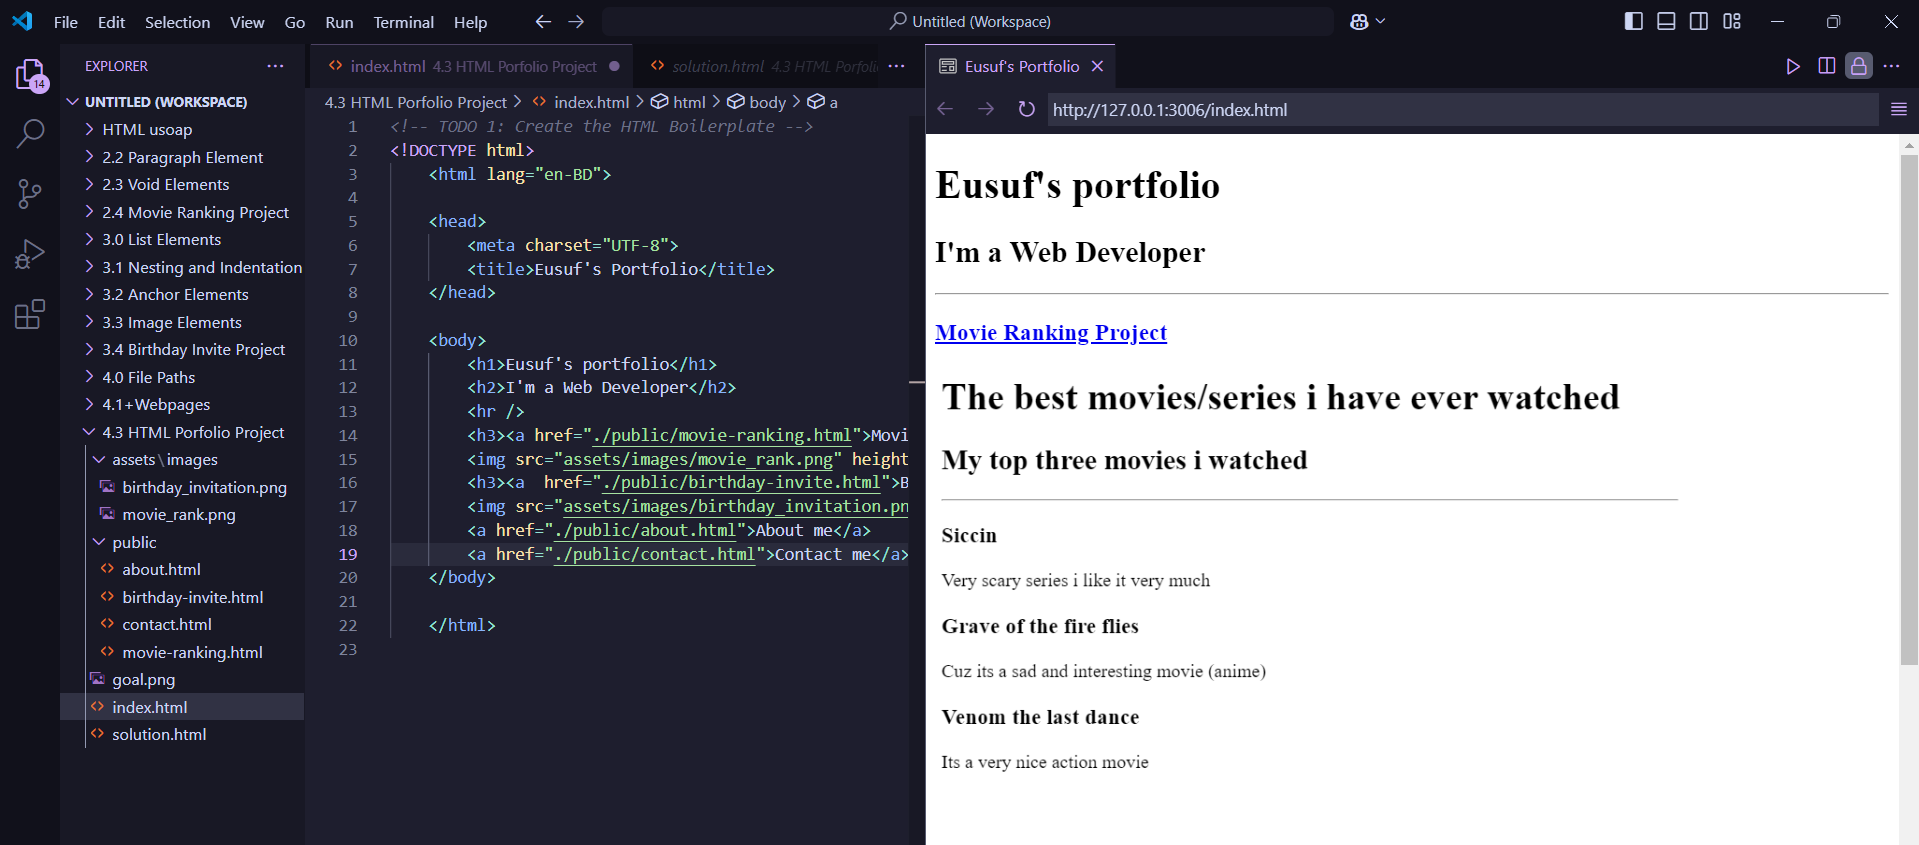
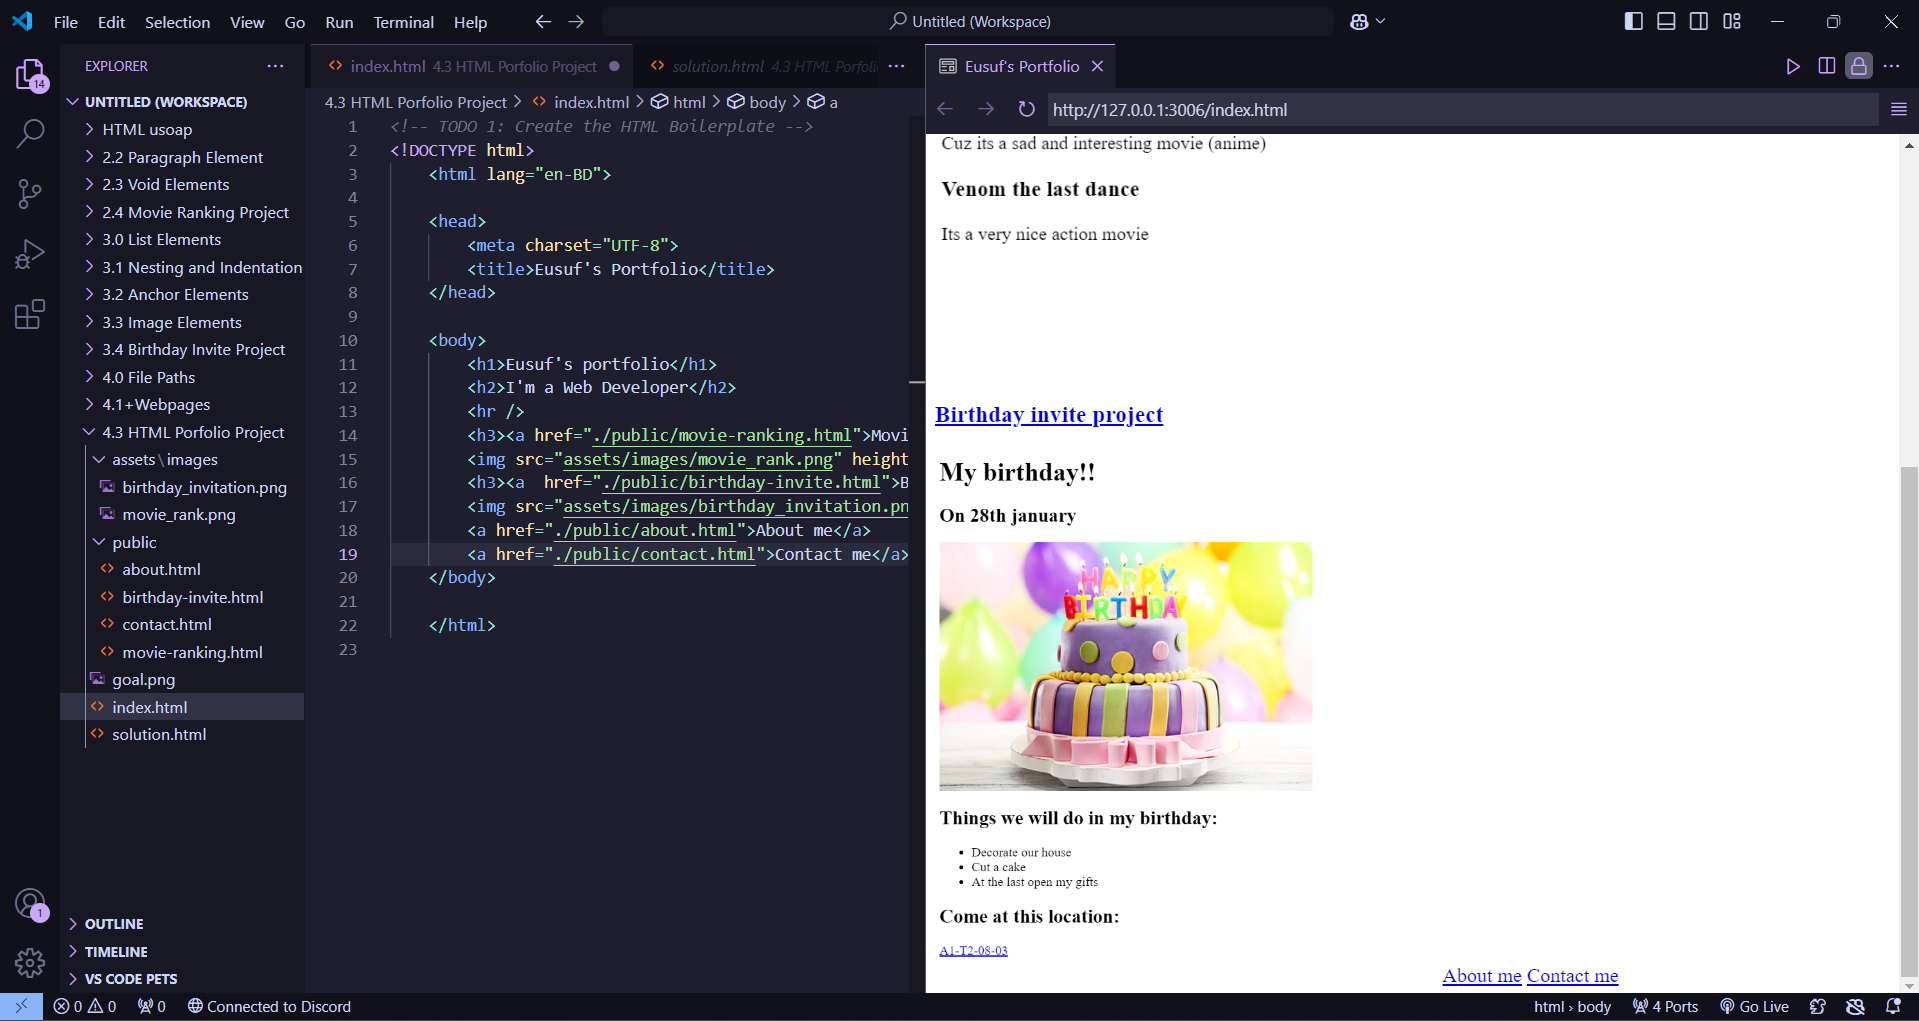
So that's it, see you in the next blog!
Subscribe to my newsletter
Read articles from Eusuf Khan directly inside your inbox. Subscribe to the newsletter, and don't miss out.
Written by

Eusuf Khan
Eusuf Khan
Hello! Welcome to my profile! I'm an 11yrs old kid, currently learning web development