Establishing a VPN Tunnel between Microsoft Azure and Fritz!Box with WireGuard
 Sven Bergendahl
Recently, I needed to set up a static Site-to-Site Tunnel between my Homelab, using my Fritz!Box, and my Azure Environment. Usually, you could use the Azure Virtual Network Gateway or Virtual WAN to set up the tunnel quickly and reliably. However, to save costs, I chose a virtual Linux machine with WireGuard.
Here are the steps for the setup:
Create a virtual machine in Azure using Terraform/OpenTofu.
Set up WireGuard VPN on your Fritz!Box and obtain the WireGuard configuration.
Configure your Linux virtual machine
Git Repository
https://github.com/bergsv/wireguard-azure-vm
Create a virtual machine in Azure with Terraform
Clone my Terraform code from my public Git repository to deploy the necessary resources in Azure, such as the Resource Group, Virtual Network, Network Interfaces, the Linux Virtual Machine, and other components. In this example, I am using a password for authentication for the Virtual Machine. It's much better to use Terraform's "admin_ssh_key" block for authentication. (Terraform Linux Virtual Machine Documentation)
Set up WireGuard VPN on your Fritz!Box and get the WireGuard Config
Before setting up your WireGuard connection, you need to register for the built-in MyFritz service or set up a DynDNS account yourself and configure it in your Fritz!Box.
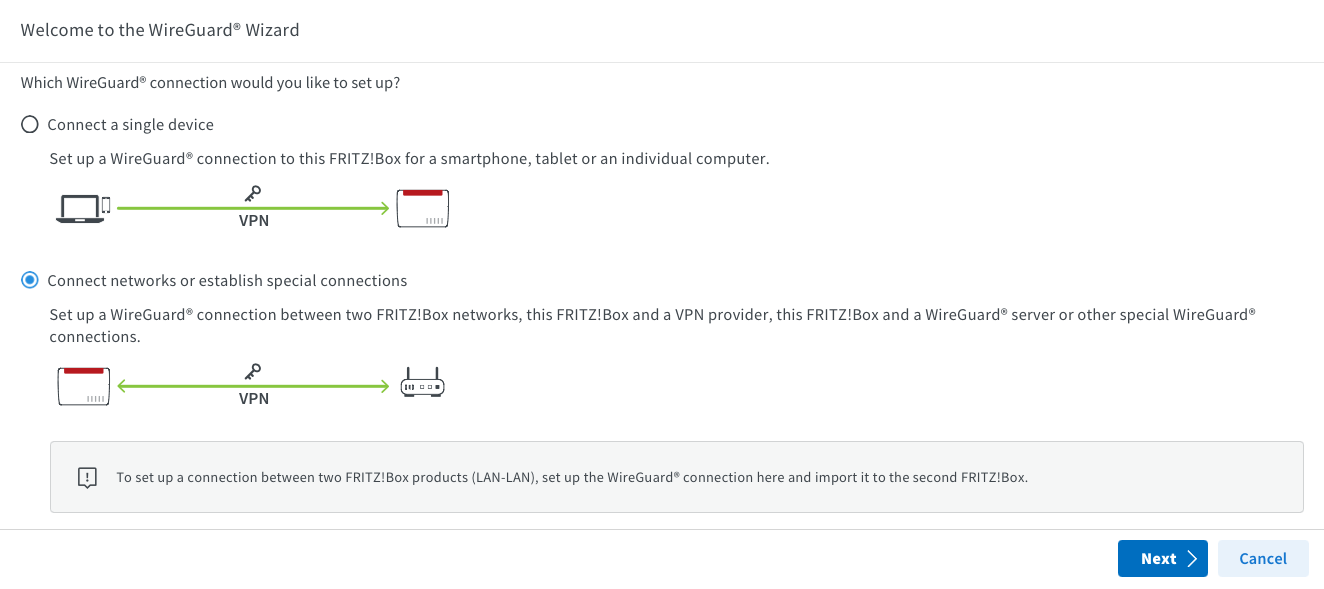
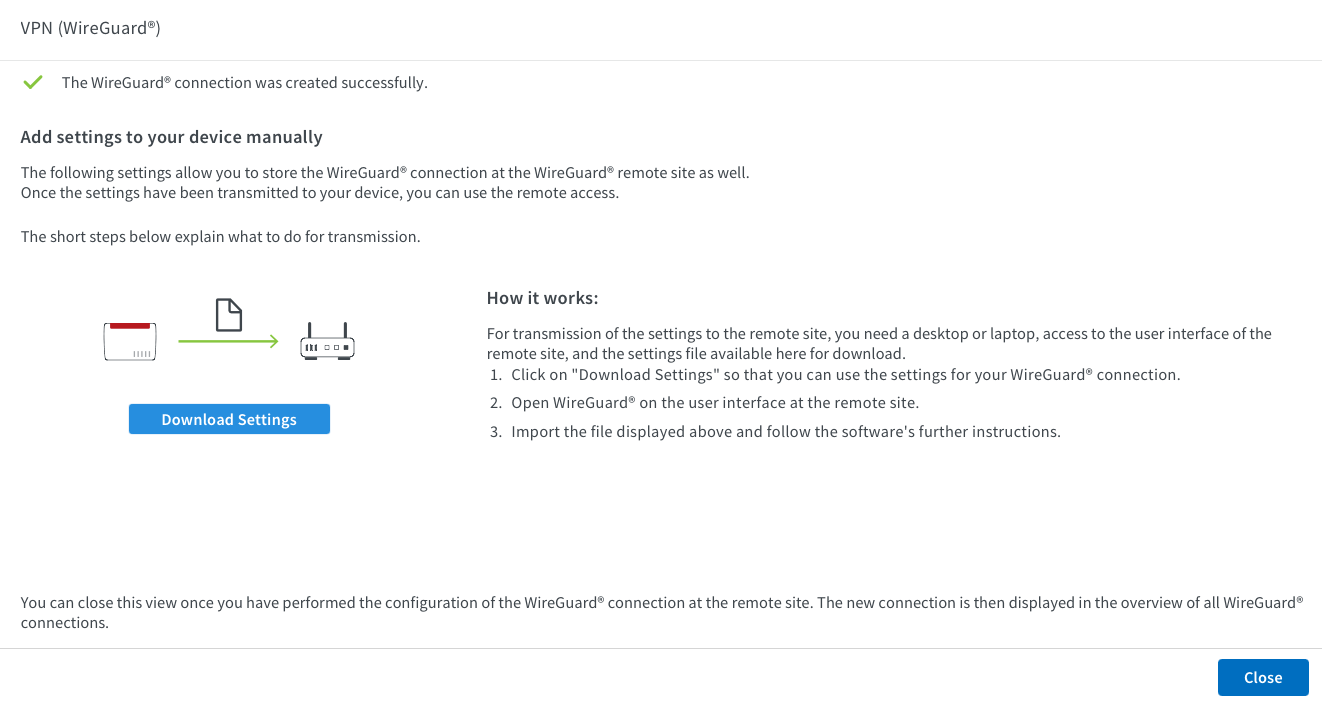
After this, log in to your Fritz!Box if you haven’t already, select "Internet," and then "Permit Access." Click on the WireGuard tab. You'll find a setup assistant that helps create the configuration and generates a wg_config.conf file for your virtual machine.


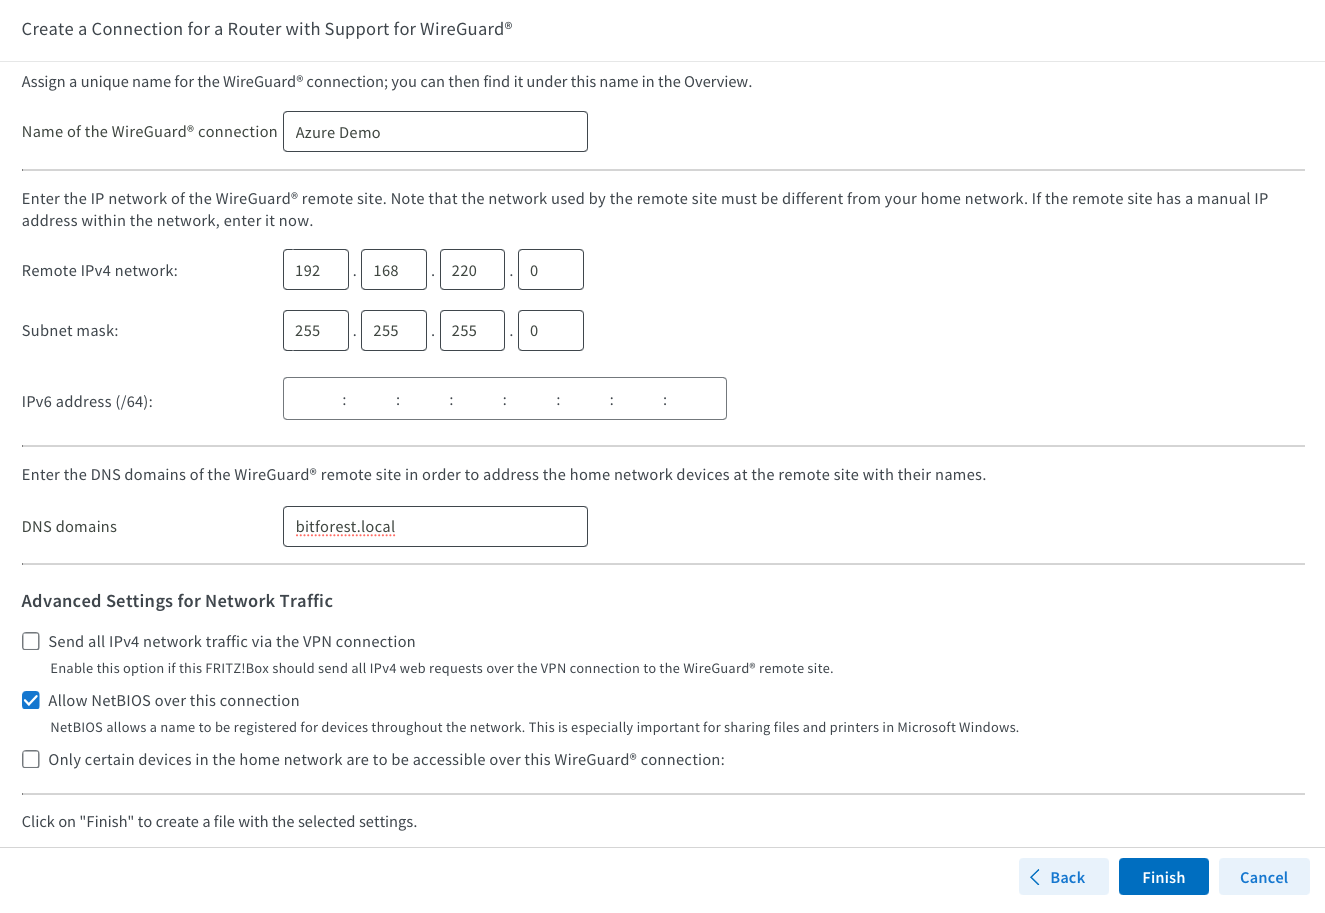
Name your connection and specify the Azure Remote Network you set up using Terraform. You don't need to enable NetBIOS unless it's necessary; I enabled it because my Domain Controller is in Azure. The DNS domain is my internal, personal one, but you can keep it as “fritz.box” or change it to whatever you prefer.


Configure your Linux virtual machine
With your wg_config.conf file ready, connect to your Linux Virtual Machine using SSH and follow these steps:
   # Update your system
   sudo apt update & upgrade -y

   # Install needed packages
   sudo apt install wireguard resolvconf -y

   # Edit your hosts file and put your vm name as loopback
   sudo nano /etc/hosts

   127.0.0.1 vm-wireguard

   # Create an folder for the WireGuard Configuration
   mkdir /opt/wg

   # Now paste your [Interface] and [Peer] Block into the wg0.conf File
   # add the remaining blocks you can look at my example in github for reference
   sudo nano /opt/wg/wg0.conf

   # Enable WireGuard Start at Boot with daemond
   sudo systemctl enable wg-quick@wg0.service
   sudo systemctl start wg-quick@wg0.service
After this, you should have a connection between your Fritz!Box and the Azure VPN.
You can now deploy virtual machines and other resources in your 192.168.220.0/24 Azure subnet, which should be accessible from your local network.
Subscribe to my newsletter
Read articles from Sven Bergendahl directly inside your inbox. Subscribe to the newsletter, and don't miss out.
Written by

Sven Bergendahl
Sven Bergendahl
Sr. Cloud Consultant with Azure expertise. Former NOC tech & sysadmin. Passionate about learning & providing great solutions.