Step-by-Step Guide to Create and Connect to a Linux Virtual Machine Scale Set in Azure
 Silias Odion
Table of contents
- Prerequisites
- Step 1: Navigate to the Azure Portal
- Step 2: Create a Virtual Machine Scale Set
- Step 3: Configure Basic Settings
- Step 4: Configure Disk Options
- Step 5: Set Up Networking
- Step 6: Configure Management Options
- Step 7: Review and Create the Scale Set
- Step 8: Connect to a VM in the Scale Set
- Step 9: Verify Connectivity
Creating a Linux Virtual Machine Scale Set (VMSS) in Azure allows you to automatically scale a set of virtual machines to handle changing workloads. In this guide, I’ll walk you through setting up a VMSS, configuring its settings, and connecting to it. Screenshots will be suggested at each key step to make the process clearer.
Prerequisites
Before we start, ensure you have:
An active Azure account. Sign up for free if you don’t have one.
Basic knowledge of Azure portal and virtual machine concepts.
Step 1: Navigate to the Azure Portal
Go to portal.azure.com.

Step 2: Create a Virtual Machine Scale Set
In the Azure portal, search for "Virtual Machine Scale Sets" in the search bar at the top.
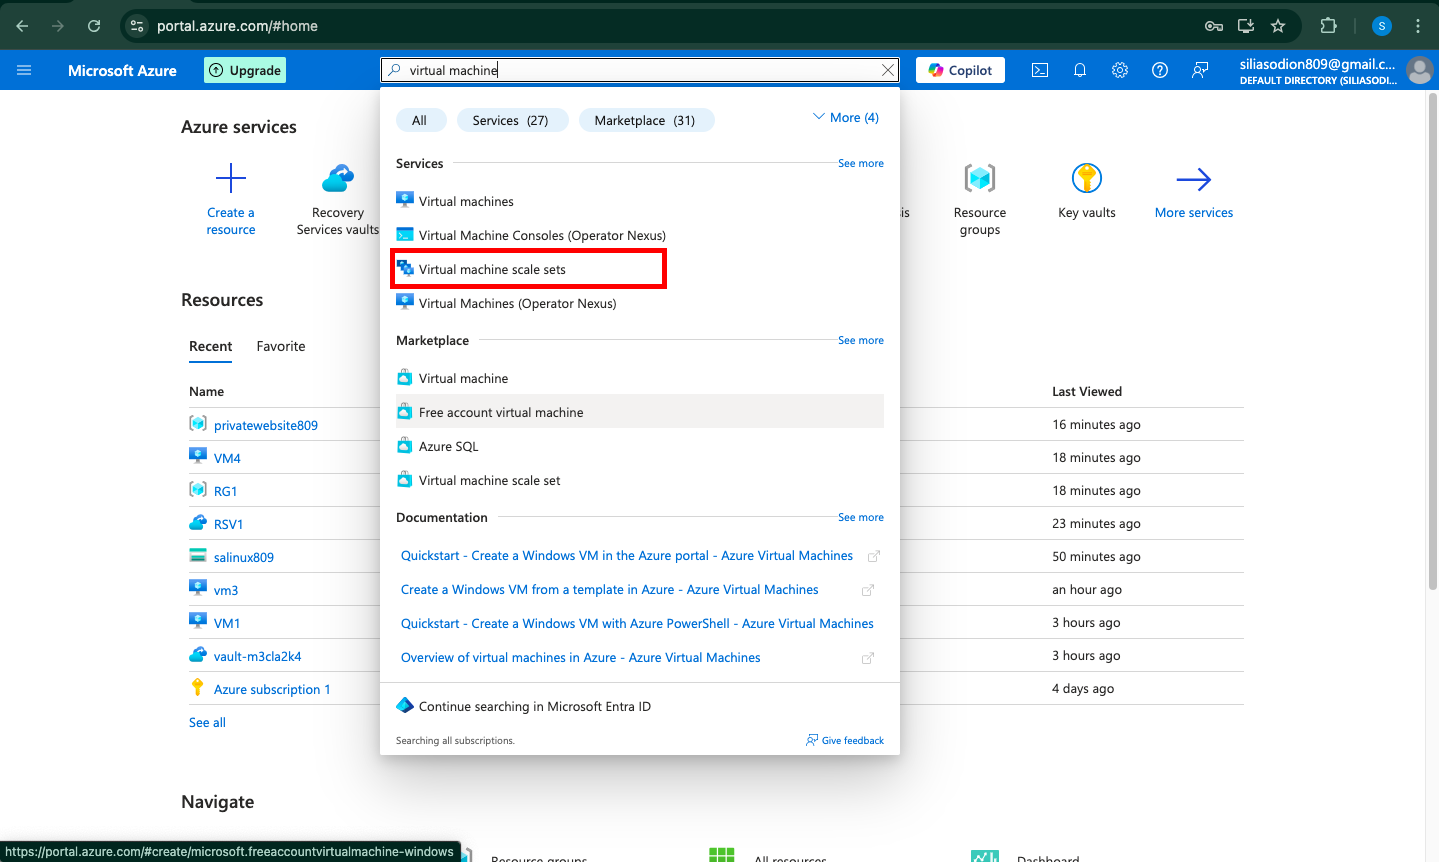
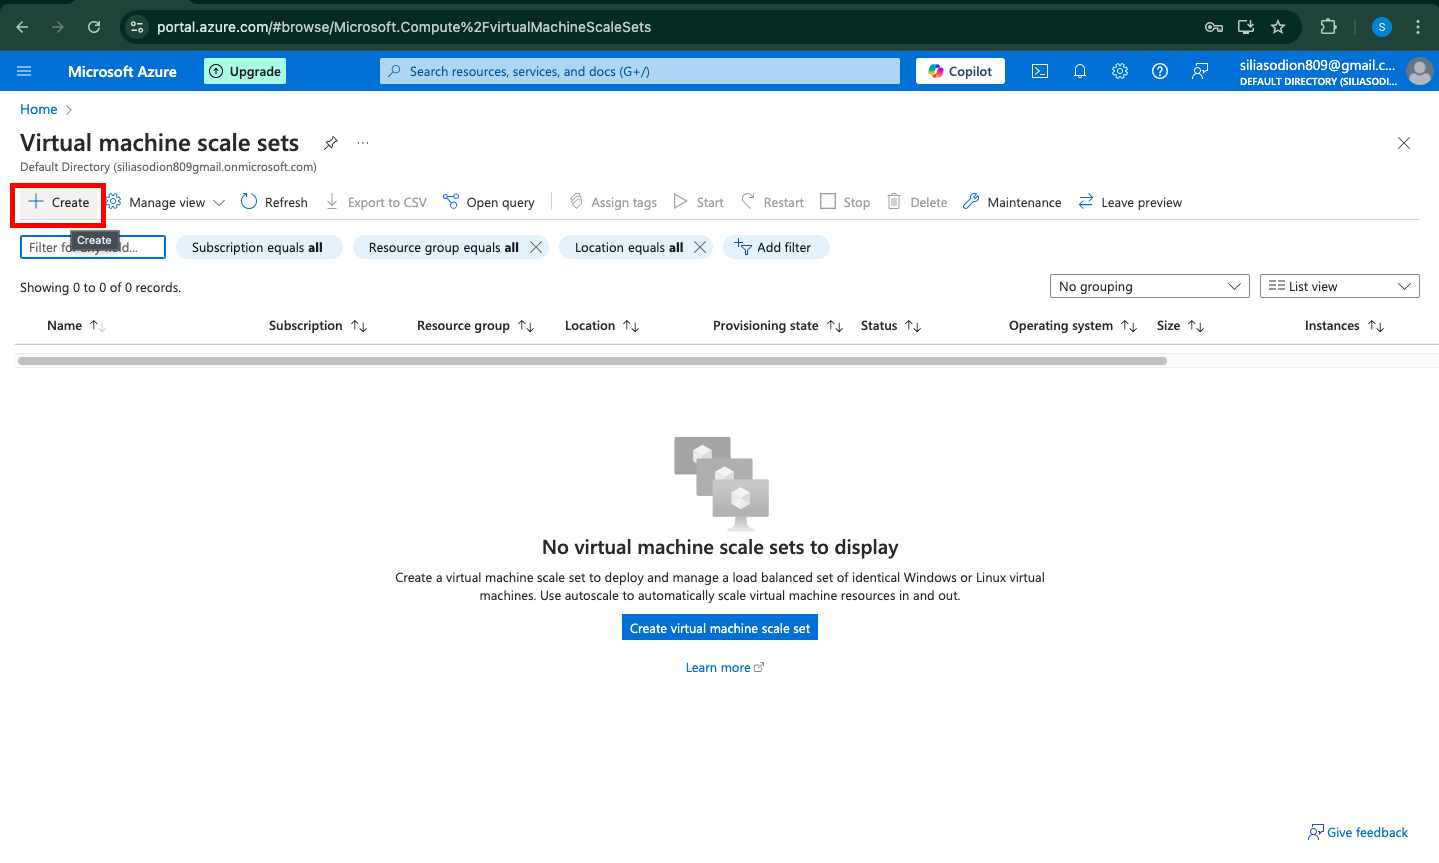
Select Virtual Machine Scale Sets from the dropdown, and click + Create to start the setup process.
Step 3: Configure Basic Settings
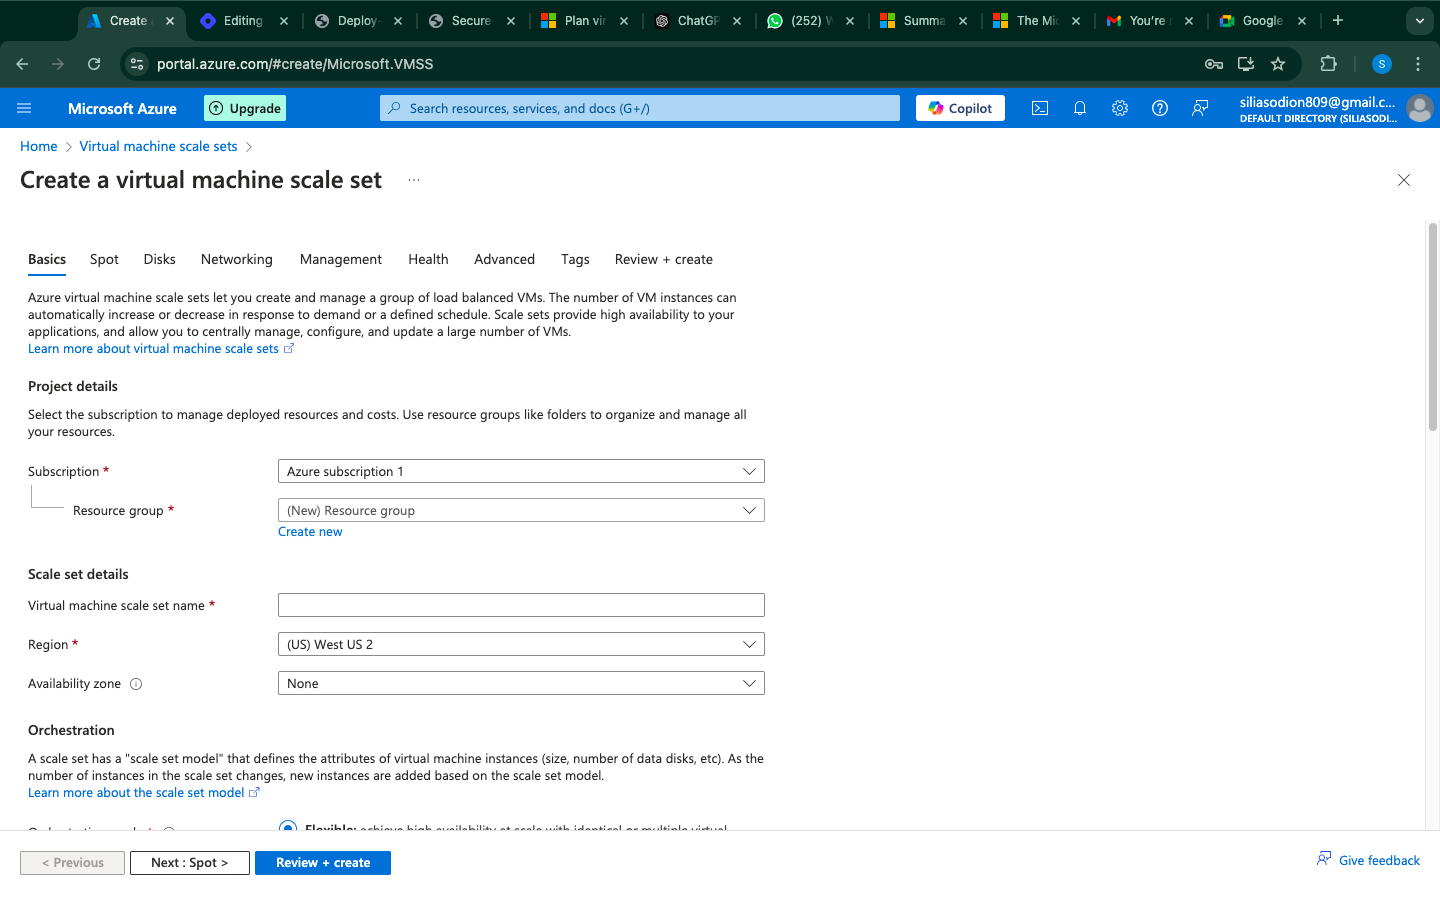
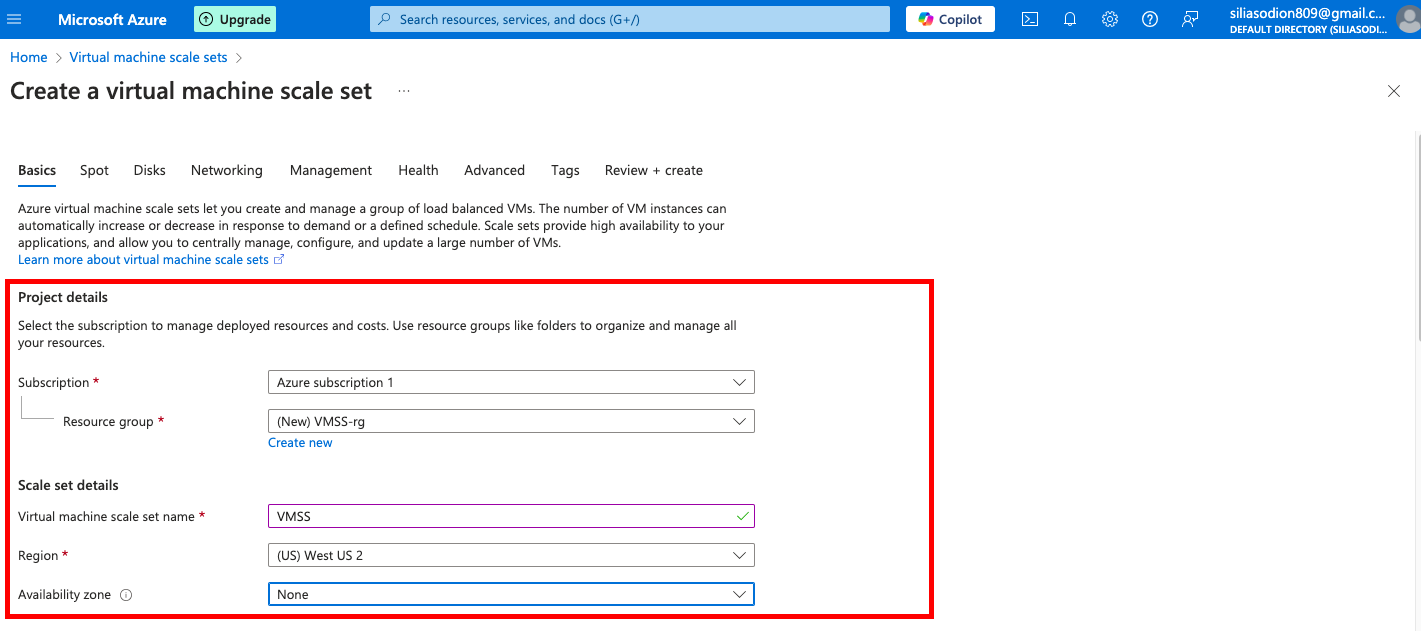
In the Basics tab, enter the following informatioSubscription: Select your Azure subscription.
Resource group: Either create a new resource group or select an existing one.
Region: Choose the region where you want to deploy the VM scale set.
Scale set name: Provide a name for your scale set.
Orchestration mode: Choose Uniform (default) for identical VMs, or Flexible if you need more control.
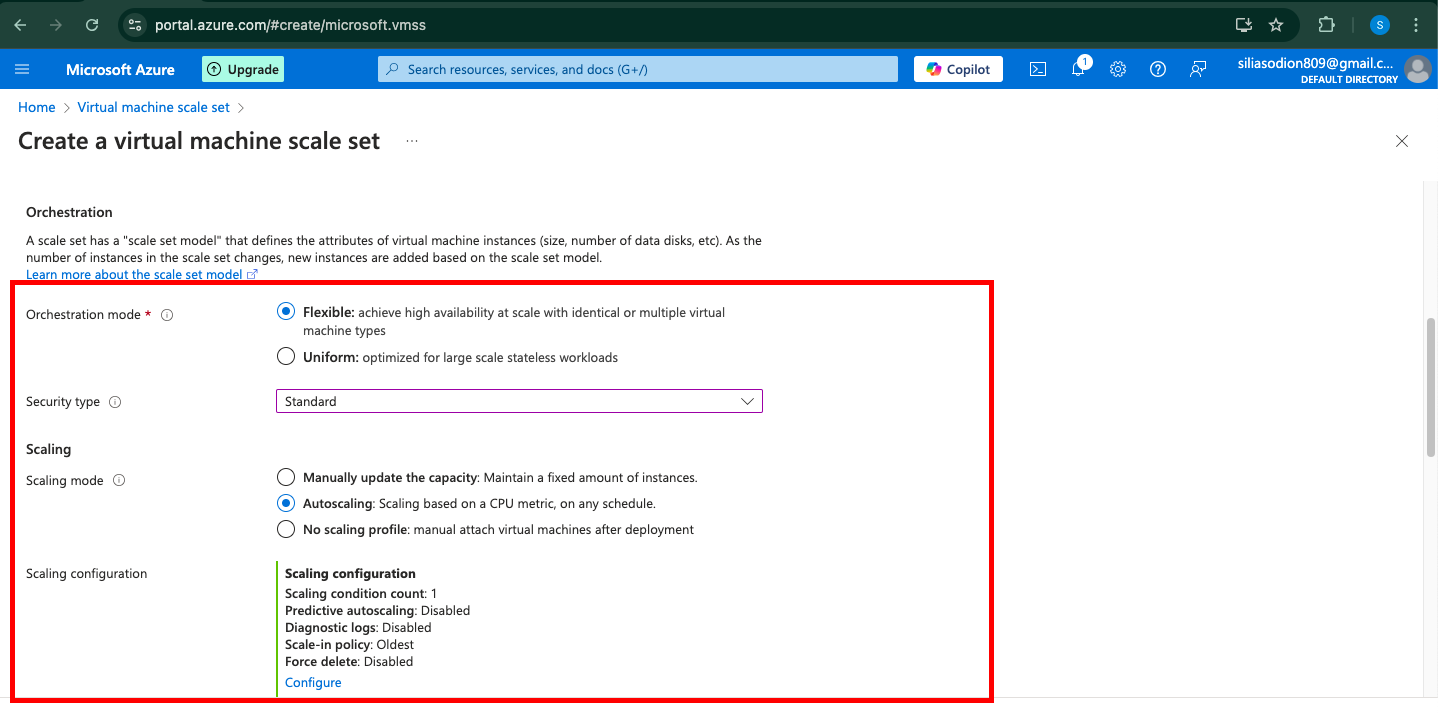
Scaling Configuration
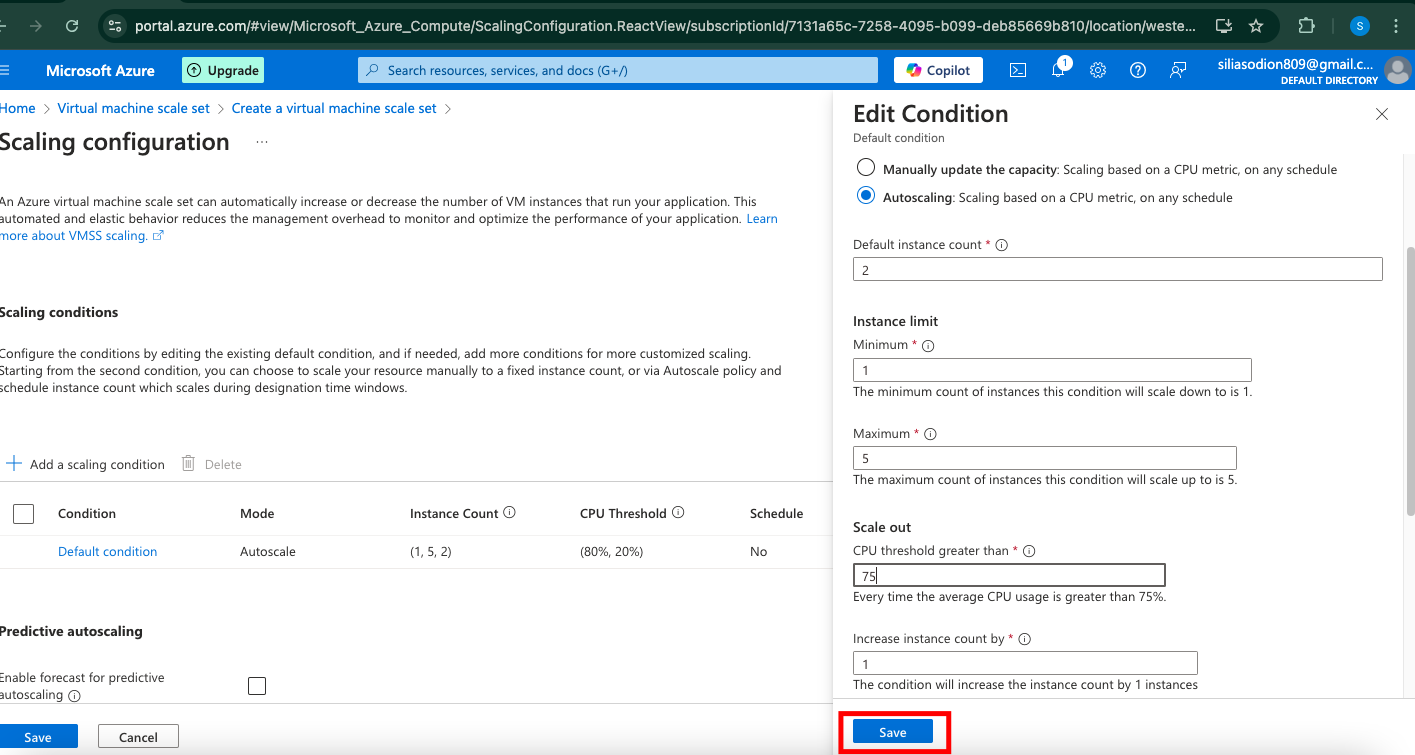
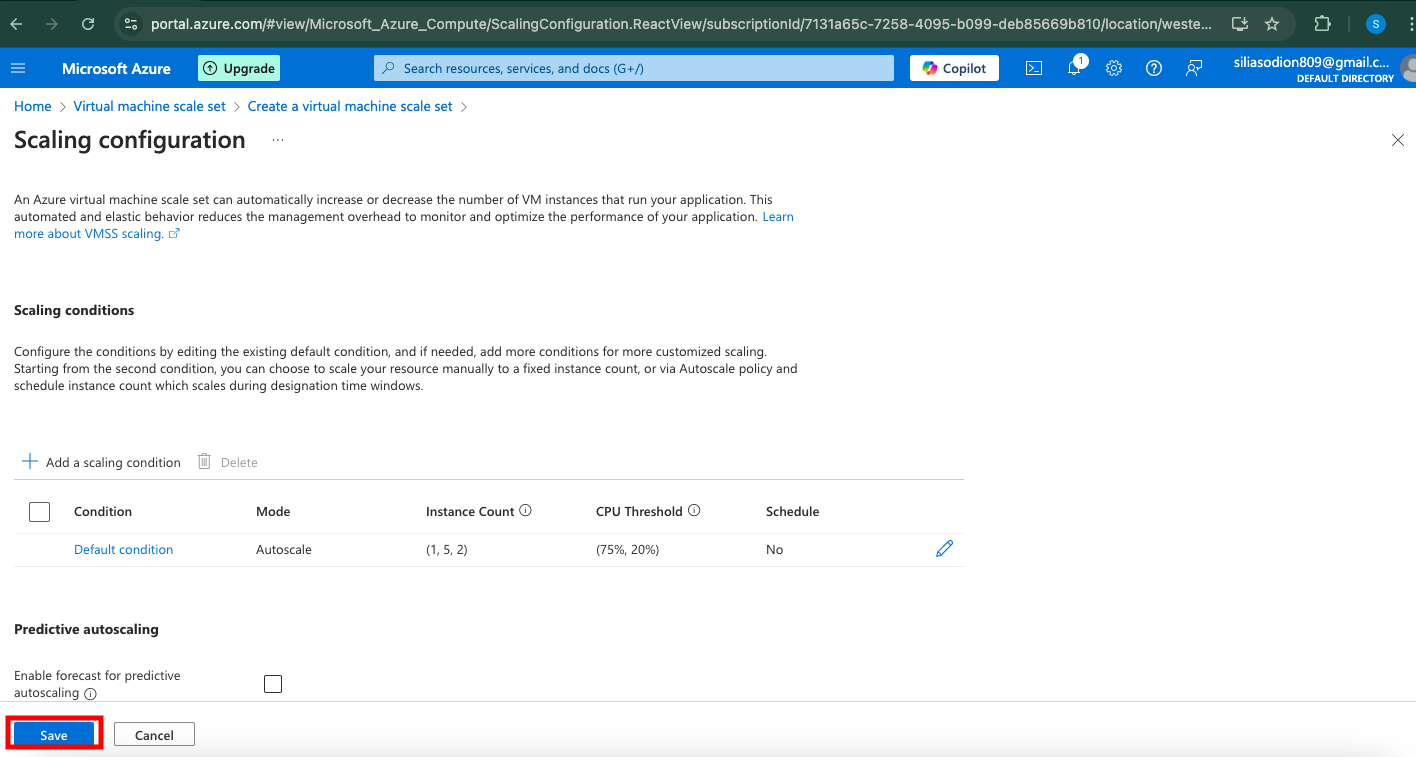
Set the Initial instance count (e.g., 2 instances).
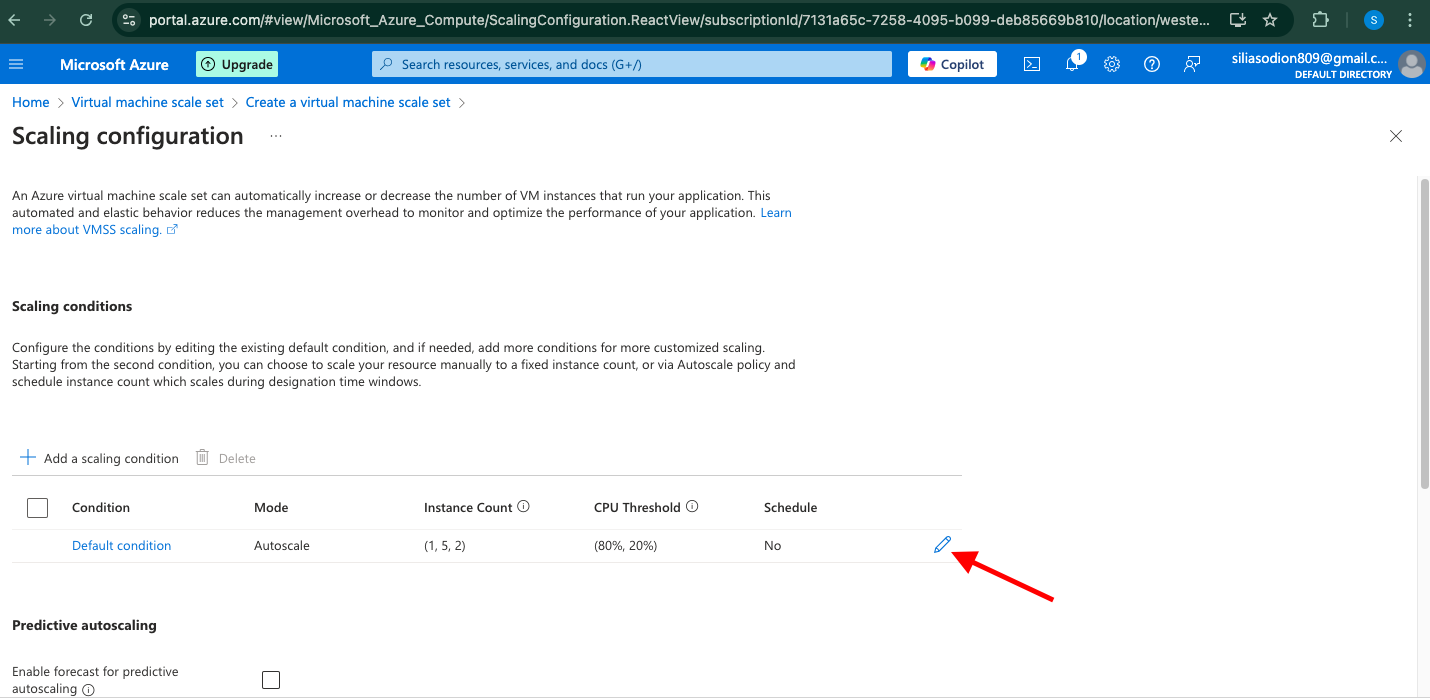
Enable Autoscale if you want the VMSS to automatically adjust the number of VMs based on demand.
Configure scale-out and scale-in rules if autoscaling is enabled (e.g., increase by 1 instance when CPU usage is above 75%).
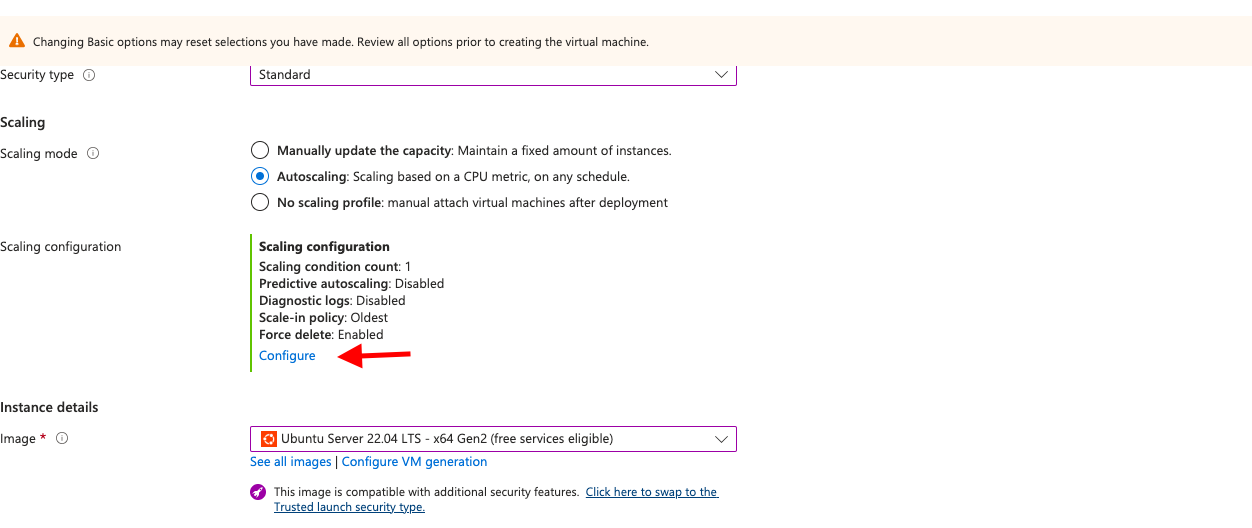
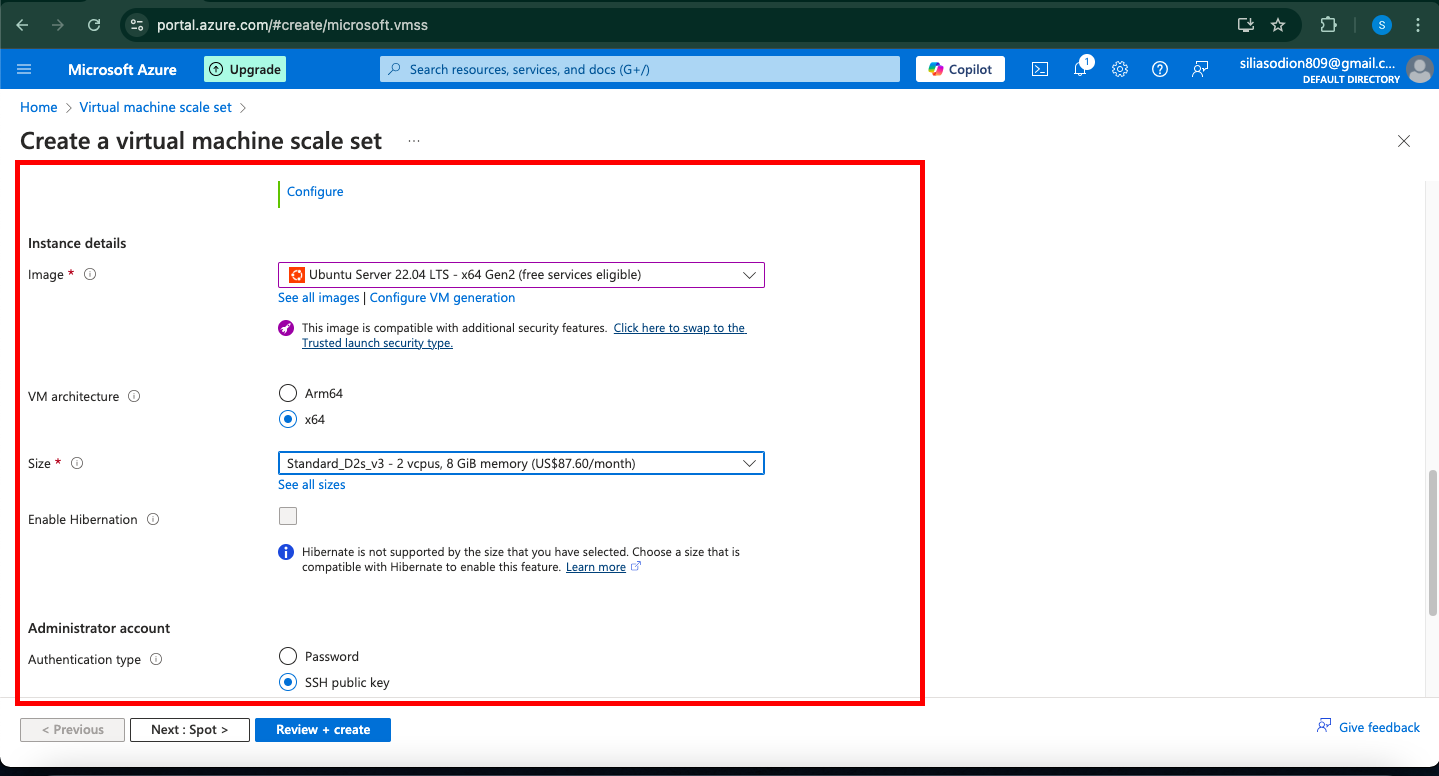
Operating System: Select Linux.
Image: Choose a Linux image, like Ubuntu Server 18.04 or 24.04 LTS.
Size: Pick a VM size suitable for your workload (e.g., Standard_D2s_v3).
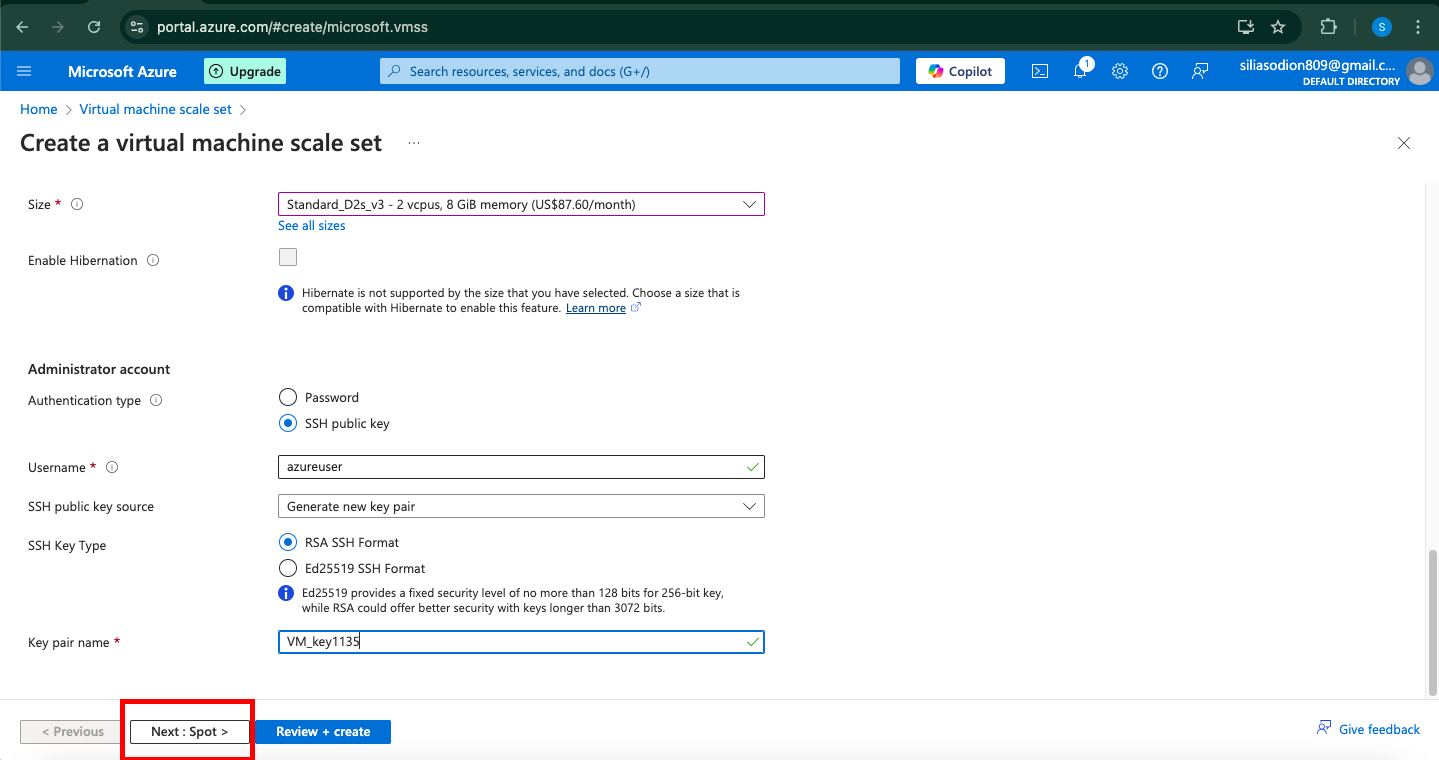
Click Next: Disks > to proceed.
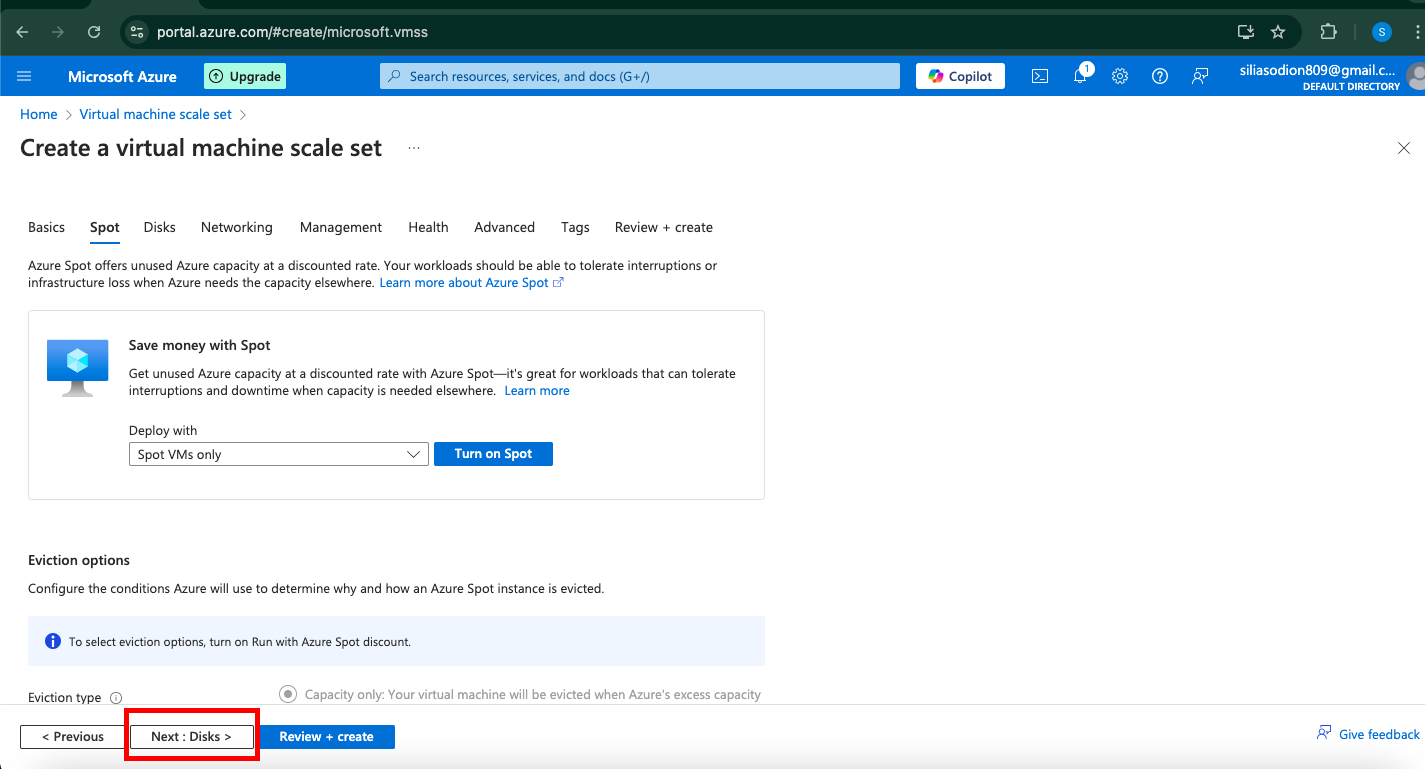
Step 4: Configure Disk Options
On the Disks tab, select Standard SSD for cost-effective storage, or choose Premium SSD if performance is critical.
Configure any additional disks if necessary.
Click Next: Networking >.
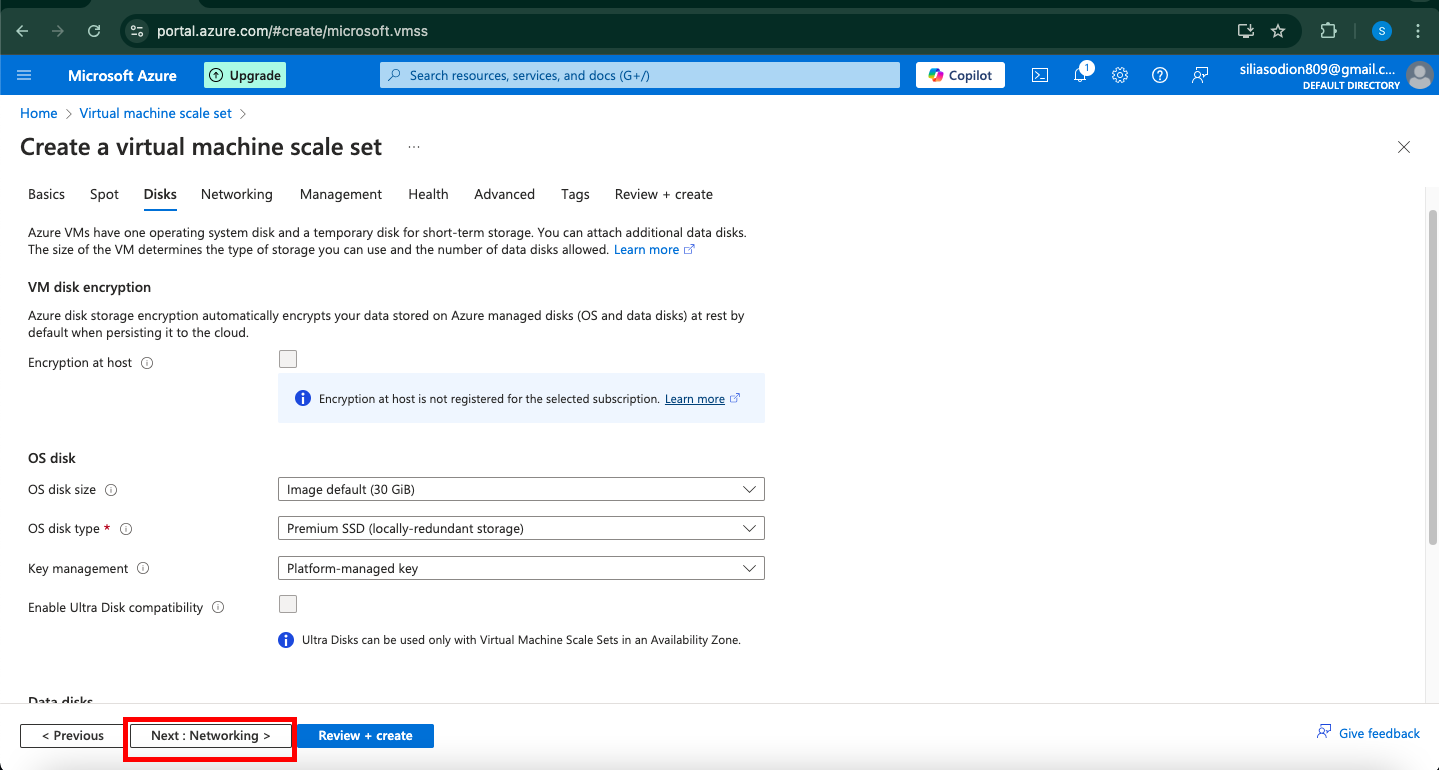
Step 5: Set Up Networking
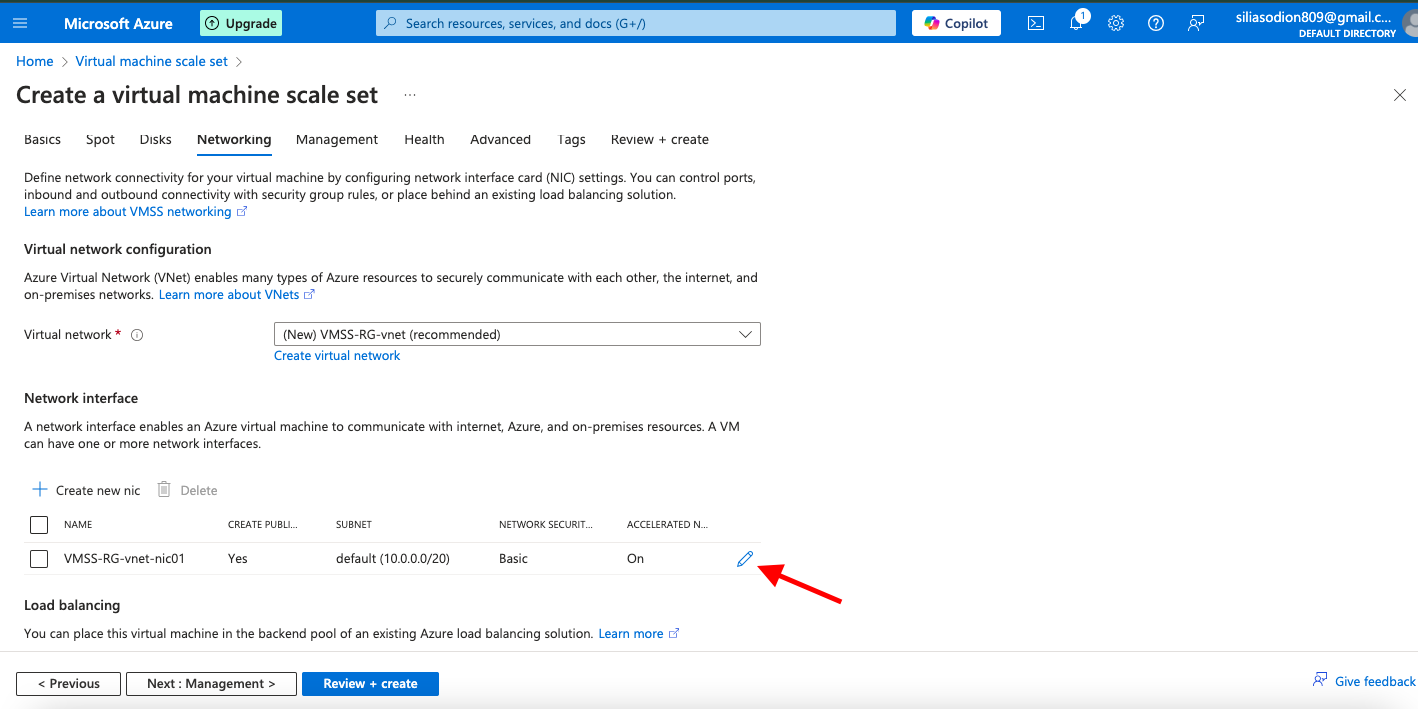
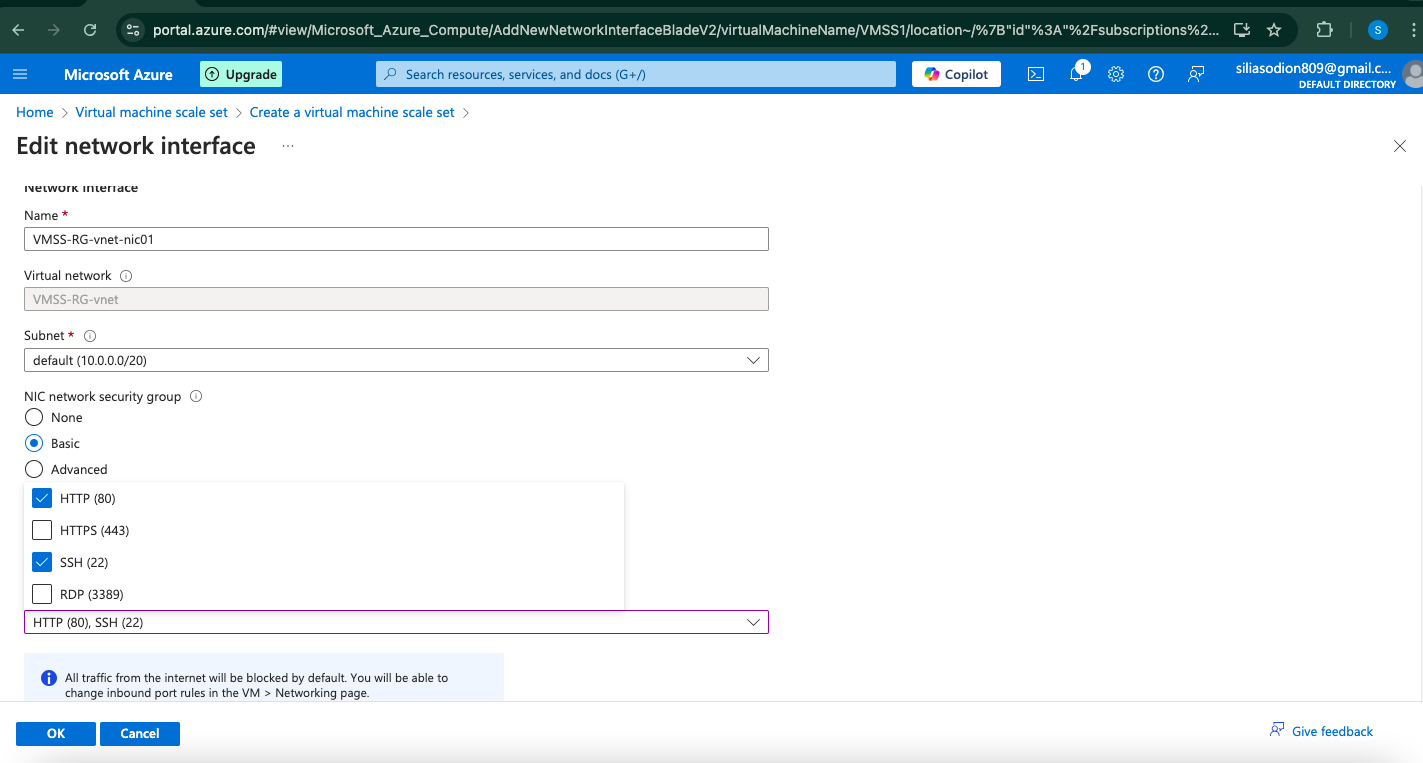
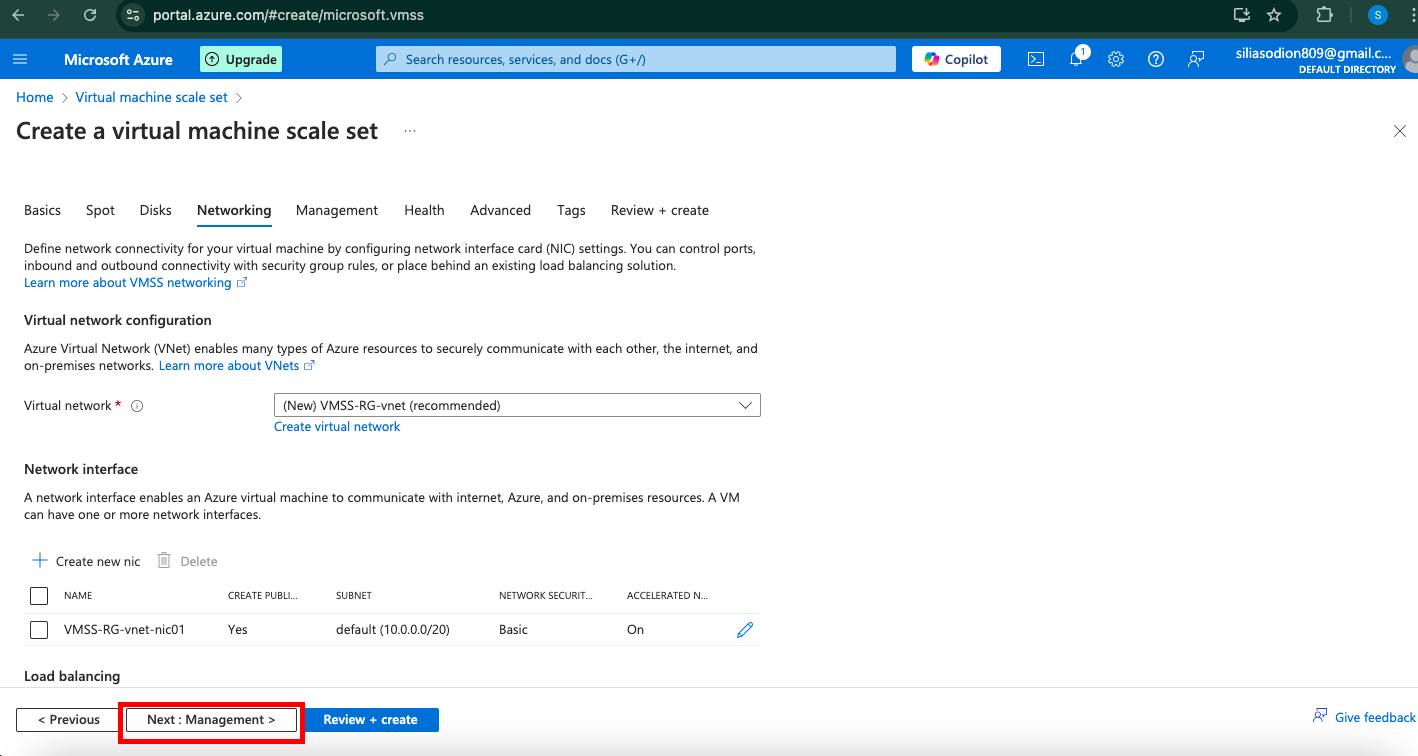
In the Networking tab, select the Virtual network you wish to use or create a new one.
Choose a Subnet for the VMs in the scale set.
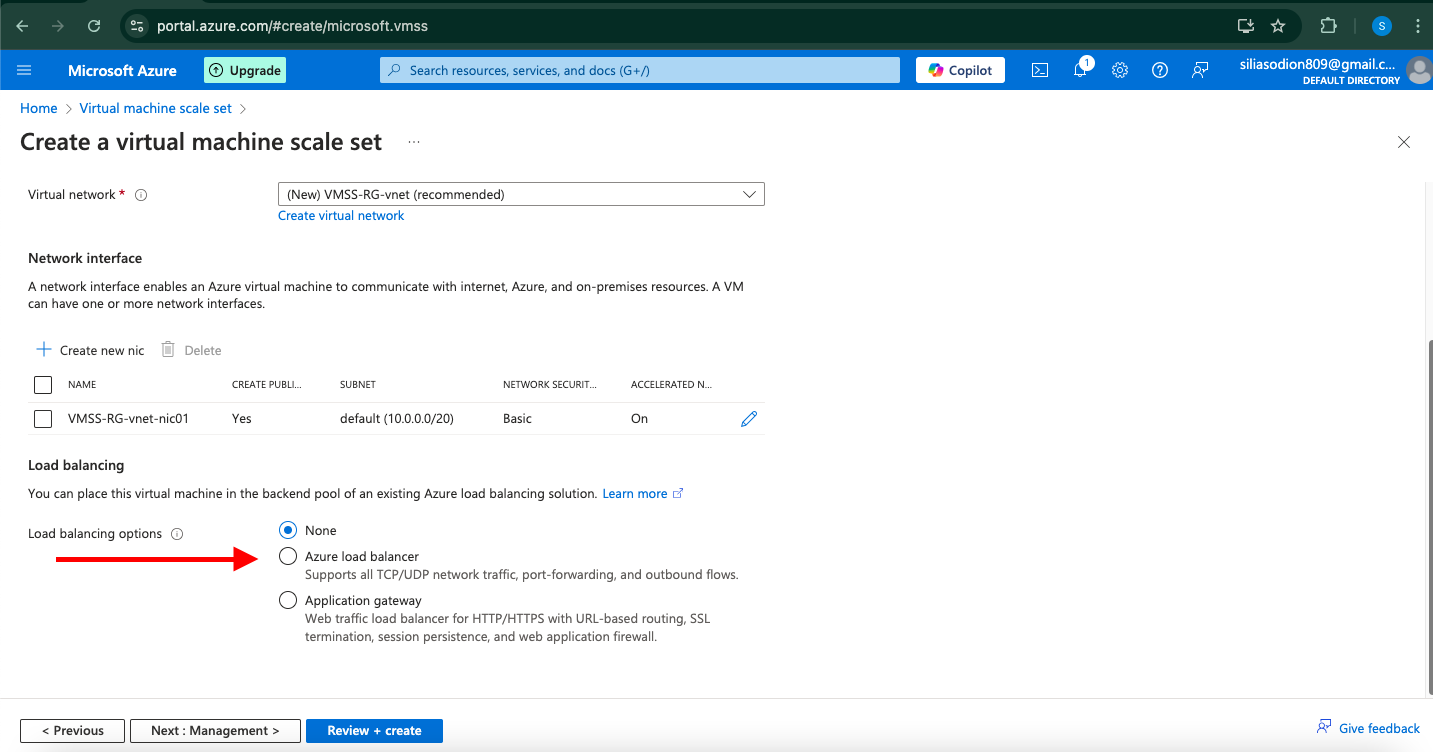
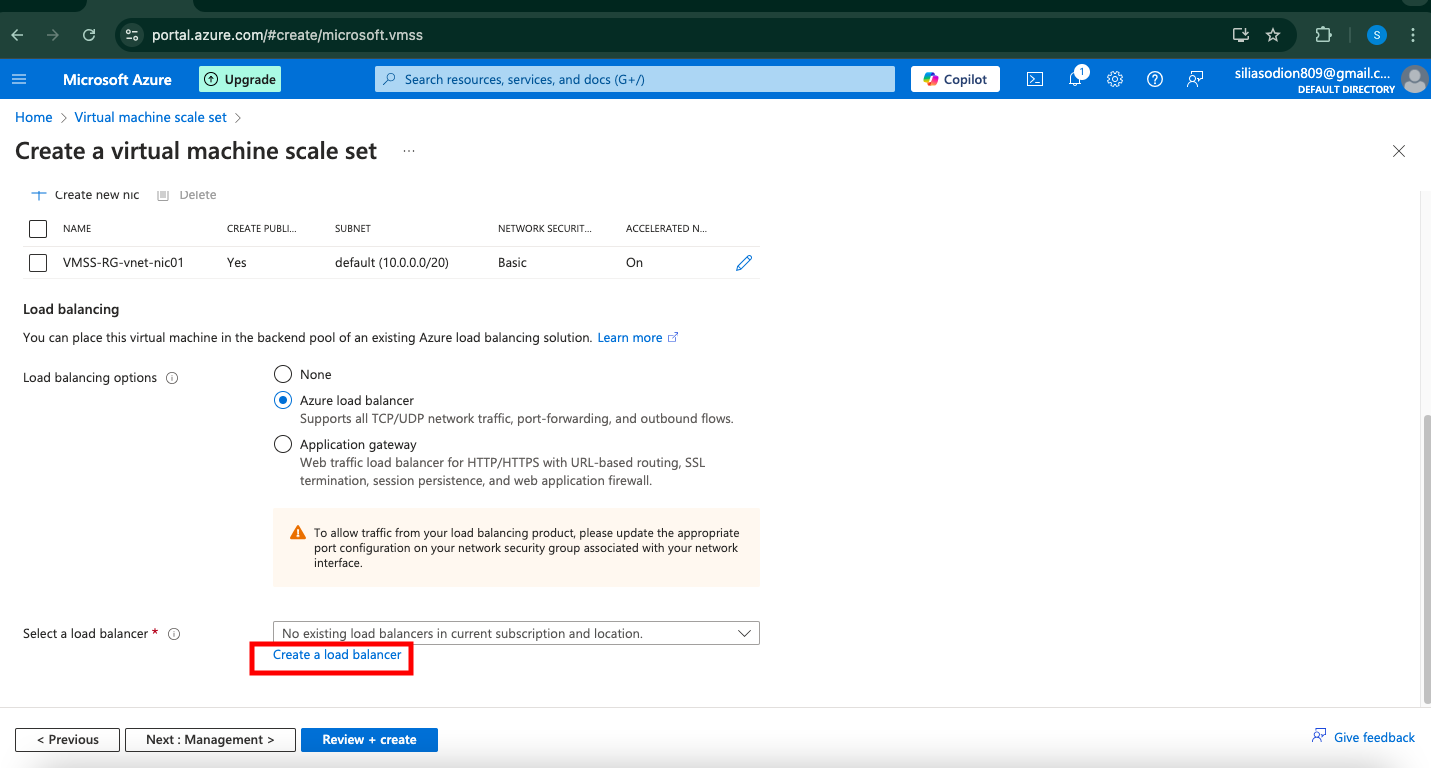
Enable Load Balancing if you want to distribute traffic across VMs.
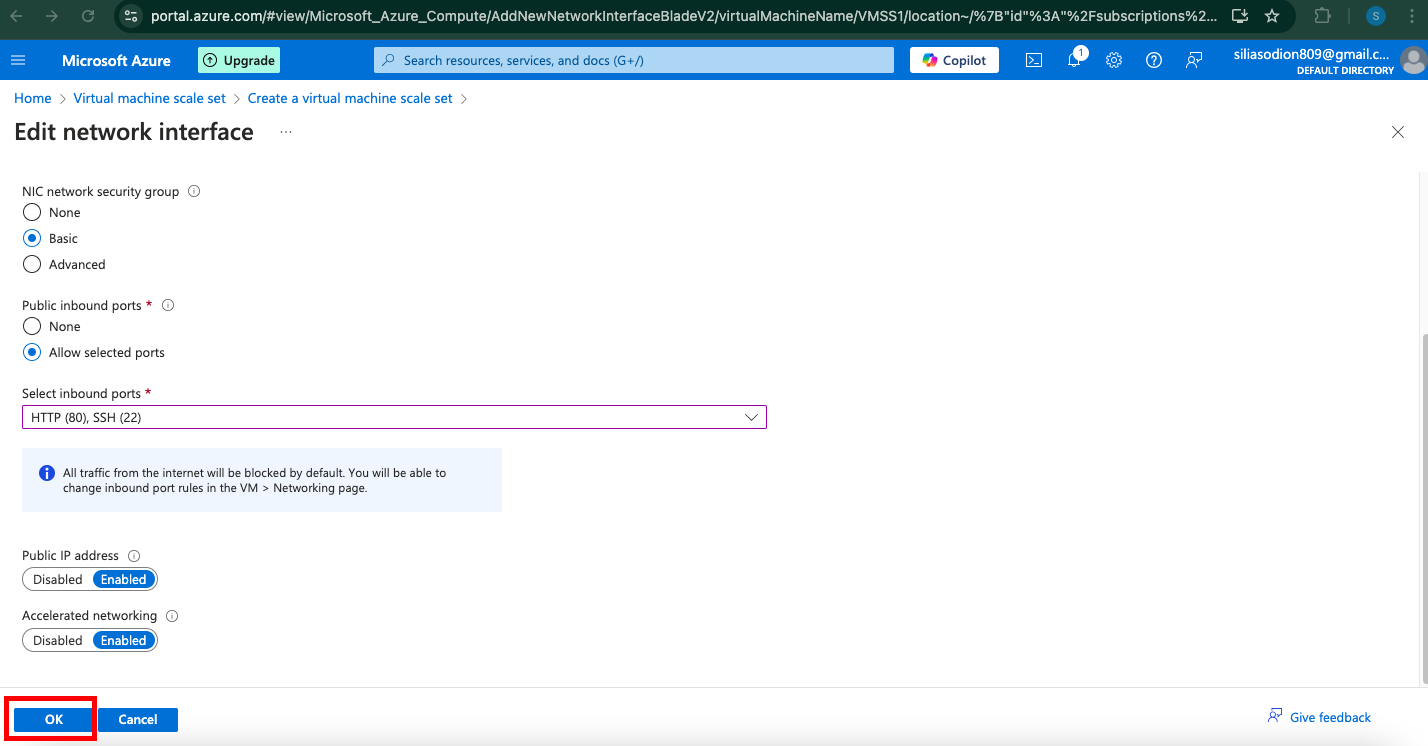
Enable Public IP for individual instances if necessary for direct connections, though it’s generally recommended to connect via Load Balancer for security.
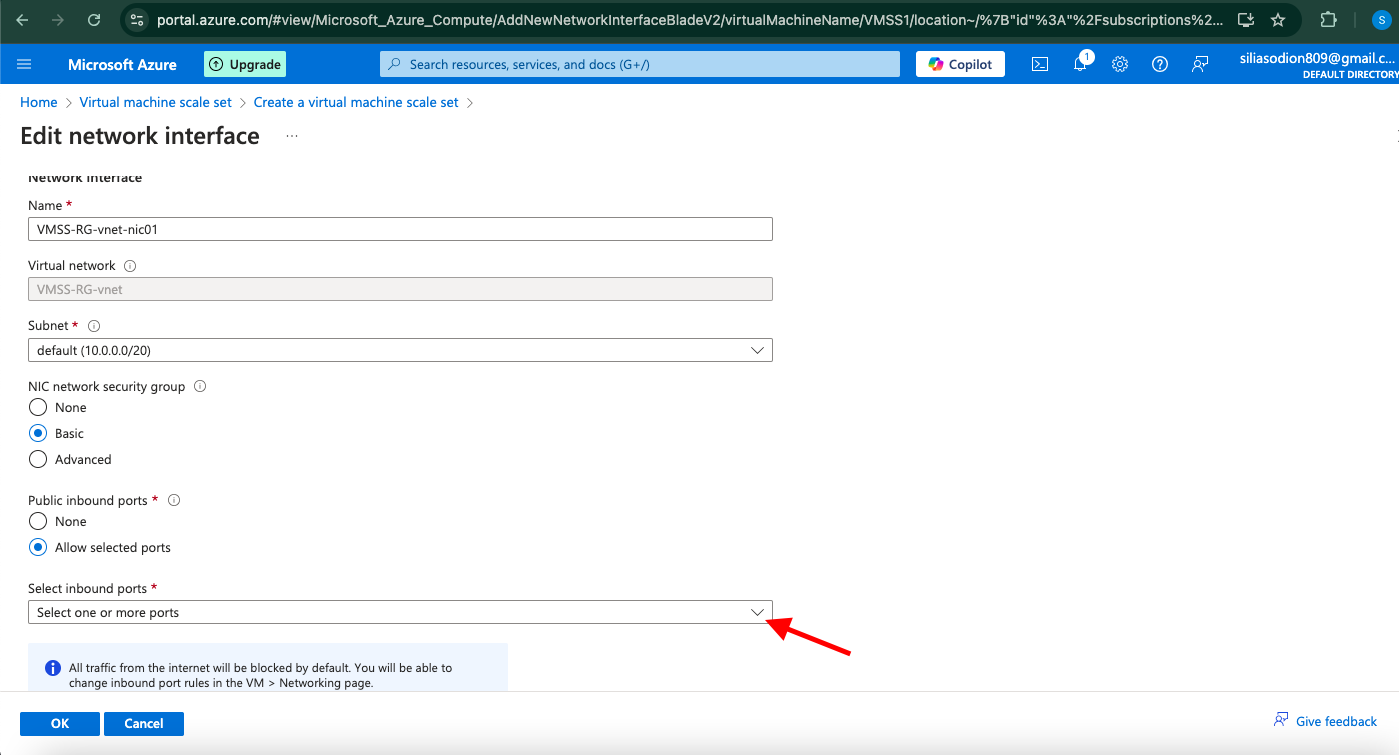
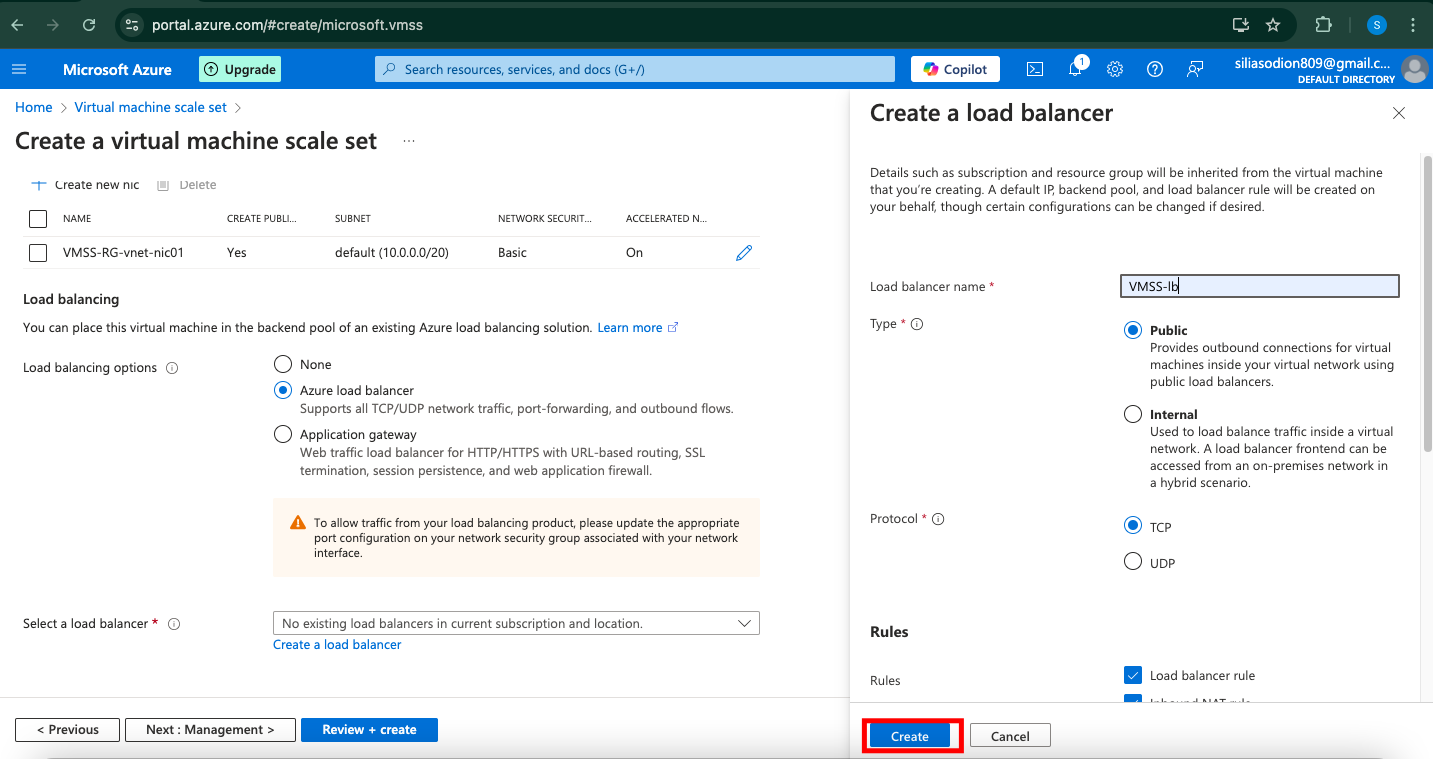
Click Next: Management >.
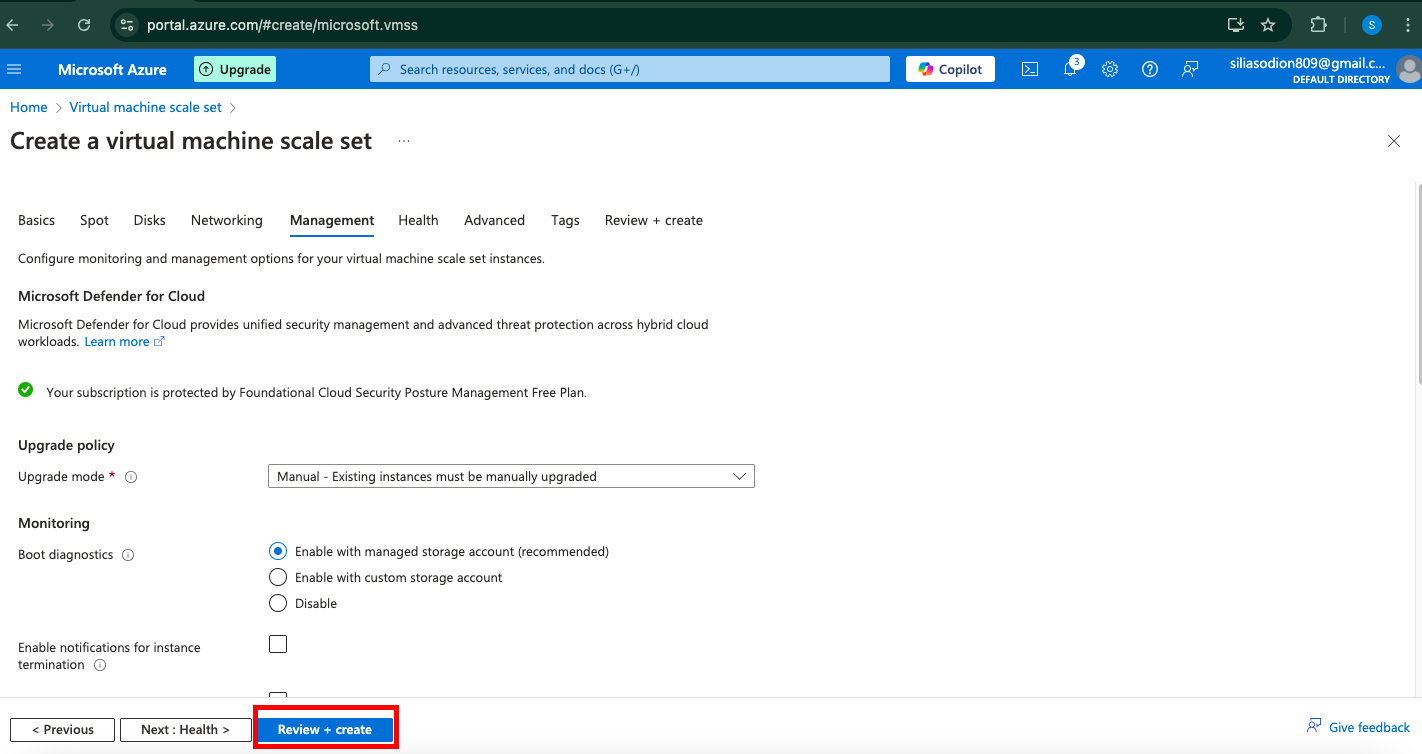
Step 6: Configure Management Options
Set the Diagnostics options to enable monitoring.
Choose Identity and Access Management settings if needed for security policies.
Enable Auto-shutdown if you want to reduce costs by automatically turning off VMs during off-hours.
Click Review + create to finalize the configuration.
Step 7: Review and Create the Scale Set
Azure will validate your configuration. If all settings are correct, click Create to start deploying the scale set.
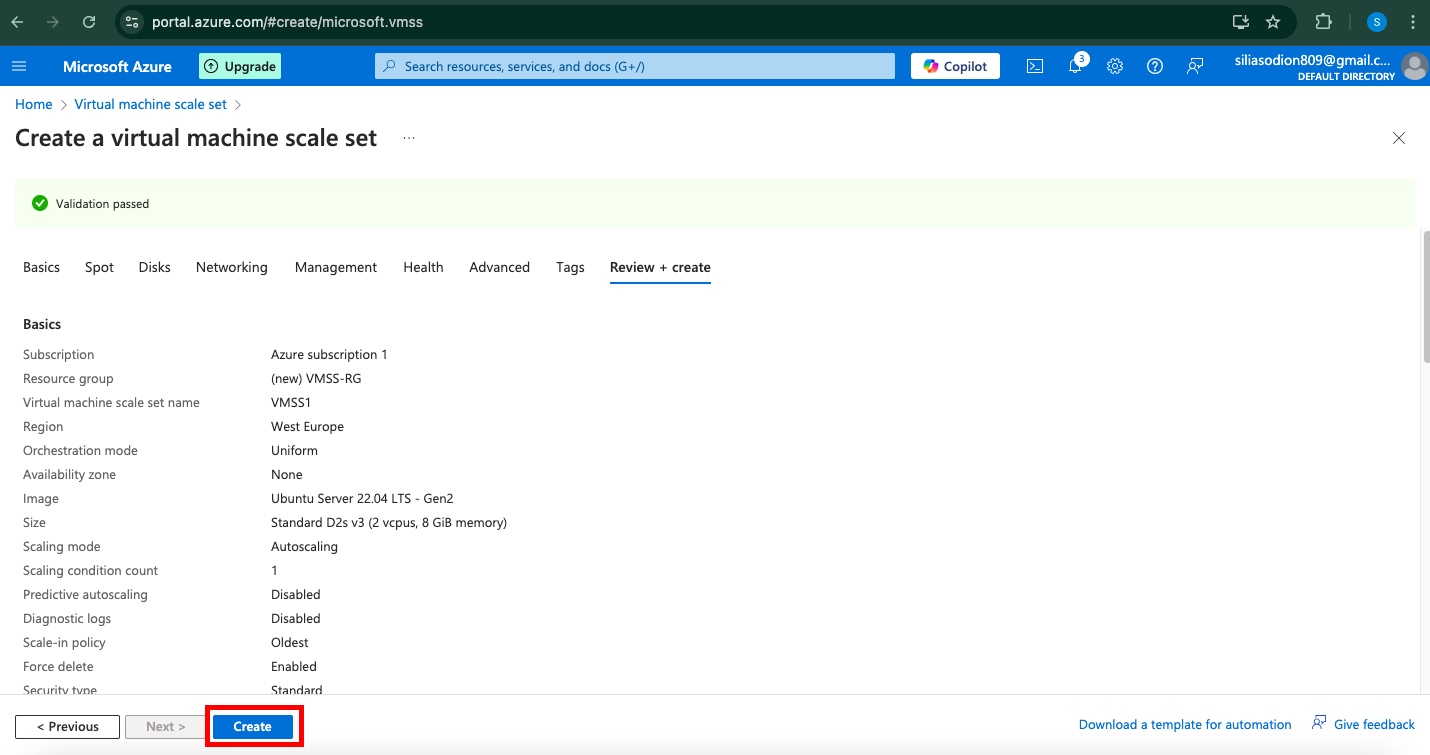
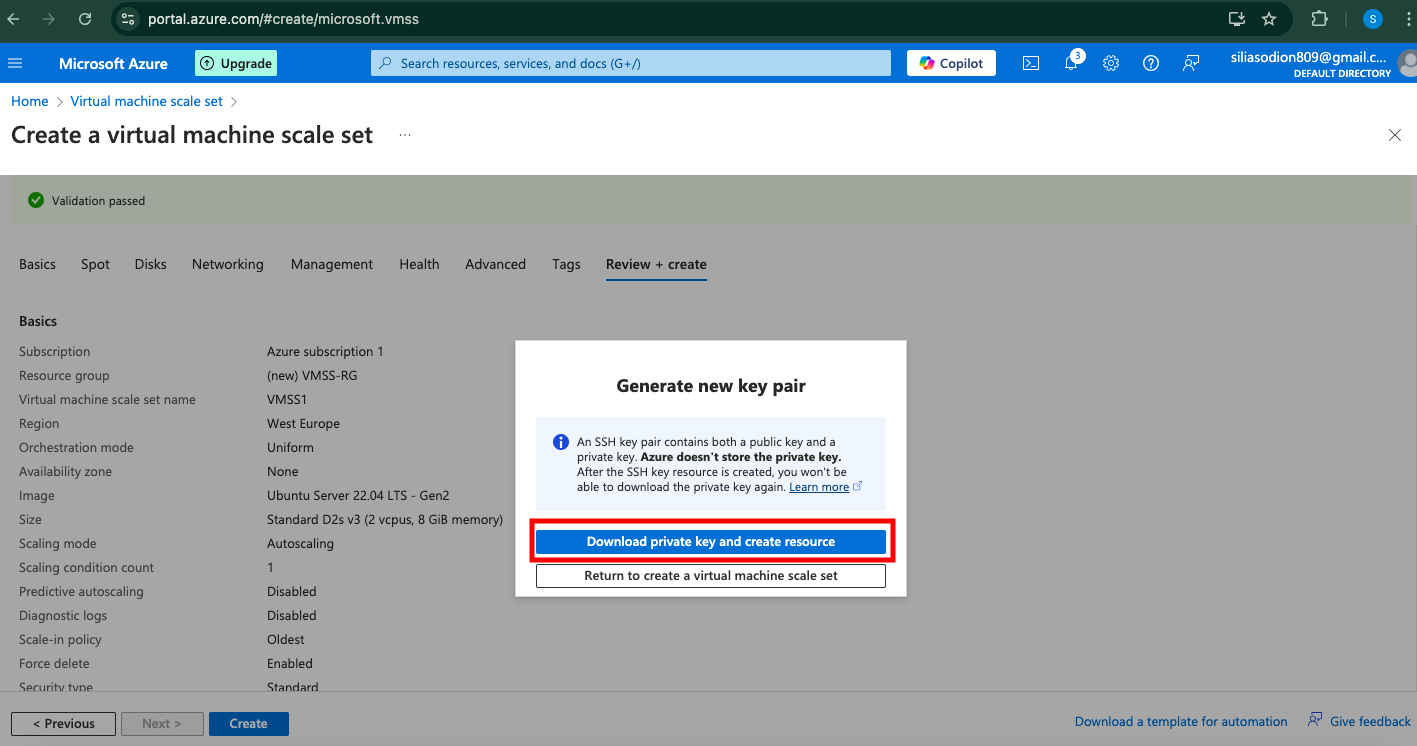
Wait for the deployment to complete, which may take a few minutes.
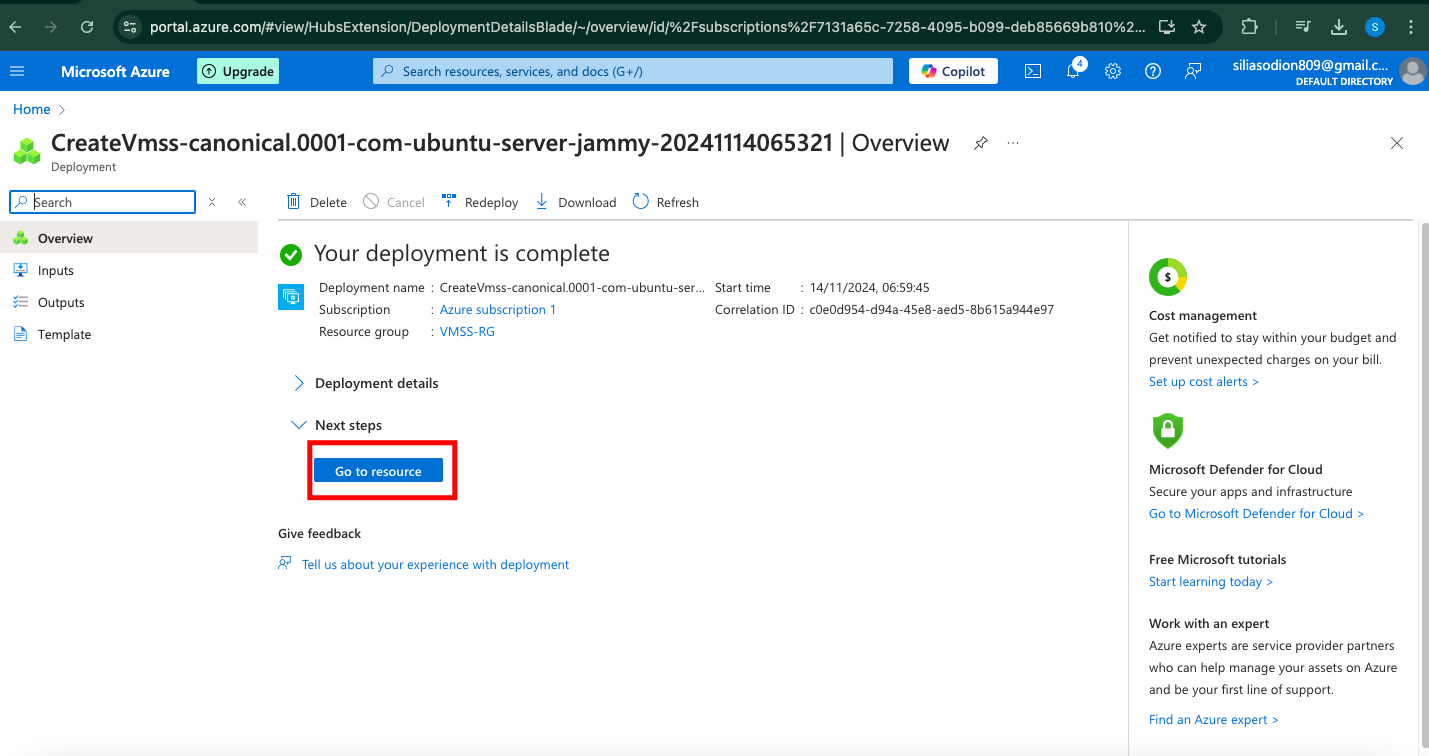
Step 8: Connect to a VM in the Scale Set
Once deployment is complete, go to the Scale Set overview page.
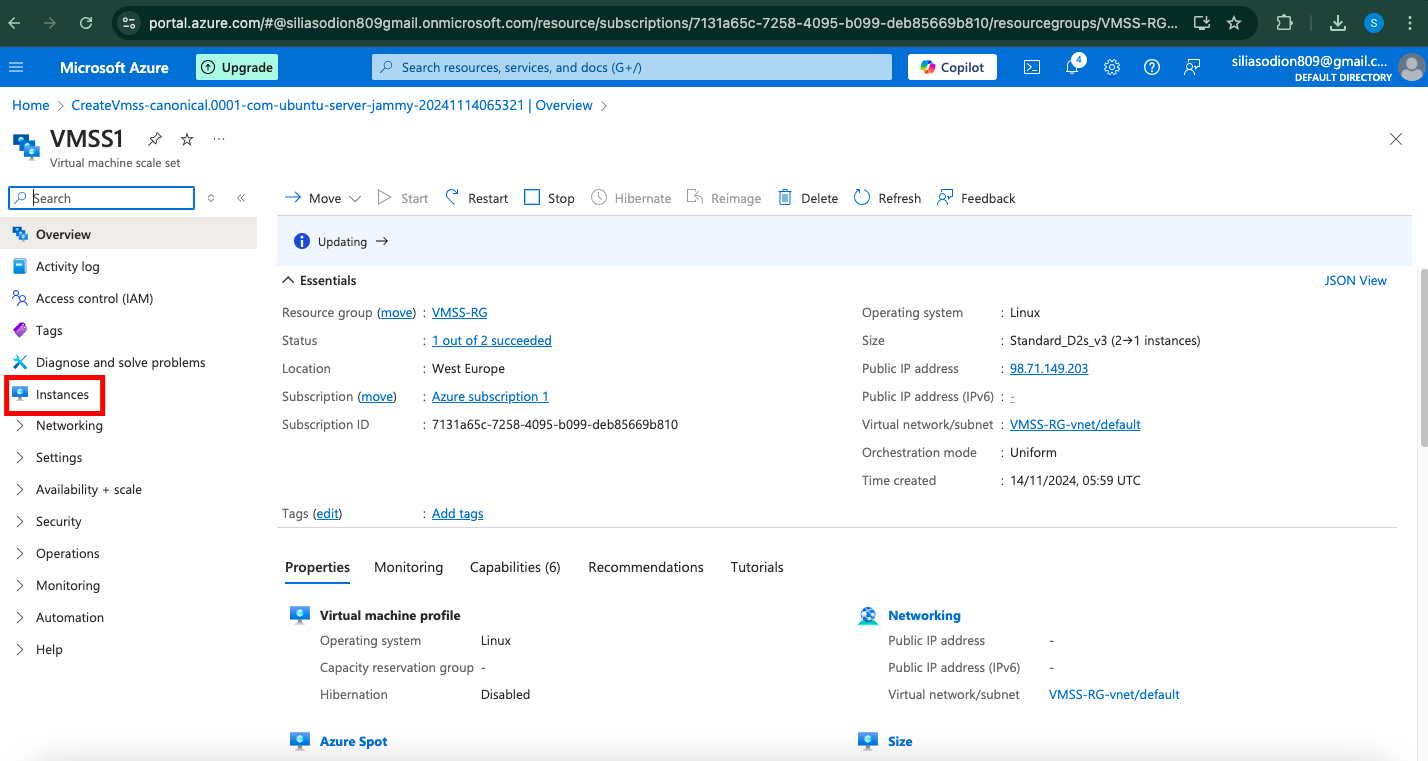
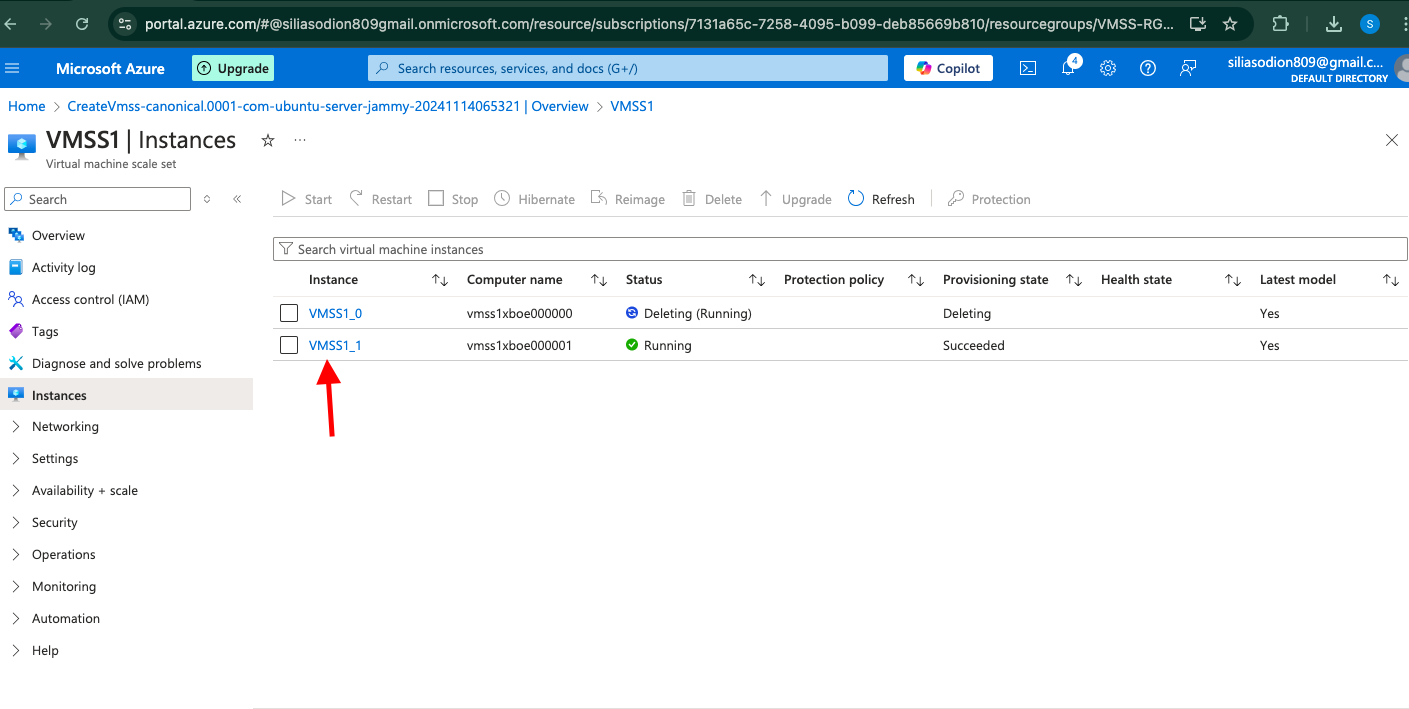
Select Instances from the left menu to view the list of VMs in the scale set.
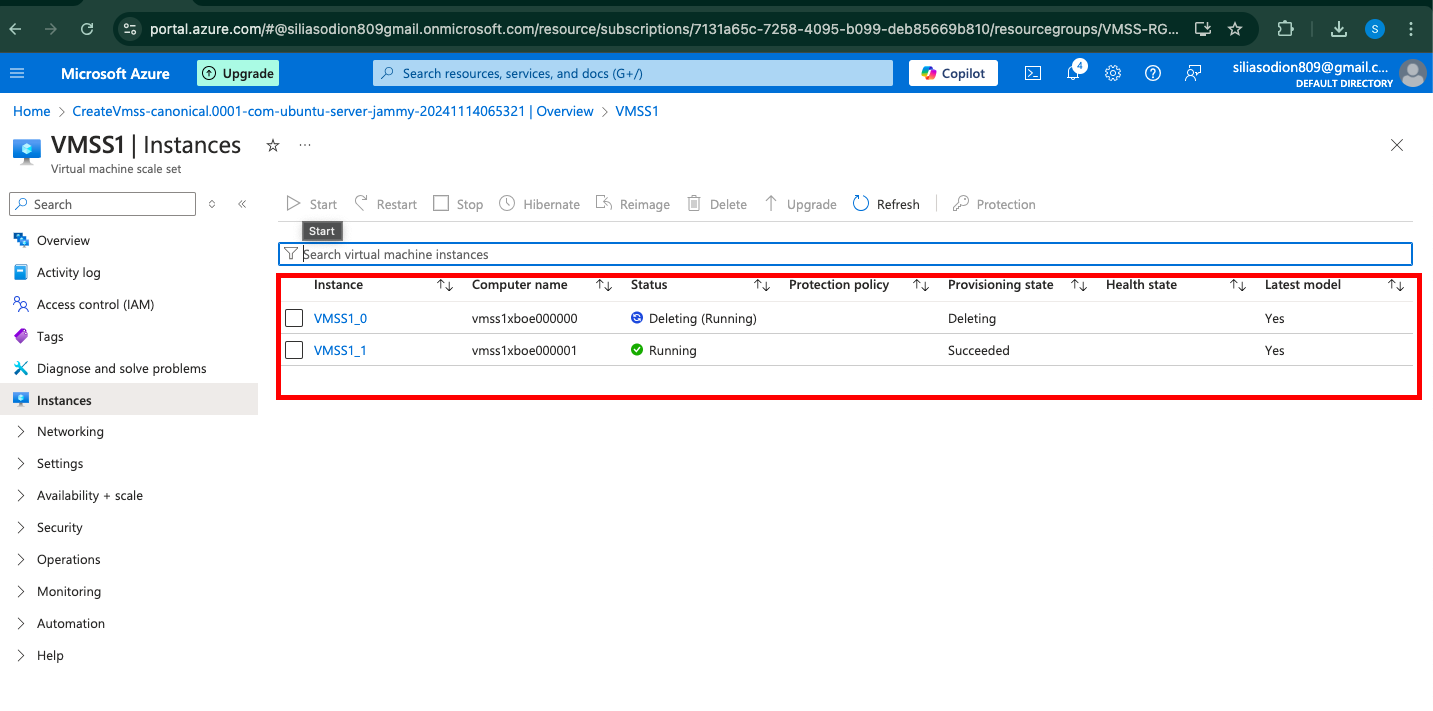
Click on one of the instance names to access its details.
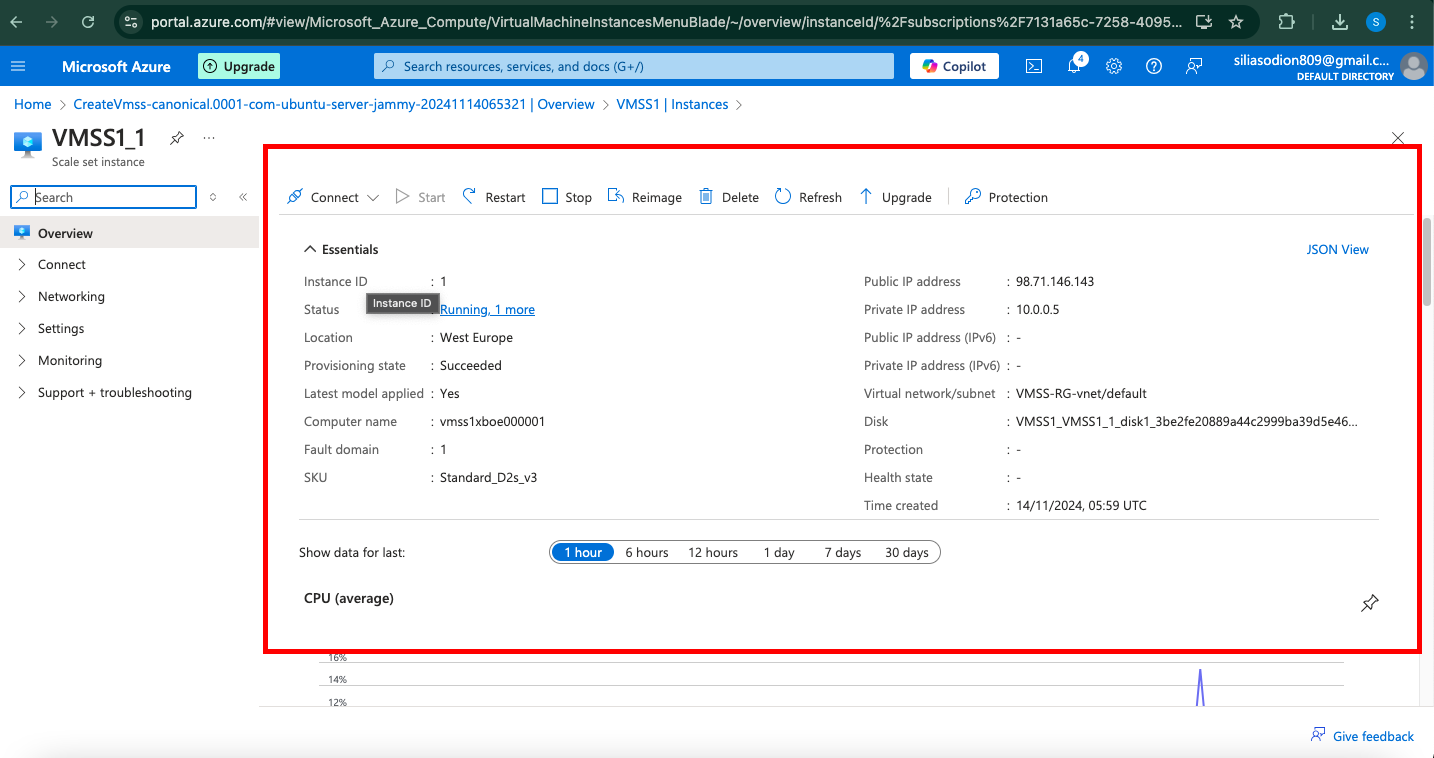
Under Settings, go to Networking and locate the Public IP address (if assigned).
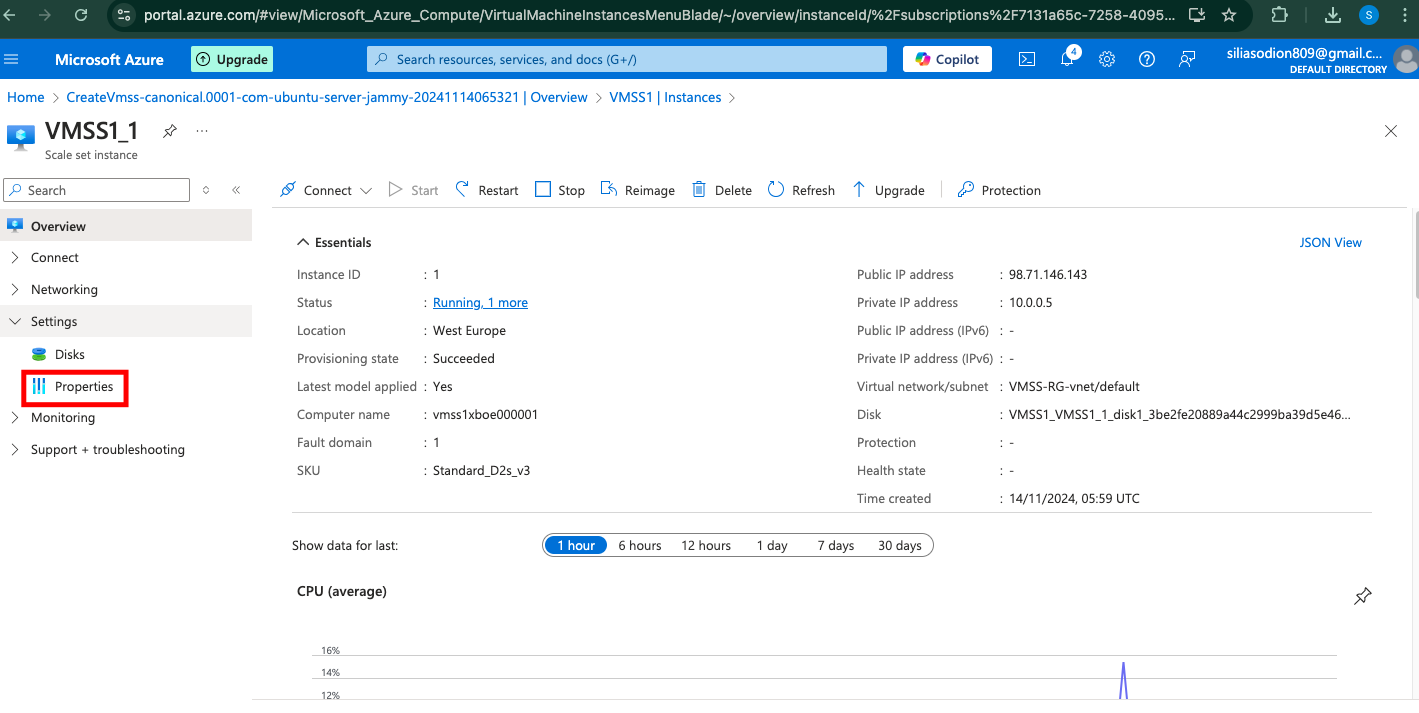
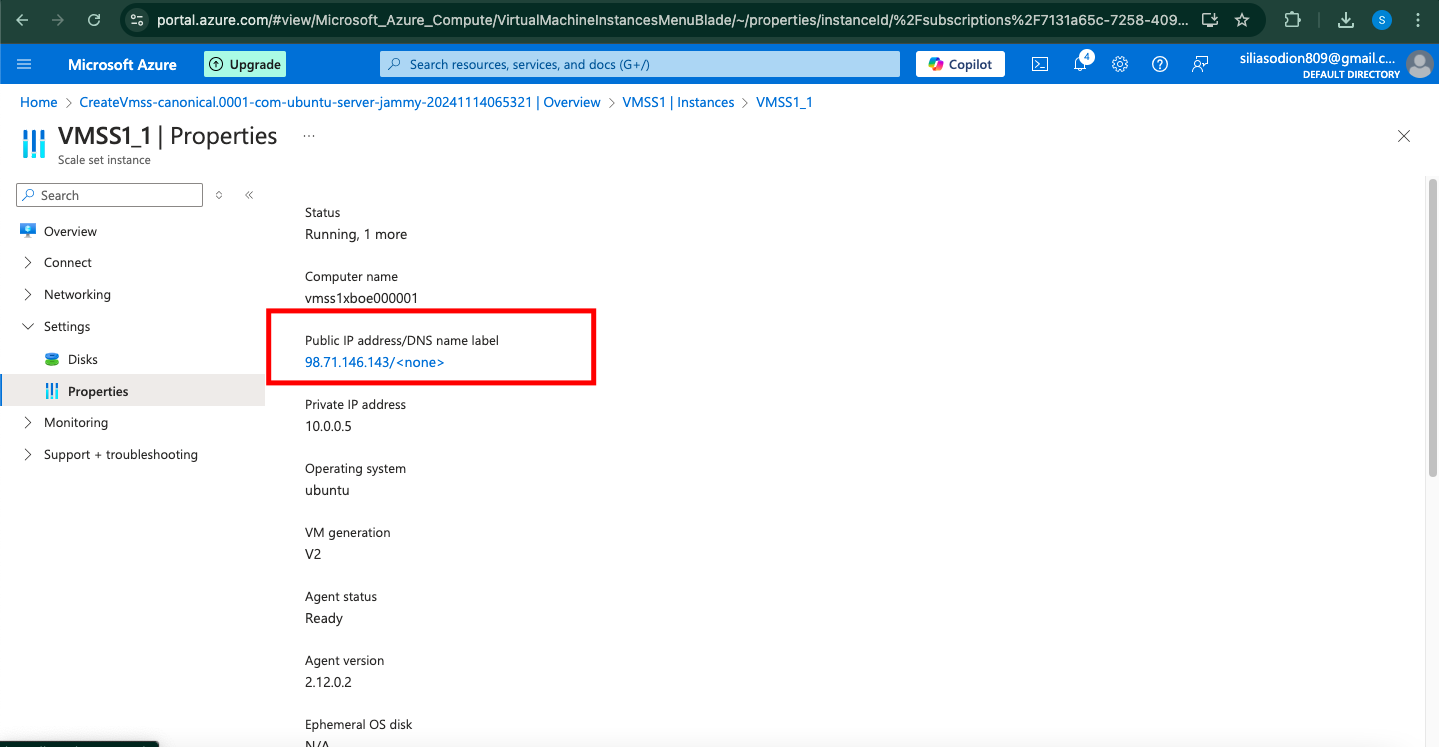
Open a terminal and connect using SSH:
ssh -i <The path to your downloaded Pem Key file> azureuser@<PublicIP>Replace
<PublicIP>with the actual IP address of the instance.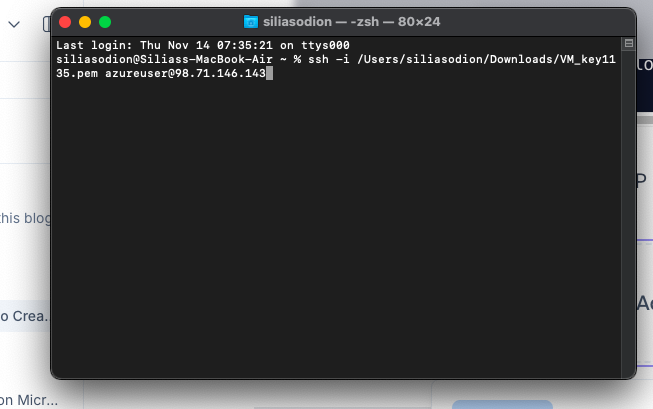
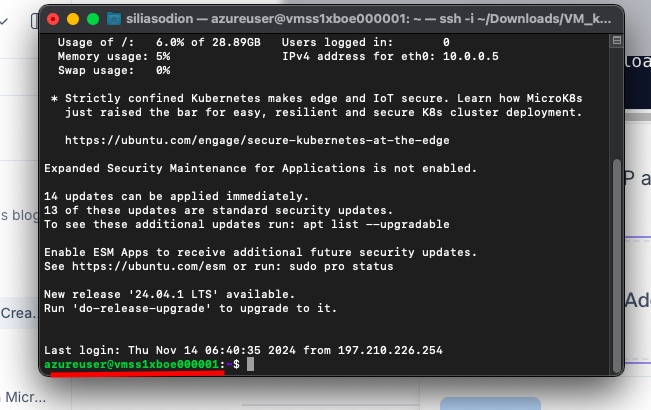
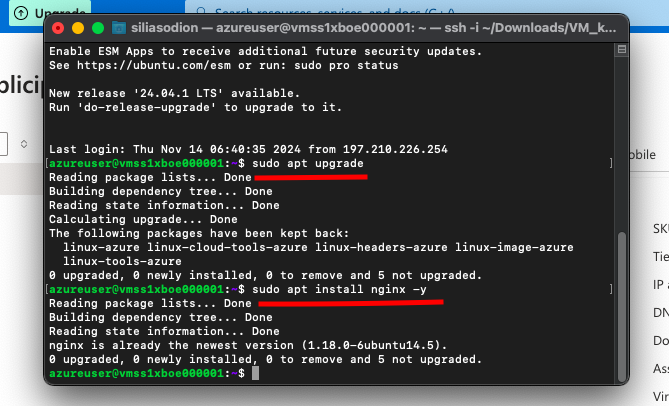
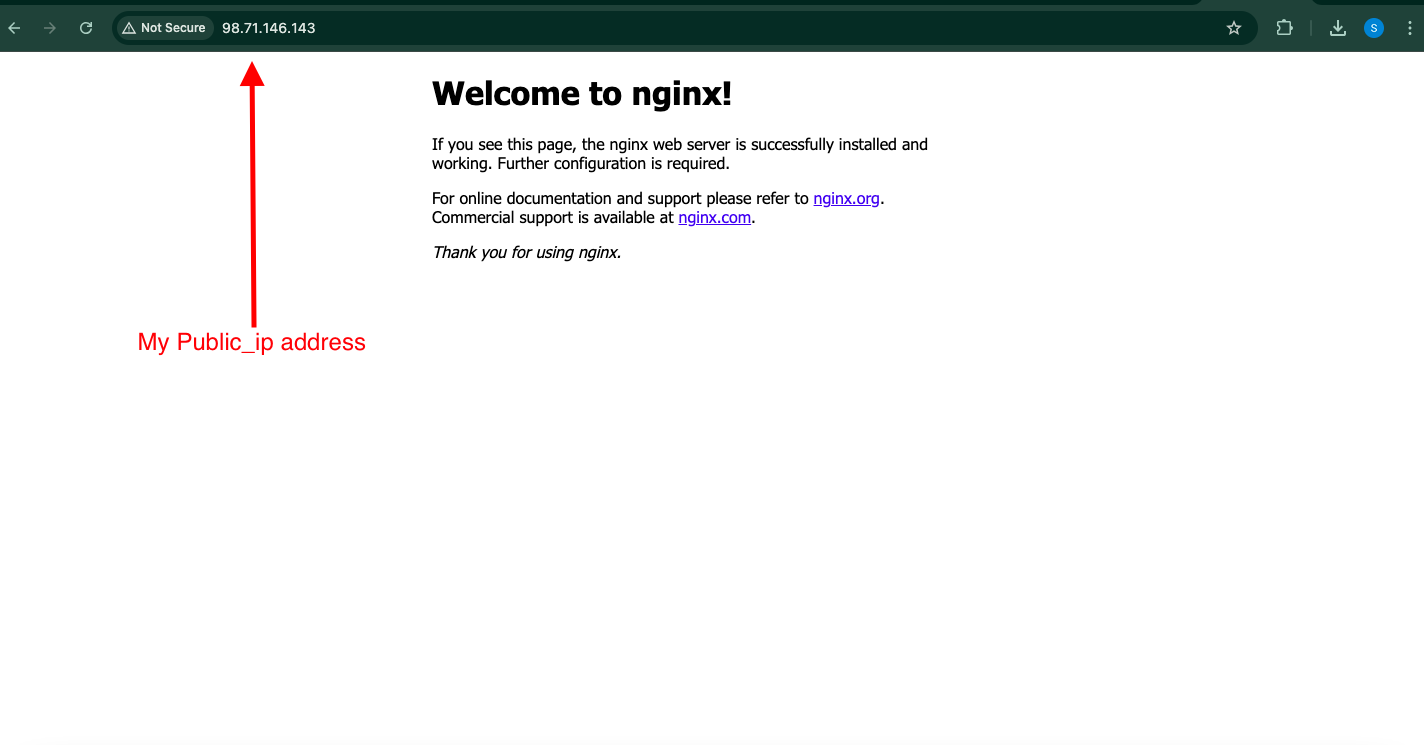
Step 9: Verify Connectivity
- Run a few commands on the connected VM to verify everything is set up as expected.
Consider setting up monitoring tools to observe the performance and scalability of the VMSS.
Conclusion
You have successfully set up a Linux Virtual Machine Scale Set, configured autoscaling, and connected to an individual instance. By following this guide, you can scale your application’s backend to handle different levels of demand seamlessly.
Subscribe to my newsletter
Read articles from Silias Odion directly inside your inbox. Subscribe to the newsletter, and don't miss out.
Written by
