Dockerizing Django- A Python Based Web-Framework
 Akash Sutar
Introduction
In the last post of the series, we saw a brief introduction to containerization and Docker. In this blog, we will see how to install Django- A Python-based web framework and run an application over it, and further, we will see how to dockerize the Django application and push it to GitHub.
What is Django?
Django is a popular open-source server-side web framework primarily focused on data-driven websites with commonly needed utilities in the platform. Django, built on Python, is suitable for front-end and back-end web development.
Process Workflow
We will follow the following steps to achieve the target of containerizing Django using Docker.
Install Django on AWS EC2 ubuntu instance.
Create an app on the Django project and see the output.
Install docker on an AWS EC2 ubuntu instance.
Dockerize the whole Django project
Push the whole code to GitHub Repo.
Create another instance pull the code from GitHub and run the container to see if the same application can be fetched.
Django Installation
Login to AWS EC2 instance. Create a new folder as below
mkdir Django_Dockerization_ProjectCreating a virtual environment to install Django using pip3. It is required to create a virtual env as directly installing the Django package using pip or pip3 might throw an error stating it is an externally managed environment. Also, other applications running on the server might fail.
 sudo apt install python3-venv  #install venv module
 python3 -m venv Django_Venv    # installing virtual env
 source Django_Venv/bin/activate # activating the Venv
Installing Django Package
pip3 install djangoOR it can also be installed using the requirements.txt file. The most common way to manage Python packages is by using a requirements or requirements.txt file. The requirements.txt file lists the packages your application uses. Let's create our requirements.txt file, add Django, and then install the library.
 echo "Django" >> requirements.txt
 pip3 install -r requirements.txt
Staring a new Django Project
django-admin startproject Django_Dockerization . # A new project named "Django_Dockerization" created
The project structure looks as follows
(Django_Venv) ubuntu@ip-172-31-36-89:~/Django_Dockerization_Project$ tree Django_Dockerization/ manage.py
Django_Dockerization/
├── __init__.py
├── asgi.py
├── settings.py
├── urls.py
└── wsgi.py
manage.py  [error opening dir]
Django_Dockerizationis considered the Python package for your project.init.pyis an empty file that functions to tell Python that this directory should be considered a package.settings.pycontains all of our settings or configurations.urls.pycontains the URLs within the project.asgi.pyandwsgi.pyserve as the entry point for our web servers depending on what type of server is deployed.The command-line utility
manage.pyis created in every Django project. It has the same function as django-admin. The following example shows how it could be used if you were inside the project folder and wanted to see the available subcommands.
Note: The tree command helps visualize the folder structure. if not installed, we can use the following command to install it first
apt install tree
Running the project
python3 manage.py runserver
Error:

python3 manage.py migrate
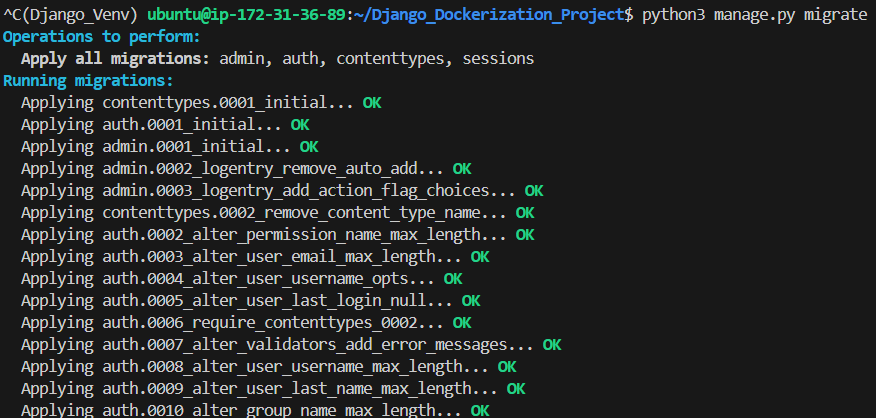
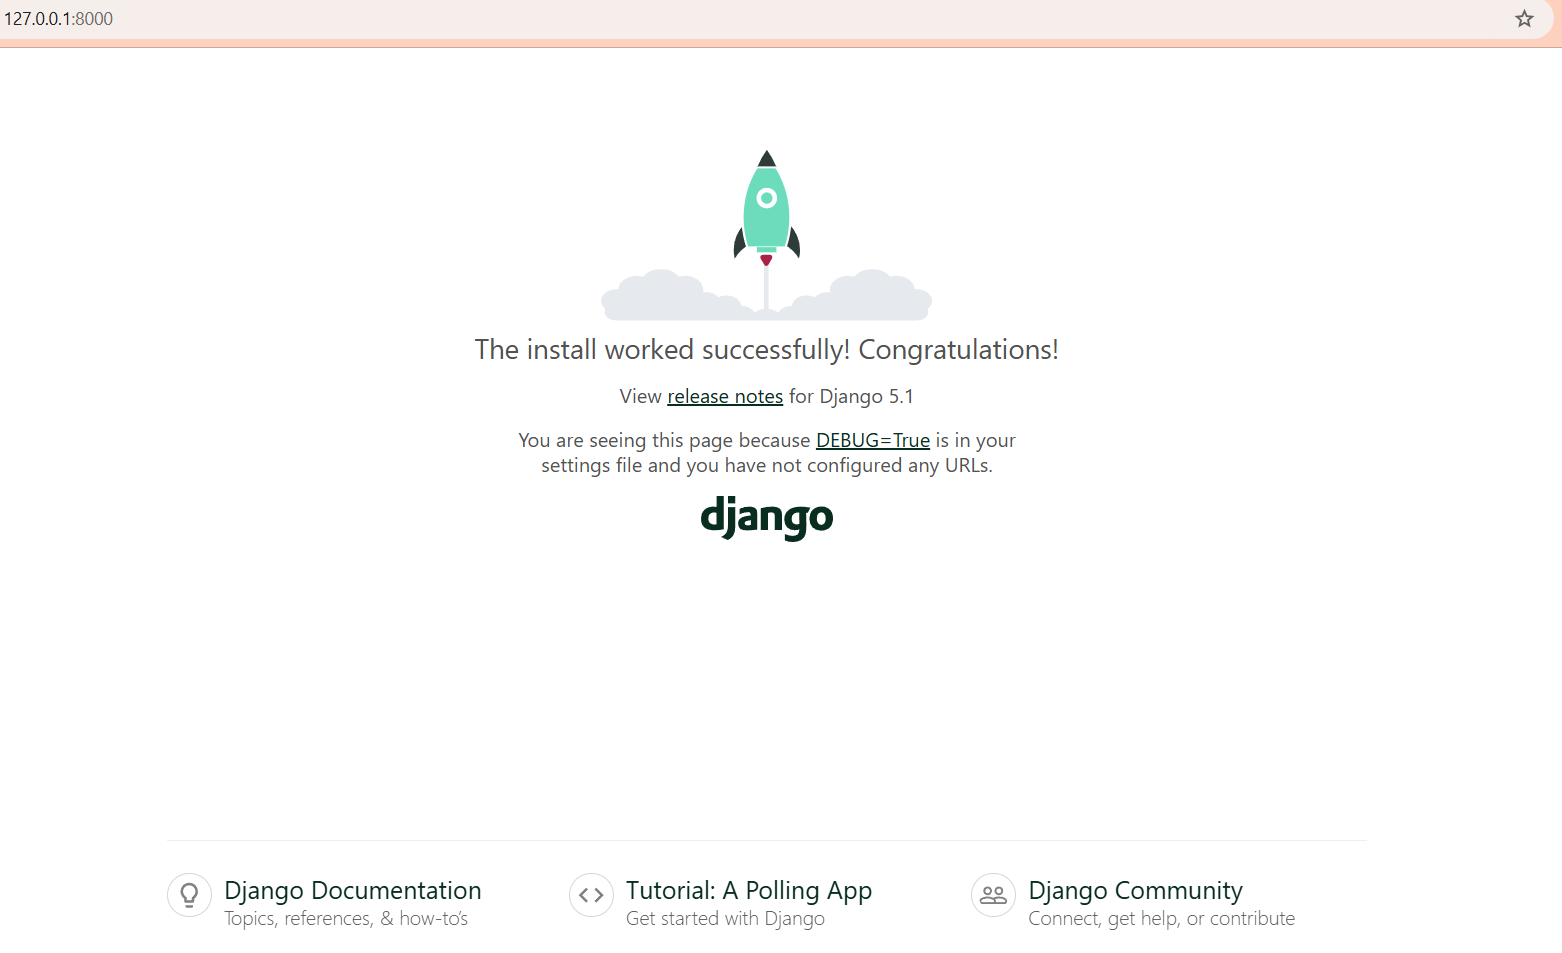
Rerunning the command

Project ran successfully!!!
Creating a Django App
As the Django framework installation is successful, now let’s create an app.
python3 manage.py startapp app1
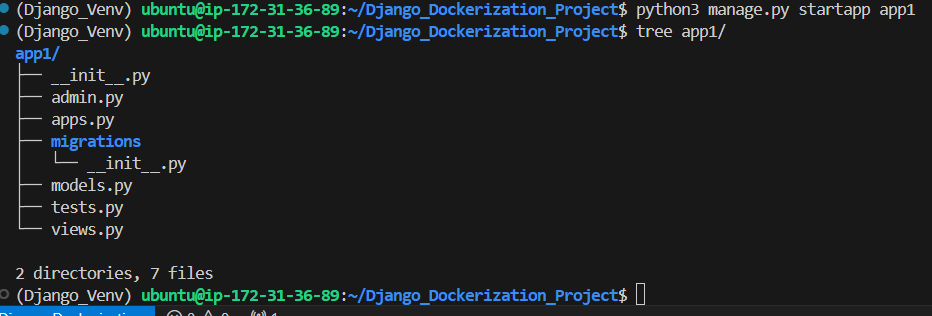
With this command, Django creates the required folders and files, and the following structure should now be visible.
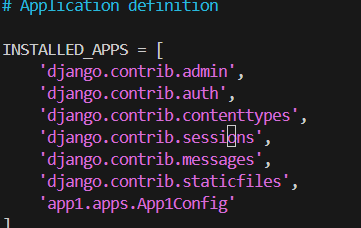
Register/Configure the app with the project.
Because apps and projects are separate in Django, we must register our app with the project. This is done by updating the
INSTALLED_APPSvariable inside settings.py for the project, adding a reference to the config class for the app. The config class is found in apps.py inside the app directory, and is the same name as the project. In our example, the class will be namedApp1Config
Navigate inside the main project folder and vi settings.py
Creating a custom webpage inside app1 dir which will be hosted on browsing.

 <!-- home/templates/home/index.html -->
 <!DOCTYPE html>
 <html lang="en">
 <head>
     <meta charset="UTF-8">
     <title>Project Details on Django Dcokerization</title>
 </head>
 <body>
     <h1>Welcome to the Django Dcokerization Project Page</h1>
     <p>This project demonstrates containerizing a Django application using Docker.</p>
 </body>
 </html>
Creating a
ViewViews determine what information should be returned to the user. Views are functions or classes that execute code in response to the user request. They return HTML or other types of responses, such as a 404 error.
Navigate to the app dir i.e.
app1in our case and editviews.py
 from django.shortcuts import render

 # Create your views here.
 def index(request):
     return render(request, 'home/index.html')
Setting up the URLs Ampping to this view

# ~/Django_Dockerization_Project/app1/urls.py

from django.urls import path
from . import views

urlpatterns = [
    path('', views.index, name='index'),  # Maps the root URL to the index view
]
Then, include this
urls.pyin the main project’surls.pyfile so Django knows about it. In our main project folder (e.g.,~/Django_Dockerization_Project/our_project/urls.py), add:
from django.contrib import admin
from django.urls import path, include

urlpatterns = [
    path('admin/', admin.site.urls),
    path('', include('app1.urls')),
]
Testing the application
Error: Following error occurevirtuald because virtaul env is not activated

source Django_Venv/bin/avtivate ## to activate the Virtaul Env
Rerunning
python3 manage.py runserver

The custom page is visible!!!

We have successfully completed our first task of setting up Django Framework and have deployed one application as well!!
Dockerizing the Django
Now, let’s containerize the whole system using docker. We will need docker to be installed on the instance.
Link to install docker: https://hashnode.com/post/cm36w7v98000209l612e31ac4
Connecting to the EC2 instance and make sure we are in virtual env, that is Venv is activated.

source Venv/bin/activate
It is required to list all the Django dependencies in requirements.txt. This file will be used by Docker to install the exact versions of the packages required for our Django app.

pip3 freeze > requirements.txt
Creating a Dockerfile
## Using official ubuntu base image
FROM Ubuntu:latest

##setting up the working dir
WORKDIR /app

##Copying the Django Project Files
COPY . /app/

## Installing python and pip3
RUN apt update -y && \
    apt-get install -y python3 python3-pip && \
    apt-get clean && \
    pip3 install -r requirements.txt

ENTRYPOINT [ "python3" ]
CMD [ "manage.py","runserver", "0.0.0.0:8000" ]
Building a docker image from this Dockerfile
docker build -t django_app .
Make sure the Dockerfile is provided with the execute permission
chmod +x Dockerfile
Build failed with following error:
33.31 error: externally-managed-environment
It means in docker also virtual environment needs to be setup
updated dockderfile:
## Using official ubuntu base image
FROM ubuntu:latest

##setting up the working dir
WORKDIR /app

##Copying the Django Project Files
COPY . /app/

## Installing python and pip3
RUN apt-get update -y && \
    apt-get install -y python3 python3-pip python3-venv && \
    apt-get clean

##creating a virtual env
RUN python3 -m venv /app/venv

##installing dependencies inside virtual env
RUN /app/venv/bin/pip3 install -r requirements.txt

ENTRYPOINT [ "/app/venv/bin/python3" ]
CMD [ "manage.py","runserver", "0.0.0.0:8000" ]
Rerunning the build:
#Error:
 unable to flush /var/lib/dpkg/updates/tmp.i after padding: No space left on device
24.68 E: Sub-process /usr/bin/dpkg returned an error code (2)
------
Dockerfile:11
--------------------
  10 |     ## Installing python and pip3
  11 | >>> RUN apt-get update -y && \
  12 | >>>     apt-get install -y python3 python3-pip python3-venv && \
  13 | >>>     apt-get clean
  14 |
--------------------
ERROR: failed to solve: process "/bin/sh -c apt-get update -y &&     apt-get install -y python3 python3-pip python3-venv &&     apt-get clean" did not complete successfully: exit code: 100
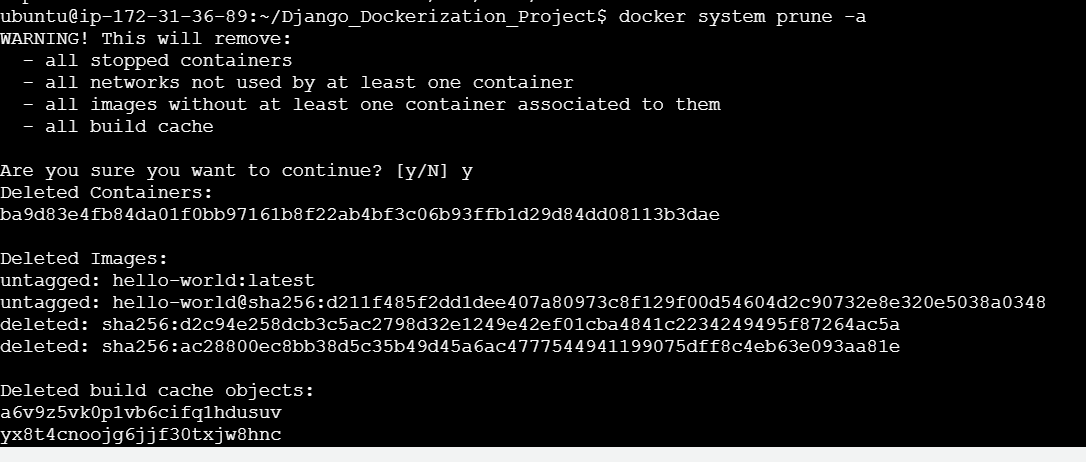
The build has failed again. This time it is because of the disk space is full.
To clear off the space, i used following command which clears all images conatiners not in use
docker system prune -a
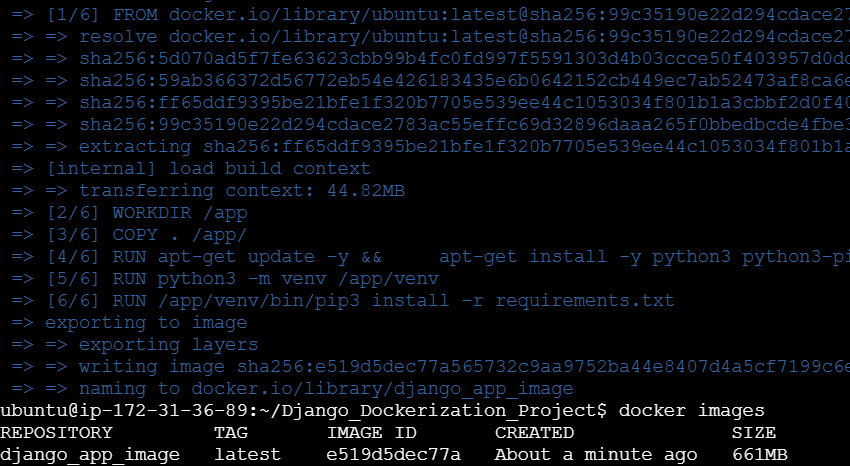
Rerunning the build:
The complete project files have been shared on a git hub repository, anyone can access and try creating an image using the Dockerfile on your own instance and further run a conatiner using the image.
Let’s see how we can pull the code from git on another instance and create an image and further run the application.
Login to the new instance and install git
 sudo apt update -y
 sudo apt install git -y
Install Docker
sudo apt install docker.ioClone the repository
 git clone https://github.com/sutarakash2411/Django_App_Containerization.git\
 cd Django_App_Containerization
Build an image using the Dockderfile
docker build -t demo_image .

Run a container using created image
docker run -it -p 8000:8000 demo_image

- Verify if the application is running by browsing
htttp://<server_ip>:8000

Summary:
We have successfully dockerized a Django Framework in this project. Django- a Python based application development framework was iinsatalled and further conatinerized using docker. Further, it was pushed to a GitHub repository so that all other users can clone the code and create an image directly on their own instance and run the application.
Reference Links
Subscribe to my newsletter
Read articles from Akash Sutar directly inside your inbox. Subscribe to the newsletter, and don't miss out.
Written by
