Securing Windows 365 virtual desktops
 Lukas Rottach
Today, we will look at some security features of Windows 365, specifically focusing on information protection and how to prevent sensitive data from being leaked.
The goal of this article is to provide an overview of some Windows 365 security features, how they work, and how they should be configured.
Please keep in mind that all the features described in this article also work for your Azure Virtual Desktop or Microsoft DevBox Environment.
I won't cover solutions like Conditional Access in this blog or deploying your CloudPCs using an Azure Network Connection (ANC) to place your Windows 365 CloudPCs behind a firewall or proxy. We might discuss these topics in another post.
Foreword
To be honest, it might not always be practical or necessary to enable all of these security features right out of the box without thinking about it. Many of these features can significantly affect the user experience and kill your users productivity. It's important to consider the specific needs of your organization or use case before deciding which features to activate.
For instance, if your primary goal is to provide secure environments for confidential desktops and applications, or if you're using Windows 365 to manage access to highly sensitive data, then enabling certain security features becomes crucial. In such scenarios, these features can help protect against data breaches and unauthorized access, ensuring that sensitive information remains secure. Therefore, it's advisable to evaluate your security requirements carefully and implement these features strategically to balance security with usability.
Session Timeouts
The most straightforward method to increase the security of your virtual desktop infrastructure and reduce the risk of unauthorized access is by configuring short session timeouts. This approach ensures that if a user steps away from their device - be it a PC, iPad, or any other device used to access their virtual desktop - and forgets to lock it, the session will automatically close after a predetermined period of inactivity. By doing so, you prevent potential unauthorized users from gaining access to sensitive information or applications left open on the screen. Implementing short session timeouts is a simple yet effective security measure that can significantly enhance the overall protection of your virtual desktop environment.
Side note: On Windows 365 Frontline, implementing short session timeouts can be particularly beneficial as it helps optimize resource allocation. By automatically closing inactive sessions, you ensure that resources are efficiently utilized and Frontline seats are available for other users.
Read more in this documentation: https://learn.microsoft.com/en-us/windows-365/enterprise/frontline-cloud-pc-session-time-limits
But watch your steps
It is important to determine an appropriate timeout duration that balances security needs with user convenience, ensuring that legitimate users are not frequently interrupted while still maintaining a secure environment. But we will think about that in more detail later.
Implementation
The most easiest thing would be to just turn on the policy Set time limit for active but idle Remote Desktop Services sessions, set your idle session limit and apply it to your Windows 365 CloudPCs. By default, Windows 365 ships with an idle session limit of two hours.
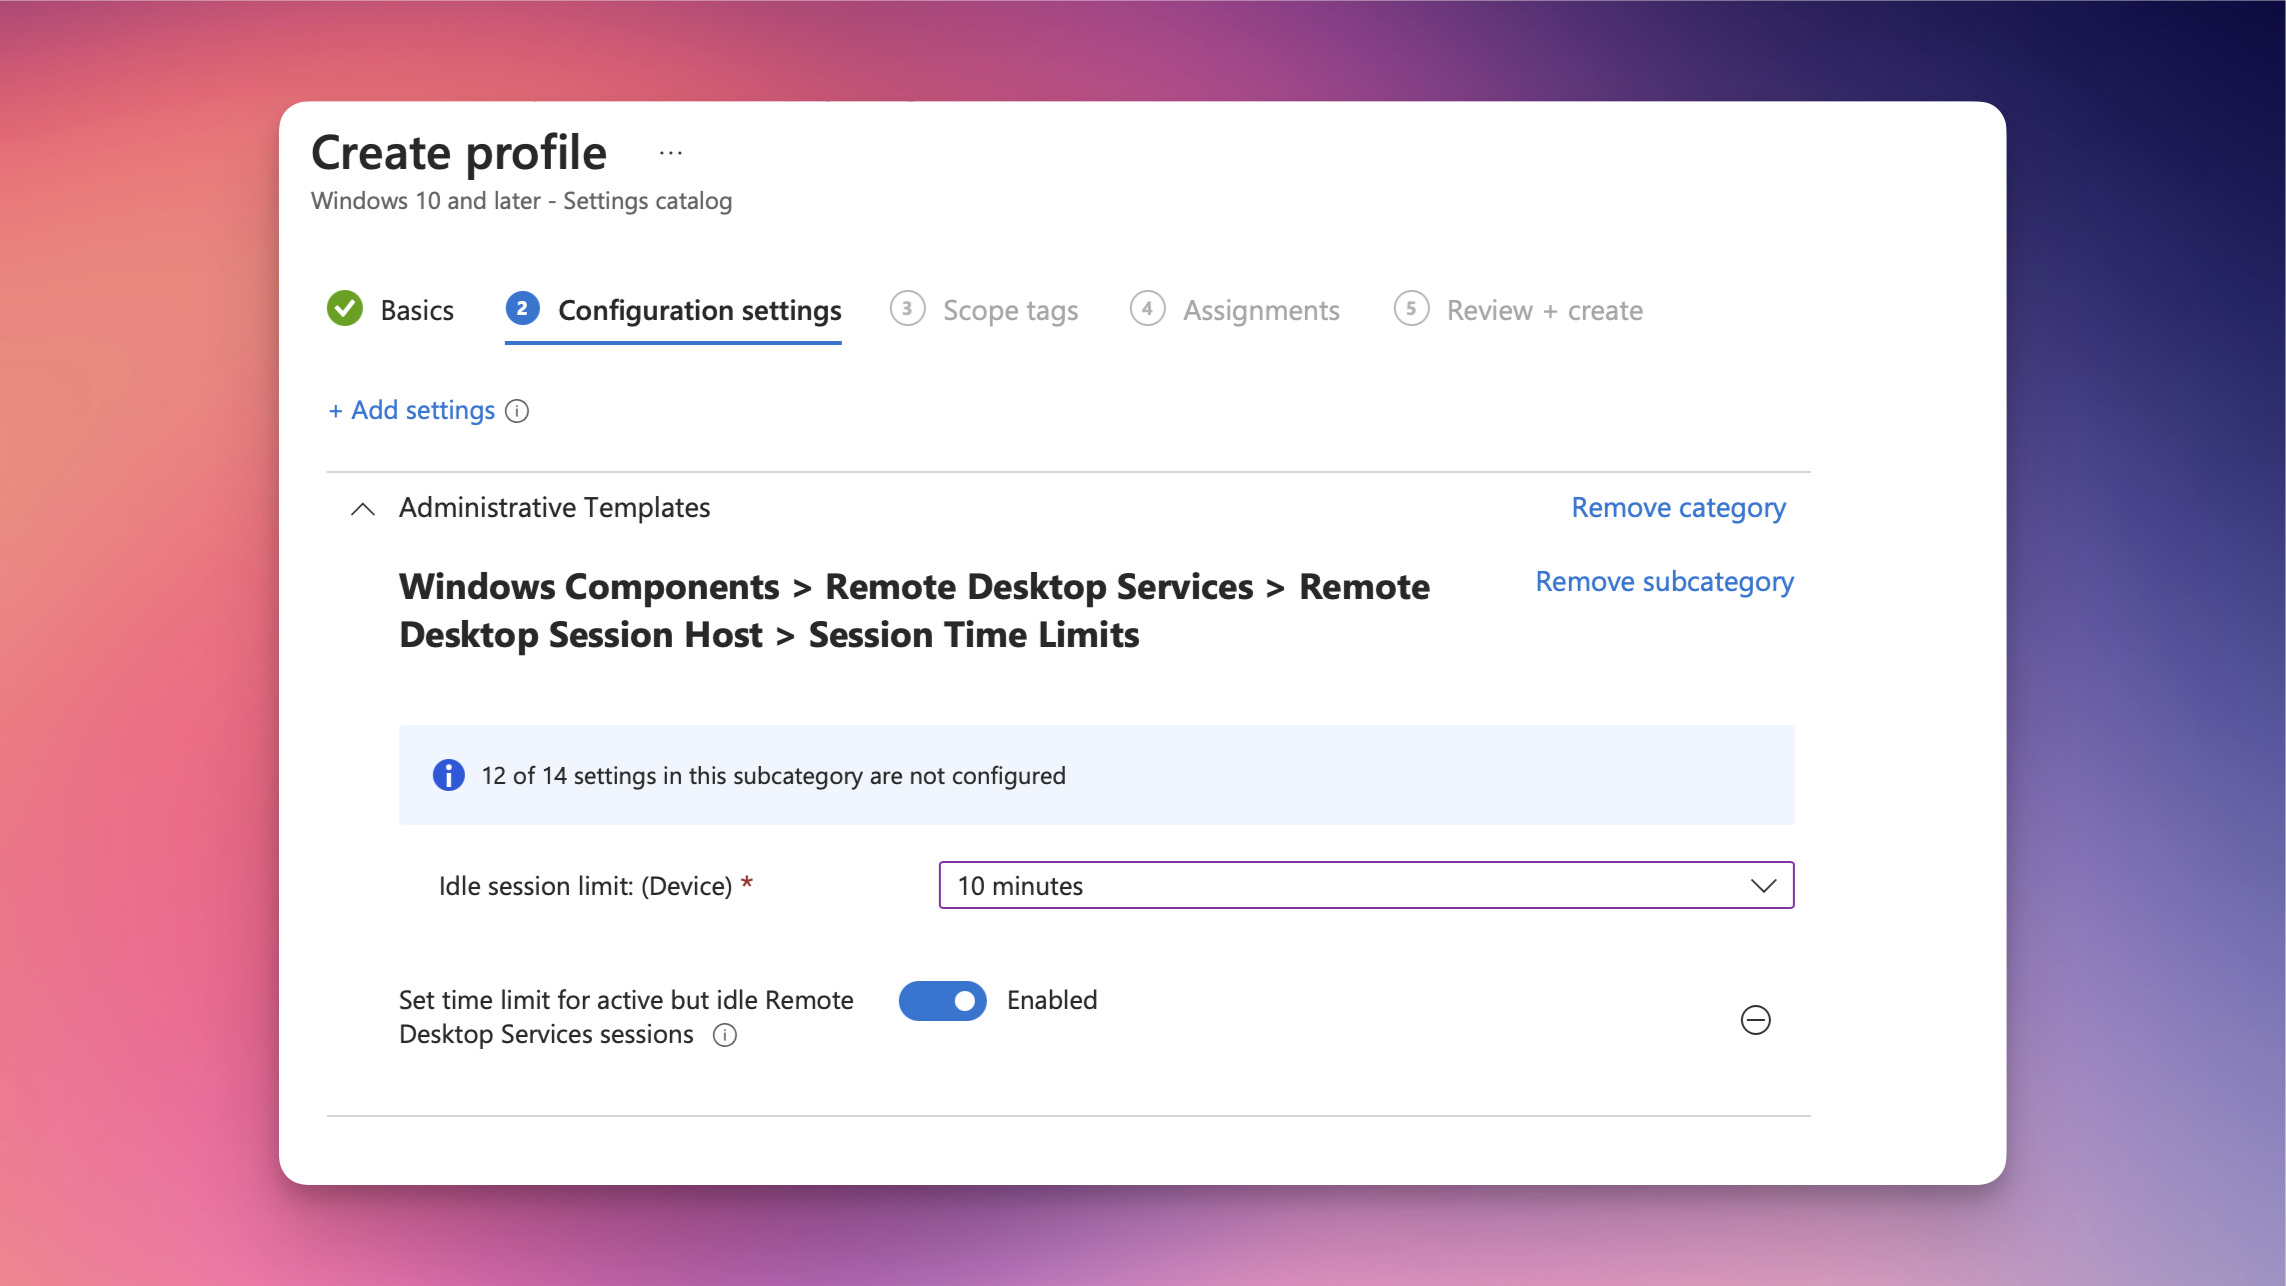
Using that policy, the session shuts down after the set period of inactivity. As I mentioned, this can be frustrating, especially with very short timeouts. For example, if you use a session limit of 10 minutes, it often happens that a user is writing an email on their local device or is focusing on a Teams Meeting. In these cases, the Windows 365 session disconnects in the background, requiring the user to reconnect.
But what if there were a way to secure the session by locking it but keeping it open, so the user doesn't have to reconnect every time? Let's explore this option.
Control session lock behavior
There's a relatively new policy available. Using this policy, administrators can control the session lock behavior for their virtual desktop environment.
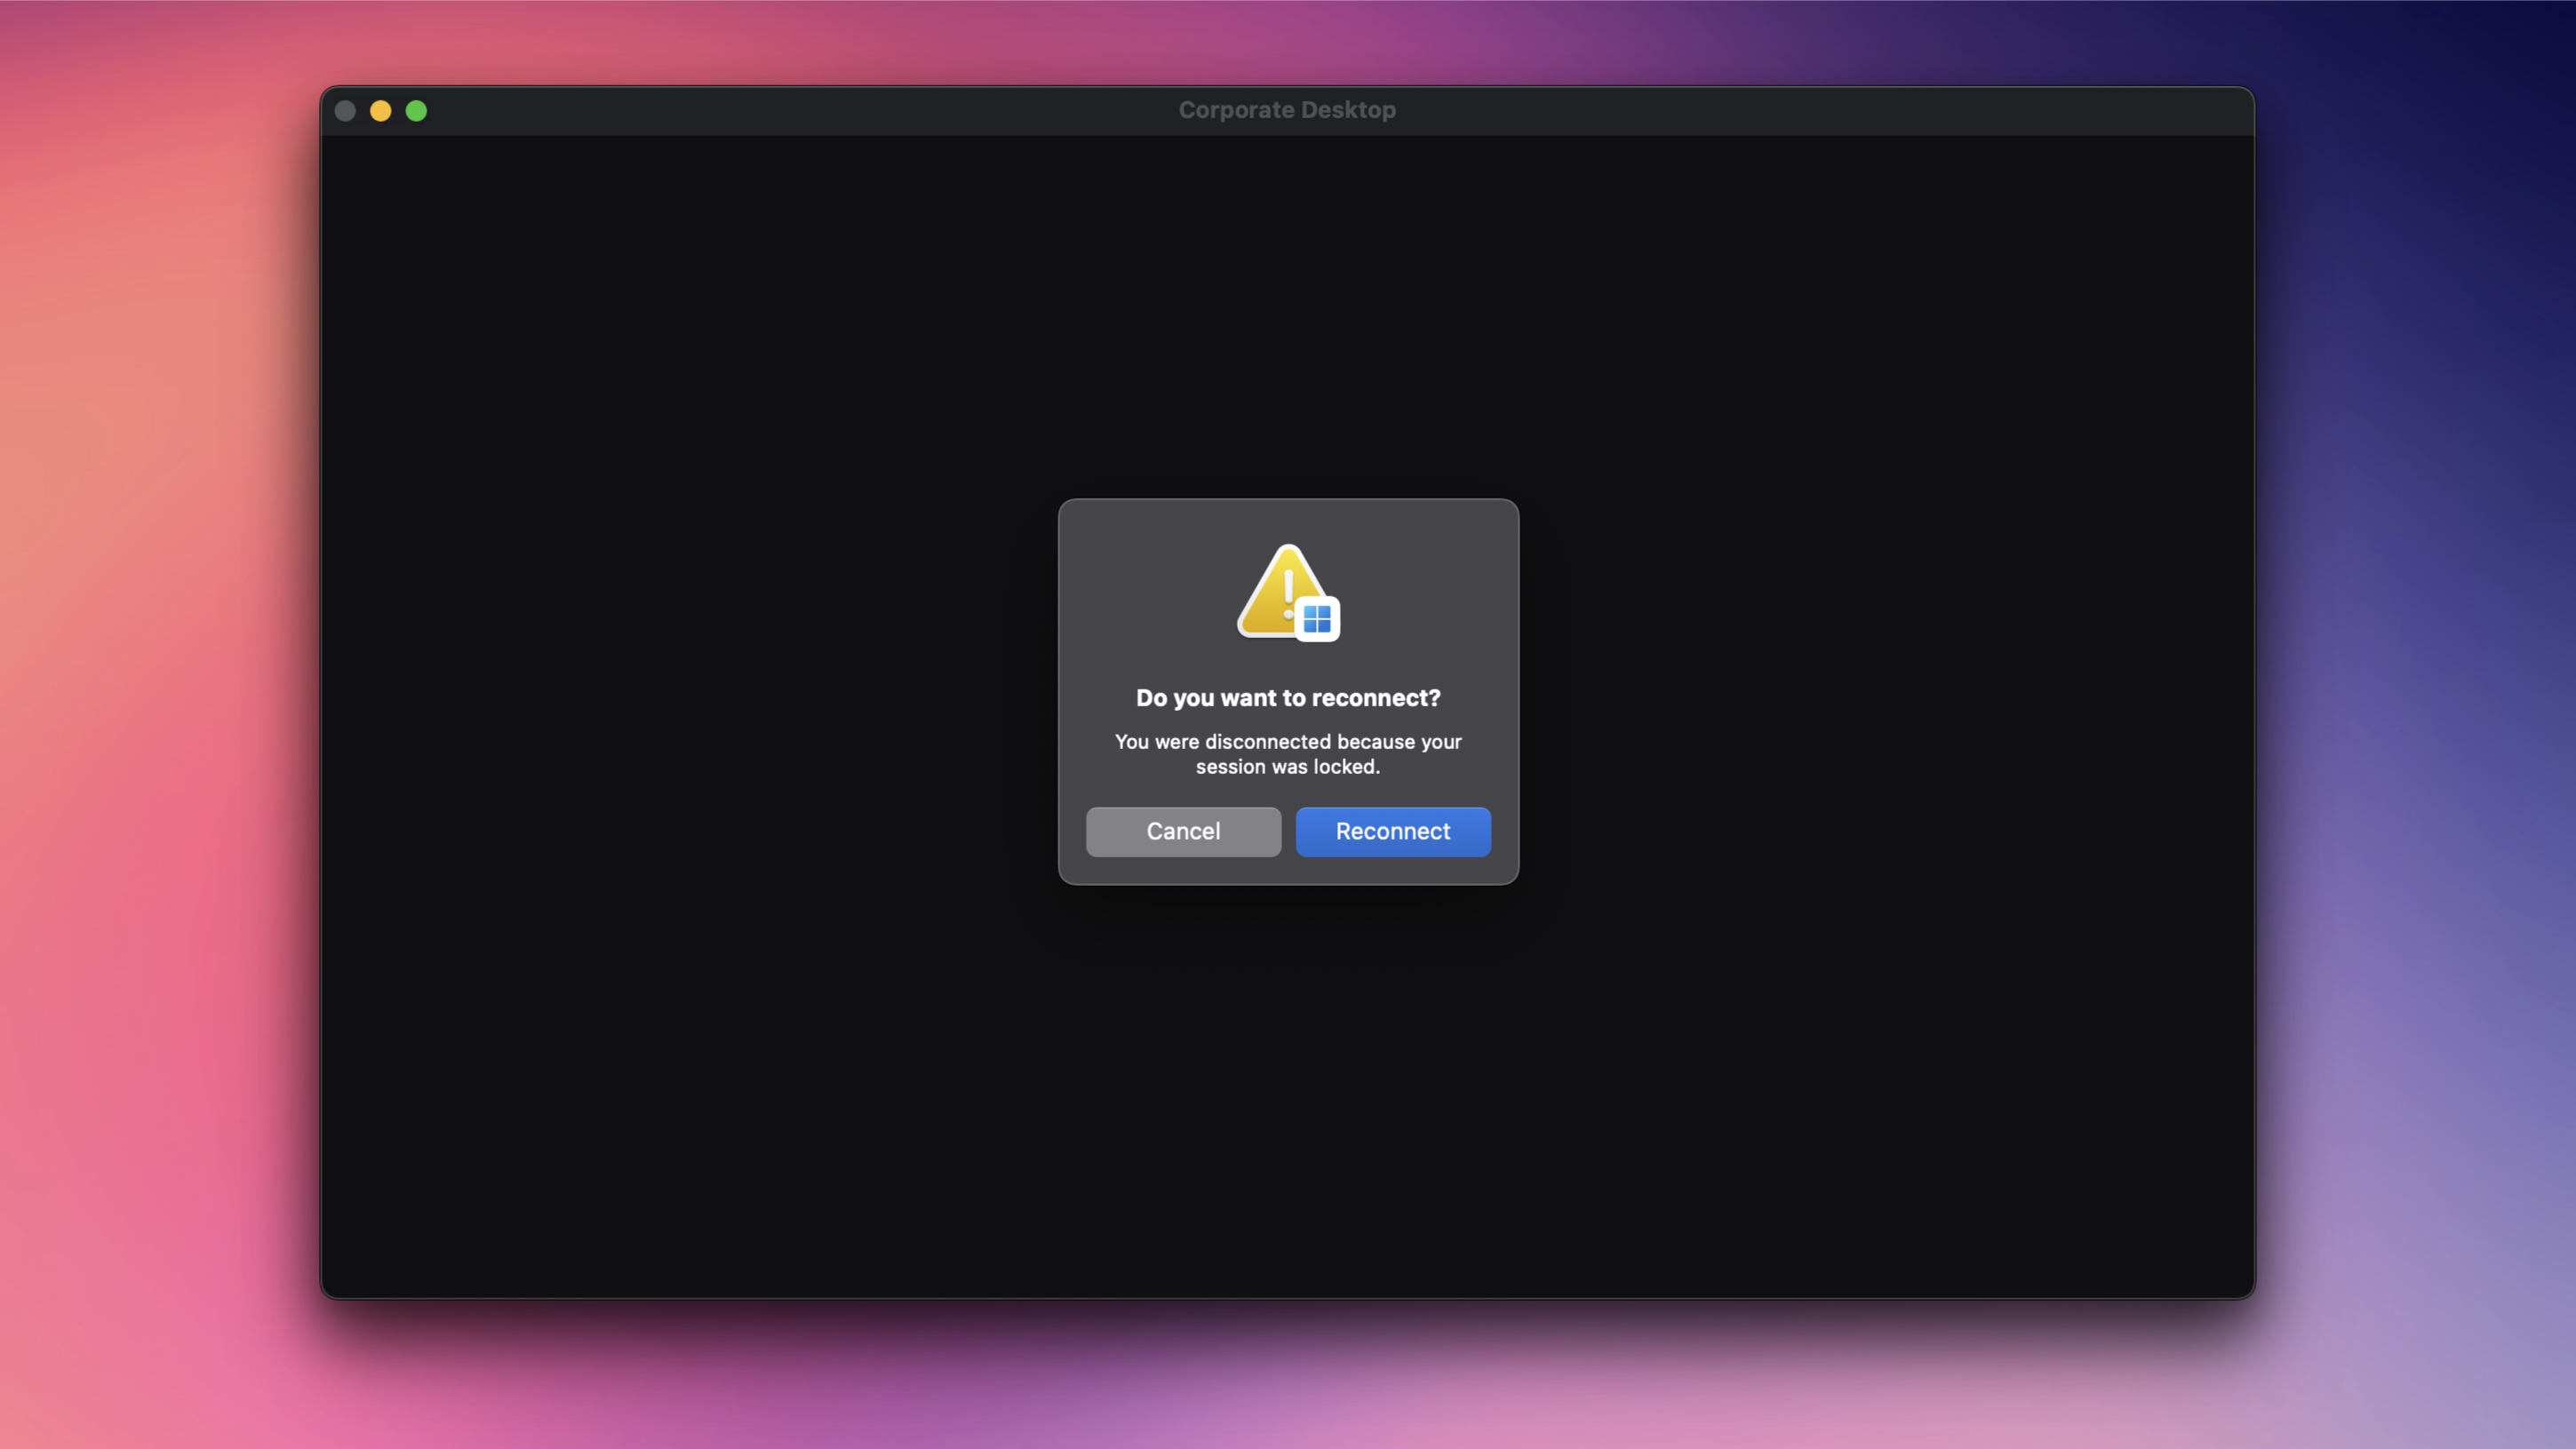
With this policy, you can choose whether a session is disconnected or if the remote lock screen is shown when a remote session is locked by a policy. By default, a remote session disconnects as soon as the CloudPC is locked and configured for Single Sign-On using Microsoft Entra ID. As mentioned earlier, reconnecting can be quite frustrating for an end user, depending on the type of work they do.
Image: Default behavior. Session gets locked as soon as the lock screen policy kicks in. Windows App tells you the exact reason, why your session was ended. In this case, because our session was locked.
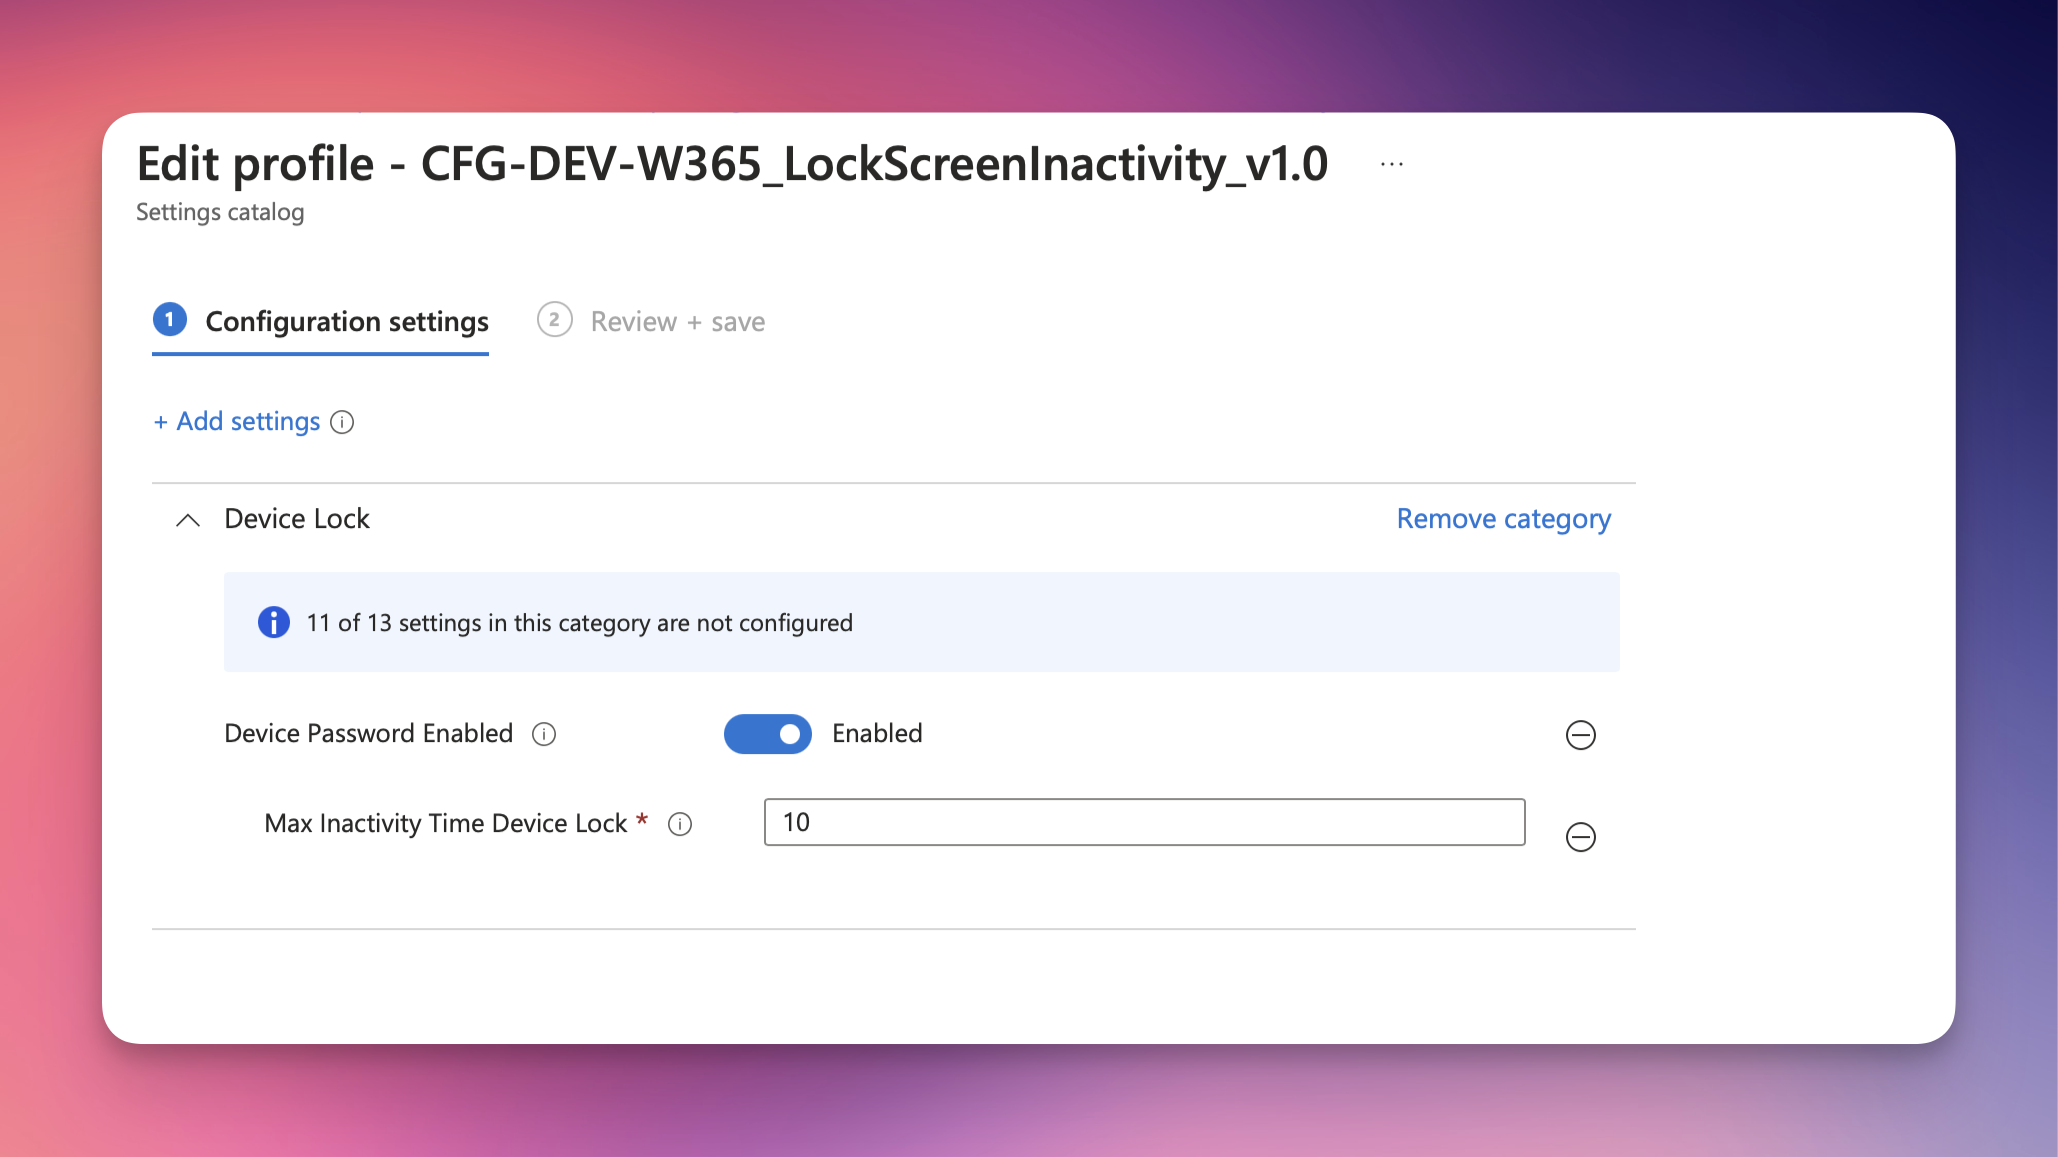
First, we will create a lock screen policy and set the Max Inactivity Time Device Lock to the desired value and apply it to your Windows 365 CloudPCs. This will ensure, that the session gets locked after the specified minutes of inactivity.
Next we will create a policy to configure the session lock behavior using the setting Disconnect remote session on lock for Microsoft identity platform authentication.
There are two different policies for Microsoft identity platform authentication and legacy authentication.
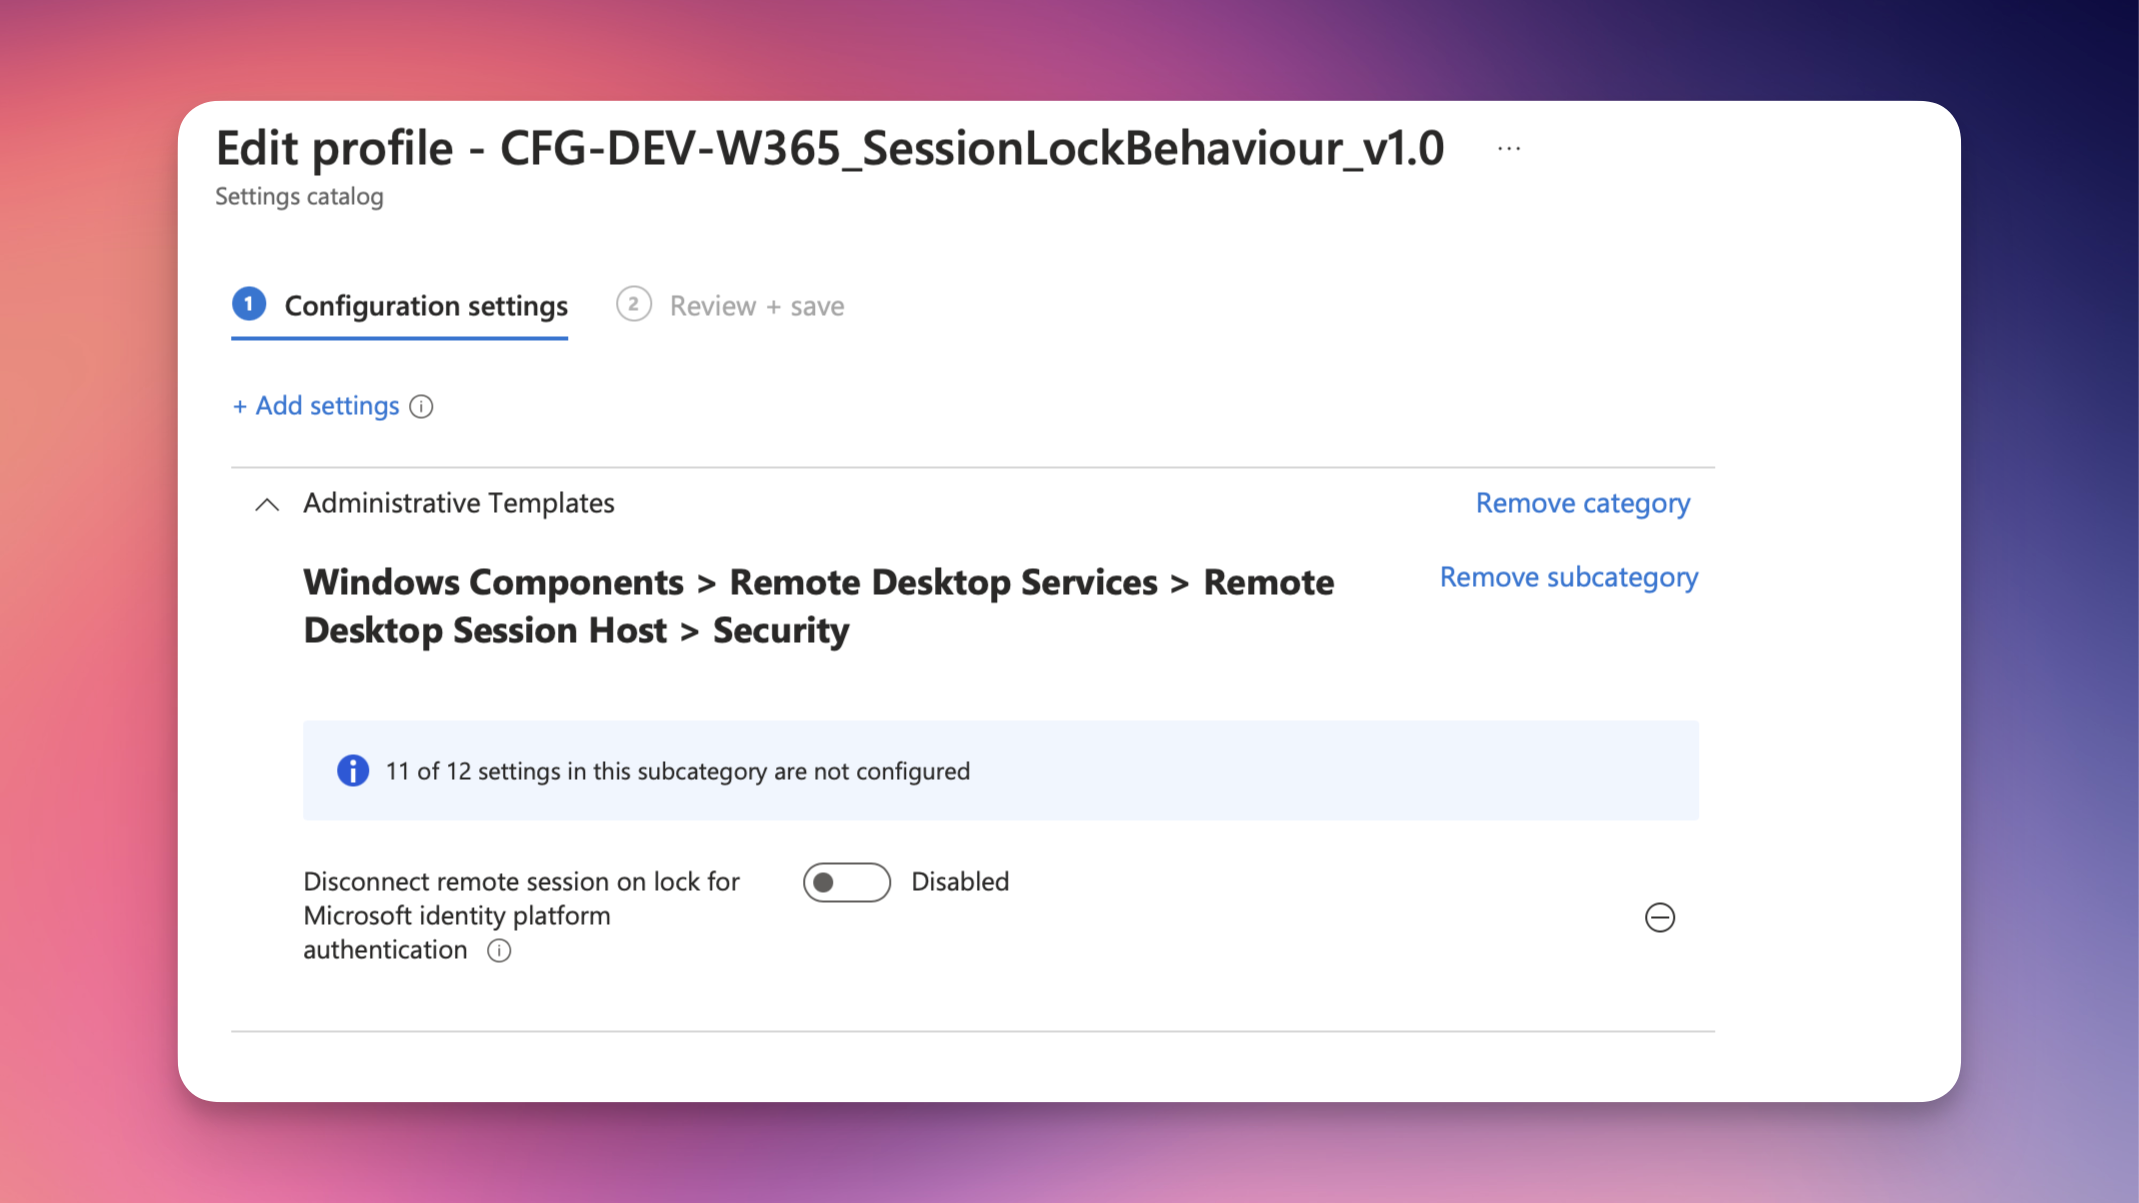
To disconnect the remote session when the session locks, toggle the switch to Enabled.
To show the remote lock screen when the session locks, toggle the switch to Disabled.
If we set this policy to disabled and apply it to our CloudPCs, the remote connection will no longer be disconnected as the screen gets locked (see screenshot below).
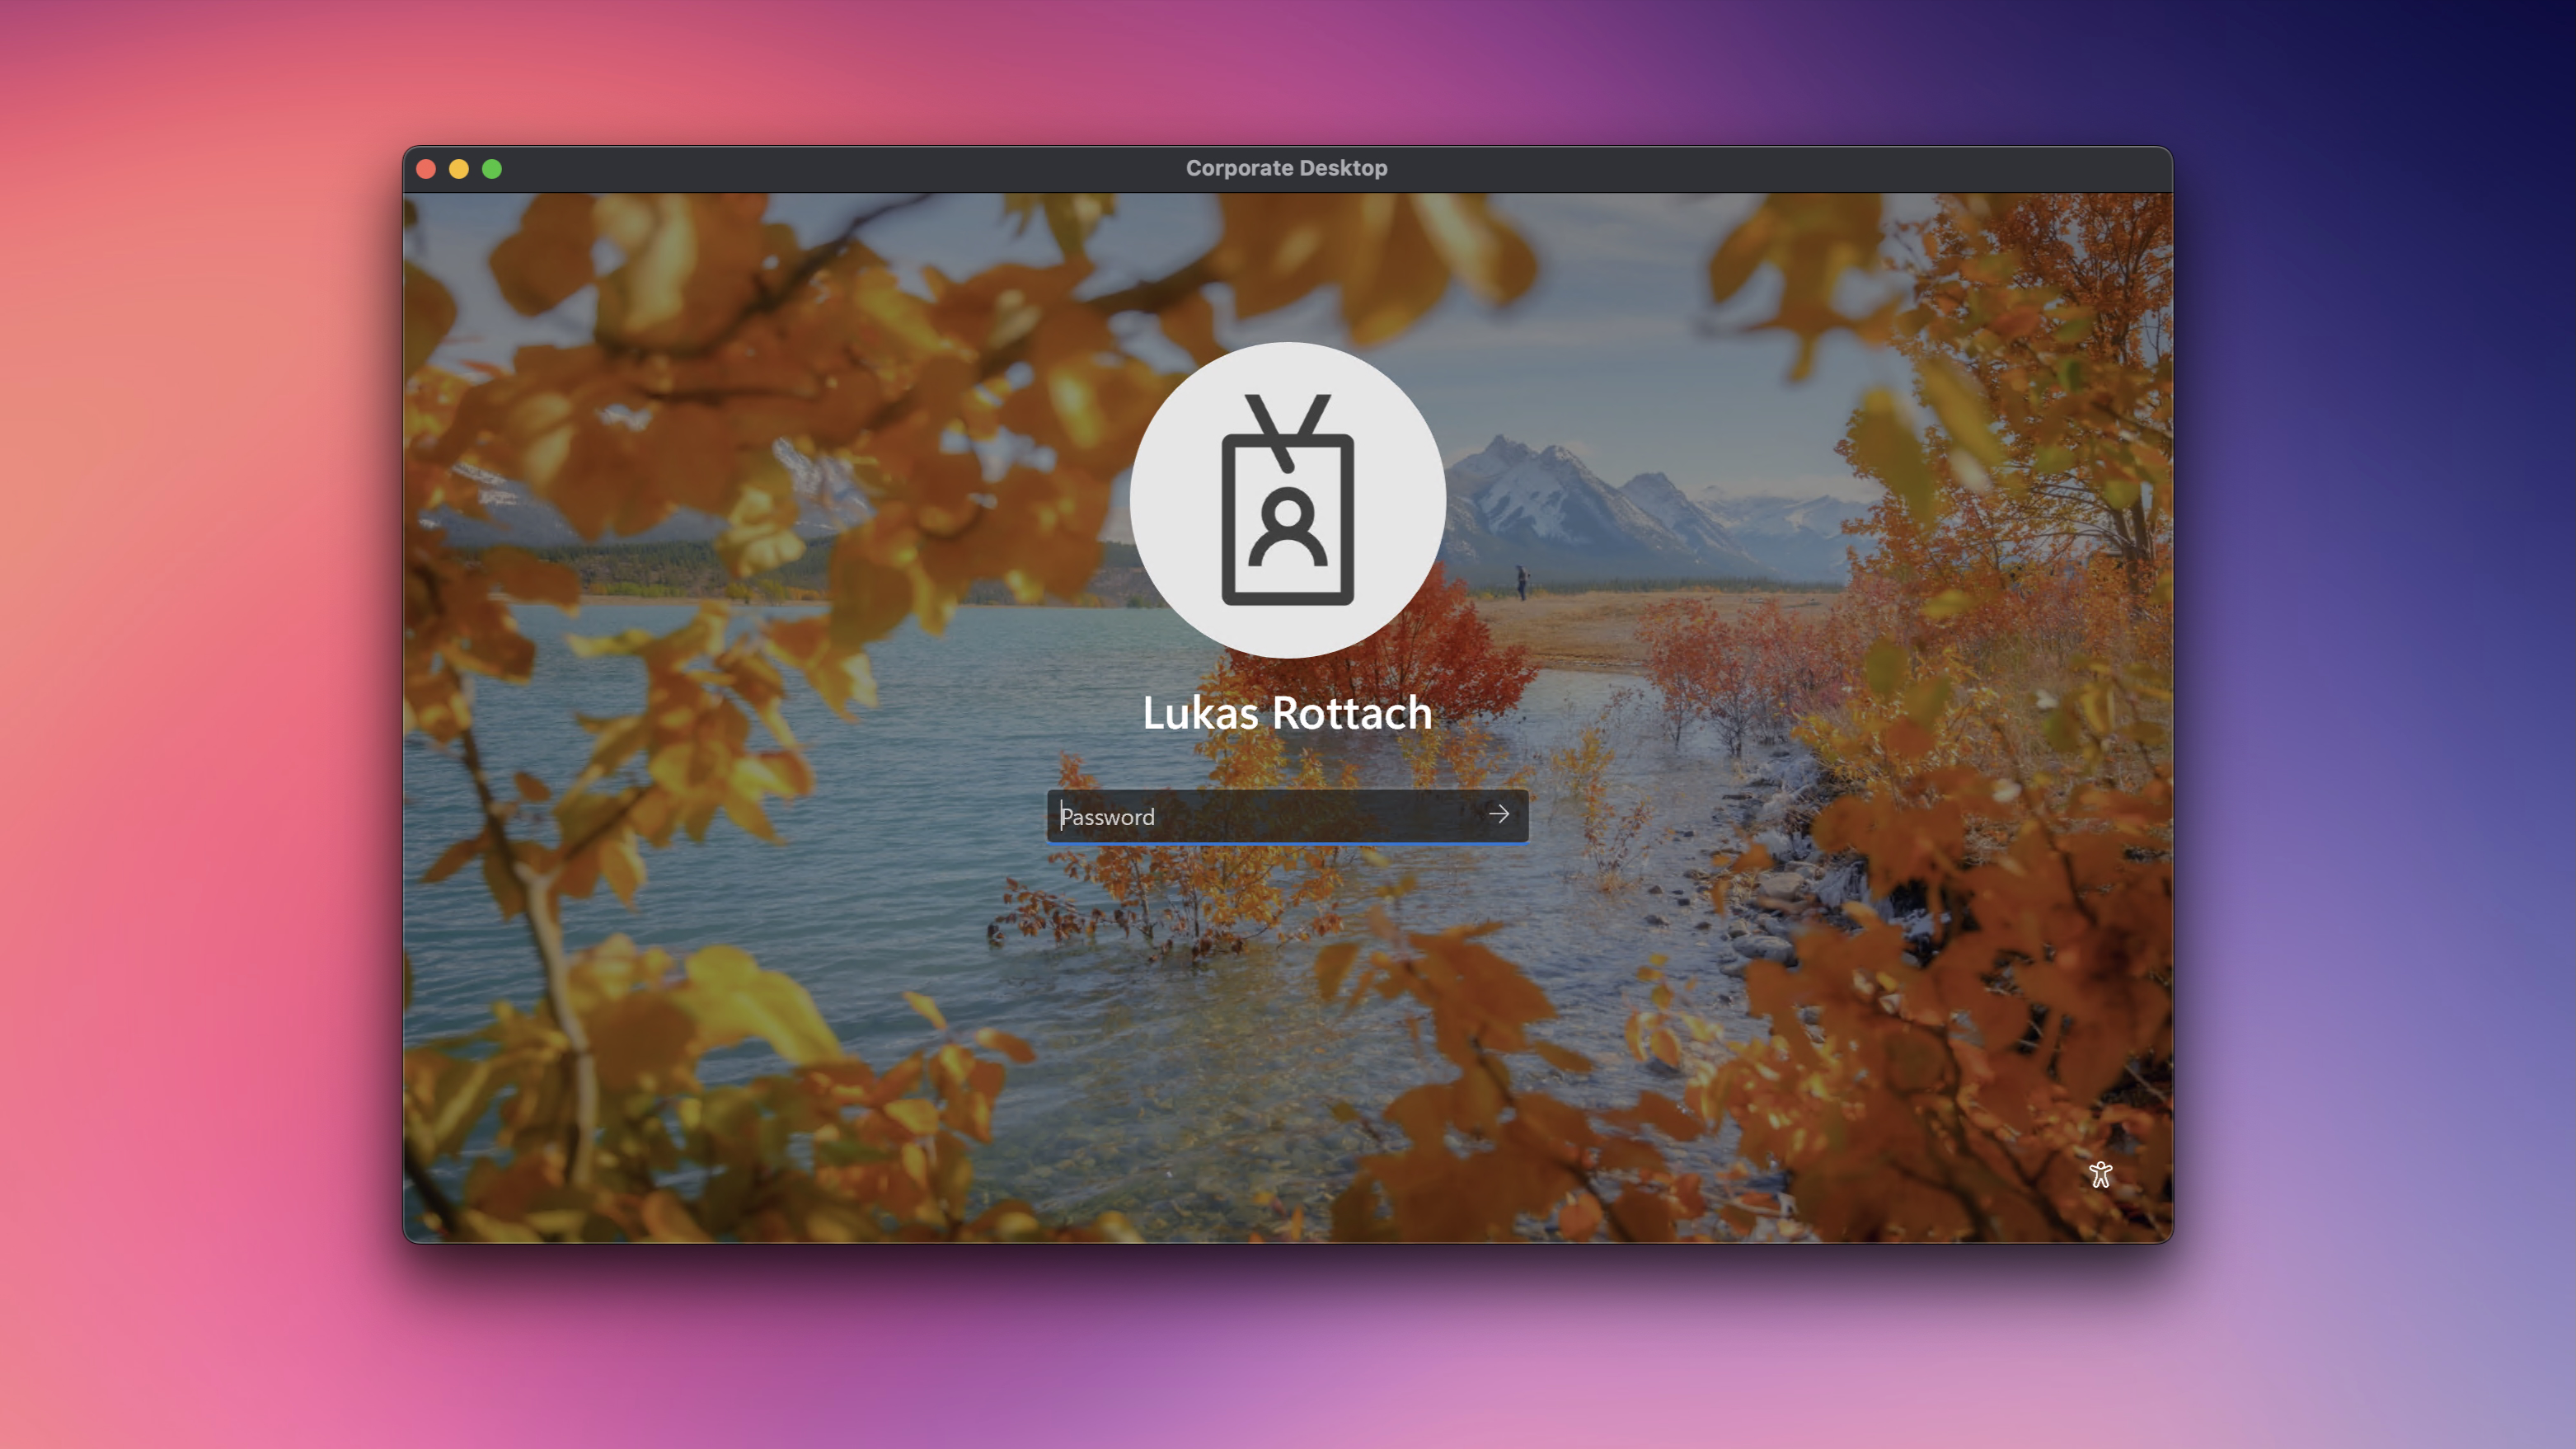
You just need to ensure that no existing idle session timeout or lock screen policies interfere with your setup.
I recommend you to think about the following. When used with single sign-on using Microsoft Entra ID, disconnecting the session provides the following benefits (quote from Microsoft Learn):
A consistent sign-in experience through Microsoft Entra ID when needed.
A single sign-on experience and reconnection without authentication prompt, when allowed by conditional access policies.
Support for password less authentication like passkeys and FIDO2 devices, contrary to the remote lock screen. Disconnecting the session is necessary to ensure full support of password less authentication.
Conditional access policies, including multifactor authentication and sign-in frequency, are reevaluated when the user reconnects to their session.
You can require multifactor authentication to return to the session and prevent users from unlocking with a simple username and password.
Source: https://learn.microsoft.com/en-us/azure/virtual-desktop/configure-session-lock-behavior?tabs=intune
In conclusion, I see this as a workaround to avoid ending the session every few minutes of inactivity. In my experience, most users find it more convenient to enter their password into an existing session than to reconnect each time.
Clipboard Redirection
Clipboard redirection in a Remote Desktop environment lets you transfer data between your local device and the remote session using the clipboard. This feature allows you to copy text, images, or files from your local machine and paste them into the remote desktop session, and vice versa. While clipboard redirection can boost productivity by making data transfer easy, it also poses a security risk. Sensitive information could accidentally or intentionally be moved out of the secure remote environment, leading to potential data breaches. Disabling clipboard redirection can be a wise security step, especially in places where data protection is crucial, as it prevents unauthorized data transfer and helps keep sensitive information safe.
Let’s dive in and disable clipboard redirection. In my case, I only want to restrict clipboard transfers from the server to my local client. This could make sense if you want to stop users from copying sensitive data out of the session to their local devices. Depending on your situation, it might also be wise to disable clipboard redirection in both directions to prevent users from copying data, like malware, to their CloudPC in a worst-case scenario.
Here I will create a new Intune policy using the settings catalog and choose the setting Restrict clipboard transfer from server to client. There are different options available to configure this policy:
Disable clipboard transfers from server to client
Allow plain text
Allow plain text and images
Allow plain text, images, and Rich Text Format
Allow plain text, images, Rich Text Format, and HTML
I want to disable the clipboard redirection completely, so I will choose Disable clipboard transfers from server to client.
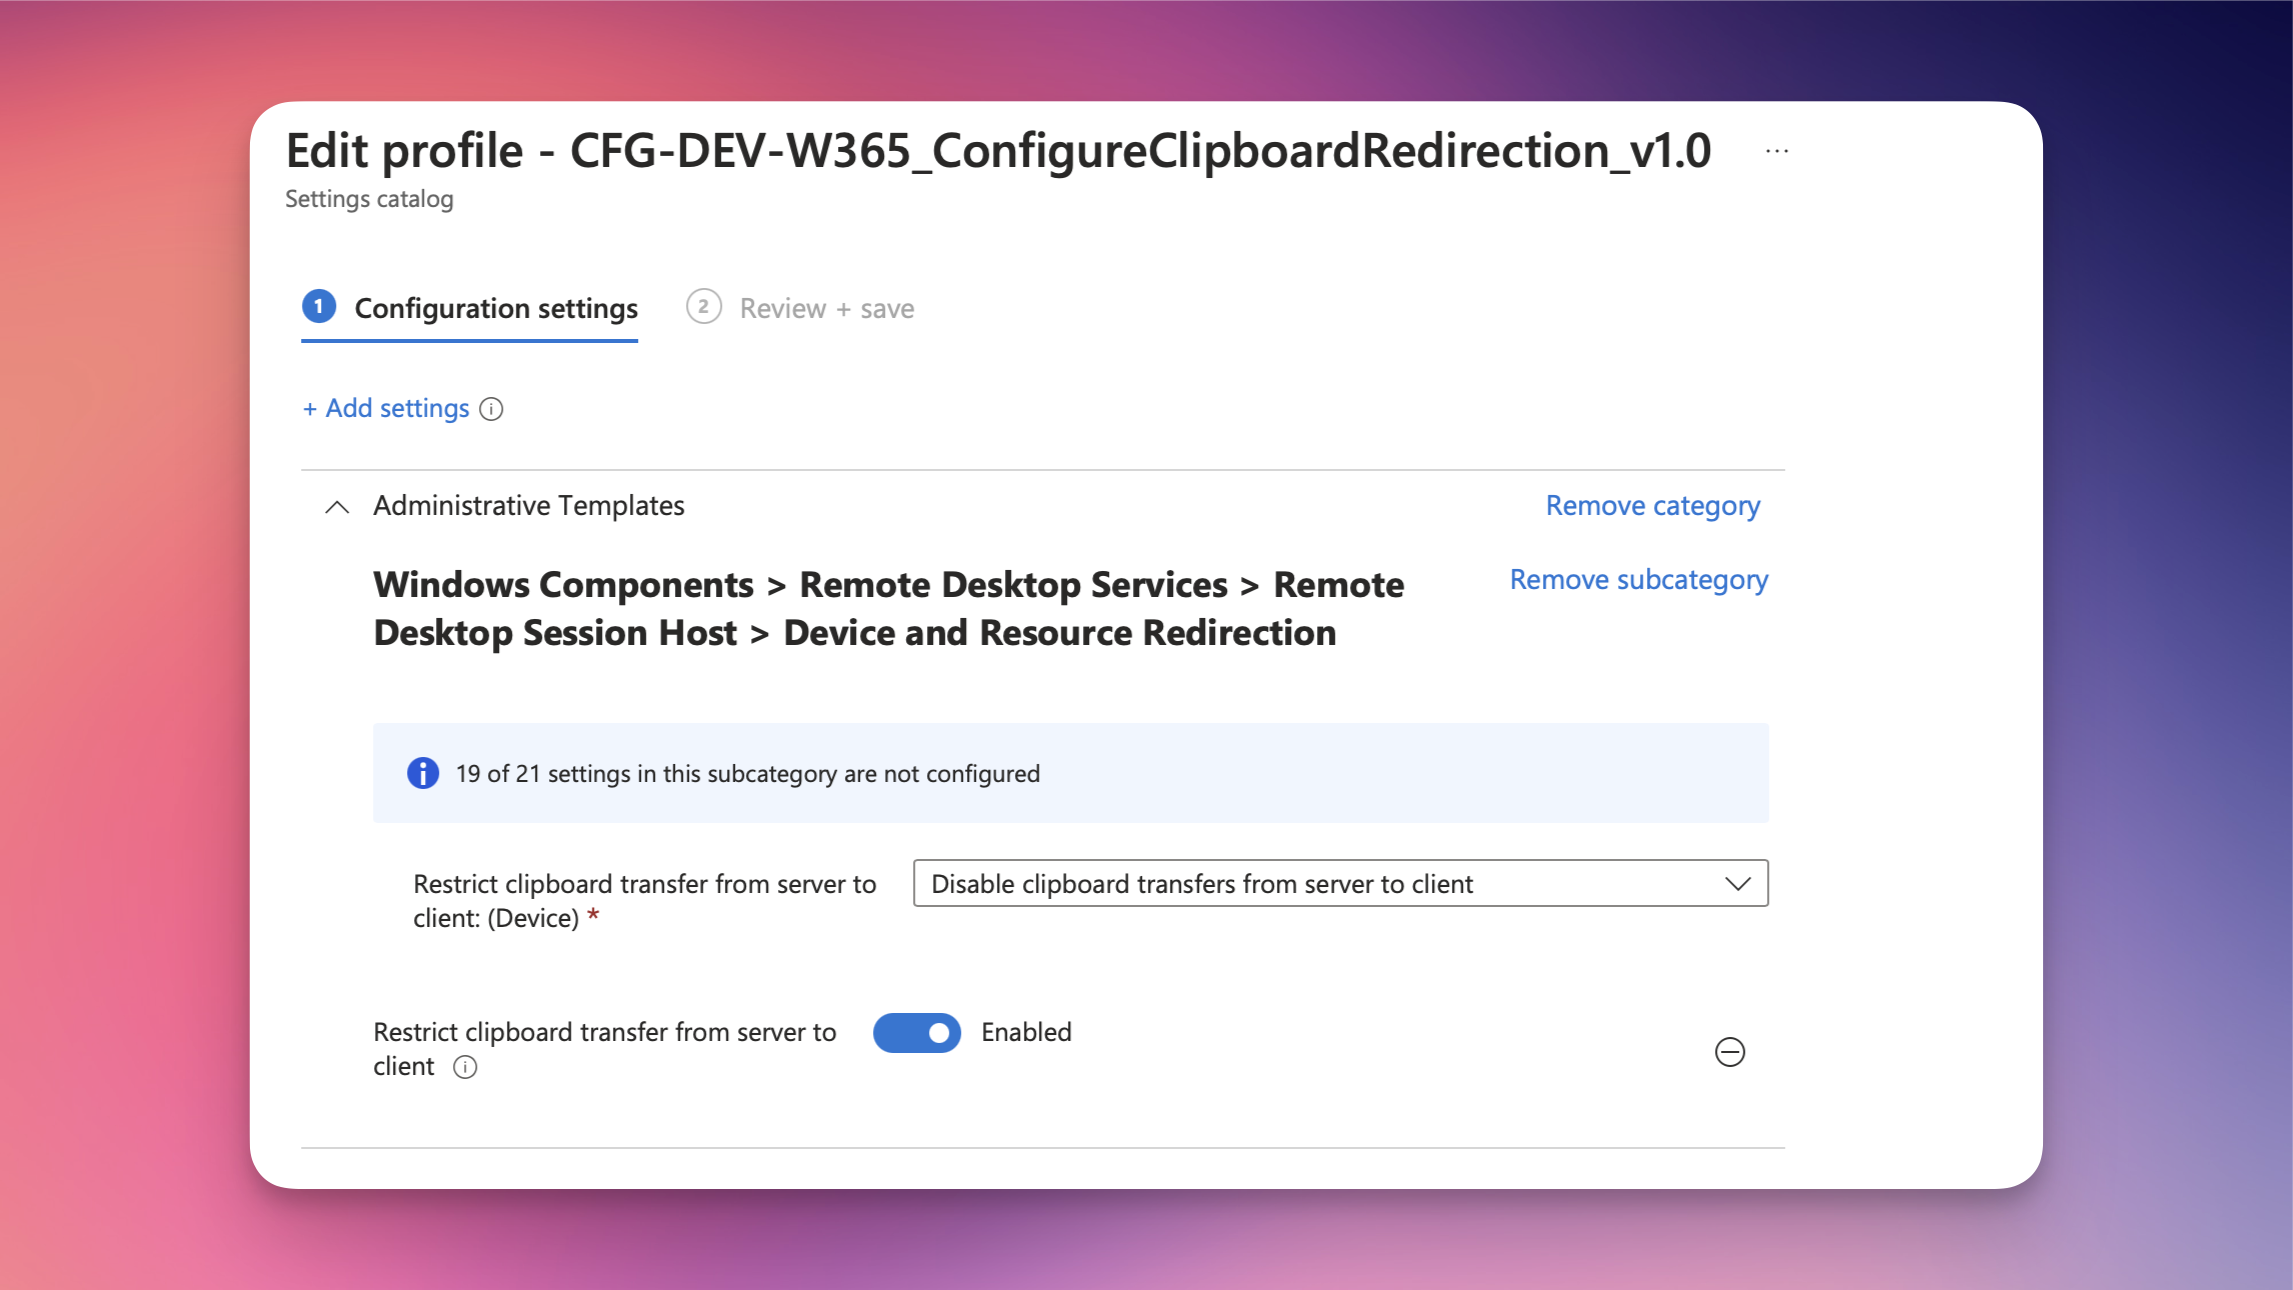
Disabling the clipboard redirection from server to client has a direct impact on the users experience. Make sure to evaluate this option and setup a clear communication to your users.
A similar recommendation would be to restrict printer redirection. Implement this if you don't want users to redirect their local printers into the remote session to print on unauthorized printers.
Screen Capture Protection
Screen capture protection is a security feature designed to prevent unauthorized capturing of the content displayed on a virtual desktop. This feature is particularly useful in environments where sensitive information is frequently accessed and needs to be safeguarded against data leaks. By enabling screen capture protection, organizations can mitigate the risk of sensitive data being captured through screenshots or screen recording software. This is especially important in industries such as finance, healthcare, and legal services, where the confidentiality of information is paramount. While it doesn't prevent physical methods of capturing screen content, like taking a photo with a smartphone, it adds a layer of security against digital capture methods, ensuring that sensitive data remains protected within the virtual environment.
The screen capture protection feature uses various APIs and operating system interfaces to block the capturing and recording of virtual desktop remote sessions. Keep in mind that this feature is not supported on all platforms and Remote Desktop apps. It works well on Windows and macOS devices with the standard Windows App and Remote Desktop client. As far as I know, screen capture protection does not work on Android, iPadOS, and other operating systems.
If you plan to implement this feature you have to choose between Block screen capture on client and Block screen capture on client and server. I would recommend going for the second option which is supported starting with Windows 11 22H2. With this option, the session host instructs a supported Remote Desktop client to enable screen capture protection for a remote session. This option prevents screen capture from the client of applications running in the remote session, but also prevents tools and services within the session host from capturing the screen.
Let’s do it and create a new Intune policy using the session catalog and look for Enable screen capture protection (see the screenshot below).
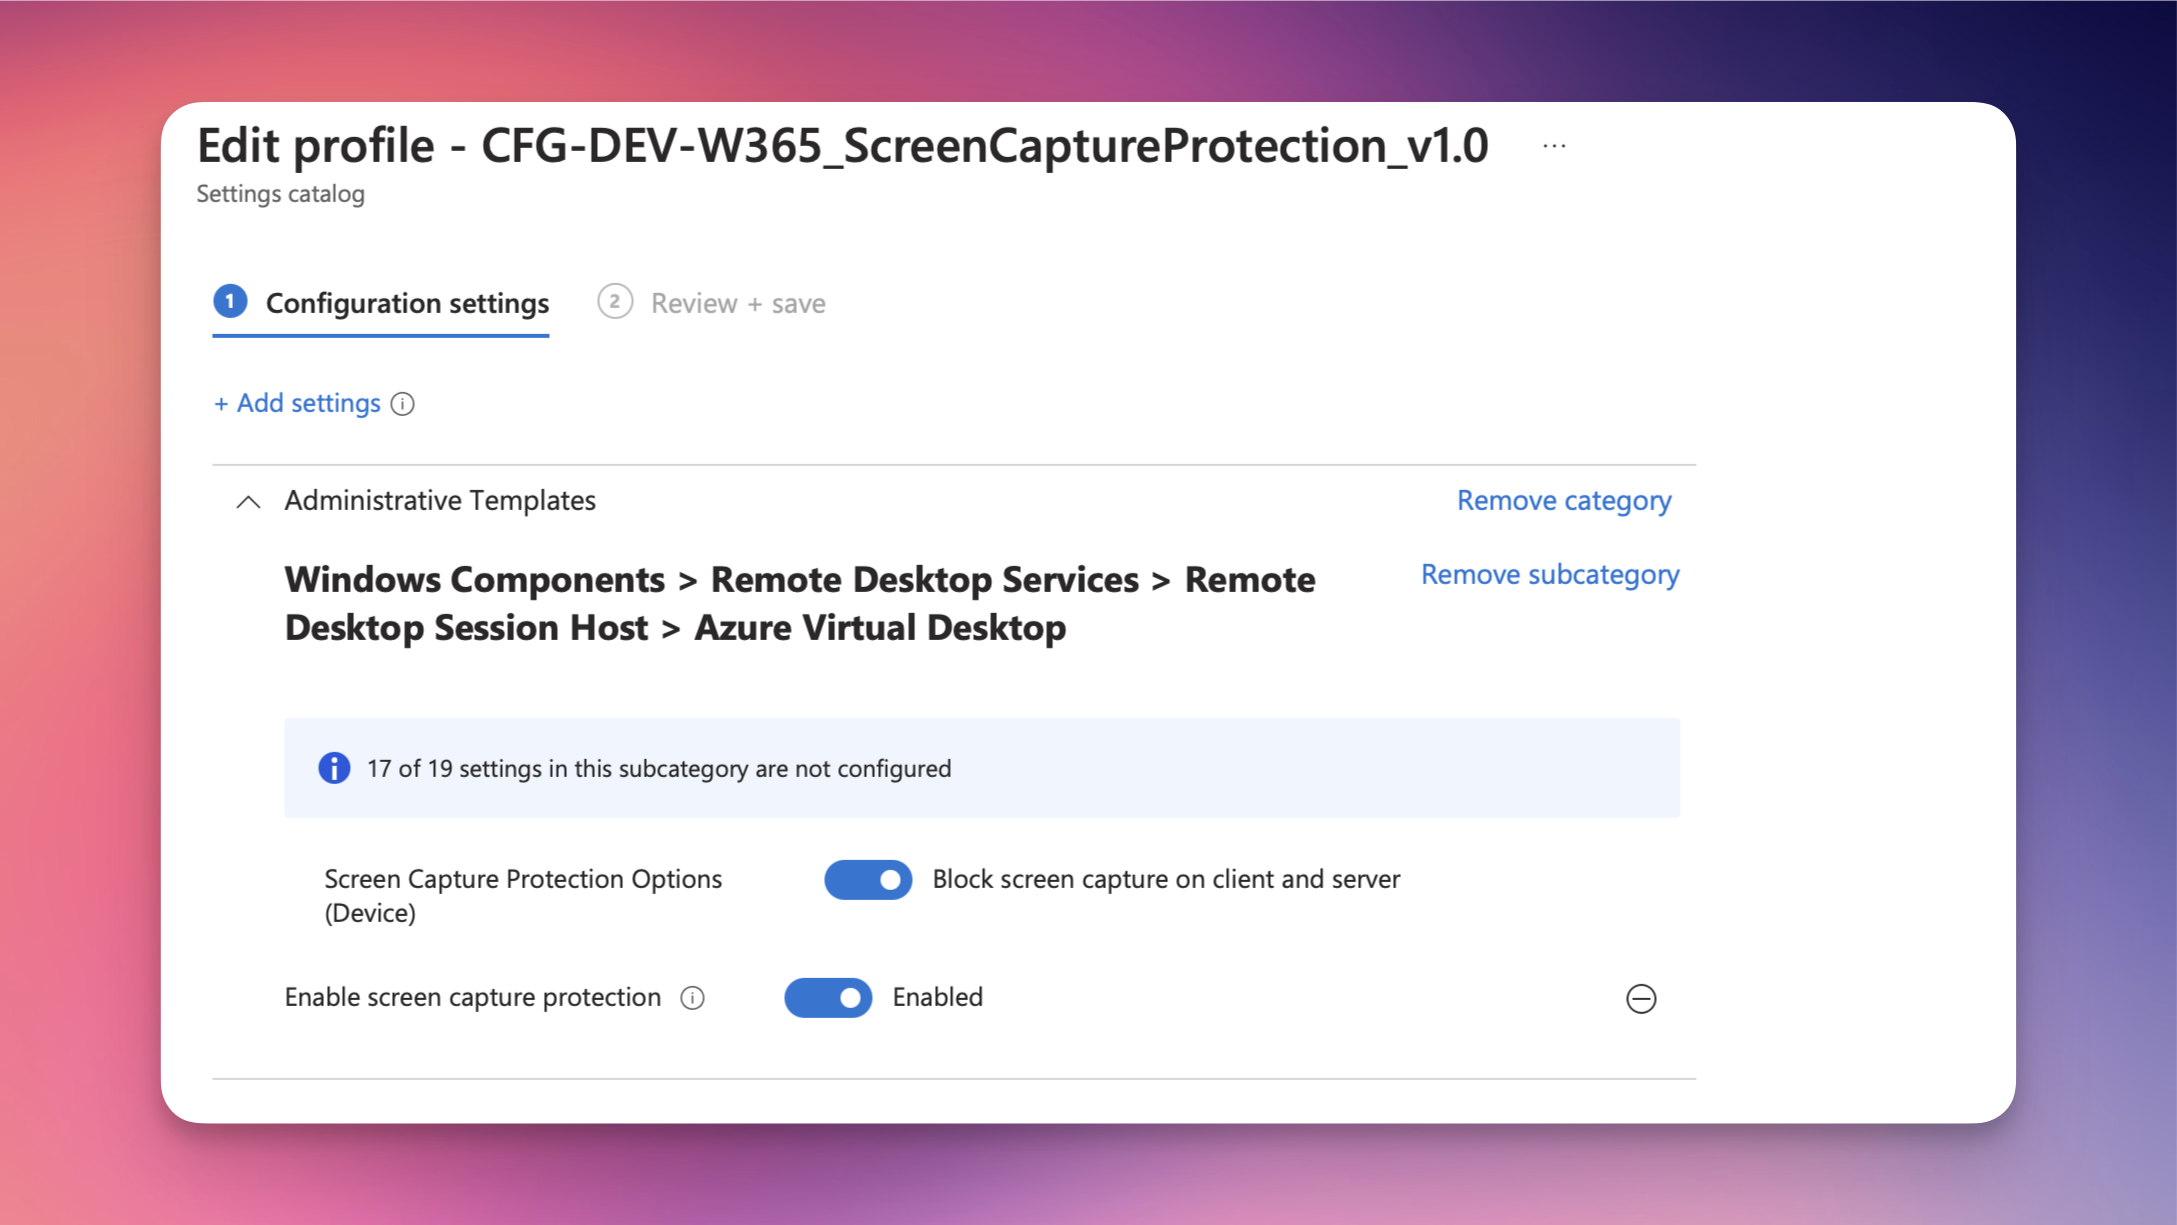
I would show you a screenshot of my Windows 365 session with the screen capture protection enabled, but it’s actually working. It's like trying to take a selfie with a vampire 😅 I have tried every known screenshot tool on my MacBook and on Windows. None of them was able to take a screenshot of my session. This also includes the screen or windows sharing functionality of Teams by the way.
But, keep in mind that enabling screen capture protection does not prevent users from taking pictures of their screen with a phone, for example. However, there is an option you might find useful. See you in the next chapter. 👀
Session watermarking
Session watermarking is a security feature that adds a visible watermark to the screen of a virtual desktop session. This watermark usually shows information like the user's identity, session details, or company branding. The main goal of session watermarking is to prevent unauthorized sharing or capturing of sensitive information on the screen. By clearly identifying who is accessing the data, it discourages users from taking screenshots or recording the session, since the watermark can be traced back to them. This feature is especially useful in places where data confidentiality is crucial, such as financial institutions or legal firms, as it helps prevent data leaks and ensures accountability.
I have to say, this feature is a great addition to the screen capture protection I described in the previous chapter.
A few words before we start implementing this. Once you enable the watermarking feature, only clients that support it can establish a session. Connections from unsupported clients will be denied. But don't worry, the new Windows App and common Remote Desktop Clients support this feature. Also, note that this will only work for full desktops and not for remote app scenarios published through Azure Virtual Desktop.
To implement this feature, we will create a new Intune policy called Enable watermarking from our settings catalog. There we have some settings available to configure the grid and QR codes of the watermarks. In my case, I will go for the default. I would recommend you to set the QR code embedded content (Device) to Device ID. Leaving this Setting on Connection ID works well for Azure Virtual Desktop, but I wouldn’t recommend it for Windows 365.
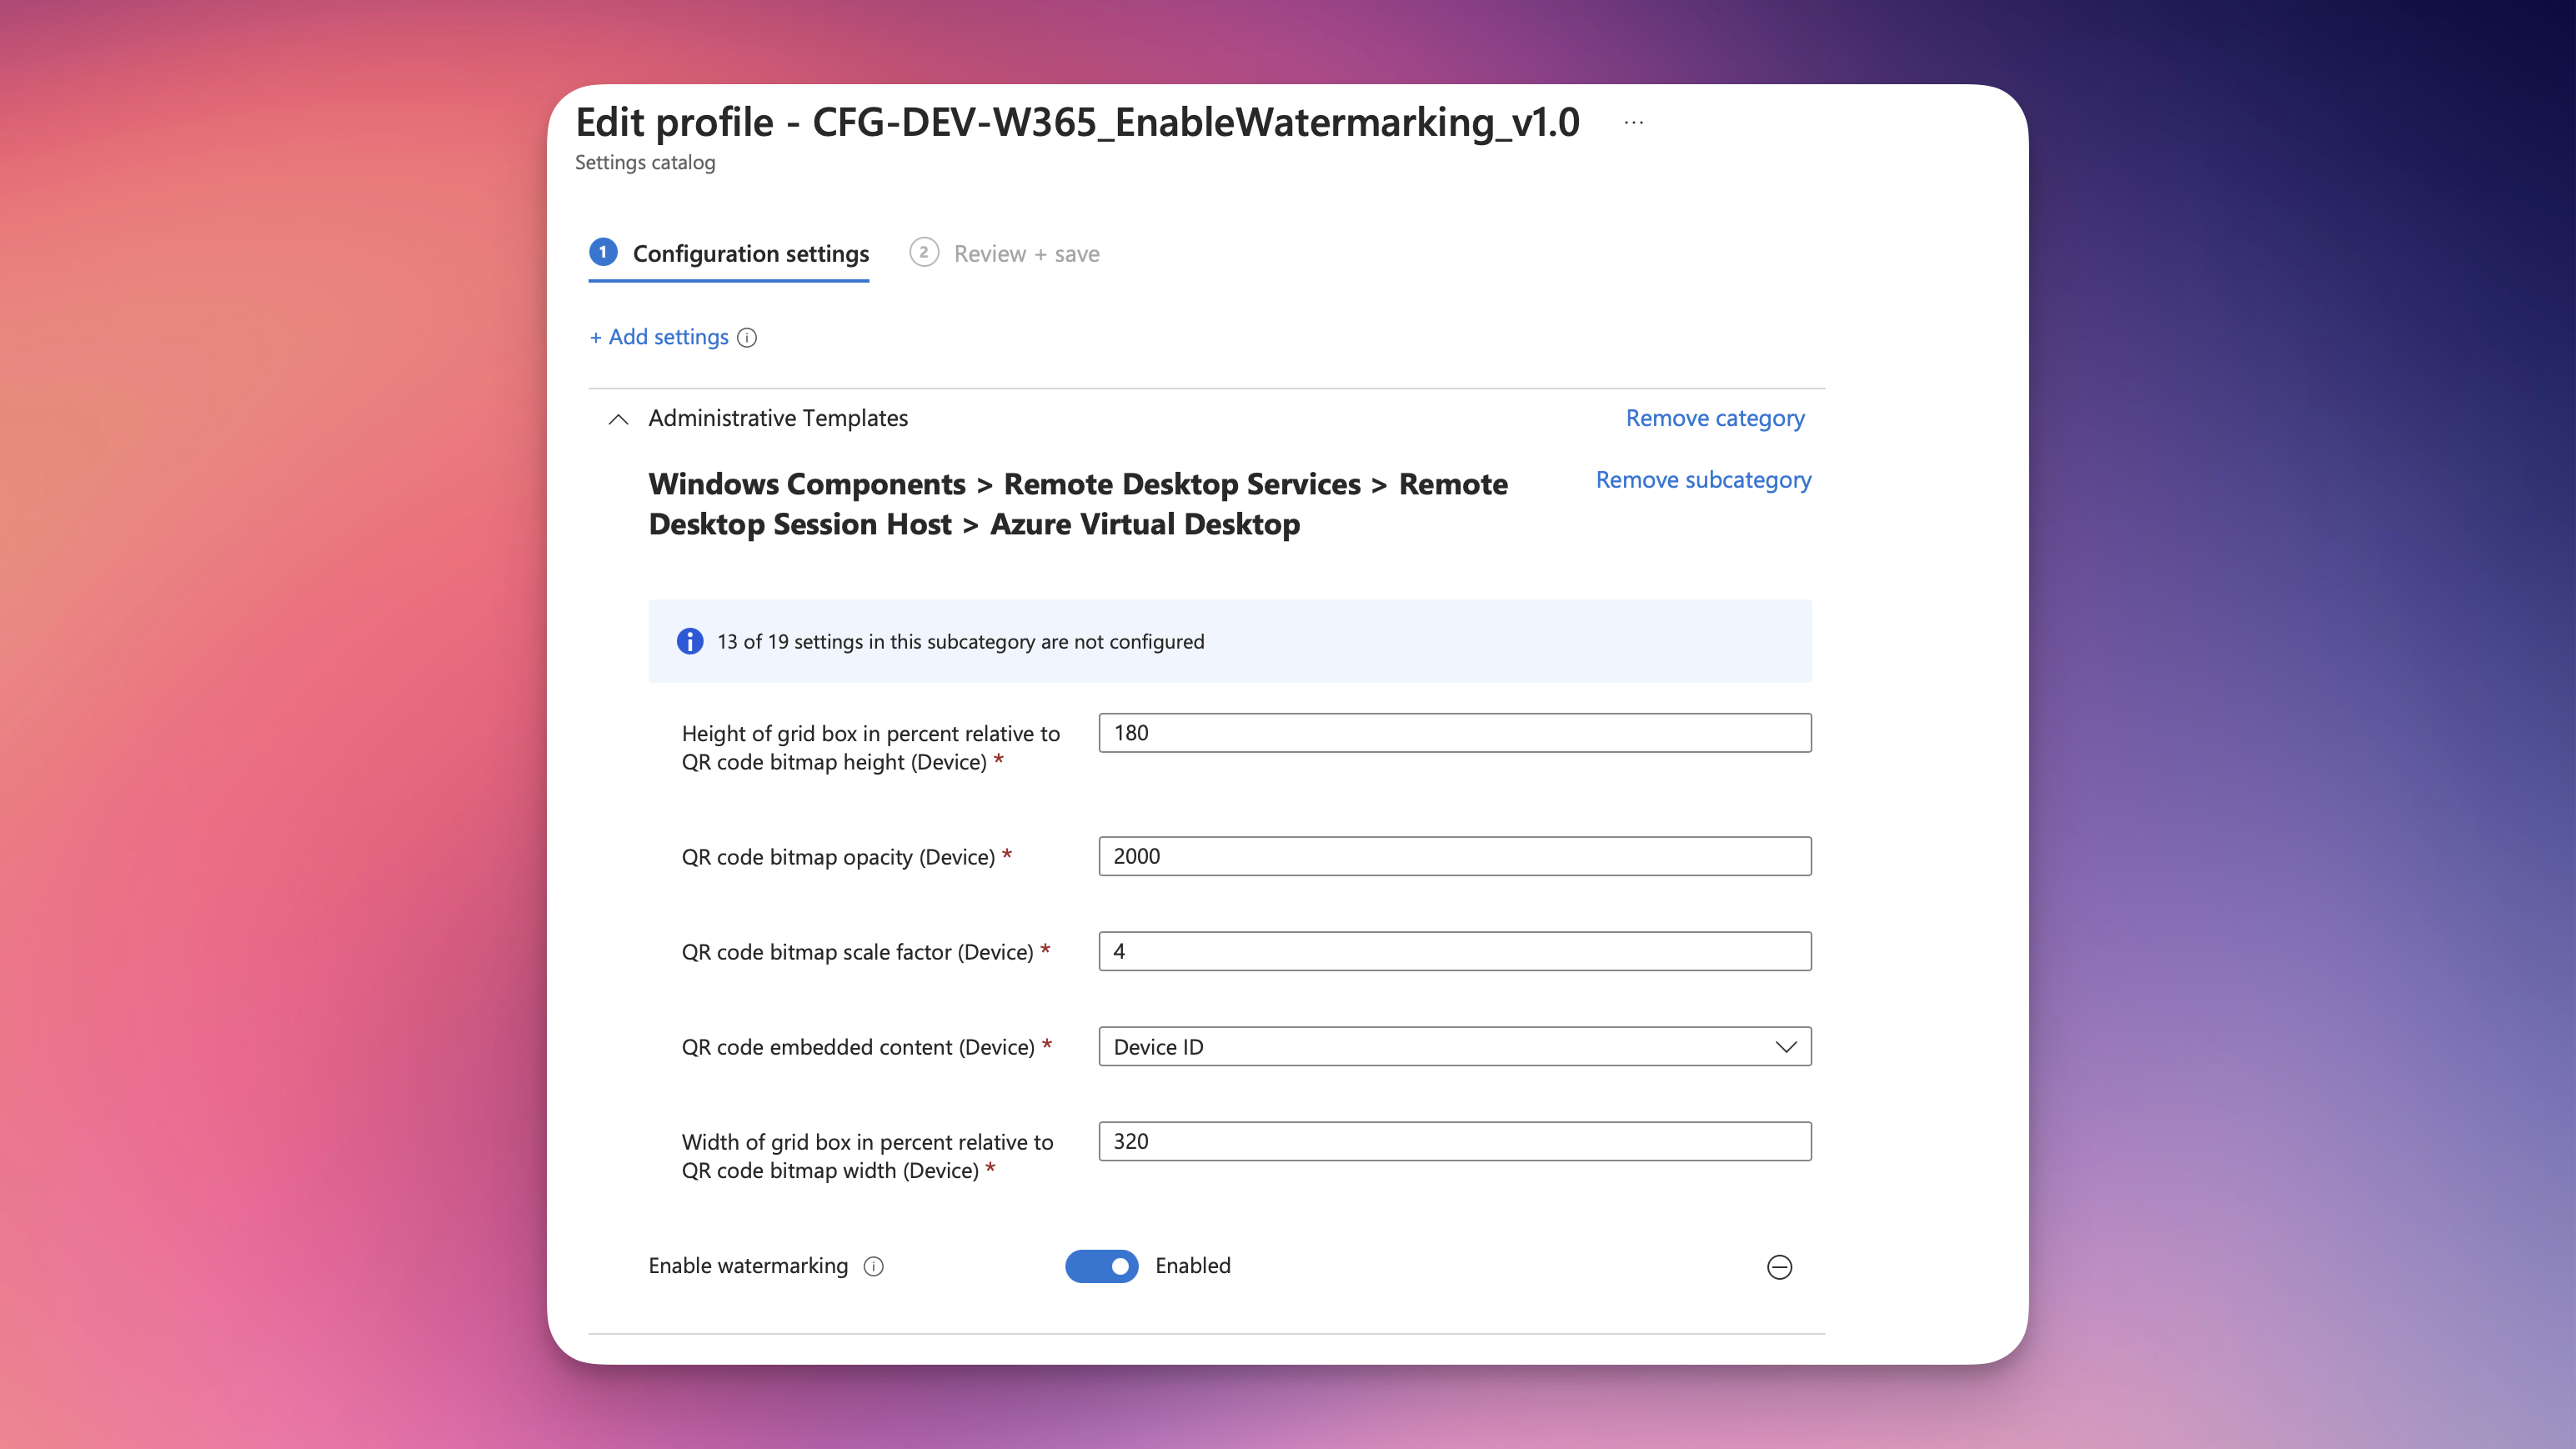
Great. Let’s apply this and check our remote session.
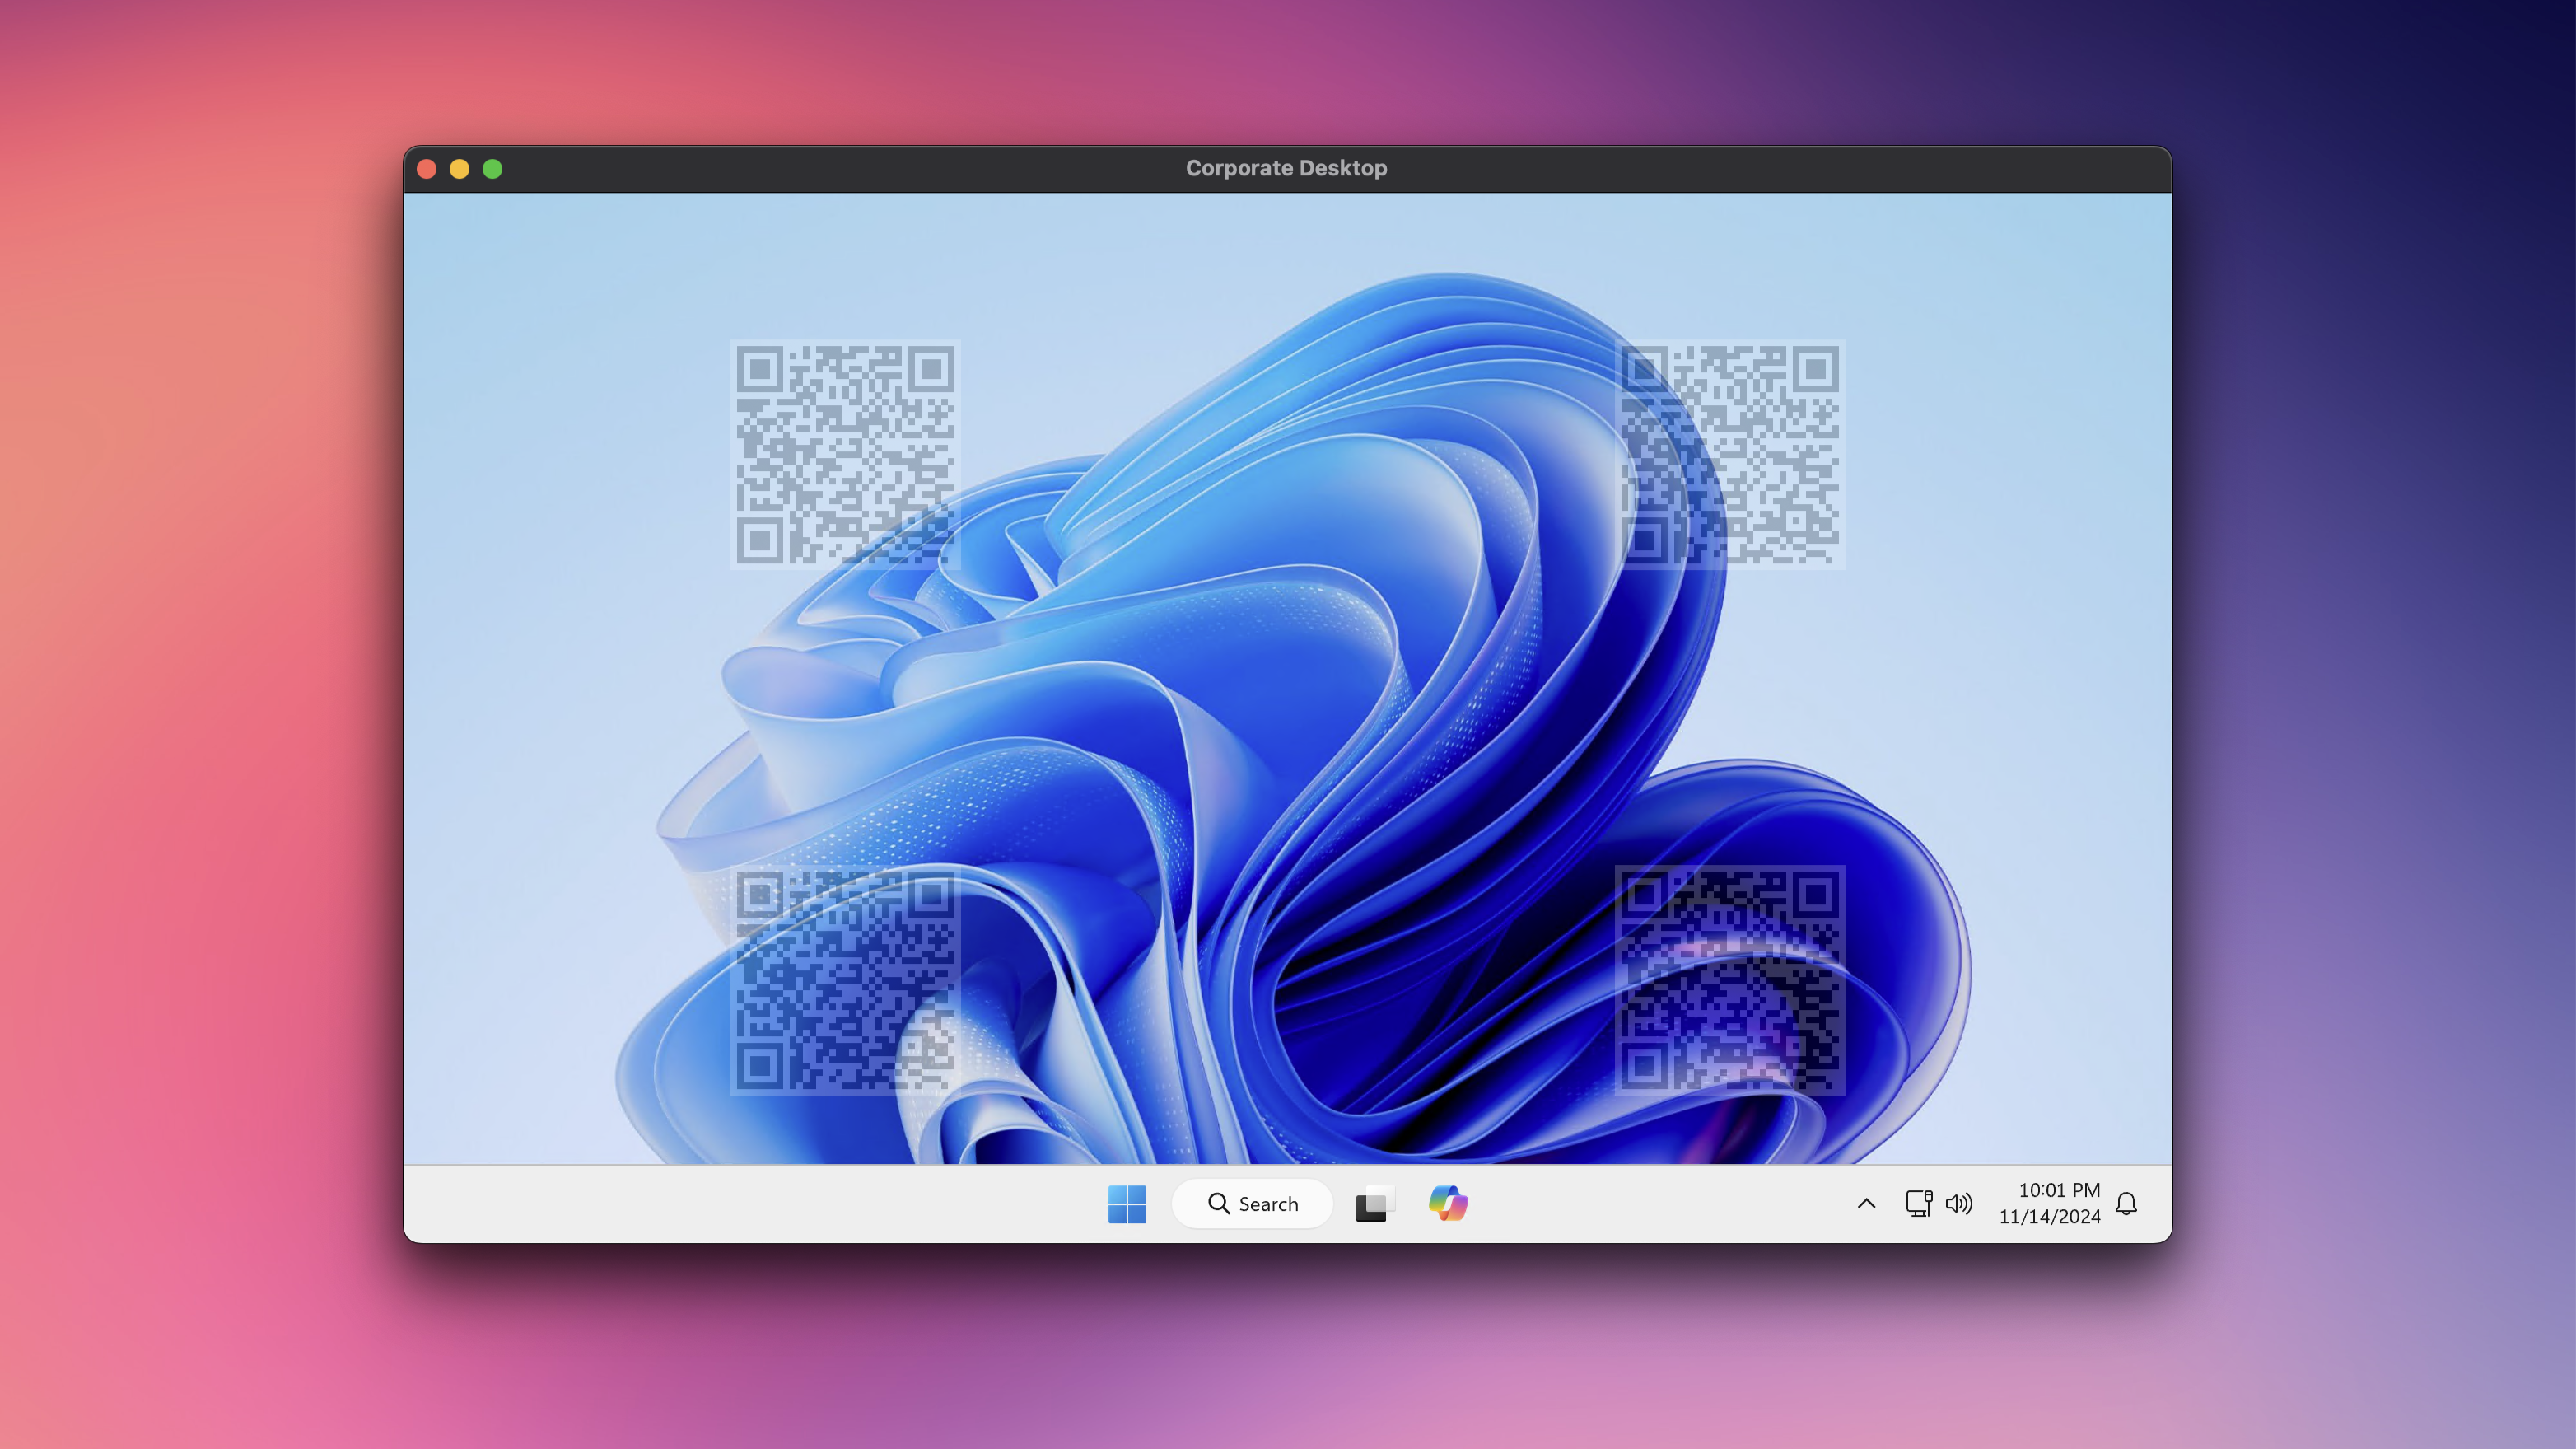
As you can see, the remote session now displays some QR codes on the screen. A user cannot remove these QR codes from their session. I suggest experimenting with the different settings in the watermarking policy to find what works best for you.
Note: It might be better to adjust the policy so that a session displays more, but smaller, QR codes. This should make it harder to make these codes unrecognizable.
Now, if a photo or screenshot gets leaked, you can scan the QR code and get an information like this:
d1a8a691-6c7b-4628-acca-aa276abb8796, 11/14/2024:20:59:20
When you scan that code, you get the device ID and the exact timestamp when the screenshot was taken. If you use that device ID to search through your Intune devices, you will find the exact device.
Conclusion
In conclusion, Windows 365 offers a wide array of security features designed to enhance the protection of your virtual desktop environment. This blog has highlighted just a few of these features, focusing on those that are straightforward to set up and configure using a single Intune policy.
It's crucial to carefully evaluate these settings and consider the specific needs of your organization and users. While a more restrictive setup might be necessary for accessing highly sensitive workloads or data, it's important to balance security with user experience. Listening to user feedback and making informed decisions will help ensure that security measures do not impede productivity. By thoughtfully implementing these features, you can effectively safeguard your Windows 365 environment while maintaining a positive user experience.
Inspiration 🛋️
Today, I won't recommend you a music album or two. Instead, I think it's time to suggest a YouTube channel called REGNUM UMBRAE, which creates beautiful tracks for reading, writing, and focusing. I listen to these creations a lot on my own. This channel is full of gems like this.
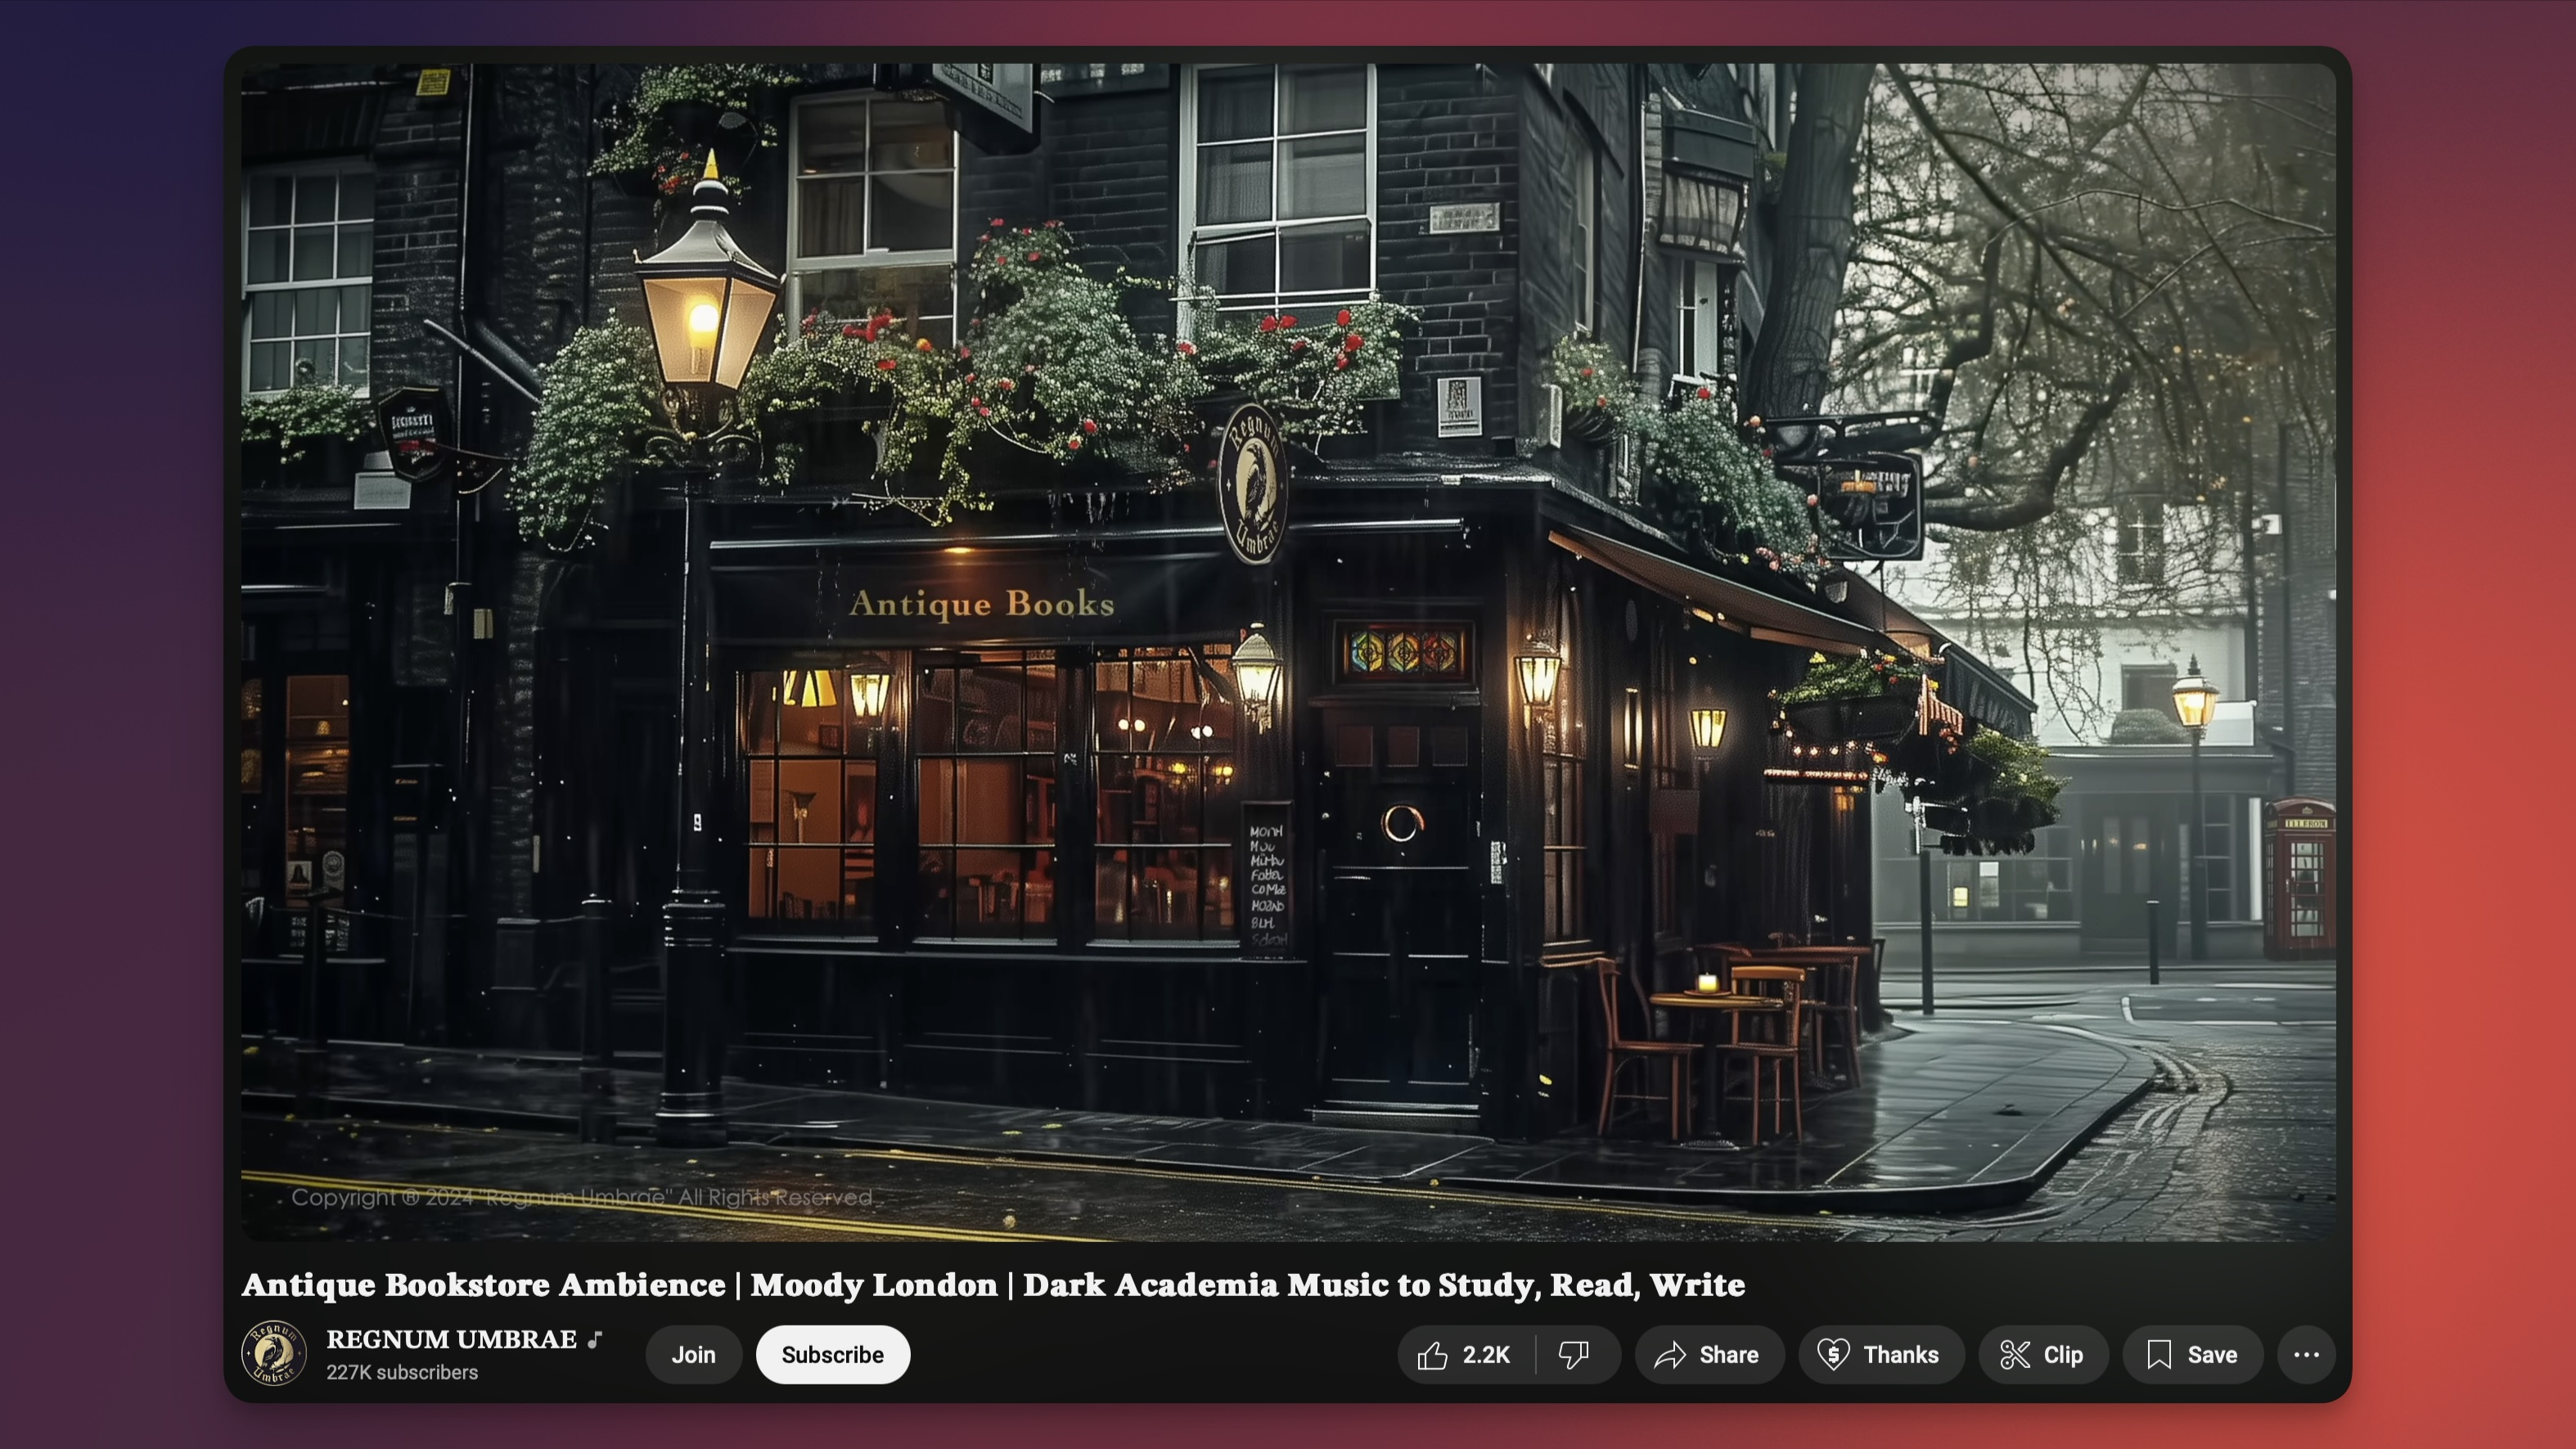
Enjoy it 🎼 See you next time.
Subscribe to my newsletter
Read articles from Lukas Rottach directly inside your inbox. Subscribe to the newsletter, and don't miss out.
Written by

Lukas Rottach
Lukas Rottach
I am an Azure Architect based in Switzerland, specializing in Azure Cloud technologies such as Azure Functions, Microsoft Graph, Azure Bicep and Terraform. My expertise lies in Infrastructure as Code, where I excel in automating and optimizing cloud infrastructures. With a strong passion for automation and development, I aim to share insights and practices to inspire and educate fellow tech enthusiasts. Join me on my journey through the dynamic world of the Azure cloud, where innovation meets efficiency.