How to Claim CrossFi Test Tokens on CrossFi Testnet
 Yusuf Roqib
The CrossFi Testnet serves as a practical environment for developers and users within the CrossFi ecosystem. It replicates mainnet conditions closely, giving developers a reliable environment to explore various platform functionalities, from account creation and token transfers to smart contract deployment, dApp development, and beyond.
Follow this step-by-step guide to claim CrossFi test tokens on the CrossFi Testnet.
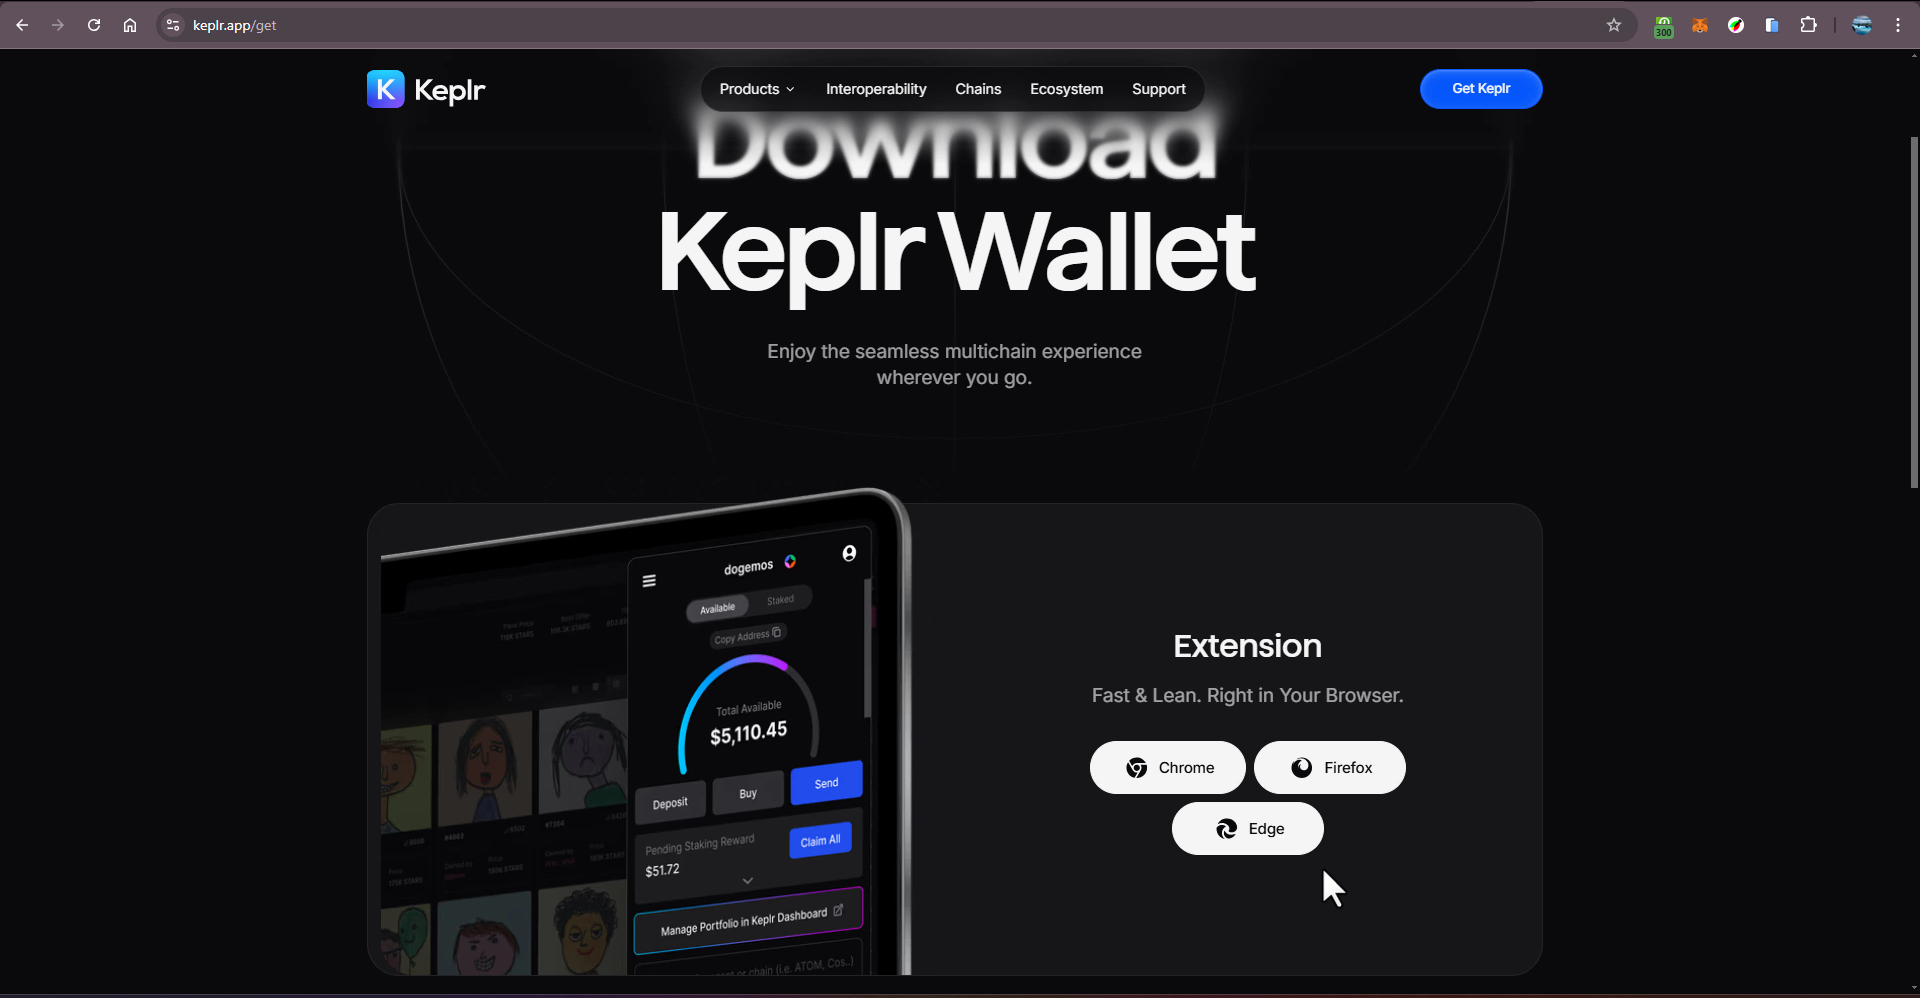
Step 1: Install Keplr Wallet
Start by installing the Keplr Wallet extension for your browser by visiting Keplr’s official website. Keplr Wallet is crucial for managing your assets on Cosmos-based blockchains, including CrossFi.
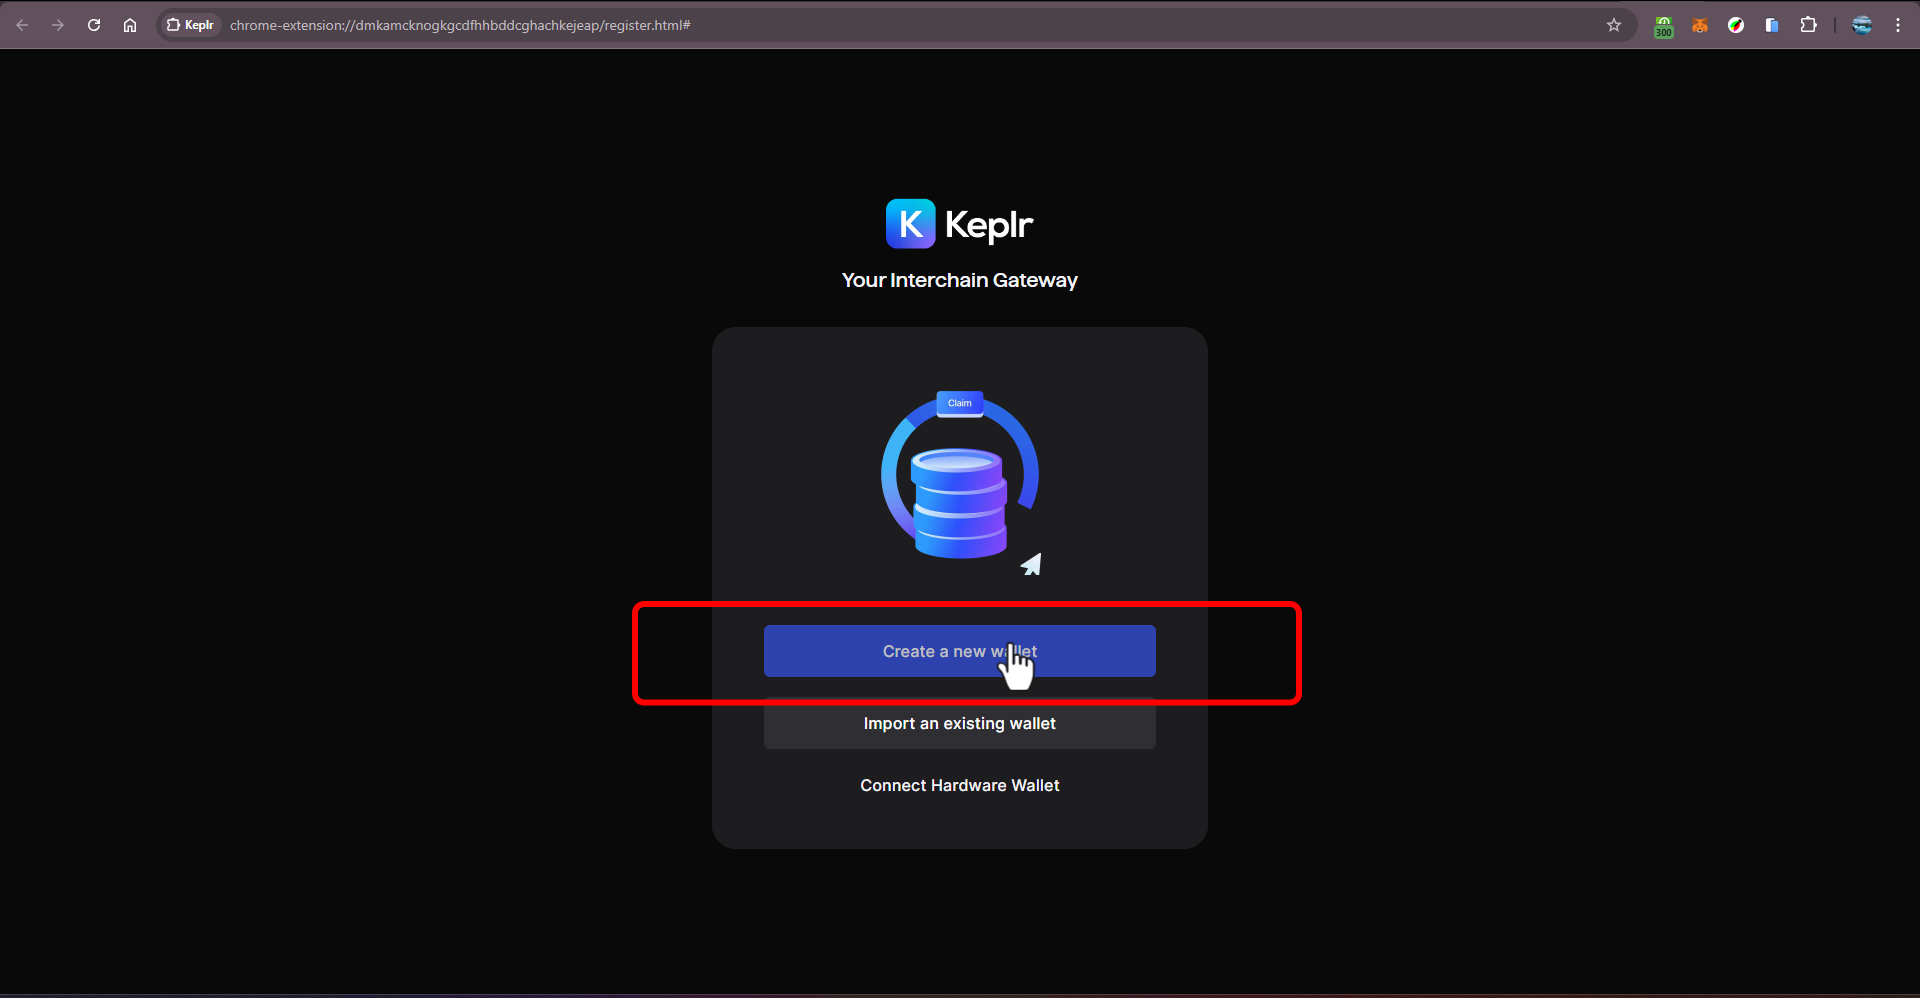
Step 2: Set Up Keplr Wallet
Once installed, open Keplr Wallet and follow the setup process. Create a new wallet and store your seed phrase or recovery phrase securely. Never share your recovery phrase with anyone—this is essential for protecting your assets.
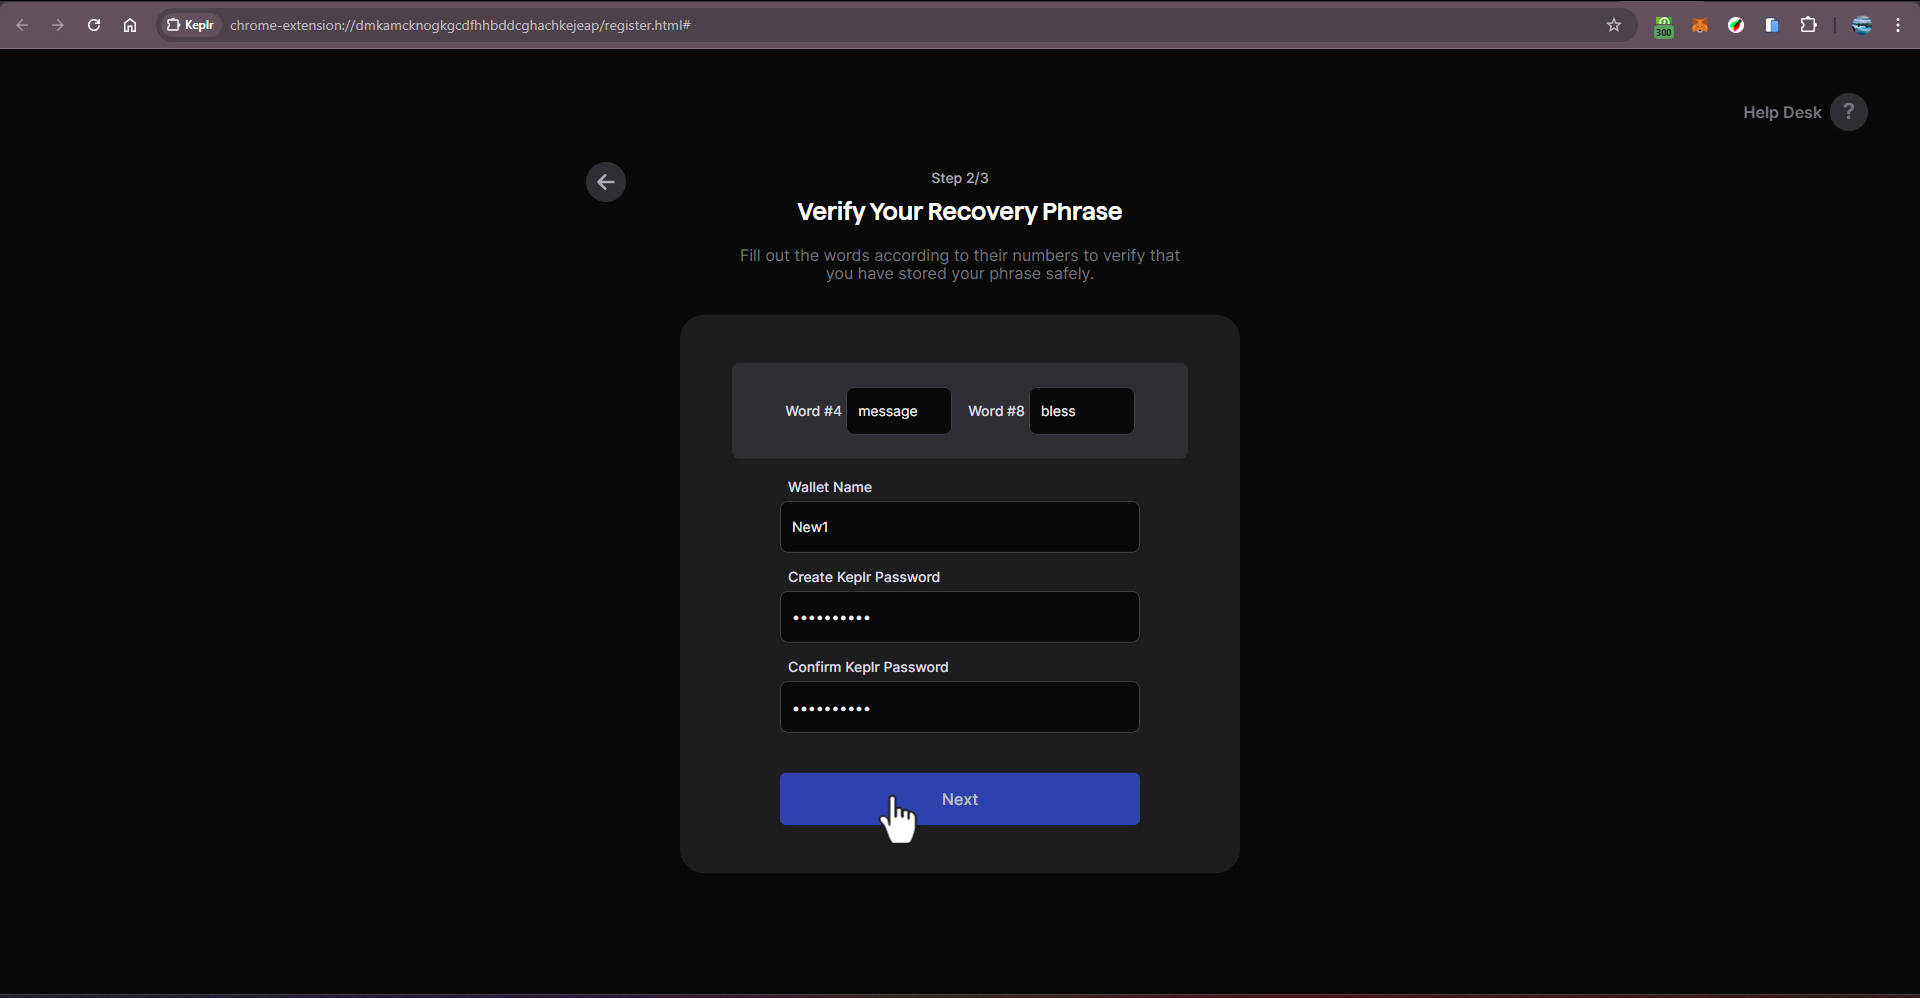
Verify that you have backed up your seed phrase. Create a wallet name and set a strong password. That should be it for this stage. Make sure your wallet is completely setup.
Step 3: Add CrossFi Chain to Keplr Wallet
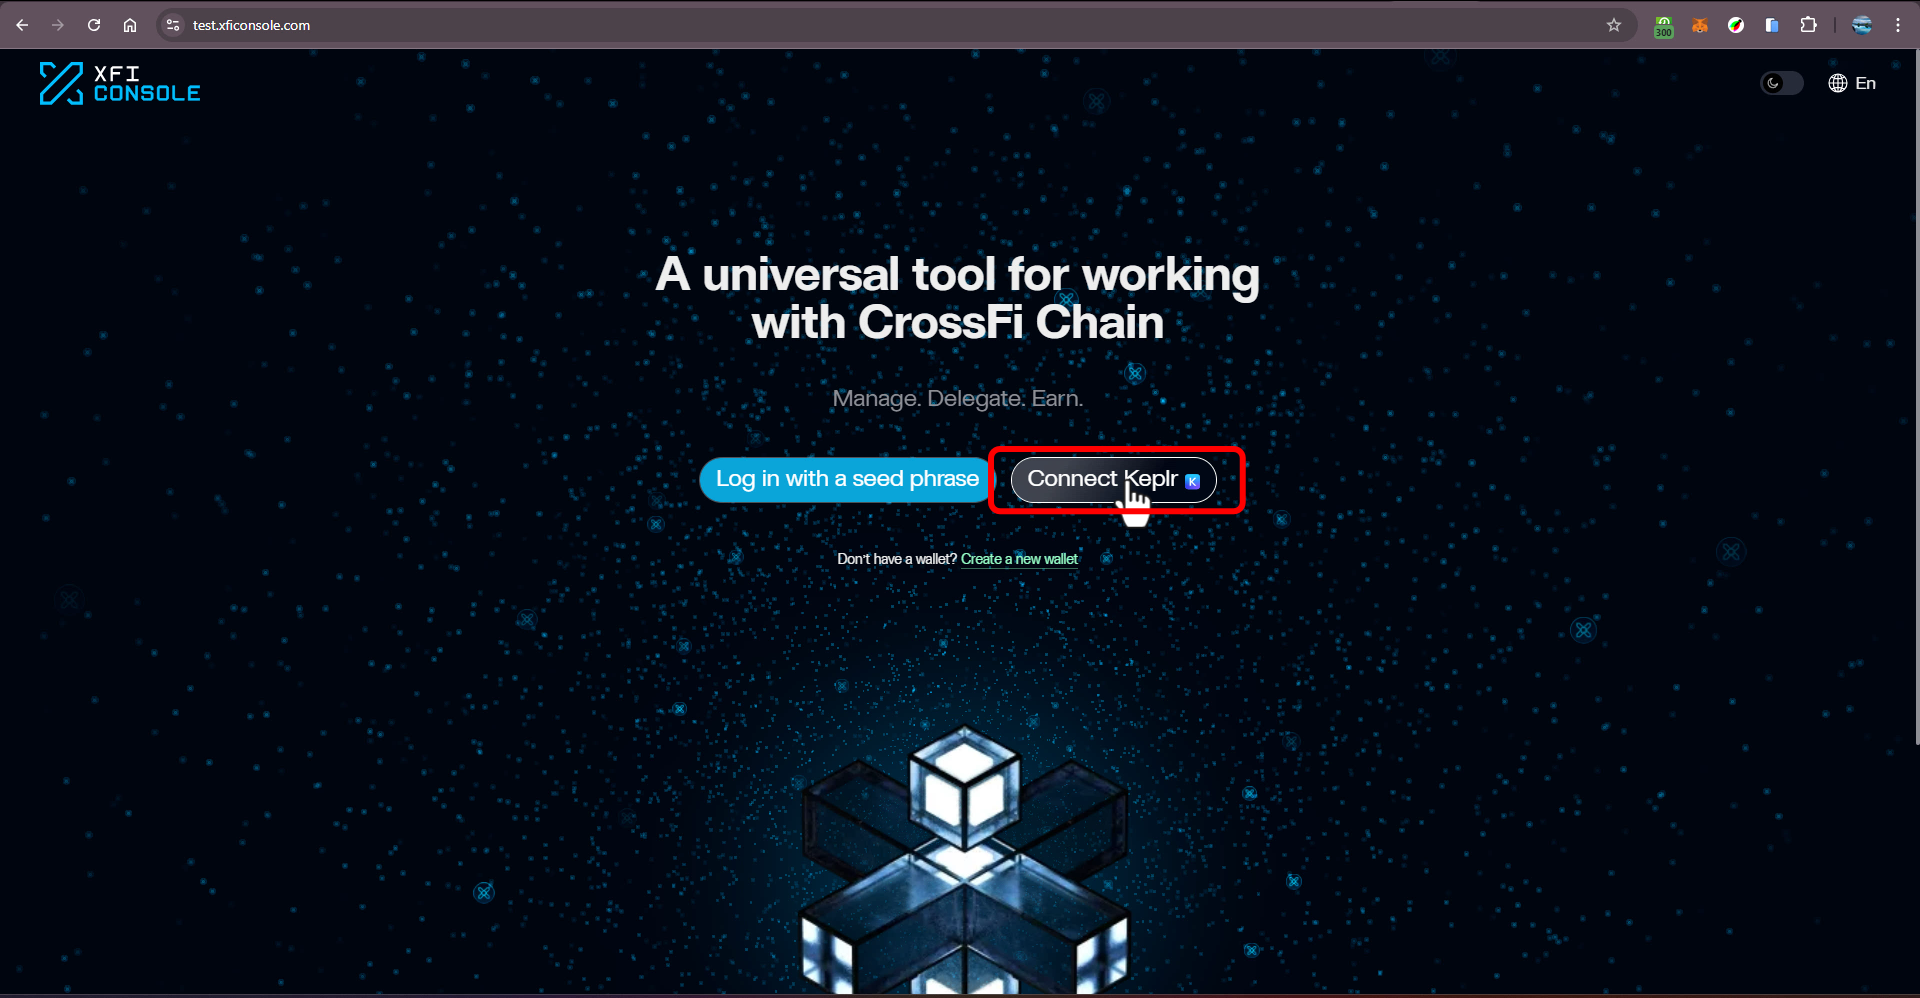
Next, integrate CrossFi Testnet Chain into your Keplr Wallet. Visit the official XFI Console and click on the “Connect Keplr” button.
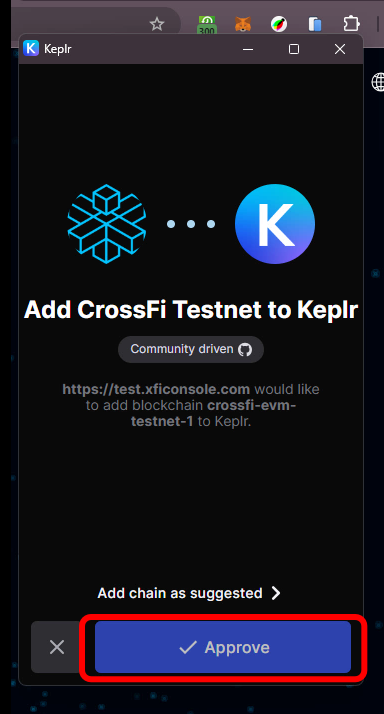
When prompted, click “Approve” to confirm and complete the integration.
Step 4: Manage Chain Visibility
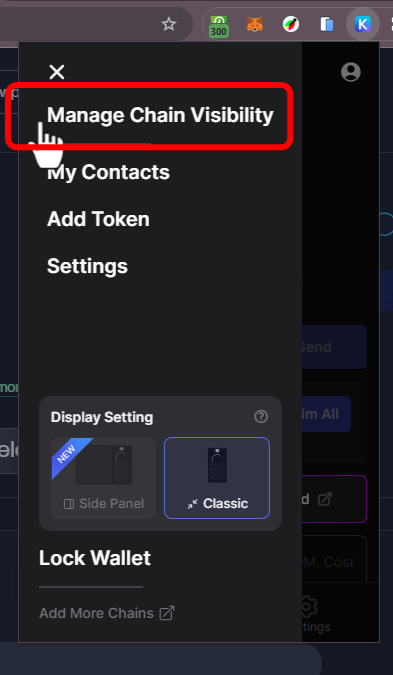
With CrossFi Chain now added, adjust your wallet settings for easy access. Open Keplr Wallet, click on the hamburger at the top left of your wallet and navigate to “Manage Chain Visibility”.
Step 5: Add CrossFi Testnet
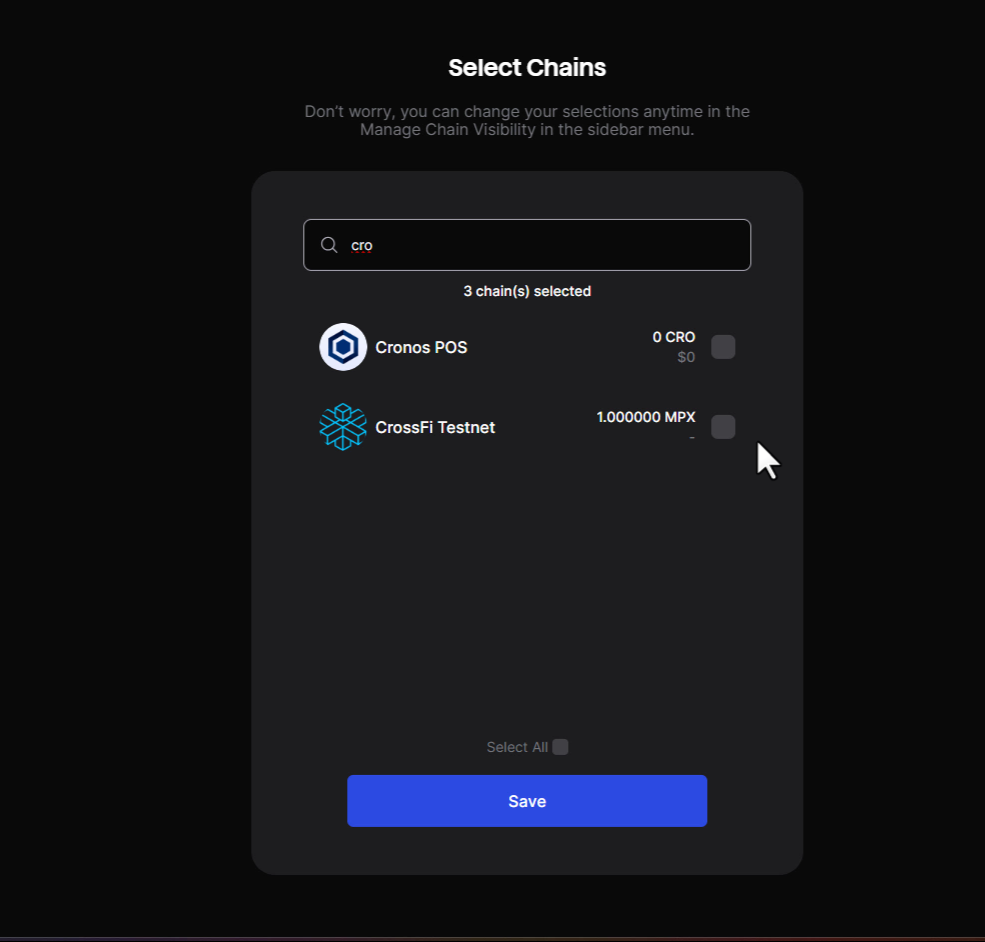
In the “Manage Chain Visibility” section, search for "CrossFi", then check the box next to “CrossFi Testnet” and save. This enables access to testnet features essential for developing and experimenting on the CrossFi platform.
Step 6: Conect Wallet to XFI Console
Now, go back to the official XFI Console and click on the “Connect Keplr” button if not connected. Then you will be taken to the console dashboard. At the “Get MPX and XFI” section, you can authorize the console with either Telegram or Discord. For the purpose of this tutorial, we will select Telegram. Make sure you are logged in to Telegram on your PC.
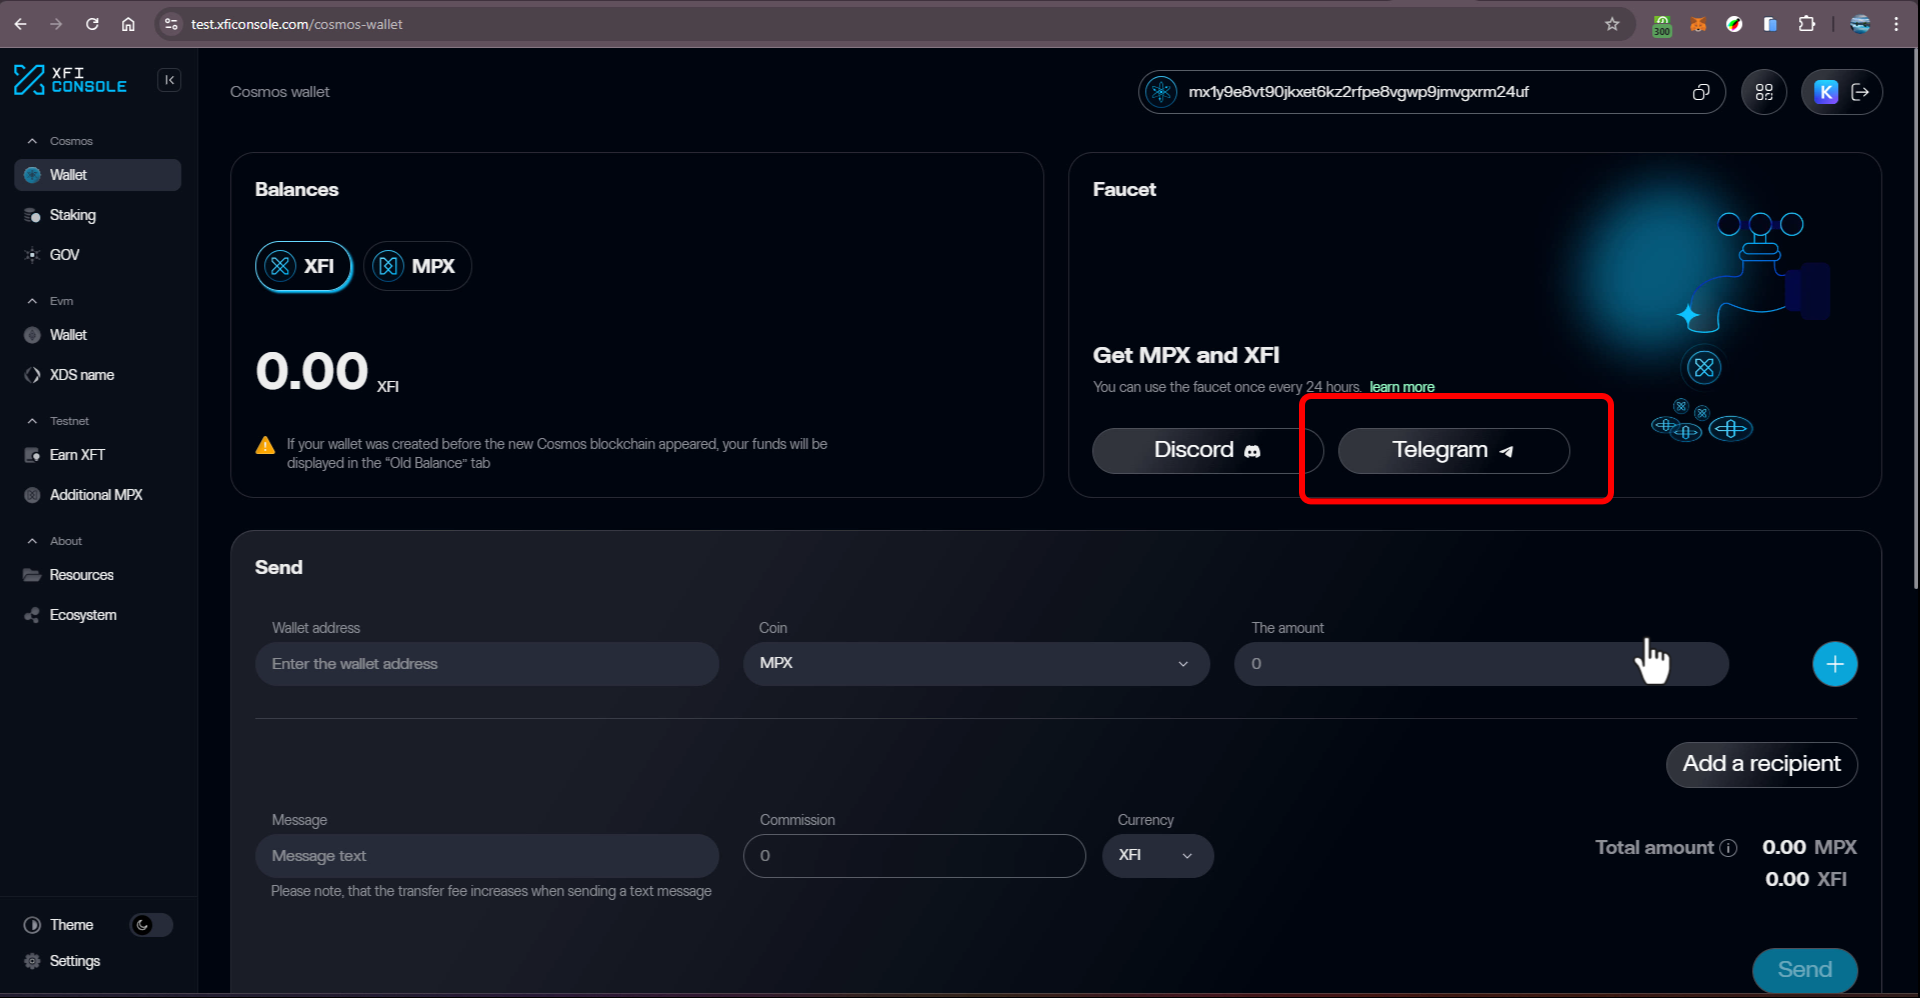
Step 7: Authorize the action with Telegram
Once your Telegram opens, click on START to get authorized. You should see a message which says “You are now authorized!”.
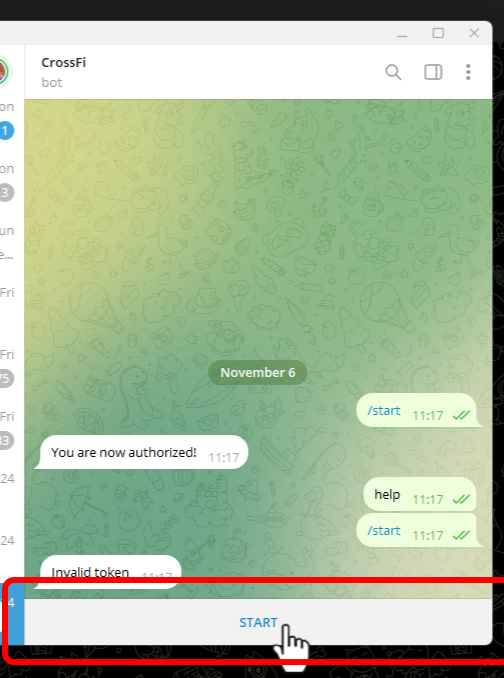
Step 8: Confirm Authorization
Now go back to the XFI console tab where you initiated the authorization. Then click Authorize button to confirm the authorization. This will make you authorized to claim both XFI and MPX tokens.
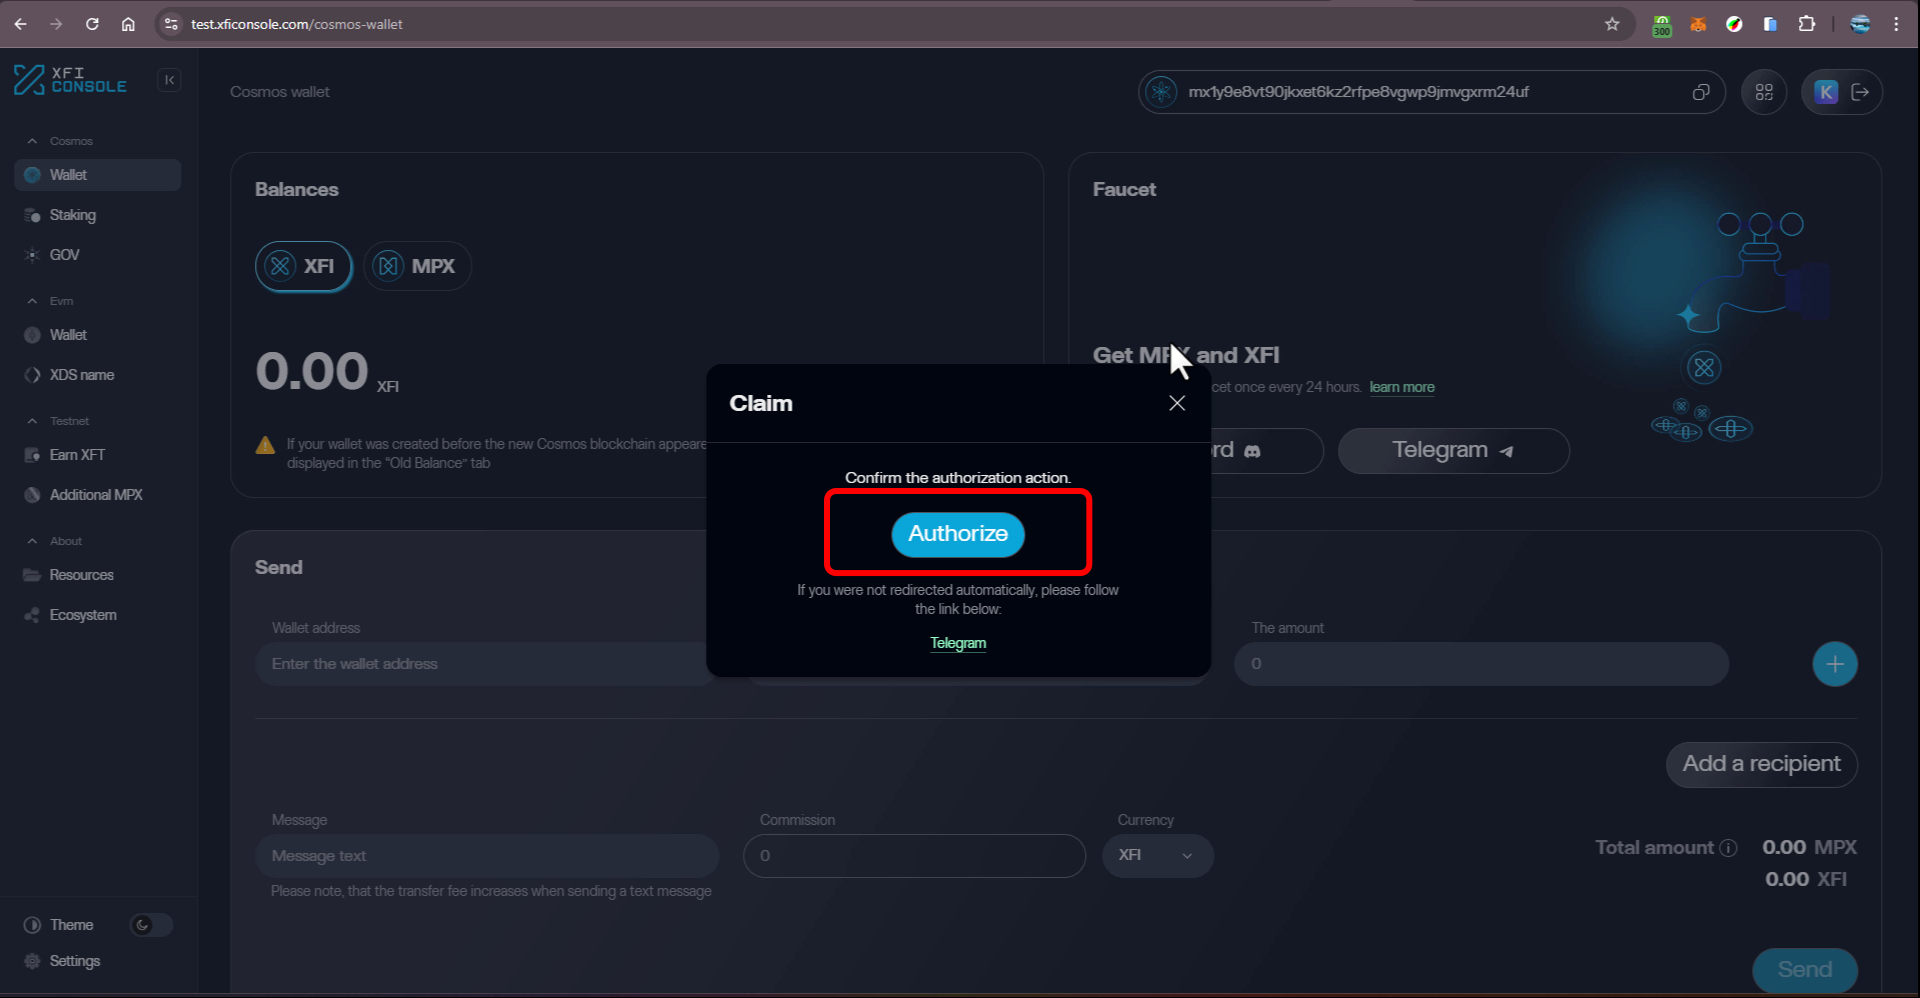
Step 9: Receive Test Tokens
Once you are authorized, there will be options to claim 1 MPX test token and 0.01 XFI test token.
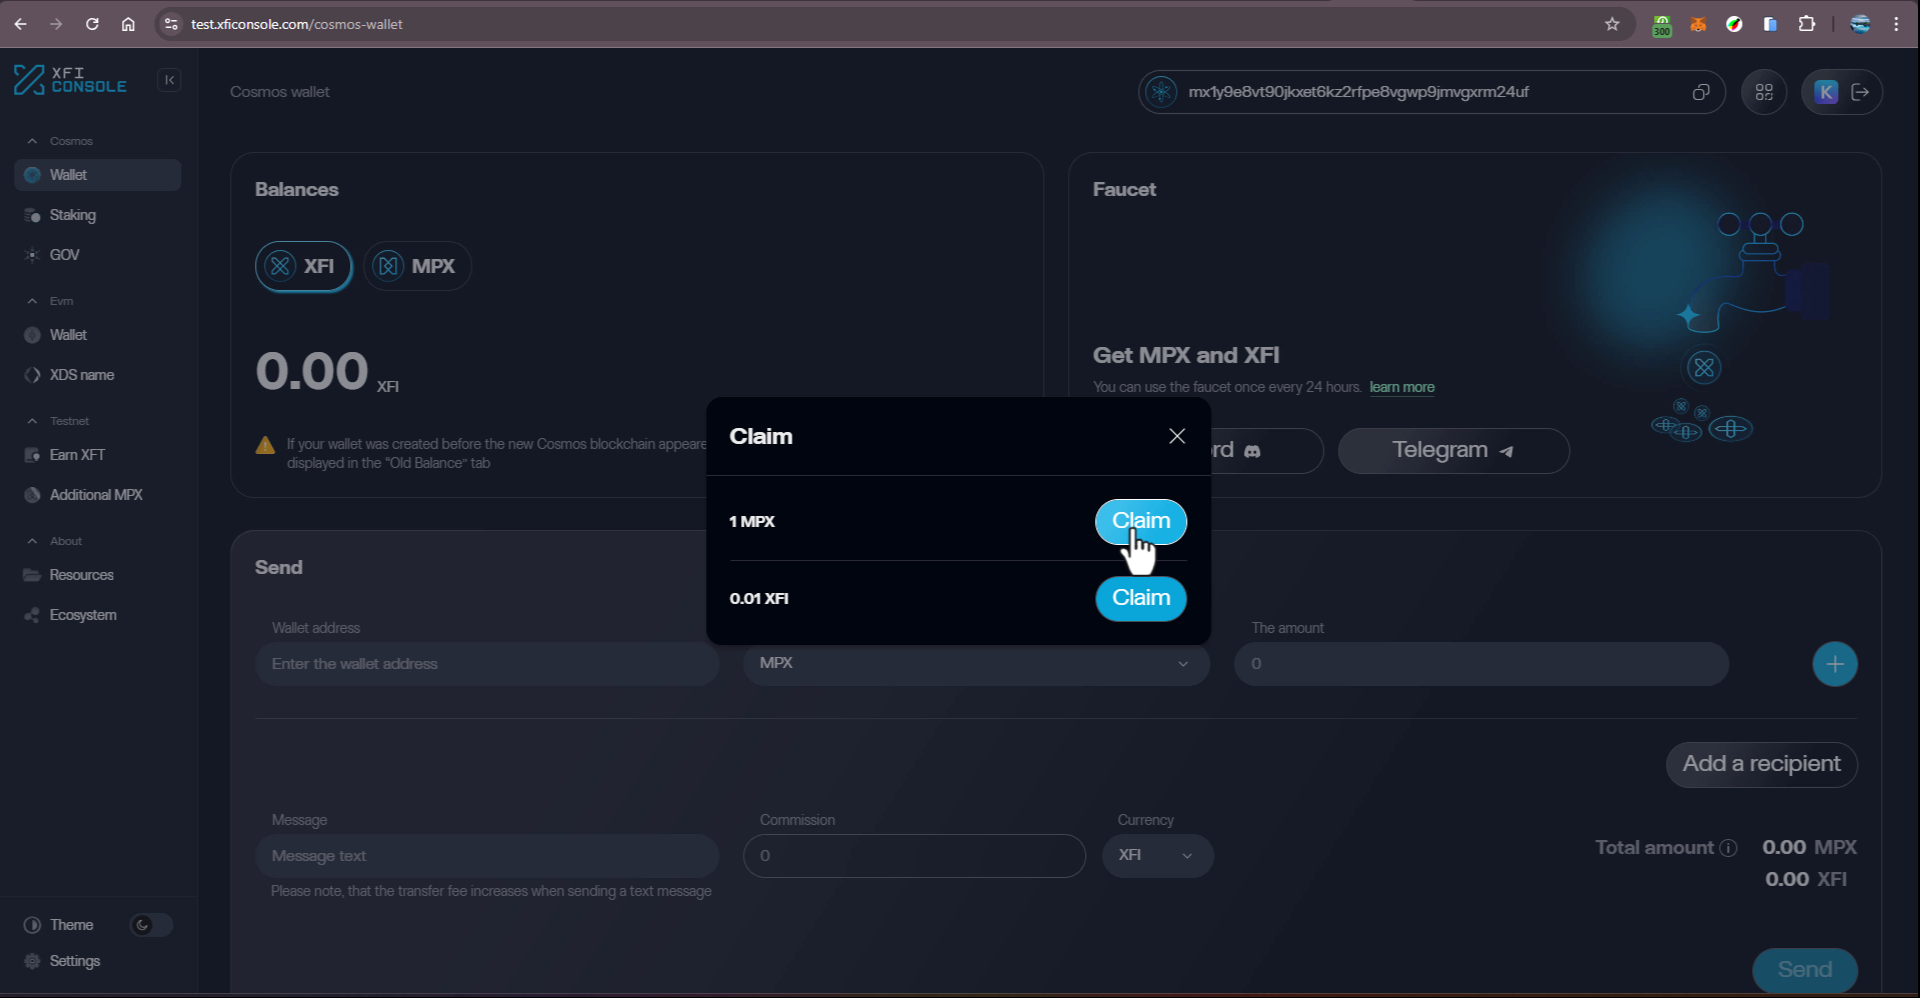
Claim both tokens and expect them in your wallet in few seconds.
Note: You can only claim both tokens once in 24 hours.
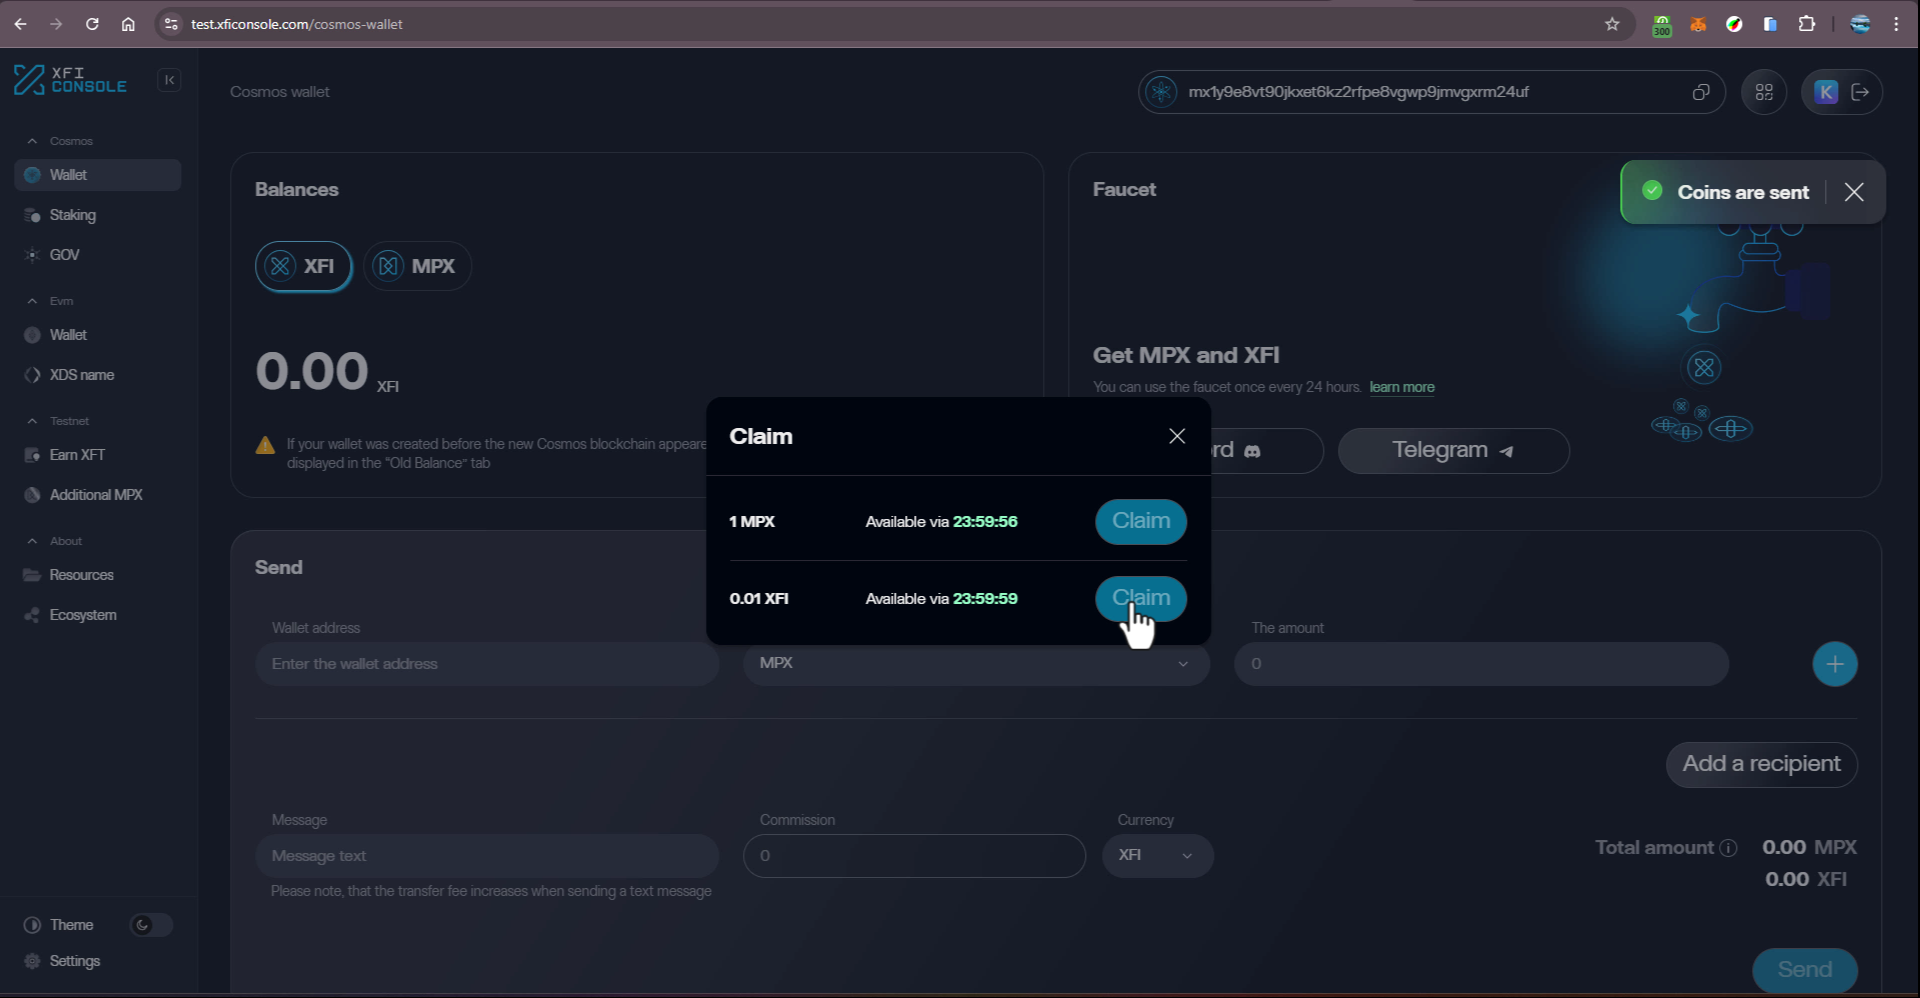
Confirm that tokens has arrived in your Keplr wallet.
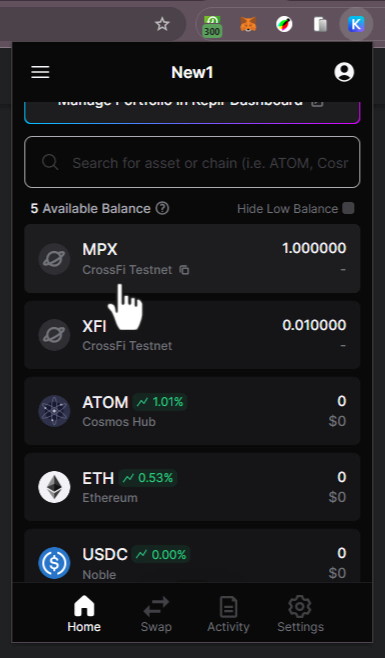
These tokens are now at your disposal and can be used for development and testing on the CrossFi Testnet.
Need Help?
If you encounter issues or have questions, join our CrossFi Africa Telegram Group to connect with the community. We’re here to assist you as you navigate the development process on the CrossFi Chain.
About CrossFi
CrossFi Chain is a layer 1 blockchain with a modular architecture. It consists of two integral parts, Cosmos and EVM. Each part is responsible for its specific functionality, with their work completely synchronized as a single organism.
Connect with us and become part of the CrossFi journey!
Subscribe to my newsletter
Read articles from Yusuf Roqib directly inside your inbox. Subscribe to the newsletter, and don't miss out.
Written by
