Building a To-Do App with Jenkins Pipeline
 Pulkit Yadav
Introduction
In this blog, I will guide you on how to deploy a simple Node using Jenkins. js To-Do application. Jenkins is a very cool CI/CD tool, it helps in automating the Build Test and Deploy Process of your software.
Even if you are a new to Jenkins, do not be concerned I will walk you through the entire process step by step. First up is configuring Jenkins, and next managing a simple Node. js app with it. You will end up with a basic app that is automatically built and deployed using Jenkins Pipeline at the end of this process.
Step 1: Install Docker & Docker compose
Update Your Package Index
Start by updating your package list to make sure you have the latest versions of the software. You can do this by running the sudo apt update command in your terminal.Install Docker
After updating, install Docker using the command sudo apt install docker.io. This will install Docker on your system.Add Your User to the Docker Group
To allow yourself to run Docker commands without needing sudo every time, add your user to the Docker group. Use the command sudo usermod -aG docker $USERApply the New Group Changes
Rather than restarting your machine, you can refresh your user’s group memberships with the command newgrp docker.Verify Docker Installation
To check if Docker was successfully installed and is working properly, run the docker ps command. This will list any running Docker containers (if there are none, it won’t show any errors).
Step 2: Install Docker Compose
Once Docker is set up, you’ll need to install Docker Compose, which helps manage multi-container Docker applications.
Download Docker Compose
Download Docker Compose by running a curl command to fetch it from the Docker GitHub page. This will download the executable to your system.Make Docker Compose Executable
After the download, make Docker Compose executable by changing its permissions. You’ll need to run a command to allow it to be run as a program.Verify Docker Compose Installation
To ensure Docker Compose is installed correctly, run the docker-compose --version command. This will display the version of Docker Compose you just installed.
Installing Jenkins on Ubuntu: Step-by-Step Guide
Step 1: Update Your System
Start by updating your system to make sure everything is up to date. You can do this by running the following command :-
sudo apt-get update
Note
Before installing Jenkins, Java is required because Jenkins is built on Java, and it needs Java to run properly. Java provides the environment that Jenkins uses to execute tasks, so without it, Jenkins won’t be able to start or function correctly.
Step 2: Install Java 17
Jenkins needs Java to run, and we’ll use OpenJDK 17. To install it, use this command:
sudo apt-get install fontconfig openjdk-17-jre
After that, check if Java is installed by running:
java -version
Step 3: Add the Jenkins Repository
Jenkins is not included in the default Ubuntu repositories, so we need to add its official repository. First, download the Jenkins key and save it to your keyring by running:
sudo wget -O /usr/share/keyrings/jenkins-keyring.asc https://pkg.jenkins.io/debian-stable/jenkins.io-2023.key
Next, add the Jenkins repository to your system using this command:
echo "deb [signed-by=/usr/share/keyrings/jenkins-keyring.asc]"
https://pkg.jenkins.io/debian-stable binary/ | sudo tee
/etc/apt/sources.list.d/jenkins.list > /dev/null
Step 4: Update the Package List Again
After adding the Jenkins repository, you need to refresh the package list to include Jenkins. Run this command:
sudo apt-get update
Step 5: Install Jenkins
Now that the repository is added, you can install Jenkins using the following command:
sudo apt-get install jenkins
This will install Jenkins along with all the necessary dependencies.
Check Jenkins Status
To make sure Jenkins is running properly, check its status by running this command:
sudo systemctl status jenkins
If Jenkins is working correctly, it shows status as active (running).
Note
After installing Jenkins, you need to open port 8080 to access Jenkins from your browser
To access Jenkins, you need to make sure port 8080 is open. Go to your AWS EC2 instance's security settings, and under "Security Groups," click to edit the inbound rules. Add a rule to open port 8080, which is the default port for Jenkins. Be sure to save your changes!
Access Jenkins:
After saving the changes, open your browser and enter your EC2 instance’s public IP address followed by :8080 for example, http://your-ec2-ip:8080. If everything is set up properly, you should see Jenkins login screen this means Jenkins is up and running, ready for use
NOTE
You can install Jenkins by following the detailed steps in my previous blog, which covers everything from downloading Jenkins, starting the service, unlocking Jenkins, to setting it up with the necessary plugins for your automation needs.
Make Sure Docker and Jenkins are Ready
Before we start building and deploying, we need to ensure that Docker and Jenkins are both running properly and that Jenkins has permission to interact with Docker. Here's how to do it:
Check if Docker is Running:
Docker needs to be active for everything to work. To check if Docker is running, open your terminal and run the command:
docker ps
This command will list all the running containers. If there are no containers running, it will simply show no errors, meaning Docker is active and working fine.Add Jenkins to the Docker Group:
Jenkins needs permission to interact with Docker. By default, Jenkins isn’t part of the docker group, so it can't use Docker commands. To add Jenkins to the Docker group, use the following commands:
sudo usermod -aG docker jenkins
This command adds Jenkins to the Docker group. After that, run:
newgrp docker
This ensures the group changes are applied immediately. These steps allow Jenkins to access Docker and run Docker commands.Restart Docker and Jenkins:
After adding Jenkins to the Docker group, you need to restart both Docker and Jenkins for the changes to take effect. To restart Docker, run:
sudo systemctl restart docker
Then, restart Jenkins with:
sudo systemctl restart jenkins
This will apply the changes and allow Jenkins to work with Docker seamlessly.
By following these steps, Docker and Jenkins will be properly configured to work together. Once this is done, you can proceed with building and deploying your app
NOTE
Make sure to complete these steps before creating your pipeline, as they are crucial for Jenkins to run the pipeline successfully.
Creating a Pipeline for the To-Do App
Once you’ve signed up and logged into Jenkins, you’re ready to get started on your pipeline. Let’s jump right in and set up a Jenkins pipeline to automatically build and deploy the Node.js To-Do app.
In DevOps, we try to make things like building, testing, and deploying apps quicker and easier. Developers write the code, and our job is to set up pipelines that do those tasks automatically, so everything works smoothly.
Big thanks to Shubham Bhaiya for giving us the Node.js code for the To-Do app! Now that we have it, we’re going to create a pipeline. We’ll write a Jenkinsfile from scratch to understand how everything works and fits together.
Now, let's create our Jenkins pipeline step by step:
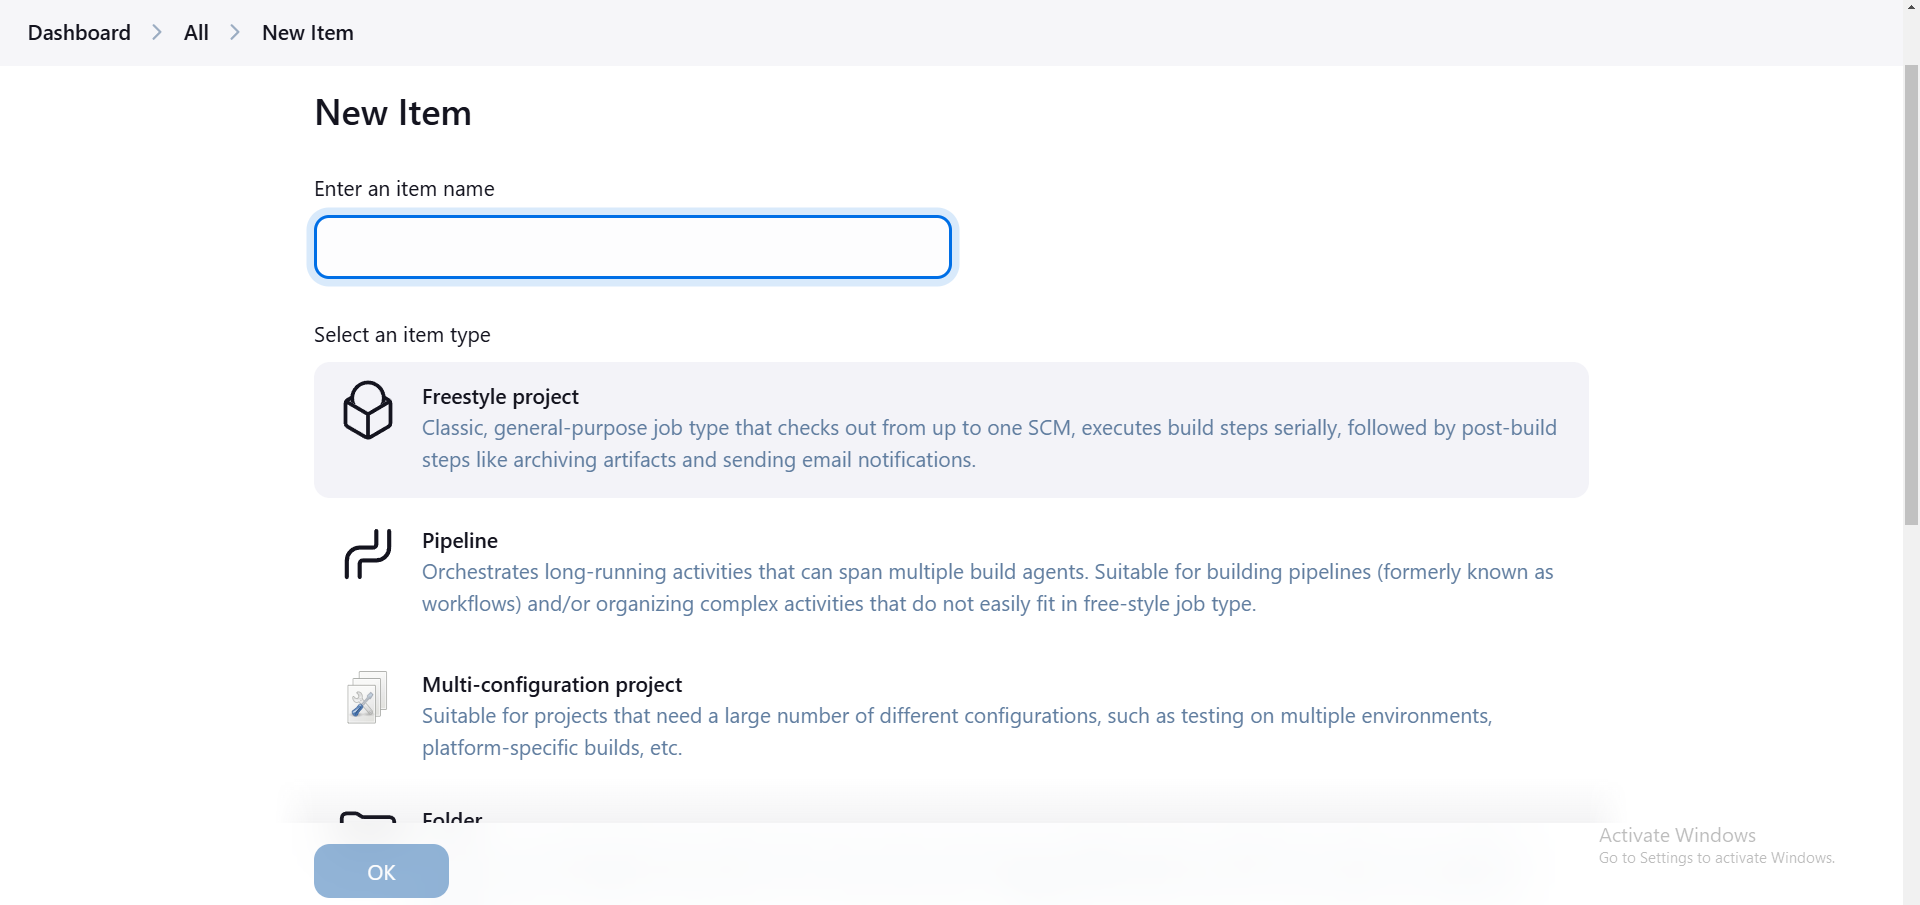
Go to Jenkins and click on "New Item".
Type in the name for your pipeline.
Select "Pipeline" and then click "OK".
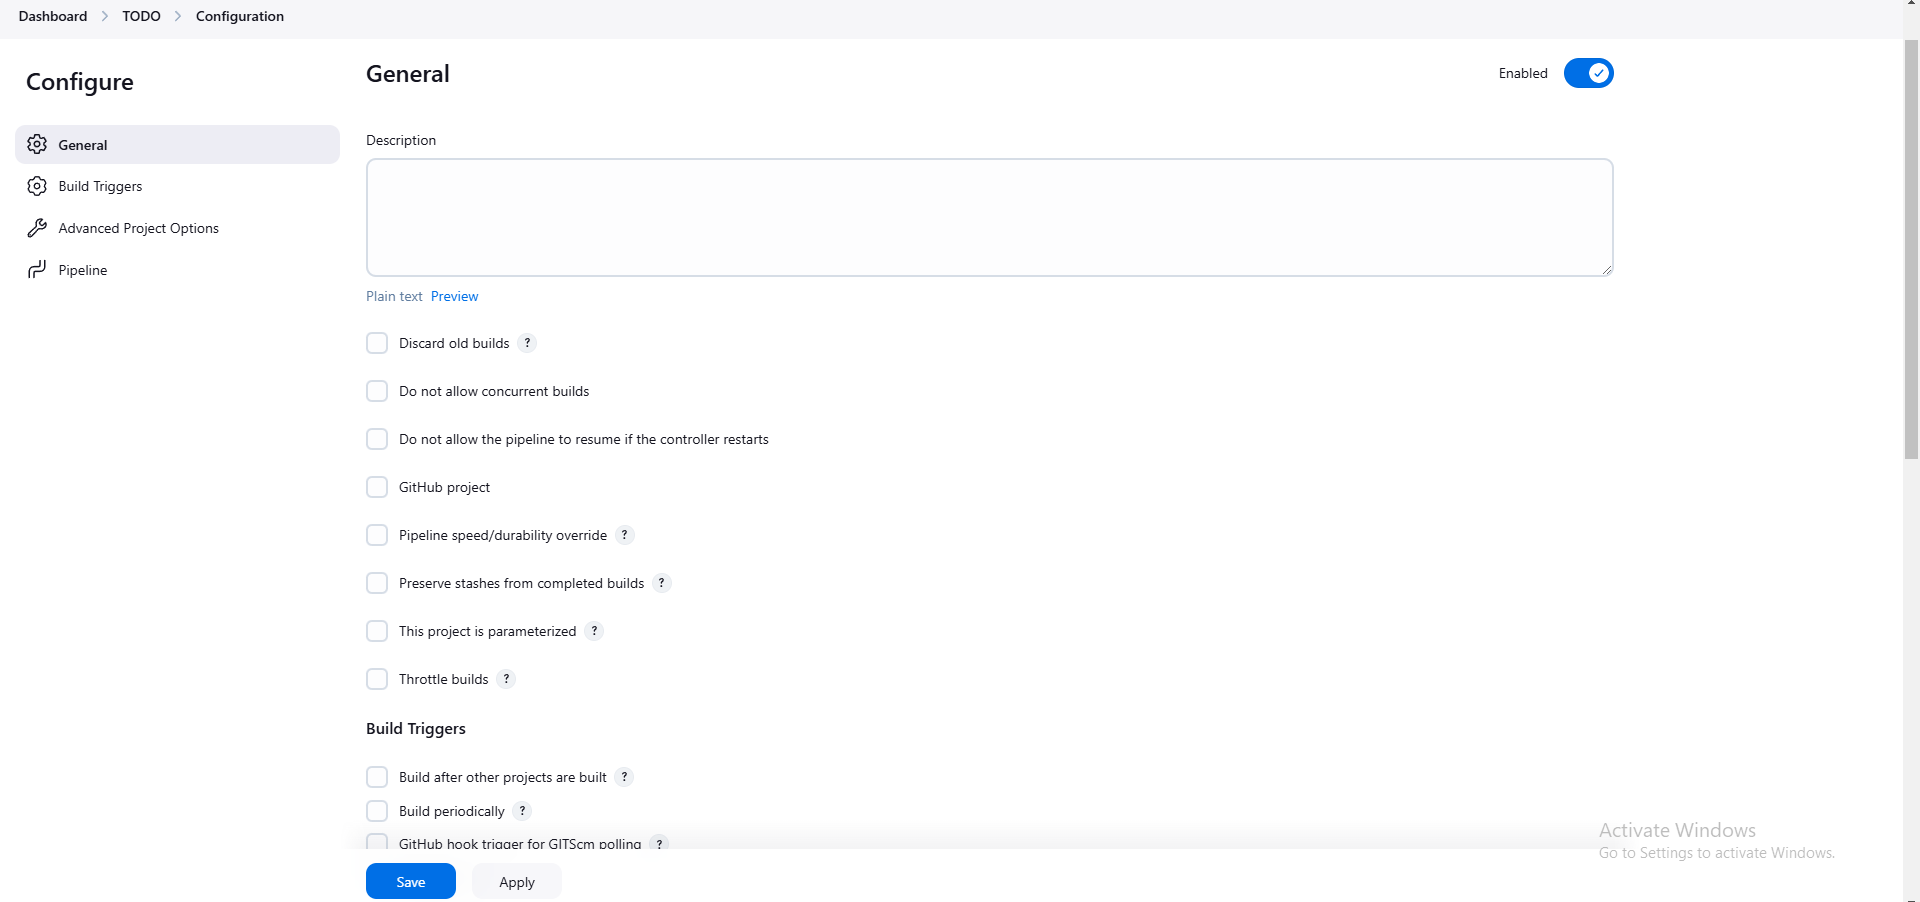
You’ll see a form where you can write a description of the pipeline (this is optional).
Scroll down to find the "Advanced" section and give your pipeline a name.
Now, click "OK" to create the pipeline.
We are creating a pipeline from scratch today, and later, we will explore more options in Jenkins.
In this pipeline, there are three main steps: getting the code, building the app, and deploying it. Let’s break each step down to make it easy to understand.
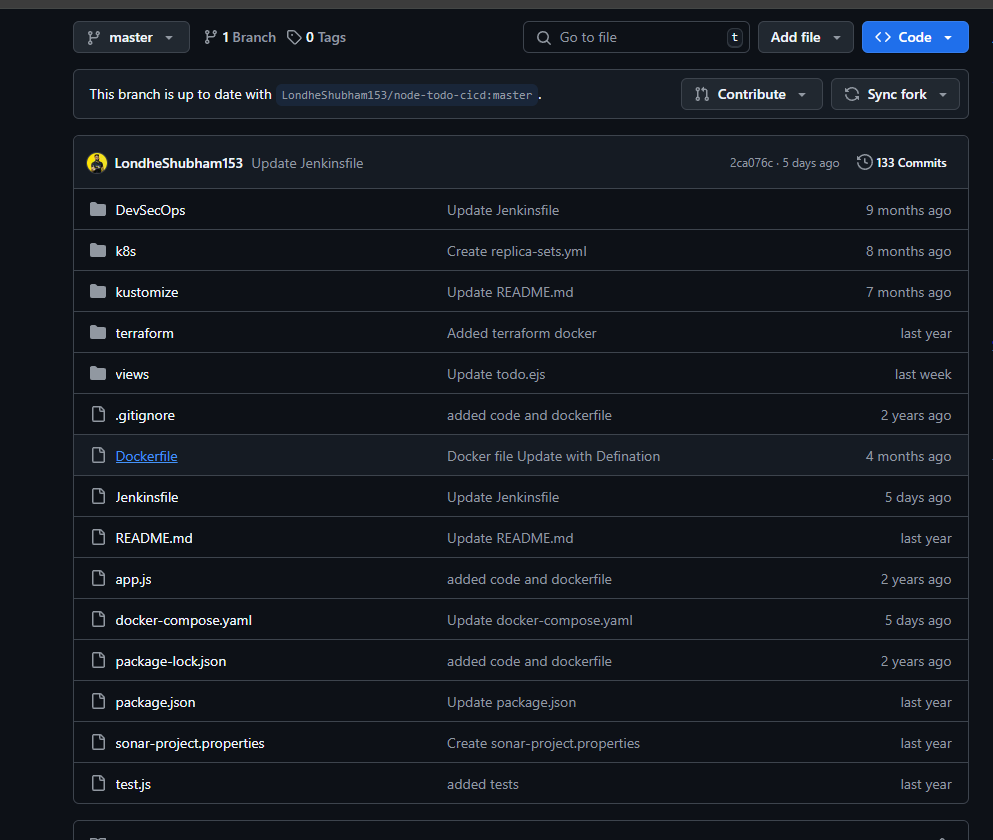
- Code Stage:
In the first stage, Jenkins pulls the app’s code from GitHub using the URL and branch you’ve specified in the pipeline. It makes sure it’s working with the right version of the app.
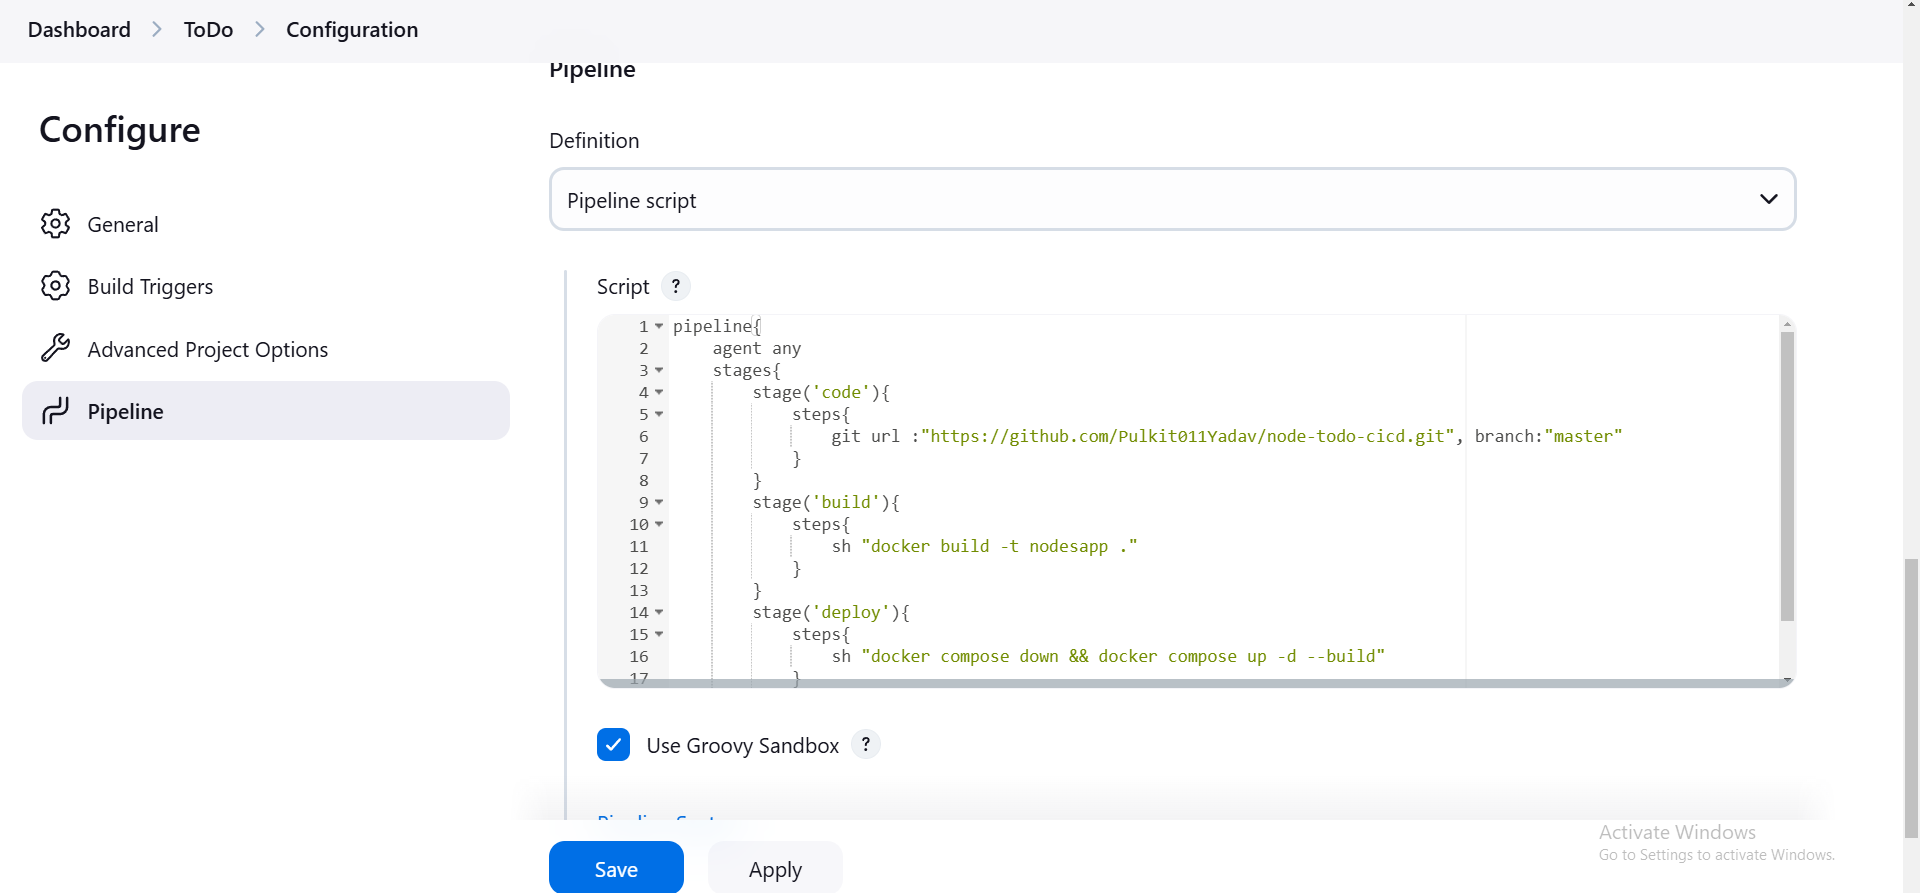
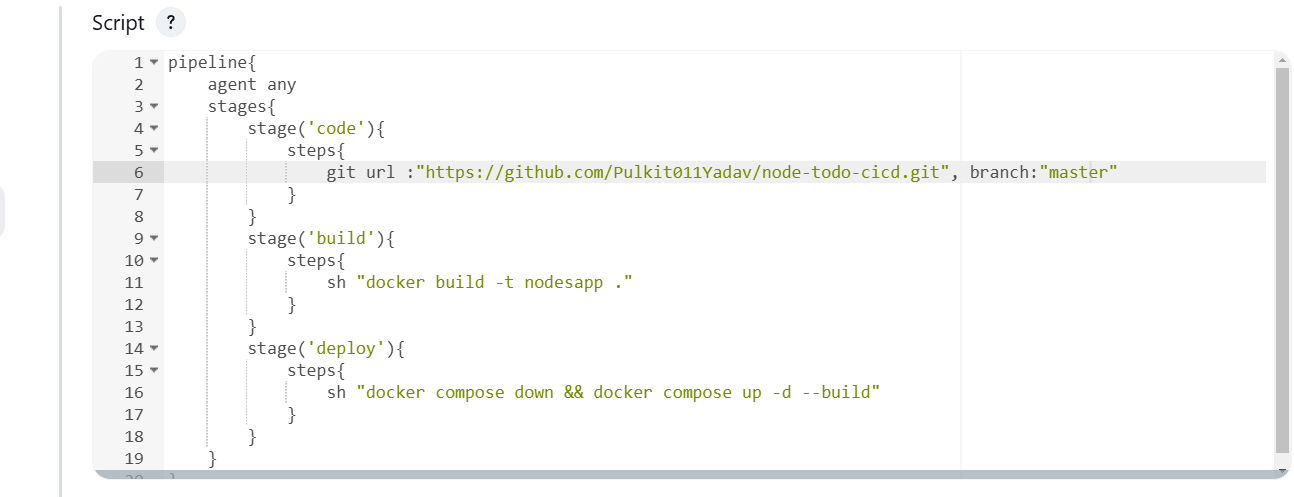
Build Stage:
In the second stage, Jenkins builds the Docker image for the app using the docker build -t image . command. The . means the Docker build will use the code from the current directory.Deploy Stage:
In the final stage, Jenkins uses Docker Compose to deploy the app. First, it stops any running containers with docker compose down. Then, it rebuilds and starts the container in detached mode -d with the --build option to make sure the image is rebuilt with the latest code.
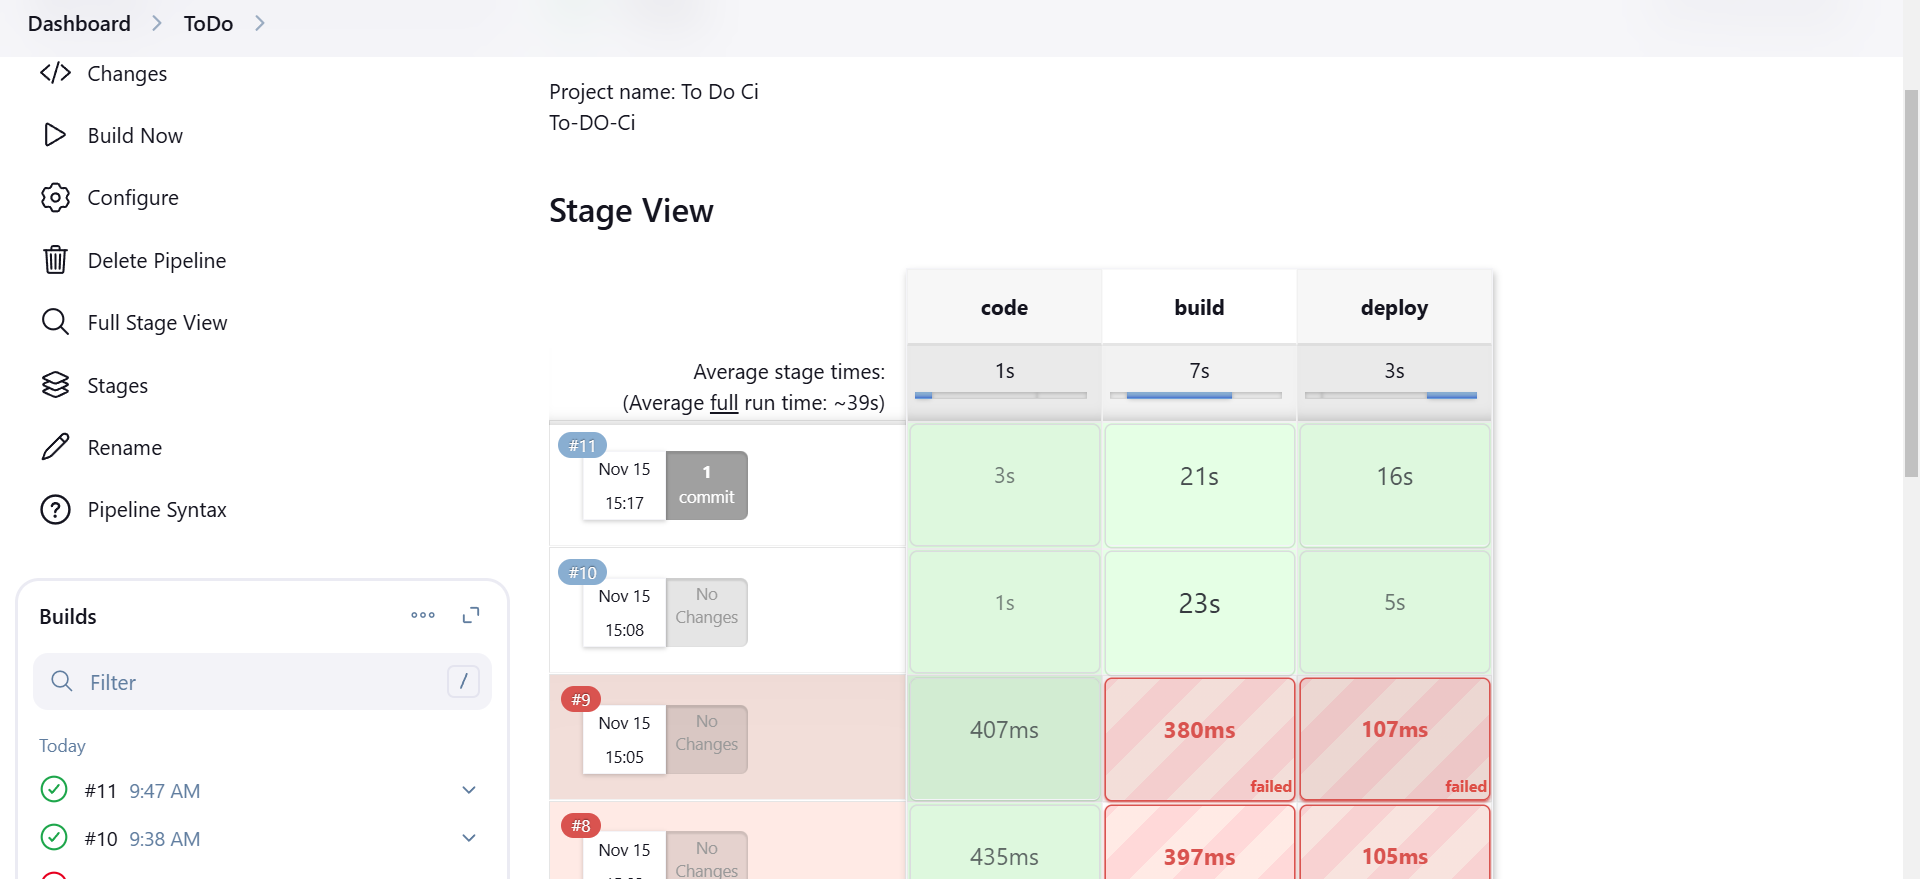
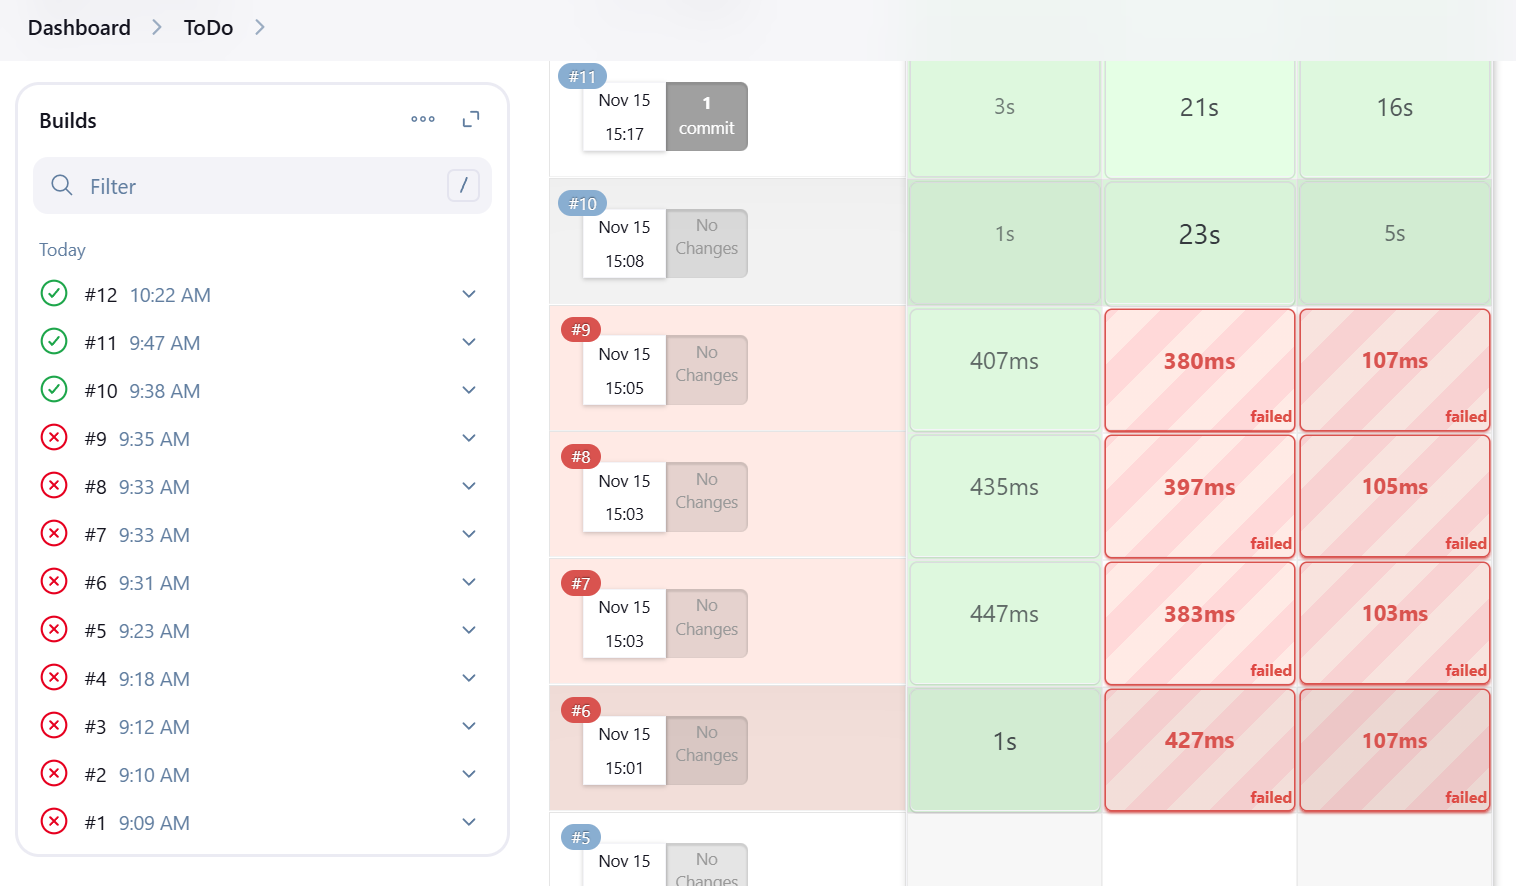
Now that everything is set, save the pipeline and run it. Congratulations! You’ve successfully created a Node.js To-Do app using Jenkins pipeline.
Step 4: Make your app accessible from the outside. To do this, head to the security settings of your AWS EC2 instance. Click Edit Inbound Rules under Security Groups. Add a new rule to open port 8000 (the port your app is running on). Save the changes.
Access Your App:
Hit save changes and open your web browser then type your public IP of EC2 along with :8000 HTTP://your-ec2-ip:8000 If everything is configured: You should see it Congrats! you have made it. Your app is online meaning your app is now up and running
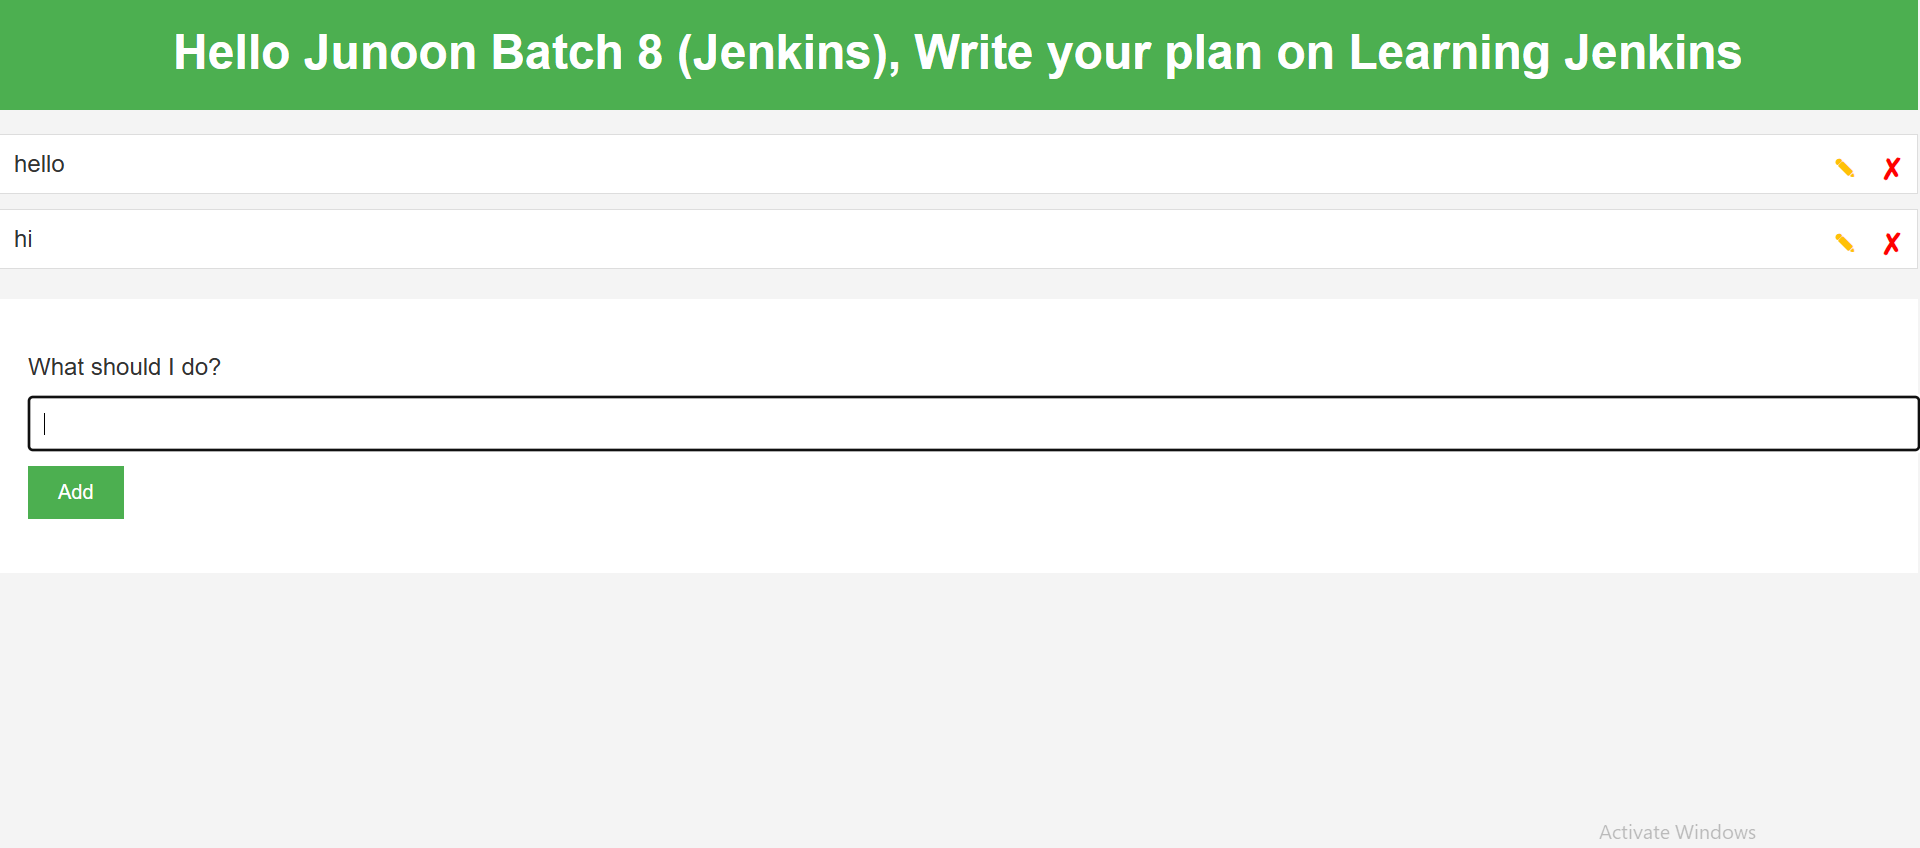
I hope you enjoyed this blog and found it easy to understand. We went through how to set up a Jenkins pipeline to build and deploy a Node.js To-Do app using Docker. If you have any questions or need help, feel free to ask—I’d love to hear from you! Thanks for reading, and happy learning
Subscribe to my newsletter
Read articles from Pulkit Yadav directly inside your inbox. Subscribe to the newsletter, and don't miss out.
Written by

Pulkit Yadav
Pulkit Yadav
DevOps Enthusiast | Exploring Cloud & Automation I’m an aspiring DevOps professional passionate about cloud computing, automation, and CI/CD pipelines. I’m currently gaining hands-on experience with tools like AWS, Docker, Kubernetes, Jenkins and GitLab CI/CD, Terraform, Ansible, and more. My focus is on improving development and deployment processes through continuous learning and practical application. Alongside my learning journey, I share my insights and experiences through blogs to help others who are exploring the same path. I believe in learning together and growing by sharing knowledge, and I’m excited to connect with like-minded individuals in the field. Let’s collaborate, share ideas, and grow together!