Creating a secure VPC with internet connected private subnets using AWS console
 Manoj Shet
A Virtual Private Cloud (VPC) in AWS is a dedicated network environment that enables users to isolate and manage their resources in a secure, private space within the broader AWS infrastructure. It essentially functions as a customizable virtual data center, offering full control over the network configuration, such as IP address ranges, subnets, route tables, and network gateways. This level of control is critical in creating secure and efficient architectures in the cloud, especially for organizations with stringent security requirements.
The primary function of a VPC is to provide a logically isolated section of the AWS cloud where users can launch AWS resources in a highly controlled environment. By using VPCs, organizations can segment their network based on specific needs and application requirements, such as isolating sensitive data and resources from public access or from other applications within the same organization. VPCs give users the flexibility to create public subnets, where resources like web servers can communicate with the internet, and private subnets, which are isolated from public networks and suitable for databases, backend services, and other sensitive applications.
Security is a key advantage of VPCs. Within a VPC, users can define security groups and network access control lists (ACLs) to control inbound and outbound traffic at multiple layers. Security groups act as virtual firewalls for resources within a VPC, allowing users to restrict traffic based on IP ranges, port numbers, and protocols, while network ACLs offer an additional layer of security at the subnet level. This granular level of control is essential for creating a secure environment, as it allows only authorized access to resources and can help mitigate the risk of unauthorized access or data breaches.
Moreover, VPCs provide options for connecting securely to on-premises data centers using Virtual Private Network (VPN) connections, AWS Direct Connect, or even peering with other VPCs within AWS or across regions. These connectivity options make it easy for organizations to build hybrid cloud architectures where sensitive workloads can stay on-premises while other workloads run in the cloud, all within a secure and controlled environment.
In summary, a VPC is fundamental for isolating AWS resources because it provides a robust, secure, and highly configurable environment. It allows organizations to design networks that meet their specific security and performance requirements while taking advantage of the scalability, flexibility, and cost-effectiveness of AWS.
This blog will guide through the process of creating a VPC with both public and private subnets, demonstrating how to structure a secure network that supports resources with different connectivity needs. It will cover how to set up a NAT (Network Address Translation) Gateway to allow resources in the private subnet to access the internet securely without being publicly accessible.
Overview of VPC Structure
In a typical VPC setup, the network is divided into public and private subnets:
Public Subnet: Contains resources that need direct internet access, such as web servers. This subnet is configured with an Internet Gateway, which allows inbound and outbound traffic from the internet.
Private Subnet: Contains resources like databases or application servers that do not need to be accessible from the internet directly. Instead, they need a secure way to connect outward (for example, to fetch updates or access external APIs) without exposing their IPs.
NAT Gateway for Internet Access in Private Subnets
The NAT Gateway serves as a bridge between the private subnet and the internet. Resources in a private subnet don't have a public IP address, meaning they can't be reached directly from outside the VPC. However, these resources may still need to access the internet for updates, downloads, or integrations with external services. This is where a NAT Gateway comes in.
When configured within the VPC, a NAT Gateway allows resources in the private subnet to initiate outbound traffic (such as a request for software updates) to the internet. However, the NAT Gateway does not permit incoming traffic from the internet to reach resources in the private subnet, keeping them isolated and secure. This setup ensures that only outbound traffic is allowed, protecting resources from any direct, potentially malicious access.
1. Step-by-Step Guide to VPC Creation
Create the VPC:
To create a VPC in AWS, start by defining the network’s IP address range using a Classless Inter-Domain Routing (CIDR) block. This block determines the IP addresses available within the VPC for subnets and resources. Here’s a step-by-step guide on creating a VPC with a specified CIDR block:
Navigate to the VPC Console
In the AWS Management Console, go to VPC under Networking & Content Delivery.
In the VPC Dashboard, click Create VPC to start the setup.
Specify the VPC Details
Name Tag: Provide a name for the VPC for easy identification.
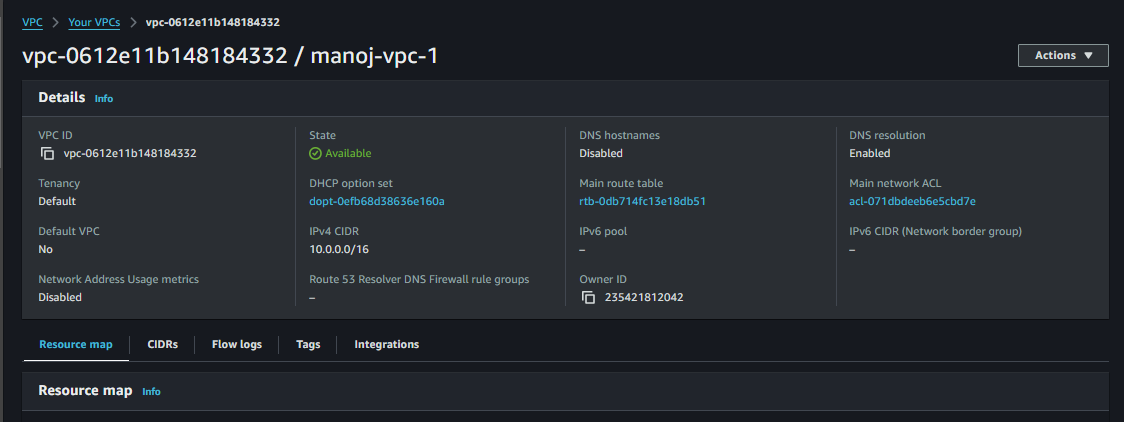
IPv4 CIDR Block: Enter a CIDR block for the VPC. A common choice for a private VPC is 10.0.0.0/16, which provides up to 65,536 IP addresses for the VPC. Adjust the CIDR block based on network requirements and planned subnets.
CIDR Block Example: 10.0.0.0/16
Tenancy: Select Default for shared tenancy unless dedicated hardware is required. Dedicated instances are costly and typically used only for specific compliance requirements.
Review and Create the VPC
After configuring these options, review the settings and click Create VPC.
AWS will provision the VPC based on the specified settings, and it will appear in the VPC Dashboard.
Verify the VPC
- Once created, verify that the VPC is listed in the VPC Dashboard with the specified CIDR block.

Create Public and Private Subnets
Set Up the Public Subnet
Navigate to the VPC Dashboard: In the AWS Management Console, go to VPC under Networking & Content Delivery.
Select Subnets: In the VPC Dashboard, click on Subnets and then Create Subnet.
Configure the Public Subnet:
VPC ID: Choose the VPC created in the previous steps.
Subnet Name: Give a descriptive name, such as public-subnet.
Availability Zone: Select an Availability Zone where the subnet will reside. Assigning subnets across different zones can improve application availability.
IPv4 CIDR Block: Specify a CIDR block within the VPC’s range, such as 10.0.0.0/24, providing up to 256 IP addresses for resources in this subnet.
Enable Auto-Assign Public IPs:
After creating the subnet, navigate back to the Subnets section, select the public subnet, and click Actions > Modify auto-assign IP settings.
Enable Auto-assign public IPv4 address and save the changes. This setting will automatically assign public IPs to instances launched in this subnet, making them accessible over the internet.
Verify the Public Subnet:
- Confirm that the subnet is created with the specified CIDR block and that auto-assign public IP is enabled.
Set Up the Private Subnet
Create the Private Subnet:
Go to Subnets in the VPC Dashboard, then click Create Subnet.
VPC ID: Select the same VPC.
Subnet Name: Name this subnet as private-subnet.
Availability Zone: Choose an Availability Zone, which could be the same or different from the public subnet’s.
IPv4 CIDR Block: Assign a CIDR block, such as 10.0.1.0/24. Ensure that this CIDR block does not overlap with the public subnet but falls within the VPC’s range.
Disable Public IP Assignment:
Once created, go to the Subnets section, select the private subnet, and click Actions > Modify auto-assign IP settings.
Ensure that Auto-assign public IPv4 address is disabled. This setting prevents resources in this subnet from receiving public IPs, keeping them inaccessible from the internet directly.
Verify the Private Subnet:
- Confirm the private subnet’s creation with the intended CIDR block and ensure auto-assign public IP is disabled.
The public subnet allows instances to receive public IP addresses, making them accessible to external networks when an Internet Gateway is attached to the VPC. The private subnet does not assign public IPs to instances, isolating these resources from direct internet access, ideal for back-end or sensitive resources. Later, a NAT Gateway will be added to enable outbound internet access for resources in the private subnet without exposing them directly.

Set Up the Internet Gateway
Create the Internet Gateway
Navigate to the VPC Console: In the AWS Management Console, go to VPC under Networking & Content Delivery.
Select Internet Gateways: In the VPC Dashboard, click on Internet Gateways and then Create Internet Gateway.
Configure the Internet Gateway:
- Name Tag: Assign a name to the Internet Gateway, to help with identification.
Create the Internet Gateway: Click Create Internet Gateway to complete the process.
Attach the Internet Gateway to the VPC
Attach Internet Gateway:
After creating the Internet Gateway, select it in the Internet Gateways section.
Click Actions > Attach to VPC.
Select VPC:
- Choose the VPC created previously from the list and click Attach Internet Gateway.
Verify Attachment:
- Once attached, the Internet Gateway will be linked to the VPC, enabling public subnets within the VPC to communicate with the internet, provided the correct route tables are configured.
Creating and attaching an Internet Gateway provides a pathway for resources in public subnets to communicate with external networks. This setup is crucial for web servers or other resources that need to be publicly accessible. In the next steps, configuring route tables will direct traffic through the Internet Gateway for resources in the public subnet.

Set Up the NAT Gateway
Create a NAT Gateway in the Public Subnet
Navigate to the VPC Console: In the AWS Management Console, go to VPC under Networking & Content Delivery.
Select NAT Gateways: In the VPC Dashboard, click on NAT Gateways and then Create NAT Gateway.
Configure the NAT Gateway:
Subnet: Select the public subnet created previously (e.g.,
public-subnet). This ensures that the NAT Gateway will be placed in a subnet with internet access, allowing outbound connections.Elastic IP Allocation: Click Allocate Elastic IP to assign a static public IP to the NAT Gateway. This Elastic IP provides a consistent, unique public IP address for the NAT Gateway, enabling stable, outbound internet access for resources in the private subnet.
Create the NAT Gateway: Once the subnet and Elastic IP are configured, click Create NAT Gateway.
Allocate an Elastic IP for the NAT Gateway
Elastic IP Role:
Elastic IP is a static, public IP address that allows resources in the private subnet to initiate outbound connections to the internet through the NAT Gateway.
The NAT Gateway, placed in the public subnet with the Elastic IP, acts as an intermediary. When resources in the private subnet need to access the internet (for updates or external APIs), their requests route through the NAT Gateway.
The Elastic IP ensures that the NAT Gateway has a fixed public IP address, allowing consistent internet access for the private subnet’s resources, without making them directly accessible from the internet.
Verify the NAT Gateway: After creation, confirm that the NAT Gateway appears in the NAT Gateways section with the attached Elastic IP and correct subnet.
Creating a NAT Gateway in the public subnet, with an allocated Elastic IP, allows resources in the private subnet to initiate outbound internet access securely. The NAT Gateway forwards outbound traffic without exposing the resources directly to the internet, maintaining the privacy and security of the private subnet.

Configure Routing
Public Route Table
Navigate to the VPC Console: In the AWS Management Console, go to VPC under Networking & Content Delivery.
Select Route Tables: In the VPC Dashboard, click on Route Tables and then Create Route Table.
Name the Route Table:
Name Tag: Provide a name for the route table, to identify it as associated with the public subnet.
VPC: Choose the VPC where the public and private subnets are created.
Create Route Table: Click Create route table to add it to the VPC.
Configure Routes to the Internet Gateway
Select the Route Table: After creation, select the new route table in the Route Tables section.
Add a Route to the Internet Gateway:
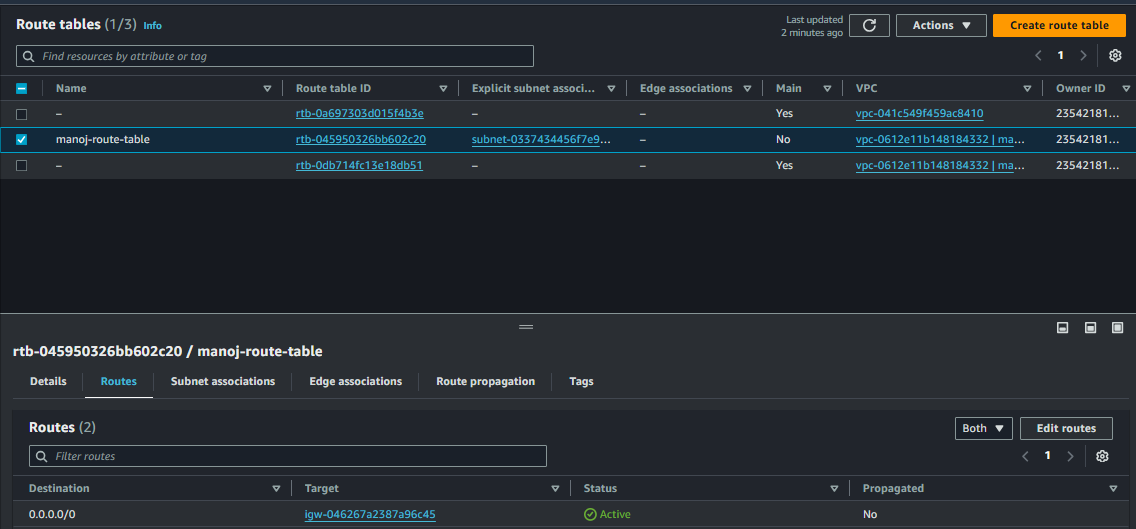
Go to the Routes tab and click Edit routes > Add route.
Destination: Enter 0.0.0.0/0, which represents all IPv4 addresses. This route allows all outbound traffic to the internet.
Target: Select the Internet Gateway created earlier. This directs all internet-bound traffic from the public subnet through the Internet Gateway.
Save Changes: Click Save routes to update the route table with the internet route.
Associate the Public Route Table with the Public Subnet
Go to the Subnet Associations: In the route table’s settings, click on the Subnet associations tab and then Edit subnet associations.
Select the Public Subnet:
Check the box next to the public subnet created earlier.
Associating this route table with the public subnet enables resources in this subnet to use the Internet Gateway for internet access.
Save Associations: Click Save associations to apply the route table to the public subnet.


Private Route Table
Navigate to the VPC Console: In the AWS Management Console, go to VPC under Networking & Content Delivery.
Select Route Tables: In the VPC Dashboard, click on Route Tables and then Create Route Table.
Name the Route Table:
Name Tag: Give the route table a descriptive name, to indicate it’s for the private subnet.
VPC: Select the VPC in which the private subnet was created.
Create Route Table: Click Create route table to complete the process and add it to the VPC.
Add a Route to the NAT Gateway
Select the Route Table: In the Route Tables section, select the newly created route table.
Add a Route for Internet Traffic:
Go to the Routes tab and click Edit routes > Add route.
Destination: Enter 0.0.0.0/0, representing all IPv4 traffic destined for the internet.
Target: Choose the NAT Gateway that was created in the public subnet, which will handle the routing of outbound internet traffic for resources in the private subnet.
Save Changes: Click Save routes to add the route that sends internet-bound traffic to the NAT Gateway.
Associate the Private Route Table with the Private Subnet
Go to Subnet Associations: In the route table’s settings, click on the Subnet associations tab and then Edit subnet associations.
Select the Private Subnet:
- Check the box next to the private subnet that needs to be routed through the NAT Gateway.
Save Associations: Click Save associations to apply the route table to the private subnet.
Associating the public subnet with a route table that includes a route to the Internet Gateway enables resources in this subnet to communicate directly with the internet. This configuration is essential for public-facing services or applications. The private subnet will remain isolated, with internet access only routed through the NAT Gateway. By creating a separate route table for the private subnet and routing outbound traffic through the NAT Gateway, resources in the private subnet can access the internet for tasks like software updates, API calls, or other external communication, while still being shielded from direct internet exposure. This setup ensures that only the NAT Gateway (in the public subnet) can be used for internet-bound traffic, keeping the private subnet isolated and secure.
Enabling Secure Internet Access for Private Subnet Resources Using a NAT Gateway and Bastion Host
To provide internet access to resources within a private subnet, several steps were taken to ensure secure and controlled access to the internet. The first step in the process was creating a NAT Gateway. This was essential because resources in the private subnet need to access the internet for tasks such as software updates, external API calls, and other outbound traffic, but these resources should not be exposed directly to the internet.
Creating the NAT Gateway
Elastic IP Allocation: The first step in creating the NAT Gateway was allocating an Elastic IP. This public IP would be used by the NAT Gateway to route internet traffic from the private subnet. Elastic IPs are essential because they are static and persist even if the NAT Gateway is restarted or the underlying instance is terminated, making it a reliable choice for production environments.
NAT Gateway Creation: After allocating the Elastic IP, the NAT Gateway was created in the public subnet. The NAT Gateway serves as the intermediary between the private subnet and the internet, forwarding requests from instances in the private subnet to the internet and relaying responses back to them.
Configuring the Route Table
Once the NAT Gateway was set up, the next step was to configure the route table for the private subnet. A separate route table was created and associated with the private subnet to ensure that all outbound internet traffic from the private instances would be routed through the NAT Gateway.
- A new route was added to the route table with a destination of 0.0.0.0/0, which indicates that any outbound traffic should be forwarded to the NAT Gateway. This allows resources within the private subnet to send internet-bound traffic through the NAT Gateway while remaining shielded from direct internet access.
Connecting to Private Subnet EC2 Instance
securely connect to the resources in the private subnet, a Bastion Host was used. A Bastion Host is an EC2 instance located in the public subnet that acts as a gateway for accessing private instances. Here’s how this setup was achieved:
Configuring Inbound Rules: The Bastion Host was configured with specific inbound rules in its security group. The rules allowed SSH access from trusted IPs, specifically the local machine’s IP address, to ensure that only authorized users could access the Bastion Host.
Private Resource Access: The EC2 instance in the private subnet, which needed internet access, was configured with a security group allowing SSH access only from the private IP of the Bastion Host. This ensured that only the Bastion Host could communicate with the private instance, protecting it from other potential threats.
Connecting to the Bastion Host and Private Subnet
SSH to Bastion Host: The Bastion Host was accessed using SSH by connecting from the local machine with the appropriate key pair. This key pair was securely generated and used for authentication.
Copying the Key Pair: To access the EC2 instance in the private subnet, the key pair needed to be copied to the Bastion Host. This was done using SCP (Secure Copy Protocol), which allowed the secure transfer of the key pair from the local machine to the Bastion Host.
SSH into the Private Instance: Once the key pair was transferred to the Bastion Host, it was used to SSH into the EC2 instance in the private subnet. This two-step SSH connection (first to the Bastion Host, then to the private instance) ensured that the private instance remained isolated while still allowing for secure management and internet connectivity through the NAT Gateway.
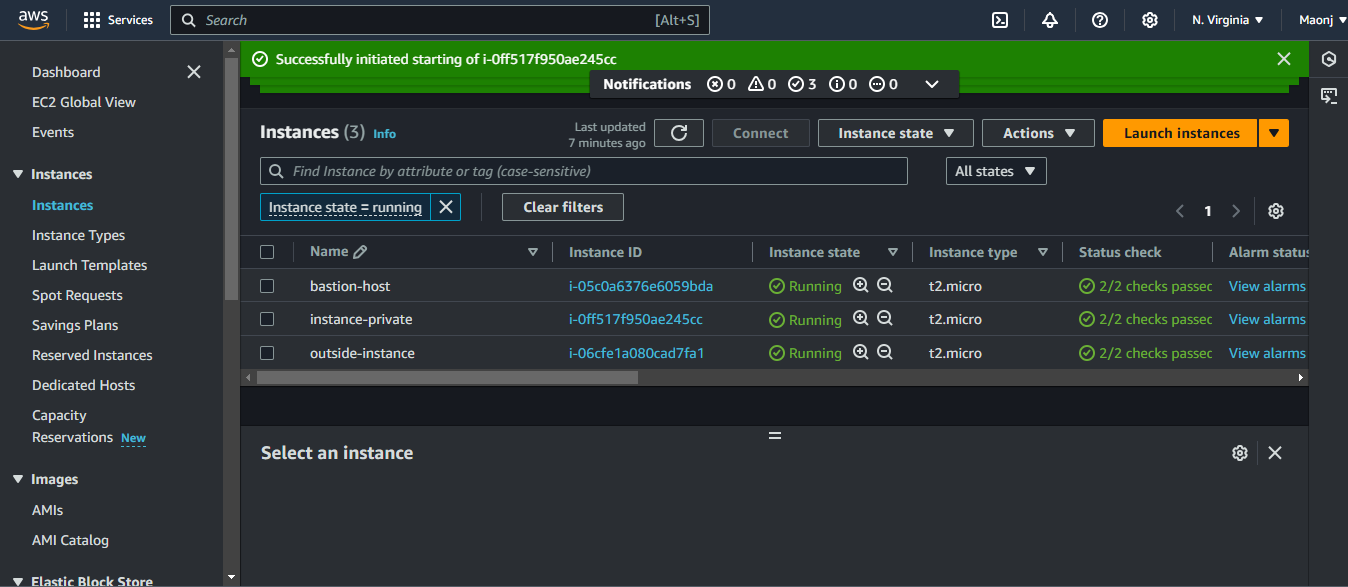

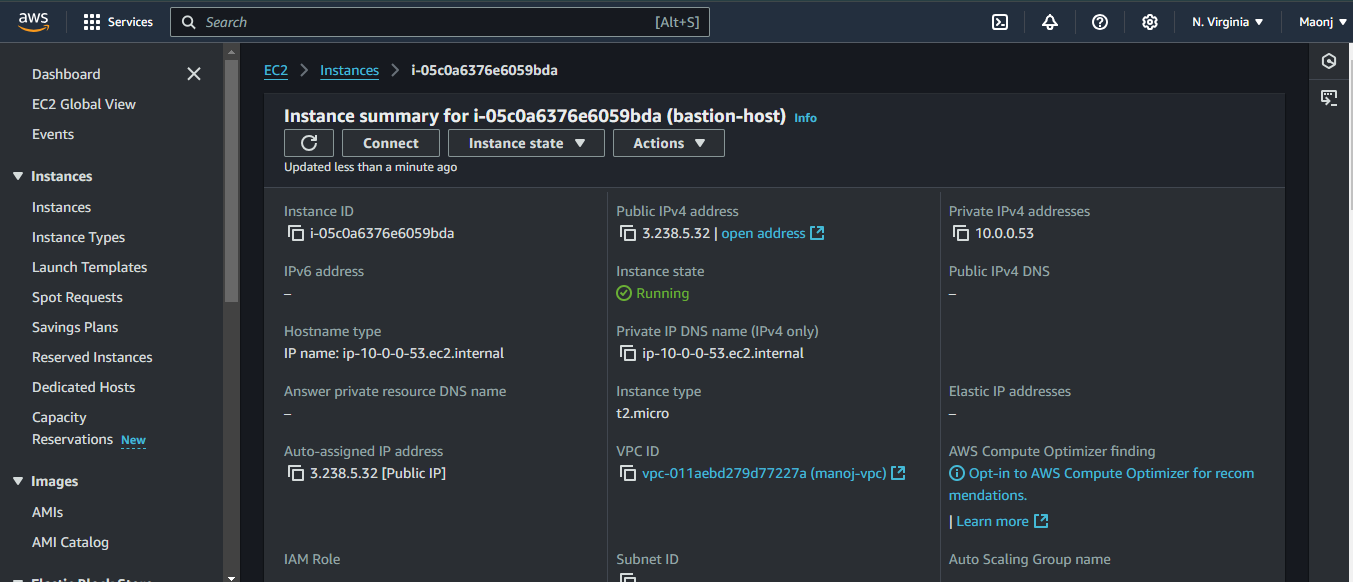
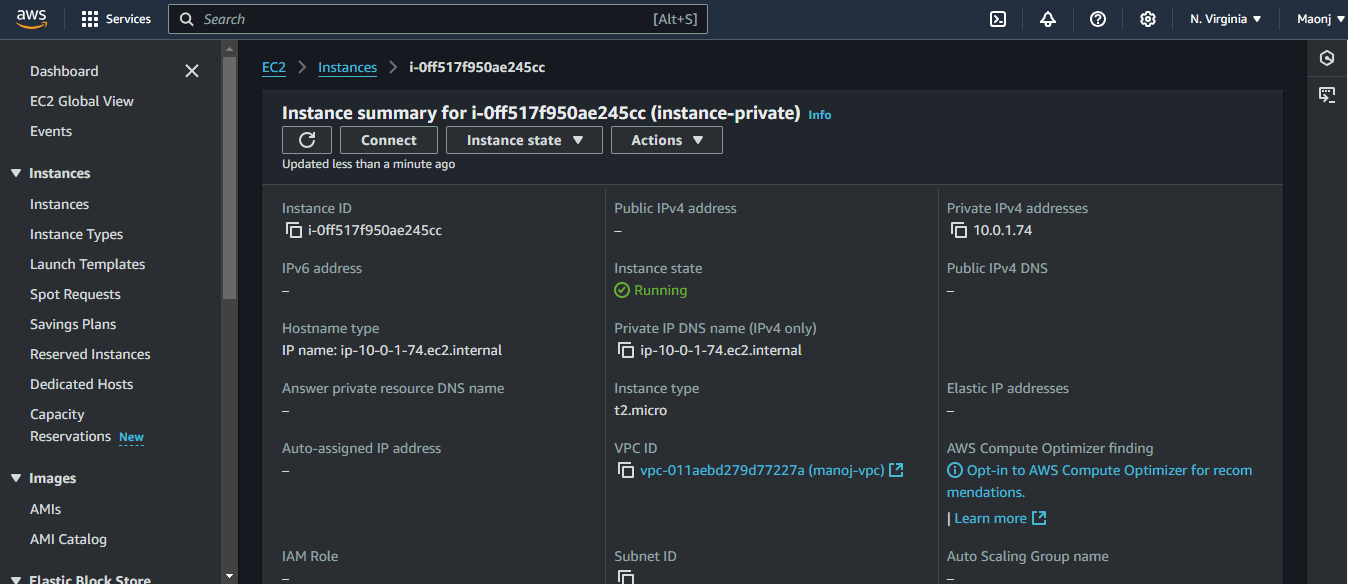
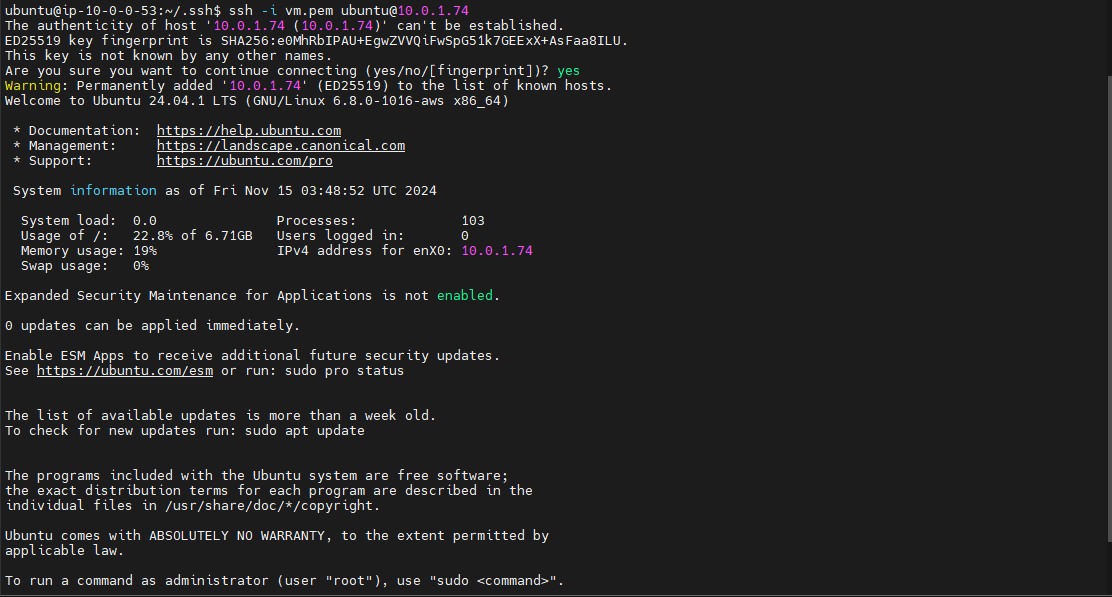
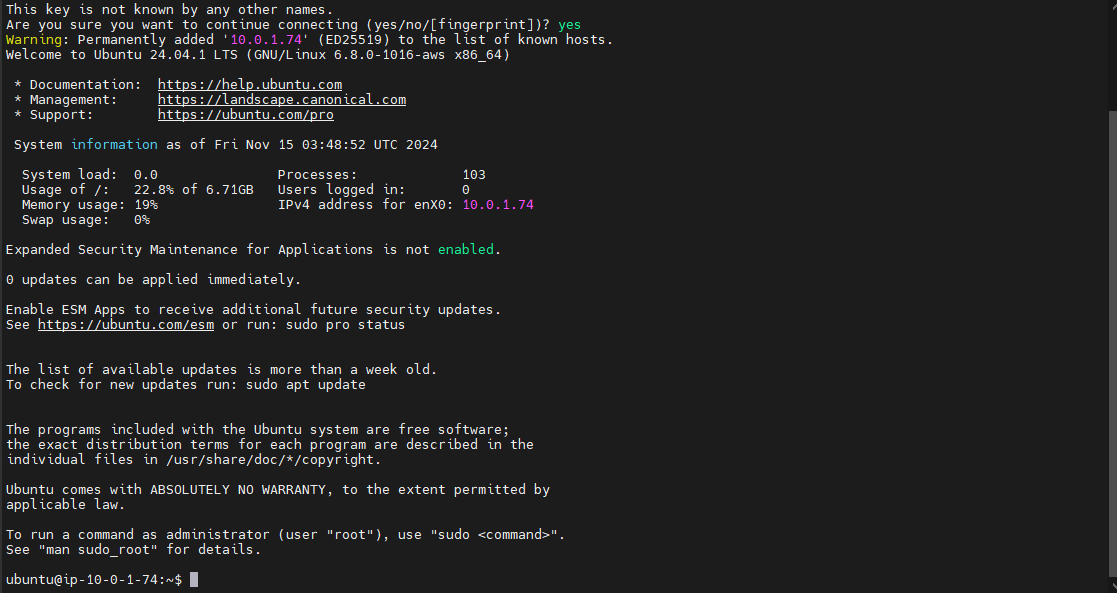
By following this process, internet access was successfully provided to the resources in the private subnet. This approach allows for secure management of private instances while keeping them shielded from the public internet. The NAT Gateway, combined with the Bastion Host, provides a robust solution for securely managing resources in a private subnet and enabling them to access the internet for necessary tasks without compromising security.
Conclusion
This successfully demonstrated how to create a secure and efficient VPC in AWS, featuring both public and private subnets with controlled internet access. By setting up a VPC with proper network segmentation, resources within the private subnet are shielded from direct internet exposure, ensuring a more secure environment. The Internet Gateway allows resources in the public subnet to freely access the internet, while the NAT Gateway facilitates outbound internet traffic for private subnet resources, such as EC2 instances, without exposing them to the public internet.
This approach strikes an essential balance between accessibility and security, enabling workloads in the private subnet to connect to external services while maintaining isolation from external threats. The use of separate route tables for public and private subnets further optimizes the network flow and routing policies. This architecture is ideal for scenarios where sensitive workloads need to be secured, yet still require the ability to update or interact with the internet, such as in a multi-tier web application setup.
By implementing this setup, a solid foundation for scalable, secure, and flexible cloud infrastructure is established. Whether you are deploying web servers, databases, or backend services, this VPC configuration allows for secure internet access and isolation, which is key to maintaining a robust cloud environment.
Subscribe to my newsletter
Read articles from Manoj Shet directly inside your inbox. Subscribe to the newsletter, and don't miss out.
Written by
