Bring the Cloud Home, Part 1: Automating bare-metal k3s with Ubuntu Autoinstaller
 Cadence Agyirey
In the last blog, I provided a high-level overview of the motivations behind the Bring the Cloud Home series and our our design for a Kubernetes cluster at home that uses Site Reliability Engineering (SRE) best practices to make the process automatic, repeatable, and secure.
By making heavy use of infrastructure-as-code techniques, I'll show you in this blog how we can create a YAML template for a Ubuntu Server that will allow us to stand up a fully ready Kubernetes cluster in minutes using just a thumb drive and a laptop.
Creating a Ubuntu Server installer USB
We'll need to prepare our USB drive in order to gather some information about our hardware before we create our template.
Download the Ubuntu Server 24.04.1 ISO
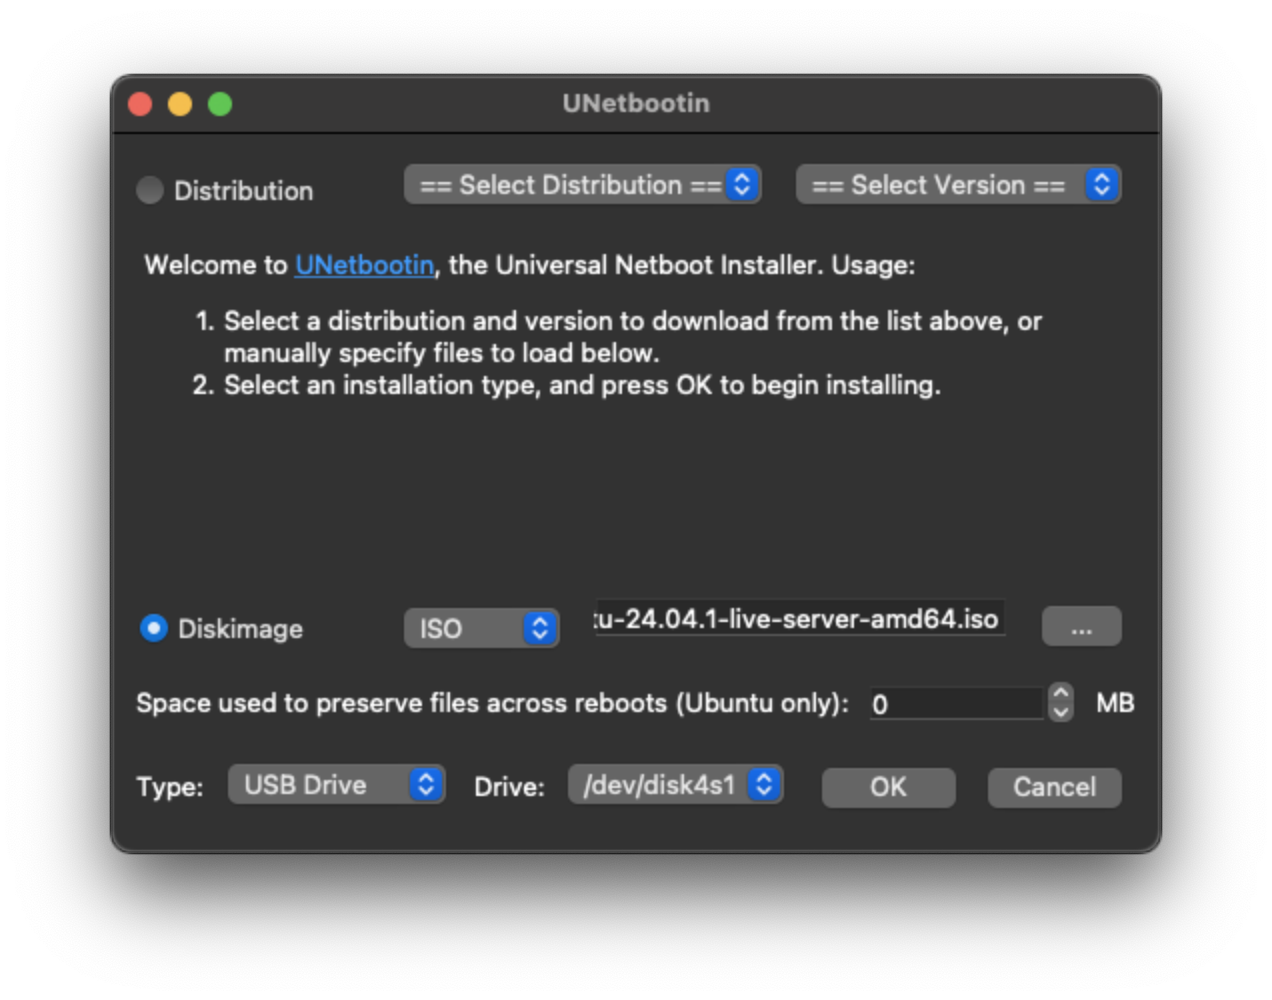
Prepare your USB drive using unetbootin
Direct download: unetbootin.github.io
MacOS & Homebrew:
brew install unetbootinWindows & Chocolatey:
choco install -y unetbootin
Select
Diskimageas the target and load the ISO file you downloaded using the file dialog, your target USB drive from the dropdown, and hit OK.
Cloud-init and the Ubuntu Autoinstaller
The Ubuntu autoinstaller allows us to perform a "hands-off" installation by supplying a remote endpoint to fetch its configuration from during the installation process. We'll host our autoinstall configuration file using python http.server or nocloud-metadata-server .
Creating autoinstall configuration provides an example of common options; for the complete list, see the autoinstall configuration reference manual.
Cloud-init is the industry-standard method for configuring cloud instances of Ubuntu and many other Linux distributions. It provides extra flexibility beyond the autoinstaller options, allowing us to customize every aspect of a Linux instance before first boot.
See the cloud-init module reference for a guide to the capabilities we'll be leveraging in the next section.
Cloud-init and autoinstall interaction explains that we can provide options from both the cloud-init user-data schema and the Ubuntu autoinstall schema, using a commonly misunderstood format:
#cloud-config

# note: any cloud-init options provided at the top level will be applied to the *installer* environment

autoinstall:
    version: 1
    ... # Ubuntu autoinstaller options go under `autoinstall`
    user-data:
        ... # cloud-init options go under `autoinstall.user-data`
#cloud-config header? When providing autoinstall via cloud-init, the autoinstall configuration is provided as cloud config data. This means the file requires a #cloud-config header and the autoinstall directives are placed under a top level autoinstall: key.(source)
Basically, when supplying config from a remote endpoint, cloud-init kicks off the install. Unlike a config dropped onto your USB, it can accept more than just #cloud-config files, so we use the header to indicate what type of configuration is being supplied.
Equipped with this information, we can put a basic template of our own together using the manual:
#cloud-init
autoinstall:
  version: 1

  # Update Subiquity, the Ubuntu server installer
  refresh-installer:
    update: yes

  # Use a fully-updated minimal image for a cloud-like environment
  source:
    id: ubuntu-server-minimal
    updates: all

  # Install (non-free) codecs — required for transcoding
  codecs:
    install: yes

  # Install all hardware drivers recommended by `ubuntu-drivers`
  drivers:
    install: yes

  # enable SSH with ED25519 keys only
  ssh:
    install-server: yes
    allow-pw: no

  # internationalization settings
  keyboard:
    layout: us

  timezone: geoip

  locale: "en_US.UTF-8"

  # default user (uid 1000)
  identity:
    name: ubuntu
    host: ubuntu
    # generate using `openssl passwd` or `mkpasswd`
    passwd: "$6$bhZARn1NjBXaQ.M.$JqHfRKB96fwRQQWNGH.tBxyECYY9rrbBeS8br84ccn4OSnC.7pyhvHunpobZ8fV8NCOIXasRGyZT4MCJWQYtM1" # ubuntu
Running the autoinstaller
Providing autoinstall configuration explains that we can supply this configuration as a cloud-config file by dropping it onto the install media, or our preferred method of hosting it on a local HTTP server whose address we'll provide during installation. If all goes right, it will require just four lines of manual keyboard input.
Understanding Ubuntu's install sequence
While Canonical docs describe how line arguments can be used to pass our configuration as a command line parameter when booting into the installer, they are less clear about how to provide it. The quickstart has instructions for using kvm virtualization, but nothing about bare-metal installations:
kvm -no-reboot -m 2048 \
    -drive file=image.img,format=raw,cache=none,if=virtio \
    -cdrom ~/Downloads/ubuntu-<version-number>-live-server-amd64.iso \
    -kernel /mnt/casper/vmlinuz \
    -initrd /mnt/casper/initrd \
    -append 'autoinstall ds=nocloud-net;s=http://_gateway:3003/'
If you haven't worked with Linux VMs extensively, this syntax will seem opaque, and I couldn’t find a good explanation of the meaning of this code in Canonical's docs. In fact, this snippet is from a thread on the Ubuntu forums that hasn't been updated much since the autoinstaller was introduced in Ubuntu 20.04!
First we'll break down what's happening here so it doesn't remain folk knowledge, and then we'll translate this into a format that the Ubuntu bootloader will accept.
GRUB2 (or GRUB) is Ubuntu's default bootloader. In bare-metal scenarios, this is our interface for configuring how the autoinstall process is kicked off. GRUB passes the arguments to the kernel, and then the Ubuntu installer framework, called Subiquity, picks them up.
Lines 1-3: Start a VM with a previously downloaded Ubuntu installer ISO
Line 4:
-kernelloads/casper/vmlinuz, a compressed, bootable Linux image from the mounted installer. Equivalent to the GRUB2 command,linuxin bare-metal scenarios.Line 5:
-initrdloads/casper/initrdas the initial RAM state for the installer. Equivalent to theinitrdGRUB command.Line 6:
-appendpasses arbitrary kernel arguments. When using GRUB, they will instead appear after/casper/vmlinuz.autoinstall, searched for by the Ubuntu installation backend, called Subiquity, skips a confirm dialogue on destructive disk actions.dsordatasourceindicates which source or cloud provider to retrieve configuration from.nocloud(sometimes appears asnocloud-net; this is legacy syntax removed in Subiquity 23.3) is the only data source relevant to us.sorsourcecontains the URL of a filesystem, HTTP, or FTP source.
From the datasources/nocloud page in cloud-init's docs, we can see that it accepts four input files at the source endpoint: user-data, meta-data, vendor-data, and network-config.
The user-data and meta-data files must be present at the URL we provide, or the autoinstall process will be skipped and you'll be booted back to the installer menu. vendor-data and network-config are optional, despite what the docs say.
Translating to GRUB2
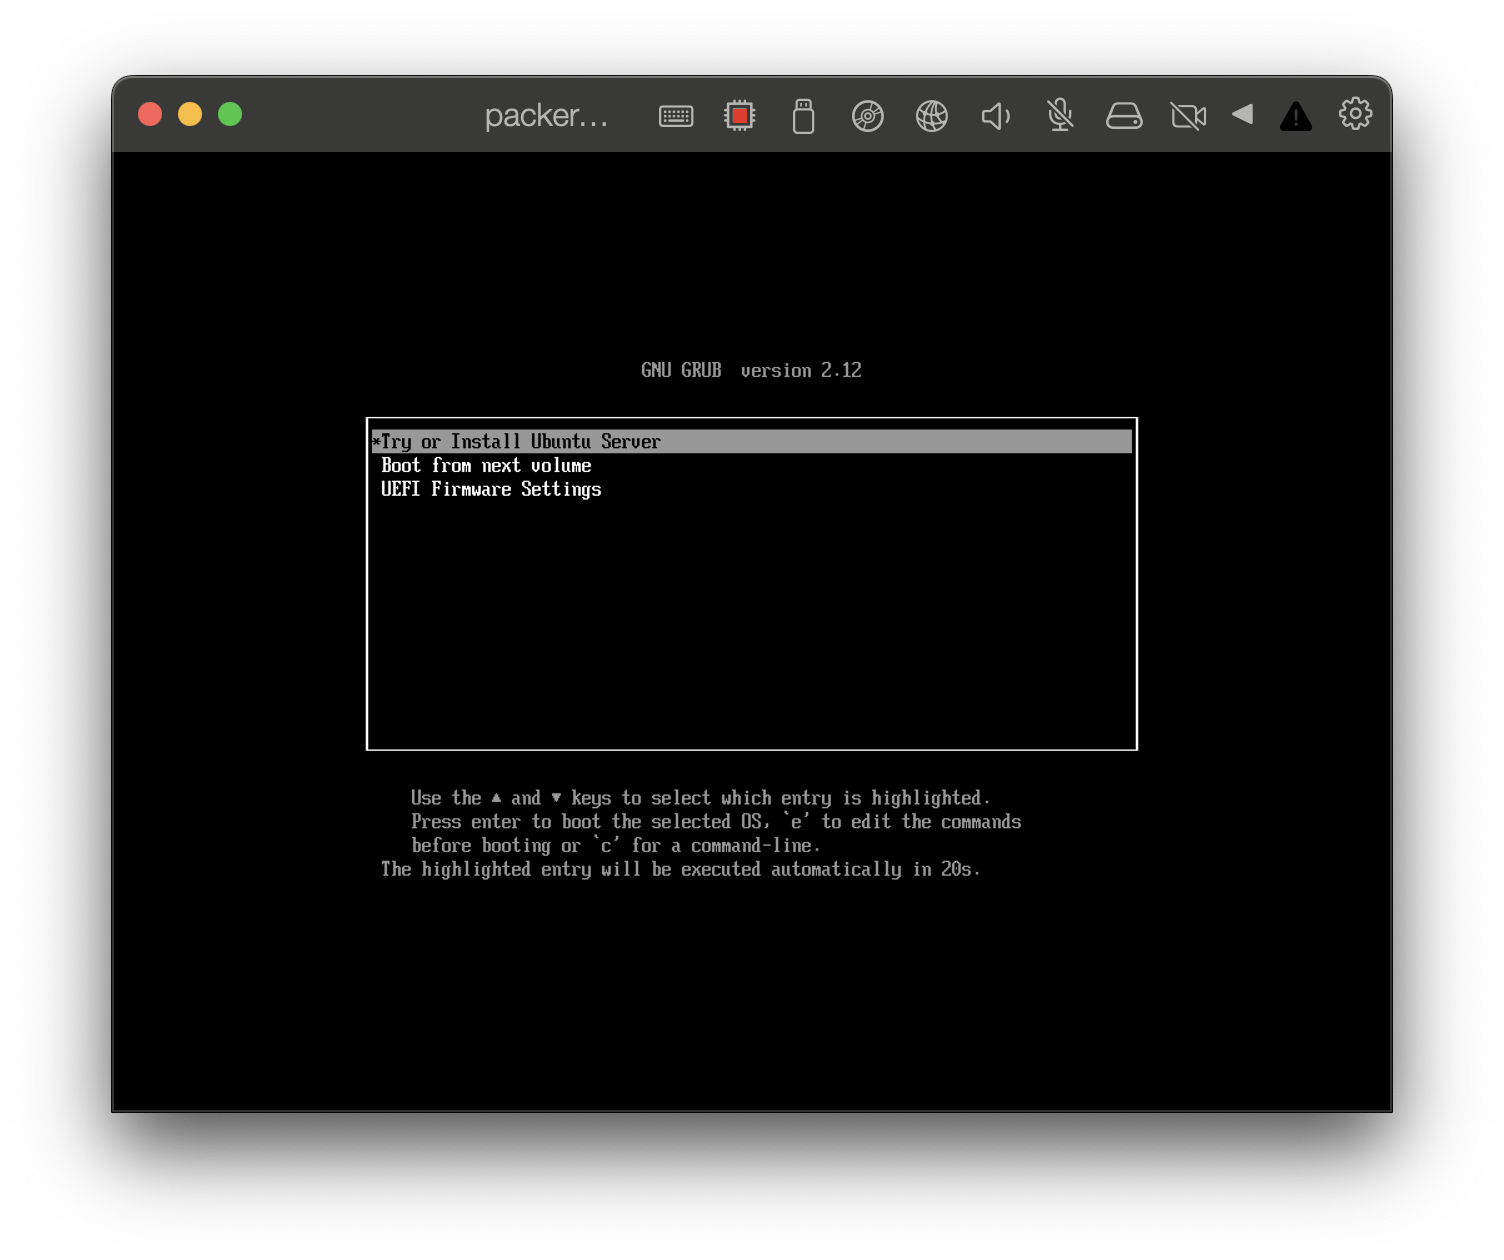
In order to understand what this would look like as a GRUB2 command, let’s boot into the USB installer we made earlier and hit e at the bootloader screen to edit the install command.

Here's what this looks like in grub.cfg syntax:
menuentry "Try or Install Ubuntu Server" {
    set gfxpayload=keep
    linux   /casper/vmlinuz ---
    initrd  /casper/initrd
}
Notice the /casper/vmlinuz argument — we recognize this format from the kvm arguments given in the Canonical tutorial. Let's try constructing a command line using what we know about GRUB and kvm arguments.
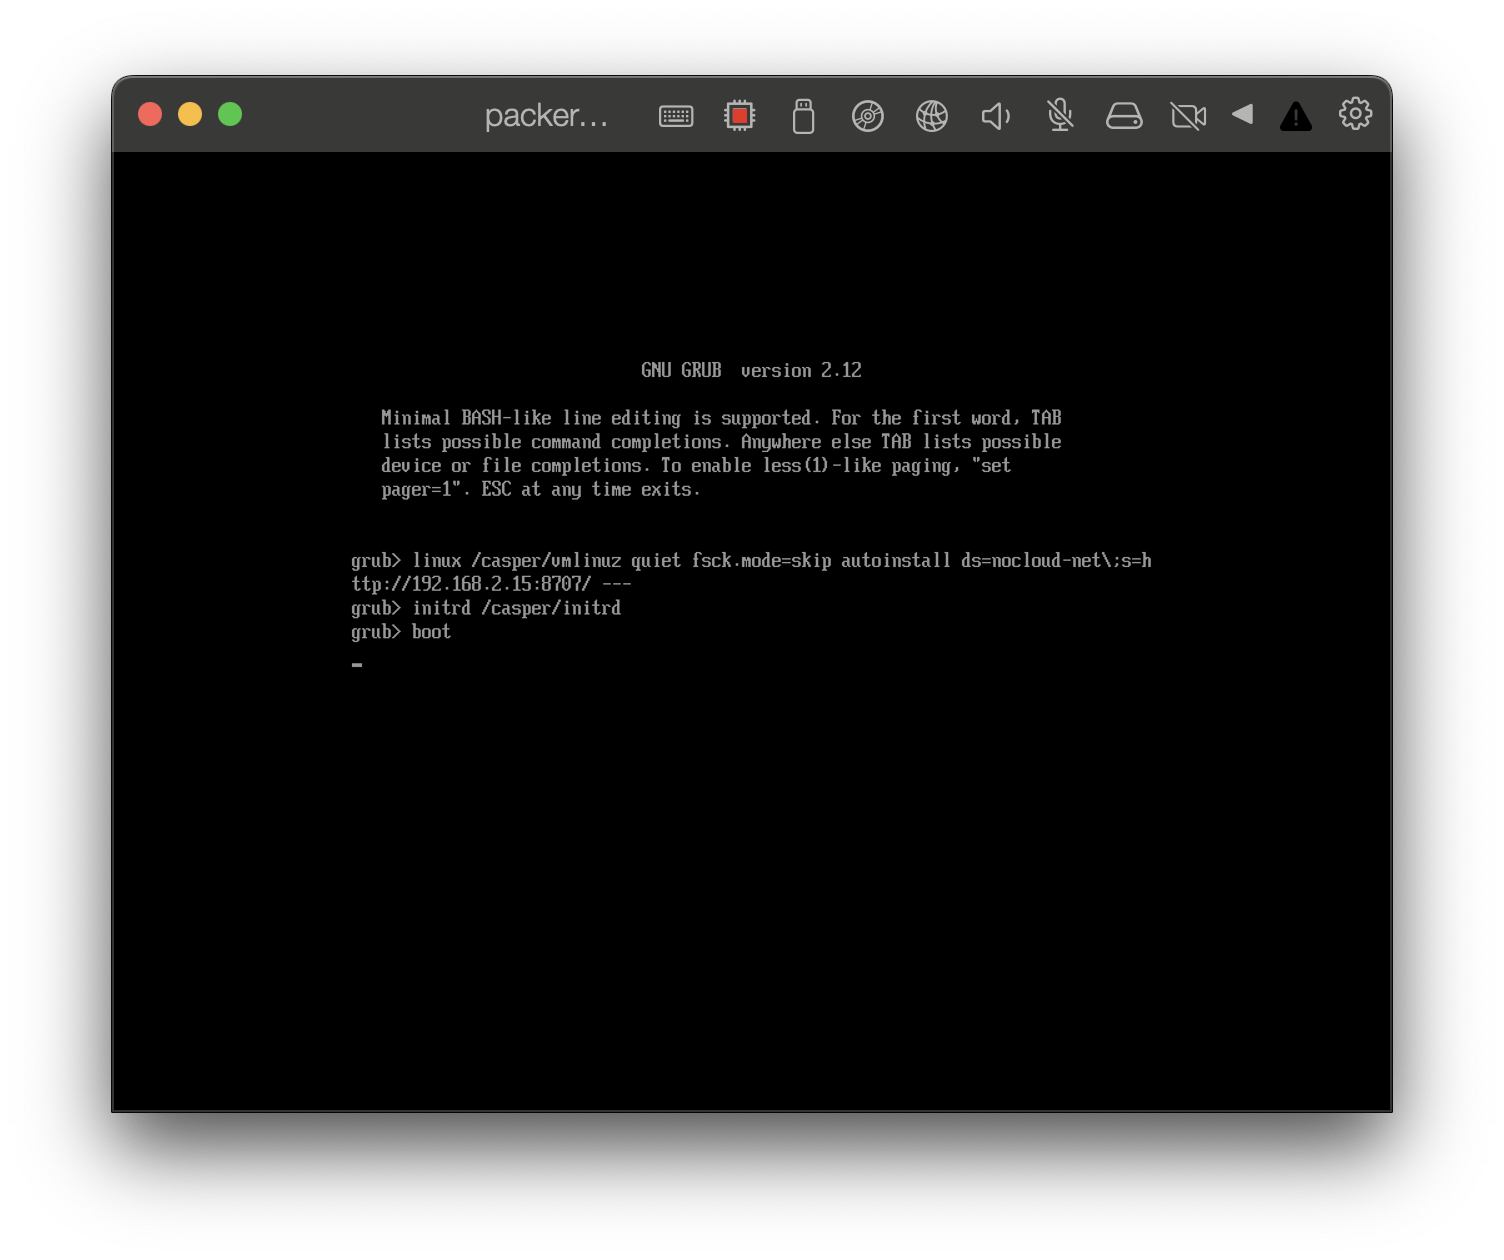
linux /casper/vmlinuz autoinstall "ds=nocloud;s=http://<OPERATOR_HOST>:OPERATOR_PORT>/" ---
initrd /casper/initrd
boot
Because GRUB uses a modified BASH syntax, the ; between the cloud-init arguments must be escaped (\;) or the entire string must be quoted as you see above.
Putting it together
From the directory containing your
user-dataandmeta-datafiles, runpython http.server 8080. Obtain your LAN IP address usingip addr(Linux) orifconfig(MacOS).Boot the target machine into the installer by selecting it under the boot options in your BIOS.
Hit
cto enter the command line. Enter thelinuxandinitrdcommands, followed byboot, replacing the HTTP URL with the IP and port we obtained in step 1.
Wait for the process to complete. If your configuration is valid, you will never see the installer GUI and will instead be presented with a login prompt on a after 5-10 minutes.
Pre-installing K3s with Advanced Cloud-init
(coming soon)
Subscribe to my newsletter
Read articles from Cadence Agyirey directly inside your inbox. Subscribe to the newsletter, and don't miss out.
Written by
