Learn Ansible Roles: An Easy Guide for Beginners with Real Examples
 Harsh Soni
Ansible Roles provide a structured way to organize playbooks into reusable and maintainable units. Roles allow you to separate configurations, tasks, variables, files, and templates into distinct directories, making complex automation workflows more manageable.
In this blog, I’ll share how I created and executed Ansible Roles during my hands-on learning experience.
1. Creating Roles
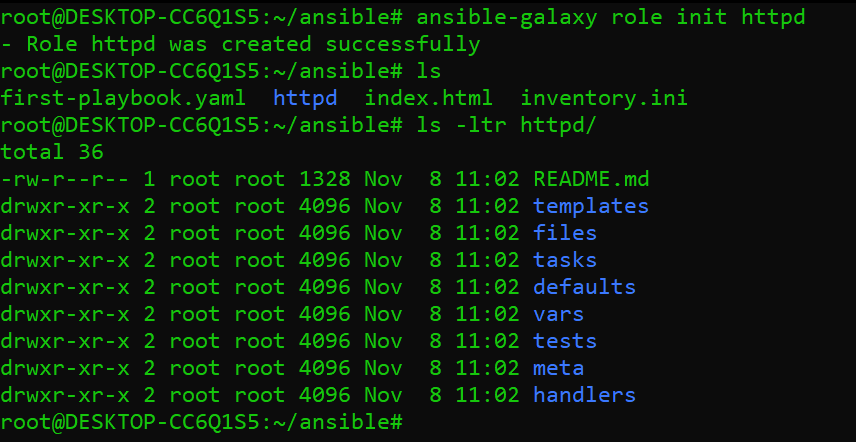
Roles can be created easily using the ansible-galaxy command:
ansible-galaxy role init httpd
This command generates a directory structure for the role httpd, which includes subdirectories like tasks, vars, files, templates, and more.
2. Adding Tasks
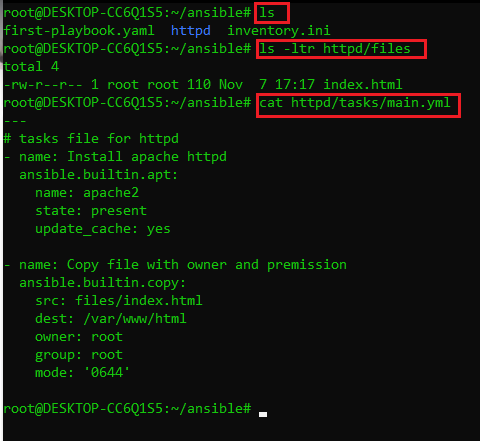
Once the role is created, the core logic resides in the tasks/main.yaml file. For example, to deploy a simple web server:
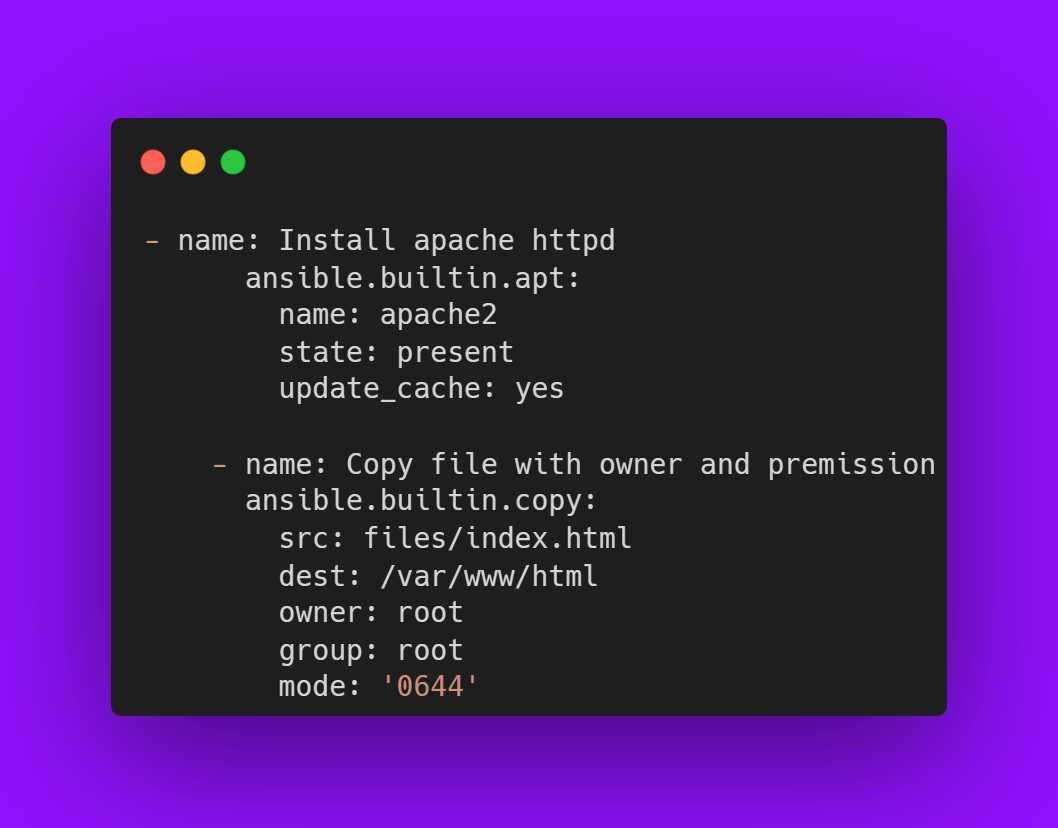
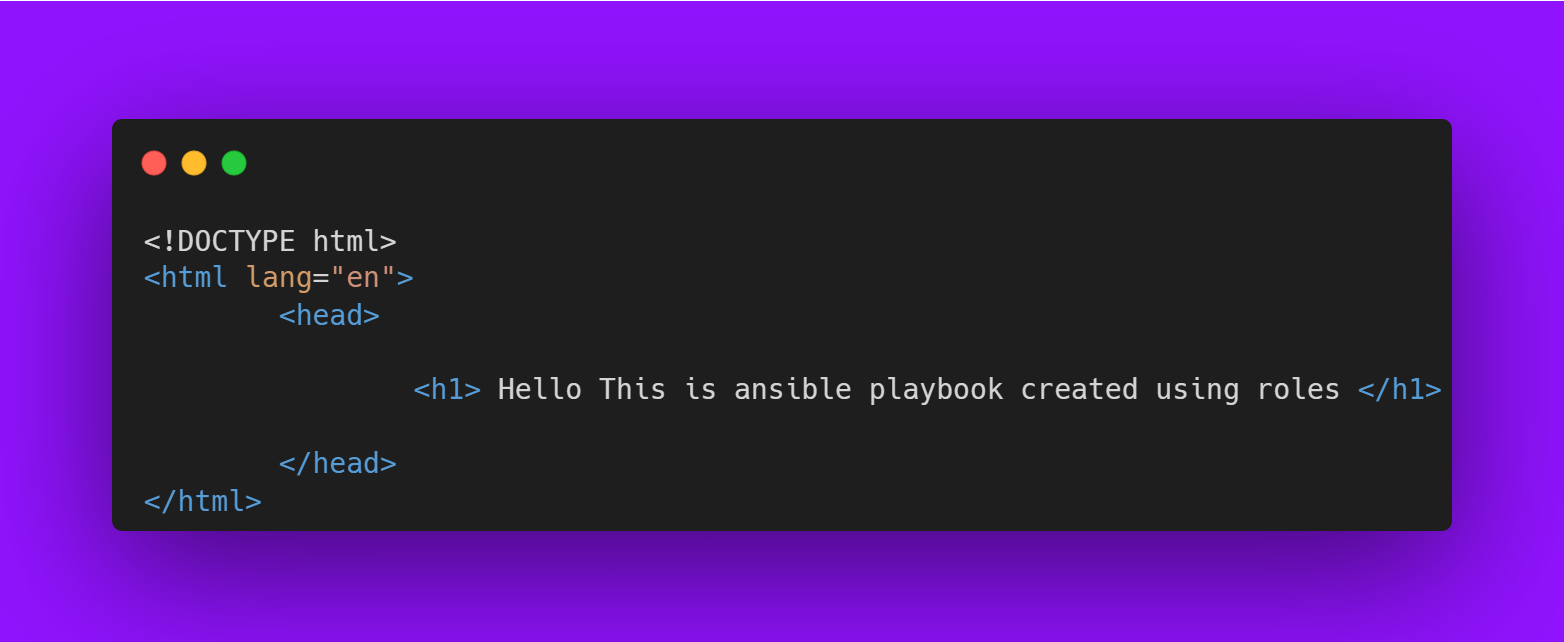
Here, the tasks include installing Apache, starting the service, and deploying a sample index.html file.
3. Using the Role in a Playbook
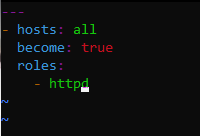
After defining the role, it’s time to integrate it into an Ansible playbook. Add the role to the roles section of the playbook:
4. All-in-One Approach
By using roles, you encapsulate everything needed for specific automation into reusable components. This modularity is especially useful for managing configurations across multiple environments.
5. Executing the Playbook
Finally, execute the playbook using the ansible-playbook command:
ansible-playbook -i inventory.ini first-playbook.yaml
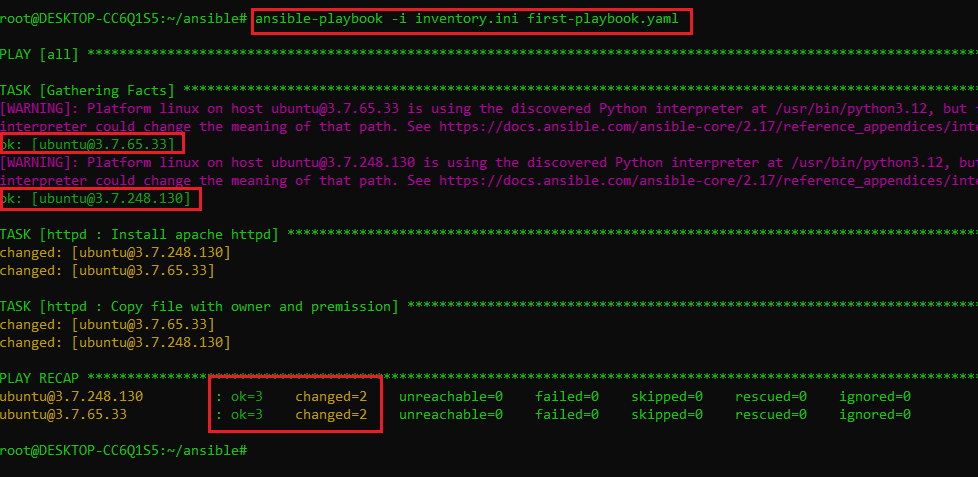
Successful 🎉

Key Takeaways:
Structured Organization: Roles make it easy to maintain and scale your Ansible projects.
Reusability: Once written, a role can be reused across multiple projects and playbooks.
Modularity: Encapsulation of logic and configurations ensures a cleaner playbook structure.
I hope this blog helps you understand the basics of Ansible Roles. Feel free to share your thoughts or ask questions in the comments!
Join the community of learners and be a part of the conversation! Your feedback is valuable to us, so please share your thoughts in the comments section. Help us make this blog even better for everyone. And if you found this post helpful, spread the word! Share it with those who could benefit from the information. And don't forget to follow along and subscribe to our newsletter for instant updates on our latest content. Thank you for taking the time to read and engage with us
Subscribe to my newsletter
Read articles from Harsh Soni directly inside your inbox. Subscribe to the newsletter, and don't miss out.
Written by

Harsh Soni
Harsh Soni
👋 Hello! I'm Harsh, a DevOps enthusiast driven by a passion for continuous learning and innovation. With hands-on experience across cloud platforms, infrastructure tools, and programming languages, I'm committed to creating scalable, automated, and efficient solutions. Let’s connect, share knowledge, and build amazing things together! SKILLS: 🔹Languages & Runtimes: Python, C#, Shell Scripting, YAML 🔹Cloud Expertise: AWS (proficient in EC2, ELB, EBS, S3, VPC, Route53, SES, SNS, CloudFormation, CloudWatch) 🔹Infrastructure & DevOps Tools: Docker, Terraform, AWS CloudFormation 🔹Development & CI/CD: Linux, Git, GitHub Actions, Jenkins, Jira, GitLab (beginner), AWS DevOps 🔹Web Development: HTML, CSS, Bootstrap, .NET, Python, SQL Why Connect with Me? I'm a detail-oriented professional with strong communication skills, always ready to tackle complex problems with a positive mindset. Whether you’re here to network or explore potential collaborations, feel free to reach out. Let’s grow together in the DevOps journey! 📧 Contact Me: harshsoni6011@gmail.com