Install Jenkins on Linux step-by-step Using Docker Compose
 S. M. Arefin Rumi
What is Jenkins?
Jenkins is an open-source automation tool written in Java with plugins built for continuous integration purposes. It is used to build and test your software projects continuously, making it easier for developers to integrate changes to the project and making it easier for users to obtain a fresh build. It also allows you to continuously deliver your software by integrating with a large number of testing and deployment technologies.
And Docker Compose?
Docker is a platform for running applications in an isolated environment called a "container" (or Docker container). Docker Compose is a tool for defining and running Docker applications. With Compose, you use a YAML file to configure your application’s services. Then, with a single command, you create and start all the services from your configuration. It lets you take advantage of the benefits of Docker while abstracting the complexity of your stack.
Installing Jenkins directly in your OS can be tricky and expensive in terms of time and resources. You need to have Java installed in your local machine and at least 10 GB of drive space. On the other hand, using Docker Composer is really straightforward and offers a lot of advantages.
We're going through the steps to install Jenkins using Docker-Compose.
Prerequisites
Linux machine with a minimum of 2GB RAM.
Needs to open 8080 port
Steps to install Jenkins
Install Docker and Docker Compose on the machine.
Create Volume for Jenkins.
Create a docker-compose file.
Run the docker-compose file.
Install Docker and Docker Compose
vim docker.sh
Input below sripped into docker.sh
 #!/bin/bash

# Make the script executable
chmod +x "$0"

# Update the system and install required packages
sudo apt-get update -y
sudo apt-get install curl apt-transport-https ca-certificates software-properties-common -y

# Add Docker’s official GPG key
curl -fsSL https://download.docker.com/linux/ubuntu/gpg | sudo apt-key add -

# Add the Docker repository to APT sources
sudo add-apt-repository "deb [arch=amd64] https://download.docker.com/linux/ubuntu $(lsb_release -cs) stable"

# Update the package database with Docker packages from the newly added repo
sudo apt update -y

# Check the Docker version to install
apt-cache policy docker-ce

# Install Docker
sudo apt install docker-ce -y

# Enable Docker to start on boot
sudo systemctl enable docker

# Check Docker status
sudo systemctl status docker

# Install Docker Compose
sudo apt install docker-compose -y

# Print success message
echo "Docker and Docker Compose have been successfully installed!"
Now run
bash docker.sh
Prerequisites
Linux machine with a minimum of 2GB RAM.
Needs to open 8080 port
Create Volume for Jenkins
mkdir -p /home/jenkins/jenkins_data/jenkins_home
Create a Docker Compose file
vim docker-compose.yml
Paste the code below and save the file
version: '3'

services:
  jenkins:
    container_name: jenkins
    image: jenkins/jenkins:lts-jdk11
    restart: unless-stopped
    ports:
      - "8080:8080"
    volumes:
      - "/home/jenkins/jenkins_data/jenkins_home:/var/jenkins_home"
Run the Docker Compose file
docker-compose up -d

(Optional) Is the container getting restarted like below, then follow the next step.

Verify Host Directory Permissions
ls -ld /home/jenkins/jenkins_data/jenkins_home
Adjust Ownership
sudo chown -R 1000:1000 /home/jenkins/jenkins_data/jenkins_home
Verify Permissions
chmod -R 755 /home/jenkins/jenkins_data/jenkins_home
Restart the Container
docker restart <container_ID>

Now the Jenkins was successfully installed. We can access Jenkins by opening the Jenkins URL on the browser http://server-ip-address:8080.
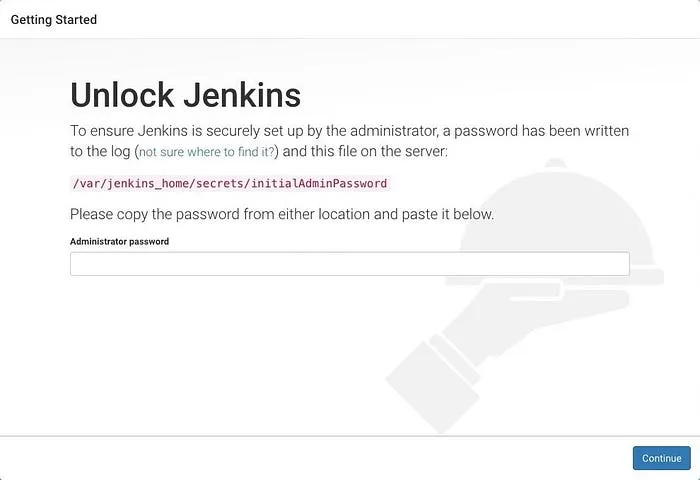
We can use the following commands to find and display the initial admin password:
docker exec -it <container_ID> bash
cat /var/jenkins_home/secrets/initialAdminPassword

Creating the first administrator user?
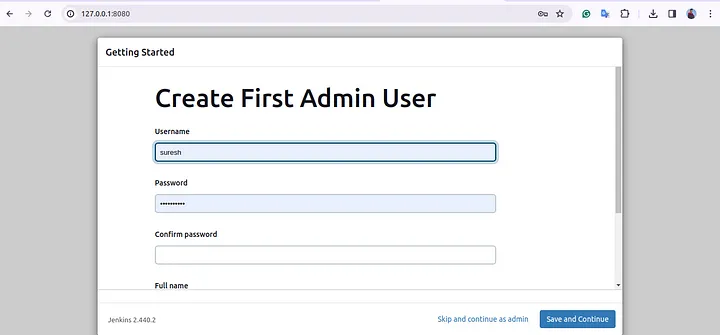
We can create our first administrator user.
When the Create First Admin User page appears, specify the details for our administrator user in the respective fields and click Save and Finish.
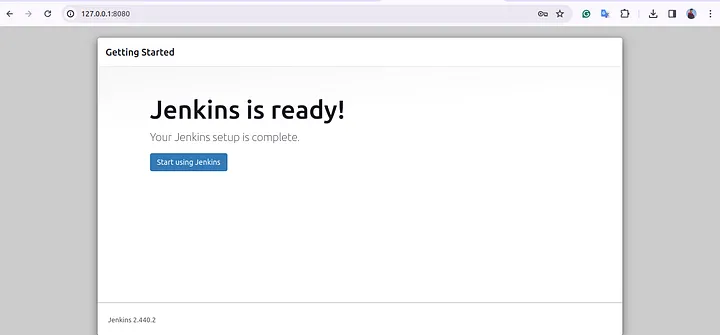
When the Jenkins is ready page appears, click Start using Jenkins.
Notes:
This page may indicate Jenkins is almost ready! instead, and if so, click Restart.
If the page does not automatically refresh after a minute, use your web browser to refresh the page manually.If required, login to Jenkins with the credentials of the user you just created, and you are ready to start using Jenkins!
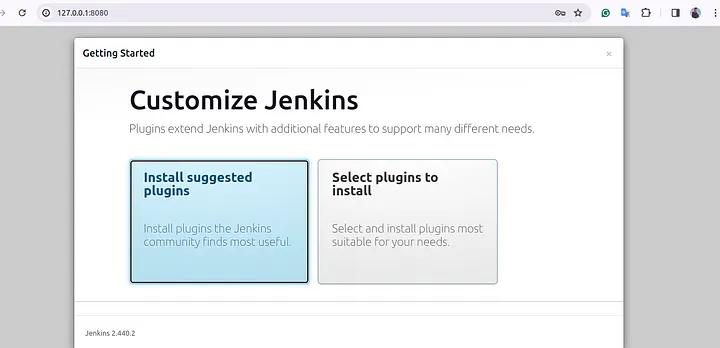
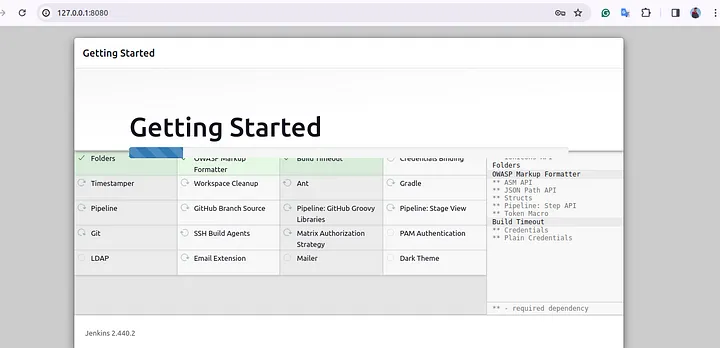
Installation of Jenkins plugins has been started. It will take a couple of minutes to complete the installation.
Create the First Admin User account for Jenkins Portal.
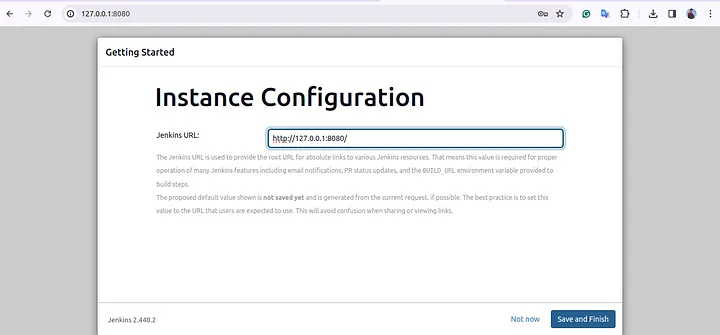
On the ‘Instance Configuration’ page, it will ask you to set the default URL for Jenkins. Click on Save and Finish to proceed.
Jenkins installation has been completed successfully. Now, you can work on Jenkins by clicking on Start using Jenkins.
Jenkins’s dashboard is displayed below.
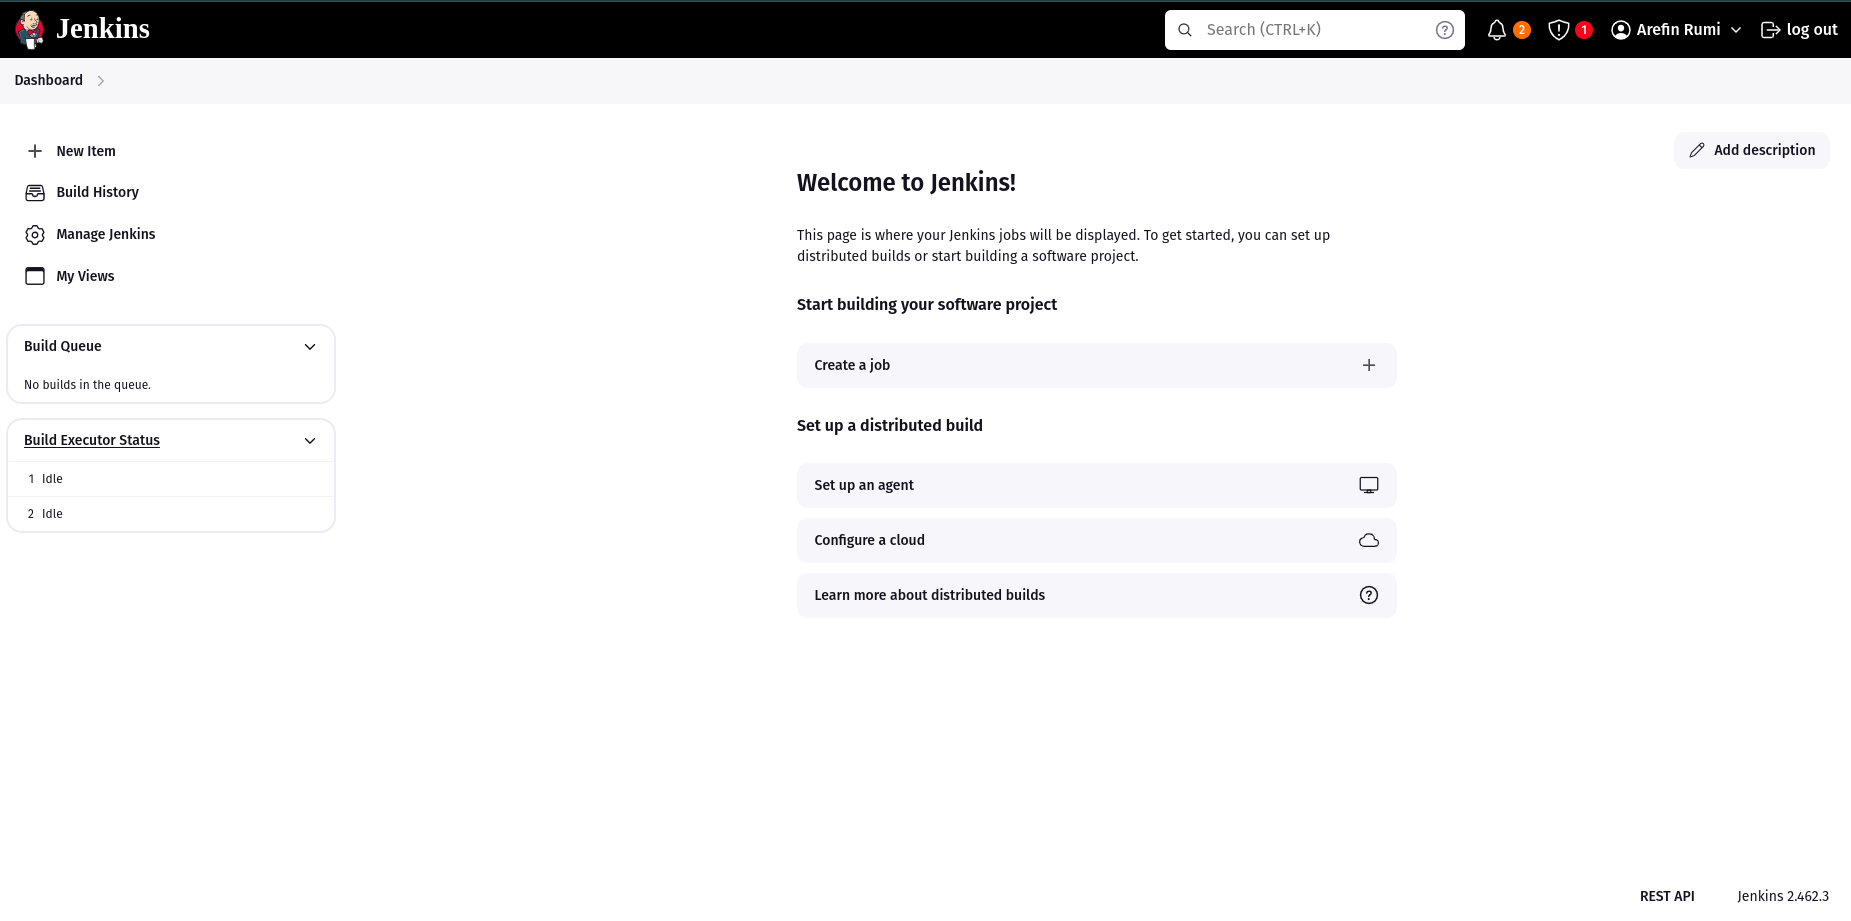
Jenkins was installed and configured successfully.
Subscribe to my newsletter
Read articles from S. M. Arefin Rumi directly inside your inbox. Subscribe to the newsletter, and don't miss out.
Written by
