ODC with AWS S3 - Events with EventBridge
 Stefan Weber
This article explains a method for setting up S3 and AWS EventBridge to receive ad-hoc events in your application, enabling you to respond to various changes in your S3 bucket.
Being able to react to change events from your S3 bucket is essential to keep your application data and S3 objects in sync.
This article is part of a series that explores ways to interact with Amazon S3 buckets. Be sure to read the introductory article to understand why S3 can be a valuable addition to your ODC applications and the challenges you might encounter.
S3 Events
You can choose between two options for sending notifications from an S3 bucket.
Event Notifications - With Event Notifications, you define which event types should be sent and, optionally, specify prefixes and parts of an object key. Then, you set a single destination for these notifications. You can send events to an SNS topic, an SQS queue, or a Lambda function.
EventBridge - When you enable EventBridge in an S3 bucket, all events from the bucket are sent to the default EventBridge bus. You can further filter relevant events using EventBridge rules. EventBridge supports a wide range of destination options, including sending an event to a configured HTTP endpoint / API Destination.
Using EventBridge is the most modern and flexible option for handling S3 events. In this pattern, we explore how to use EventBridge to manage S3 events in a bucket. This involves the following steps:
Activate EventBridge Notifications at the S3 bucket level.
Set up a REST endpoint in our application to receive EventBridge notifications.
Configure an API Destination in EventBridge to target our REST API endpoint.
Create an EventBridge rule for the events we want to handle.
Amazon EventBridge
Amazon EventBridge is a serverless event bus service that makes it easy to connect applications together using data from your own applications, integrated Software-as-a-Service (SaaS) applications, and AWS services. It simplifies the process of building event-driven architectures by allowing you to route events between various services and applications in a scalable and reliable manner.
Prerequisites
The ODC with S3 Patterns reference application includes a secret setting called WebhookAPIKey. Be sure to set a value for it in the ODC Portal. This API Key is used by the reference application to authorize event notifications sent by Amazon EventBridge.
S3 Bucket EventBridge Notifications
This is the easiest part. You just need to activate EventBridge Notifications for an S3 bucket.
In the AWS S3 console, select your bucket and click the Properties tab. Scroll down to the Amazon EventBridge section and click Edit Amazon EventBridge.
Turn on "Send notifications to Amazon EventBridge for all events in this bucket" and click Save changes to submit.
Before setting up EventBridge, we need a REST API endpoint ready to receive EventBridge notifications. Let's look at this part in the reference application first.
EventReceiver Exposed REST API
Open the reference application in ODC Studio. Go to the Logic tab and expand Integrations - REST - EventReceiver.
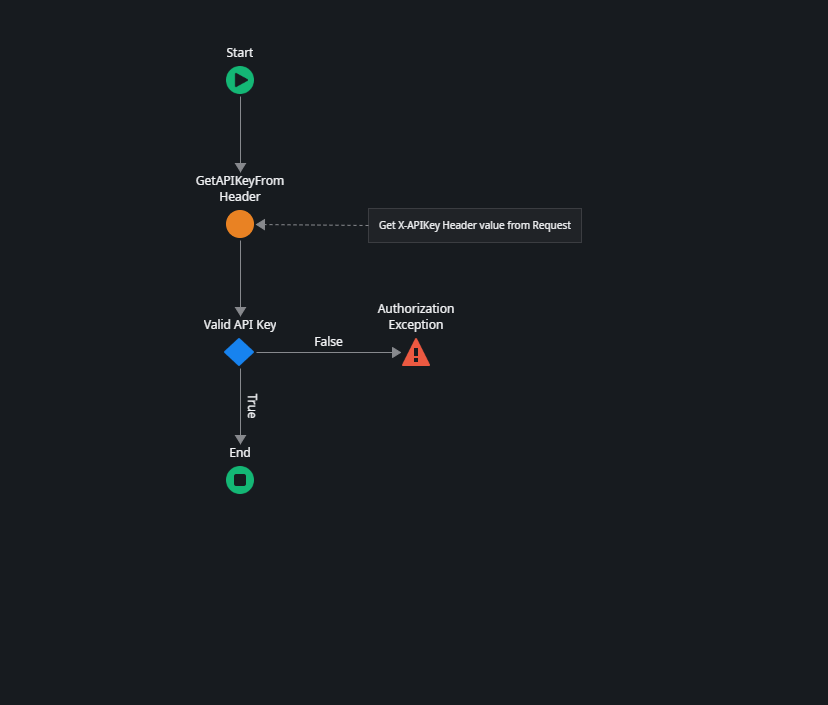
The EventReceiver API has a custom OnAuthentication handler that checks if the request includes a header named X-APIKey. It then verifies whether the header's value matches the WebhookAPIKey set in the application settings. If the header value is missing or doesn't match, it raises an exception.
The exposed REST API has an endpoint called Receive, which is a POST type and has a single input parameter named Event of type S3Event.
The S3Event structure deserializes the EventBridge S3 event. S3 events sent by EventBridge follow a specific pattern, and here is a sample event for a PutObject action.
{
  "version": "0",
  "id": "17793124-05d4-b198-2fde-7ededc63b103",
  "detail-type": "Object Created",
  "source": "aws.s3",
  "account": "111122223333",
  "time": "2021-11-12T00:00:00Z",
  "region": "ca-central-1",
  "resources": [
    "arn:aws:s3:::amzn-s3-demo-bucket1"
  ],
  "detail": {
    "version": "0",
    "bucket": {
      "name": "amzn-s3-demo-bucket1"
    },
    "object": {
      "key": "example-key",
      "size": 5,
      "etag": "b1946ac92492d2347c6235b4d2611184",
      "version-id": "IYV3p45BT0ac8hjHg1houSdS1a.Mro8e",
      "sequencer": "617f08299329d189"
    },
    "request-id": "N4N7GDK58NMKJ12R",
    "requester": "123456789012",
    "source-ip-address": "1.2.3.4",
    "reason": "PutObject"
  }
}
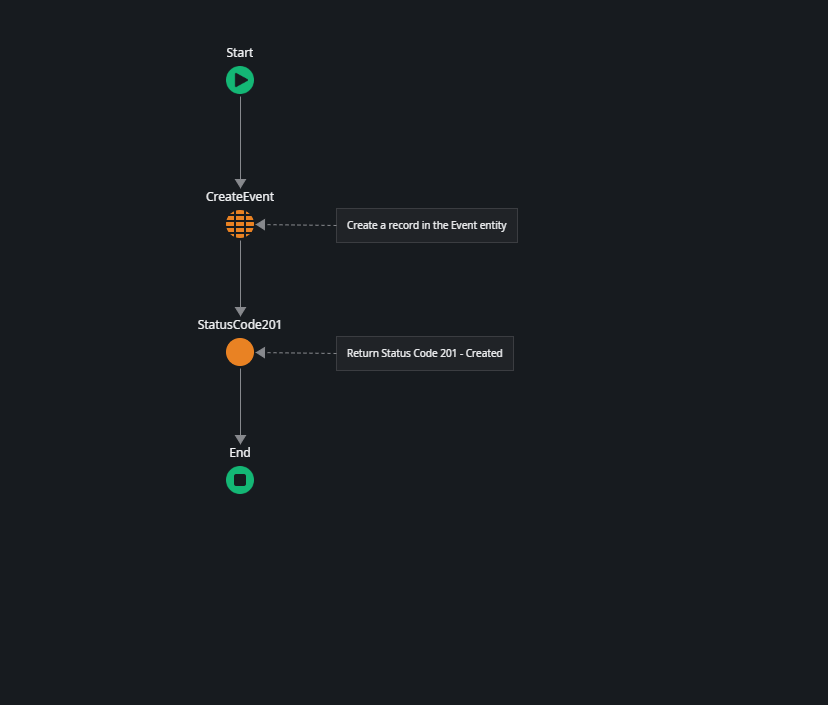
The Receive action is straightforward. It creates a record in the Event entity using some details sent by EventBridge and returns a status code of 201 - Created.
The endpoint URL for the Receive action is shown below. You will need the complete URL for the next steps.
https://<your ODC stage URL>/ODCwithAWSS3Patterns/rest/EventReceiver/Receive
EventBridge Connection
The next step is to create a Connection entry in Amazon EventBridge. A connection defines the authorization method for connecting to an API destination, which we will set up in the next step.
In our case, we authorize using an API Key sent as the X-APIKey request header.
In the AWS EventBridge console, select Connections from the menu and click on Create connection.
Provide a name for your connection.
Select API Key in the Authorization configuration.
Enter X-APIKey for the API key name and your configured WebhookAPIKey value.
Click Create to create the connection.
EventBridge API Destination
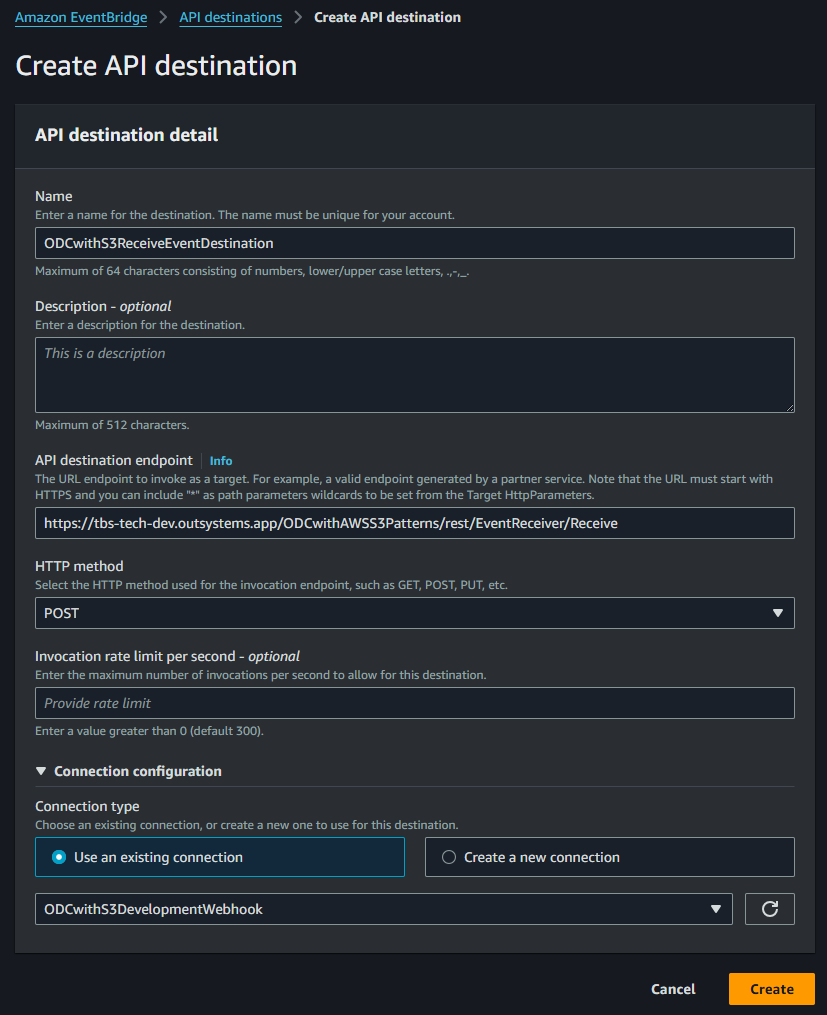
In the AWS EventBridge console, select API destinations from the menu and click on Create API destination.
Enter a name for the destination.
Paste your exposed Receive endpoint URL into the API destination endpoint field.
Choose POST for the HTTP method.
For Connection type, select Use an existing connection and choose the connection you created in the previous step.
Click Create.
EventBridge Rule
The final step is to create an EventBridge rule. This rule defines an event pattern that filters the events we are interested in and specifies a destination where these events should be routed. In our case, the destination is the API destination created in the previous step.
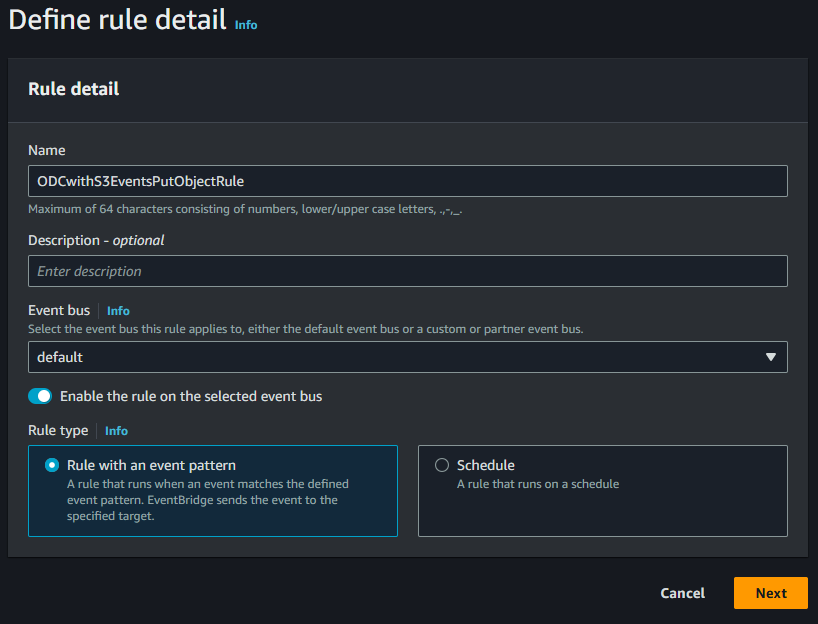
In the AWS EventBridge console select Rules from the menu and click Create rule.
Provide a name for the rule.
Make sure that default is selected for Event bus
Click Next.
In the Build event pattern screen make sure that AWS events or EventBridge partner events is select for event soure. Then scroll down to Creation method
- Select Custom pattern, then paste the following pattern and modify <Your S3 bucket name> to the bucket name you are using.
{
  "source": ["aws.s3"],
  "detail-type": ["Object Created"],
  "detail": {
    "bucket": {
      "name": ["<Your S3 bucket name>"]
    }
  }
}
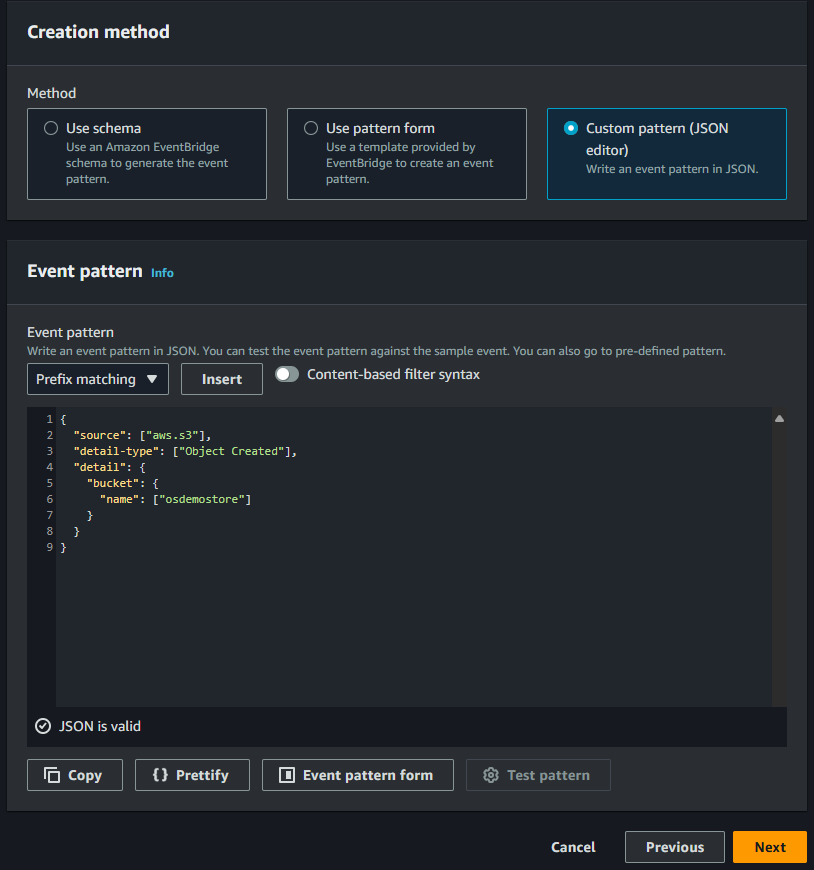
- Click Next.
Rule patterns in Amazon EventBridge are very powerful and can include matching patterns. In our case, the setup is quite simple. We only accept an event if:
source is "aws.s3"
detail-type is "Object Created" (PutObject events)
detail.bucket.name is <your bucket name>
Anything else is not accepted by this rule.
In the Select target(s) screen:
Select EventBridge API destination as Target type.
For API destination choose Use existing destination and select the API destination you created previously.
A rule can also have multiple targets, which is quite useful. For example, you can send an event to several API destinations or a mix of API destinations and Amazon services like Simple Queue Service.
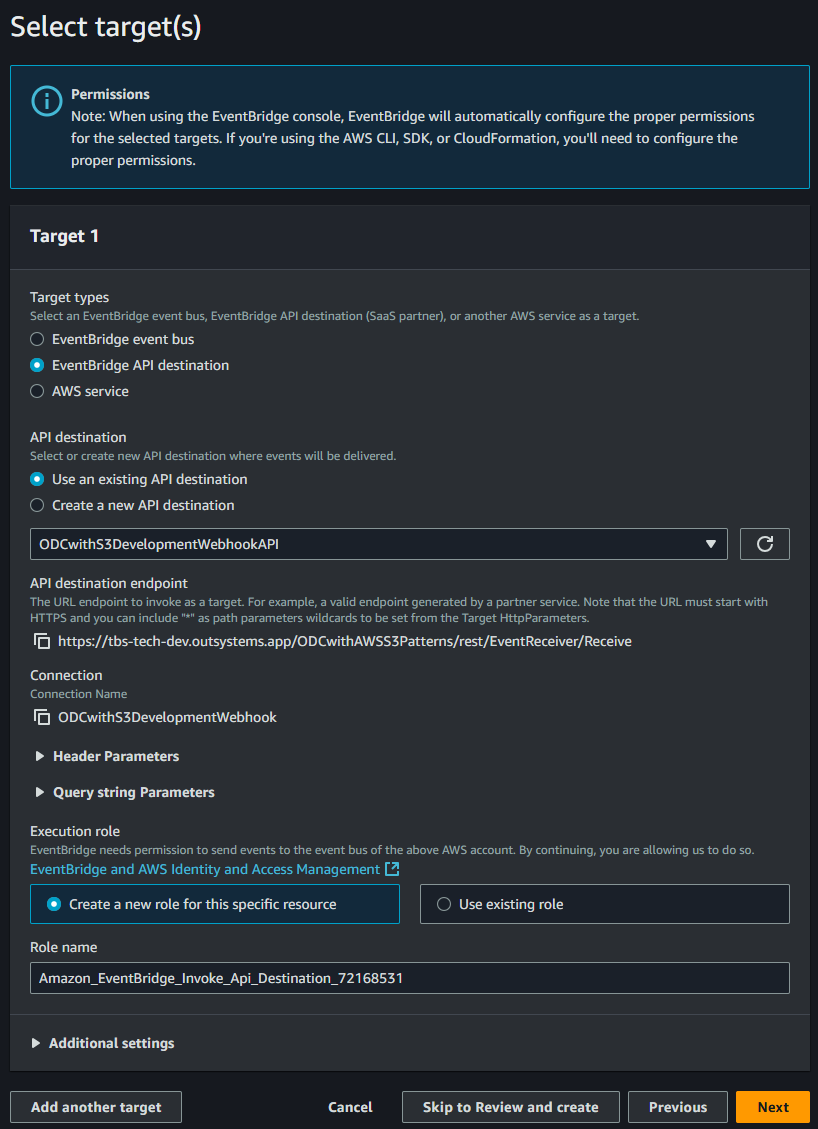
- Click Next.
Skip the Tags screen and review your settings on the Review screen. Then submit the rule by clicking Create.
Your new rule is immediately active. Try it out in the reference application.
The Events screen in the reference application queries the Event entity and shows all the events created and received through the webhook. Try uploading some objects and hit the Refresh button to refresh the query.
Summary
Reacting to S3 events in the ODC application is simple. The setup involves enabling Amazon EventBridge notifications on a bucket, creating an API destination with connection options in EventBridge, and finally setting up an EventBridge rule to filter and forward relevant events.
I hope you found this article helpful and that I explained the key points clearly. If not, please let me know by leaving a comment. I invite you to read the other articles in this series about different patterns for storing and retrieving S3 objects.
Subscribe to my newsletter
Read articles from Stefan Weber directly inside your inbox. Subscribe to the newsletter, and don't miss out.
Written by

Stefan Weber
Stefan Weber
Throughout my diverse career, I've accumulated a wealth of experience in various capacities, both technically and personally. The constant desire to create innovative software solutions led me to the world of Low-Code and the OutSystems platform. I remain captivated by how closely OutSystems aligns with traditional software development, offering a seamless experience devoid of limitations. While my managerial responsibilities primarily revolve around leading and inspiring my teams, my passion for solution development with OutSystems remains unwavering. My personal focus extends to integrating our solutions with leading technologies such as Amazon Web Services, Microsoft 365, Azure, and more. In 2023, I earned recognition as an OutSystems Most Valuable Professional, one of only 80 worldwide, and concurrently became an AWS Community Builder.