Design and Configure a Scalable Relational Database Solution with Amazon RDS on AWS
 Celestina Odili
Introduction
Amazon RDS (Relational Database Service) is a fully managed cloud database service provided by Amazon Web Services (AWS). It simplifies the process of setting up, managing, and scaling relational databases in the cloud. Amazon RDS is designed to help developers, database administrators, and organizations manage database workloads without having to worry about the underlying hardware or extensive administrative tasks.
A Scalable Relational Database Solution with Amazon RDS on AWS refers to the process of using Amazon RDS to deploy and manage a relational database in a cloud environment with the ability to scale both vertically and horizontally to meet changing demands.
Designing and configuring Amazon RDS (Relational Database Service) on AWS involves setting up a managed database instance that supports various relational database engines, including MySQL, PostgreSQL, Oracle, SQL Server, and Amazon Aurora. Here's a step-by-step guide on how to design and configure an RDS instance in AWS:
Step 1: Sign In to AWS Management Console
Go to the AWS Management Console.
Log in using your AWS account credentials or create a free account if you do not have one.
Step 2: Launch the RDS Instance
Navigate to the RDS Dashboard:
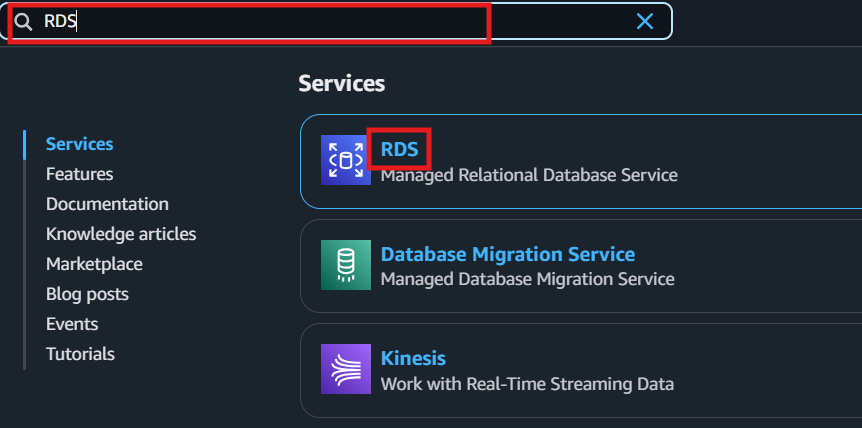
In the AWS Management Console, search for RDS in the search bar or find it under Services.
Click on RDS to go to the Amazon RDS dashboard.
Create a Database Instance:
On the RDS dashboard, click on the Databases option from the left menu.
Click the Create database button to start the instance creation process.

Choose a Database Creation Method:
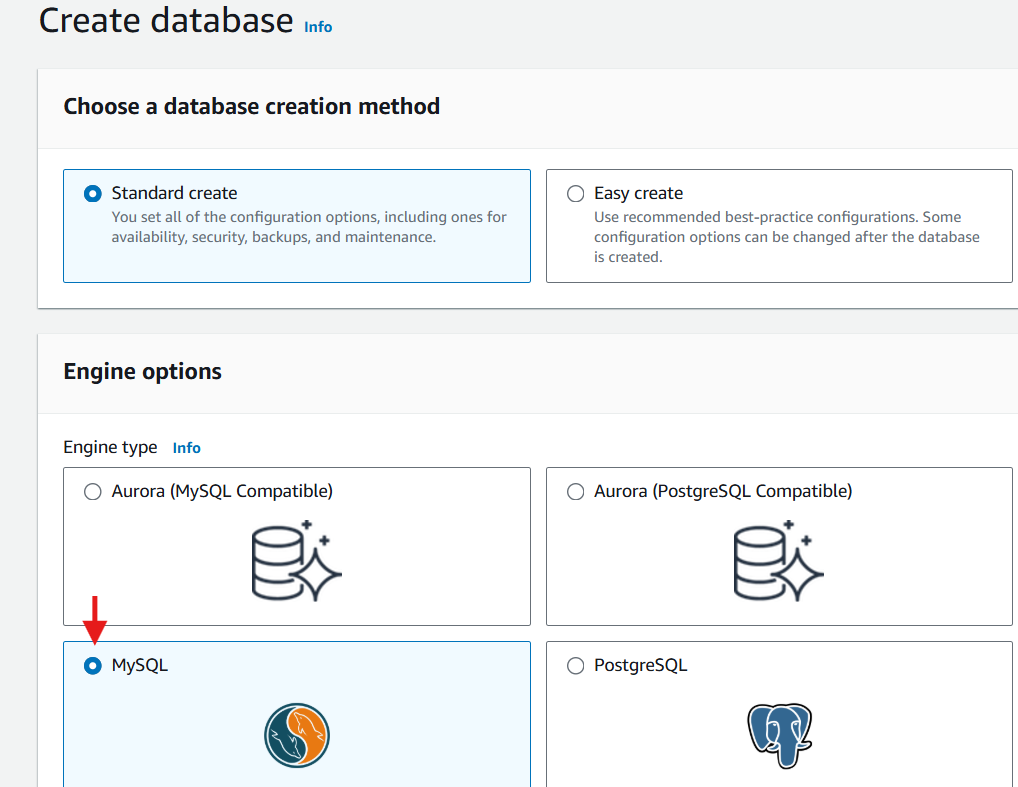
Standard Create: Provides more options for configuration.
Easy Create: AWS automatically selects recommended configurations for you.
For more flexibility, select Standard Create.
Choose a Database Engine:
You will be prompted to choose a database engine. Select the database engine that you want to use (e.g., MySQL, PostgreSQL, Oracle, SQL Server, or Amazon Aurora).
For example, to choose MySQL, click on the radio button beside MySQL.
Choose a Sample Template:
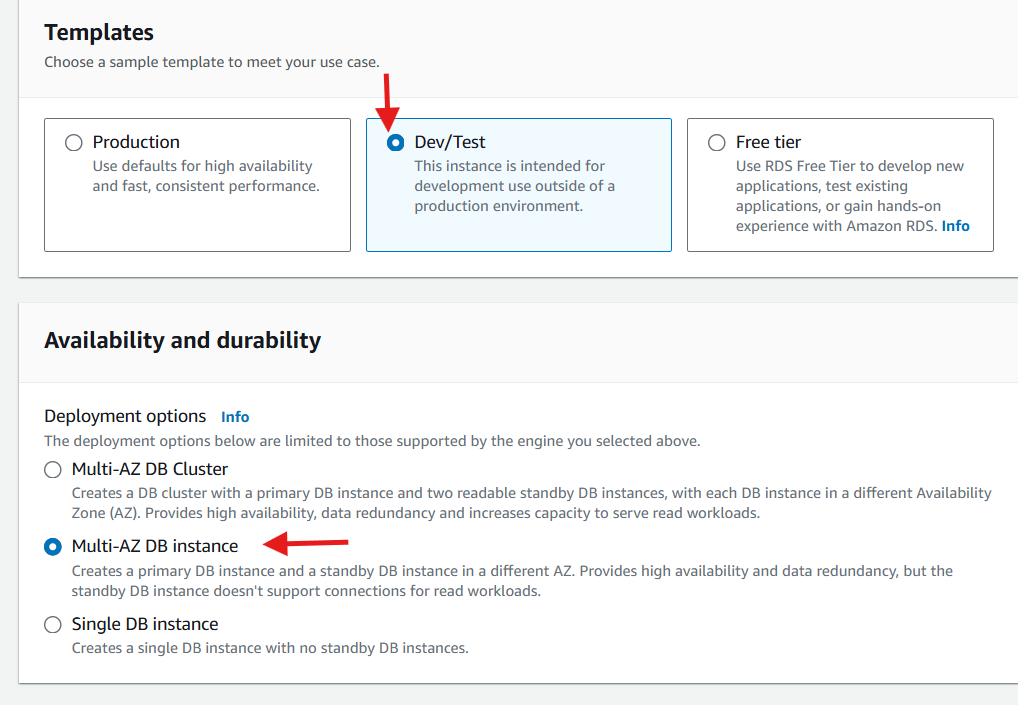
Choose whether to use Production, Dev/Test or Free tier
If you want to set availability options, select Production or Dev/Test. Free tier do not have this option.
Set Availability & Durability:
Choose whether to enable Multi-AZ Deployment for high availability.
Configure Database Settings:
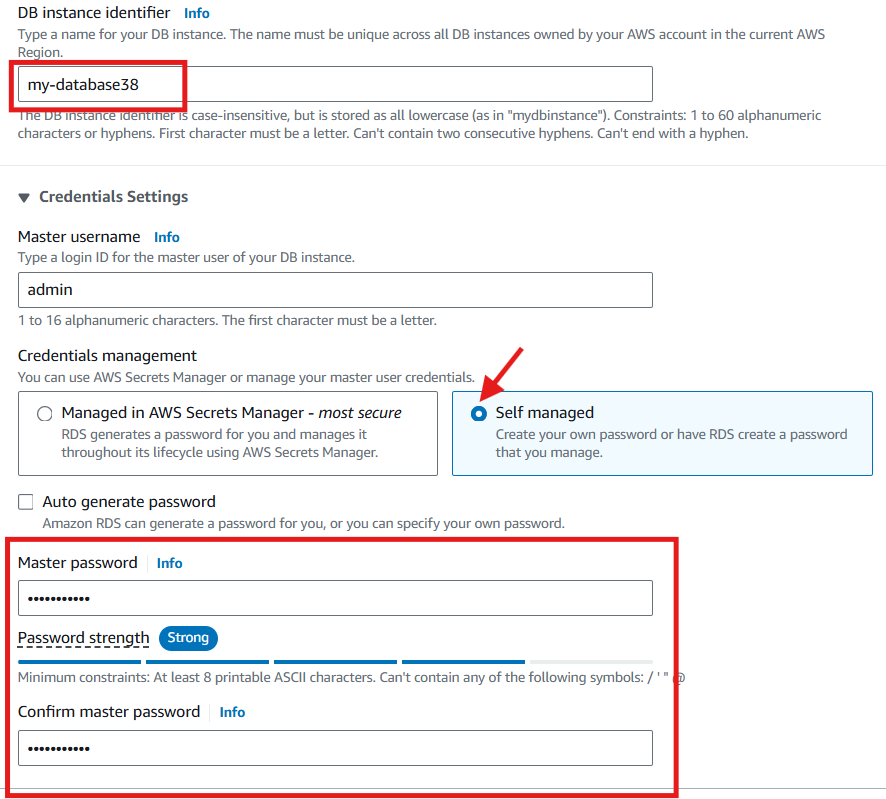
DB Instance Identifier: Give your database instance a unique name (e.g.,
my-database38).Master Username: Enter a username for the master user (e.g.,
admin).Select self-managed
Master Password: Set a password for the master username.
Confirm the password.
Choose DB Instance Class:
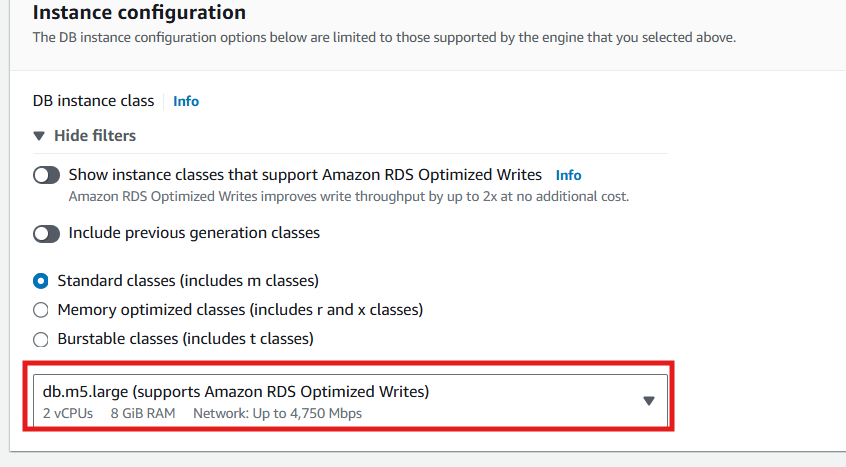
Select the DB instance class based on the compute capacity (e.g.,
db.t3.micro,db.m5.large).The instance class determines the amount of CPU and memory available for your database
Configure Storage:
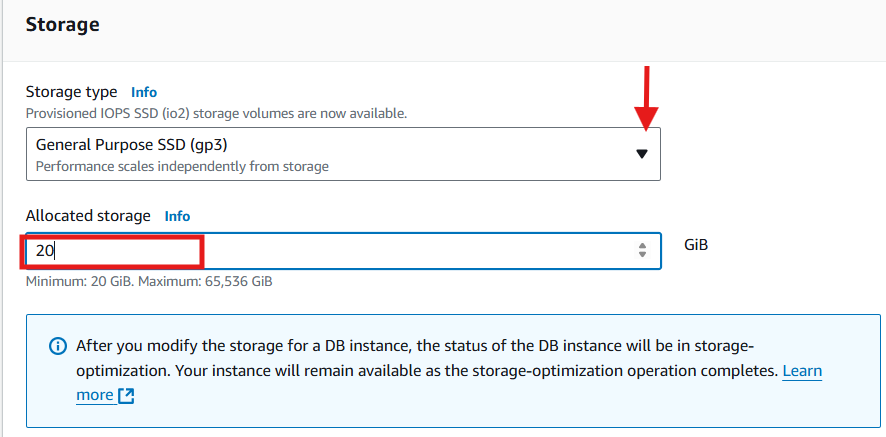
Choose the storage type (e.g., General Purpose (SSD), Provisioned IOPS (SSD), Magnetic).
You can also set the allocated storage size (e.g., 20 GB).
Configure VPC and Network Settings:
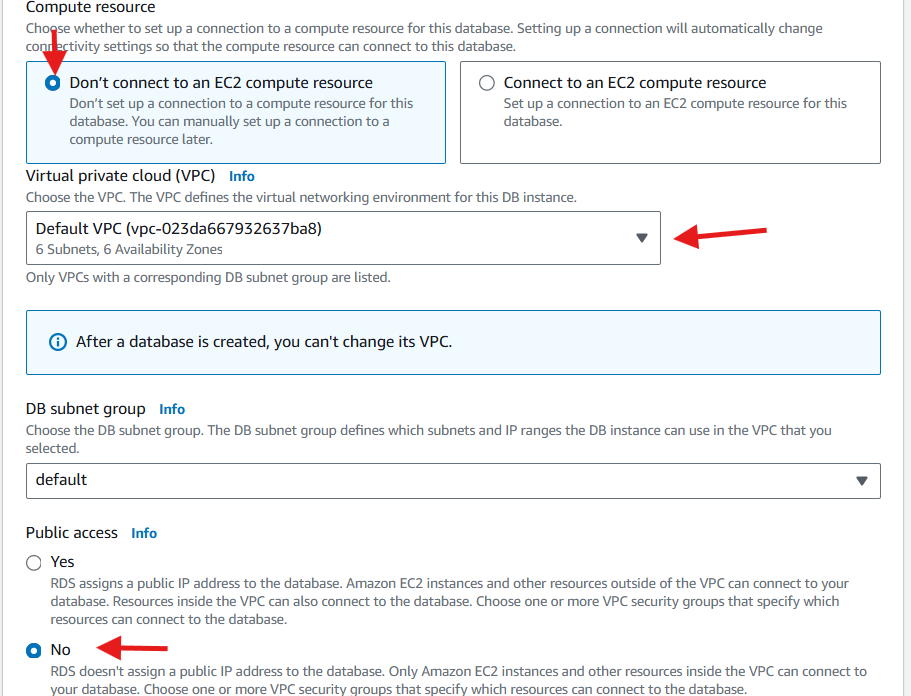
VPC: Choose the Virtual Private Cloud (VPC) where your database will be deployed.
Subnet: Select a subnet for your RDS instance within the VPC.
Public Accessibility: Choose whether you want your database to be publicly accessible. If set to Yes, it will allow access from outside AWS (such as your local machine or on-premise network).
Security Group: Choose an existing or create new security group. You will need this for inbound access to your instance or server.

Set Additional Configuration:
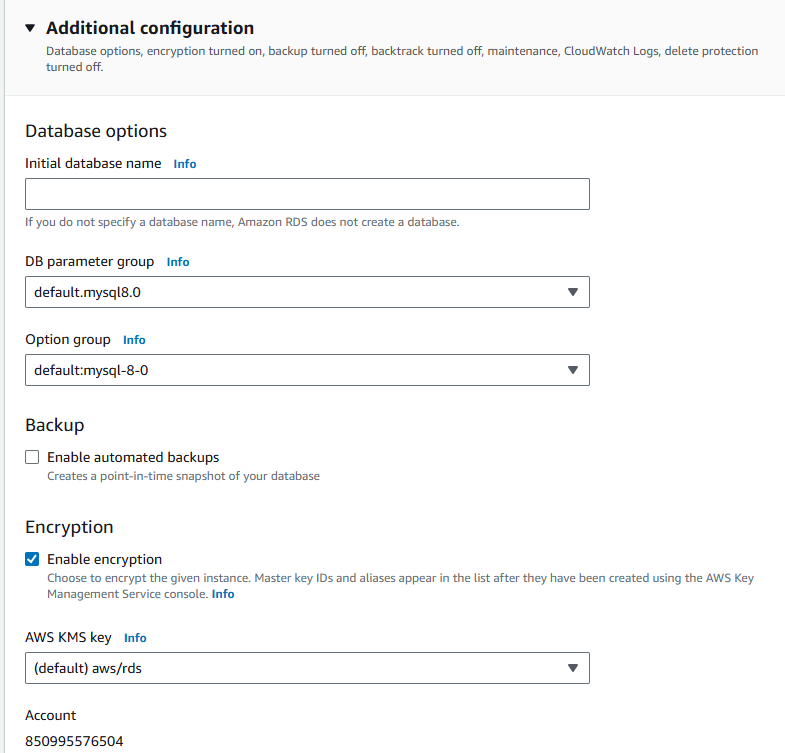
Database Name: Optionally, specify a database name to create when the DB instance is launched.
Parameter Group: You can use default or custom parameter groups based on your needs.
Option Group: Select the option group if you require advanced configurations for things like backups and auditing.
If you need automatic backups, enable Backup automated backups(the default is 7 days).
Enable Encryption if needed for additional security.
Step 3: Review and Create
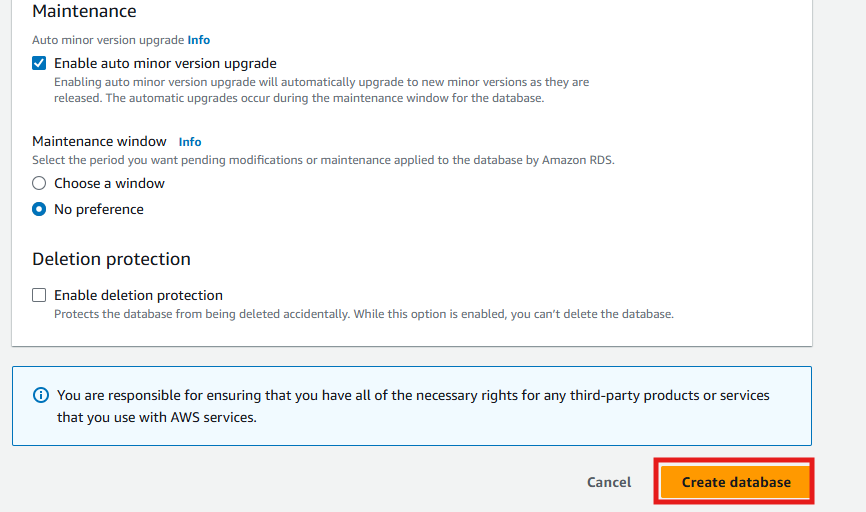
After configuring all the necessary options, review your choices.
Click on Create database to launch your RDS instance.
Step 4: Access the RDS Instance
Once the instance is created, it will appear on the Databases page in the RDS Dashboard.
Find the Endpoint:
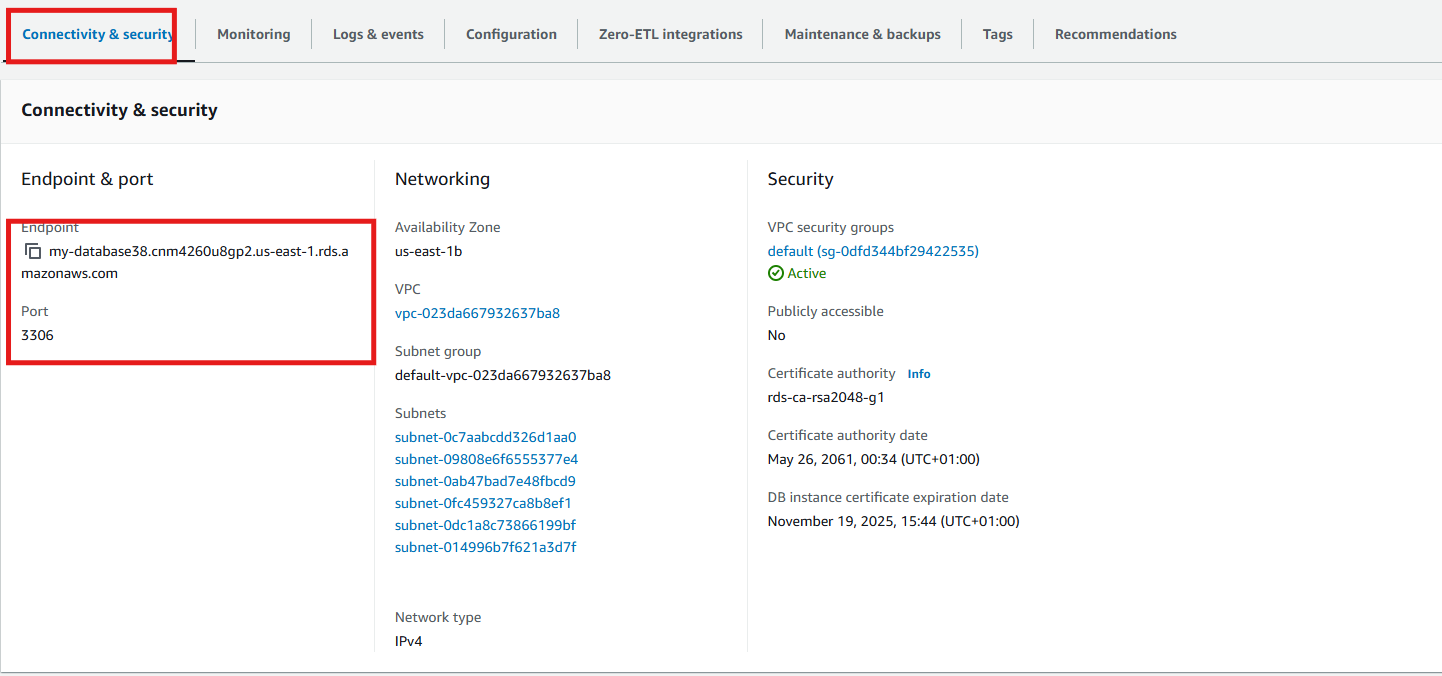
After the instance status changes to Available, click on your database instance name to view its details. This could take a couple of minutes.

Under the Connectivity & security tab, you will find the Endpoint (hostname) and Port. This is the address you will use to connect to your database.
Configure Security Groups:
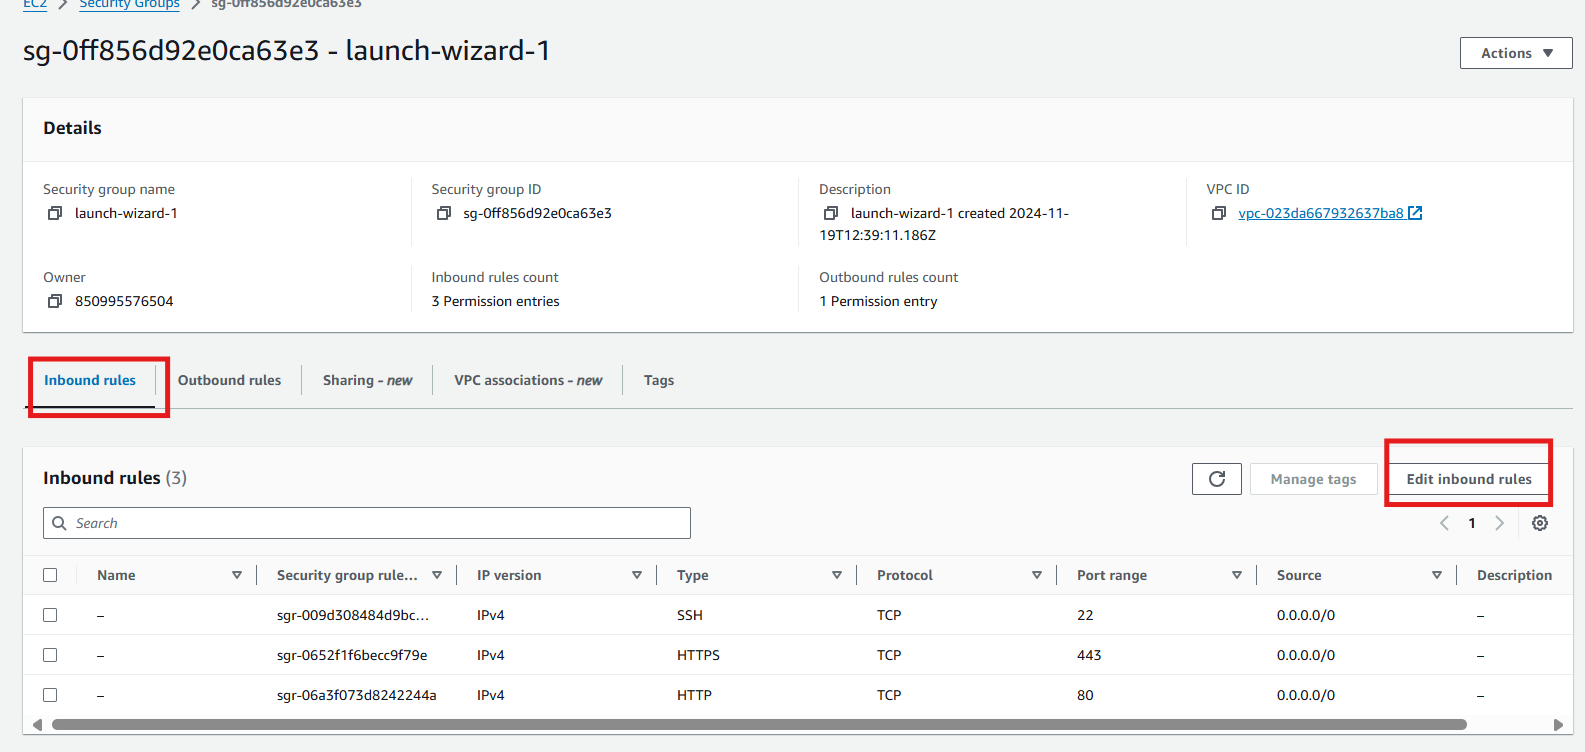
You need to ensure that the Security Group associated with your RDS instance allows inbound traffic on the port your database is listening on (default MySQL port is 3306).
Go to EC2 Dashboard
Select Security Groups
Open the security group created or selected when configuring your database

Under Inbound rules tab, click Edit inbound rules
Click Add rule
Allow access on port 3306 to the security group of the instance or server you want to connect to your database.
Congratulations you have successfully designed and configured your database. You are all set to connect your database to your application
Conclusion
Setting up Amazon RDS on AWS provides you with a fully managed database environment, where AWS handles database maintenance tasks like patching, backups, and scaling, allowing you to focus on application development. Whether you choose MySQL, PostgreSQL, or another supported database engine, Amazon RDS simplifies the process of managing relational databases in the cloud.
Subscribe to my newsletter
Read articles from Celestina Odili directly inside your inbox. Subscribe to the newsletter, and don't miss out.
Written by

Celestina Odili
Celestina Odili
Computer Scientist/ Cloud Engineer/DevOps Engineer / Technical writer