Winter '25 Updates - Action Button
 Ranjith Raja Mathiyalagan
Salesforce's Winter '25 release introduces an exciting feature: the Action Button for Screen Flows. This enhancement allows users to interact seamlessly within a single screen, enabling functionality like cloning or displaying related records. When combined with Auto-Launched Flows, it offers powerful solutions for managing related data efficiently.
If you need to display related records based on a selected parent record while keeping everything consolidated on one screen, this feature is perfect! Let’s walk through the step-by-step process to implement this functionality.
Step 1: Create an Auto-Launched Flow
The Auto-Launched Flow will handle the backend logic, fetching related records based on the selected parent record.
Create a Variable:
Define a variable calledrecordId. This variable will store the parent record's ID passed from the Screen Flow.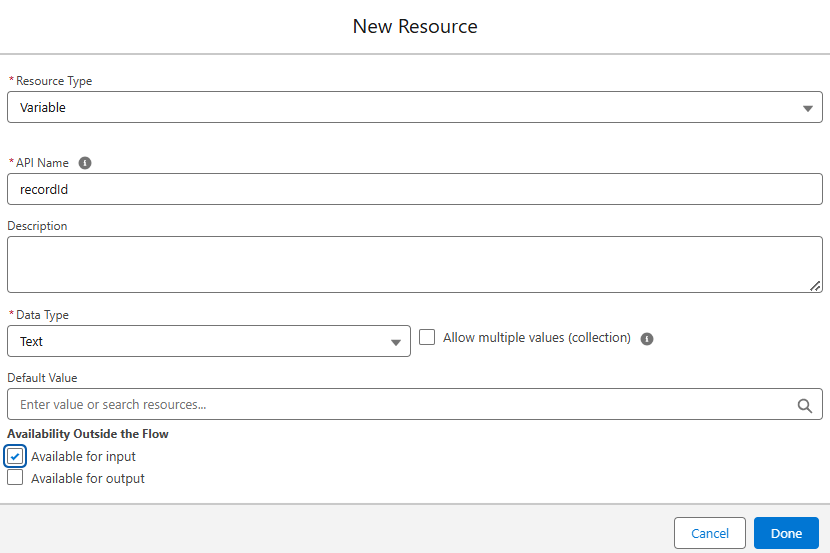
Fetch Related Records:
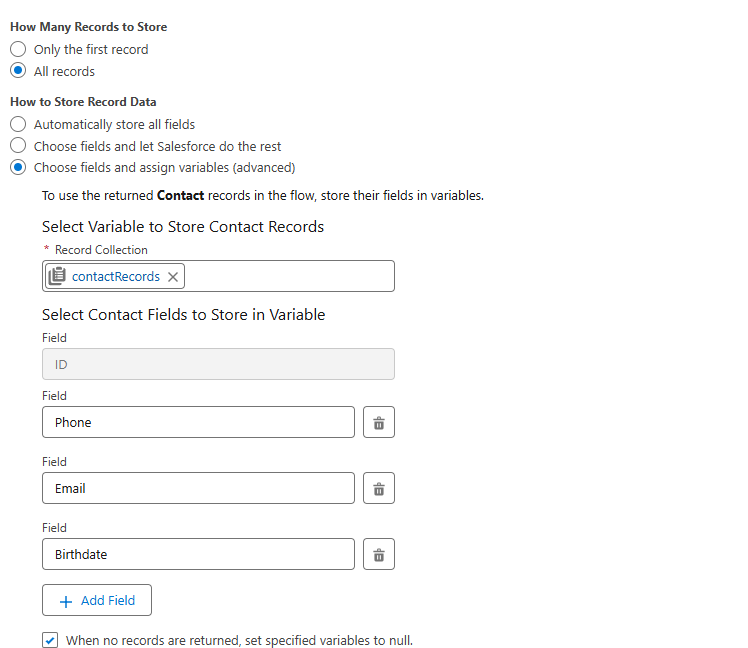
Use therecordIdto query related contacts. Create a Collection Variable to store the retrieved contacts.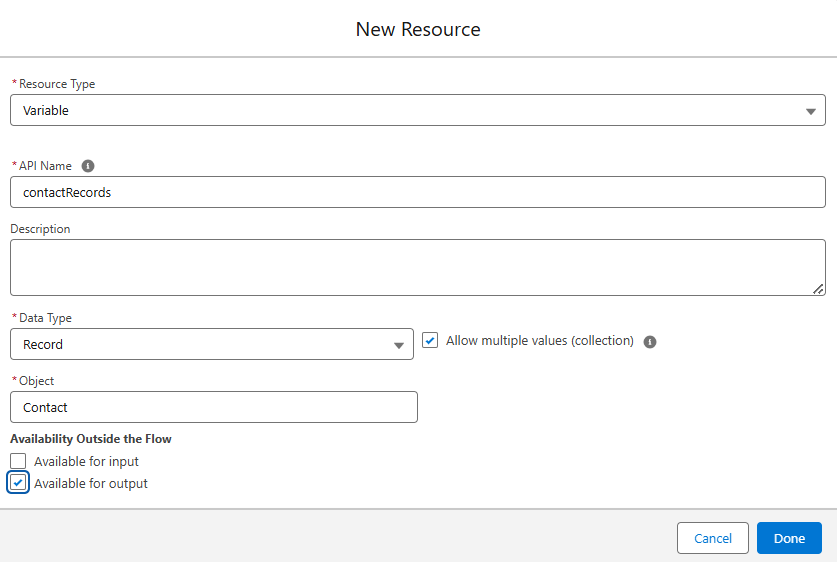
Set Entry Criteria and Sorting Logic:
Configure entry conditions, sorting preferences, and the fields to be retrieved. (Refer to the image below for setup details.)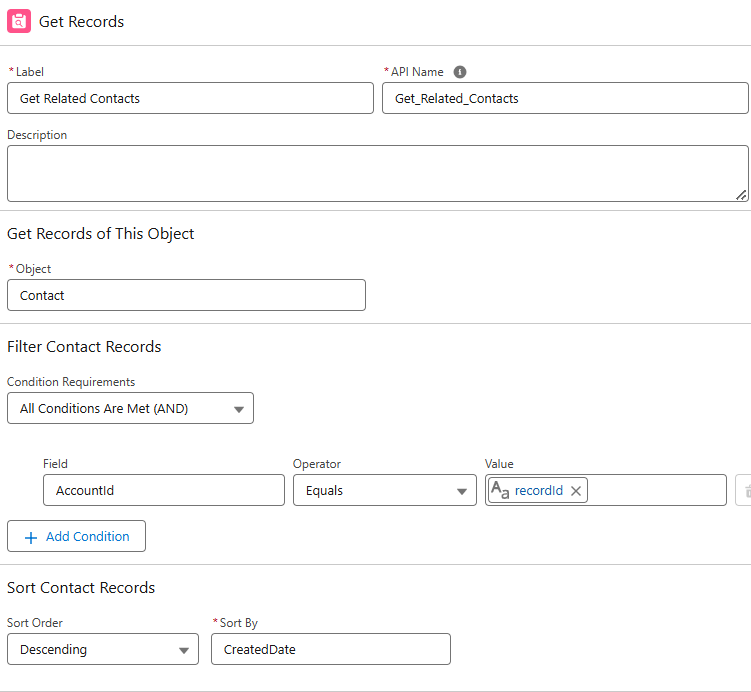
Save and Activate:
Once everything is set up, save and activate the flow.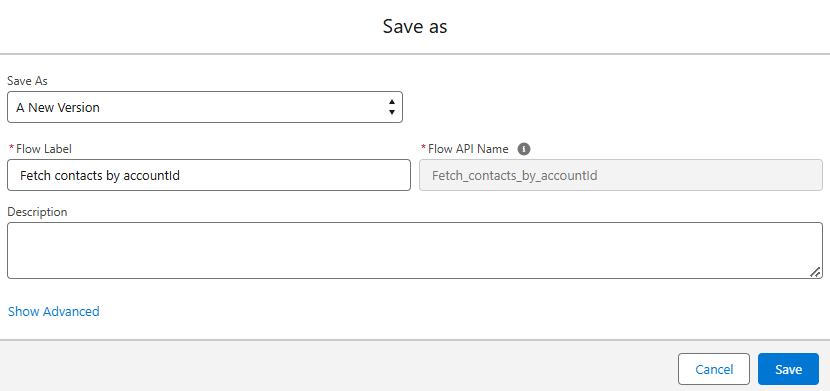
Step 2: Create a Screen Flow
This Screen Flow will serve as the user interface and leverage the Action Button to interact with the Auto-Launched Flow.
Add Components:
Lookup Field:
Add a Lookup field for users to select the parent record (e.g., Parent Account).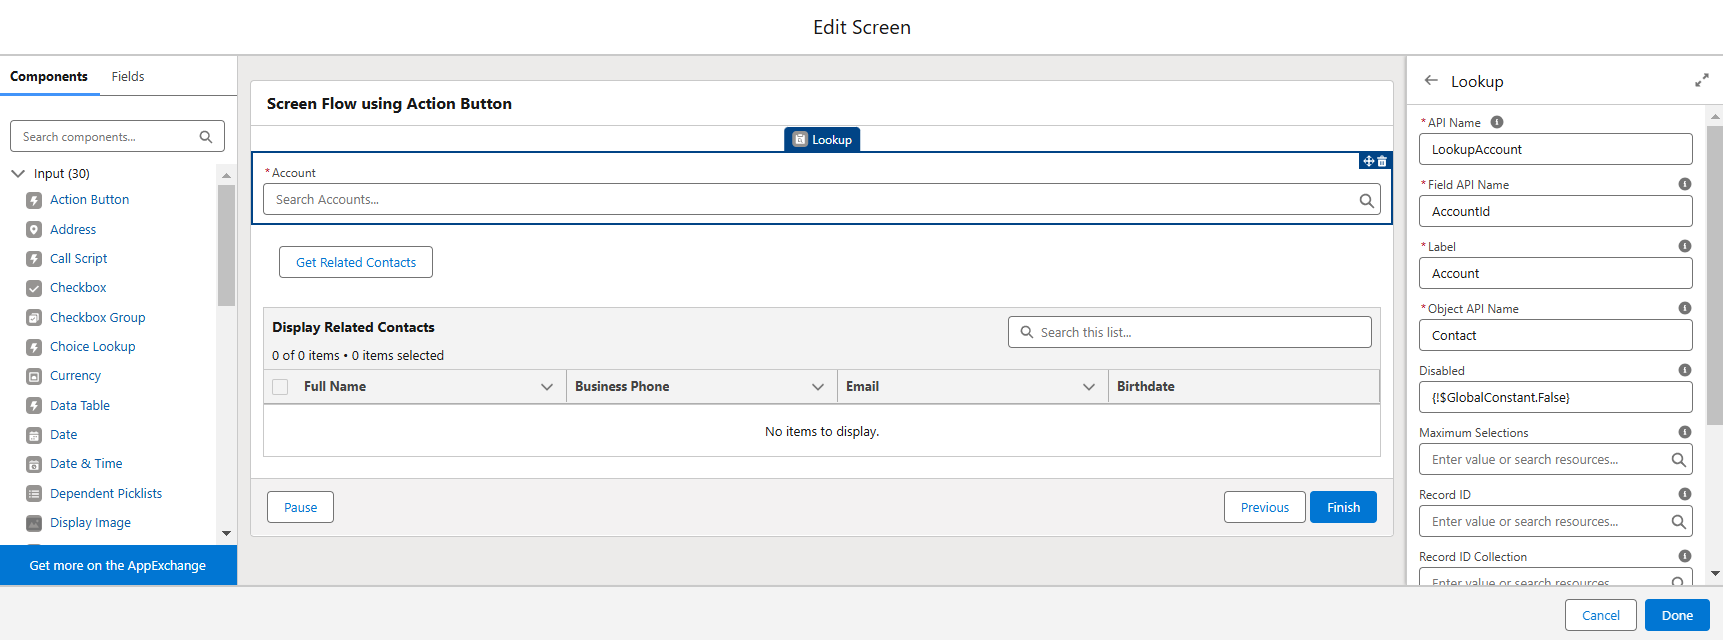
Action Button:
Use the Action Button to call the Auto-Launched Flow, passing therecordIdand receiving the output data.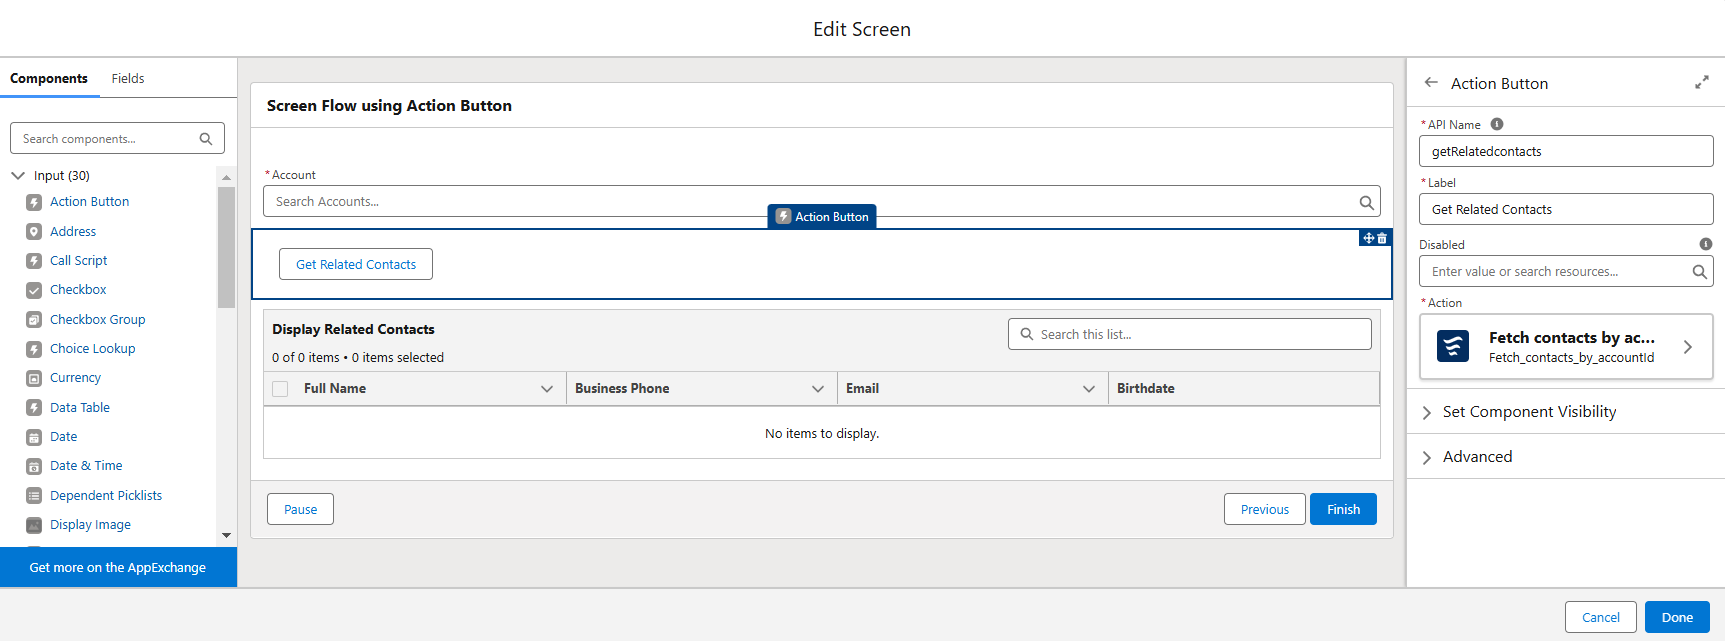
Data Table:
Add a Data Table component to display the retrieved contacts from the Auto-Launched Flow.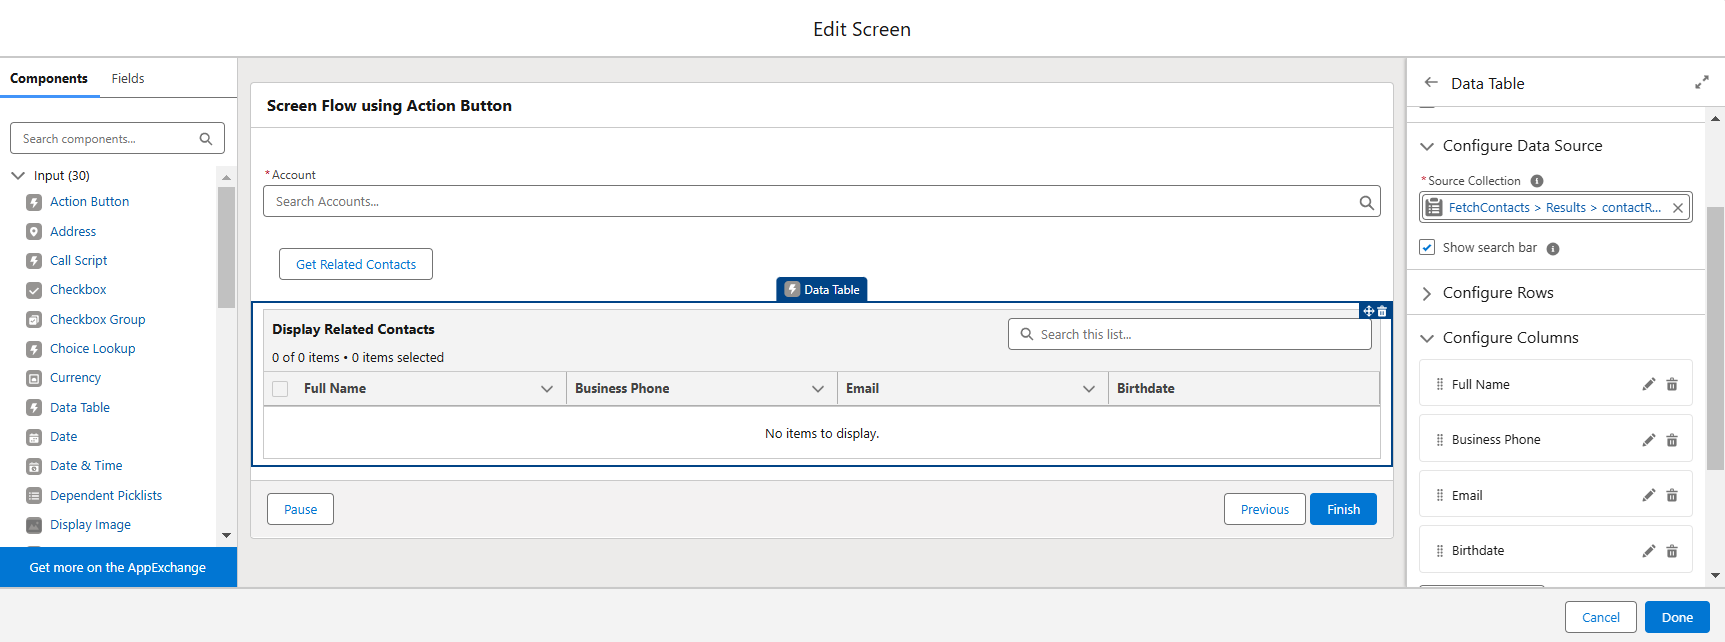
Save and Activate:
Save and activate the flow.
Step 3: Deploy the Flow
You can deploy the Screen Flow wherever it fits your use case. For example, you can add it to a Quick Action.
Here's a demonstration video showcasing the final result:
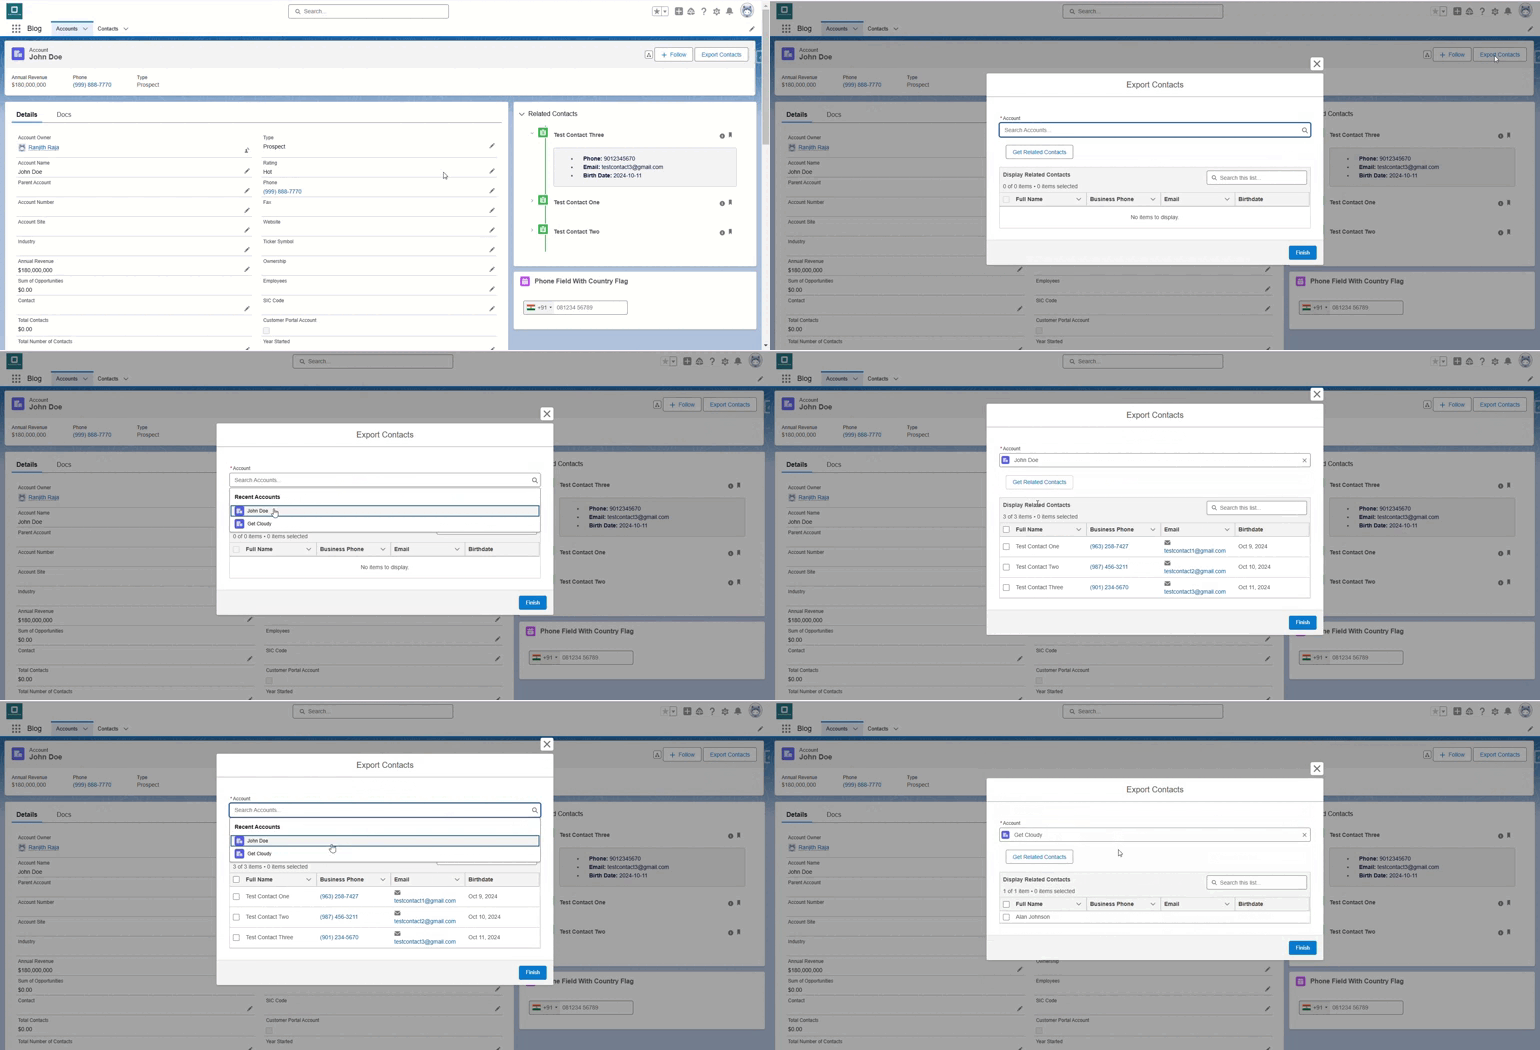
Why Use the Action Button?
The Action Button simplifies workflows by enabling data updates and actions within a single screen, reducing the need for navigation. It's ideal for streamlining processes like:
Displaying and managing related records.
Keeping users focused on the task at hand.
Enhancing user experience with seamless UI interactions.
Feel free to try this feature in your Salesforce org and share your thoughts😊.
Subscribe to my newsletter
Read articles from Ranjith Raja Mathiyalagan directly inside your inbox. Subscribe to the newsletter, and don't miss out.
Written by

Ranjith Raja Mathiyalagan
Ranjith Raja Mathiyalagan
Passionate Salesforce Developer with 6.5 years of experience in building scalable CRM solutions and delivering innovative Salesforce applications. Sharing knowledge and insights on Salesforce development, best practices, and real-world use cases. Follow for expert tips, use case documentation, and project success stories.