Jenkins Master-Worker Connection Setup
 Pulkit Yadav
Introduction
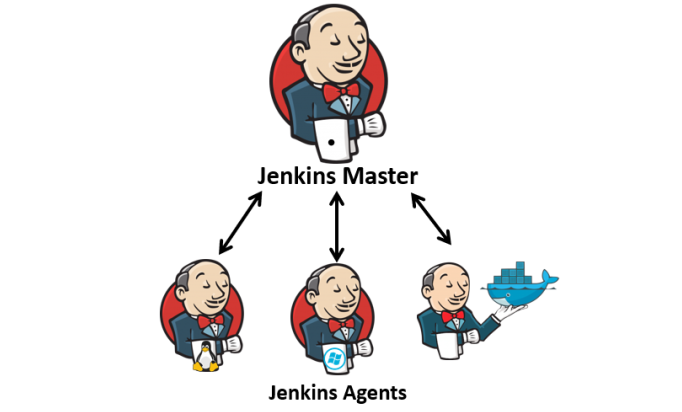
In this guide, I’ll show you how to connect a Jenkins master to worker nodes. Jenkins helps automate tasks in software development, and by linking the master to workers, you can make the process faster and more efficient. This simple guide will help you set up the connection and get everything running smoothly. Let’s get started
What is Jenkins
Jenkins is an open-source tool used in DevOps to automate tasks in the software development process. It helps teams build, test, and deploy software faster and more easily. Jenkins is often used in Continuous Integration (CI) and Continuous Delivery (CD) pipelines, which make sure code changes are tested and deployed automatically. By automating these tasks, Jenkins helps teams work better together, speeds up development, and reduces mistakes. In short, Jenkins makes the development process faster and easier
Jenkins Architecture
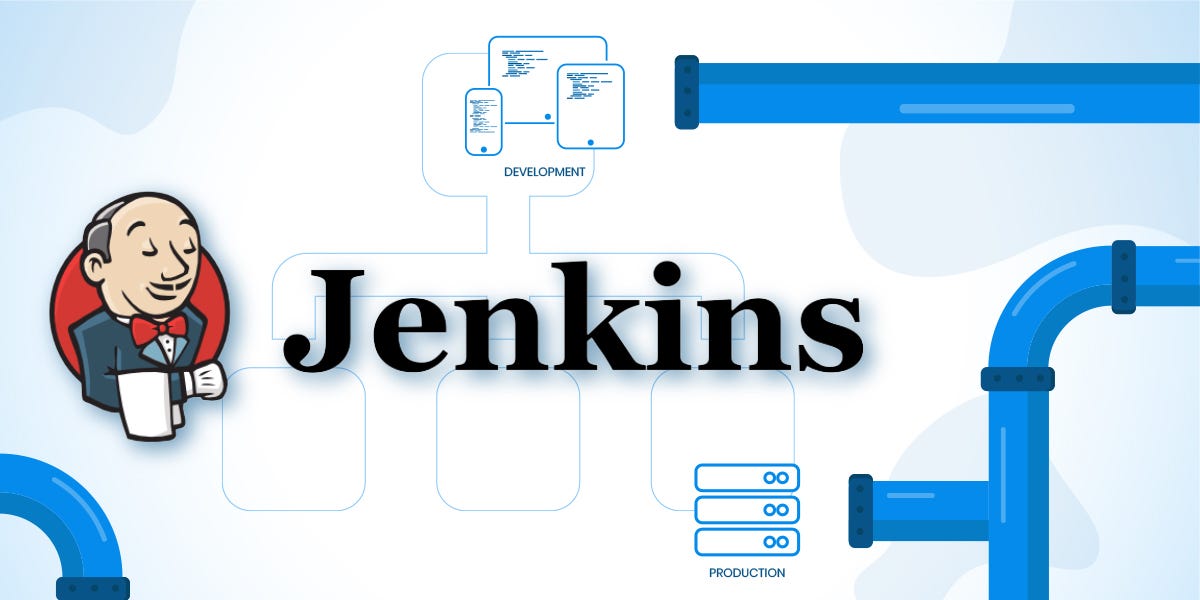
Jenkins follows a master-worker architecture where the master server is responsible for managing tasks, scheduling jobs, and monitoring the workers. The workers (also called slaves) are separate servers that carry out the tasks assigned by the master, such as building, testing, or deploying parts of the application. This setup enables Jenkins to distribute workloads across multiple servers, improving efficiency and scalability
Why Do We Need Master -Worker in Jenkins
Imagine a team working on different parts of an application. The master is like the team leader, who decides what tasks need to be done and makes sure everything is going smoothly. But the leader can’t do all the work alone. To get everything done faster, the leader (master) gives tasks to team members (workers).
Each worker is like a team member who does specific jobs, such as building, testing, or deploying parts of the application. With many workers, Jenkins can split the work, which means the tasks get done faster without overloading the master. This way, the team works together, finishing more tasks in less time.
So, the master organizes the tasks, and the workers do the work. This makes Jenkins faster and better at handling bigger applications.
Jenkins Distributed Architecture
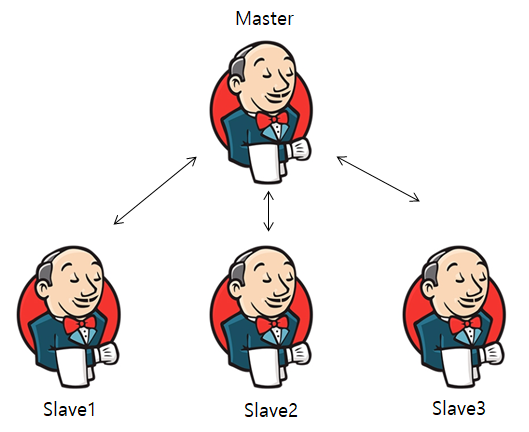
Jenkins uses a distributed setup to make it faster and handle more work. In this setup, there are master and worker servers working together.
The master is the main server. It organizes the tasks and keeps everything running smoothly, but it doesn’t do all the work itself.
The workers (or slaves) are separate servers that do the actual work, like building, testing, and deploying parts of the application.
By having many workers, Jenkins can do more tasks at once, making it faster and more efficient. Each worker can handle different tasks, so Jenkins can grow and handle bigger jobs without slowing down.
Setting Up the Master Node
Launching an AWS Instance
Log in to AWS Console
First, log in to your AWS account. If you don’t have one, create an account at AWS website.Go to EC2 Dashboard
Once logged in, go to the EC2 Dashboard. EC2 is the service that lets you create virtual servers (called instances) in AWS.Launch a New Instance
Click the Launch Instance button to create a new virtual server.Choose an Amazon Machine Image (AMI)
Select Ubuntu as the operating system for your server.Choose Instance Type
Choose t2.micro as the instance type. This is part of the AWS free tier, and it's good for basic tasks.Configure Instance Settings
Set up the basic settings for your instance. The default settings are usually fine, but you can change them if needed.Add Storage
You can leave the default storage settings. The free tier gives you a basic amount of storage.Configure Security Group
You can create a new security group or use an existing one. No need to worry about SSH port 22, as it’s already enabled by default.Create and Download Key Pair
You’ll need a key pair to connect to the instance. If you don’t have one, create a new key pair and download the .pem file. Keep this file safe, as you’ll use it to log in to your instance.Launch the Instance
After setting everything up, click Launch to start the instance. It will take a few moments for AWS to create your instance.
Naming Your Jenkins Master Node and Connecting via SSH
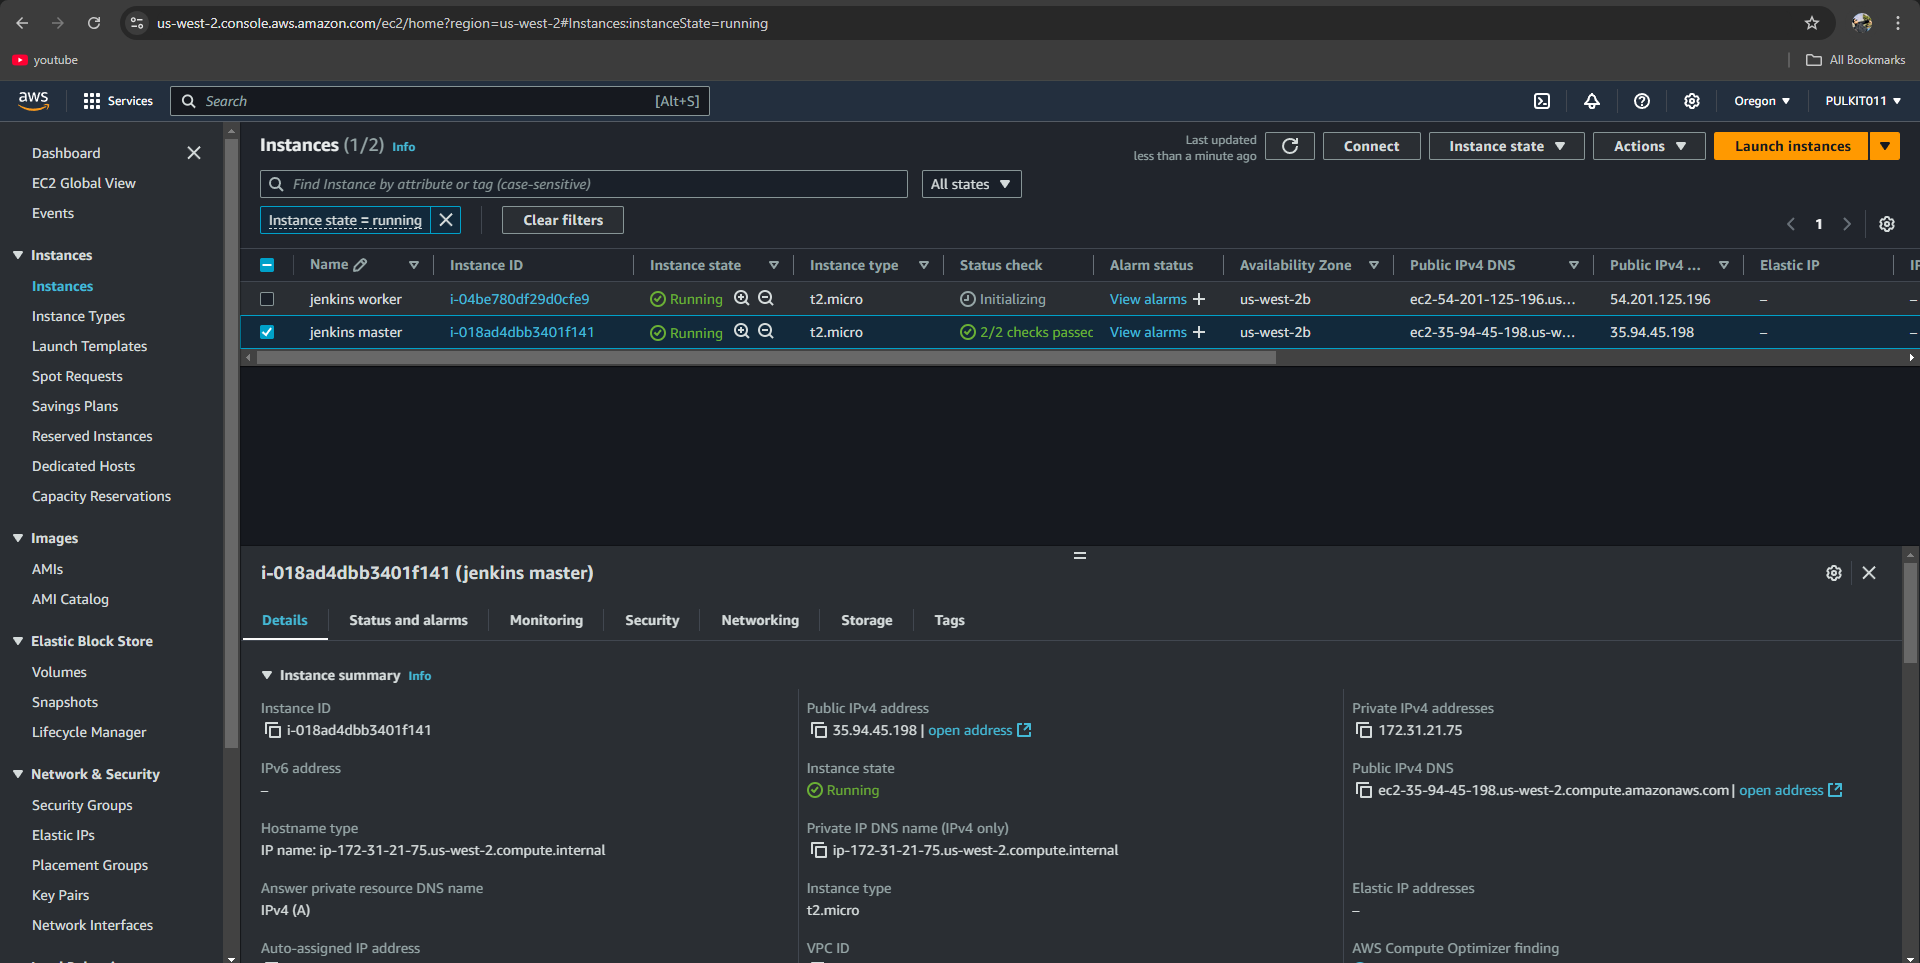
After creating the instance, go to your EC2 Dashboard.
Click on your instance and then click on the instance name at the top.
Change the instance name to Jenkins Master to easily identify it later.
Wait until the instance status shows Running.
Once it’s running, click the Connect button at the top.
Under the SSH client tab, copy the command provided.
Open your terminal on your local machine and paste the copied SSH command to connect to the instance.
Now, you’re connected to your Jenkins Master Node instance
NOTE :- If you need more details about SSH and how it works, refer to the previous section for a detailed understanding of SSH.
Installing Jenkins
Now that you're connected to your instance, it's time to install Jenkins.
First, update your instance by running the command:
sudo apt-get update
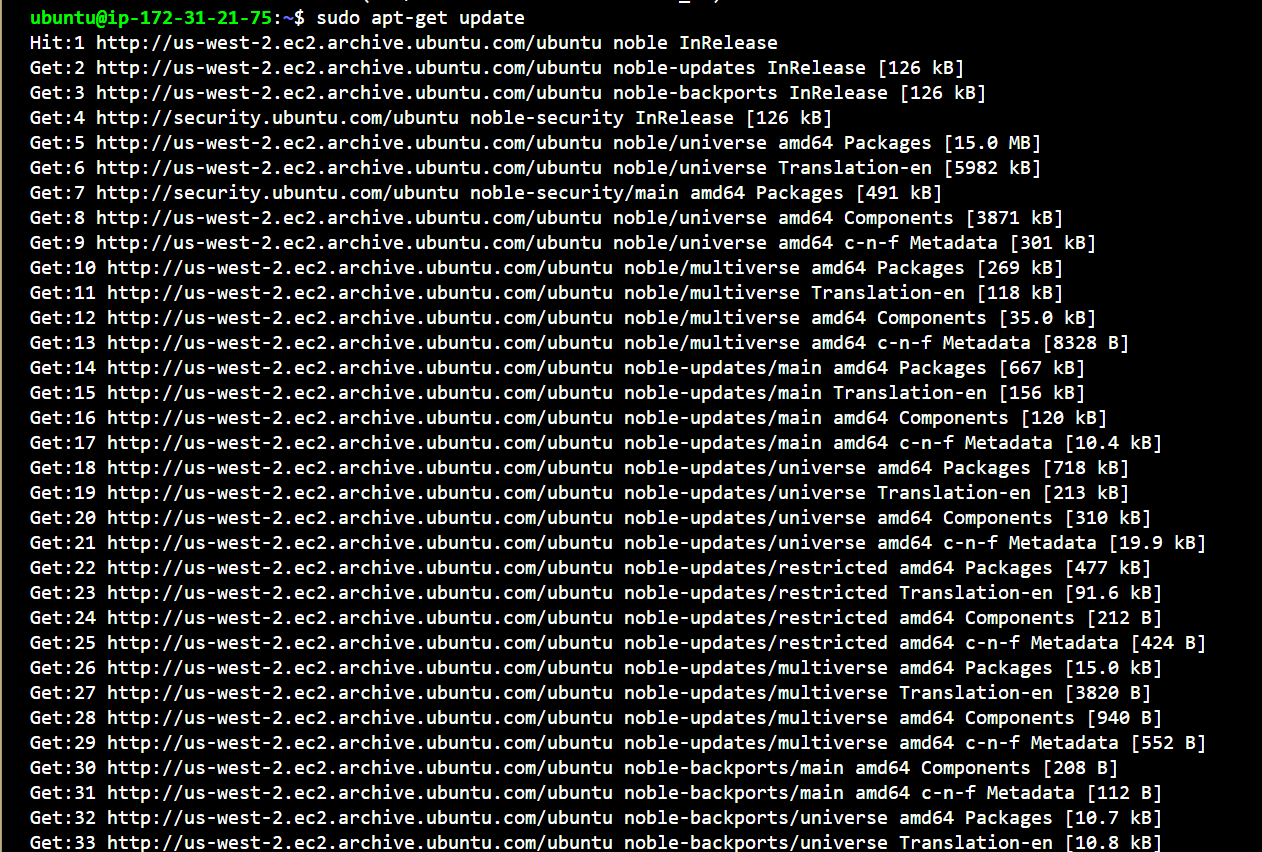
After the update, you need to install Java, as Jenkins requires it to run. Let's set up Java first.
Install Java 17
Jenkins needs Java to run, and we’ll use OpenJDK 17. To install it, use this command:
sudo apt-get install fontconfig openjdk-17-jre
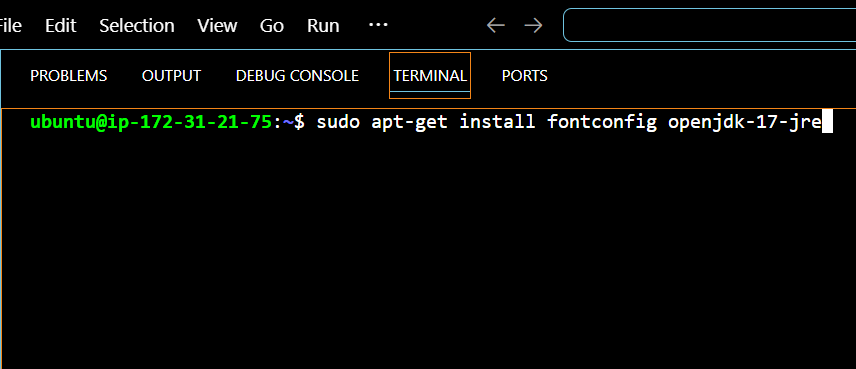
After that, check if Java is installed by running:
java -version
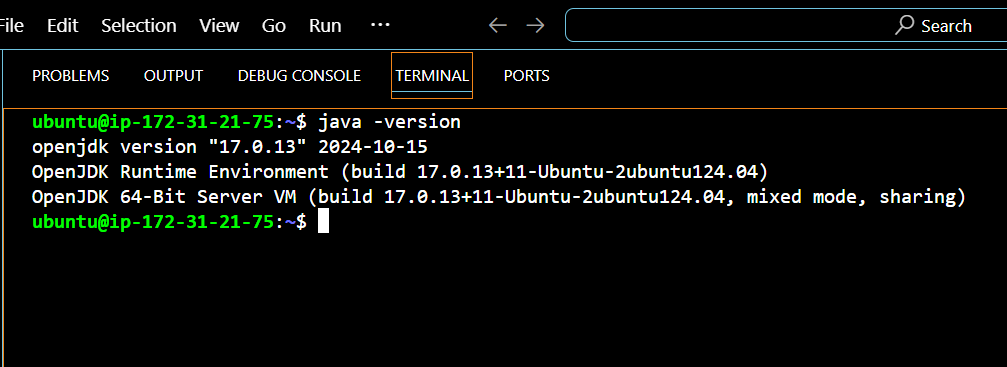
Now that Java is set up, it's time to install Jenkins
Add the Jenkins Repository
- Download the Jenkins Key
Jenkins is not included in the default Ubuntu repositories, so we first need to download its official key and save it to your keyring by running:
sudo wget -O /usr/share/keyrings/jenkins-keyring.aschttps://pkg.jenkins.io/debian-stable/jenkins.io-2023.key

- Add the Jenkins Repository
After that, add the Jenkins repository to your system using this command:
echo "deb [signed-by=/usr/share/keyrings/jenkins-keyring.asc] https://pkg.jenkins.io/debian-stable binary/" | sudo tee /etc/apt/sources.list.d/jenkins.list > /dev/null

Update the Package List Again
After adding the Jenkins repository, you need to refresh the package list to include Jenkins. Run this command
sudo apt-get update

Install Jenkins
With the repository added, you're ready to install Jenkins. Run this command
sudo apt-get install jenkins
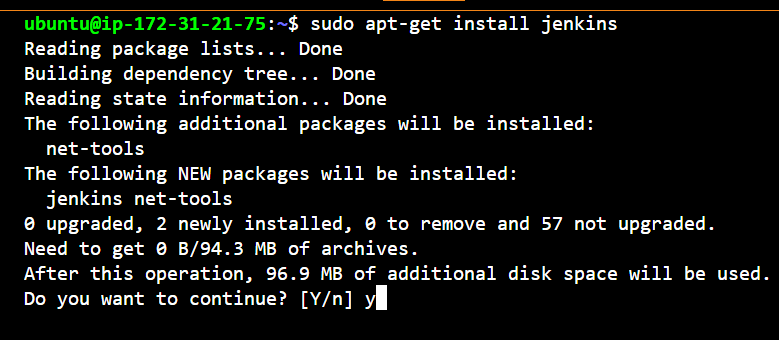
This will install Jenkins along with all the necessary dependencies.
Check Jenkins Status
To make sure Jenkins is running properly, check its status by running this command:sudo systemctl status jenkins

If Jenkins is working correctly, it shows status as active (running).
Note
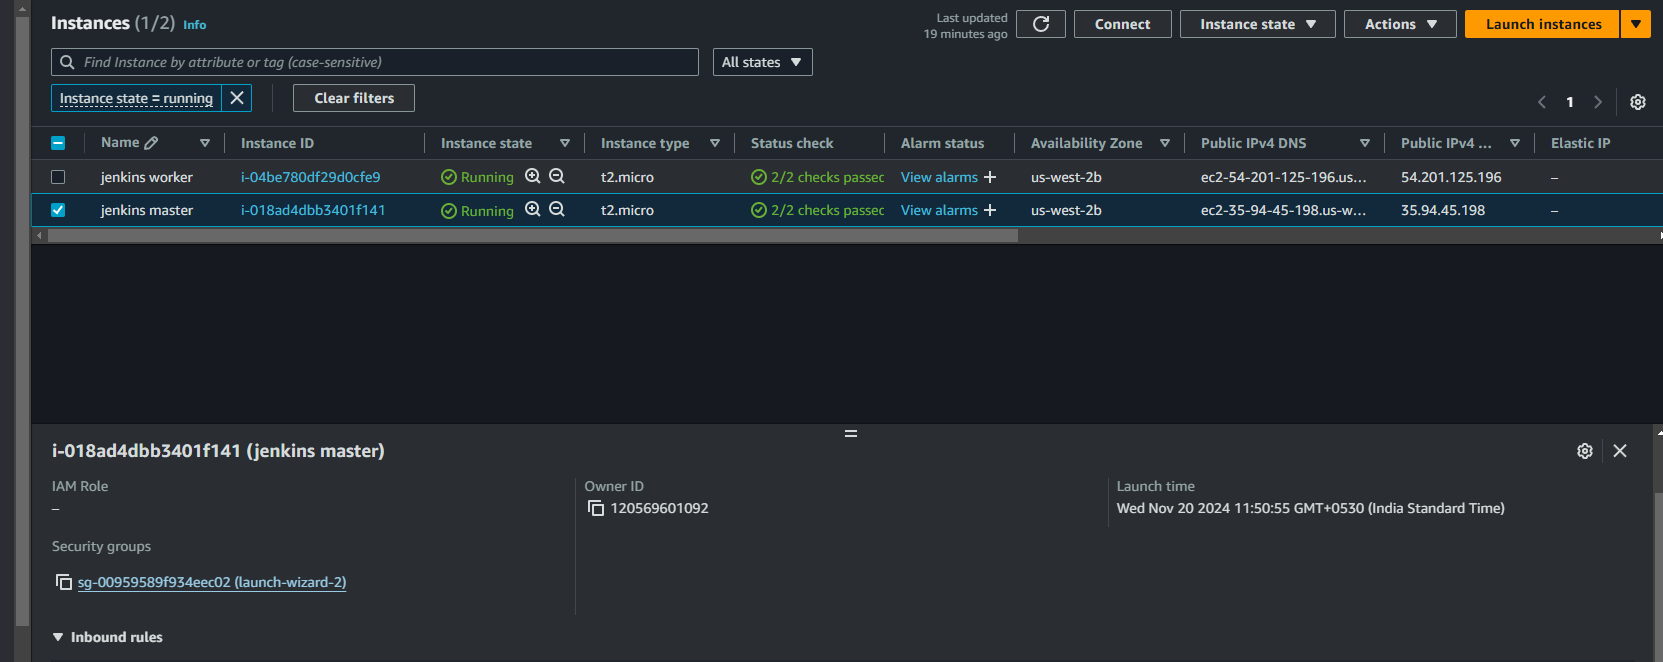
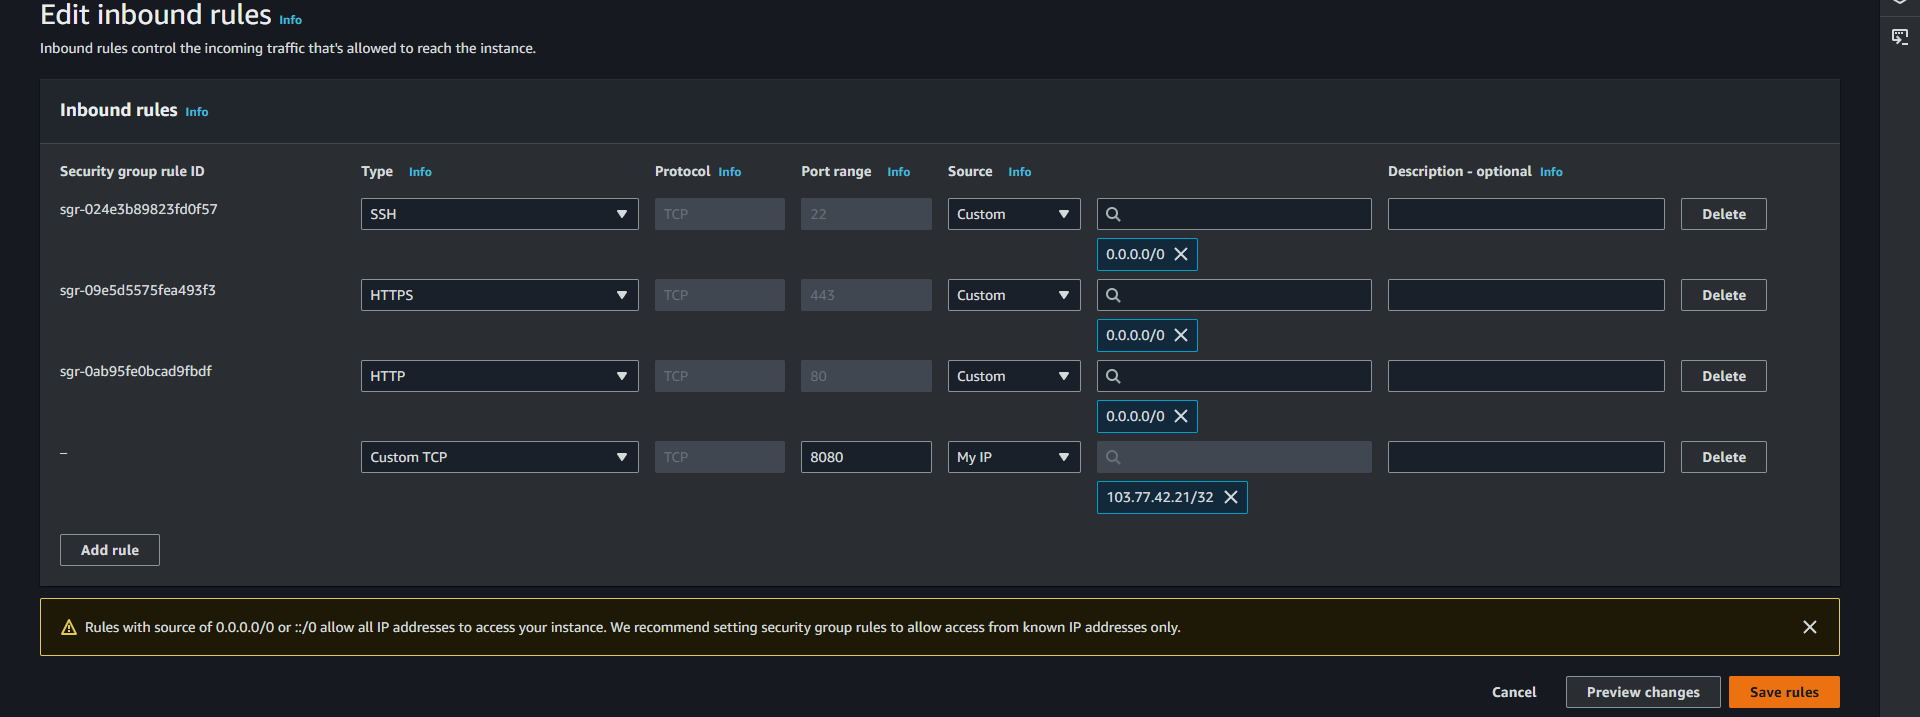
After installing Jenkins, you need to open port 8080 to access Jenkins from your browser. Follow these steps to open the port:
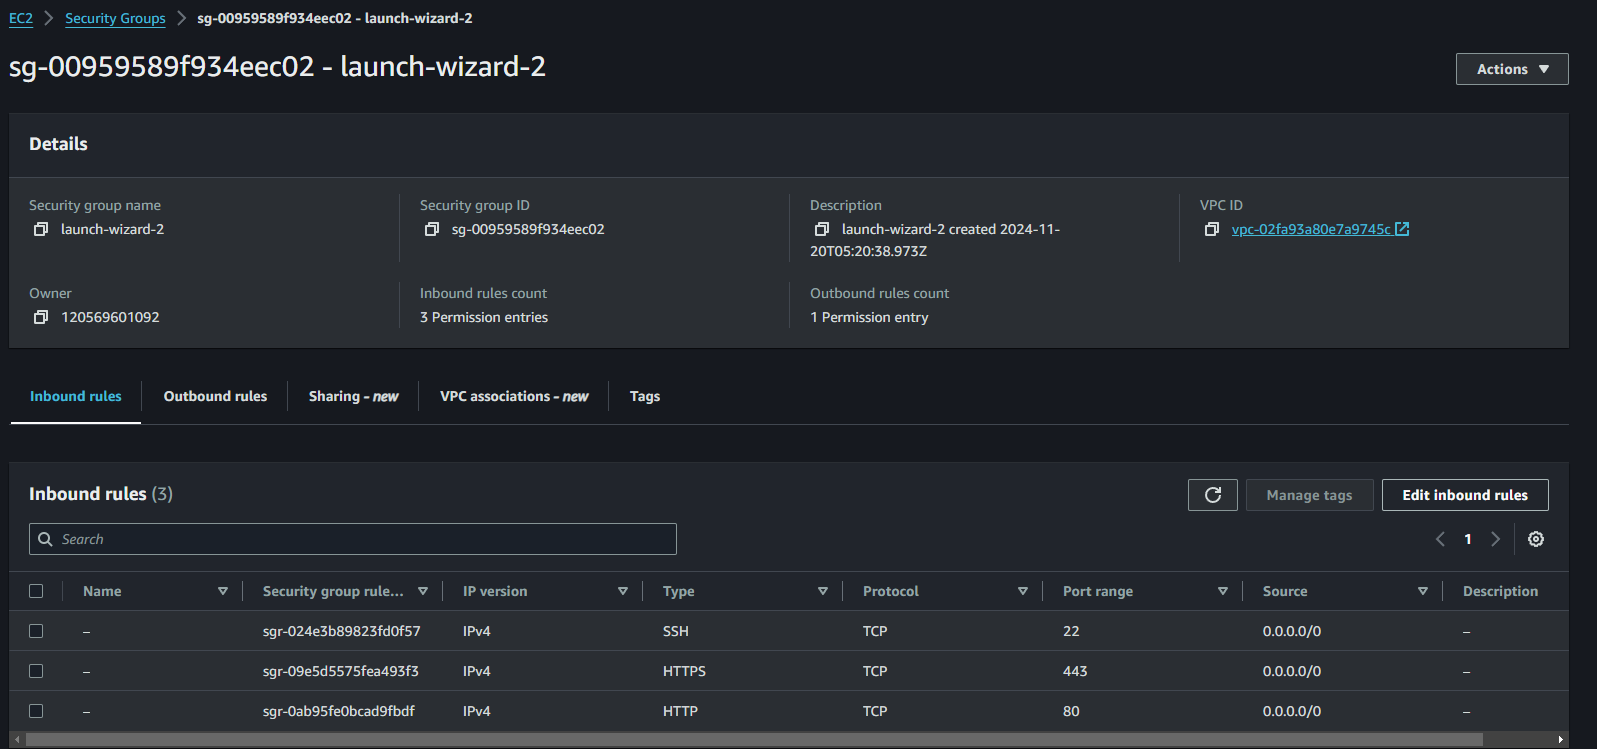
Go to the Security Group.
Click Edit Inbound Rules.
Add a rule for port 8080, allowing access from your IP.
Save the changes, then you can access Jenkins.
Access Jenkins in Your Browser
Once Jenkins is running, open your browser and go to:http://<your_server_ip>:8080
If you're accessing Jenkins remotely, replace <your_server_ip> with your EC2 server’s IP address.
Unlock Jenkins
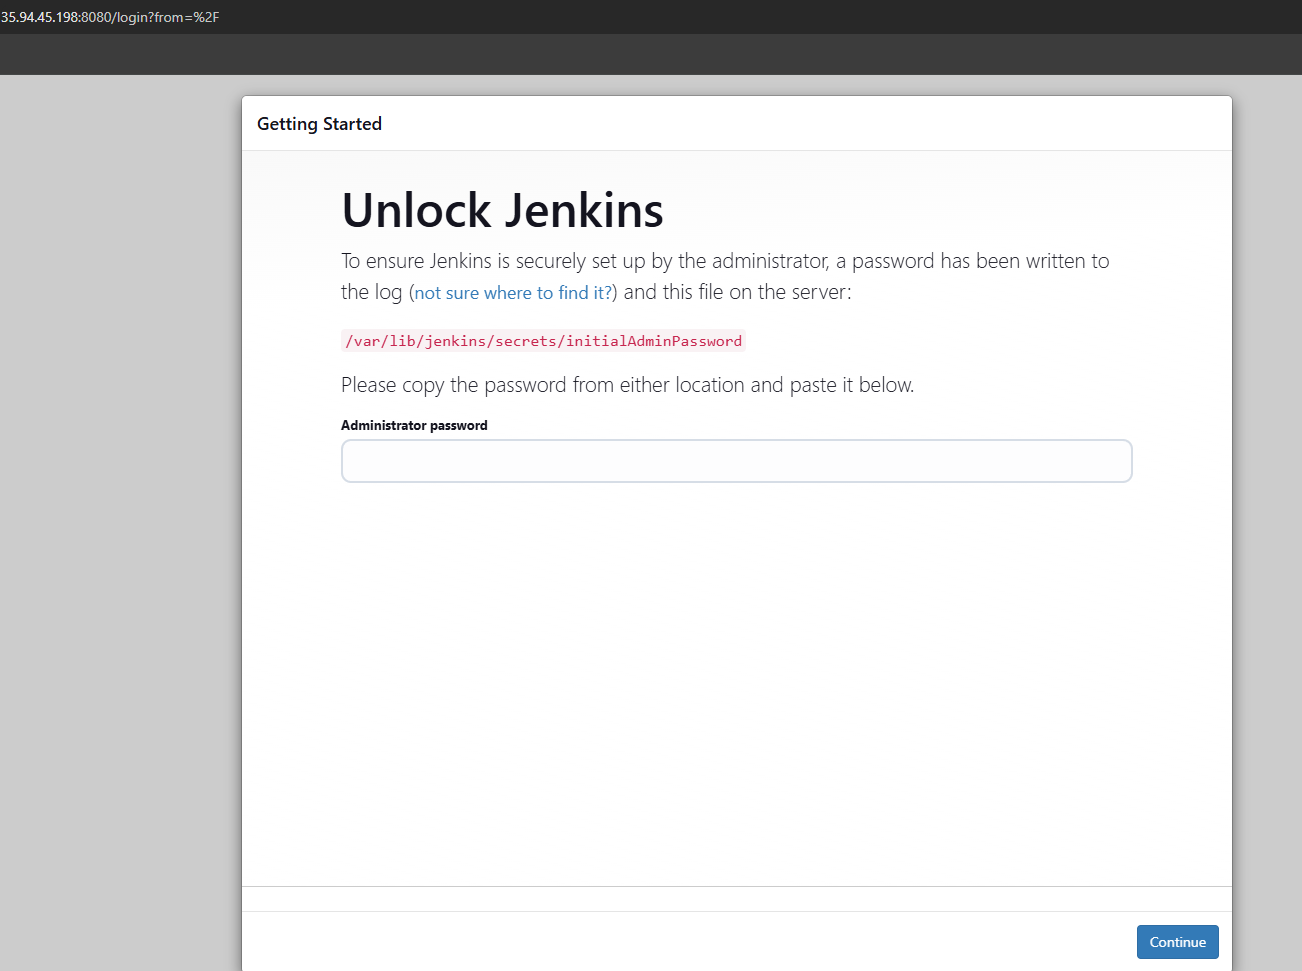
When you access Jenkins for the first time, it will ask for an Admin Password. To find this password, run the following command:sudo cat /var/lib/jenkins/secrets/initialAdminPassword

Copy the password and paste it into the Jenkins setup screen.
Install Suggested Plugins
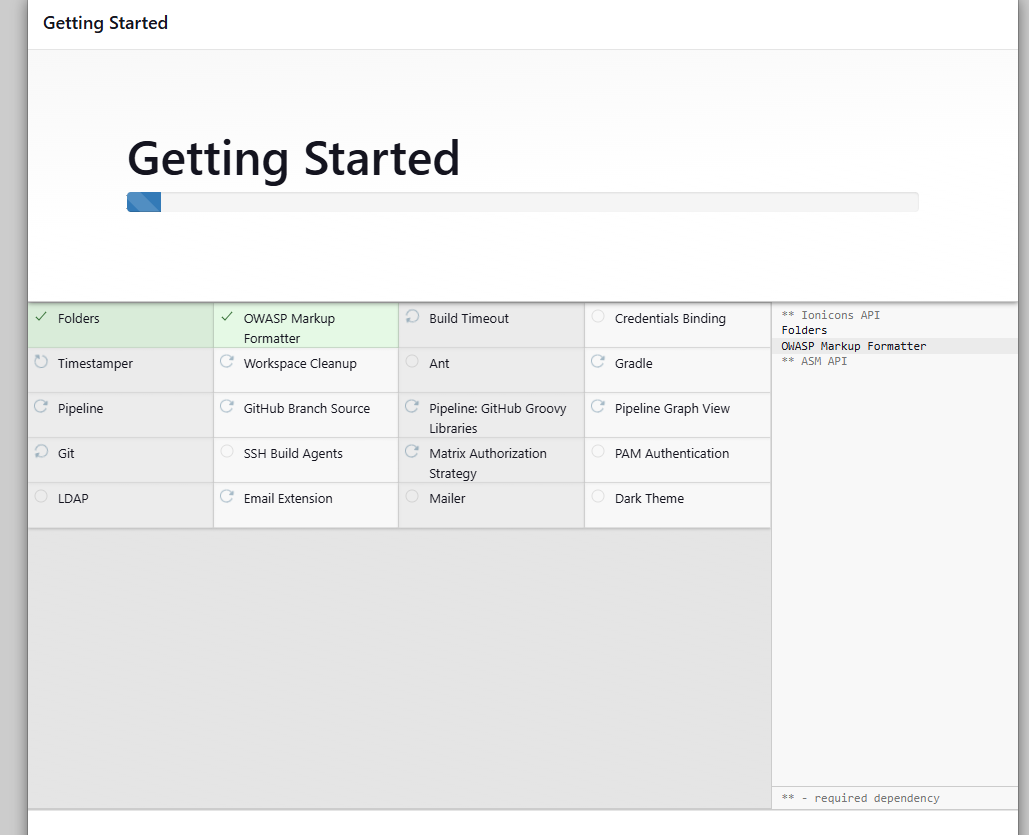
After logging into Jenkins, you’ll be prompted to install suggested plugins.
Click Install suggested plugins.
Wait for the plugins to install automatically. This may take a few minutes.
Create Credentials
Follow the on-screen instructions to create a new admin user by filling in a username, name, and password. You will also need to set an ID for the user during this process.
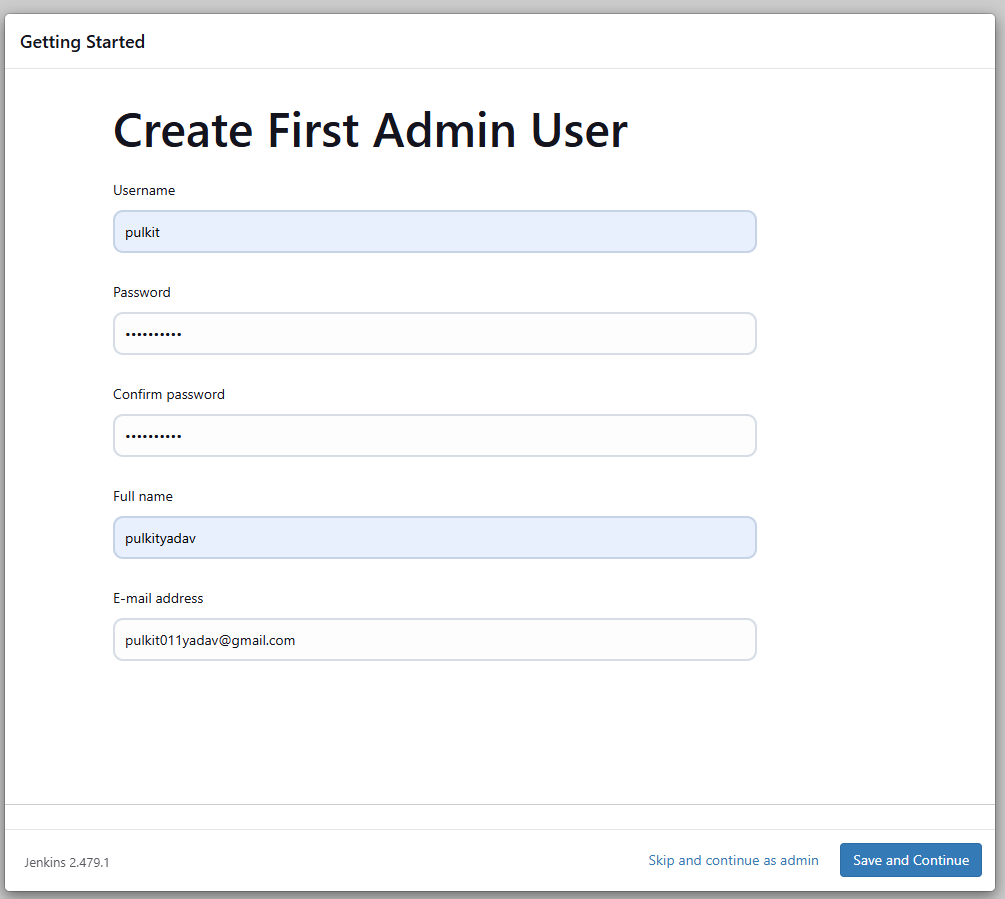
Jenkins Installation Done
Jenkins will be ready to use.
You can now start creating and managing your pipelines. Jenkins is fully set up, and you can begin automating your tasks like building, testing, and deploying applications.
Congratulations
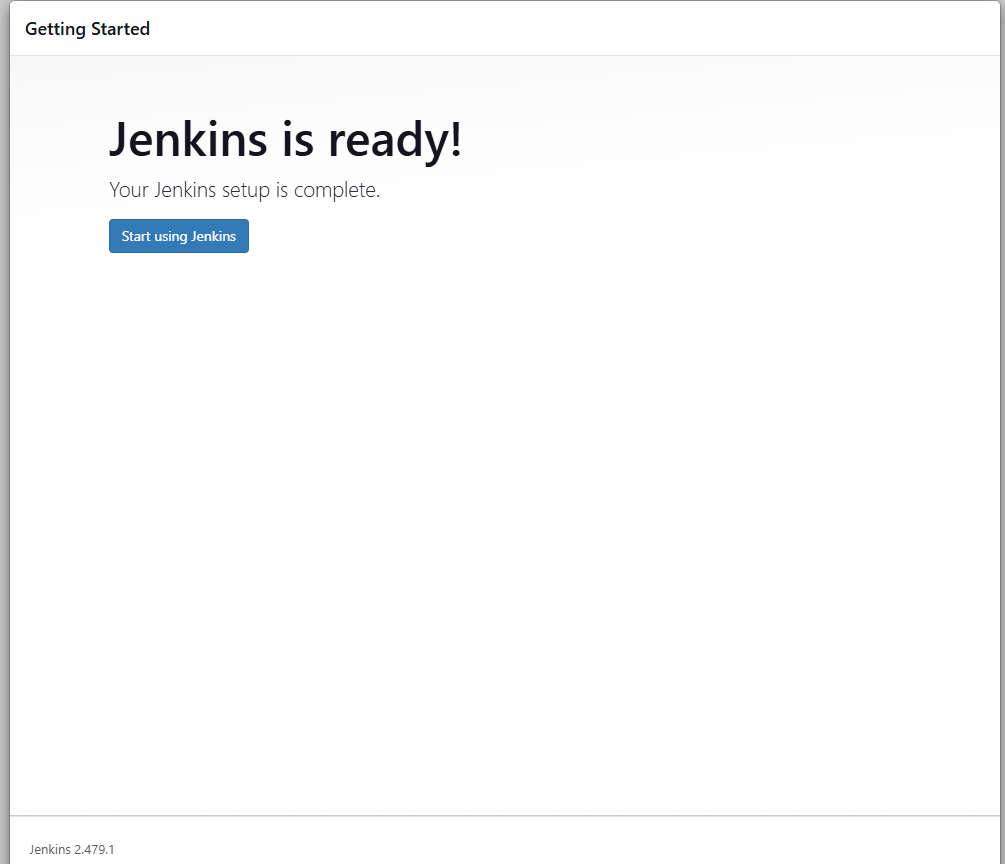
Your Jenkins master node is now created. Next, you can assign a worker node to it.
Step 1: Launch a New Instance for Worker Node
Go to AWS and launch a new instance.
Choose the size (e.g., t2.micro for the free tier).
Select Ubuntu as the image.
Follow the setup process and create the instance.
Name the instance as Worker Node.
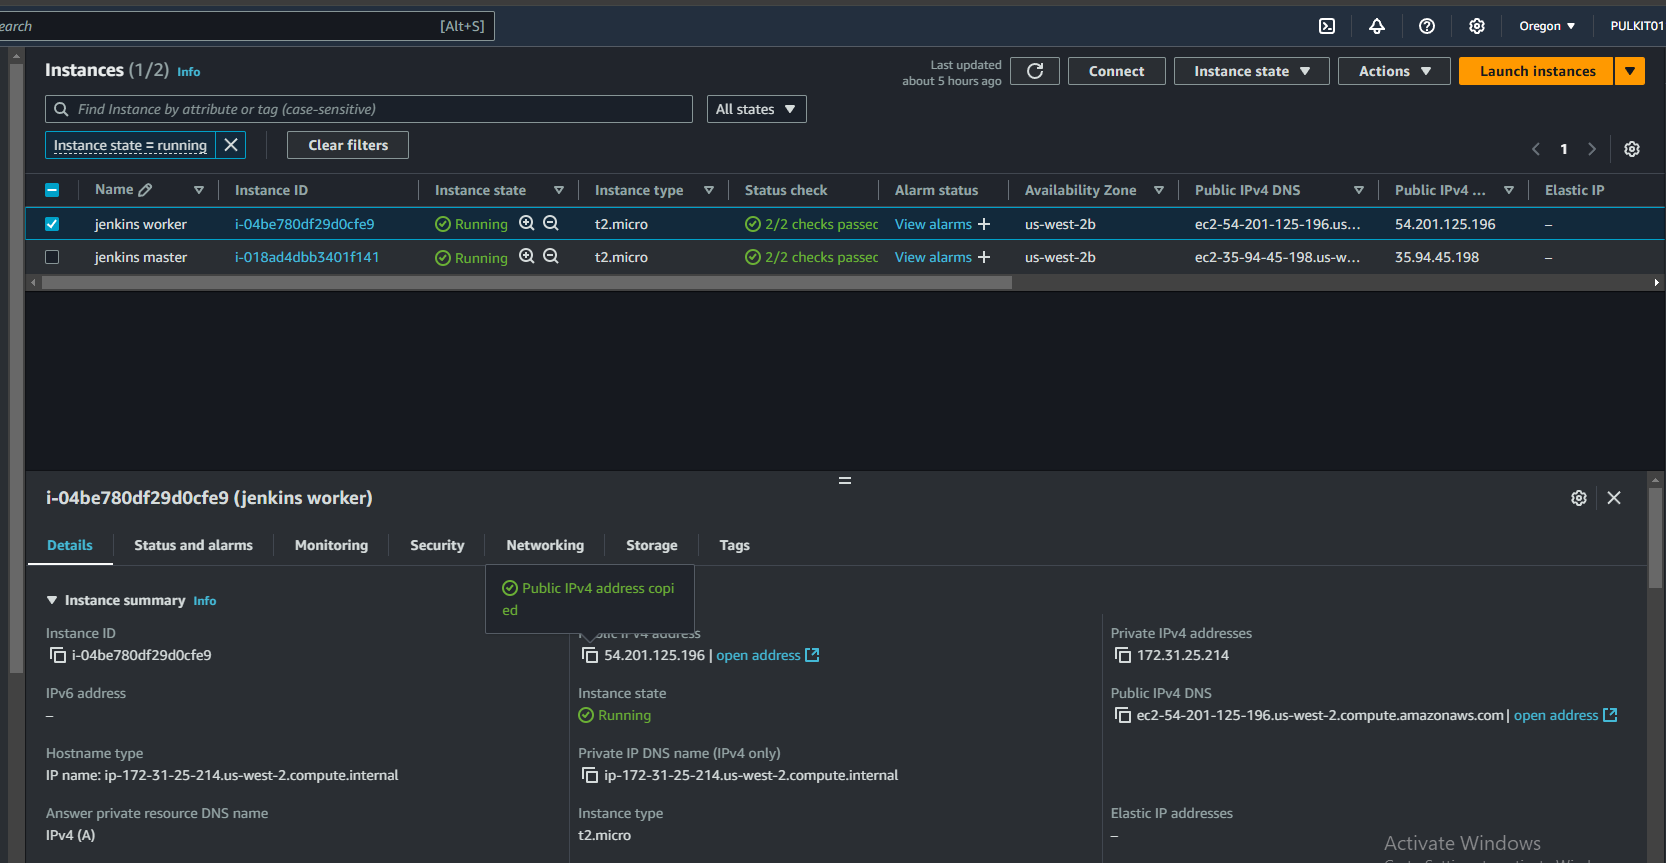
Step 2: Access the Worker Node Instance
Once the instance is created, click on the Worker Node instance name.
Click Connect and copy the SSH command.
Paste the SSH command in your local terminal to connect to the worker node.
Important Note
In the Worker Node, you do not need to install Jenkins because Jenkins is already set up on the Master Node. The Worker Node will connect to the Master Node and handle tasks such as building and testing. However, since Jenkins is developed in Java, you need to install Java on the Worker Node so it can communicate with the Master Node.
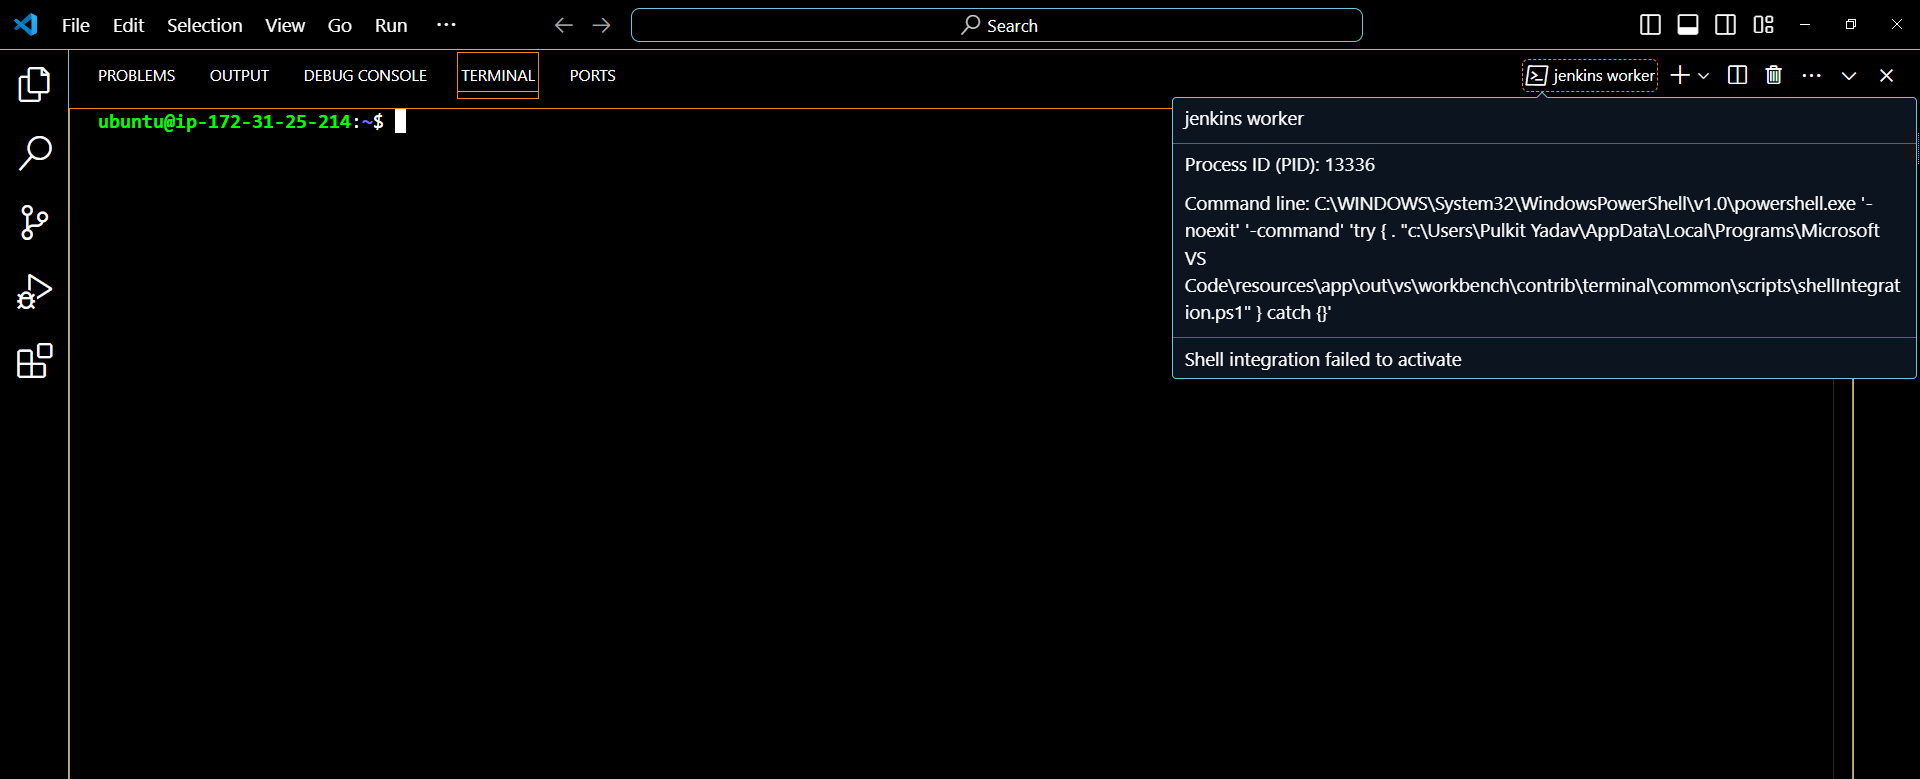
Step 3: Install Java on Worker Node
Update the package list by running
sudo apt-get updateInstall Java (OpenJDK 17) by running
sudo apt-get install openjdk-17-jreAfter installation, check if Java is installed by running
java -version


Connecting Master Node and Worker Node
Open your browser and go to your Jenkins dashboard using
http://<Your-EC2-IP>:8080.On the Jenkins dashboard, click on Set up Agent.
A new page will open. In the Node Name field, enter
dev server.Select Permanent Agent.
Click Create
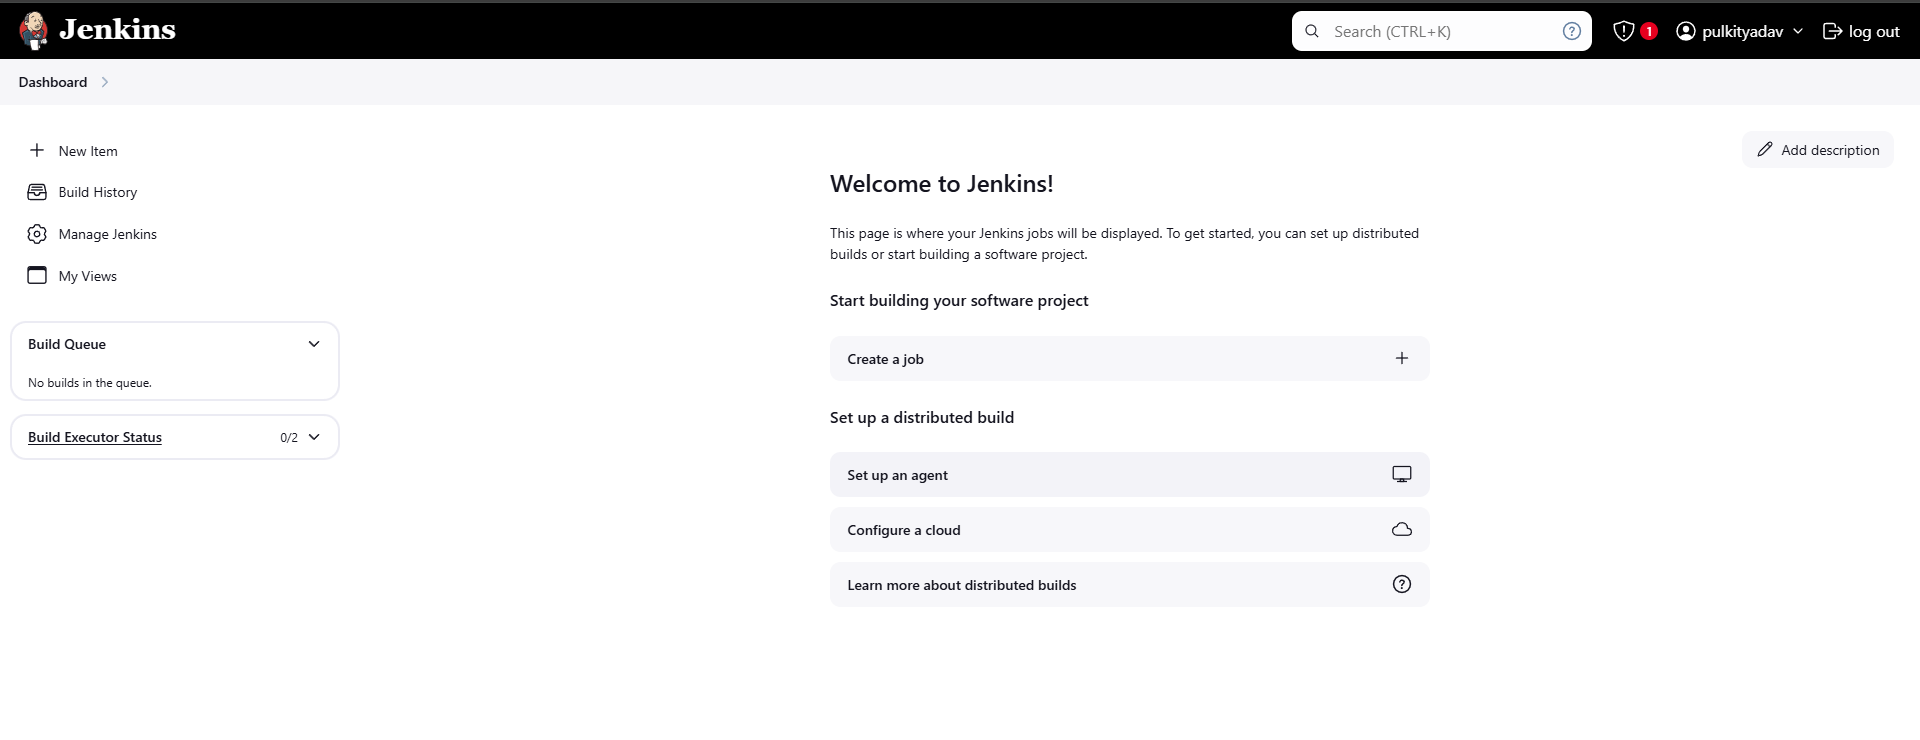

After you click Create, a new page will open with an important form to set up the node
1. Fill in the Node Name
- Fill in the Name as dev-server.
2. Add Description
- Add Description: This is the worker node.
3. Set Number of Executors
Executors: 1 (based on your system's resources).
Executors are the number of tasks the node can run at the same time.
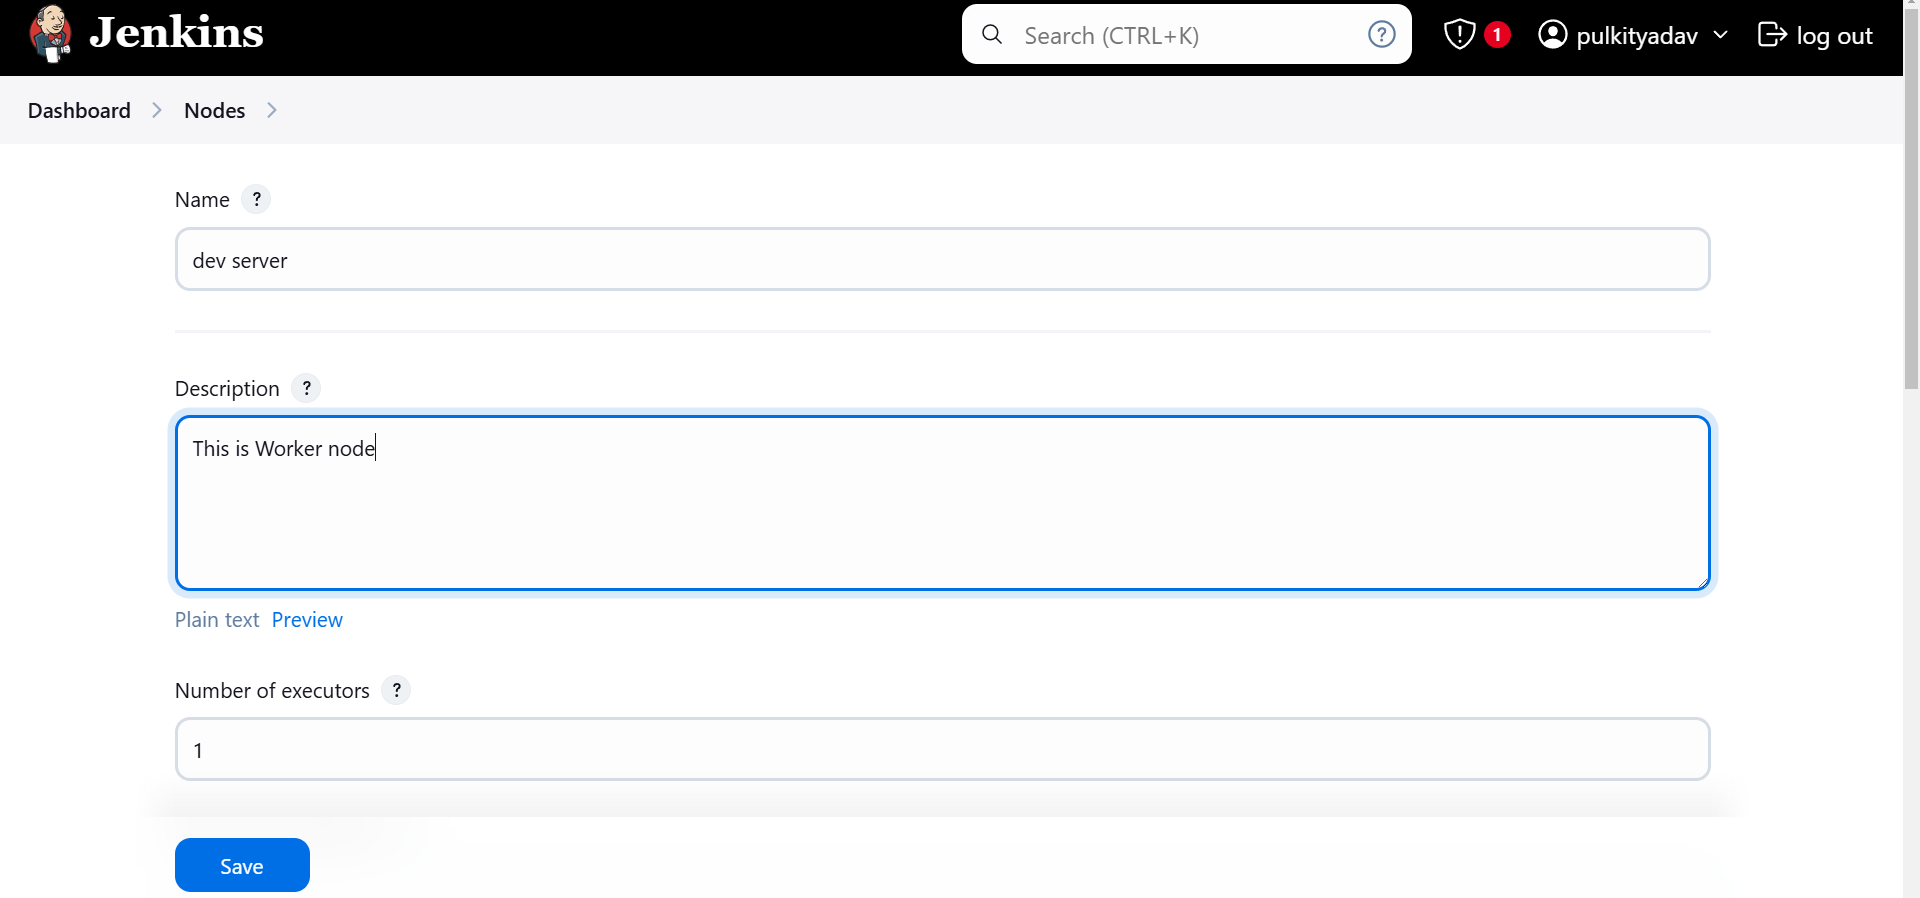

4. Set Remote Root Directory
- For Remote Root Directory, open the terminal on your worker node, run the
pwdcommand, and paste the path here.

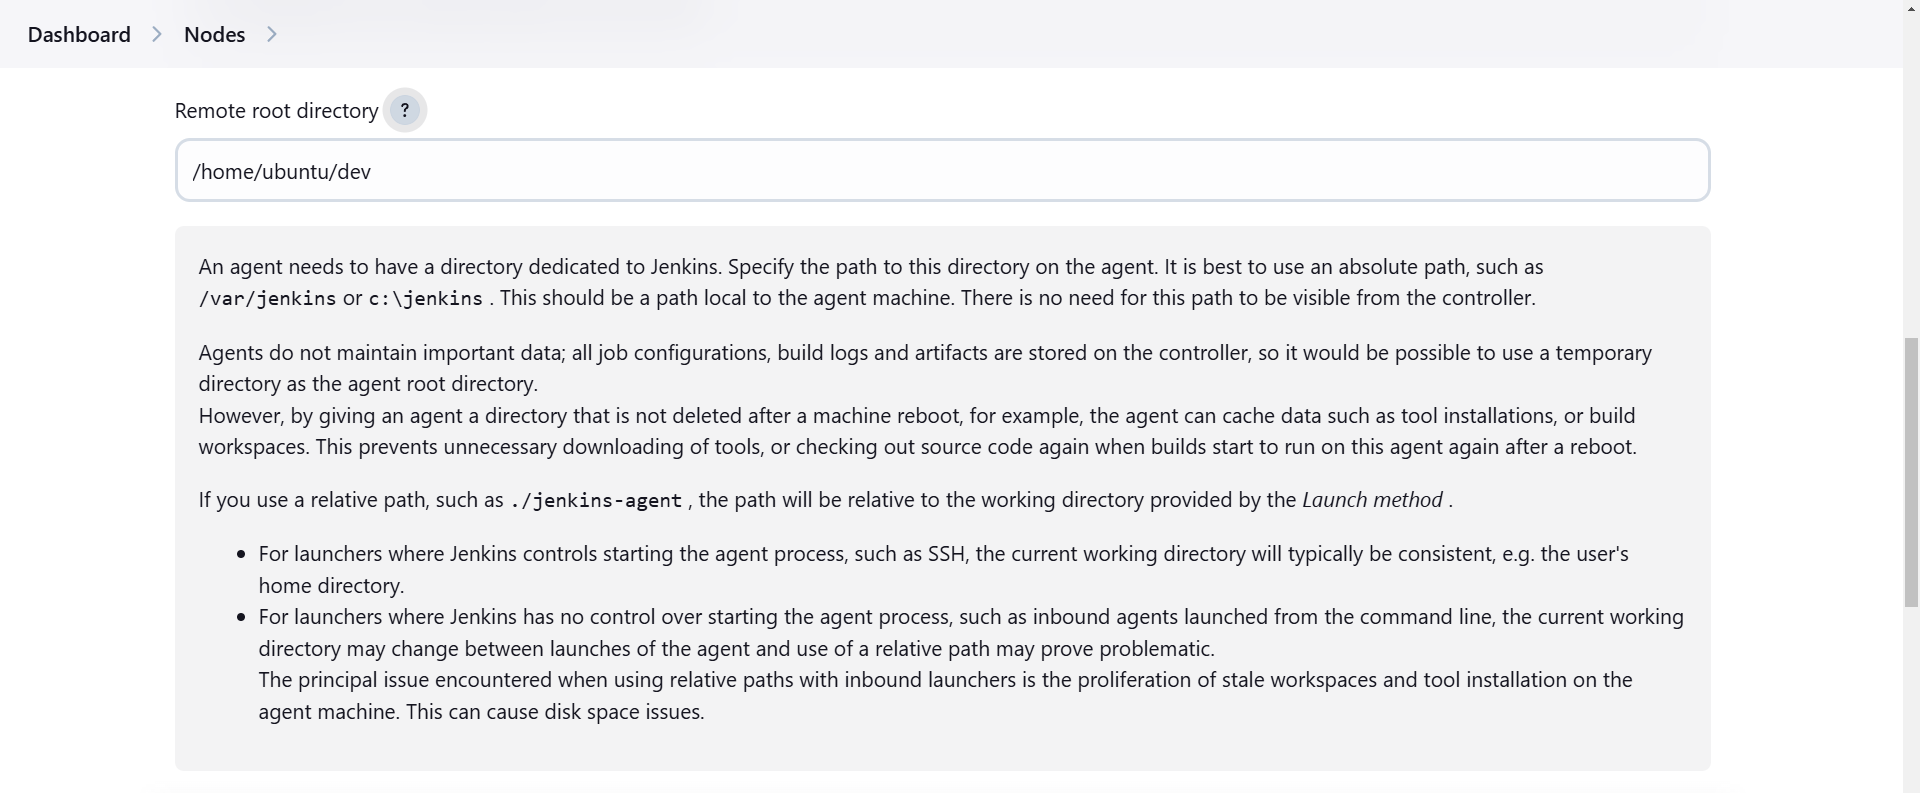
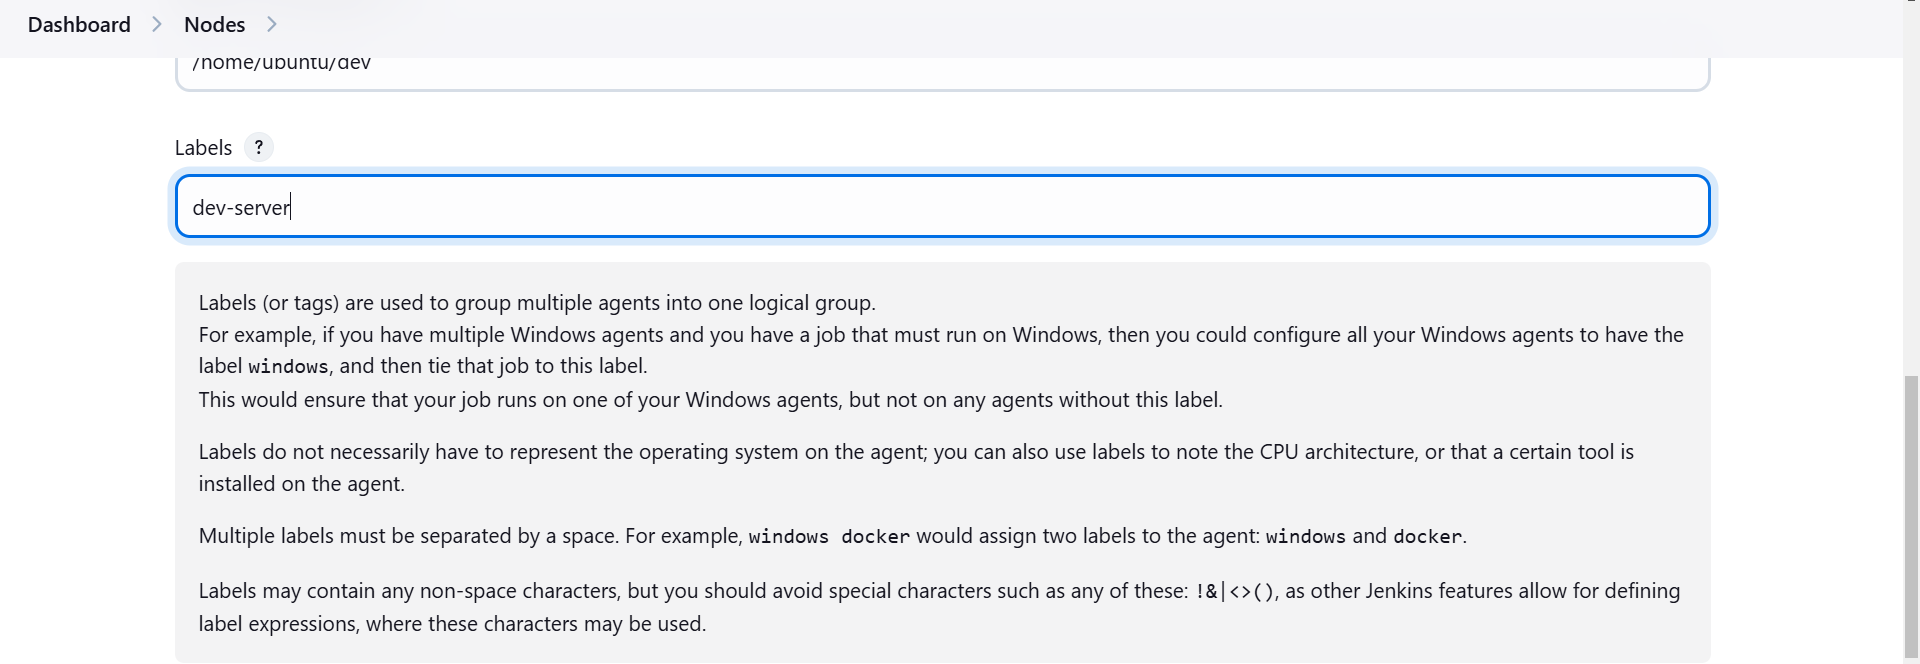
5. Set Labels
Labels, enter the name dev-server.
Labels are used to direct Jenkins to run specific jobs on specific nodes based on the label.
6. Set Node Usage
Set Usage: Use this node as much as possible.
This means Jenkins will use the worker node whenever it needs to run tasks.

7. Launch Agent via SSH
- Select Launch agent via SSH option. A new page will appear.
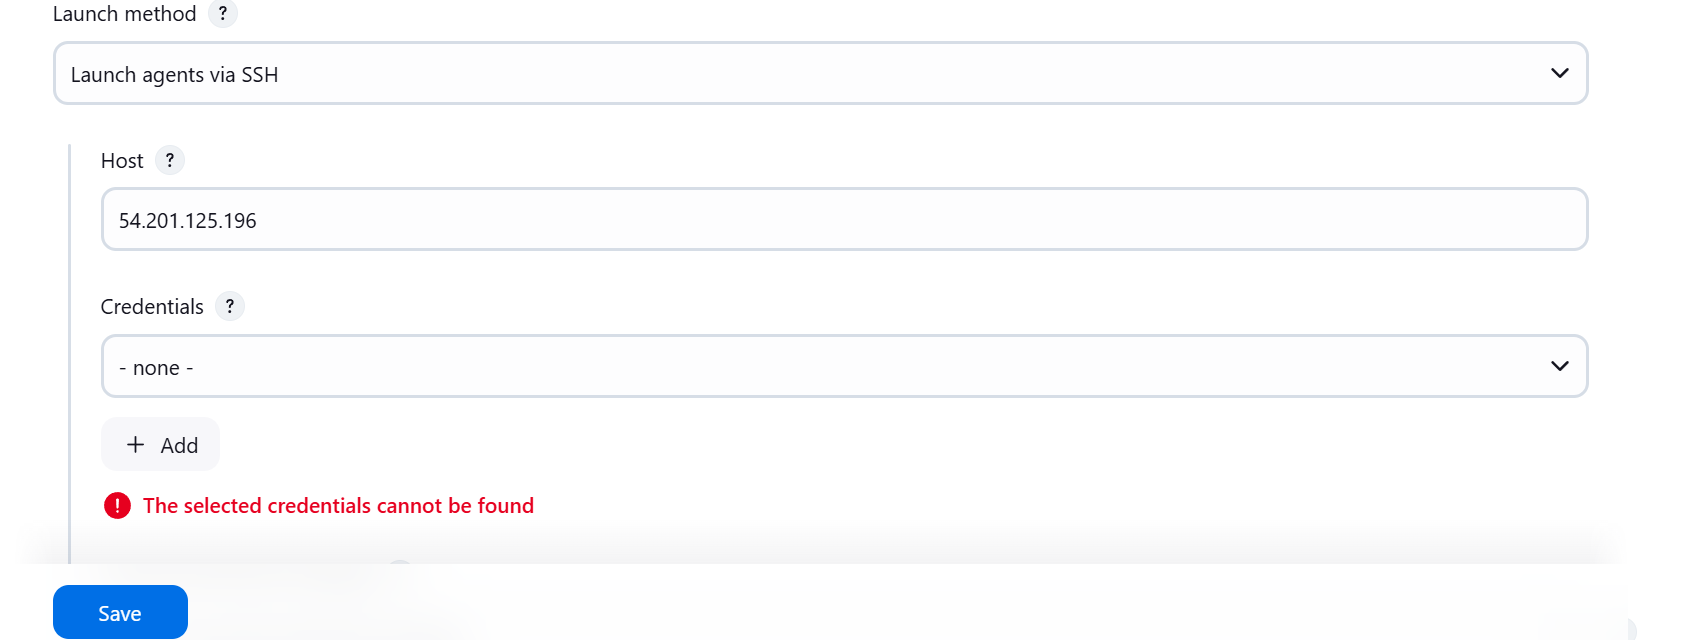
8. Add Worker Node IP
- Go to your Jenkins worker node instance in AWS, copy its IP address, and paste it into the "Host" field.

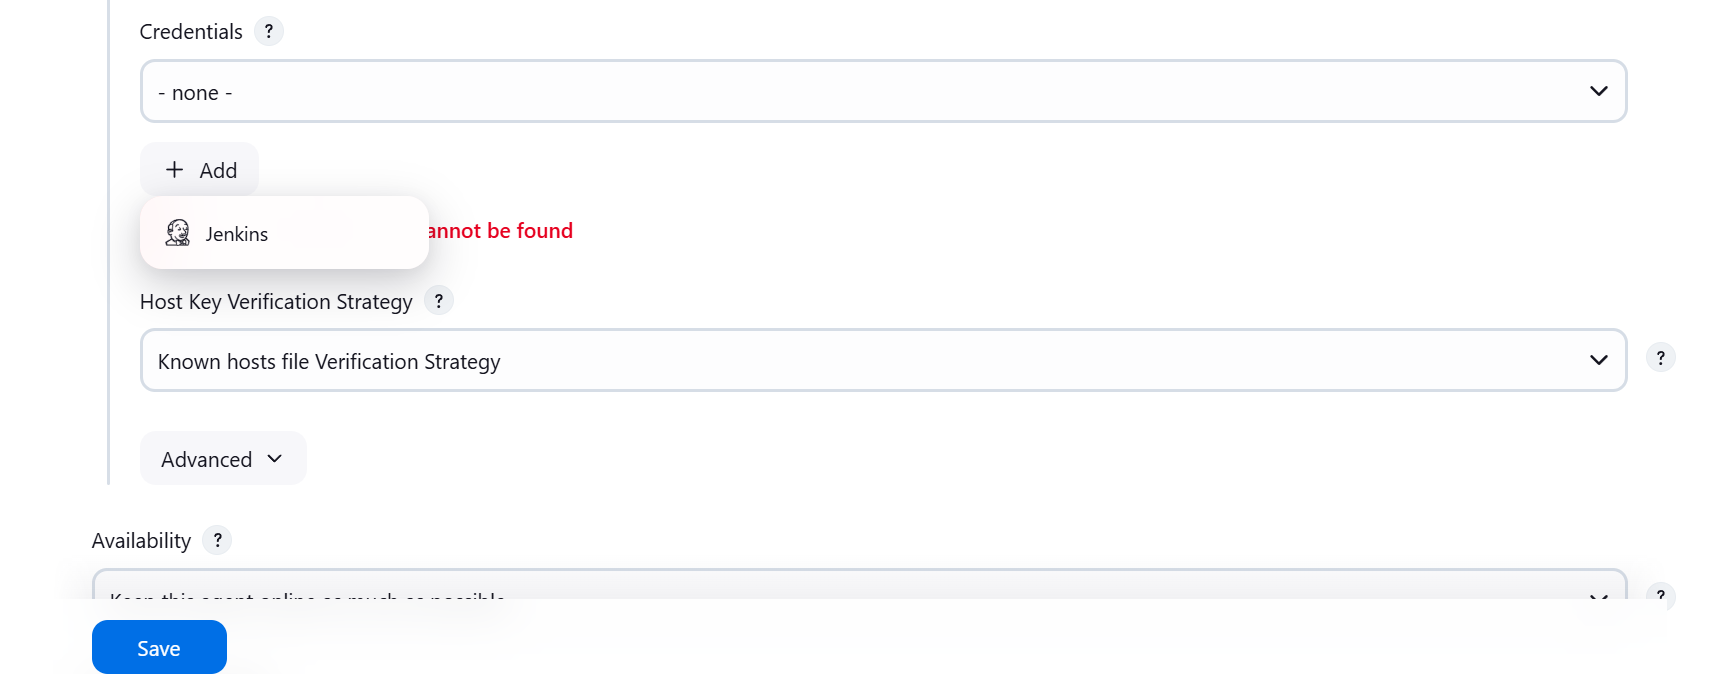
9. Add SSH Credentials
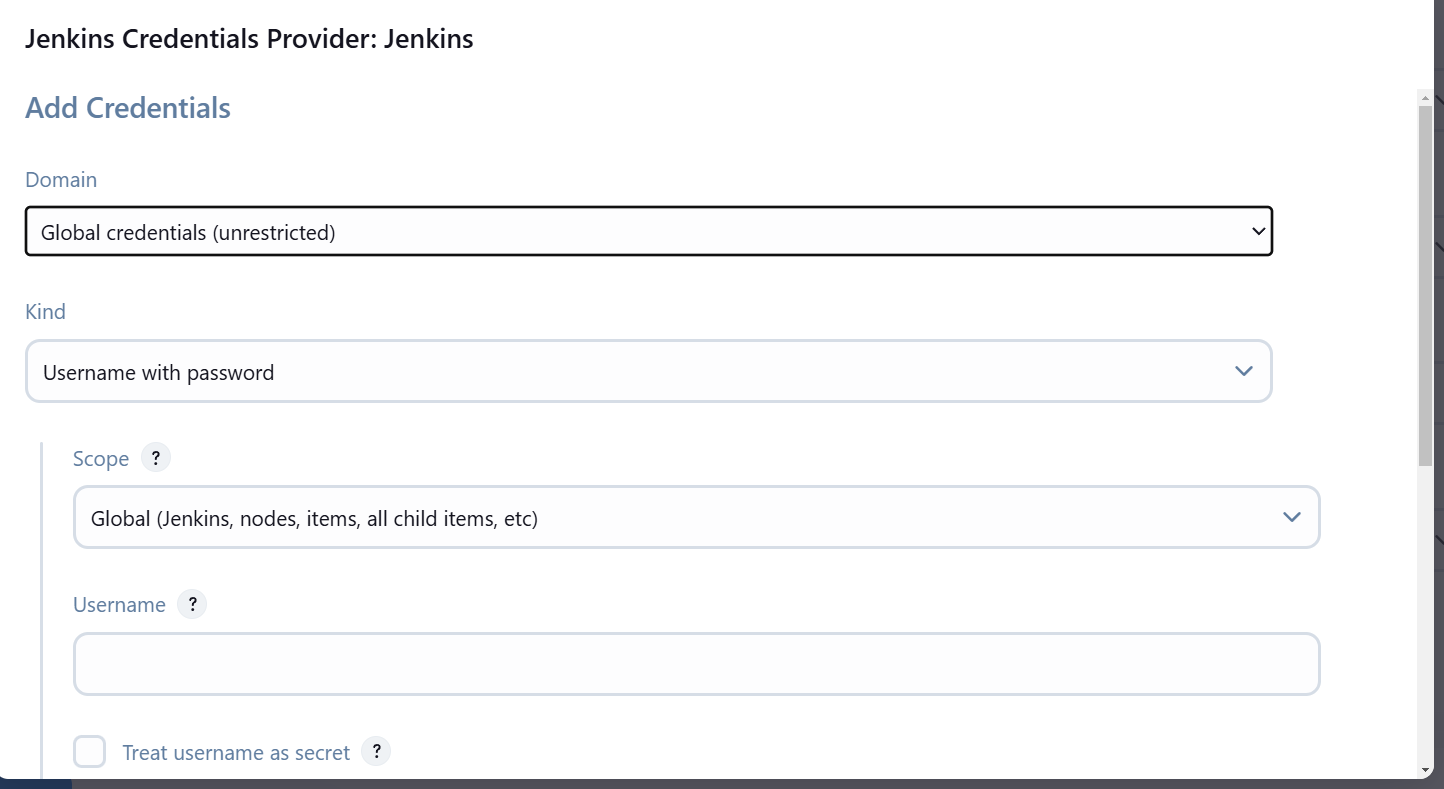
Click the + button, then click Jenkins. A new page will open.
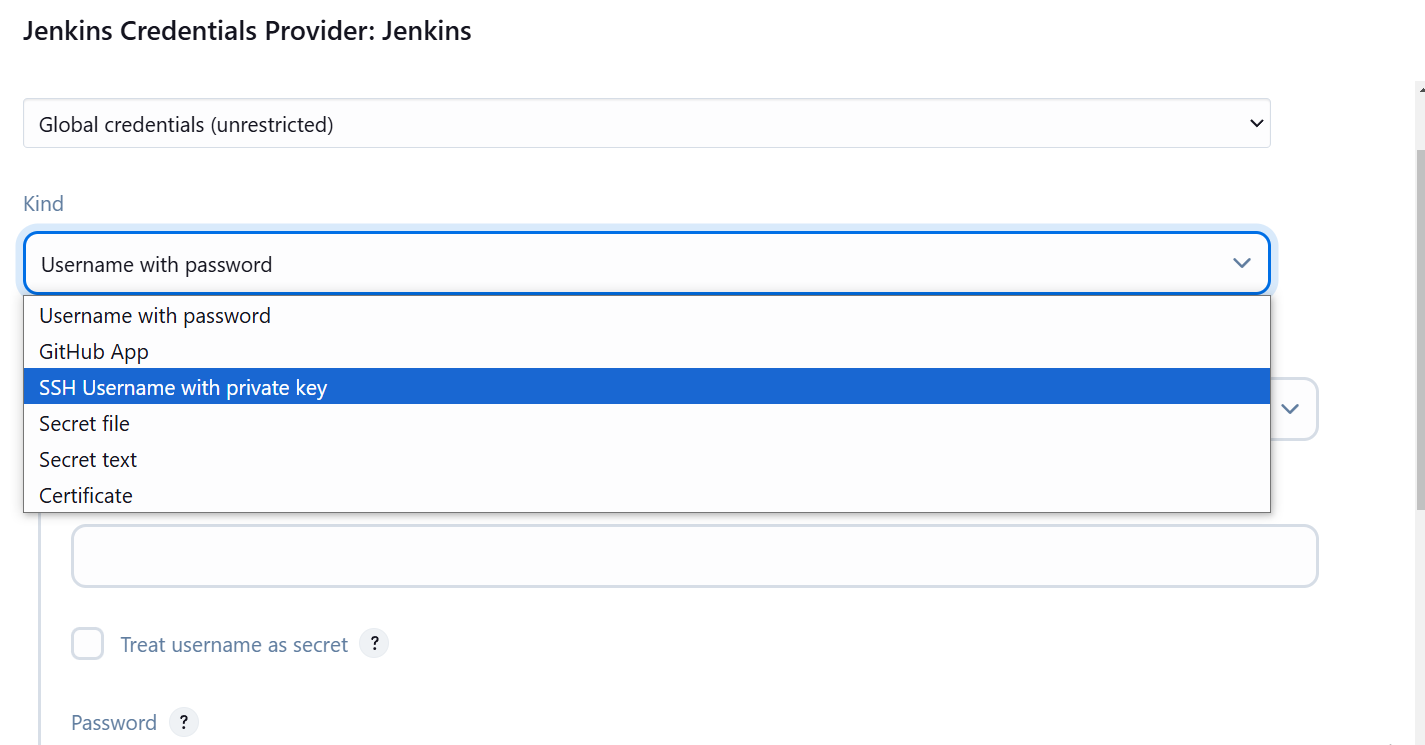
In the "Kind" field, select SSH Username with private key.
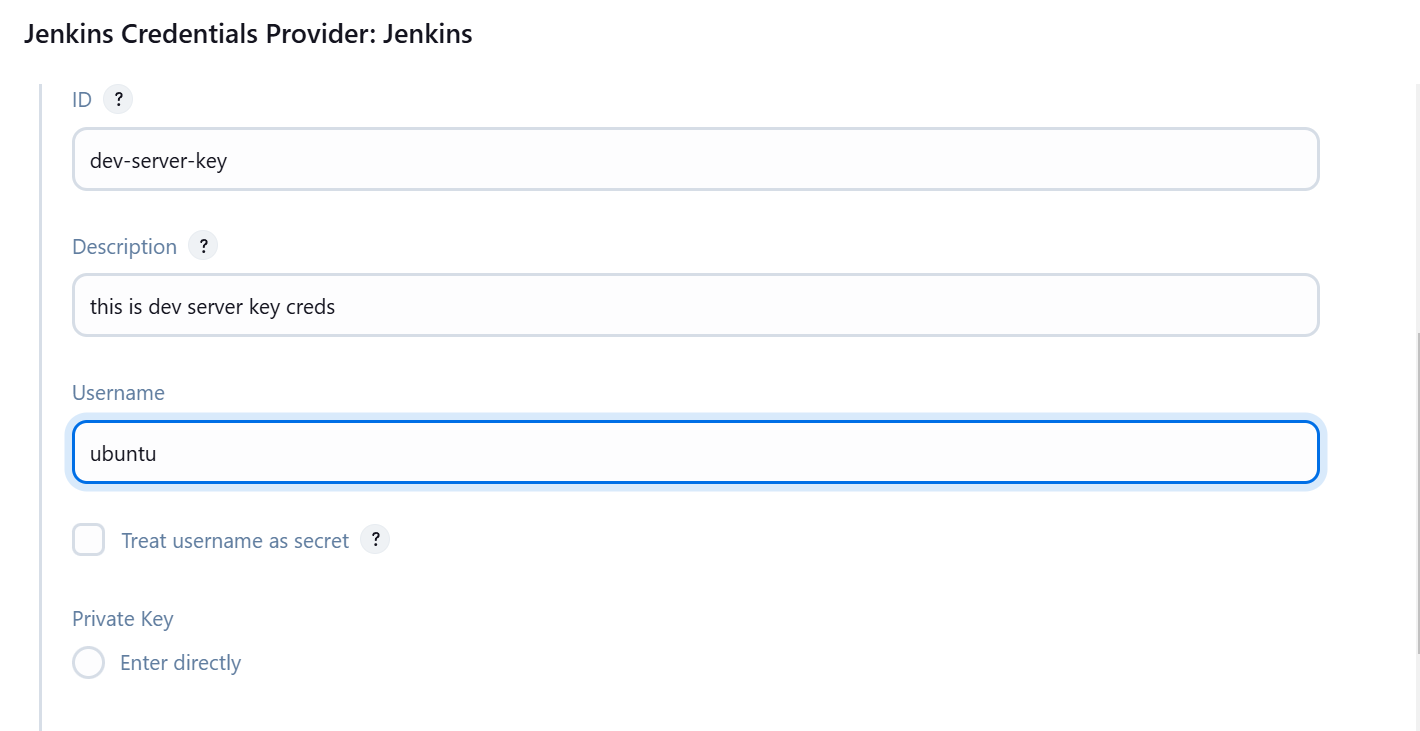
ID: Enter dev-server-key for the ID.
Description: Enter This is dev server key creds for the description.
10. Set Username
- Open the worker node terminal and run the command
whoamito find the username. For example, if the username is ubuntu, enter ubuntu in the Username field.

11. Private Key
- Leave the Private Key field blank for now.
12. Generate Private Key on Master Node
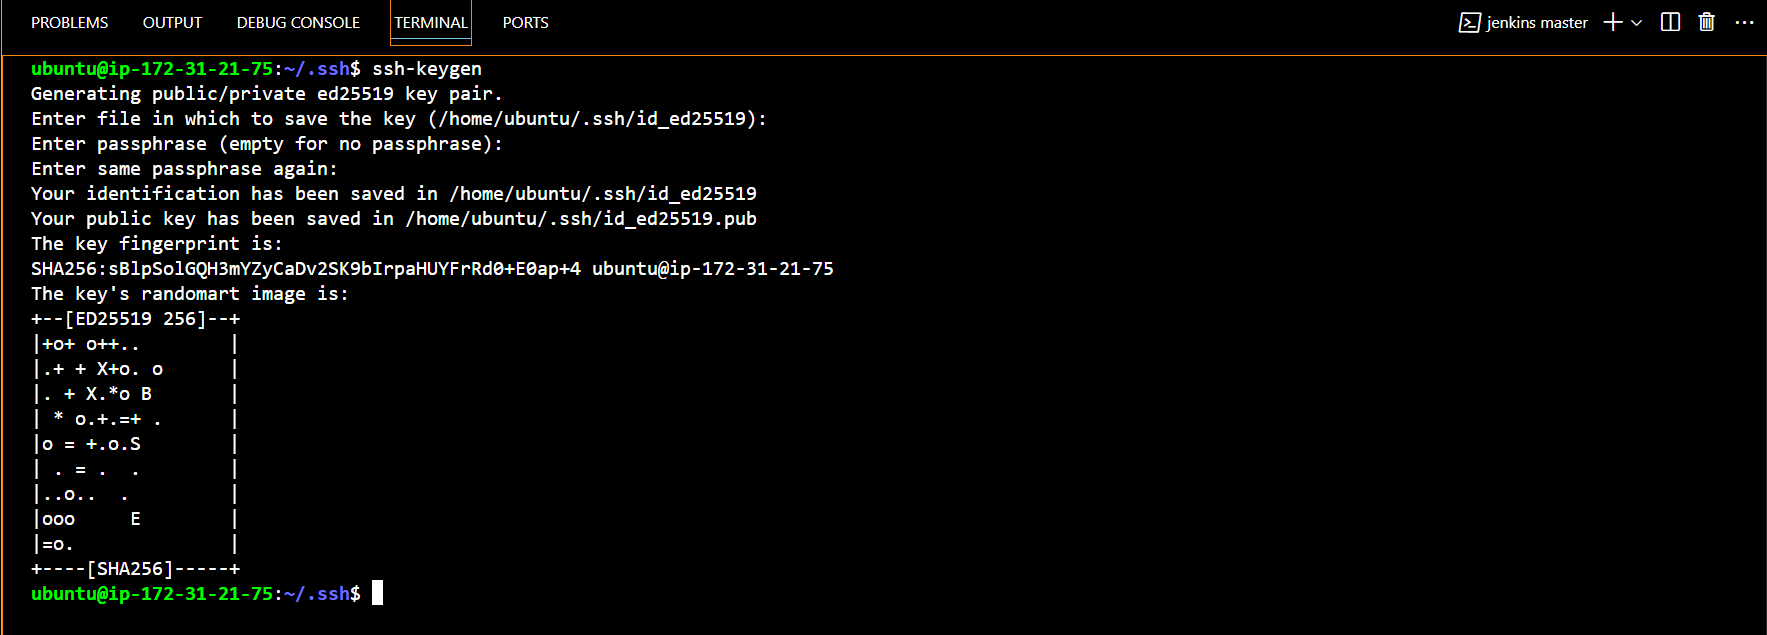
On the master node, run the following commands:
cd .sshssh-keygenFollow the instructions to generate the key pair.
Run
lsto list the files.
- Note: If you have to copy the public key to the worker node, this is an important step. The public key allows the master to authenticate with the worker node securely.
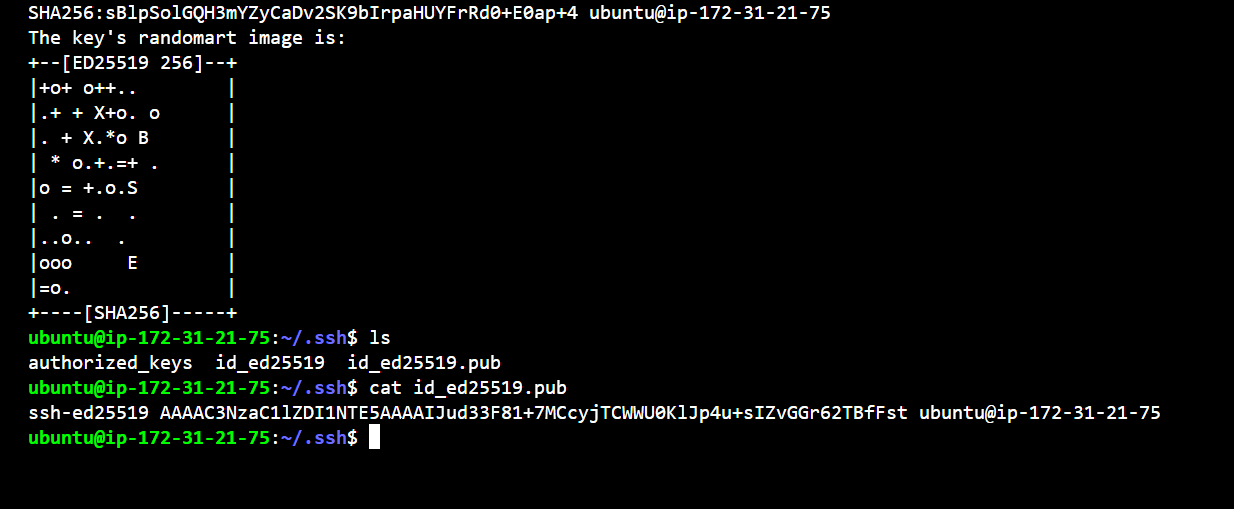
Copy the public key and paste it into the worker node’s authorized_keys file using the following commands:
vim authorized_keysPress i to enter insert mode.
Paste the copied public key.
Pressand hit Enter to save and exit.
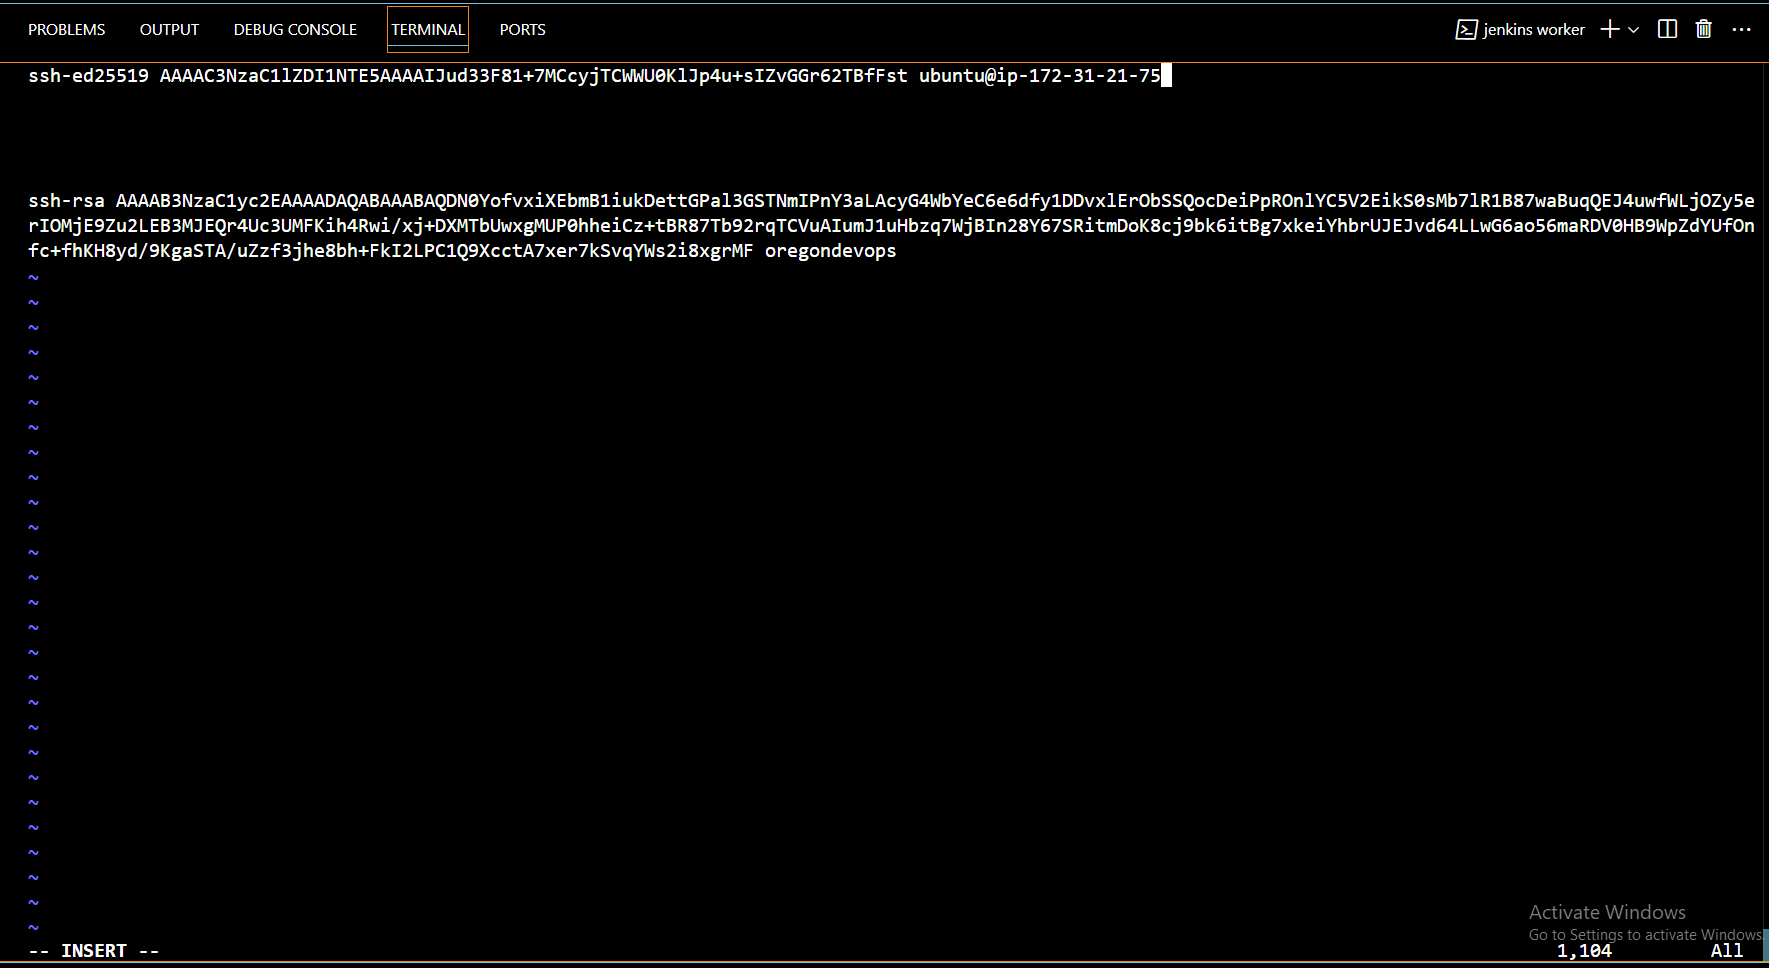
13. Add SSH Key to Jenkins Master
- Go back to the Jenkins Master node and paste the private key into the Private Key field in Jenkins. Then, click Add.

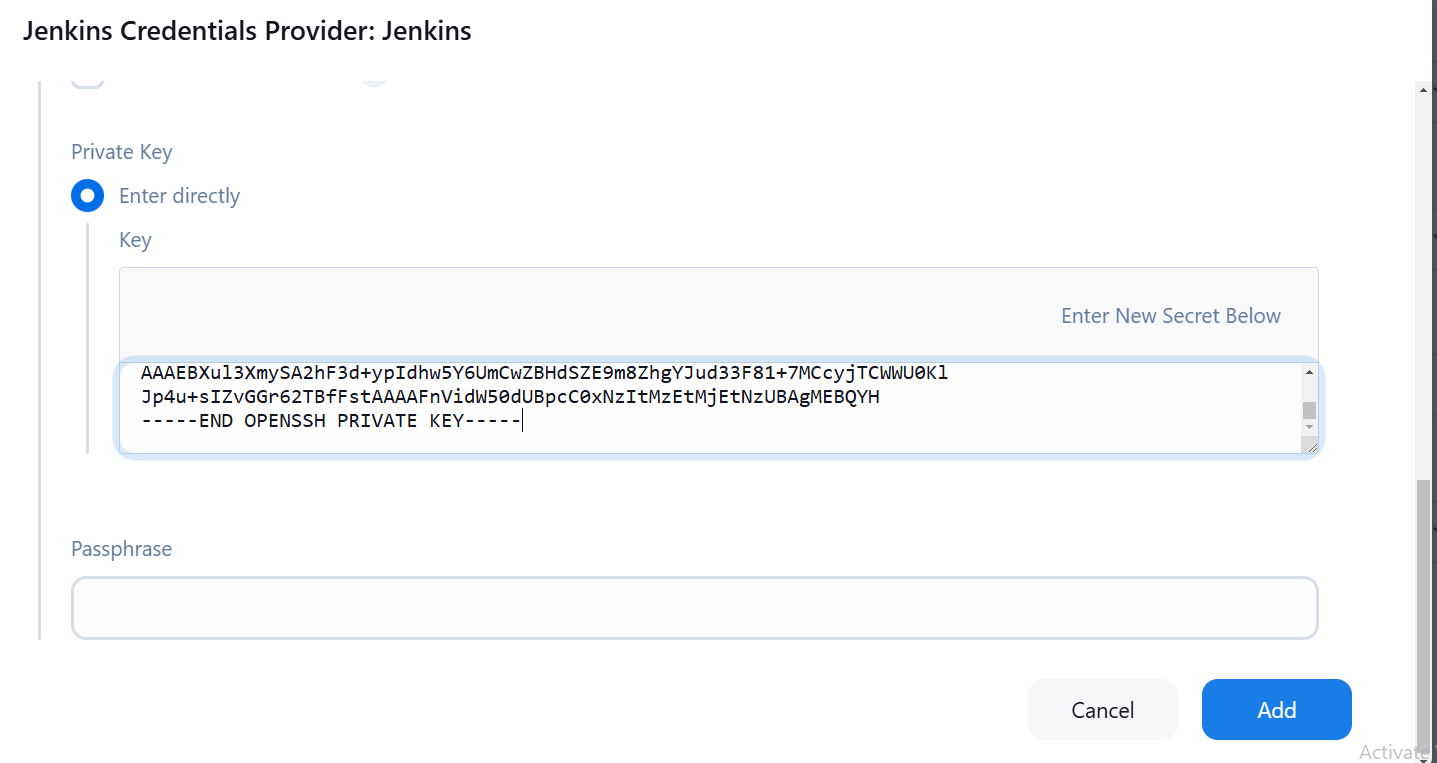
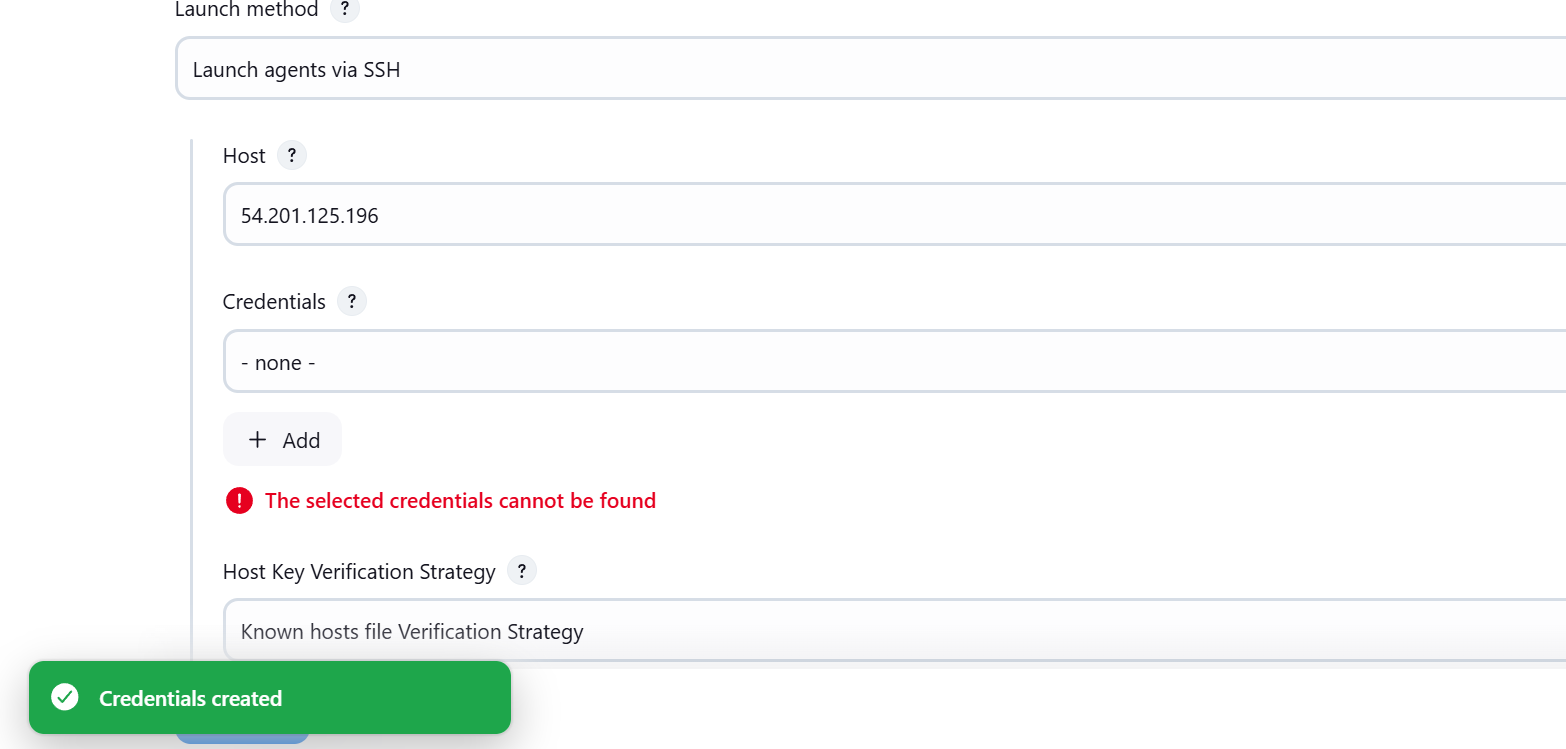
14. Select Credential
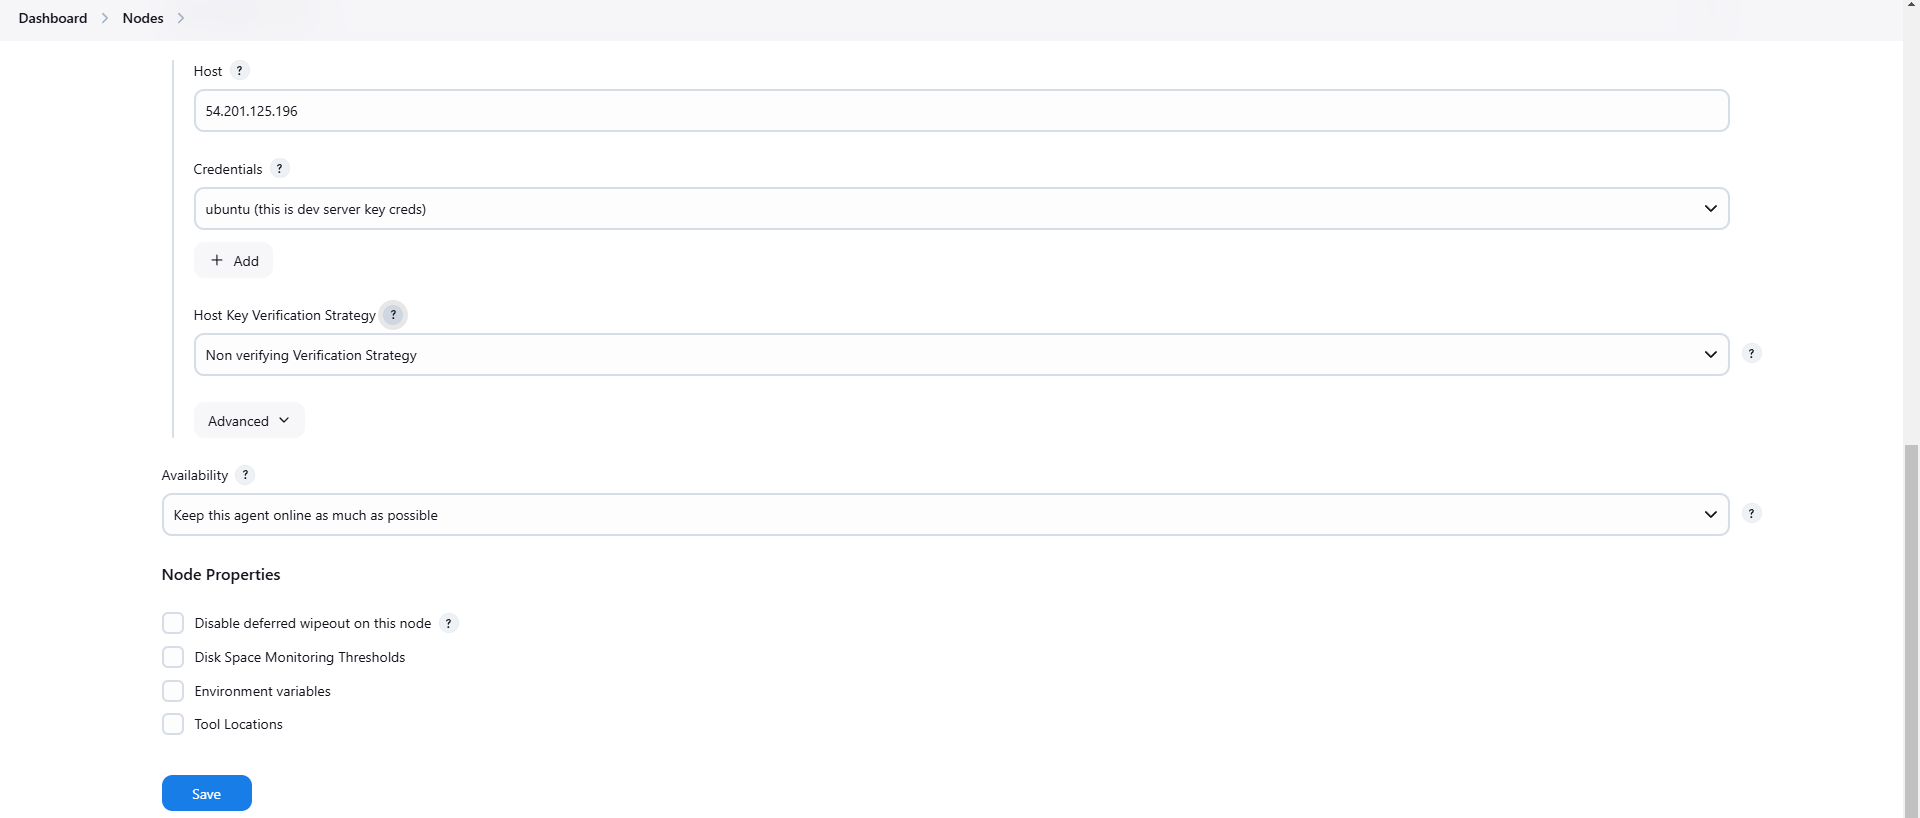
- In the Credentials field, click None, and you should see the SSH key listed with its ID, Name, and Description. Select the correct key and proceed.
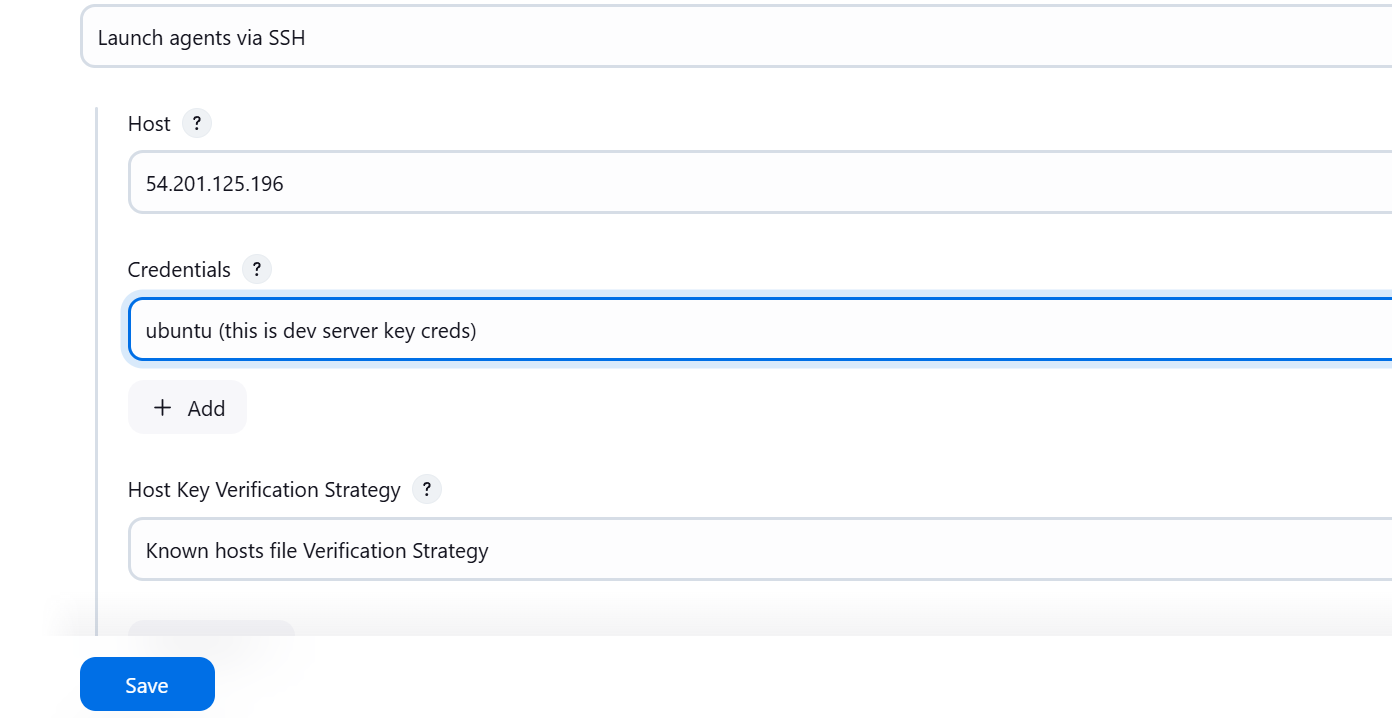
15. Host Key Verification
- Host Key Verification: Select Non-Verifying

16. Availability
- Availability: Select Keep agent online as much as possible.
This makes sure your worker node stays online and ready for Jenkins to use.
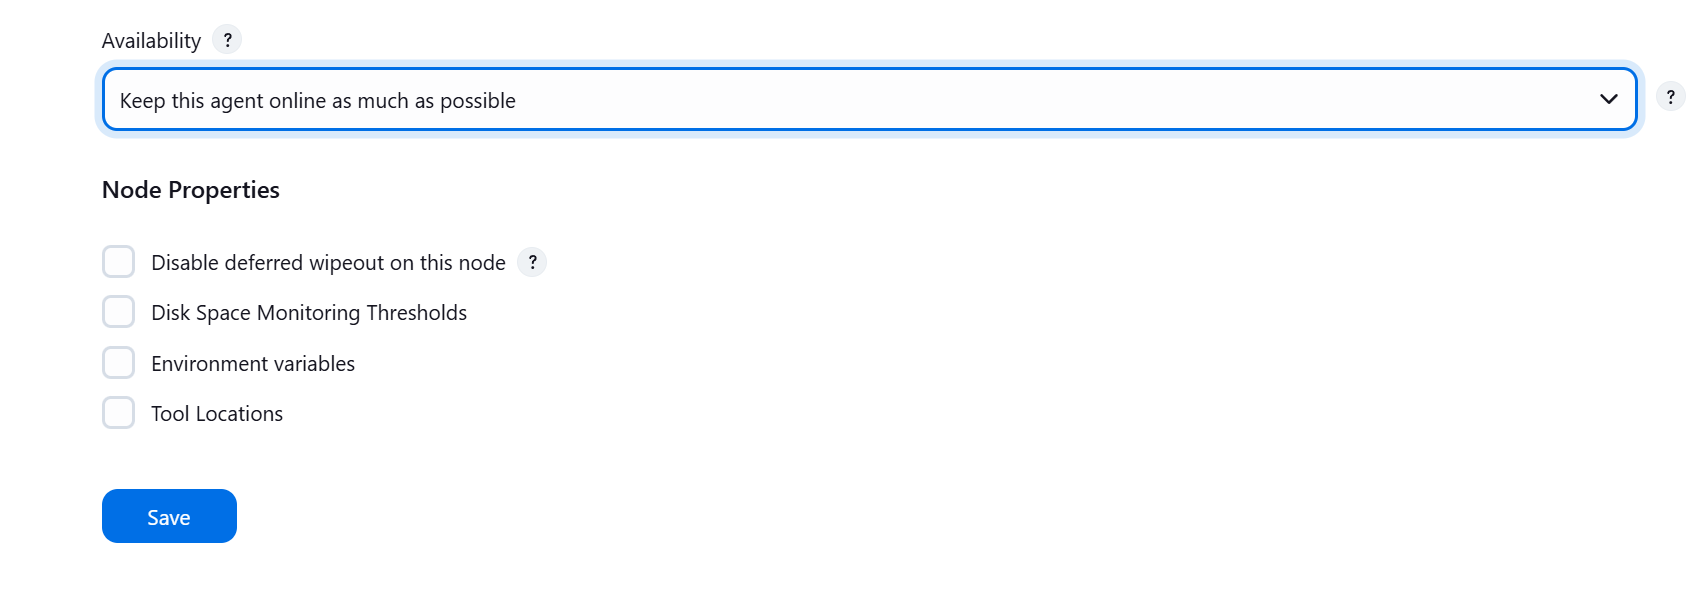
17. Add Node Properties (Optional)
- You can add extra settings for the node here, like environment variables. This step is optional
Save Configuration
Click Save to finish setting up the node.
Verify Node Connection
Go to the Jenkins Dashboard and check the Nodes section. You should see your dev-server node there. Wait a few seconds and refresh the page. Once it says In Sync and shows Online, your worker node is connected to Jenkins.


Double-Check Worker Node Connection
Go to your worker node terminal and navigate to the directory where you set the Remote Root Directory. Run the command ls. If you see remoting and remoting.jar files listed, it means your worker node is successfully connected to Jenkins.

Congratulations You’ve successfully connected your Jenkins master and worker node. Your setup is now complete and ready to use
Conclusion
In this blog, I showed how to set up a Jenkins master node and connect it to a worker node. You learned how to install Jenkins, configure both nodes, and ensure they are connected.
Your Jenkins master and worker nodes are now connected, and you can start automating tasks and building pipelines.
Thank you for reading. Let’s learn together
Subscribe to my newsletter
Read articles from Pulkit Yadav directly inside your inbox. Subscribe to the newsletter, and don't miss out.
Written by

Pulkit Yadav
Pulkit Yadav
DevOps Enthusiast | Exploring Cloud & Automation I’m an aspiring DevOps professional passionate about cloud computing, automation, and CI/CD pipelines. I’m currently gaining hands-on experience with tools like AWS, Docker, Kubernetes, Jenkins and GitLab CI/CD, Terraform, Ansible, and more. My focus is on improving development and deployment processes through continuous learning and practical application. Alongside my learning journey, I share my insights and experiences through blogs to help others who are exploring the same path. I believe in learning together and growing by sharing knowledge, and I’m excited to connect with like-minded individuals in the field. Let’s collaborate, share ideas, and grow together!