Deploying a Static Website with Azure Storage and Visual Studio Code
 Chigozie Ozoemena
Requirements:
To use Azure Storage, you need an active Azure subscription. If you don't have one, create a free account to get started.
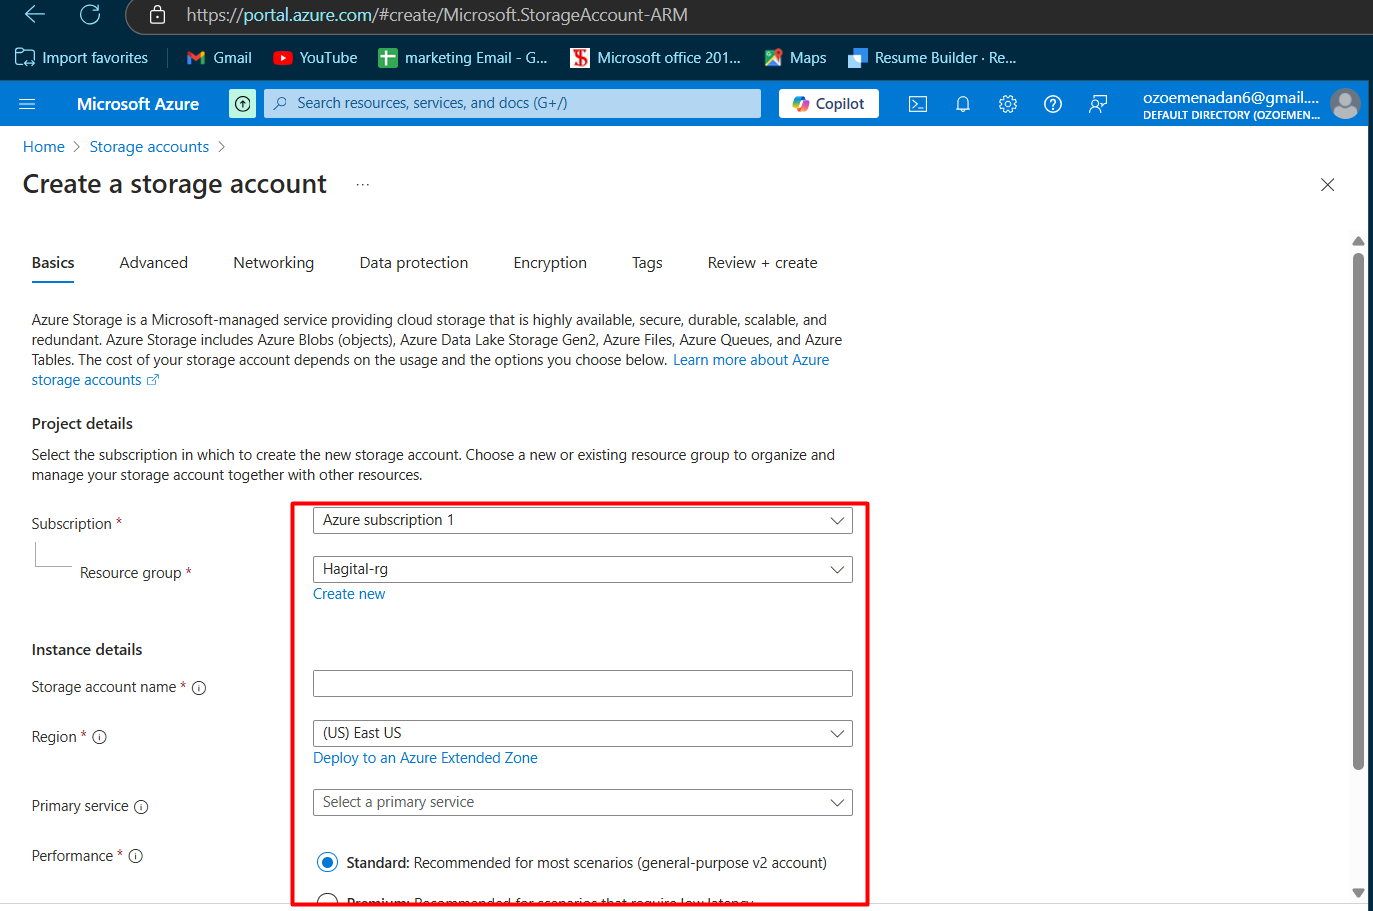
All Azure Storage interactions require a storage account. For this quick start, create one using the Azure portal. Need help? Click here for guidance.
This guide leverages Visual Studio Code to build and deploy a static website to an Azure Storage account.
1. Prerequisites
Azure Subscription: Create a free account if you don’t have one.
Azure Storage Account: Ensure a storage account is set up.
Visual Studio Code (VS Code) installed.
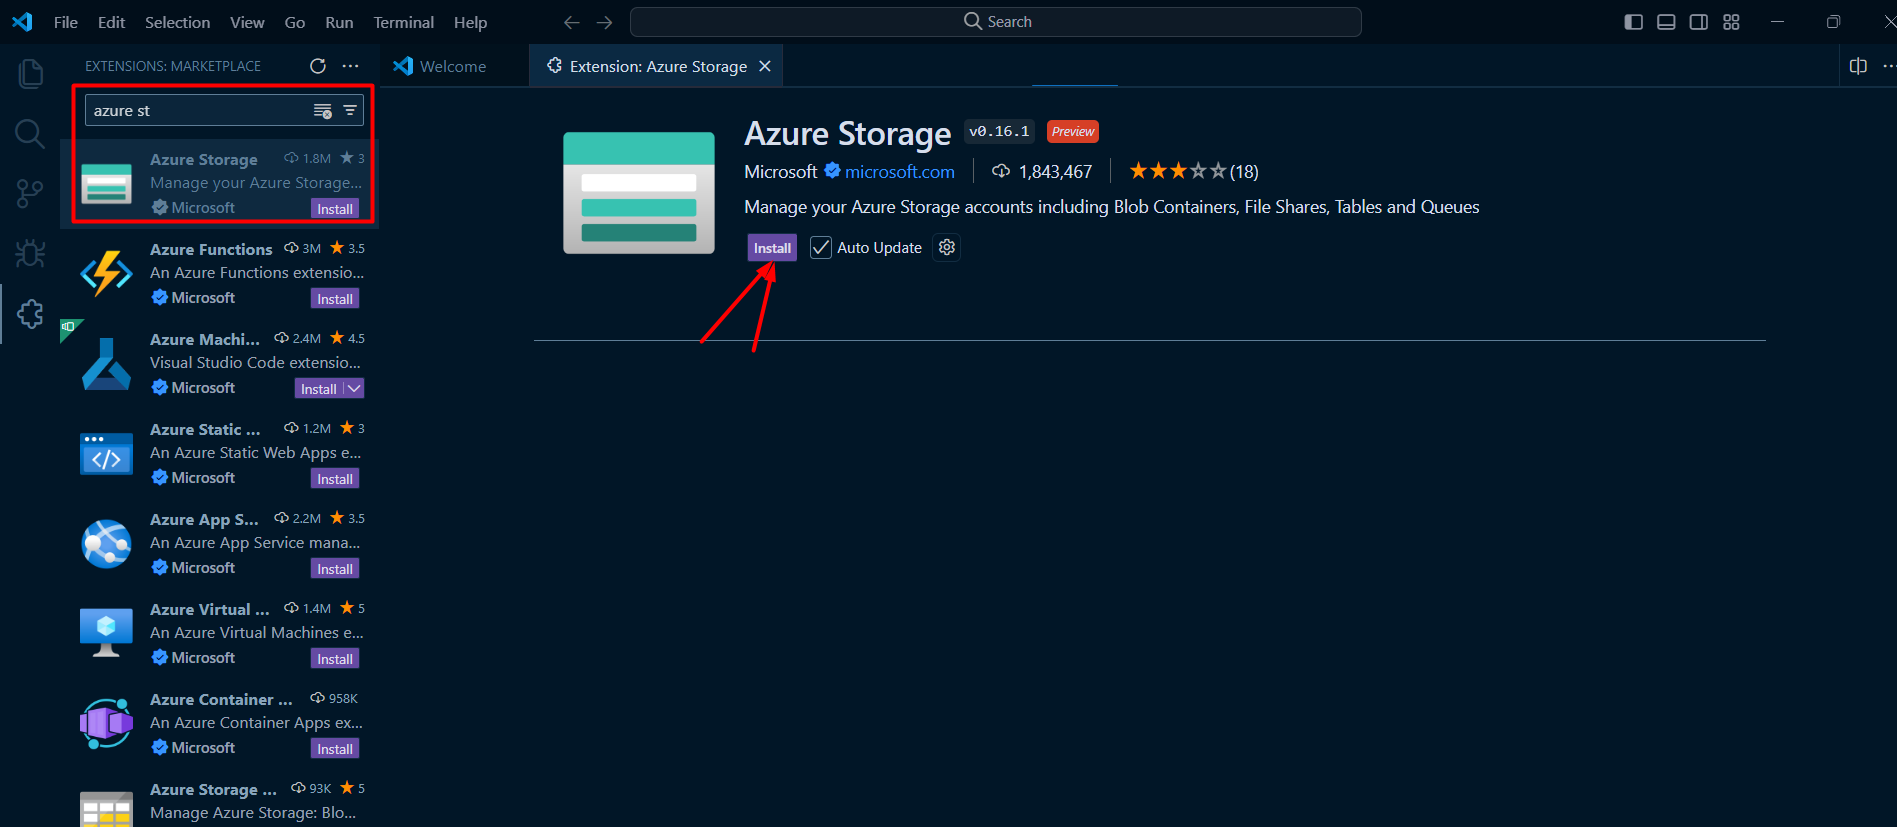
Azure Storage Extension: Install the Azure Storage extension in VS Code.
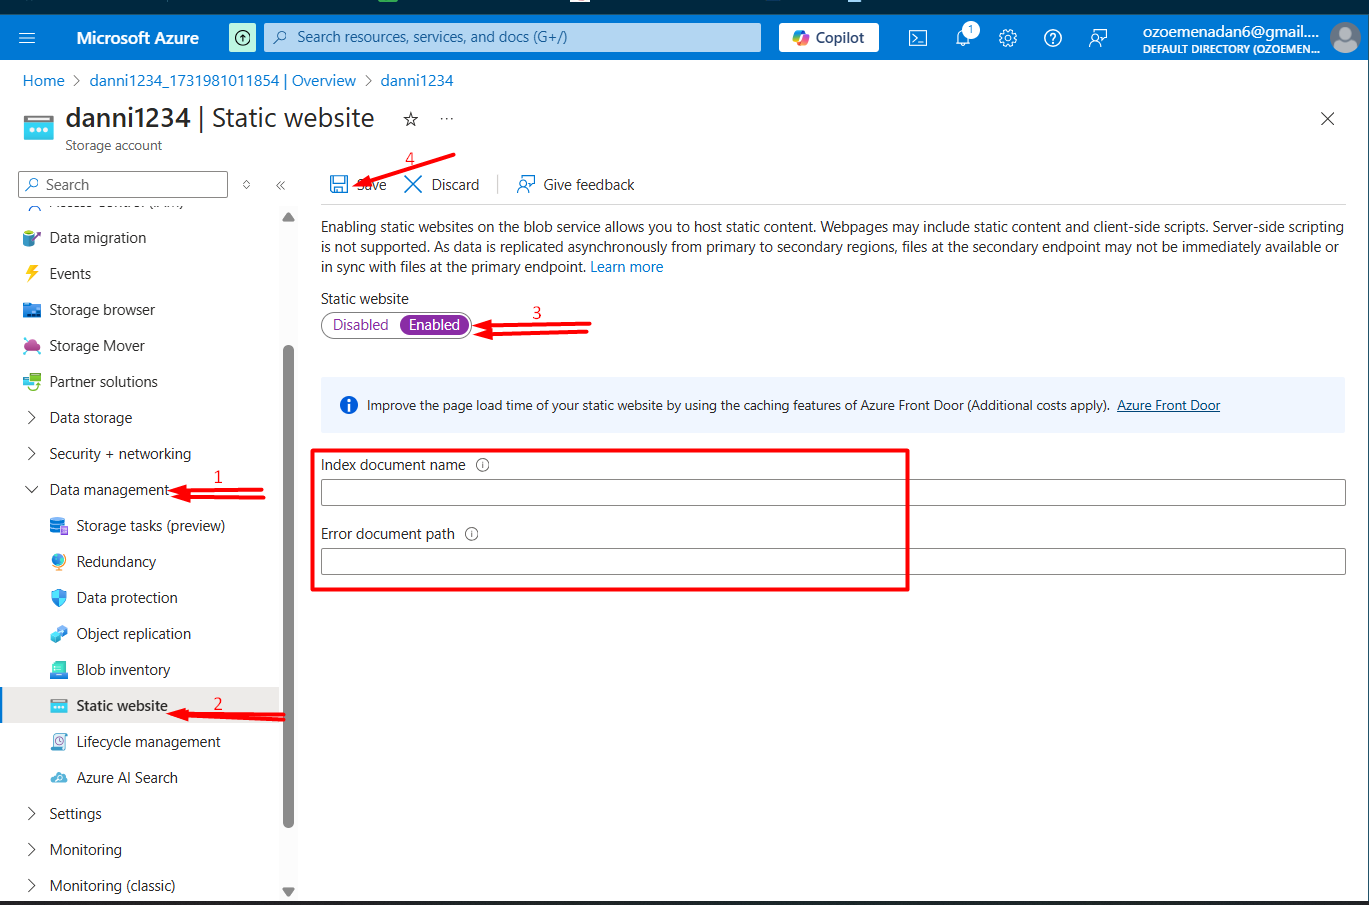
2. Enable Static Website Hosting in Azure
Navigate to your Azure Storage Account in the Azure Portal.
Under the Data Management section, select Static Website.
Click Enable and specify the index document name (e.g.,
index.html) and optionally an error document (e.g.,404.html).Click Save.
3. Create and Prepare Your Website
Open Visual Studio Code.
Create a new folder for your project and add files like
index.html,style.css, andscript.js.Edit the
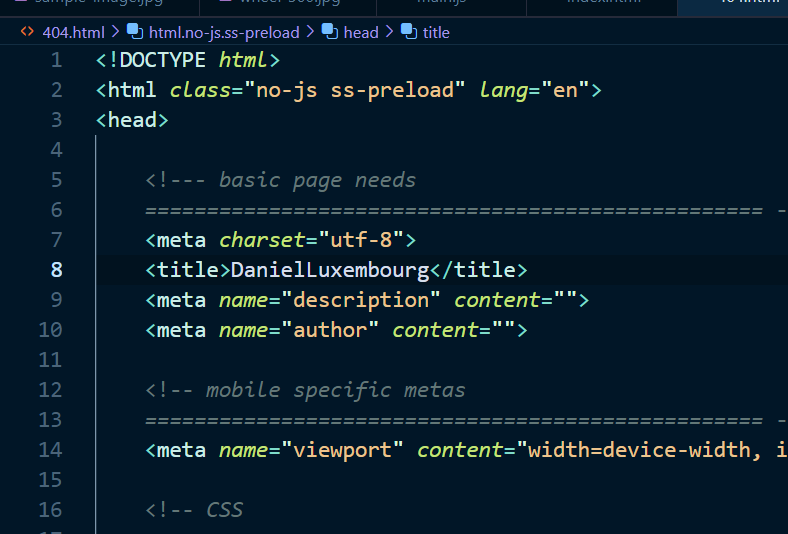
index.htmlto include basic content, such as: but for learning purposes check out this Free Bootstrap Themes for Responsive HTML5 Websites | ThemeWagon<!DOCTYPE html> <html class="no-js ss-preload" lang="en"> <head> <!--- basic page needs ================================================== --> <meta charset="utf-8"> <title>DanielLuxembourg</title> <meta name="description" content=""> <meta name="author" content="">To generate the default error file, create a file named "404.html." Open this file in the editor, paste the following text, and save it:
4. Deploy your Website
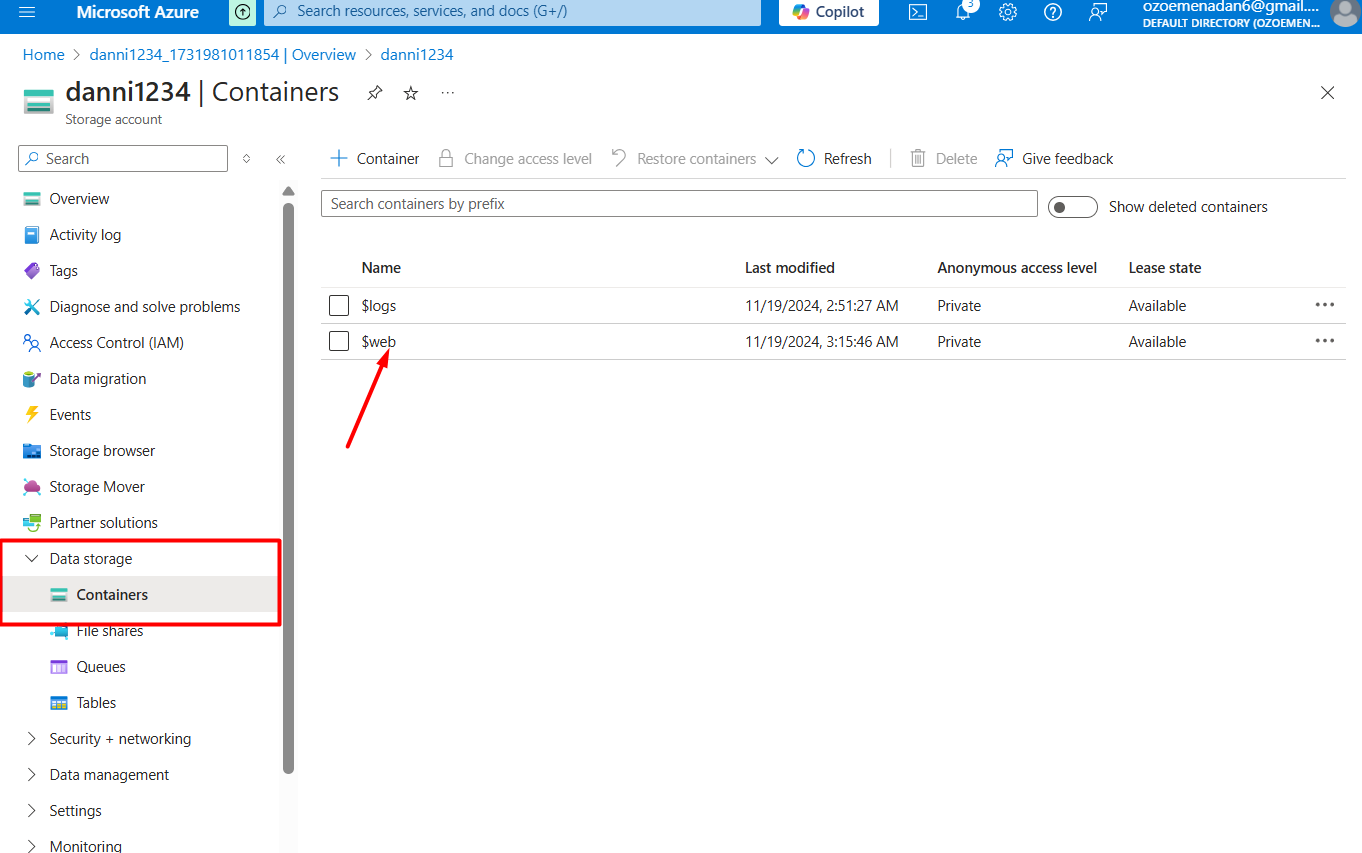
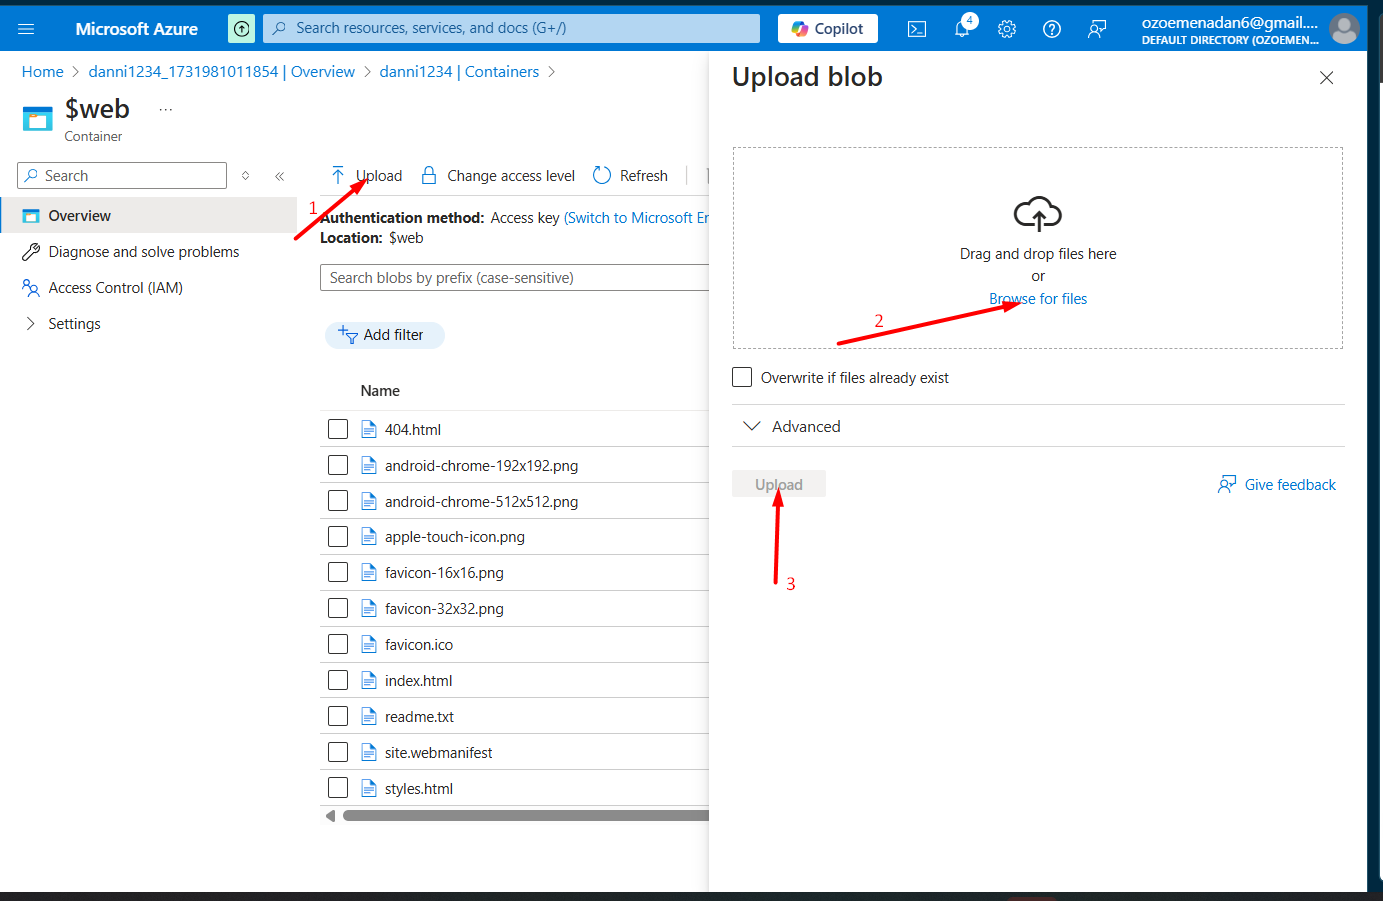
In the Azure Portal, go to your storage account.
Navigate to data Storage and open the $web container.
Upload your website files (e.g.,
index.html,style.css)
5. Access Your Website
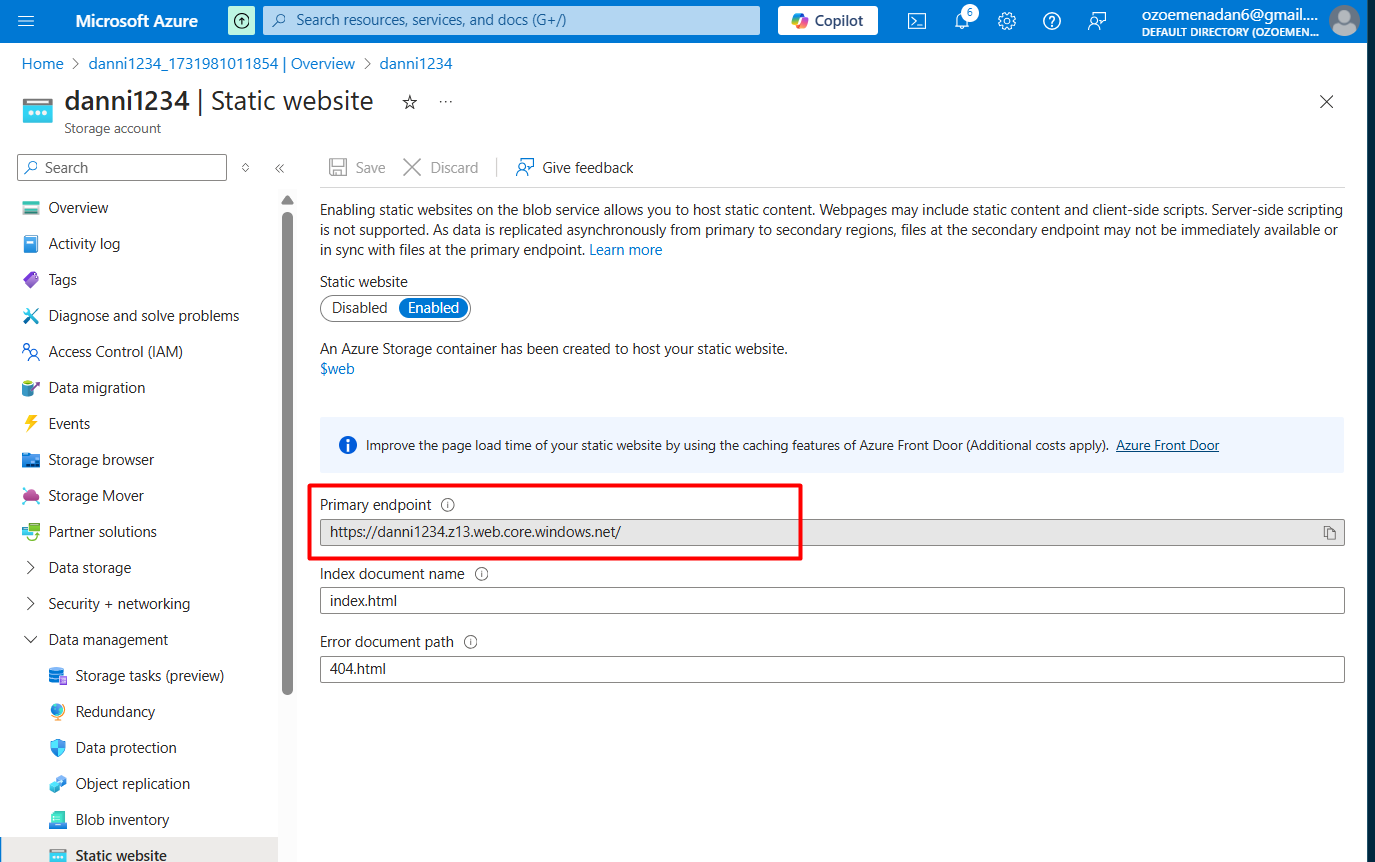
After deployment, go to the Static Website blade in the storage account.
Copy the Primary endpoint URL and open it in your browser to view your website.

Conclusion
Congratulations! You’ve successfully deployed a static website using Azure Storage and Visual Studio Code. Enhance your site by adding more pages, improving CSS styles, or integrating JavaScript functionality.
References
for more information, you can check out - Tutorial: Host a static website on Blob storage - Azure Storage | Microsoft Learn
Subscribe to my newsletter
Read articles from Chigozie Ozoemena directly inside your inbox. Subscribe to the newsletter, and don't miss out.
Written by

Chigozie Ozoemena
Chigozie Ozoemena
Hi there! 👋 I'm Daniel Ozoemena, a passionate Cloud Solution Architect and DevOps Engineer dedicated to building scalable, secure, and innovative cloud solutions. With hands-on experience in Azure, AWS, and Google Cloud Platform, I specialize in deploying infrastructure as code, automating workflows, and optimizing system reliability. Driven by a love for problem-solving, I constantly explore new technologies and best practices to deliver impactful results. Beyond the cloud, I enjoy mentoring, blogging about tech insights, and contributing to open-source projects. When I'm not automating deployments or creating secure virtual networks, you can find me playing chess, learning about AI, or brainstorming solutions to real-world challenges. Let’s connect and grow together on this tech journey! 🚀
