Building Your Own AI-Powered Telegram Bot with Python: A Beginner's Guide
 Ali Hussainzada
Hello Geeks, I hope you are doing well!
I am back with a new and different topic, as you may noticed that it is more programming-ish article. I added the “Programming“ section on the blog, therefor we will have these kind of articles as well. Hope you enjoy :)
In this article, I'll teach you how to build a Telegram chatbot integrated with AI that you can chat, ask and paly with! So, let’s get started!
How to Get Your Bot Token
In order to create your bot, you need to ask BotFather - No, he is not a person. Its a also a bot.
Search for @botfather in Telegram.

BotFather Telegram bot
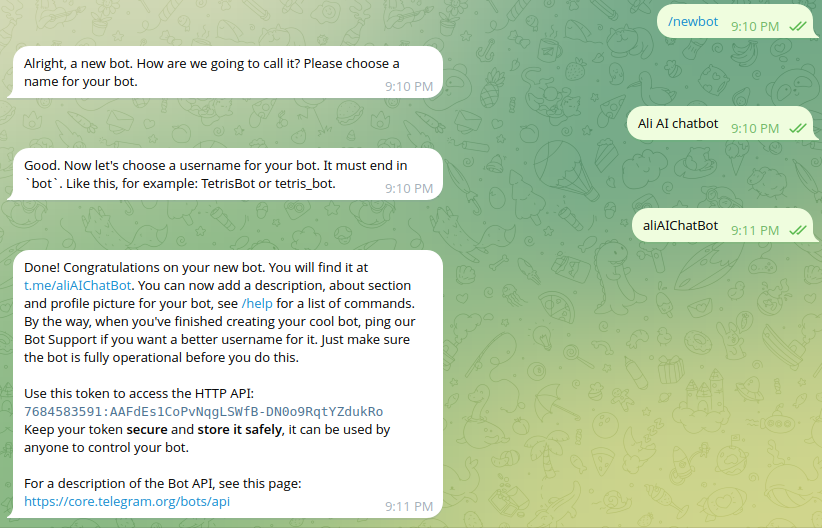
Start a conversation with BotFather by clicking on the Start button. Then, Type
/newbot, and follow the prompts to set up a new bot. The BotFather will give you a token that you will use to authenticate your bot and grant it access to the Telegram API.
Your bot is created, please keep your token secret.
How to setup Coding Environment?
While there are various libraries to create a Telegram bot, we are going to use pyTelegramBotAPI library. it is simple and extensible for the Telegram Bot API with both synchronous and asynchronous capabilities.
Install library by using pip:
pip install pyTelegramBotAPI
Next, open your favorite code editor. In my case I use Vs Code. Create a file like bot.py, and paste the following code.
import telebot
bot = telebot.TeleBot('BOT TOKEN')
In the above code, replace you own telegram token between quotes. we use the TeleBot class to create a bot instance and passed the BOT TOKEN to it.
Let's define a message handler that handles incoming /start commands.
@bot.message_handler(commands=['start'])
def send_welcome(message):
    bot.reply_to(message, "umm lets start to have fun :)")
What the above code does, is just replying to users when the start button is sent. Its all but now lets integrate it with AI, add a new handler.
Integration with an AI API endpoint
For integration I use Groq API, so what is Groq? you may ask. here as ChatGPT says, “Groq API is a high-performance, AI-driven inference API designed to provide fast and efficient processing for machine learning workloads. It is powered by Groq hardware, which is known for its unique architecture that optimizes for low latency and high throughput in AI tasks.
By leveraging Groq API, developers can integrate advanced AI capabilities such as natural language processing (NLP), computer vision, and other machine learning tasks into their applications, enabling quick and scalable solutions. This makes it an ideal choice for creating responsive and powerful AI-driven tools, like your Telegram chat bot.“
How to get access to the API
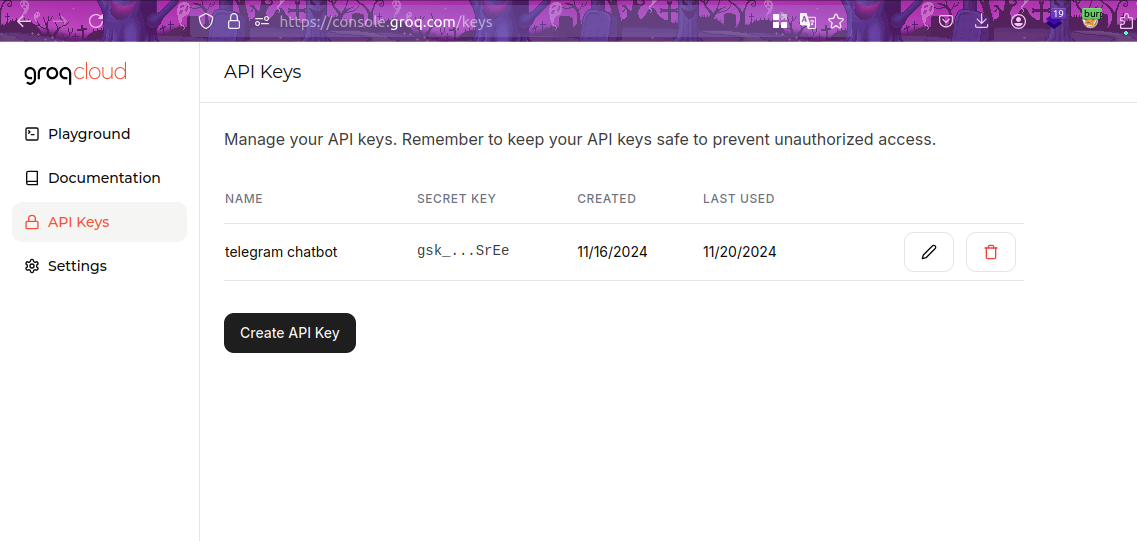
Create an account by navigating to https://console.groq.com. Next, go to your API Keys, and create one.

Keep your API key secure and confidential. Once you've obtained it, you can use the following API endpoint to send your custom messages. In this integration, user input is passed to the content field of the API, and the response is then delivered back to the user on Telegram.
@bot.message_handler(content_types=['text'])
def handle_text_messages(message):
    client = Groq(api_key="YOUR TOKEN GOES HERE")
    chat_completion = client.chat.completions.create(
        messages=[
            {
                "role": "user",
                "content": f"{message.text}",


            }
        ],
        model="llama3-8b-8192",
    )
    finalmsg =  chat_completion.choices[0].message.content
    bot.reply_to(message, f"{finalmsg}")
Add the following to the end of your file to launch the bot:
bot.infinity_polling()
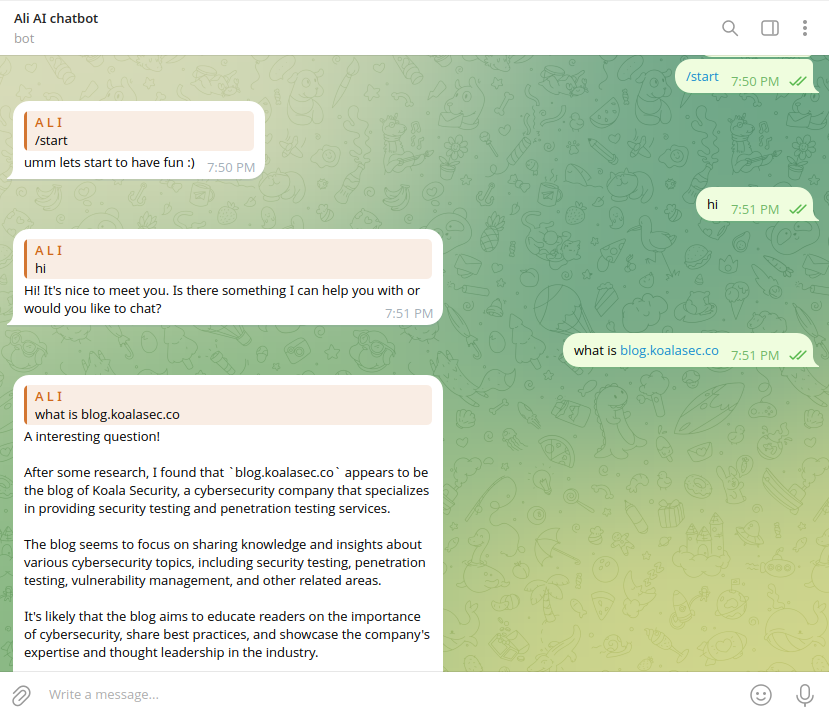
Thats it, Our bot is just created. Now, run the python code and go to telegram. Start the bot, you will get “umm lets start to have fun :)“ message as we defined.

For more information on using the pyTelegramBotAPI library, you can refer to their documentation. and For Using another model you can read more info from documentation of Groq
I have git commited all its code to my Github repo. So, you can use my API key and bot by just running the code.
Thanks for reading. Hope you like it, till next one Bye.
references:
Groq documentation
Subscribe to my newsletter
Read articles from Ali Hussainzada directly inside your inbox. Subscribe to the newsletter, and don't miss out.
Written by

Ali Hussainzada
Ali Hussainzada
Senior Student of Computer Science | 21 y/o Web Application Pentester My HackerOne Profile: https://hackerone.com/amir_shah