🚀 Day 17: Dockerfile – First DevOps Project with Docker 🚀
 Chintamani Tare
Hey there, DevOps enthusiasts! 👋 Welcome to Day 17 of the #90DaysOfDevOps challenge. Today, we're diving into Docker and exploring the magical world of the Dockerfile. By the end of this blog, you'll have a shiny new Dockerized web app ready to flaunt. Let’s get started! 🛠️
What is a Dockerfile? 🐳
Think of a Dockerfile as a recipe 🧑🍳 for building your application into a container. It contains step-by-step instructions that Docker follows to create a lightweight, portable environment for your app.
Imagine you're making a pizza 🍕:
The base image is the dough 🫓.
The instructions (like "bake for 10 minutes") are the Docker commands.
The result? A containerized app that works perfectly anywhere! 🌍
Here’s how a Dockerfile works:
Start with a base image: A pre-made environment (e.g., Python, Node.js, etc.).
Add your app: Copy your code, dependencies, and settings.
Define the run command: Tell Docker how to start your app.
Understanding the Key Components of a Dockerfile
Let’s break it down using an example for a Python Flask web app:
1. Base Image 🧱
FROM python:3.9-slim
This tells Docker, "Hey, I want to use Python 3.9 as my base environment!"
2. Set Working Directory 🗂️
WORKDIR /app
It creates a folder called /app inside the container and sets it as the default working directory.
3. Copy Dependencies 📄
COPY requirements.txt requirements.txt
This copies the requirements.txt (which lists Python packages) into the container.
4. Install Dependencies ⚙️
RUN pip install --no-cache-dir -r requirements.txt
This installs all the Python libraries your app needs to run.
5. Copy Your App Code 🖥️
COPY . .
It copies your application code into the container.
6. Expose a Port 🌐
EXPOSE 5000
This opens port 5000 so we can access the app.
7. Define the Start Command ▶️
CMD ["python", "app.py"]
This tells Docker to run app.py when the container starts.
Let’s Build a Project: Dockerized Flask App 🐍
We’re creating a simple Flask app, containerizing it with Docker, and publishing it to Docker Hub. Follow these steps:
1. Build the App Code 🖋️
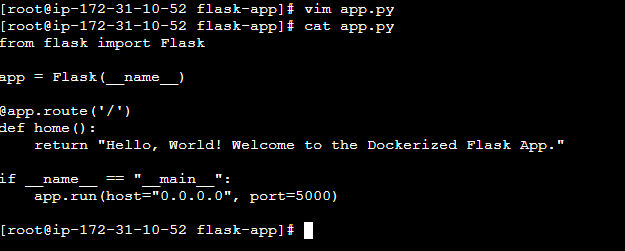
Create a file called
app.py:from flask import Flask app = Flask(__name__) @app.route('/') def home(): return "Hello, World! 🚀 Welcome to the Dockerized Flask App." if __name__ == "__main__": app.run(host="0.0.0.0", port=5000)
Add a
requirements.txtfile:flask
2. Create the Dockerfile 📃
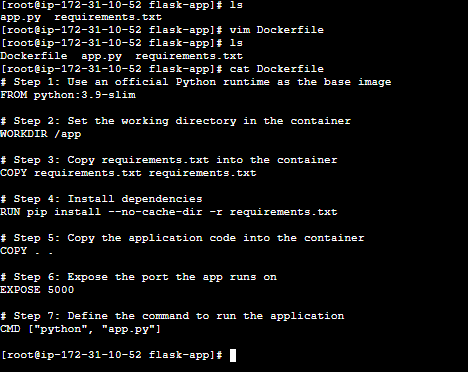
  # Use Python 3.9 base image
  FROM python:3.9-slim

  # Set the working directory
  WORKDIR /app

  # Copy dependencies
  COPY requirements.txt requirements.txt

  # Install dependencies
  RUN pip install --no-cache-dir -r requirements.txt

  # Copy app code
  COPY . .

  # Expose port
  EXPOSE 5000

  # Run the application
  CMD ["python", "app.py"]
3. Build the Docker Image 🛠️
Run this command in your terminal:
docker build -t flask-app .4. Run the Docker Container 🏃♂️
Start the container:
docker run -d -p 5000:5000 flask-docker-app
5. Test the App 🌐
Open your browser and visit:
👉 http://localhost:5000
You’ll see:
Hello, World! 🚀 Welcome t``o the Dockerized Flask App.
6. Push to Docker Hub 🚢
Log in to Docker Hub:
docker loginTag your image:
docker tag flask-docker-app chintamani1804/flask-app:latestPush the image:
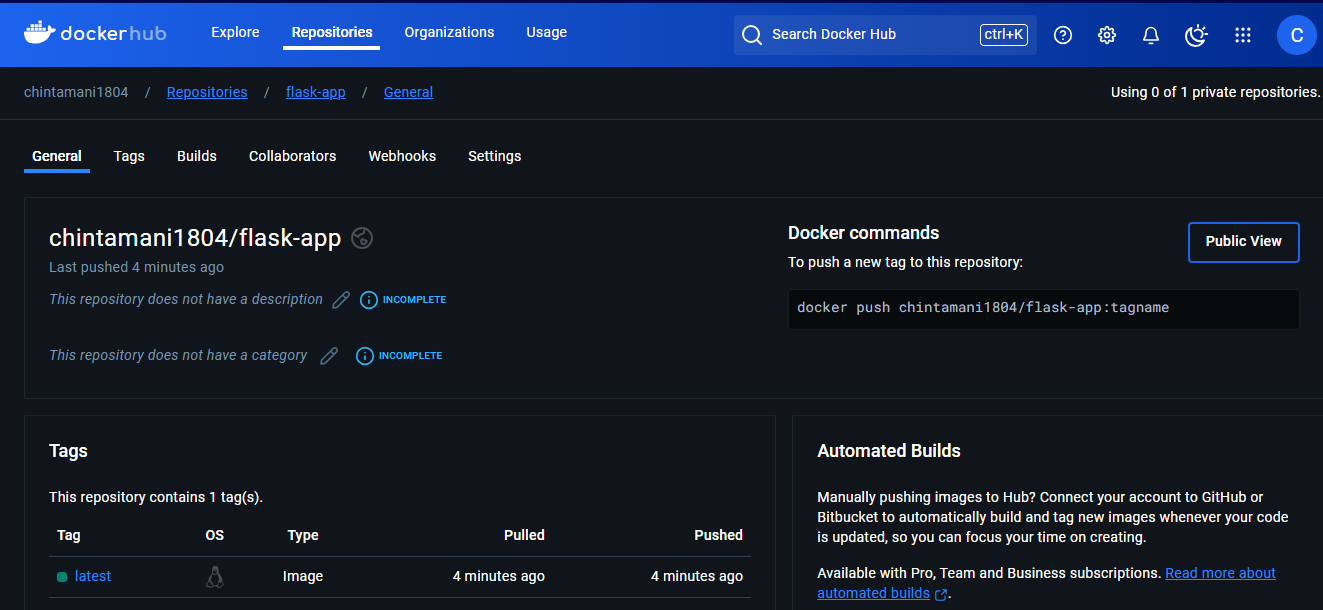
docker push chintamani1804/flask-app:latestCheck your Docker Hub repository to see your app image live! 🎉

Step 5: Clean Up
Stop the container and remove the image (optional):
    docker stop <container-id>
    docker rm <container-id>
    docker rmi flask-docker-app

Why is this Project Important? 🤔
This project demonstrates:
Containerization: You’ve packaged your app to run anywhere.
DevOps Workflow: You’ve learned how to push images to Docker Hub.
Web Development + Docker Skills: A great combination for your resume!
Takeaways 💡
Docker simplifies application deployment and scaling.
A Dockerfile is a must-have skill for any DevOps engineer.
Pushing images to Docker Hub makes your project easily shareable.
Keep going strong on your #90DaysOfDevOps journey. You’re doing amazing! 💪
Let me know how your project turned out in the comments below! 😊
Subscribe to my newsletter
Read articles from Chintamani Tare directly inside your inbox. Subscribe to the newsletter, and don't miss out.
Written by

Chintamani Tare
Chintamani Tare
👨💻 Chintamani Tare | DevOps Enthusiast & Linux Advocate 🌐 I'm a passionate DevOps engineer with a solid foundation in Linux system administration. With a deep interest in automation, cloud technologies, and CI/CD pipelines, I love simplifying complex tasks and building scalable infrastructure. Whether it's scripting in Bash, managing servers with Ansible, or deploying applications with Docker and Kubernetes, I'm always eager to explore the latest tools and practices in the DevOps space.