Drawflow Tutorial: 1. Setting Up Drawflow
 Avic Ndugu
Drawflow is a JavaScript library that makes creating interactive, visual workflows on the web easy.
If you've explored its documentation, you might have found it detailed but a bit challenging to follow for beginners. This tutorial series will guide you through:
setting up Drawflow
adding basic nodes
adding connected nodes
customizing your nodes and connecting lines
In this first part, we’ll cover the essentials to add Drawflow to your project, create a canvas, and add a basic "Hello World" node to make sure everything is working.
Step 1: Include Drawflow in Your Project
Option 1: Add Drawflow via CDN
Using a CDN is the fastest way to include Drawflow in a project, especially if you’re testing things out or building a quick prototype.
- Add the following
<script>and<link>tags to your HTML file inside the<head>section:
<link rel="stylesheet" href="https://unpkg.com/drawflow@0.0.60/dist/drawflow.min.css" />
<script src="https://unpkg.com/drawflow@0.0.60/dist/drawflow.min.js"></script>
This links directly to Drawflow's JavaScript and CSS files via the CDN.
Option 2: Install Drawflow via NPM
If you’re working on a larger project and prefer package management, you can install Drawflow via NPM.
- In your project directory, run:
npm install drawflow
- Then, import Drawflow into your JavaScript file:
import Drawflow from 'drawflow';
import styleDrawflow from 'drawflow/dist/drawflow.min.css'
Step 2: Set Up the HTML Canvas
Drawflow needs a parent HTML container(which I like calling the canvas) to render the nodes and connections. Here’s how to set it up:
- Add a
<div>with an ID and class ofdrawflowin your HTML file. This will serve as the main canvas where all nodes and workflows will appear.
<div id="drawflow" class="drawflow"></div>
- Next, style the canvas to give it some space and make it easy to view:
#drawflow {
  width: 100%;
  height: 600px;
  border: 1px solid #ddd;
}
Step 3: Initialize Drawflow in JavaScript
Once you have the Drawflow library included and the HTML canvas set up, you need to initialize the Drawflow instance.
- Add a
<script>tag at the end of your HTML file, or include the following JavaScript code in a dedicated file.
const drawflowContainer = document.getElementById('drawflow');
const editor = new Drawflow(drawflowContainer);
editor.start();
This initializes Drawflow on the canvas we created.
Step 4: Add a Basic Node ("Hello World")
To confirm everything is working, let’s add a basic node with the text "Hello Drawflow"
- Inside the
<script>tag (or in your JavaScript file), use the following code to add a node:
const nodeId = editor.addNode(
  'hello',
  1,  // Number of inputs
  1,  // Number of outputs
  100, // x position
  100, // y position
  'Hello Node',  // Class name to be used for additional styling in CSS
  {},  // Data (if any)
  '<div>Hello Drawflow</div>'  // HTML content
);
Here’s what each parameter does:
'hello': a unique identifier for the node.1and1: specify one input and one output for the node.100,100: the x and y coordinates where the node will appear.'node': an optional CSS class name.{}: data associated with the node (leave it empty for now).'<div>Hello Drawflow</div>': the HTML content of the node.
The code for the full page should be as follows:
<!DOCTYPE html>
<html lang="en">
<head>
    <meta charset="UTF-8">
    <meta name="viewport" content="width=device-width, initial-scale=1.0">
    <title>Drawflow Demo Hello World</title>
    <link rel="stylesheet" href="https://unpkg.com/drawflow@0.0.60/dist/drawflow.min.css">
    <style>
        #drawflow {
          width: 100%;
          height: 600px;
          border: 2px solid #e2e8f0;
          border-radius: 0.375rem;
        }
    </style>
</head>
<body>
  <script src="https://unpkg.com/drawflow@0.0.60/dist/drawflow.min.js"></script>
  <div id="drawflow"></div>

  <script>
    var id = document.getElementById("drawflow");
    const editor = new Drawflow(id);
    editor.start();

    // Add nodes
    editor.addNode('Hello Node', 1, 1, 100, 100, 'node',  {}, `<div>Hello Drawflow!</div>`);

  </script>

</body>
</html>
Step 5: Test Your Setup
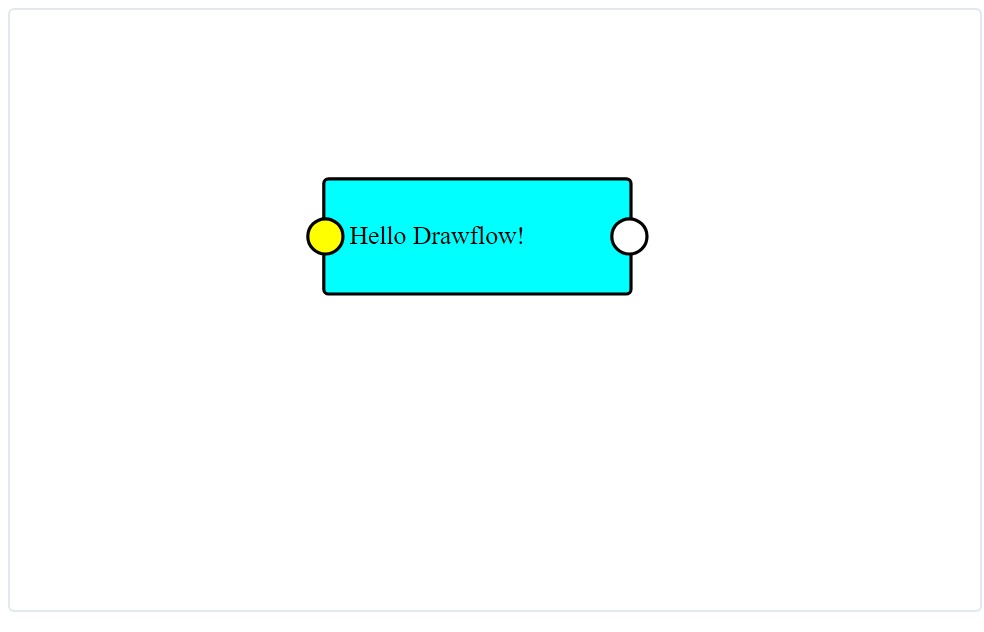
Open your HTML file in a browser. You should see a workflow canvas with a single node displaying "Hello Drawflow."

If you see this, congratulations — you've setup a working Drawflow project.
In the next tutorial, you'll dive deeper into creating nodes that load by default on page load
This blog post was originally published on Devpractical.com.
Subscribe to my newsletter
Read articles from Avic Ndugu directly inside your inbox. Subscribe to the newsletter, and don't miss out.
Written by

Avic Ndugu
Avic Ndugu
Developer and writer at devpractical.com