Deploying an OpenShift Lab Environment Using CodeReady Containers (CRC) and HAProxy
 Aamir Yaqoob
This blog will guide you through setting up an OpenShift lab environment using CodeReady Containers (CRC) on a Linux machine. We'll automate the process with a bash script and include user configuration steps. This environment is ideal for developers and sysadmins looking to test or experiment with OpenShift in a controlled lab setup.
Prerequisites
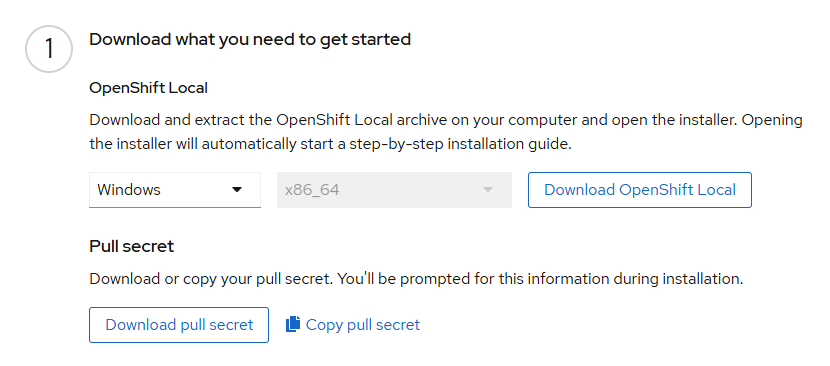
Pull Secret: Obtain your OpenShift pull secret from Red Hat's OpenShift site.
Linux Machine: Ensure you have a fresh Fedora based Linux installation with root access.
Stable Internet Connection: Required for downloading and setting up dependencies.
Steps to Set Up
1. Create a User for CRC Management
Use the following commands to create a user for managing the CRC environment. This helps isolate tasks and enhances security:
useradd crc-lab
passwd crc-lab
Set a secure password when prompted. Next, grant administrative privileges and configure SSH for the user:
usermod -aG wheel crc-lab
mkdir /home/crc-lab/.ssh
cp ~/.ssh/authorized_keys /home/crc-lab/.ssh/
chown -R crc-lab:crc-lab /home/crc-lab/.ssh
chmod 500 /home/crc-lab/.ssh
Modify the sudoers file to enable the wheel group for administrative access:
sed -e 's/^%wheel/#%wheel/g' -e 's/^# %wheel/%wheel/g' -i /etc/sudoers
2. Log In as the New User
Log out of your current session and log back in as the new user crc-lab. This ensures all configurations are applied correctly.
logout
On the login screen, select the crc-lab user and log in.
3. Add Your OpenShift Pull Secret
Copy your OpenShift pull secret into a file named pull.txt in the crc-lab user's home directory. This pull secret is essential for accessing OpenShift Container Platform components.

vim pull.txt
Paste the pull secret, save the file, and exit.
4. Install Required Packages and Configure Services
Create and execute a bash script to install and configure all required dependencies:
#!/bin/bash
set -e

echo "Updating system and installing dependencies..."
sudo dnf upgrade -y
sudo dnf install -y @virtualization NetworkManager haproxy firewalld policycoreutils-python-utils wget

echo "Starting and enabling libvirtd and firewalld services..."
sudo systemctl enable libvirtd --now
sudo systemctl enable firewalld --now

echo "Configuring firewall rules..."
sudo firewall-cmd --add-port=80/tcp --permanent
sudo firewall-cmd --add-port=6443/tcp --permanent
sudo firewall-cmd --add-port=443/tcp --permanent
sudo systemctl restart firewalld

echo "Configuring SELinux for OpenShift..."
sudo semanage port -a -t http_port_t -p tcp 6443 || echo "Port 6443 already configured for SELinux."

echo "Downloading and setting up CRC (CodeReady Containers)..."
wget -c https://mirror.openshift.com/pub/openshift-v4/clients/crc/latest/crc-linux-amd64.tar.xz
tar xfv crc-linux-amd64.tar.xz
sudo mv crc-linux-*/crc /usr/local/bin/
yes N | crc setup

echo "Starting CRC..."
crc start -p pull.txt

echo "Backing up existing HAProxy configuration..."
cp /etc/haproxy/haproxy.cfg{,.bak}

echo "Fetching CRC IP..."
CRC_IP=$(crc ip)

echo "Configuring HAProxy..."
cat <<EOF | tee /etc/haproxy/haproxy.cfg
global
    log stdout format raw local0

defaults
    log global
    mode http
    timeout connect 5000ms
    timeout client 5000ms
    timeout server 5000ms

frontend apps
    bind 0.0.0.0:80
    option tcplog
    mode tcp
    default_backend apps

frontend apps_ssl
    bind 0.0.0.0:443
    option tcplog
    mode tcp
    default_backend apps_ssl

backend apps
    mode tcp
    balance roundrobin
    server webserver1 $CRC_IP:80 check

backend apps_ssl
    mode tcp
    balance roundrobin
    option ssl-hello-chk
    server webserver1 $CRC_IP:443 check

frontend api
    bind 0.0.0.0:6443
    option tcplog
    mode tcp
    default_backend api

backend api
    mode tcp
    balance roundrobin
    option ssl-hello-chk
    server webserver1 $CRC_IP:6443 check
EOF

echo "Starting and enabling HAProxy service..."
sudo systemctl enable haproxy --now

echo "Setup complete!"
Save the script as setup_openshift.sh, make it executable (chmod +x setup_openshift.sh), and run it as root (sudo ./setup_openshift.sh).
5. Configure Hostnames for Accessing OpenShift
To make the OpenShift components accessible via browser, add the following entries to your system's hosts file:
On Windows
Open Notepad as an administrator:
Search for "Notepad" in the Start menu.
Right-click and select Run as administrator.
Open the file at:
C:\Windows\System32\drivers\etc\hostsAdd the following line at the end of the file:
<public-ip> api.crc.testing oauth-openshift.apps-crc.testing console-openshift-console.apps-crc.testing default-route-openshift-image-registry.apps-crc.testingSave the file and close Notepad.
On Linux
Open the
/etc/hostsfile in your favorite text editor as root:sudo vi /etc/hostsAdd the following line at the end of the file:
<public-ip> api.crc.testing oauth-openshift.apps-crc.testing console-openshift-console.apps-crc.testing default-route-openshift-image-registry.apps-crc.testingSave the file and exit.
Once added, you can access the OpenShift web console using the following URL:
Subscribe to my newsletter
Read articles from Aamir Yaqoob directly inside your inbox. Subscribe to the newsletter, and don't miss out.
Written by
Aamir Yaqoob
Aamir Yaqoob
I'm Aamir Yaqoob, currently working as a Jr. DevOps Engineer. I have a passion for learning new things and continuously expanding my skill set. My journey in tech is fueled by curiosity and a desire to contribute to the tech community.