Deploying a Voting App with ArgoCD and Kubernetes: A Beginner-Friendly Guide
 Pravesh Sudha
💡 Introduction
Welcome to the world of DevOps! In this blog, we’ll embark on an exciting journey to build a full-fledged CI/CD project from scratch. We’ll start by creating an EC2 instance to serve as our working environment. From there, we’ll clone a Voting Application project from a GitHub repository and set up the necessary tools, including Docker and Kind (a lightweight Kubernetes tool). We’ll then install ArgoCD in the cluster to implement Continuous Delivery, enabling seamless automated deployments whenever we make changes to the code. By the end of this tutorial, you’ll have hands-on experience with modern DevOps workflows and a fully functional pipeline for deploying containerized applications.
Let’s get started!
💡 Pre-requisites
Before diving into this project, let’s make sure we have the basics covered. A little preparation goes a long way in making the process smooth and enjoyable. Here’s what you should have a basic understanding of:
AWS EC2: Familiarity with launching and managing EC2 instances will help you set up the working environment.
Docker and Kind (Kubernetes): Understanding containerization with Docker and how Kind creates Kubernetes clusters locally will make the deployment process easier to follow.
ArgoCD: A basic idea of what ArgoCD is and how it manages continuous delivery will help you grasp its role in automating application updates.
If you’re new to any of these, don’t worry! We’ll guide you through the steps, and you’ll pick things up as we progress.
💡 Setting Up the EC2 Instance
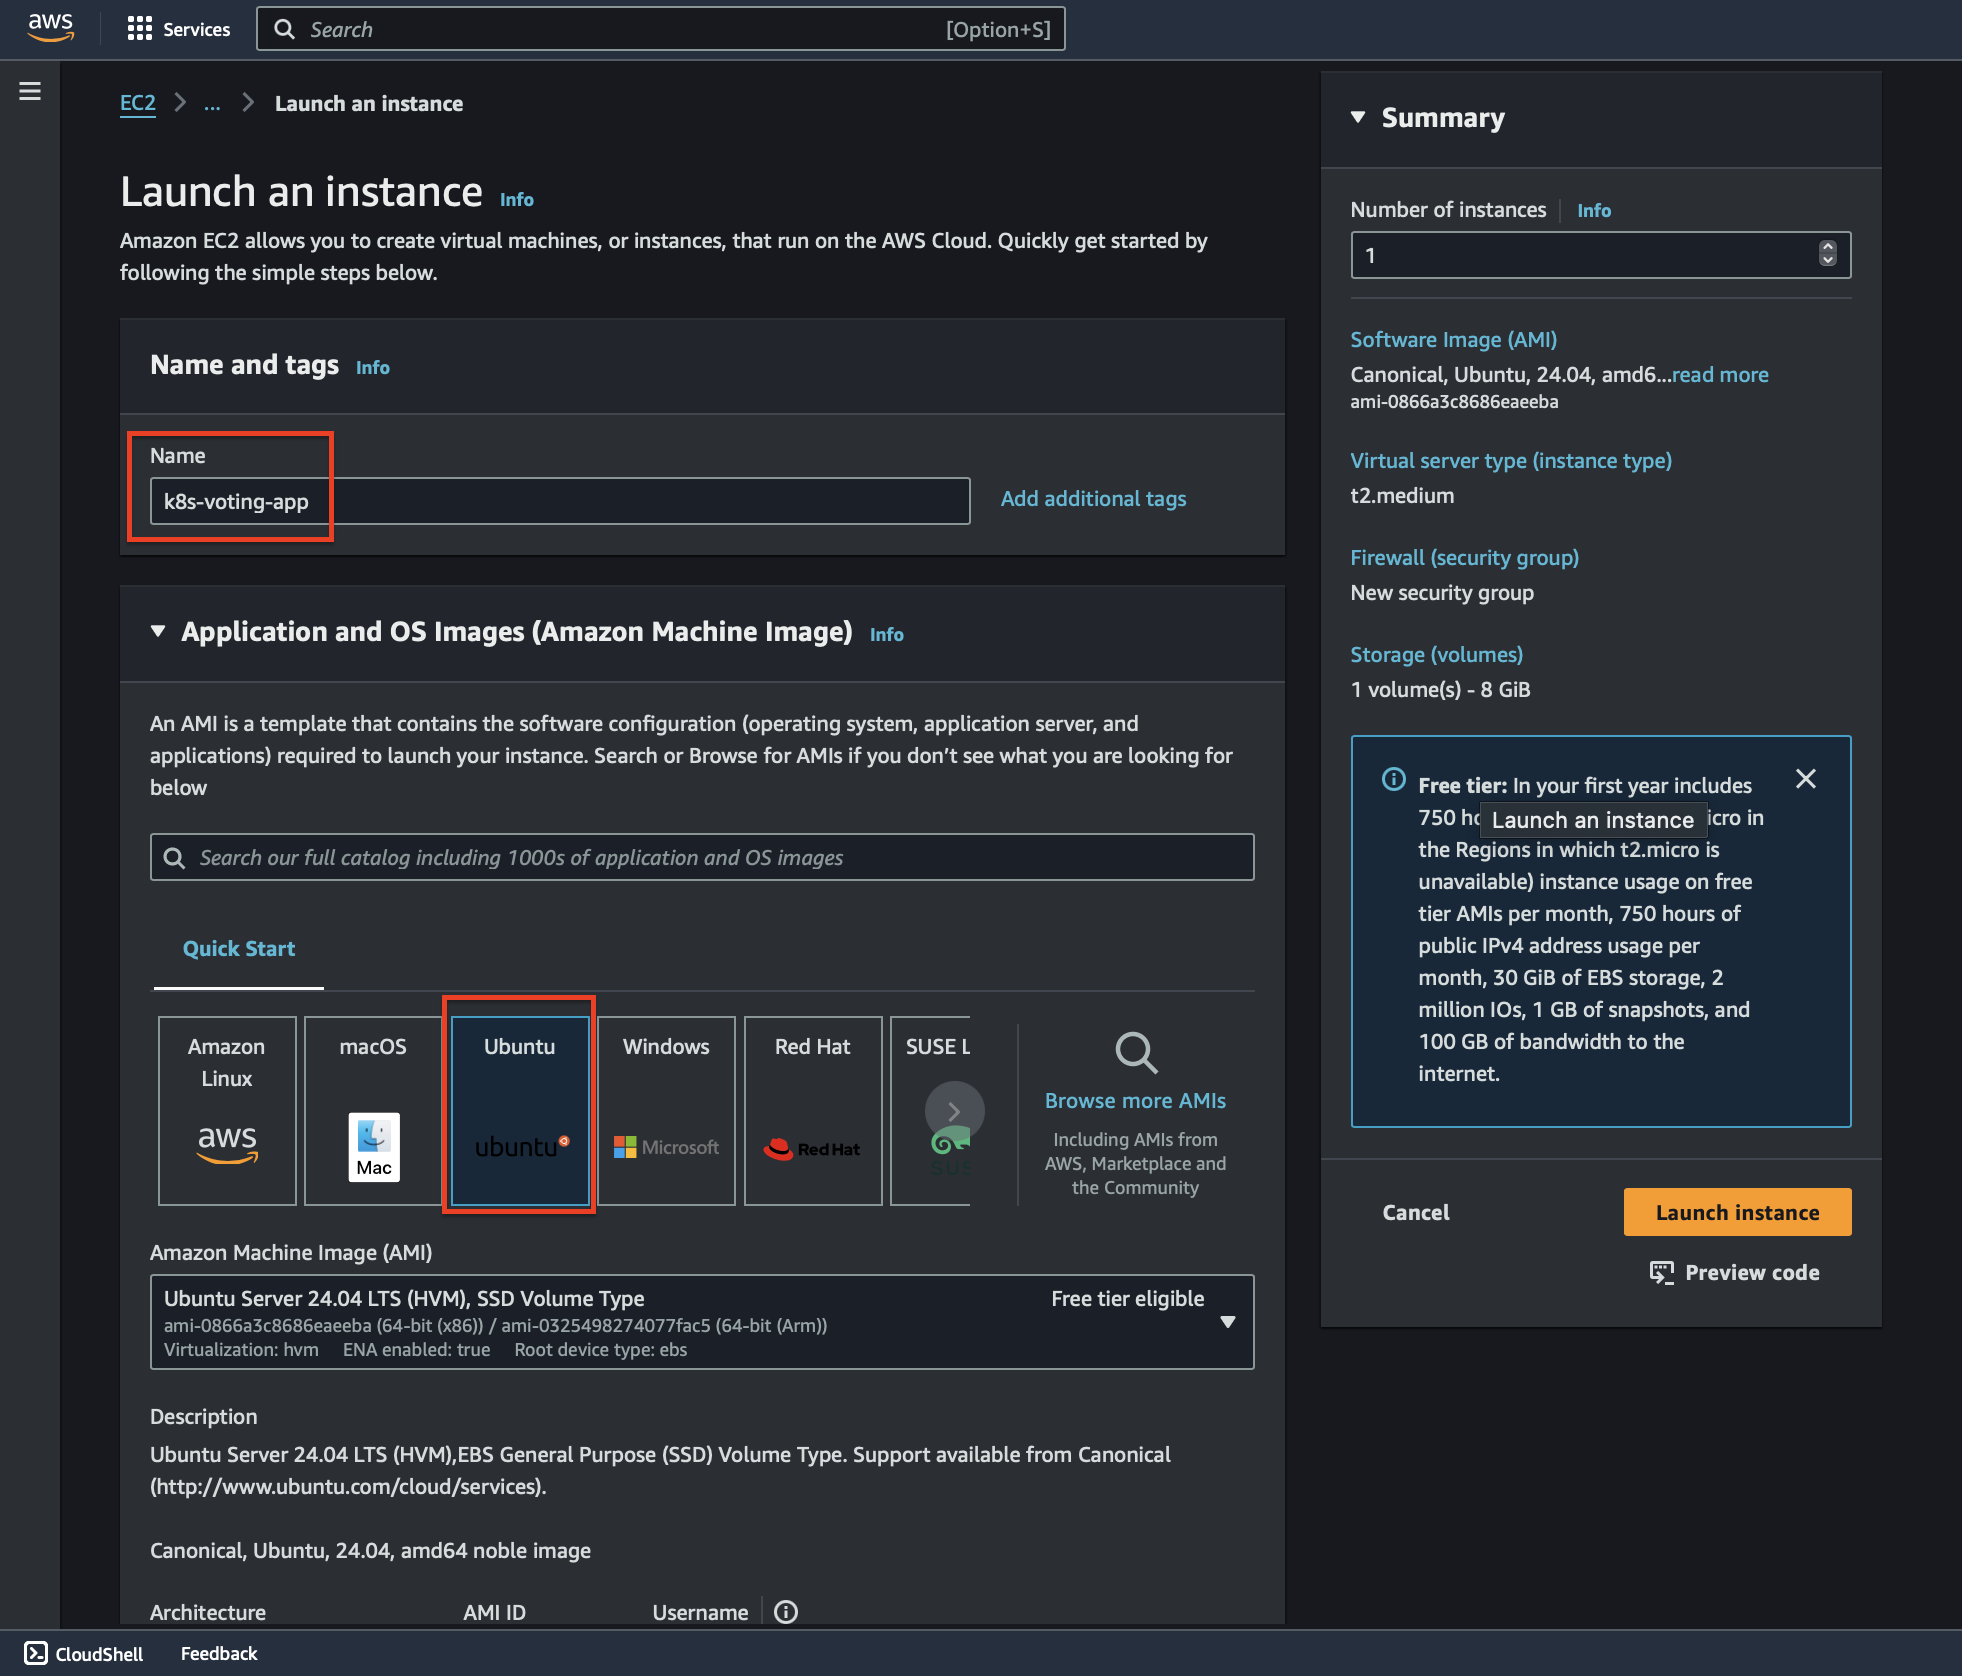
To kickstart our project, we need an AWS EC2 instance with a bit more compute power to support our Kubernetes cluster (which includes a control plane and two worker nodes). Let’s create a t2.medium instance by following these steps:
Navigate to the AWS EC2 dashboard and click on Launch Instance.
Provide a name for your instance, such as k8s-voting-app.
Select Ubuntu as the AMI (Amazon Machine Image).
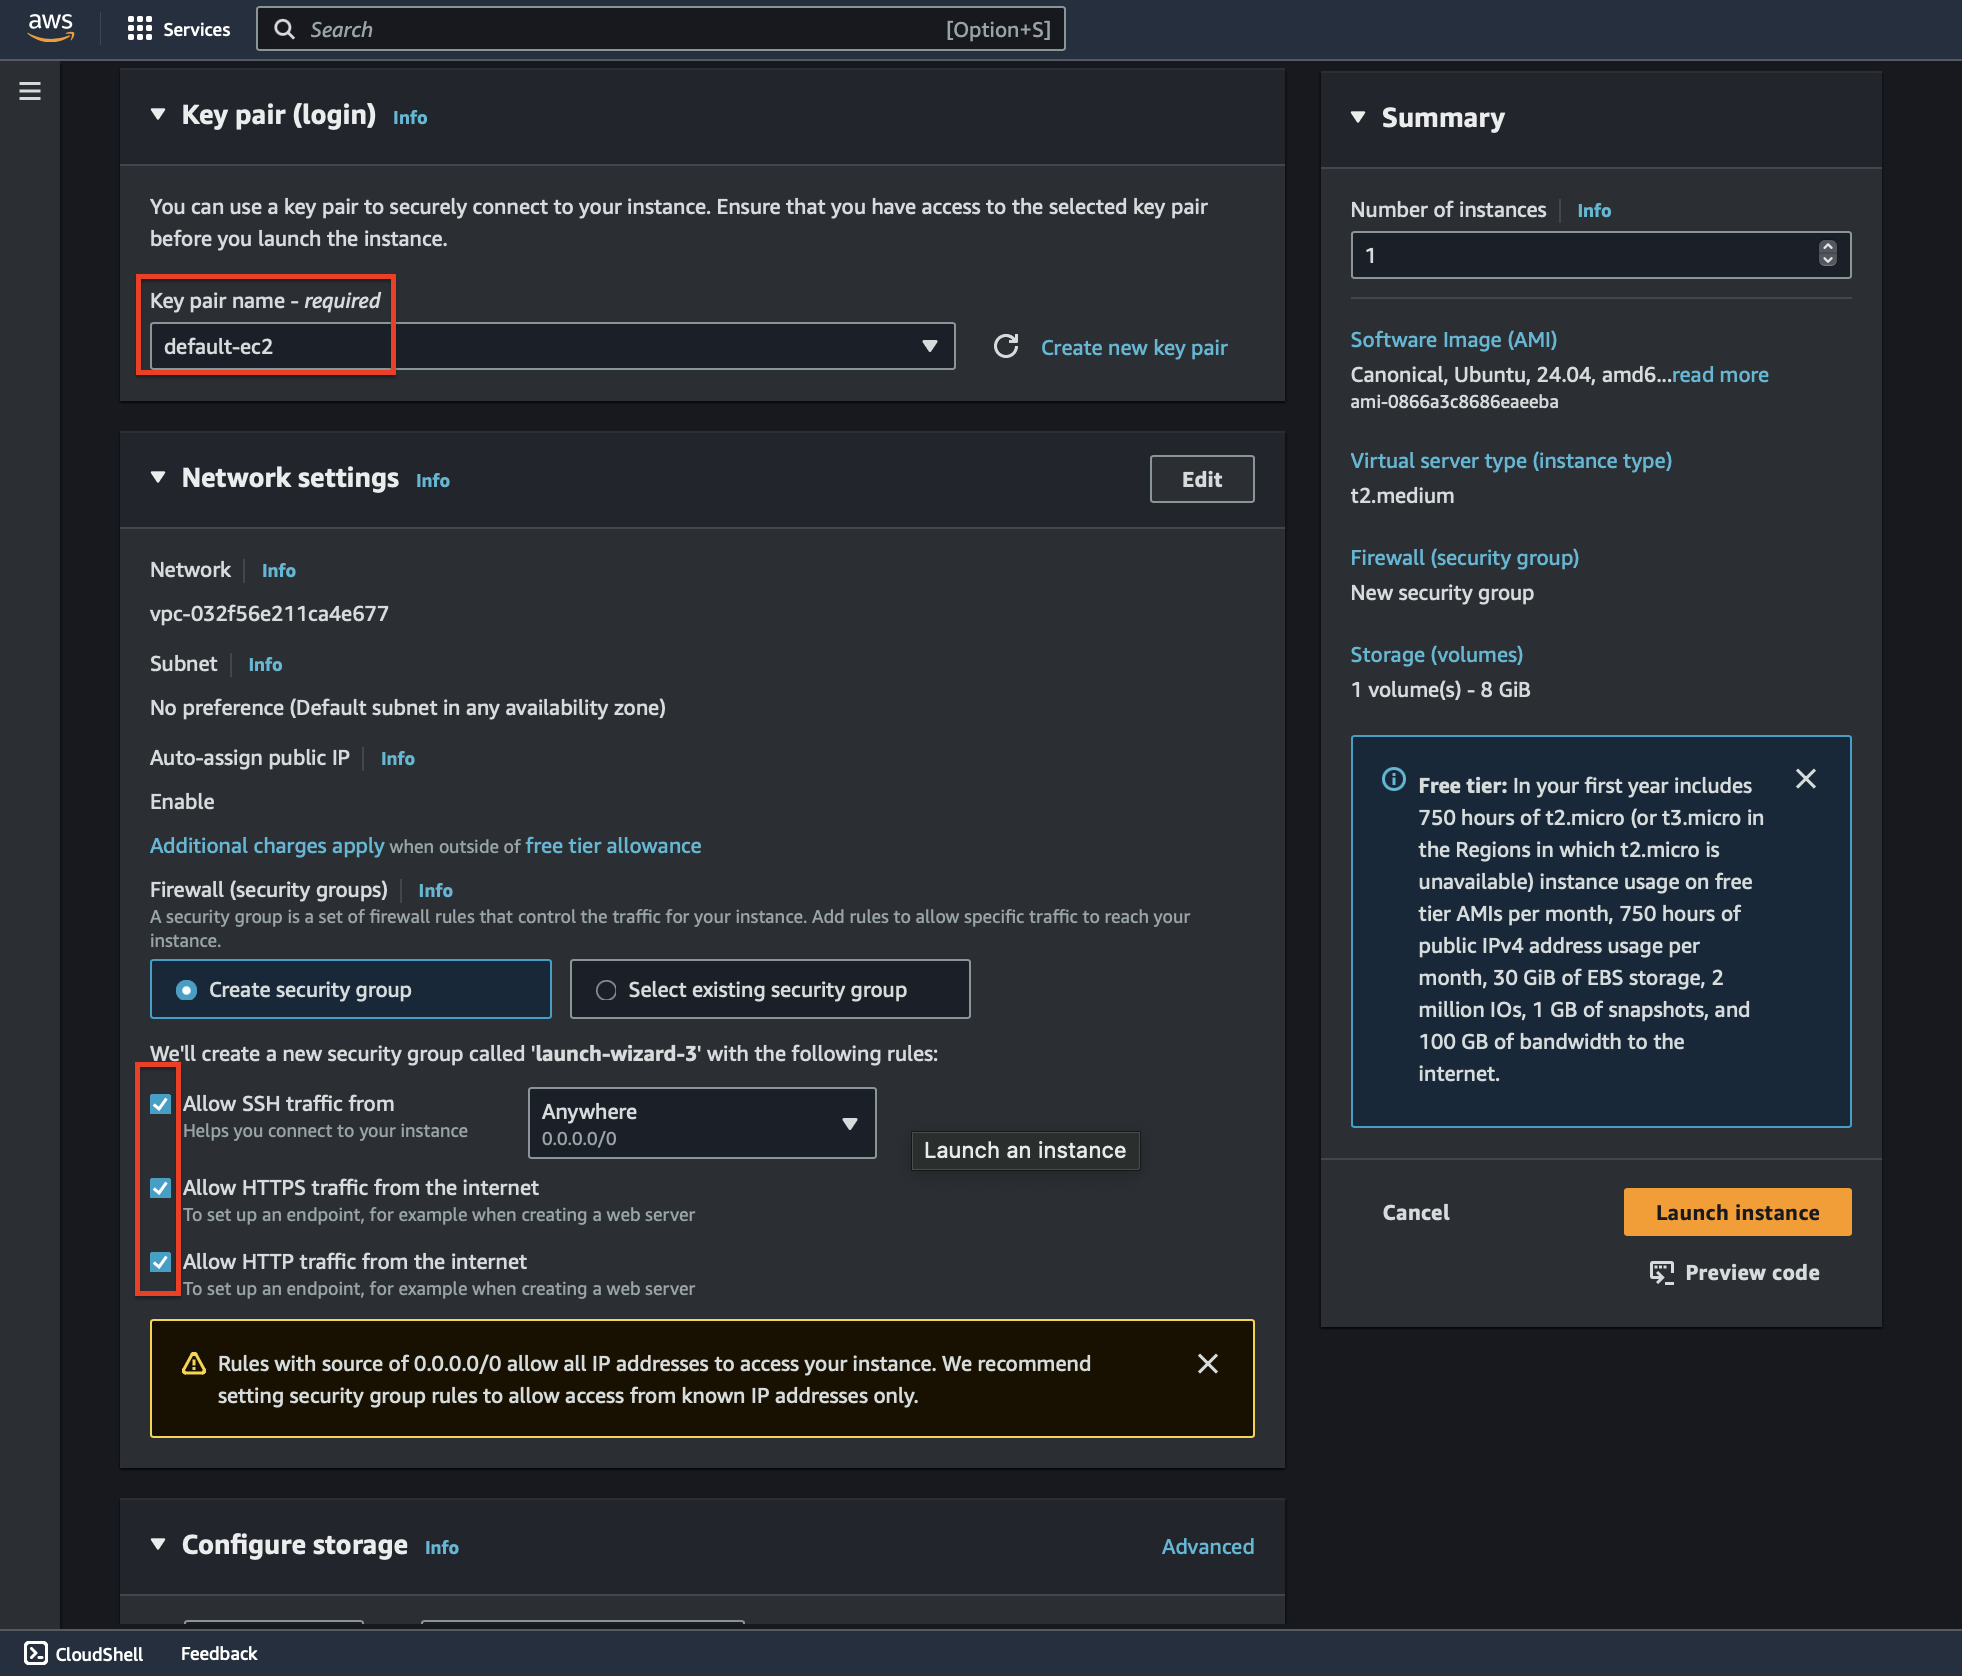
In the Network settings, allow HTTP (port 80) and HTTPS (port 443) for web traffic.
Set up a key pair for secure access. If you already have one, select it. Otherwise, generate a new key pair and download it—it will be required to log in to your instance via SSH.
Once the instance is created:
Make the key executable by running:
chmod +x <your_key.pem>Use the SSH command provided in the SSH Client tab of the instance’s Connect page to log in:
ssh -i <your_key.pem> ubuntu@<your_instance_public_ip>
After logging into the server:
Update the system:
sudo apt updateInstall Docker:
sudo apt install docker.io -yAdd the current user (default is
ubuntu) to the Docker group so you can run Docker commands withoutsudo:sudo usermod -aG docker $USERReboot the instance to apply the changes:
sudo reboot
Once the instance reboots, reconnect using the same SSH command. After logging back in, verify Docker installation by running:
docker --version

With Docker installed and ready to use, we’re now set to proceed with setting up Kind for our Kubernetes cluster.
💡 Installing Kind and Kubectl
With Docker installed on the EC2 instance, the next step is to set up Kind (Kubernetes in Docker) to create our lightweight Kubernetes cluster. Additionally, we’ll install kubectl, the Kubernetes command-line tool, to interact with the cluster.
Installing Kind
To install Kind, run the following commands on the EC2 instance:
[ $(uname -m) = x86_64 ] && curl -Lo ./kind https://kind.sigs.k8s.io/dl/v0.20.0/kind-linux-amd64
chmod +x ./kind
sudo cp ./kind /usr/local/bin/kind
rm -rf kind
This downloads the Kind binary, makes it executable, and moves it to a system-wide path for easy access.
Installing Kubectl
To simplify the kubectl installation, we’ll create a script file. Follow these steps:
Create a file named
install_kubectl.sh:nano install_kubectl.shPaste the following script into the file:
 #!/bin/bash

 # Variables
 VERSION="v1.30.0"
 URL="https://dl.k8s.io/release/${VERSION}/bin/linux/amd64/kubectl"
 INSTALL_DIR="/usr/local/bin"

 # Download and install kubectl
 curl -LO "$URL"
 chmod +x kubectl
 sudo mv kubectl $INSTALL_DIR/
 kubectl version --client

 # Clean up
 rm -f kubectl

 echo "kubectl installation complete."
Save and close the file, then make it executable:
chmod +x install_kubectl.shRun the script to install kubectl:
./install_kubectl.sh
After the installation is complete, you can verify that kubectl is installed correctly by checking its version:
kubectl version --client
With Kind and kubectl installed, your EC2 instance is now ready to create and manage a Kubernetes cluster. Let’s move on to setting up the cluster!
💡 Creating a Kubernetes Cluster with Kind
With Kind and kubectl installed, we can now create a Kubernetes cluster tailored to our needs. This involves creating a configuration file that defines the cluster structure and then using Kind to deploy the cluster.
Step 1: Create the Configuration File
Start by creating a file named config.yaml:
nano config.yaml
Add the following content to the file:
kind: Cluster
apiVersion: kind.x-k8s.io/v1alpha4

nodes:
- role: control-plane
  image: kindest/node:v1.30.0
- role: worker
  image: kindest/node:v1.30.0
- role: worker
  image: kindest/node:v1.30.0
Explanation of config.yaml:
kind: Specifies that we are defining a Kubernetes cluster.
apiVersion: Indicates the Kind API version being used.
nodes: Defines the cluster’s nodes and their roles:
control-plane: The node that runs the Kubernetes control plane, managing the cluster.
worker: Nodes that will run application workloads.
image: Specifies the version of the Kind node image to use (v1.30.0 in this case).
This configuration creates a cluster with one control plane and two worker nodes.
Step 2: Create the Cluster
Run the following command to create the cluster based on the configuration:
kind create cluster --config=config.yaml --name my-cluster
This command initializes a cluster named my-cluster with the nodes and roles defined in the configuration file. The process may take a few minutes as Kind pulls the required images and sets up the cluster.
Step 3: Set the Kubernetes Context
Once the cluster is created, you’ll need to set the current context of kubectl to your new cluster:
kubectl cluster-info --context kind-my-cluster
This ensures that all subsequent kubectl commands interact with the my-cluster Kind cluster.
At this stage, you now have a fully functional Kubernetes cluster running locally on your EC2 instance, ready for deploying and managing applications. Next, we’ll move on to deploying the Voting App!
💡 Installing ArgoCD in the Kubernetes Cluster
With our Kind cluster up and running, the next step is to set up ArgoCD, a powerful continuous delivery tool for Kubernetes. ArgoCD will enable automated deployment and management of our applications.
Step 1: Create a Namespace for ArgoCD
ArgoCD runs in its own namespace. Let’s create it:
kubectl create namespace argocd
This command sets up a dedicated namespace named argocd in the cluster.
Step 2: Install ArgoCD
To install ArgoCD, apply its manifests directly from the official repository:
kubectl apply -n argocd -f https://raw.githubusercontent.com/argoproj/argo-cd/stable/manifests/install.yaml
This will install all the necessary components, including the ArgoCD server, controller, and related services.
Step 3: Check the ArgoCD Services
Once all argocd pods are running, verify that the ArgoCD services have been deployed successfully:k
kubectl get svc -n argocd
You should see a list of services, including the argocd-server, which will act as the entry point to the ArgoCD dashboard.
Step 4: Expose the ArgoCD Server
By default, the ArgoCD server runs as a ClusterIP service, meaning it’s only accessible from within the cluster. To make it accessible externally, we’ll change it to a NodePort service:
kubectl patch svc argocd-server -n argocd -p '{"spec": {"type": "NodePort"}}'
This exposes the ArgoCD server on a port that can be accessed from outside the cluster.
Step 5: Port Forward the ArgoCD Server
To access the ArgoCD dashboard locally, use port forwarding:
kubectl port-forward -n argocd service/argocd-server 8443:443 &
Make sure to open port 8443 in your security group.
This maps the cluster’s ArgoCD server to port 8443 on your EC2 instance, allowing you to access the dashboard using the instance's public IP.
Accessing the ArgoCD Dashboard
Open your web browser and navigate to:
https://<your_instance_public_ip>:8443
You’ll need login credentials for the dashboard. By default:
Username:
adminPassword: The name of the ArgoCD server pod (you can retrieve it using
kubectl get secret -n argocd argocd-initial-admin-secret -o jsonpath="{.data.password}" | base64 -d && echo).
Once logged in, ArgoCD is ready to manage your applications! Next, we’ll configure it to deploy our Voting App.
💡 Deploying the Voting App with ArgoCD
With ArgoCD installed and accessible via the dashboard, we are ready to deploy our Voting App. Let’s configure and deploy the app step by step.
Step 1: Create a New Application in ArgoCD
Log in to the ArgoCD dashboard using your credentials.
Click on New App to create a new application.
Fill out the application details as follows:
Application Name:
voting-appProject Name:
defaultSync Policy: Set to
Automaticand enable both Prune Resources and Self Heal options to ensure ArgoCD keeps your application’s state consistent with the repository.Repository URL:
https://github.com/Pravesh-Sudha/k8s-kind-voting-app.git(You can fork the repository and use that)Revision:
main(specifying the branch).Path:
k8s-specifications(path to the Kubernetes manifests in the repository).Cluster URL: Use the default cluster URL.
Namespace: Use the default namespace.
Click Create App.
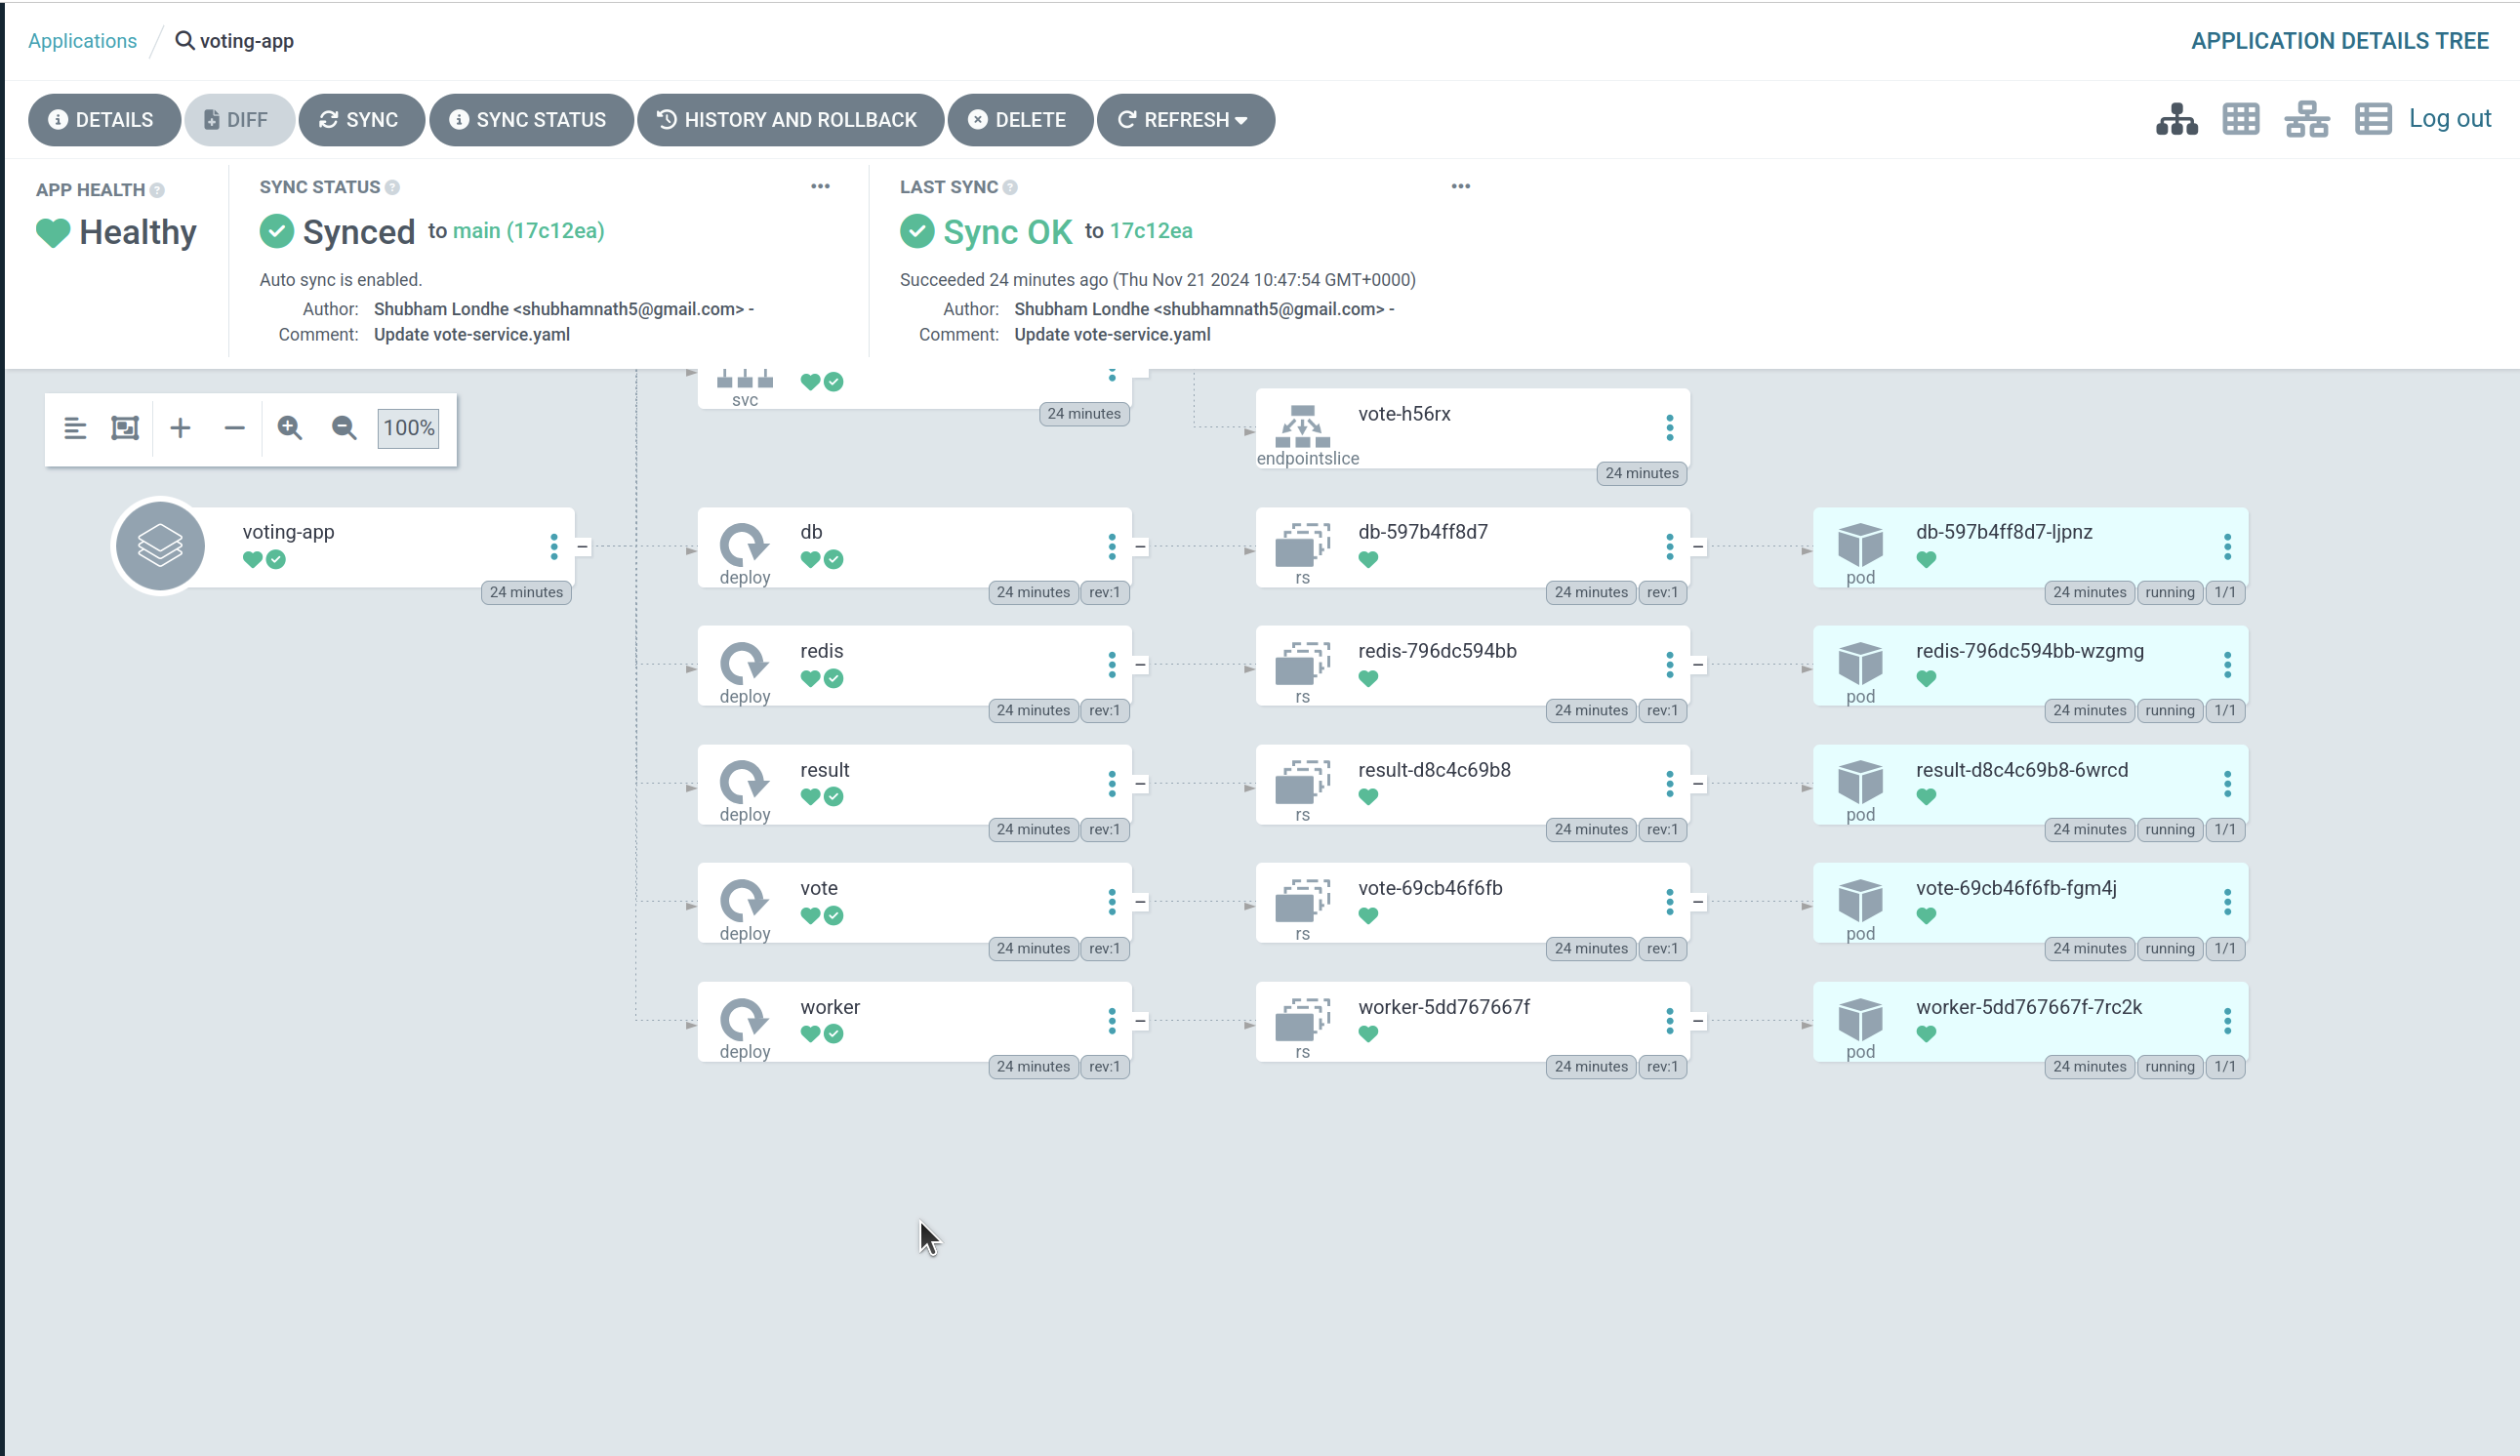
ArgoCD will begin deploying the application into the cluster based on the Kubernetes manifests in the specified repository path.
Step 2: Verify Application Deployment
Wait for the application to synchronize. Once all the pods are deployed and show a Healthy status in the ArgoCD dashboard, the application is live in your Kind cluster. You can fork the repo and make changes to the deployment file (like changing the replica count) and it will be reflected in the argocd dashboard.
Step 3: Expose the Application Services
To make the Voting App accessible externally, expose the vote and result services using the following commands:
kubectl port-forward service/vote 5000:5000 --address=0.0.0.0 &
kubectl port-forward service/result 5001:5001 --address=0.0.0.0 &
These commands forward traffic from your EC2 instance’s public IP to the services running in the Kind cluster.
Step 4: Update Security Groups
Ensure that ports 5000 and 5001 are open in your EC2 instance’s security group to allow external access.
Step 5: Access the Application
Open your browser and go to:
Voting App:
http://<your-public-ip>:5000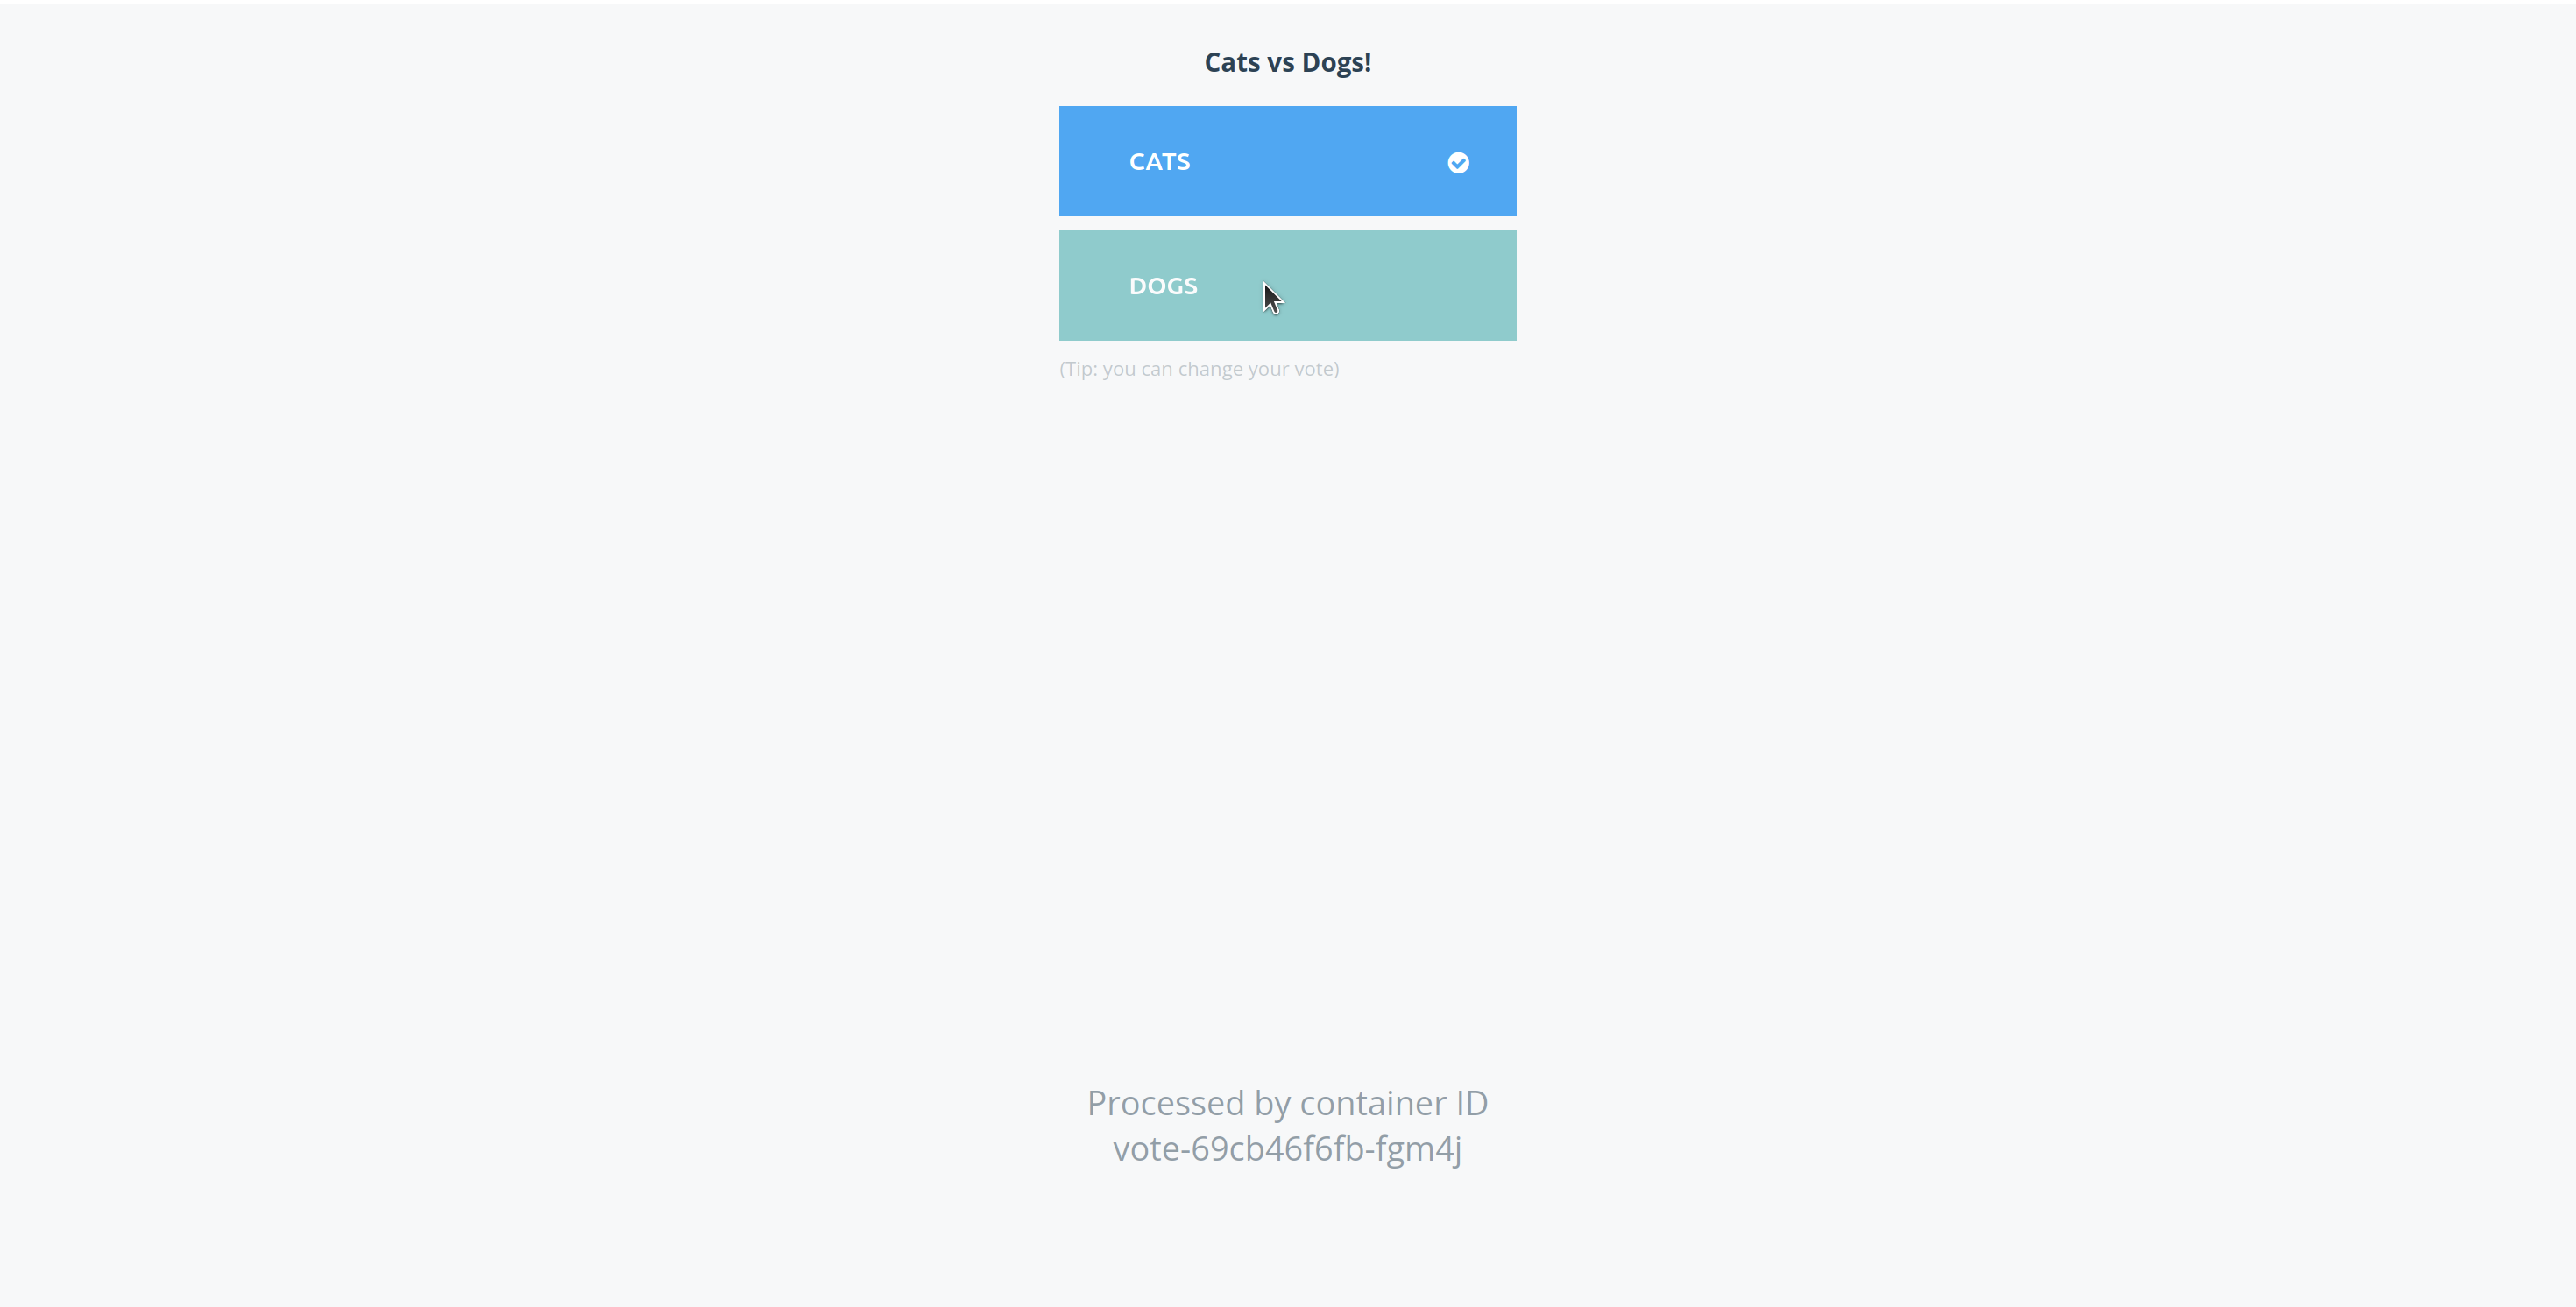
Results App:
http://<your-public-ip>:5001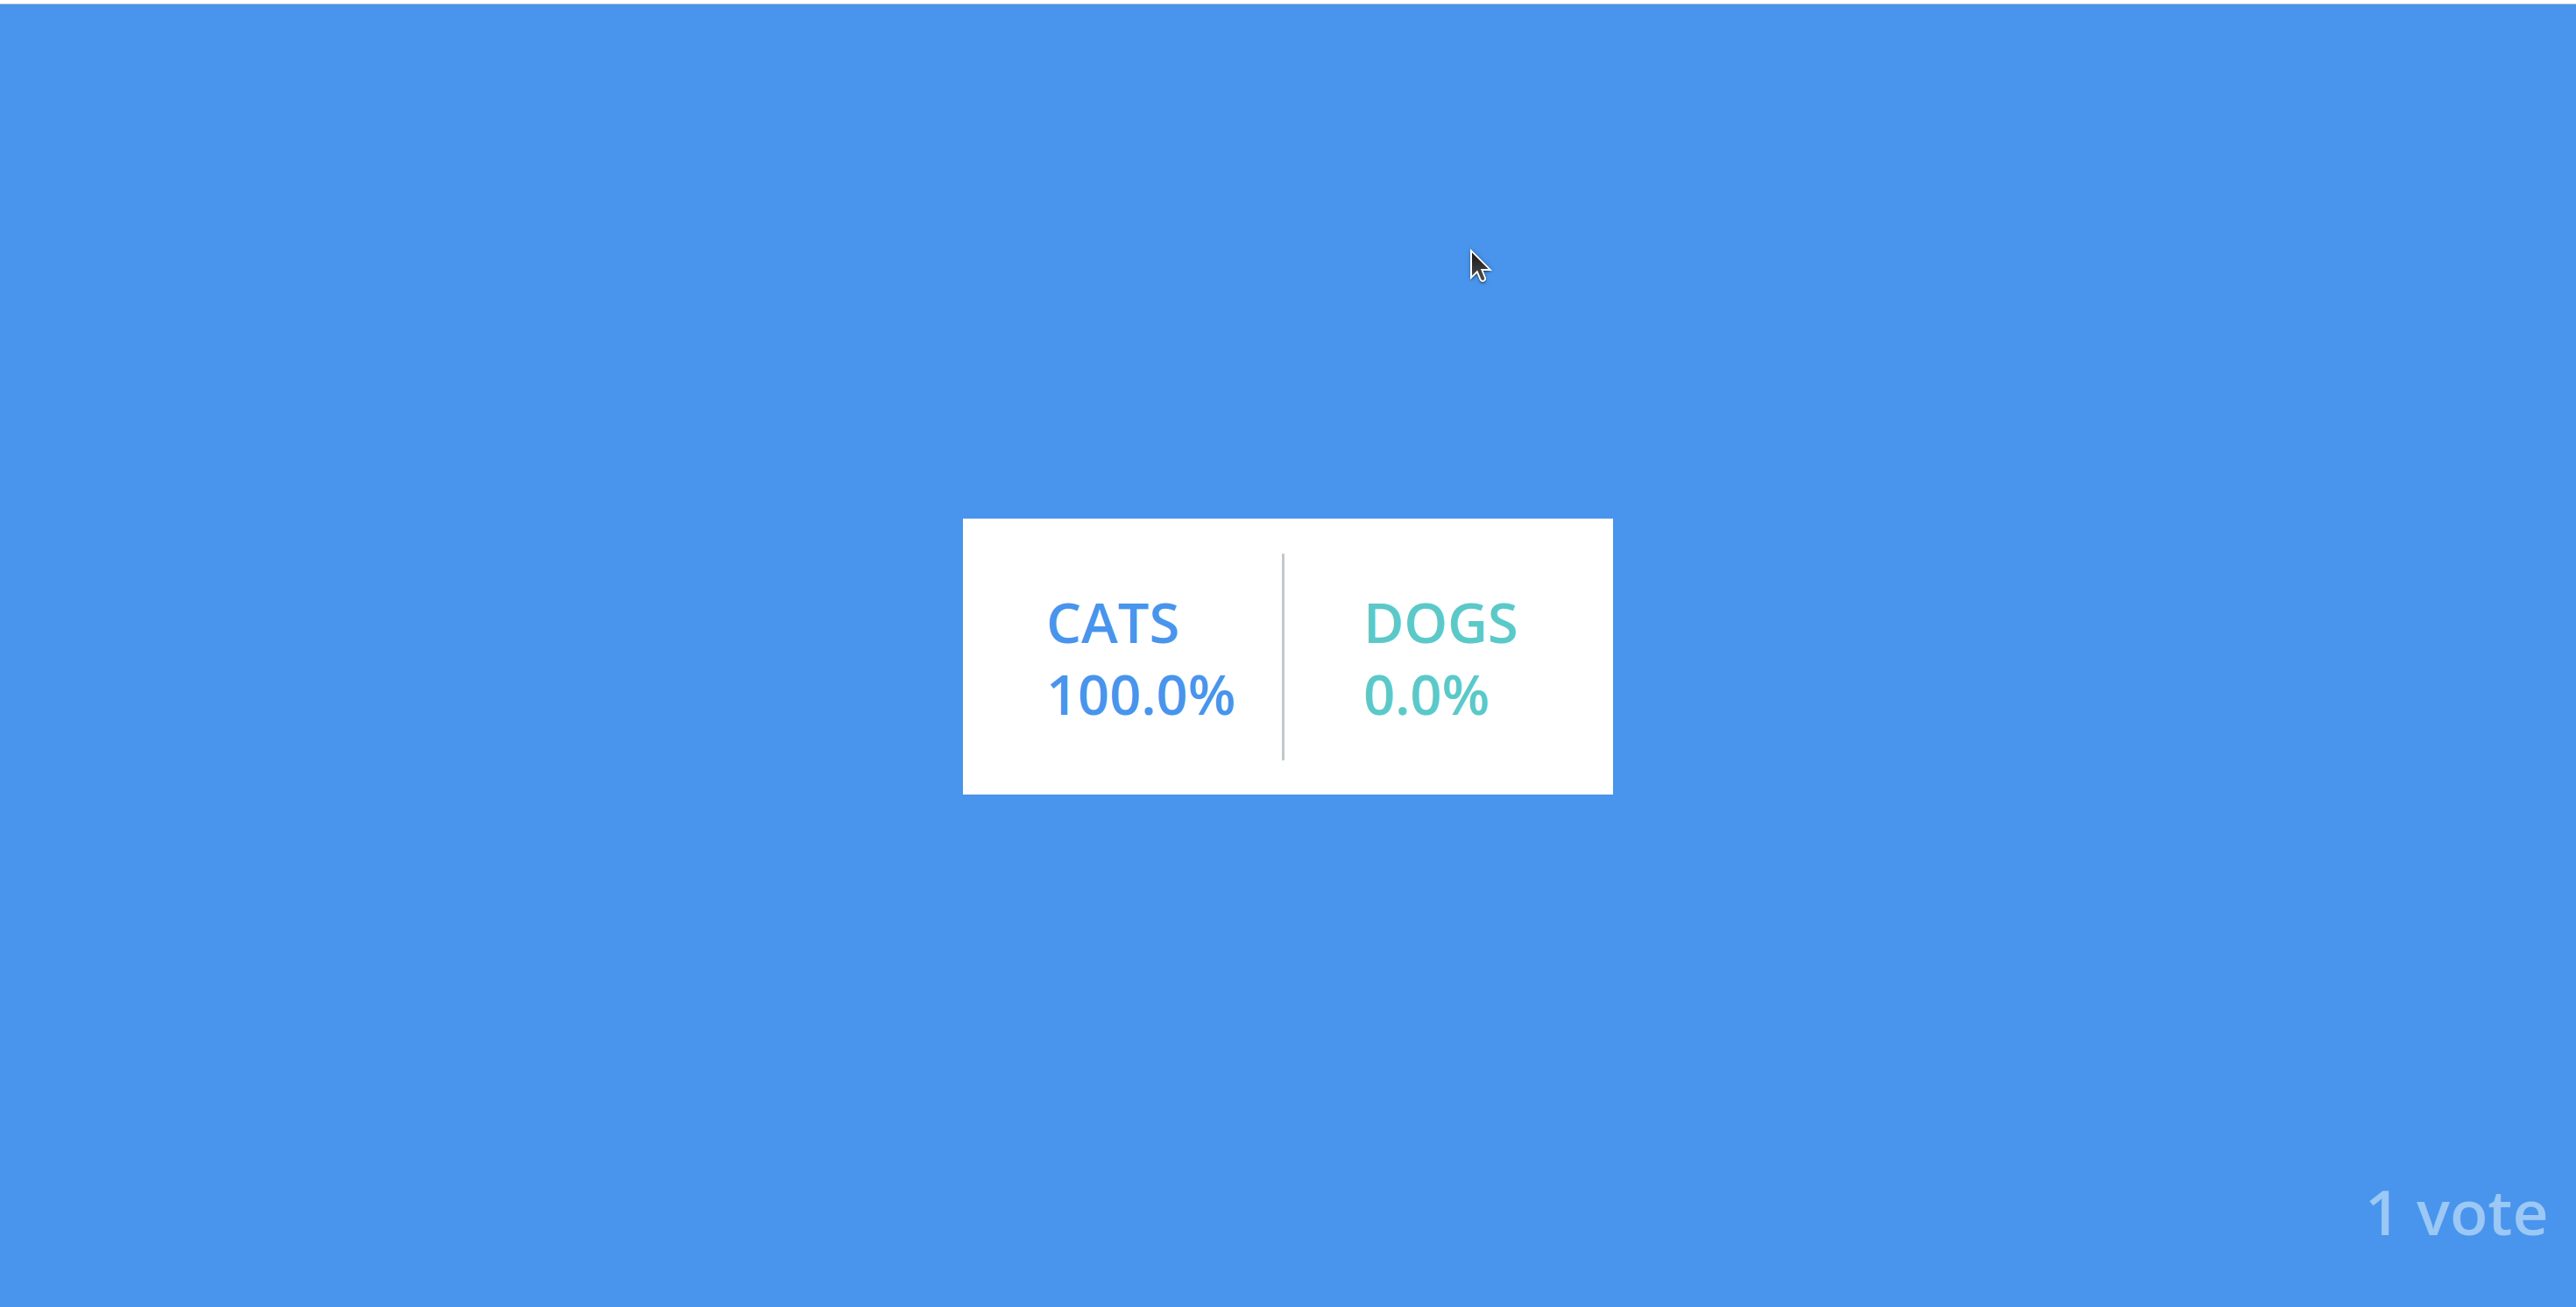
You’ll now see the Voting App up and running! Users can vote via the app, and you can monitor the results on the Results page.
💡 Visualizing the Cluster with Kubernetes Dashboard
To gain a graphical view of your Kind cluster and manage it efficiently, we’ll deploy the Kubernetes Dashboard. Follow these steps to set it up and access it securely.
Step 1: Deploy Kubernetes Dashboard
Apply the official Kubernetes Dashboard manifests to your cluster:
kubectl apply -f https://raw.githubusercontent.com/kubernetes/dashboard/v2.7.0/aio/deploy/recommended.yaml
This deploys the Dashboard components, including the service and pod necessary for the UI.
Step 2: Create a Service Account
To access the Dashboard with administrative privileges, we’ll create a service account. Create a manifest file named admin-user.yaml:
nano admin-user.yaml
Add the following content:
apiVersion: v1
kind: ServiceAccount
metadata:
  name: admin-user
  namespace: kubernetes-dashboard
---
apiVersion: rbac.authorization.k8s.io/v1
kind: ClusterRoleBinding
metadata:
  name: admin-user
roleRef:
  apiGroup: rbac.authorization.k8s.io
  kind: ClusterRole
  name: cluster-admin
subjects:
- kind: ServiceAccount
  name: admin-user
  namespace: kubernetes-dashboard
Apply the manifest to create the service account and bind it to the cluster-admin role:
kubectl apply -f admin-user.yaml
Step 3: Generate Access Token
Generate a token to authenticate the admin-user:
kubectl -n kubernetes-dashboard create token admin-user
Copy the generated token and save it securely—you’ll need it to log in to the Dashboard.
Step 4: Expose the Kubernetes Dashboard
Expose the Dashboard service using port-forwarding:
kubectl port-forward svc/kubernetes-dashboard -n kubernetes-dashboard 8080:443 --address=0.0.0.0
Ensure that port 8080 is open in the EC2 security group to allow external access.
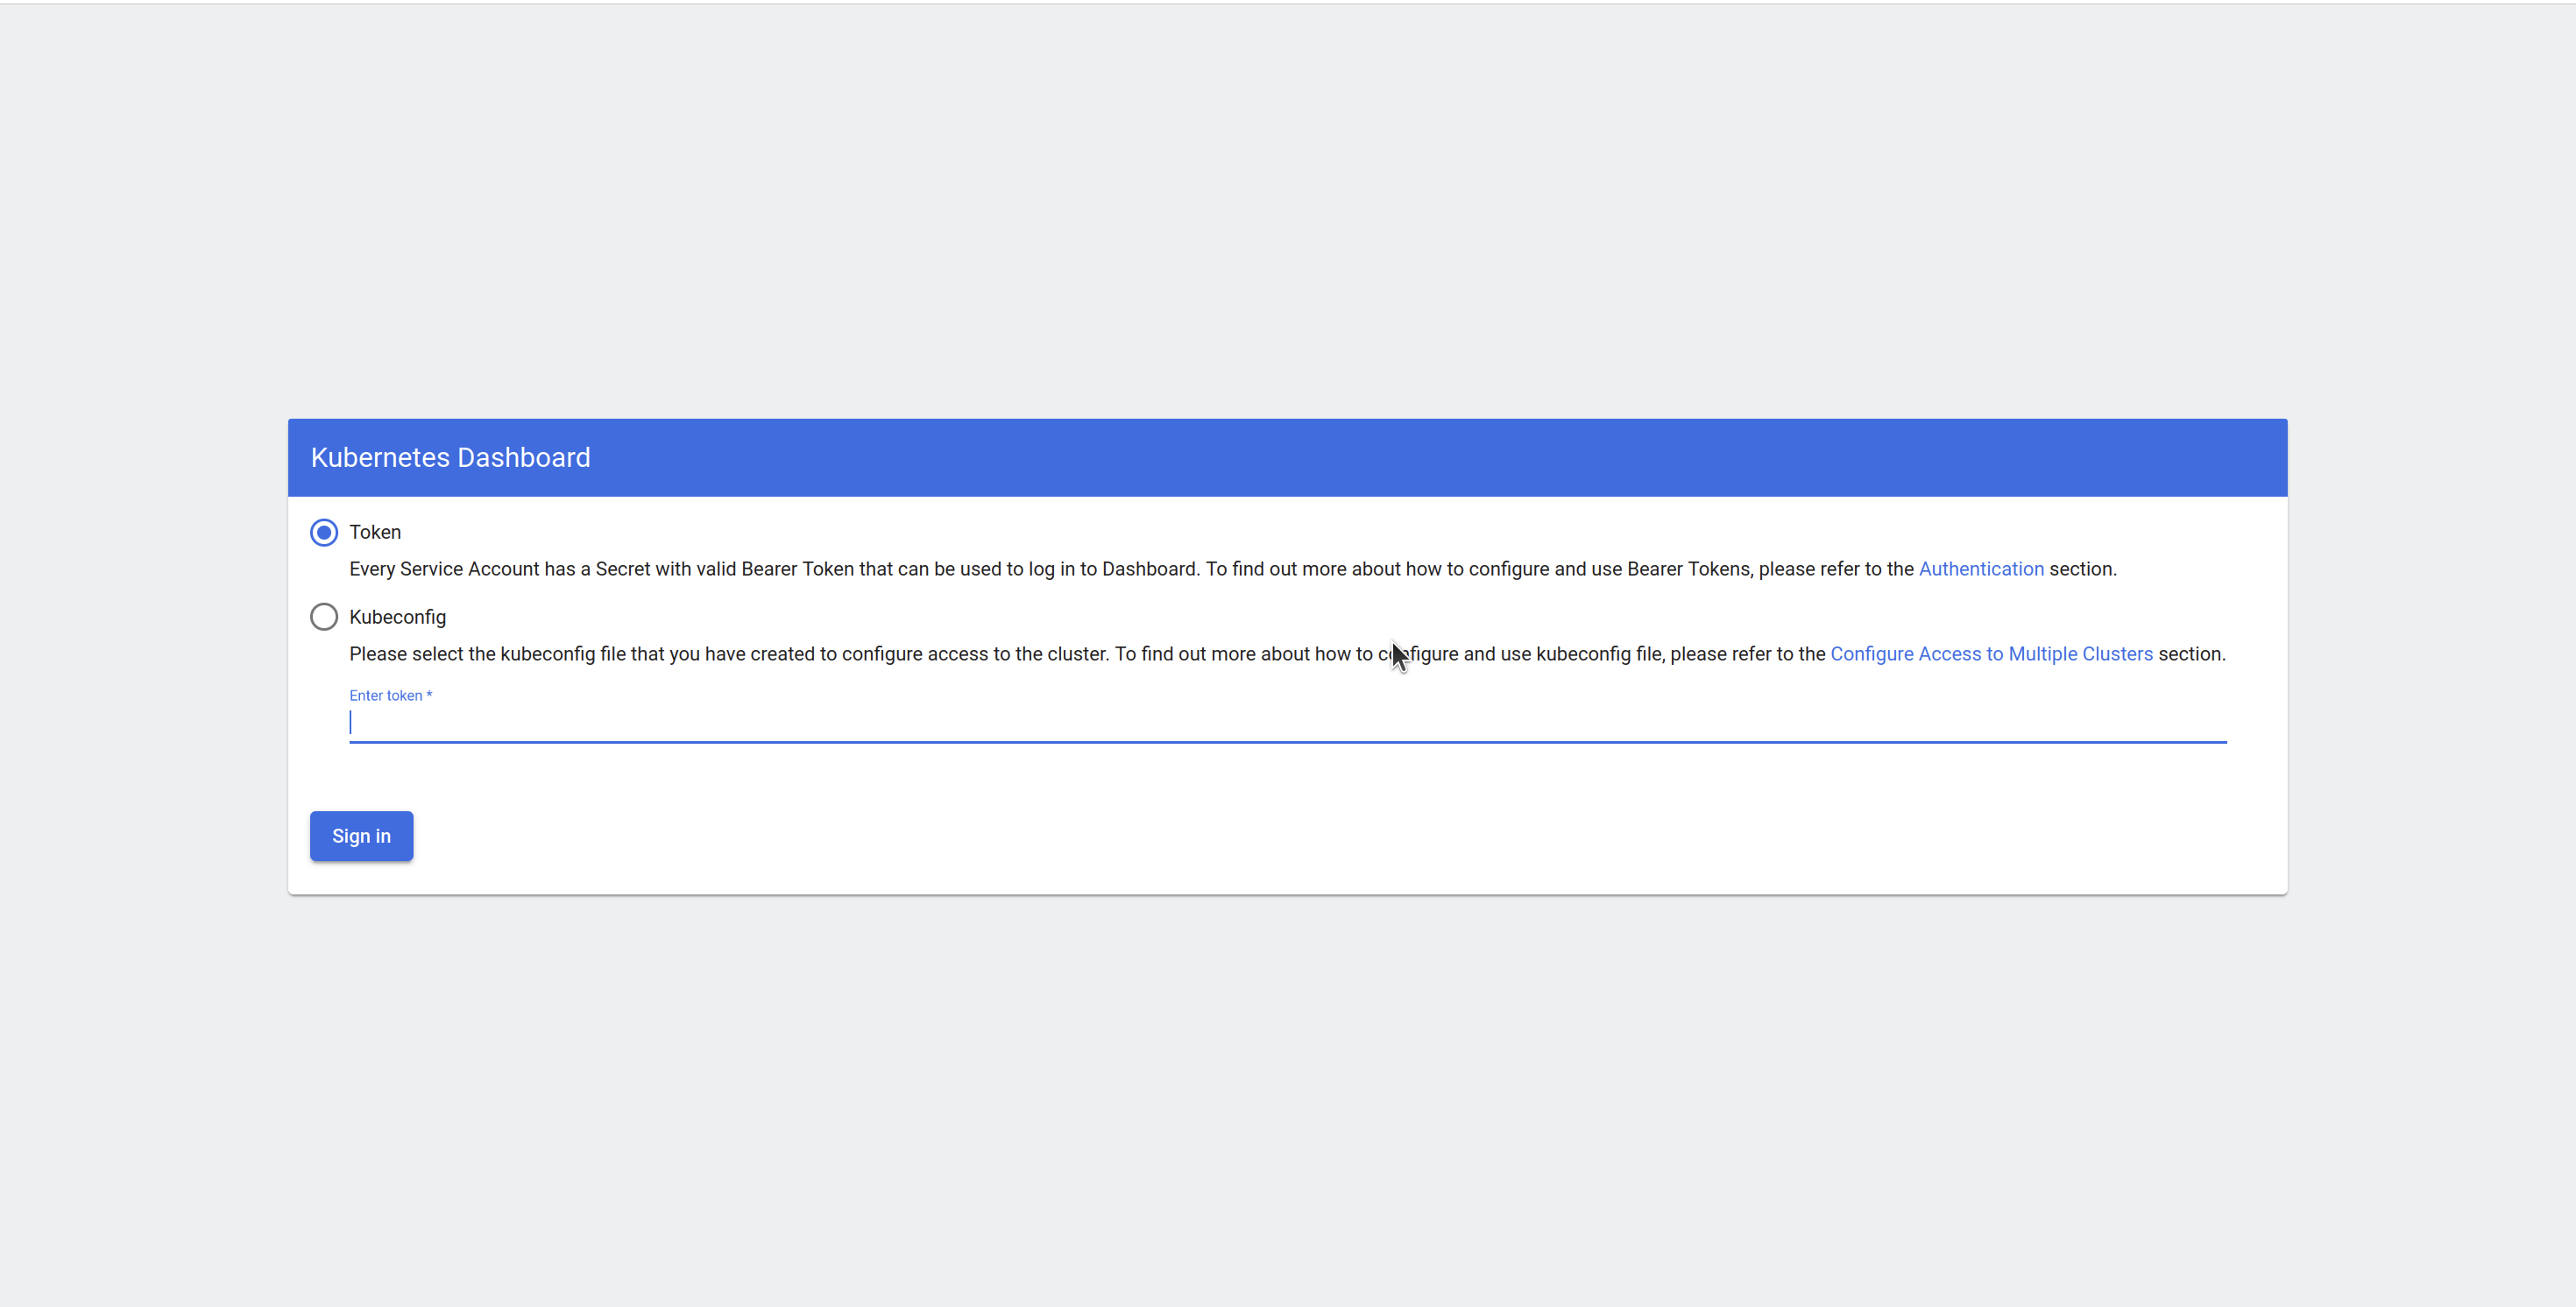
Step 5: Access the Dashboard
Open your browser and navigate to:
https://<your-ec2-public-ip>:8080Enter the token generated in Step 3 when prompted.
Step 6: Explore the Dashboard
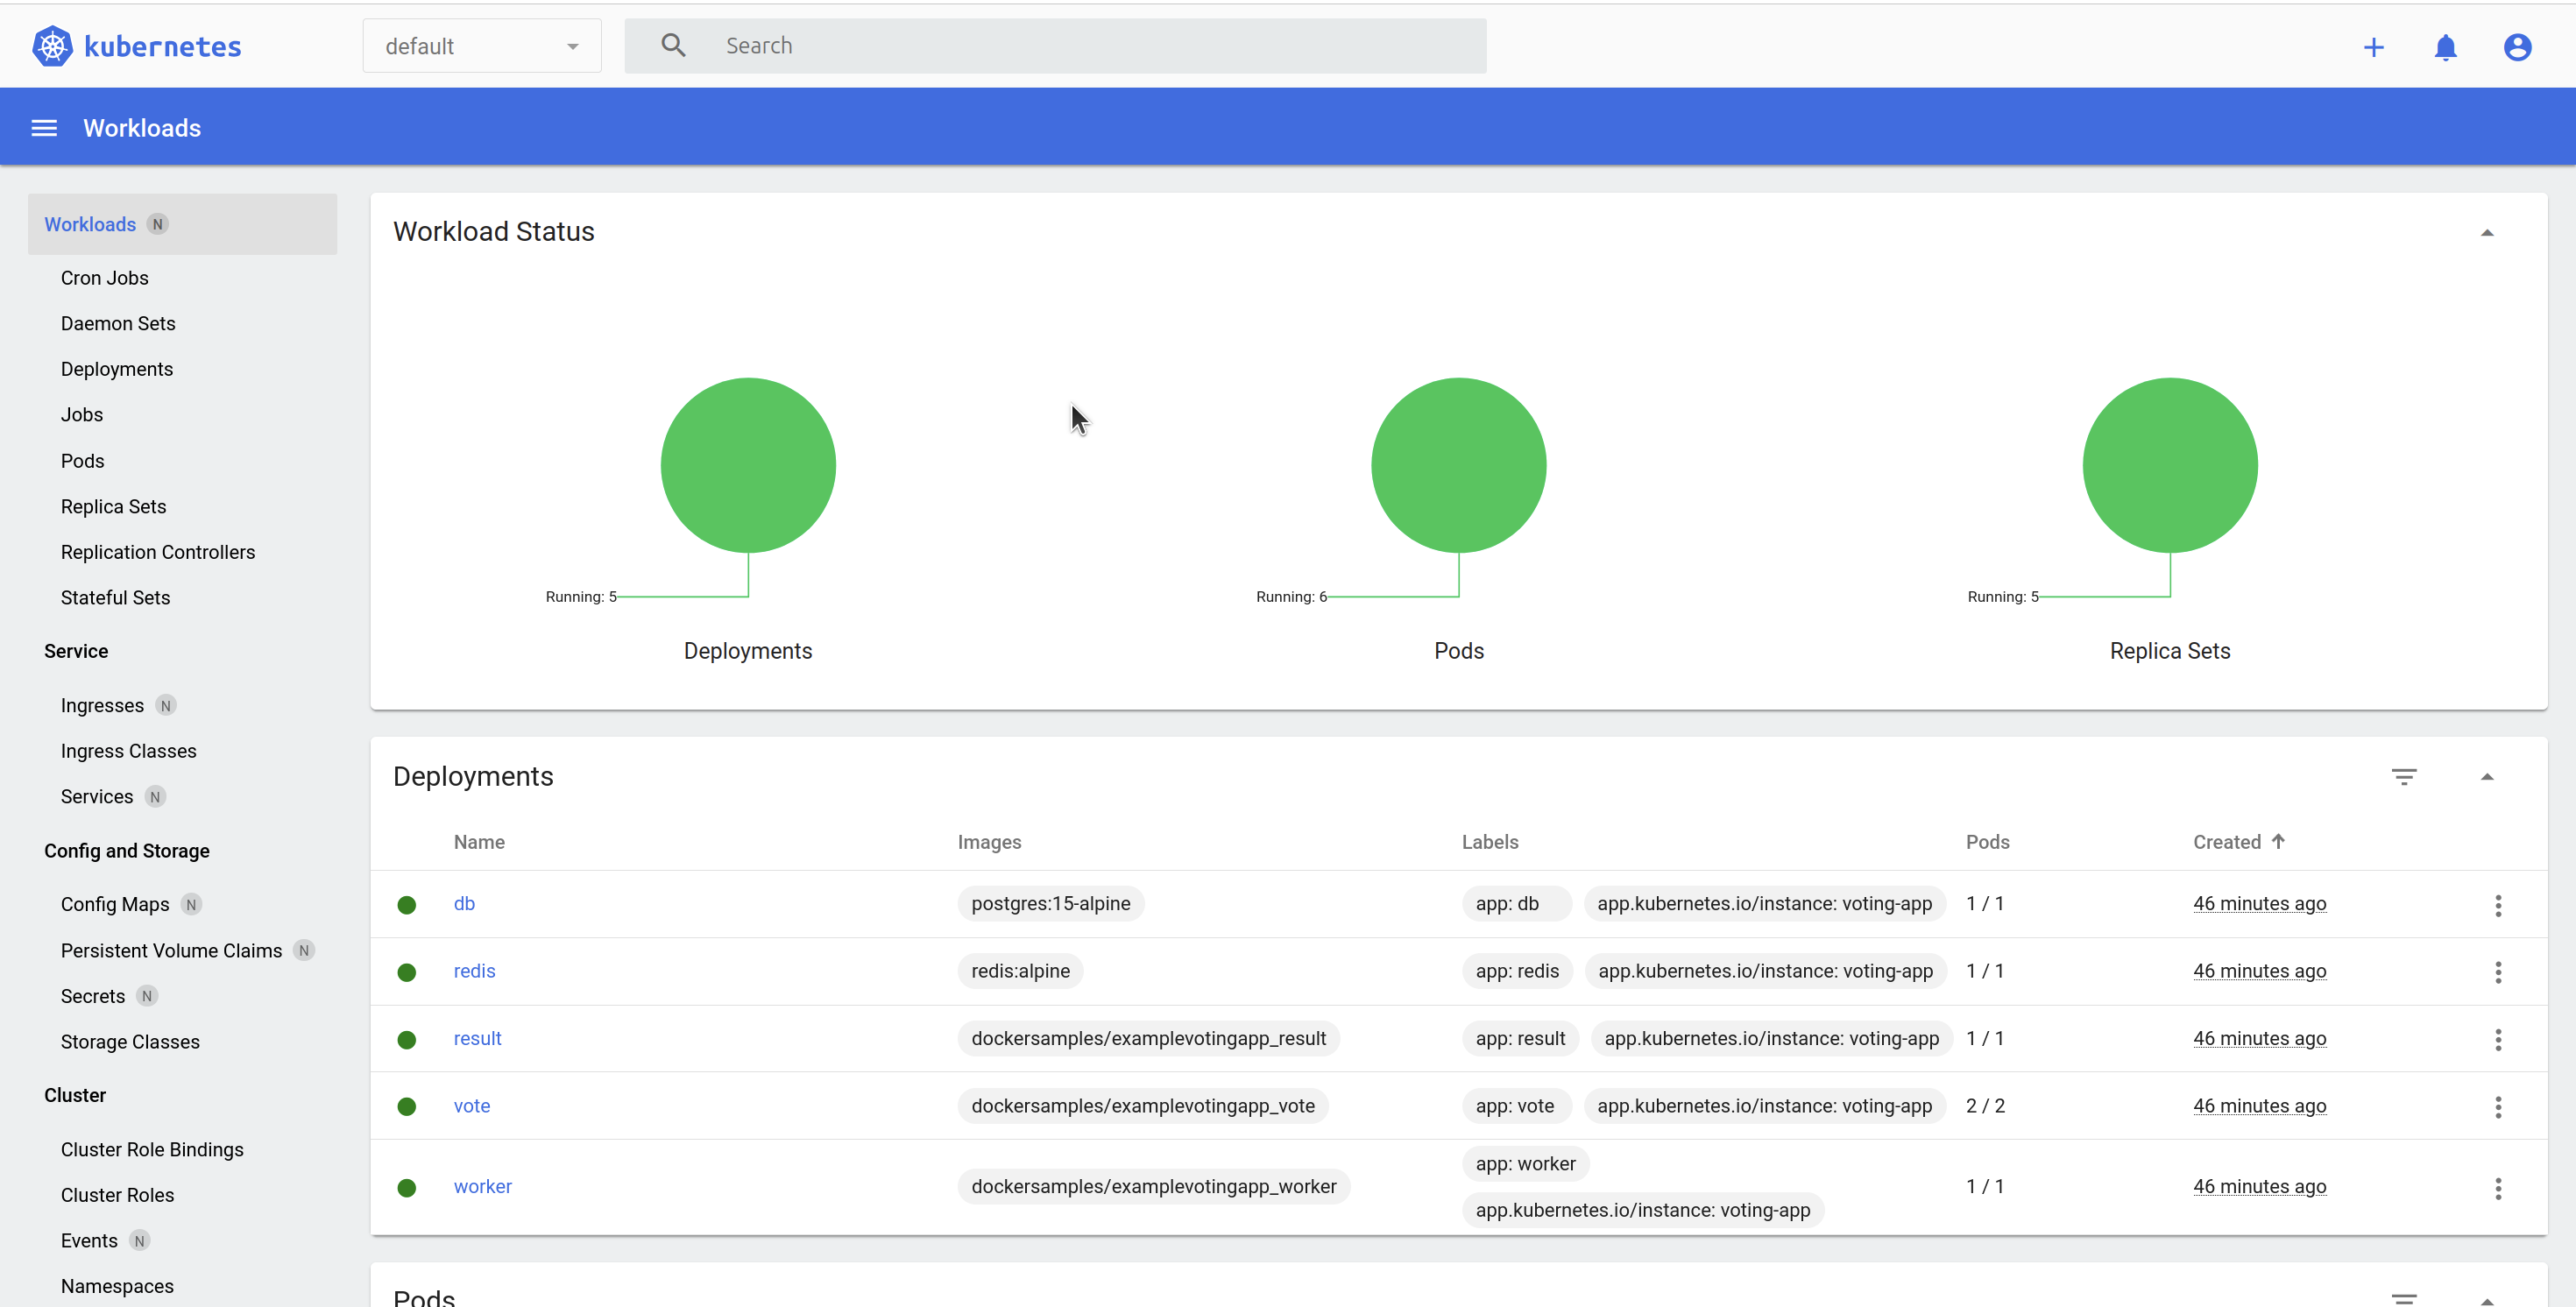
Once logged in, you’ll have a graphical interface to:
View cluster resources like nodes, pods, and services.
Monitor workloads and deployments.
Manage namespaces, roles, and service accounts.
💡 Visualising data using Prometheus and Grafana
Now that our application is running on the Kind Kubernetes cluster, it's time to install Helm, which will help us deploy Prometheus and Grafana in our cluster.
🛠 Installing Helm (Kubernetes Package Manager)
Helm is a powerful package manager for Kubernetes that simplifies the installation of complex applications. We will use Helm to install kube-prometheus-stack, which includes Prometheus, Grafana, and Alertmanager.
Navigate to the commands directory (inside the cloned repo):
cd ~/k8s-kind-voting-app/kind-clusterRun the following commands to install Helm:
 curl -fsSL -o get_helm.sh https://raw.githubusercontent.com/helm/helm/main/scripts/get-helm-3
 chmod 700 get_helm.sh
 ./get_helm.sh
This script will download and install Helm 3 on your EC2 instance.
📥 Installing Prometheus & Grafana with Helm
Once Helm is installed, we can use it to install the kube-prometheus-stack. This stack includes Prometheus (for metric collection) and Grafana (for visualization).
Add the required Helm repositories:
 helm repo add prometheus-community https://prometheus-community.github.io/helm-charts
 helm repo add stable https://charts.helm.sh/stable
 helm repo update
Create a separate namespace for monitoring:
kubectl create namespace monitoringInstall the kube-prometheus-stack using Helm:
 helm install kind-prometheus prometheus-community/kube-prometheus-stack --namespace monitoring \
 --set prometheus.service.nodePort=30000 \
 --set prometheus.service.type=NodePort \
 --set grafana.service.nodePort=31000 \
 --set grafana.service.type=NodePort \
 --set alertmanager.service.nodePort=32000 \
 --set alertmanager.service.type=NodePort \
 --set prometheus-node-exporter.service.nodePort=32001 \
 --set prometheus-node-exporter.service.type=NodePort
This command deploys Prometheus, Grafana, Alertmanager, and other monitoring components into the monitoring namespace.
Verify the deployment:
kubectl get svc -n monitoringEnsure that all services are up and running. If some pods are still initializing, wait a few minutes and re-run the command.
🌍 Exposing Prometheus and Grafana Services
Once all pods are running, we need to expose the Prometheus and Grafana services so we can access them via our browser.
Run the following port-forwarding commands:
kubectl port-forward svc/kind-prometheus-kube-prome-prometheus -n monitoring 9090:9090 --address=0.0.0.0 &
kubectl port-forward svc/kind-prometheus-grafana -n monitoring 3000:80 --address=0.0.0.0 &
Prometheus will be available at
http://<EC2-IP>:9090
Grafana will be available at
http://<EC2-IP>:3000
Make sure to open port 9090, 5000, 3000 on your security groups

🔹 Use your EC2 instance's public IP to access the dashboards in your web browser.
Step 5: Running Prometheus Queries and Generating Traffic
Now that Prometheus is up and running, let’s verify that it’s correctly collecting Kubernetes cluster metrics.
🛠 Running Prometheus Queries
Open Prometheus Dashboard in your browser:
http://<EC2-IP>:9090Click on the "Graph" tab and enter the following queries one by one to check system metrics:
✅ CPU Usage (%)
sum (rate (container_cpu_usage_seconds_total{namespace="default"}[1m])) / sum (machine_cpu_cores) * 100This query calculates the CPU usage percentage of all containers running in the default namespace.
✅ Memory Usage by Pod
sum (container_memory_usage_bytes{namespace="default"}) by (pod)This query shows memory consumption per pod.
✅ Network Data Received by Pod
sum(rate(container_network_receive_bytes_total{namespace="default"}[5m])) by (pod)This helps monitor incoming network traffic per pod.
✅ Network Data Transmitted by Pod
sum(rate(container_network_transmit_bytes_total{namespace="default"}[5m])) by (pod)This checks outgoing network traffic from each pod.
Since we haven’t started the application yet, most of the metrics will be static. To generate real-time data, let’s simulate some traffic.
🚀 Generating Traffic by Interacting with the Application
Now, we will expose the Vote application service and interact with it to see real-time metric updates.
Expose the Vote application service:
kubectl port-forward service/vote 5000:5000 --address=0.0.0.0 &
Open your browser and navigate to:
http://<EC2-IP>:5000
Interact with the application by:
Casting votes
Refreshing the page
Submitting multiple requests
This will increase CPU, memory, and network usage, which will be reflected in Prometheus metrics.
- Go back to Prometheus and re-run the queries. You should now see dynamic changes in CPU, memory, and network metrics based on your interactions with the app!

Step 6: Visualizing Metrics in Grafana
Now that we have verified our metrics using Prometheus, it’s time to visualize them in Grafana for better insights.
🖥️ Accessing Grafana Dashboard
Open your browser and navigate to:
http://<EC2-IP>:3000Login to Grafana:
Username:
adminPassword:
prom-operator
(You can change the password later in the Grafana settings for better security.)
📊 Importing a Pre-Built Dashboard
Grafana allows us to import pre-configured dashboards for Prometheus metrics.
Navigate to Dashboard Import:
Click on Dashboards → New
Click on Import Dashboard
Enter Dashboard ID:
In the Import via Grafana.com section, enter the dashboard ID:
15661
Set the Data Source as Prometheus
Click Import, and your Grafana Dashboard will now display live metrics from Prometheus 🎉

💡 Conclusion
In this blog, we embarked on an exciting journey to build a fully functional DevOps pipeline from scratch using AWS EC2, Kind, and ArgoCD. Starting with provisioning an EC2 instance, we set up essential tools like Docker, Kind, and kubectl to create a Kubernetes cluster. We then deployed a Voting App, automated its continuous delivery using ArgoCD, and enhanced cluster management with the Kubernetes Dashboard.
This project demonstrates how seamlessly DevOps tools can integrate to simplify deployment workflows and provide real-time monitoring. By leveraging GitOps principles with ArgoCD, we ensured that our application stays synchronized with its source code repository, offering reliability and efficiency in managing deployments.
Whether you are a student, an aspiring DevOps engineer, or a seasoned professional, this hands-on approach to deploying and managing Kubernetes applications equips you with valuable insights into the world of CI/CD pipelines and container orchestration.
Now it’s your turn to try this project and explore further possibilities with Kubernetes and DevOps tools. Remember, the only limit is your curiosity and willingness to learn!
🚀 For more informative blog, Follow me on Hashnode, X(Twitter) and LinkedIn.
Till then, Happy Coding!!
Happy Learning! 🎉
Subscribe to my newsletter
Read articles from Pravesh Sudha directly inside your inbox. Subscribe to the newsletter, and don't miss out.
Written by

Pravesh Sudha
Pravesh Sudha
Bridging critical thinking and innovation, from philosophy to DevOps.