How to Deploy a Static Website Using Azure Storage and Visual Studio Code
 Francis Chukwu
Azure Storage offers a reliable and scalable way to host static websites. This guide walks you through the process of setting up static website hosting and deploying your website using Visual Studio Code, ensuring a smooth and efficient workflow.
Requirements
Before getting started, ensure you have the following:
1. An Azure Subscription:
To use Azure Storage, you need an active Azure subscription. If you don’t have one, you can [create a free Azure account](https://azure.microsoft.com/free/) to get started.
2. Azure Storage Account:
All interactions with Azure Storage require a storage account. Create one via the Azure portal, Azure PowerShell, or Azure CLI. If you’re unfamiliar with this process, check out the [Azure Storage account creation guide](https://learn.microsoft.com/en-us/azure/storage/common/storage-account-create).
3. Visual Studio Code:
Install [Visual Studio Code](https://code.visualstudio.com/), a powerful and flexible code editor, which you’ll use to build and deploy your static website.
Setup Static Website Hosting
To set up static website hosting in the Azure portal, the first step is to configure your storage account. When static website hosting is enabled, Azure Storage automatically creates a container named $web to store all the files for your static website.
Start by logging into the Azure portal through your web browser.
Next, locate and select your storage account, then navigate to its overview page
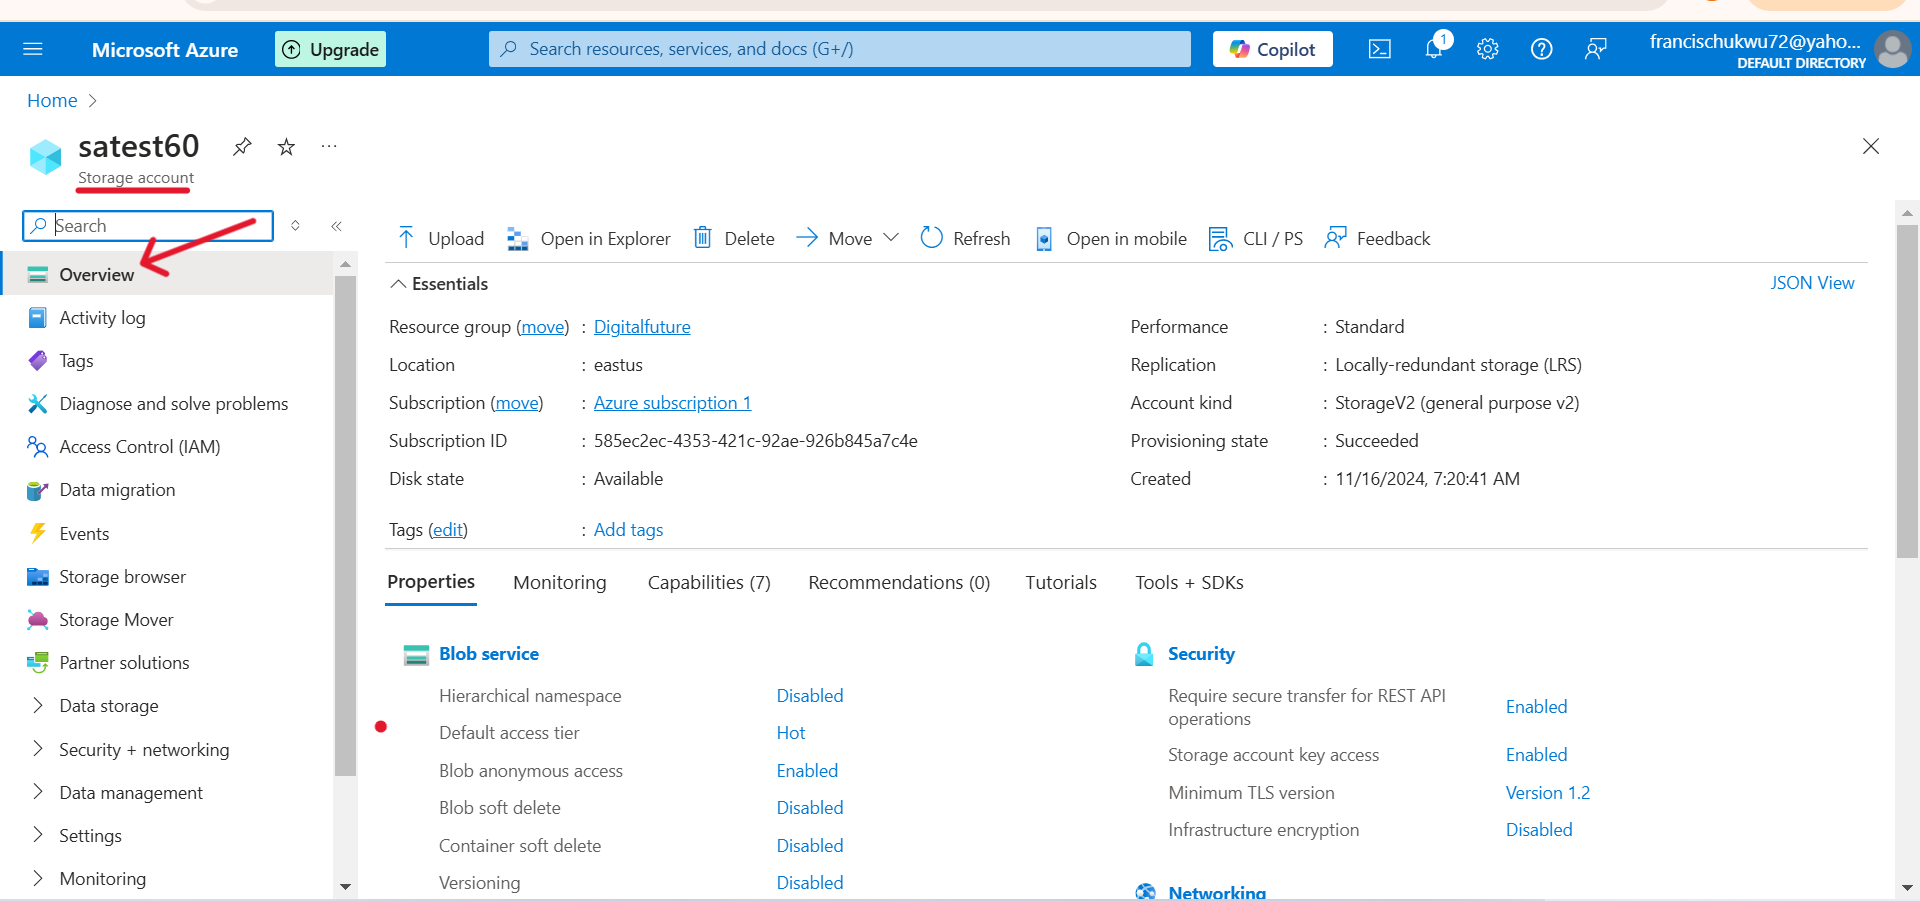
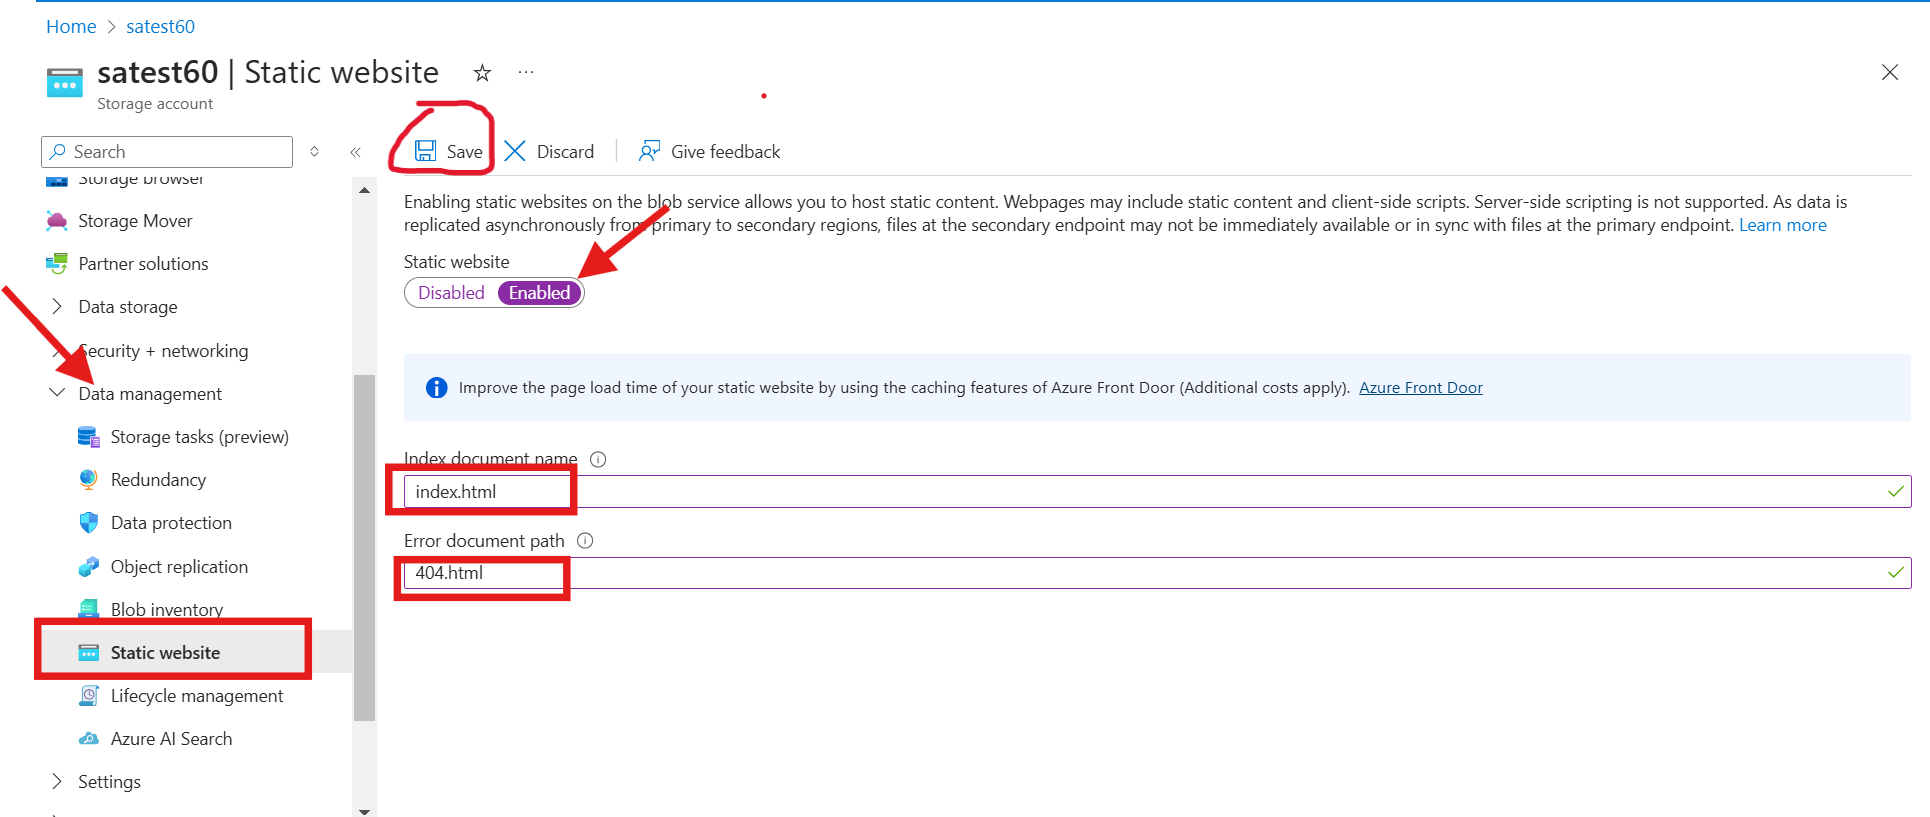
Scroll down to the Data Management section and select Static website to open the configuration page.
Switch the toggle to Enabled to activate static website hosting for your storage account.
In the Index document name field, enter
index.htmlas the default page to display when users visit the root of your static website.In the Error document path field, enter
404.htmlas the default page to show when users attempt to access a non-existent page.Click Save. Once saved, the Azure portal will display the endpoint URL for your static website.
Deploy Your Website
Create an empty folder named "portfolio" on your local file system.
Launch Visual Studio Code and open the newly created folder through the Explorer panel.
In the editor, open
index.html, make your desired edits, and save the file.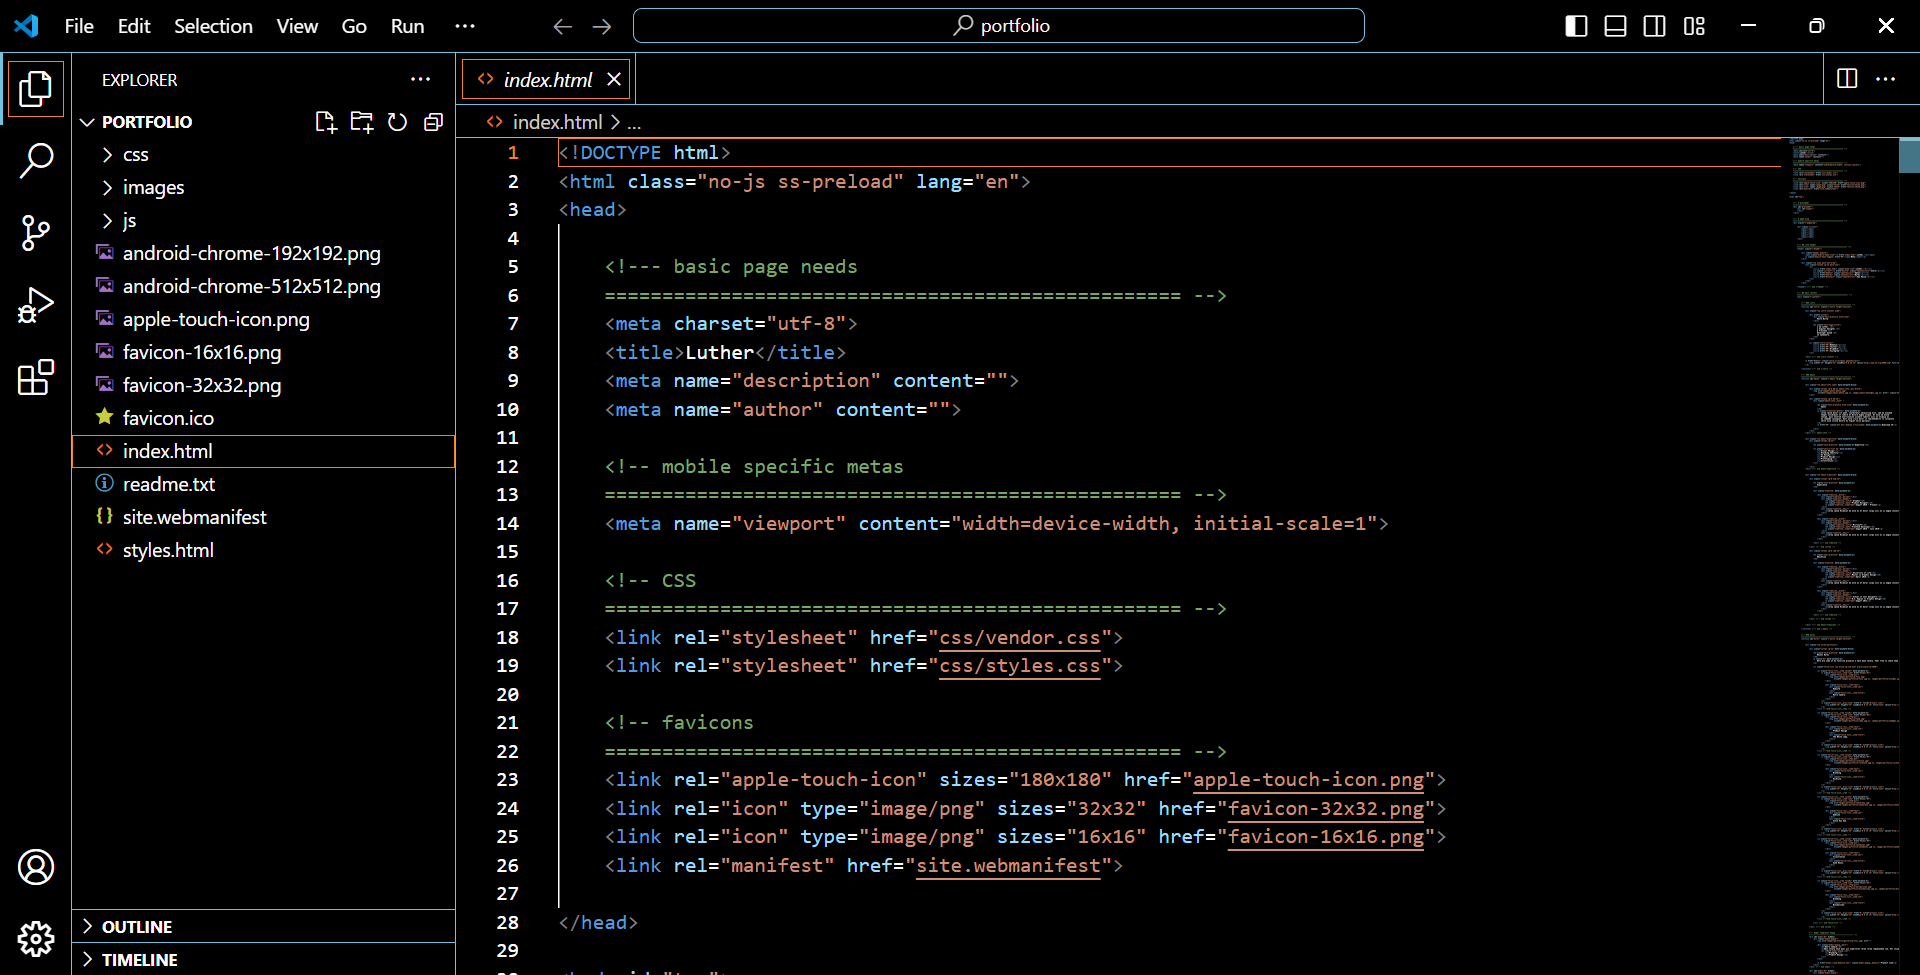
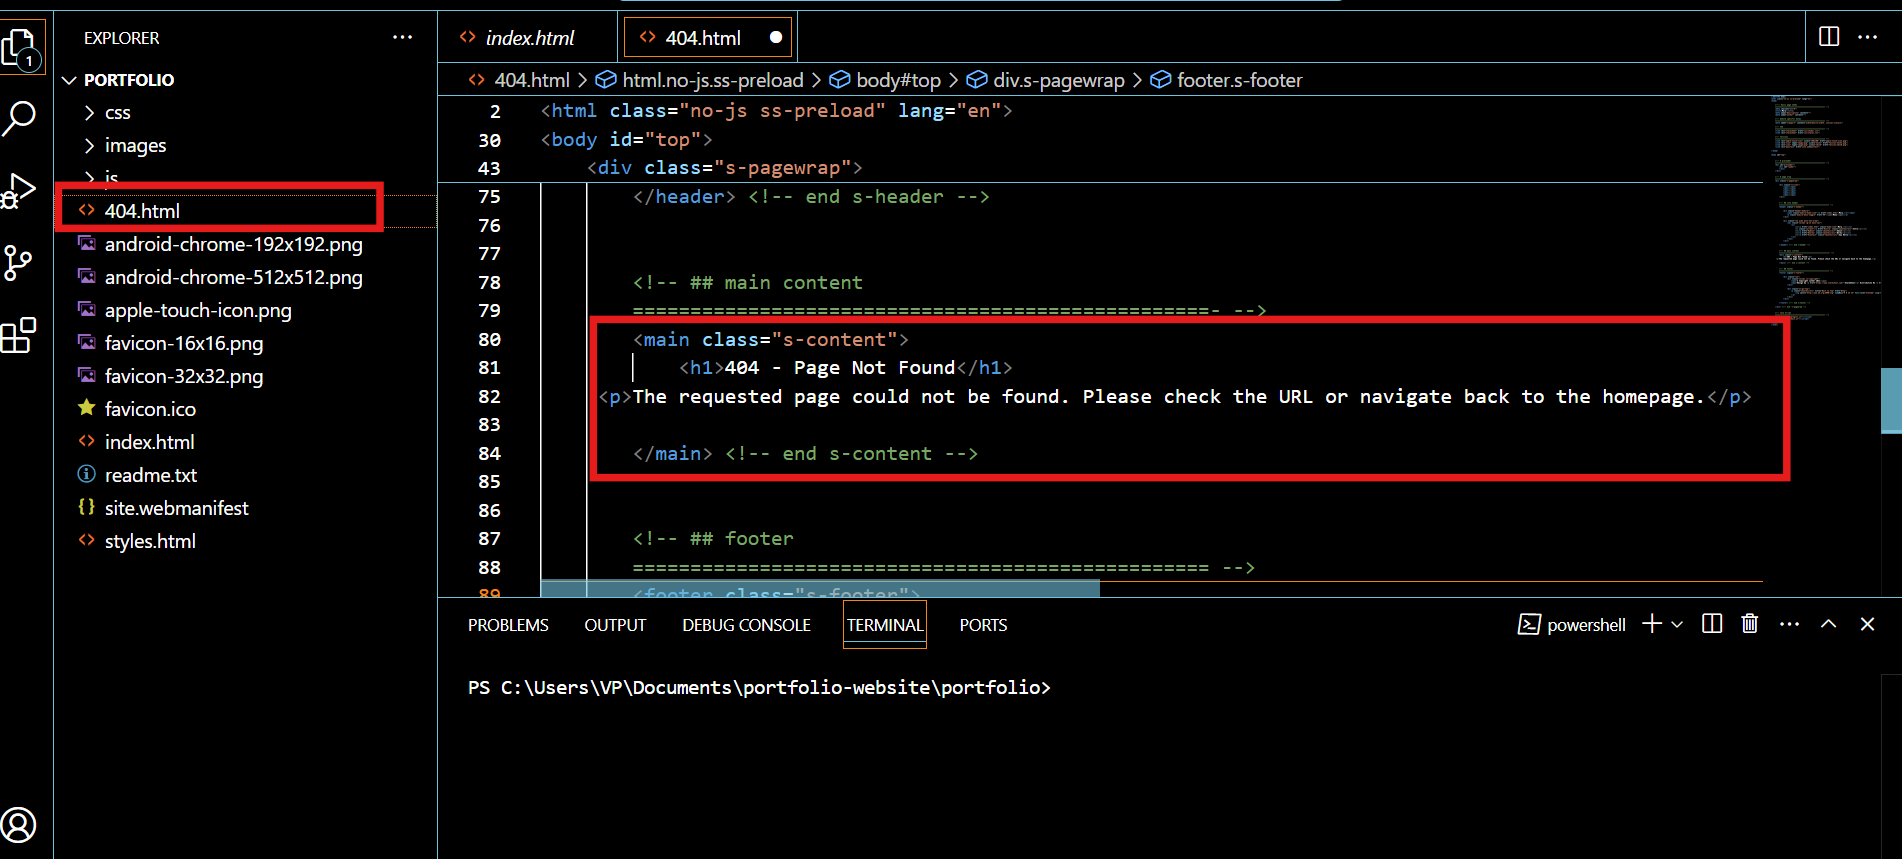
To generate the default error file, create a file named "404.html."
Upload files
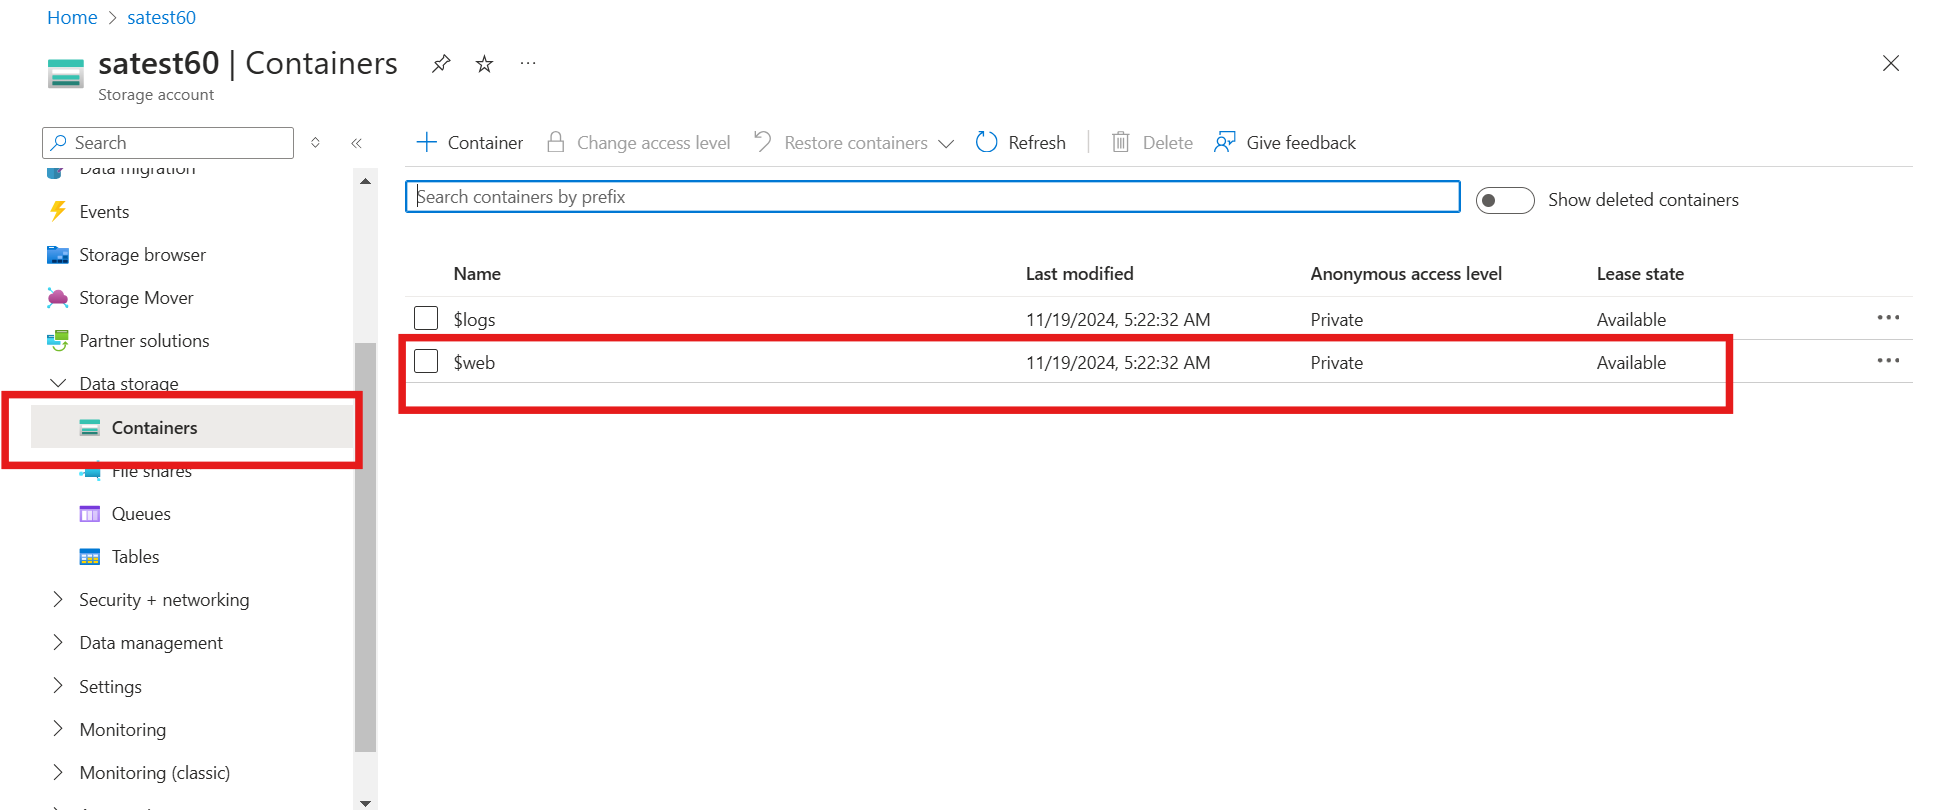
In the Azure portal, navigate to the storage account containing your static website. Select Containers in the left navigation pane to display the list of containers.
In the Containers pane, select the $web container to open the container's Overview pane.
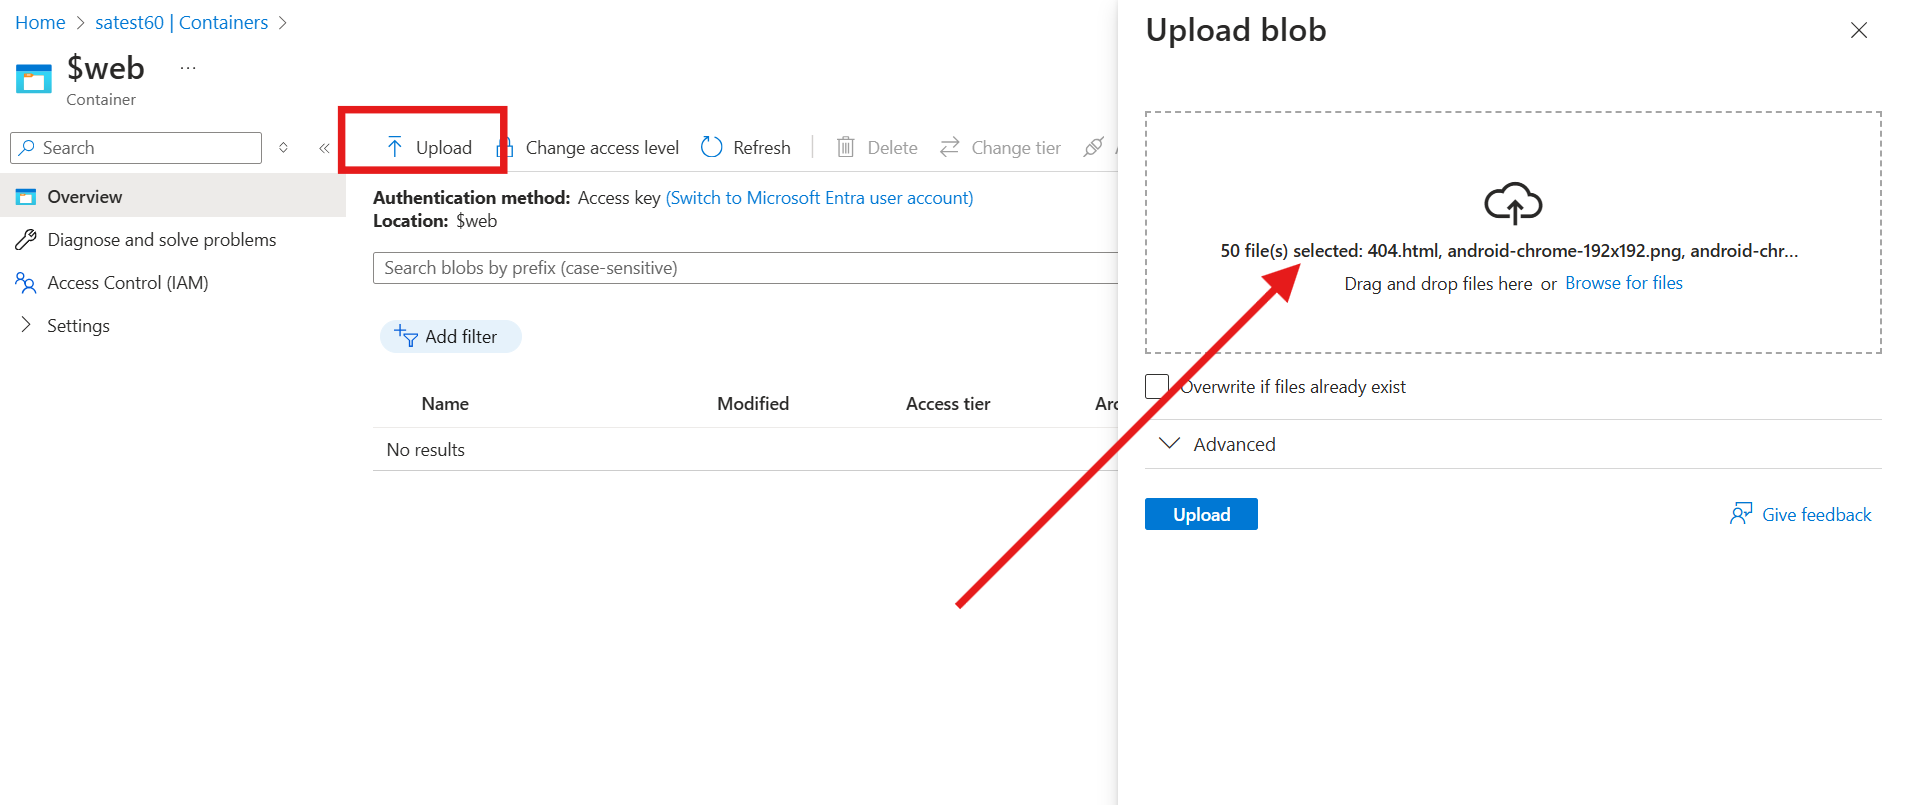
In the Overview pane, click the Upload icon to open the Upload blob pane. In the Files field of the Upload blob pane, click to open the file browser. Navigate to the file you wish to upload, select it, and click Open to populate the Files field. If needed, you can optionally check the Overwrite if files already exist checkbox.
Find the website URL
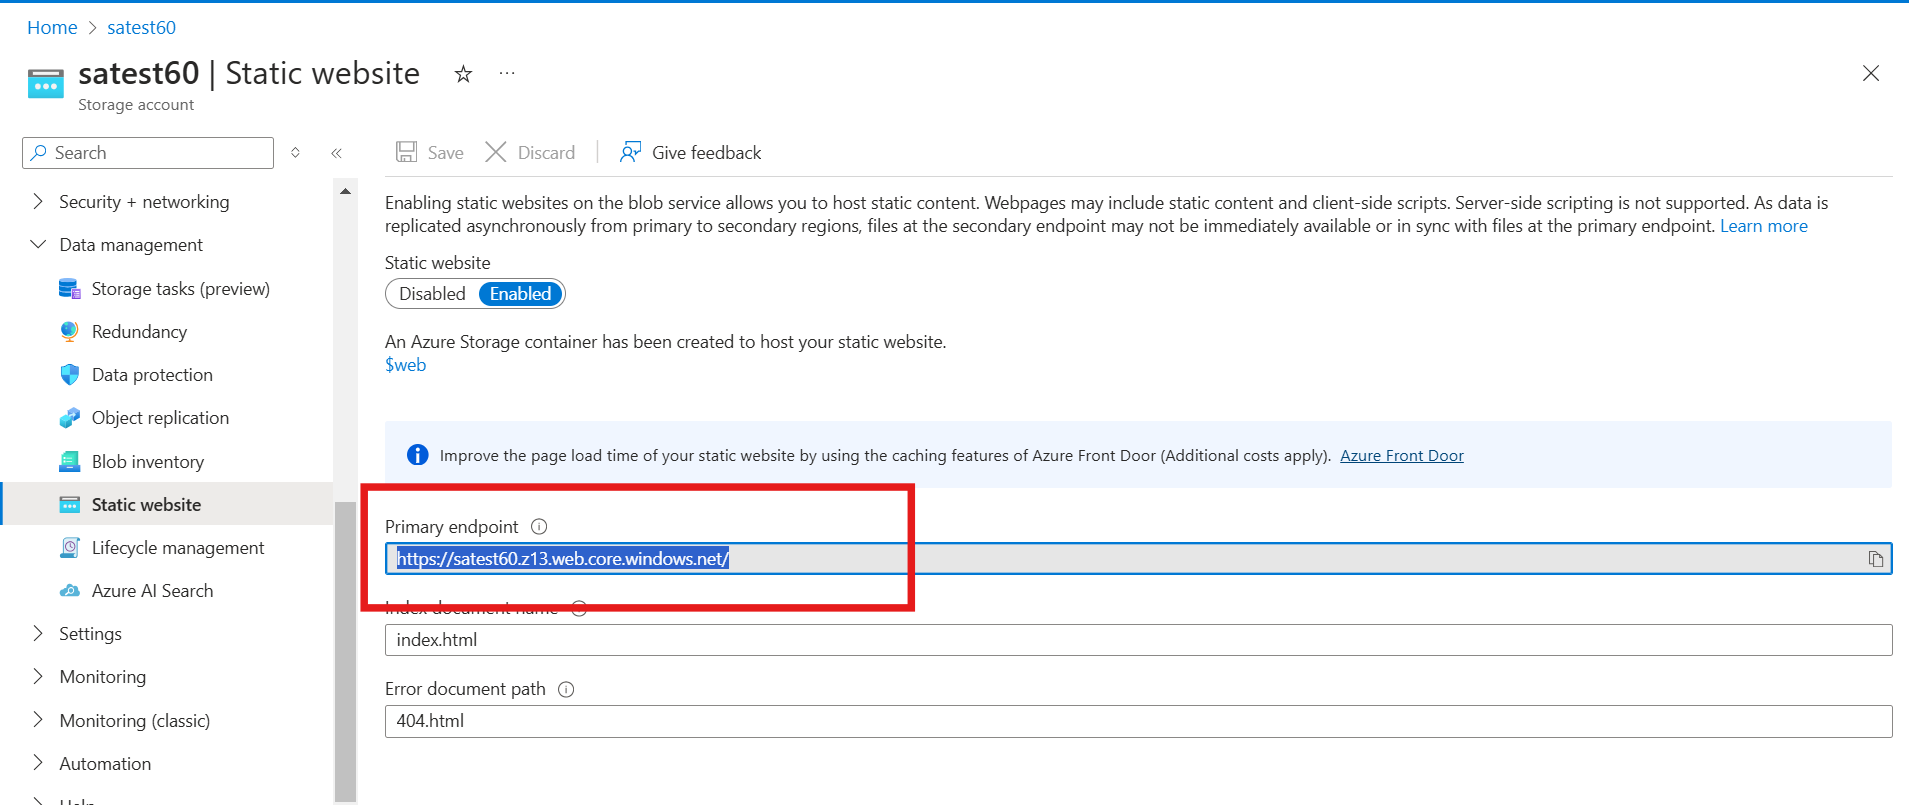
In the pane that appears beside the account overview page of your storage account, select Static Website. The URL of your site appears in the Primary endpoint field.
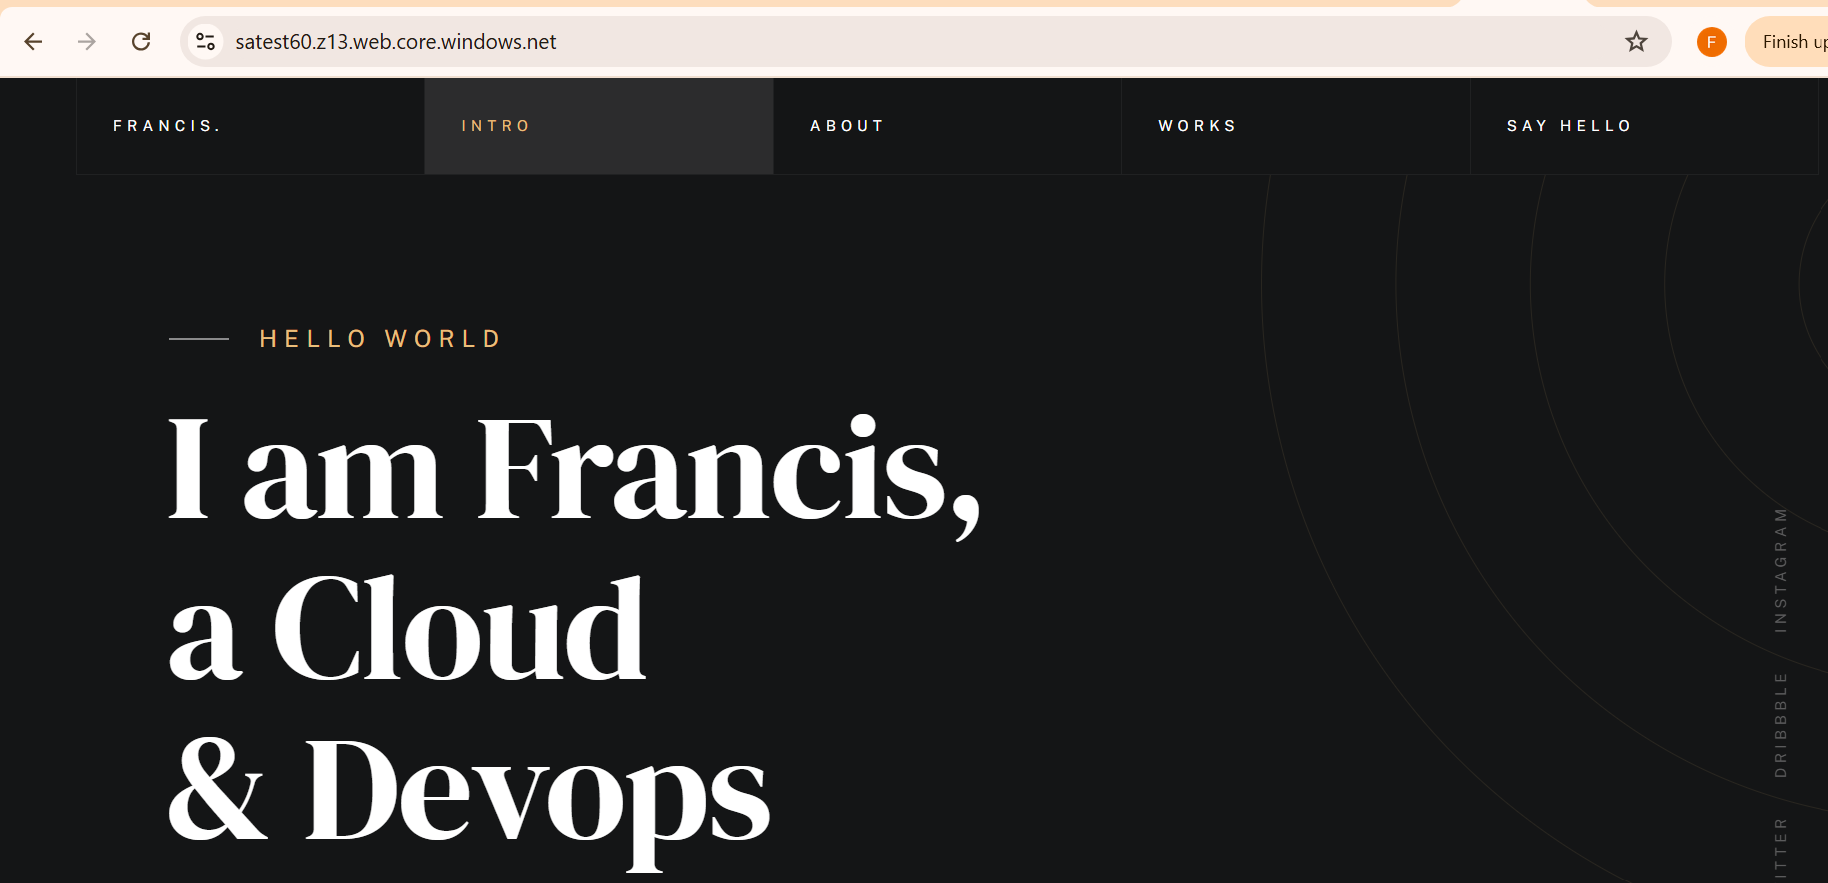
You can view the pages of your site from a browser by using the public URL of the website.

References
For more information, you can check out - https://learn.microsoft.com/en-us/azure/storage/blobs/storage-blob-static-website-host
Subscribe to my newsletter
Read articles from Francis Chukwu directly inside your inbox. Subscribe to the newsletter, and don't miss out.
Written by
