Streamlining Roles and Permissions Management with Hasura and Clerk
 Oussama Chahidi
Introduction:
In the world of modern web development, managing user roles and permissions effectively is key to building secure and scalable applications. Hasura, with its robust GraphQL capabilities, and Clerk, offering seamless authentication and user management, are two powerful tools that can simplify this process. When integrated, they provide a flexible and efficient way to control access to resources, ensuring users only interact with the parts of your app relevant to their roles. In this article, we’ll explore how to harness the combined power of Hasura and Clerk to implement a dynamic roles and permissions system that meets the demands of today’s complex applications. Whether you're building a small project or a large-scale platform, this guide will help you establish a solid foundation for secure and efficient user management.
Setup:
I'm gonna walk you step by step how to setup things.
Go the your clerk Dashboard
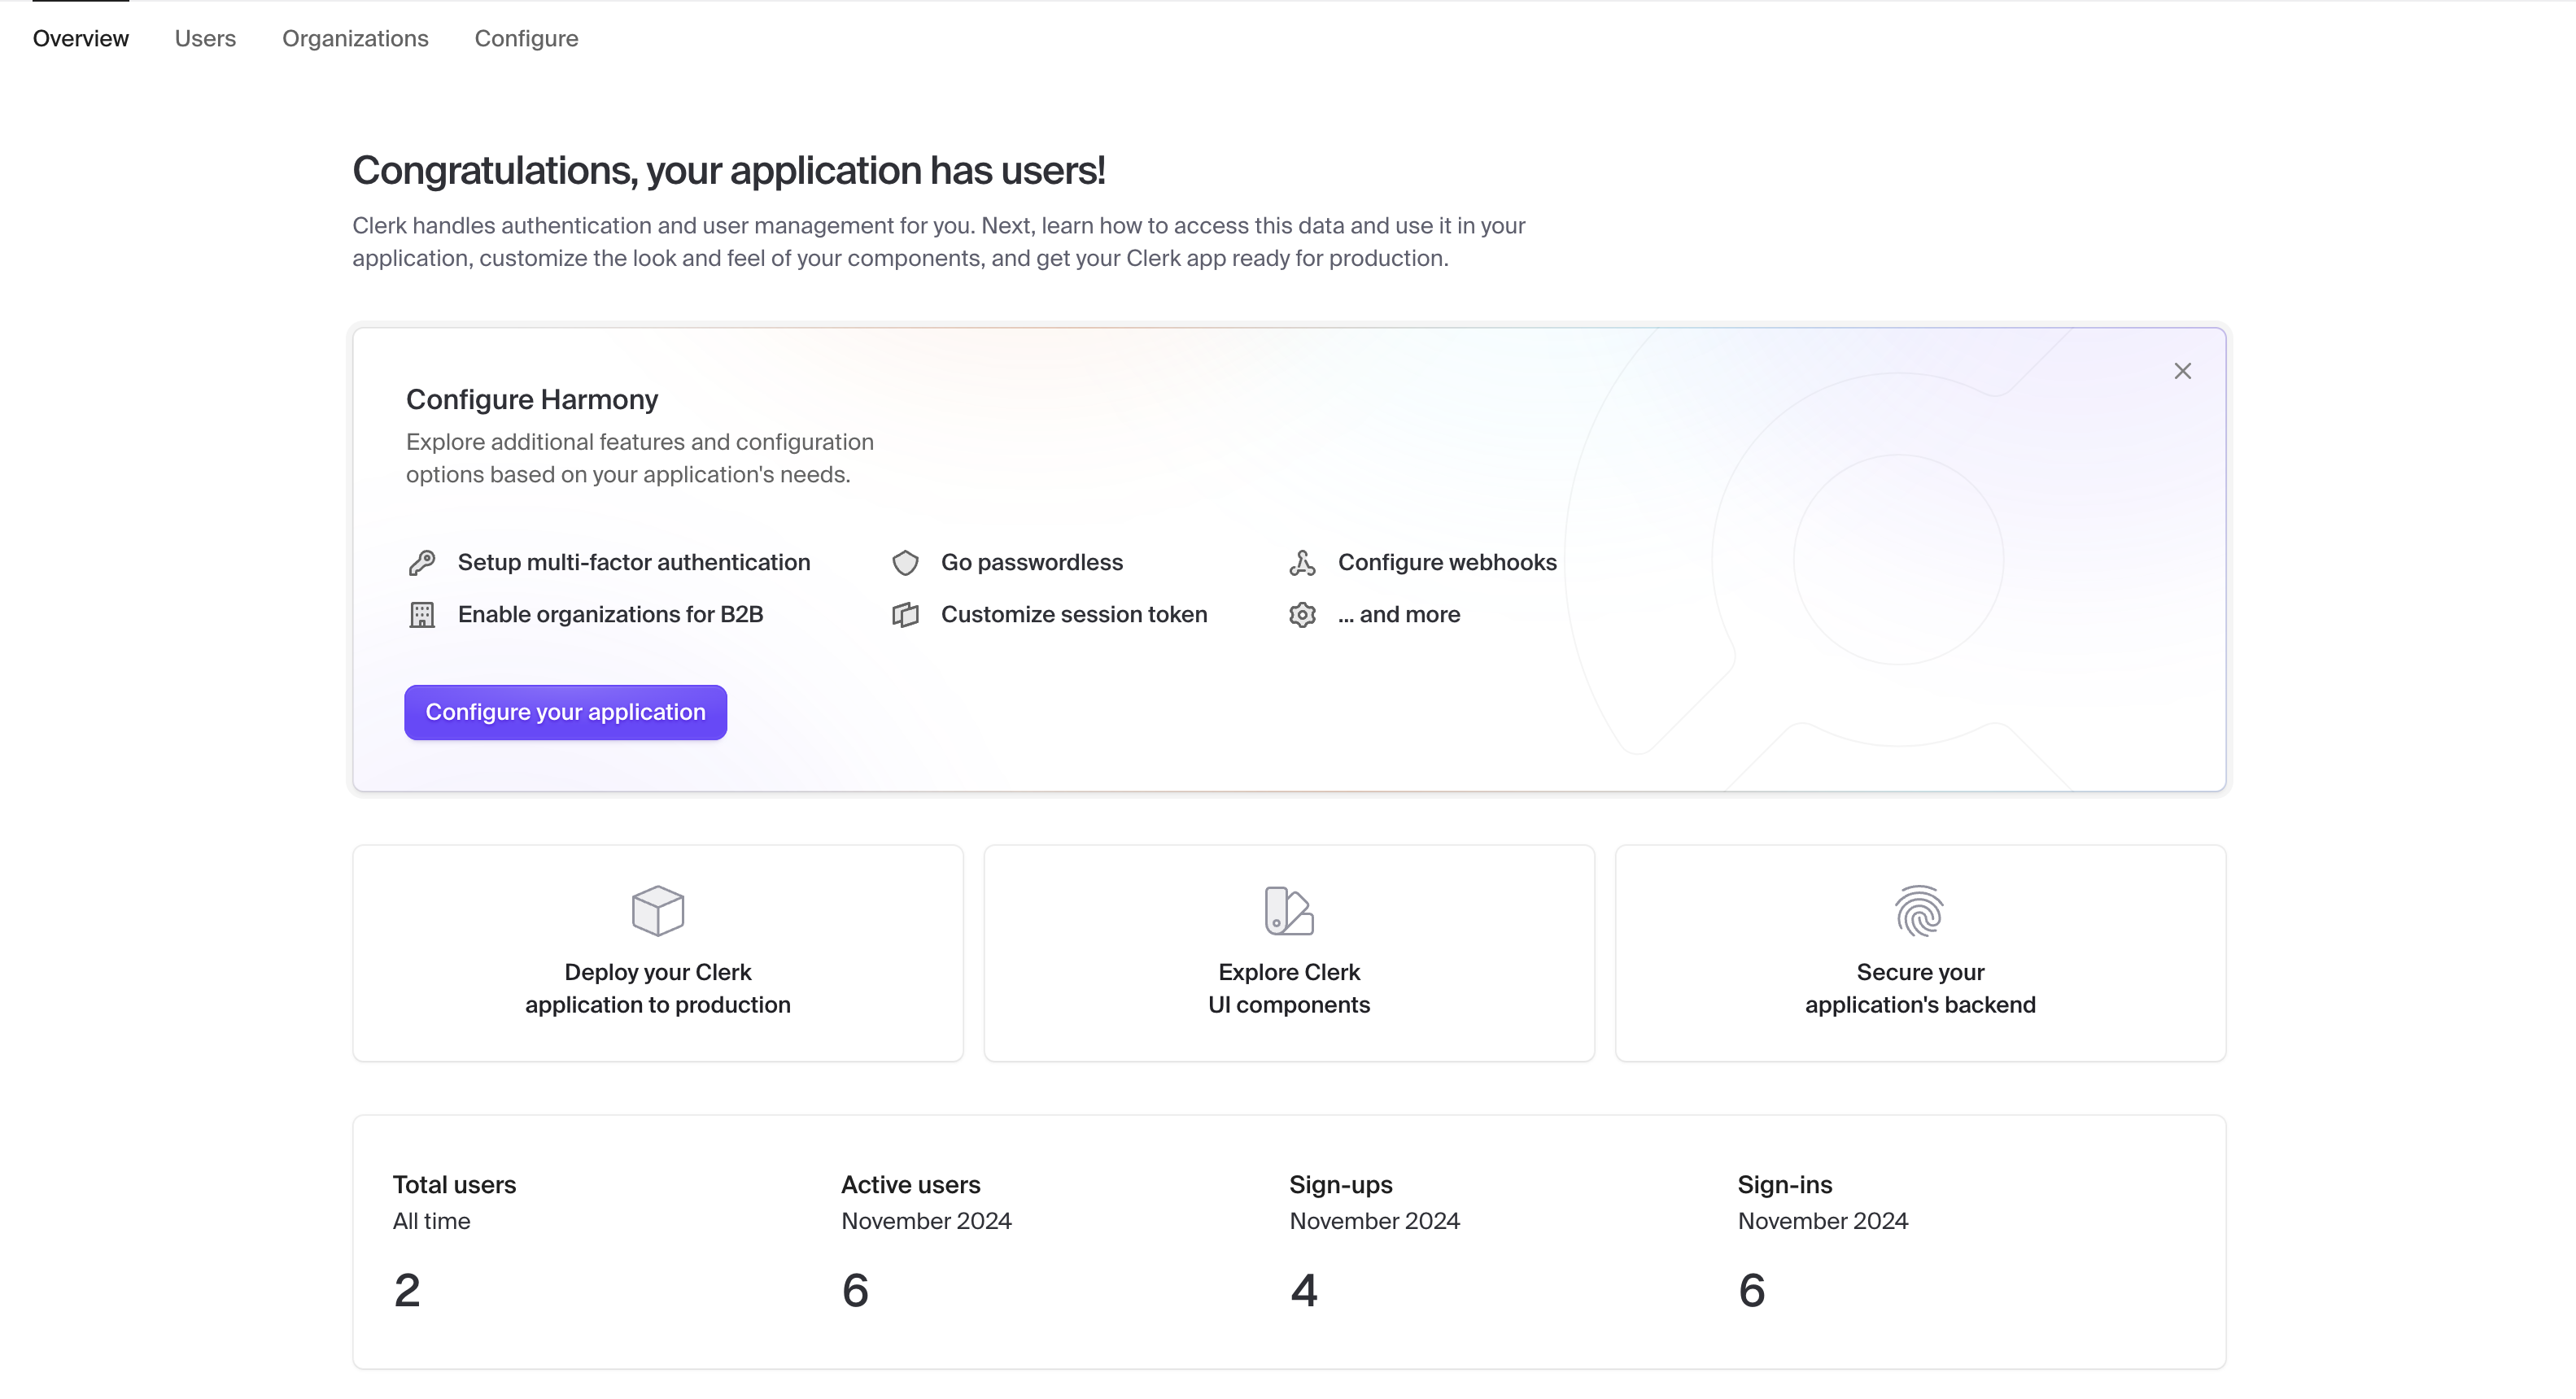
hit Configure your application button to see more settings
Setup JWT templates
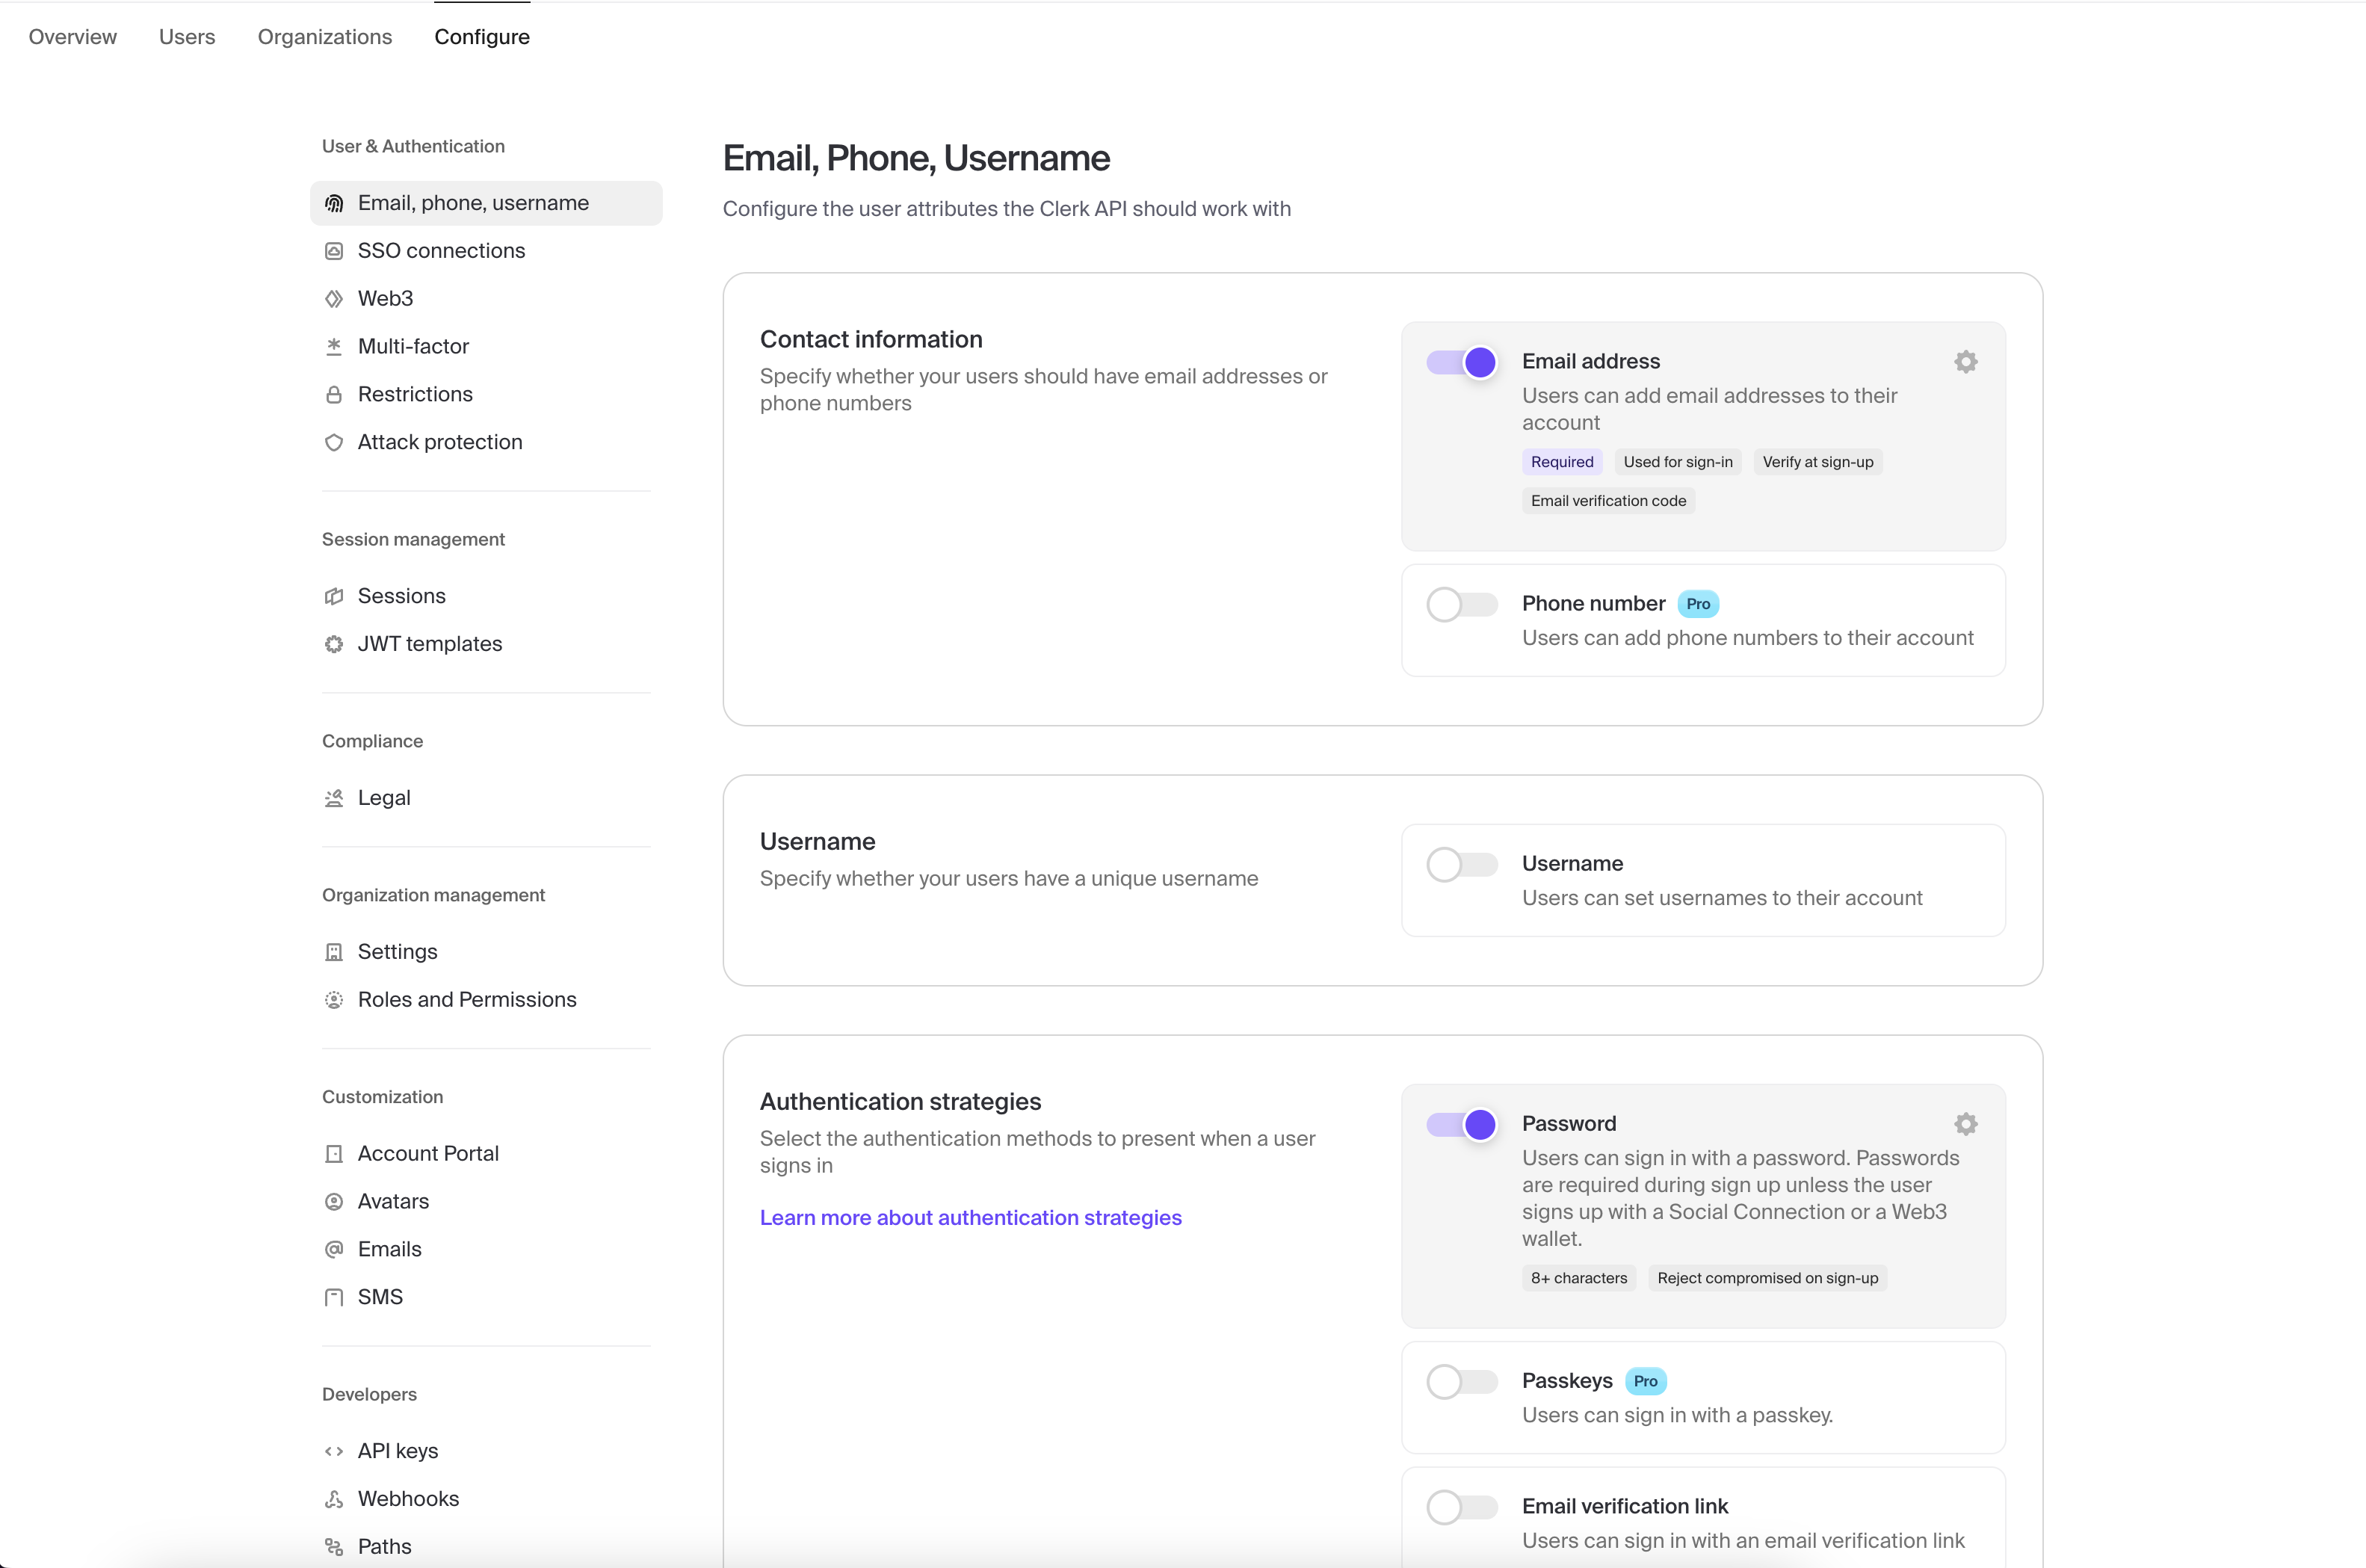
Click on JWT Template button in the side bar and you’ll get on this page
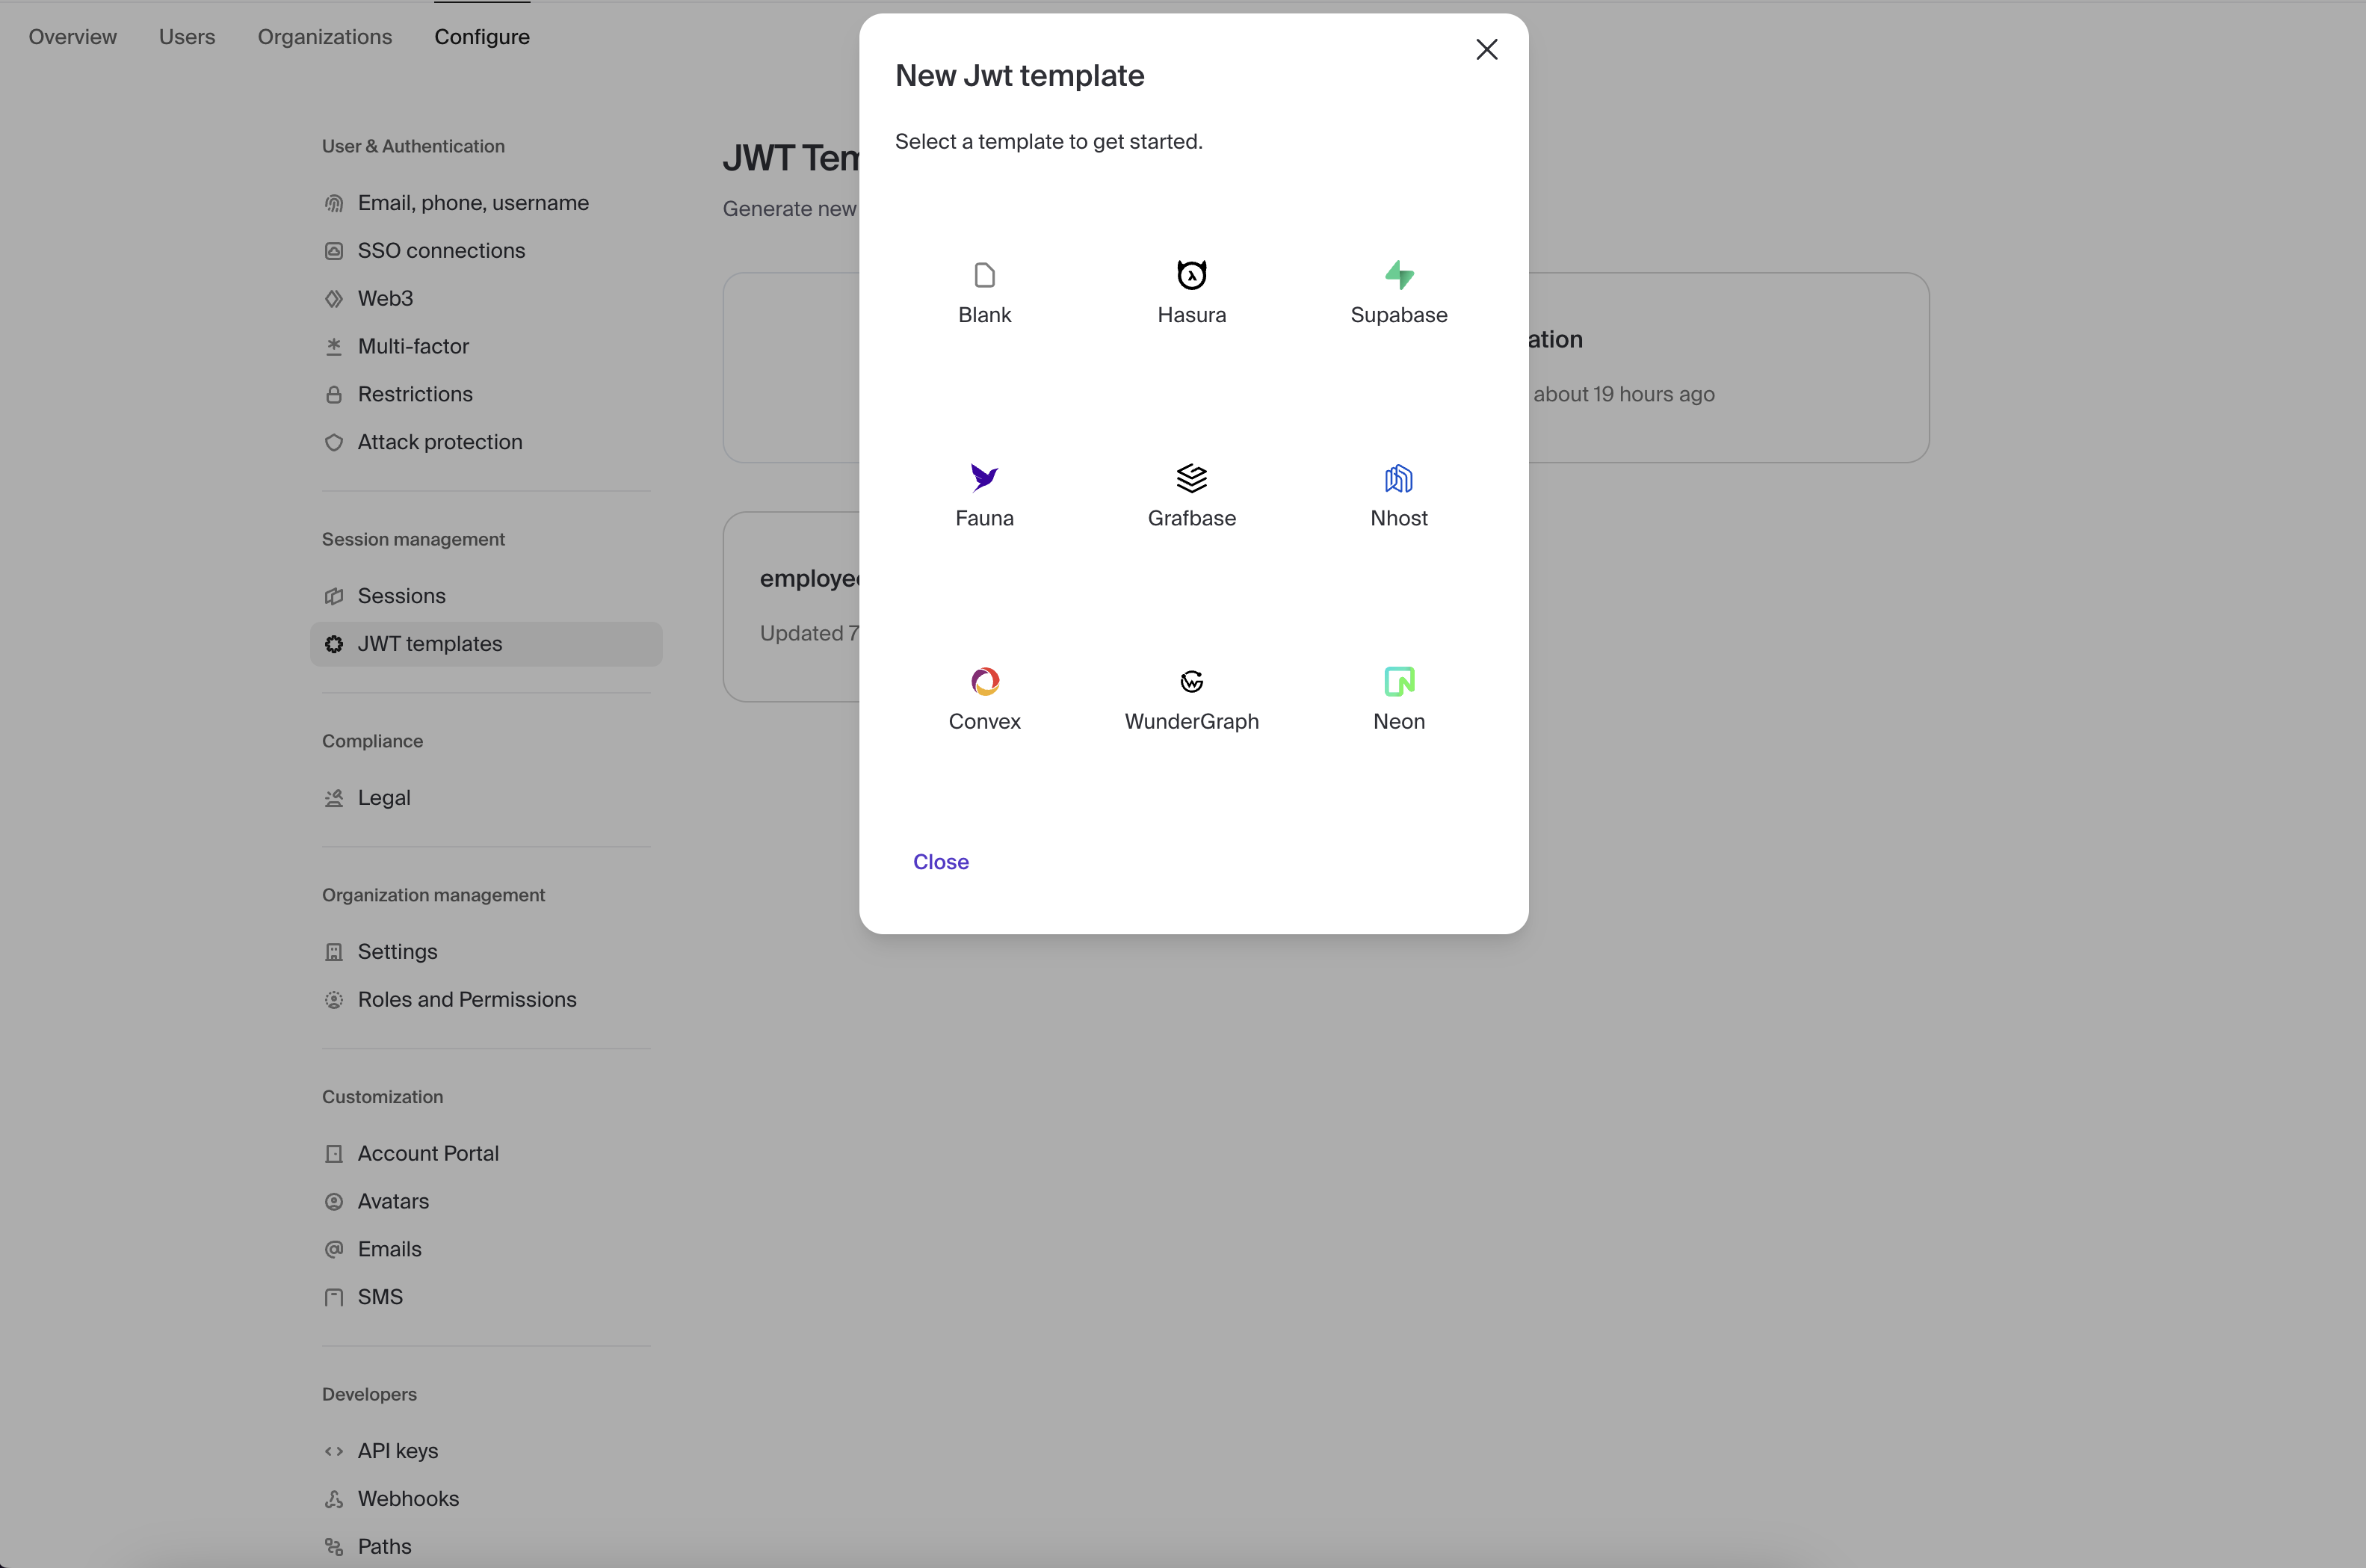
after clicking on New Template button, and choose Hasura.
Configure your JWT template
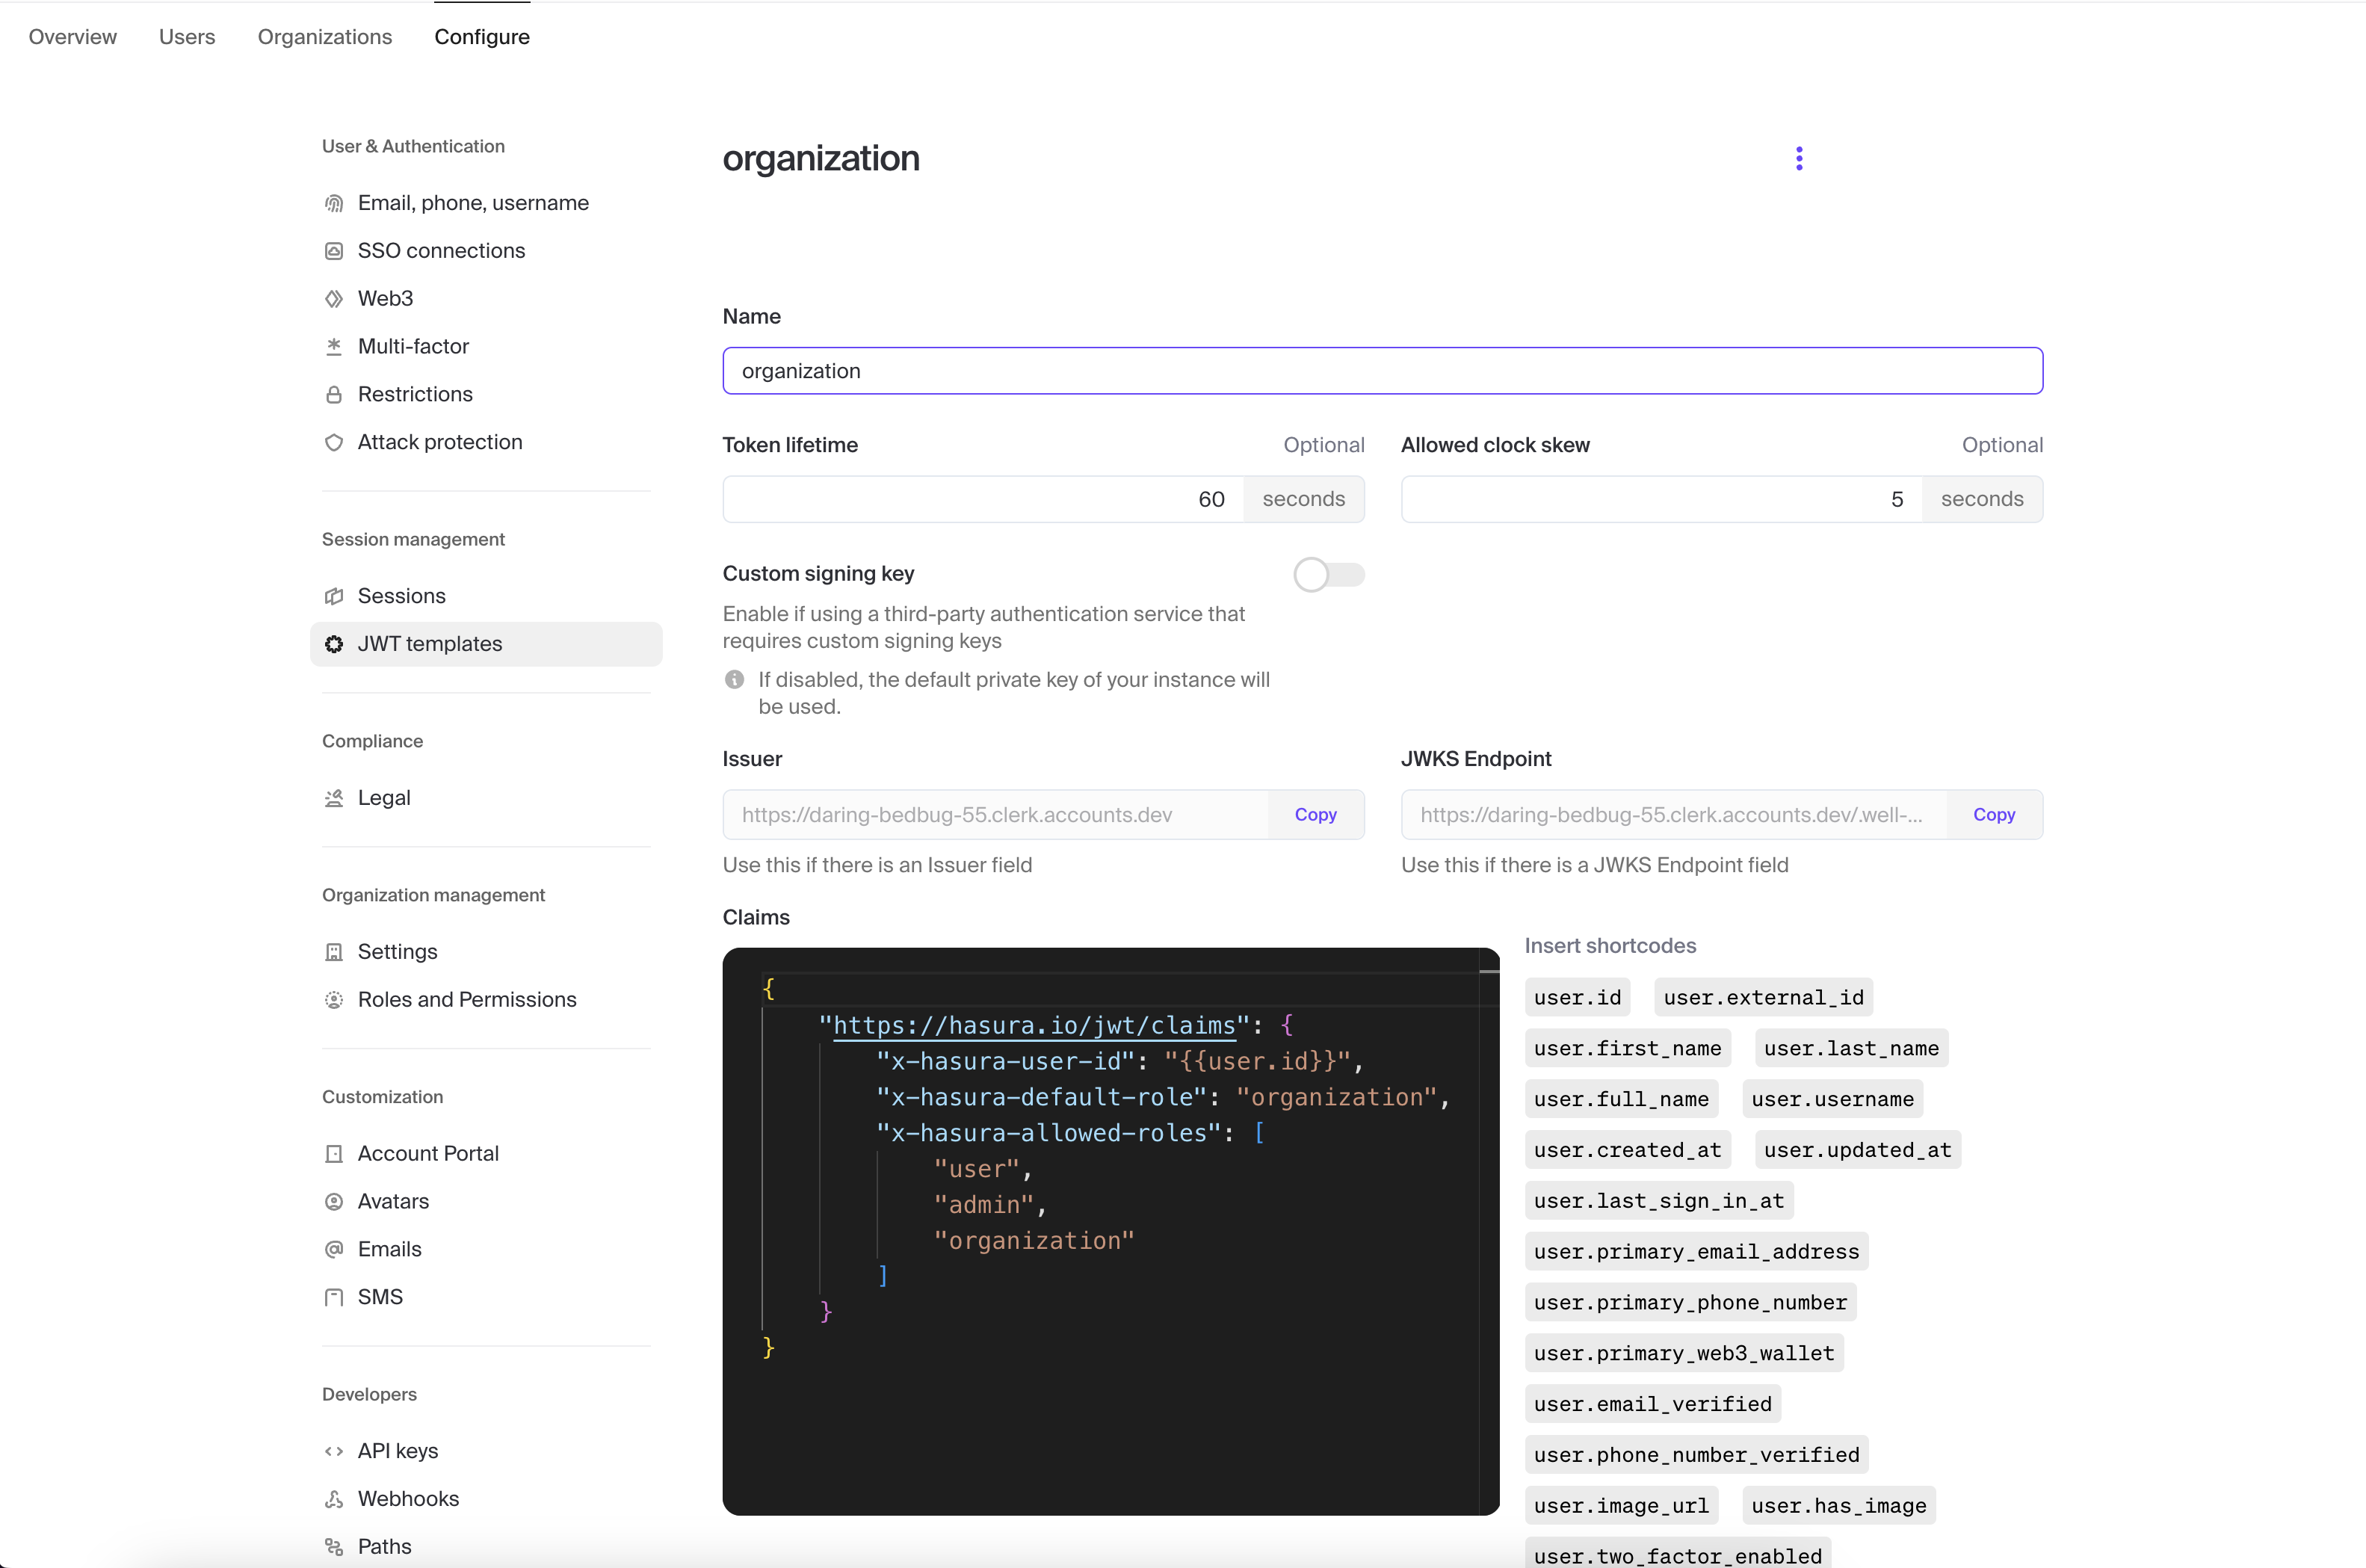
You can give it any name you want and the data inside the token claims. after finishing hit save and copy the JWKS Endpoints you gonna need it.
Config Hasura Project
in the Hasura project dashboard, hit the ⚙️ button on the top-right of your project


on the side bar , click on Env vars then new env button
Search for HASURA_GRAPHQL_JWT_SECRET, then pass the jwt endoints
{ "jwk\_url": "the\_url\_your copied on step 3" }Great, We are almost done ! Now go your hasura console and choose any table you want to start with.
Set Permission
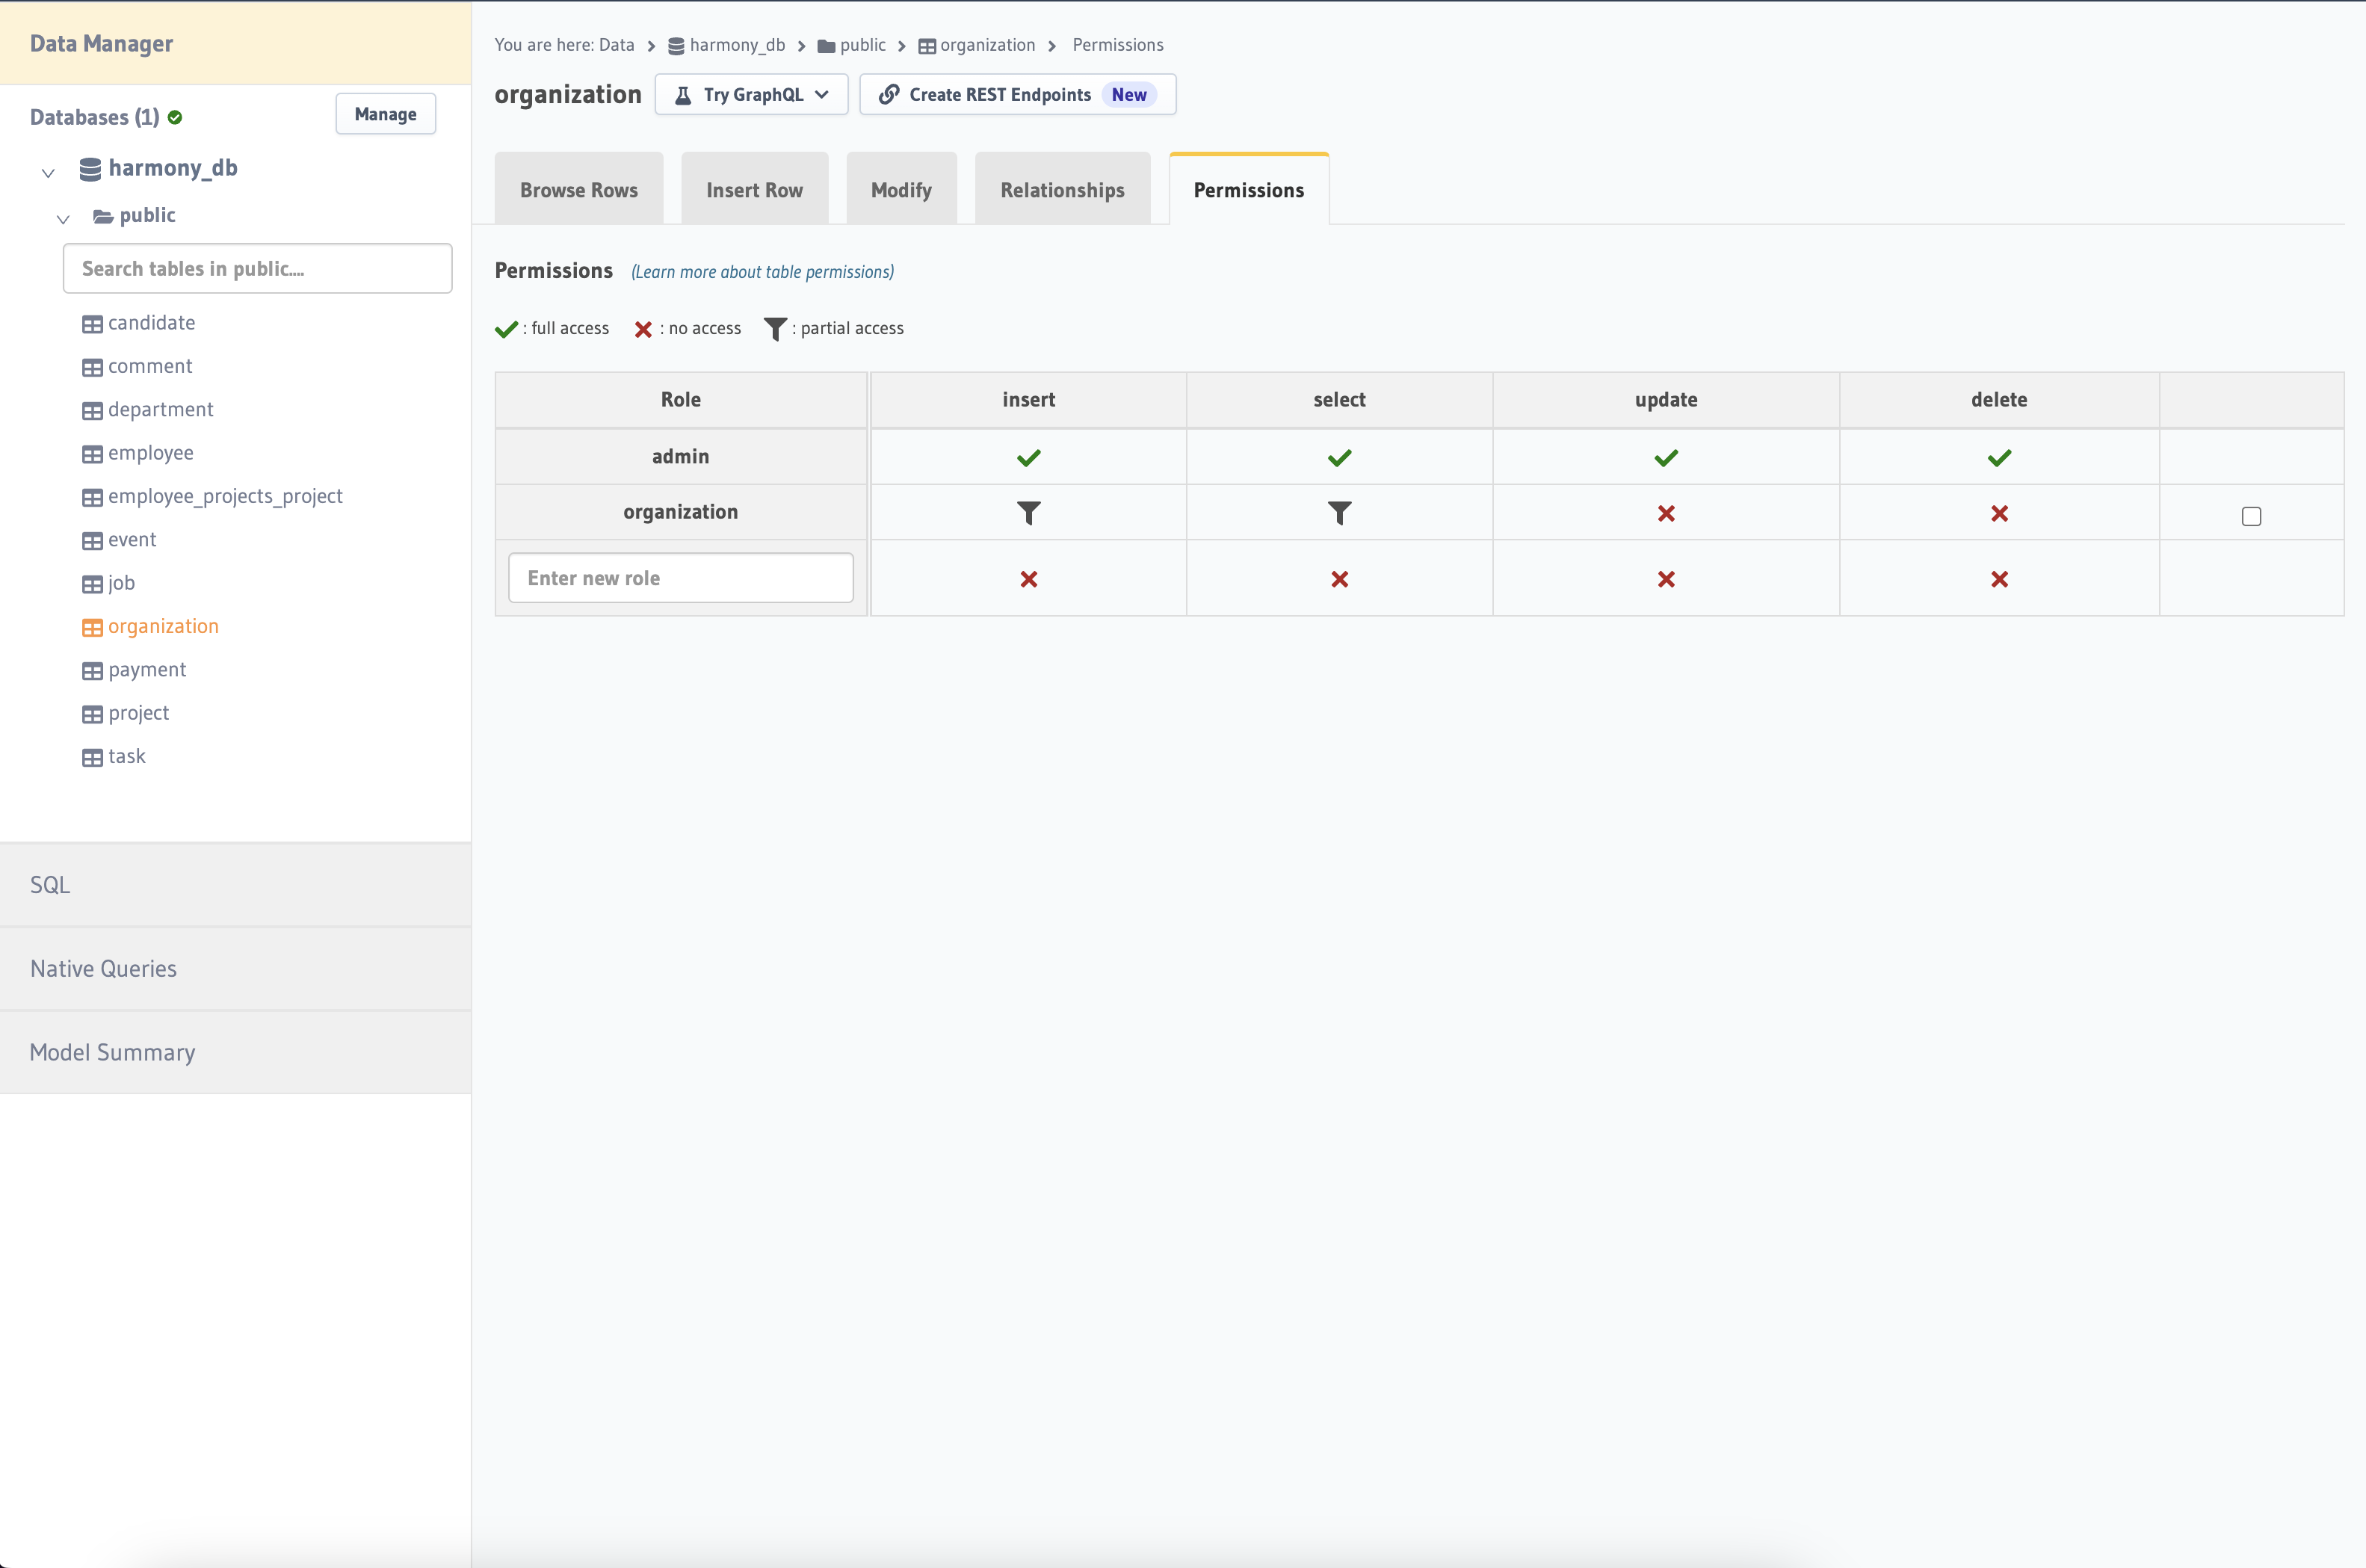
Enter a new role, the role must have the same name as the JWT template you created, and then select an action to see something like this
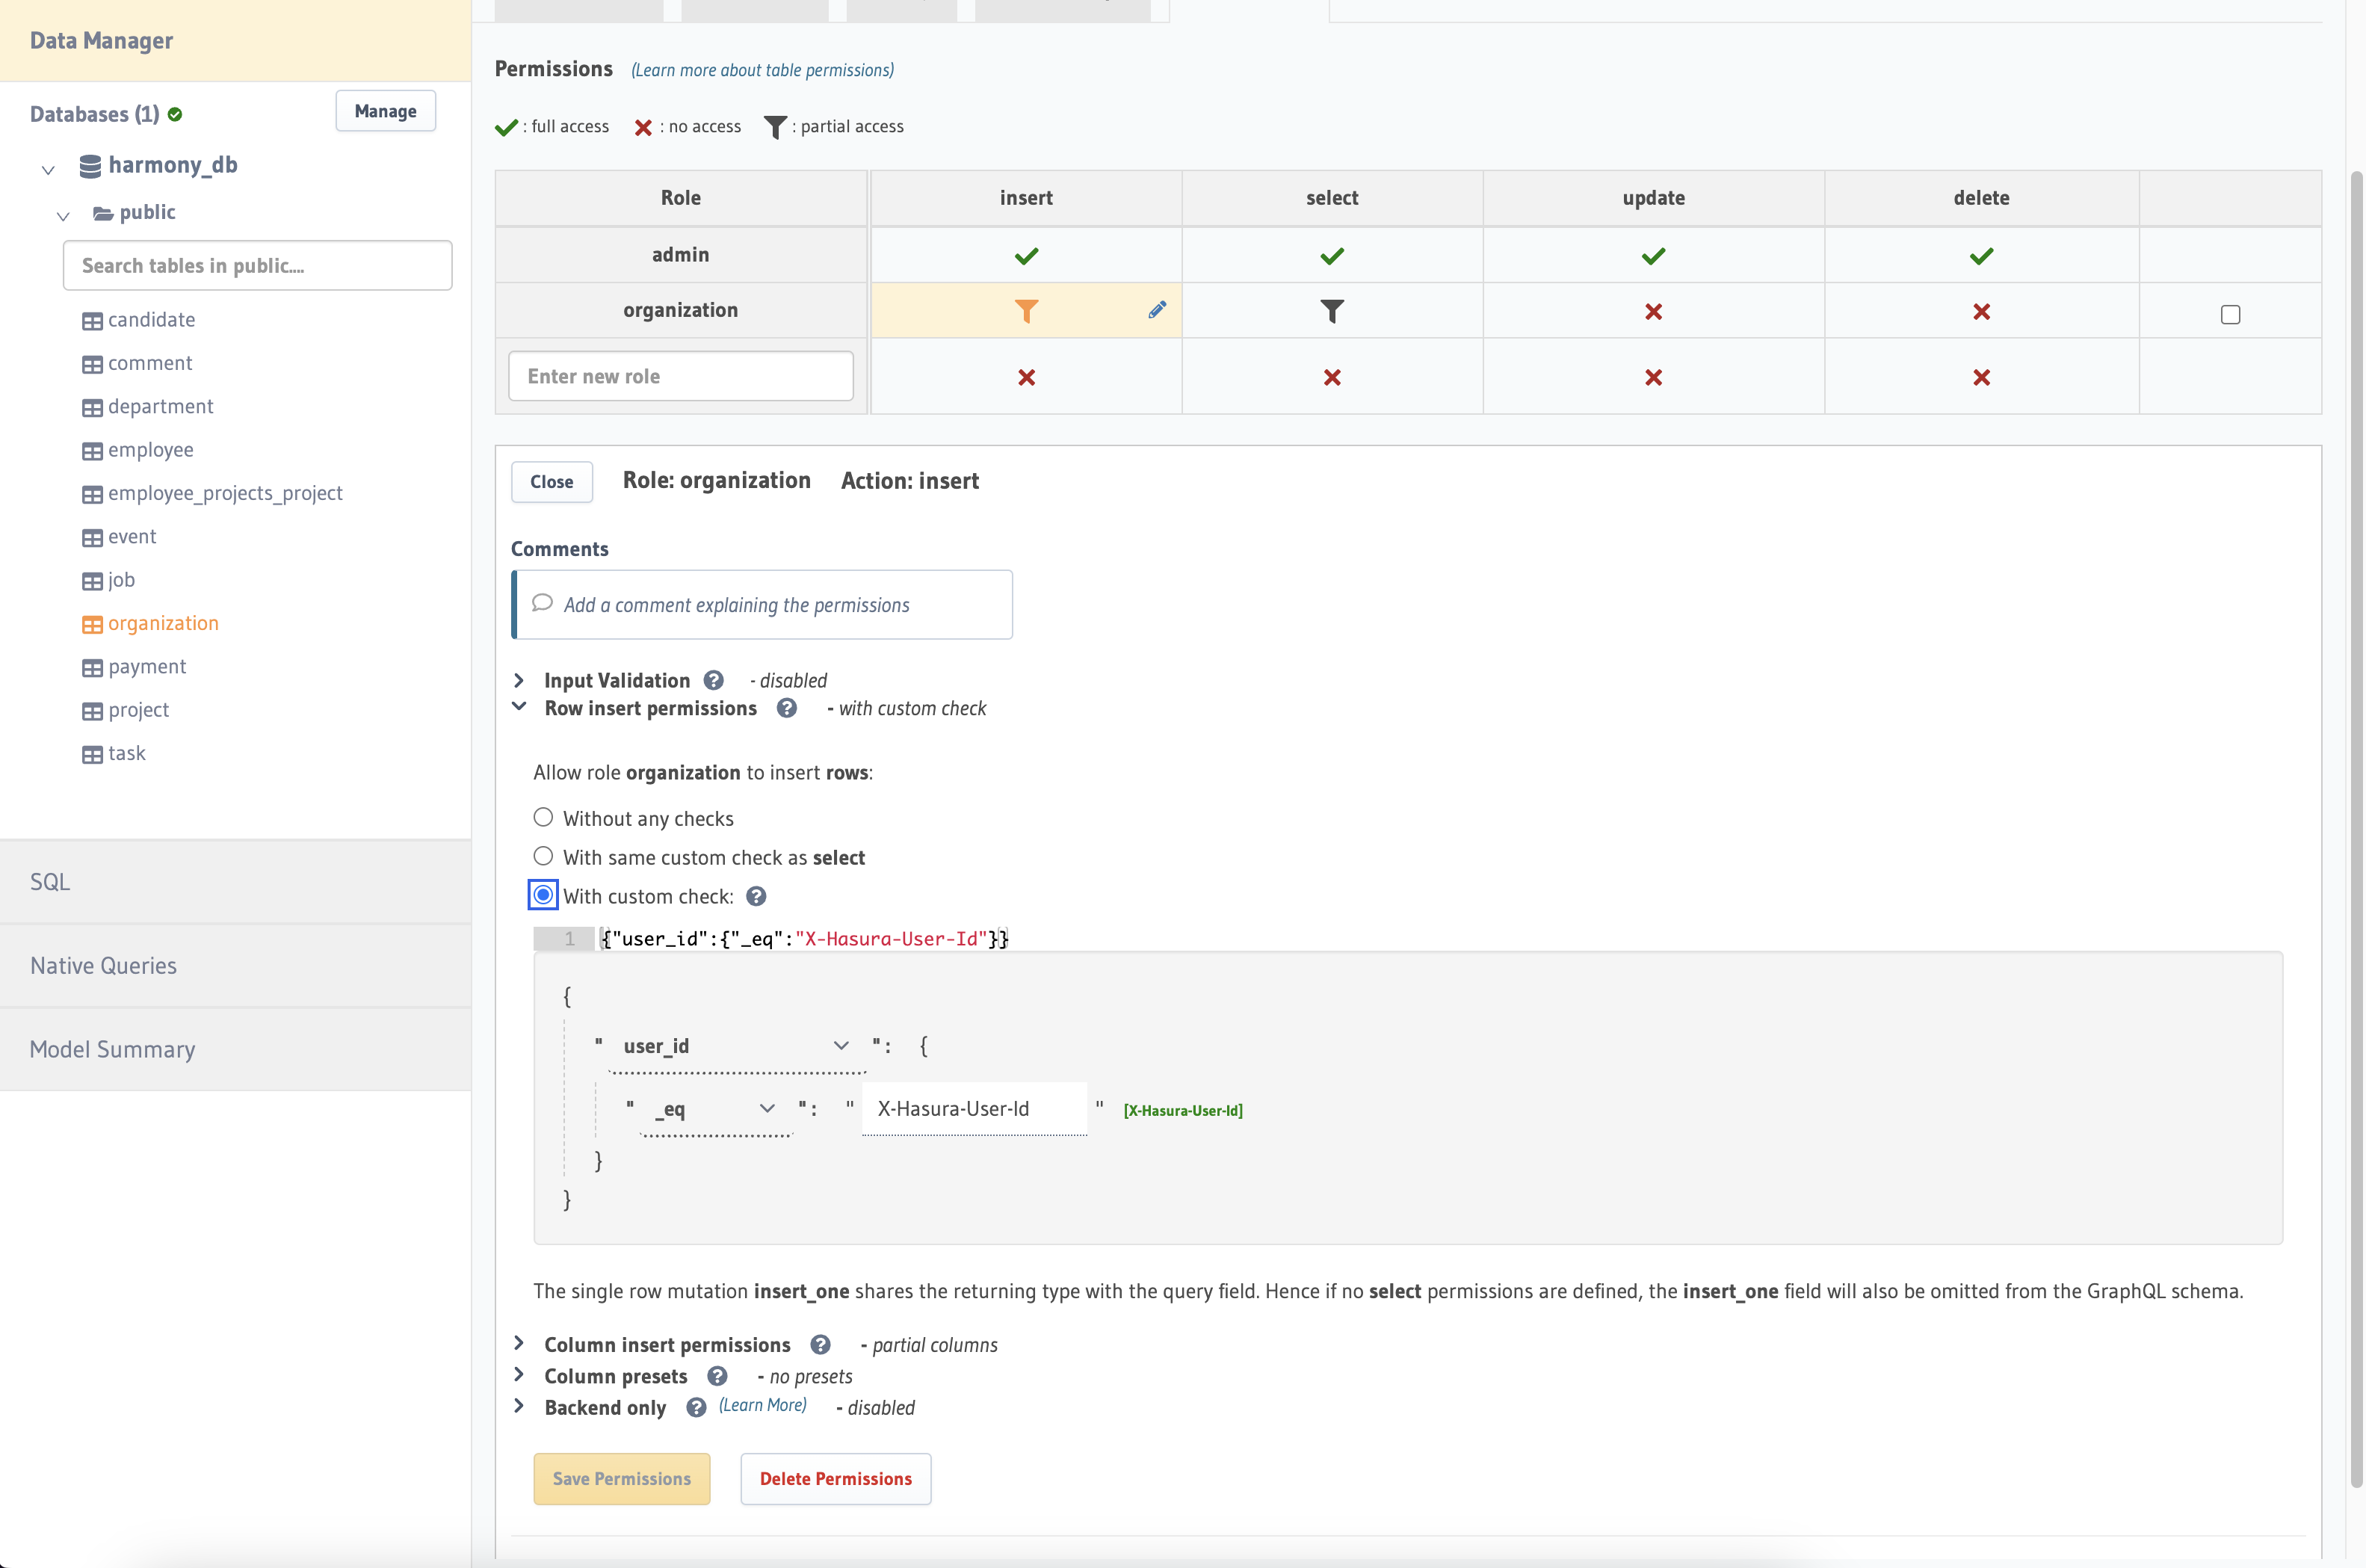
Select Custom Check and enter the required field then set the value to X-Hasura-User-Id hasura will retrieve the value from the claims of the generated clerk tokan.
Wohoooo ! The setup is done. One last thing, i’m gonna show you how to retrieve the token inside your application.
Go to your apollo provider and modify the code.
const ApolloProviderWrapper = ({ children }: Props) => {
  const { getToken } = useAuth();
  const apolloClient = useMemo(() => {
    const authMiddleware = setContext(async (req, { headers }) => {
      const token = await getToken({ template: 'name of your JWT template' });

      return {
        headers: {
          ...headers,
          authorization: `Bearer ${token}`,
        },
      };
    });

    const httpLink = new HttpLink({
      uri: 'url to your hasura console',
    });

    return new ApolloClient({
      link: from([authMiddleware, httpLink]),
      cache: new InMemoryCache(),
    });
  }, []);

  return <ApolloProvider client={apolloClient}>{children}</ApolloProvider>;
};
After making the modifications, your will application will be able to access and use the token in order to validate the user and interact with the database in a secure way.
BONUS:
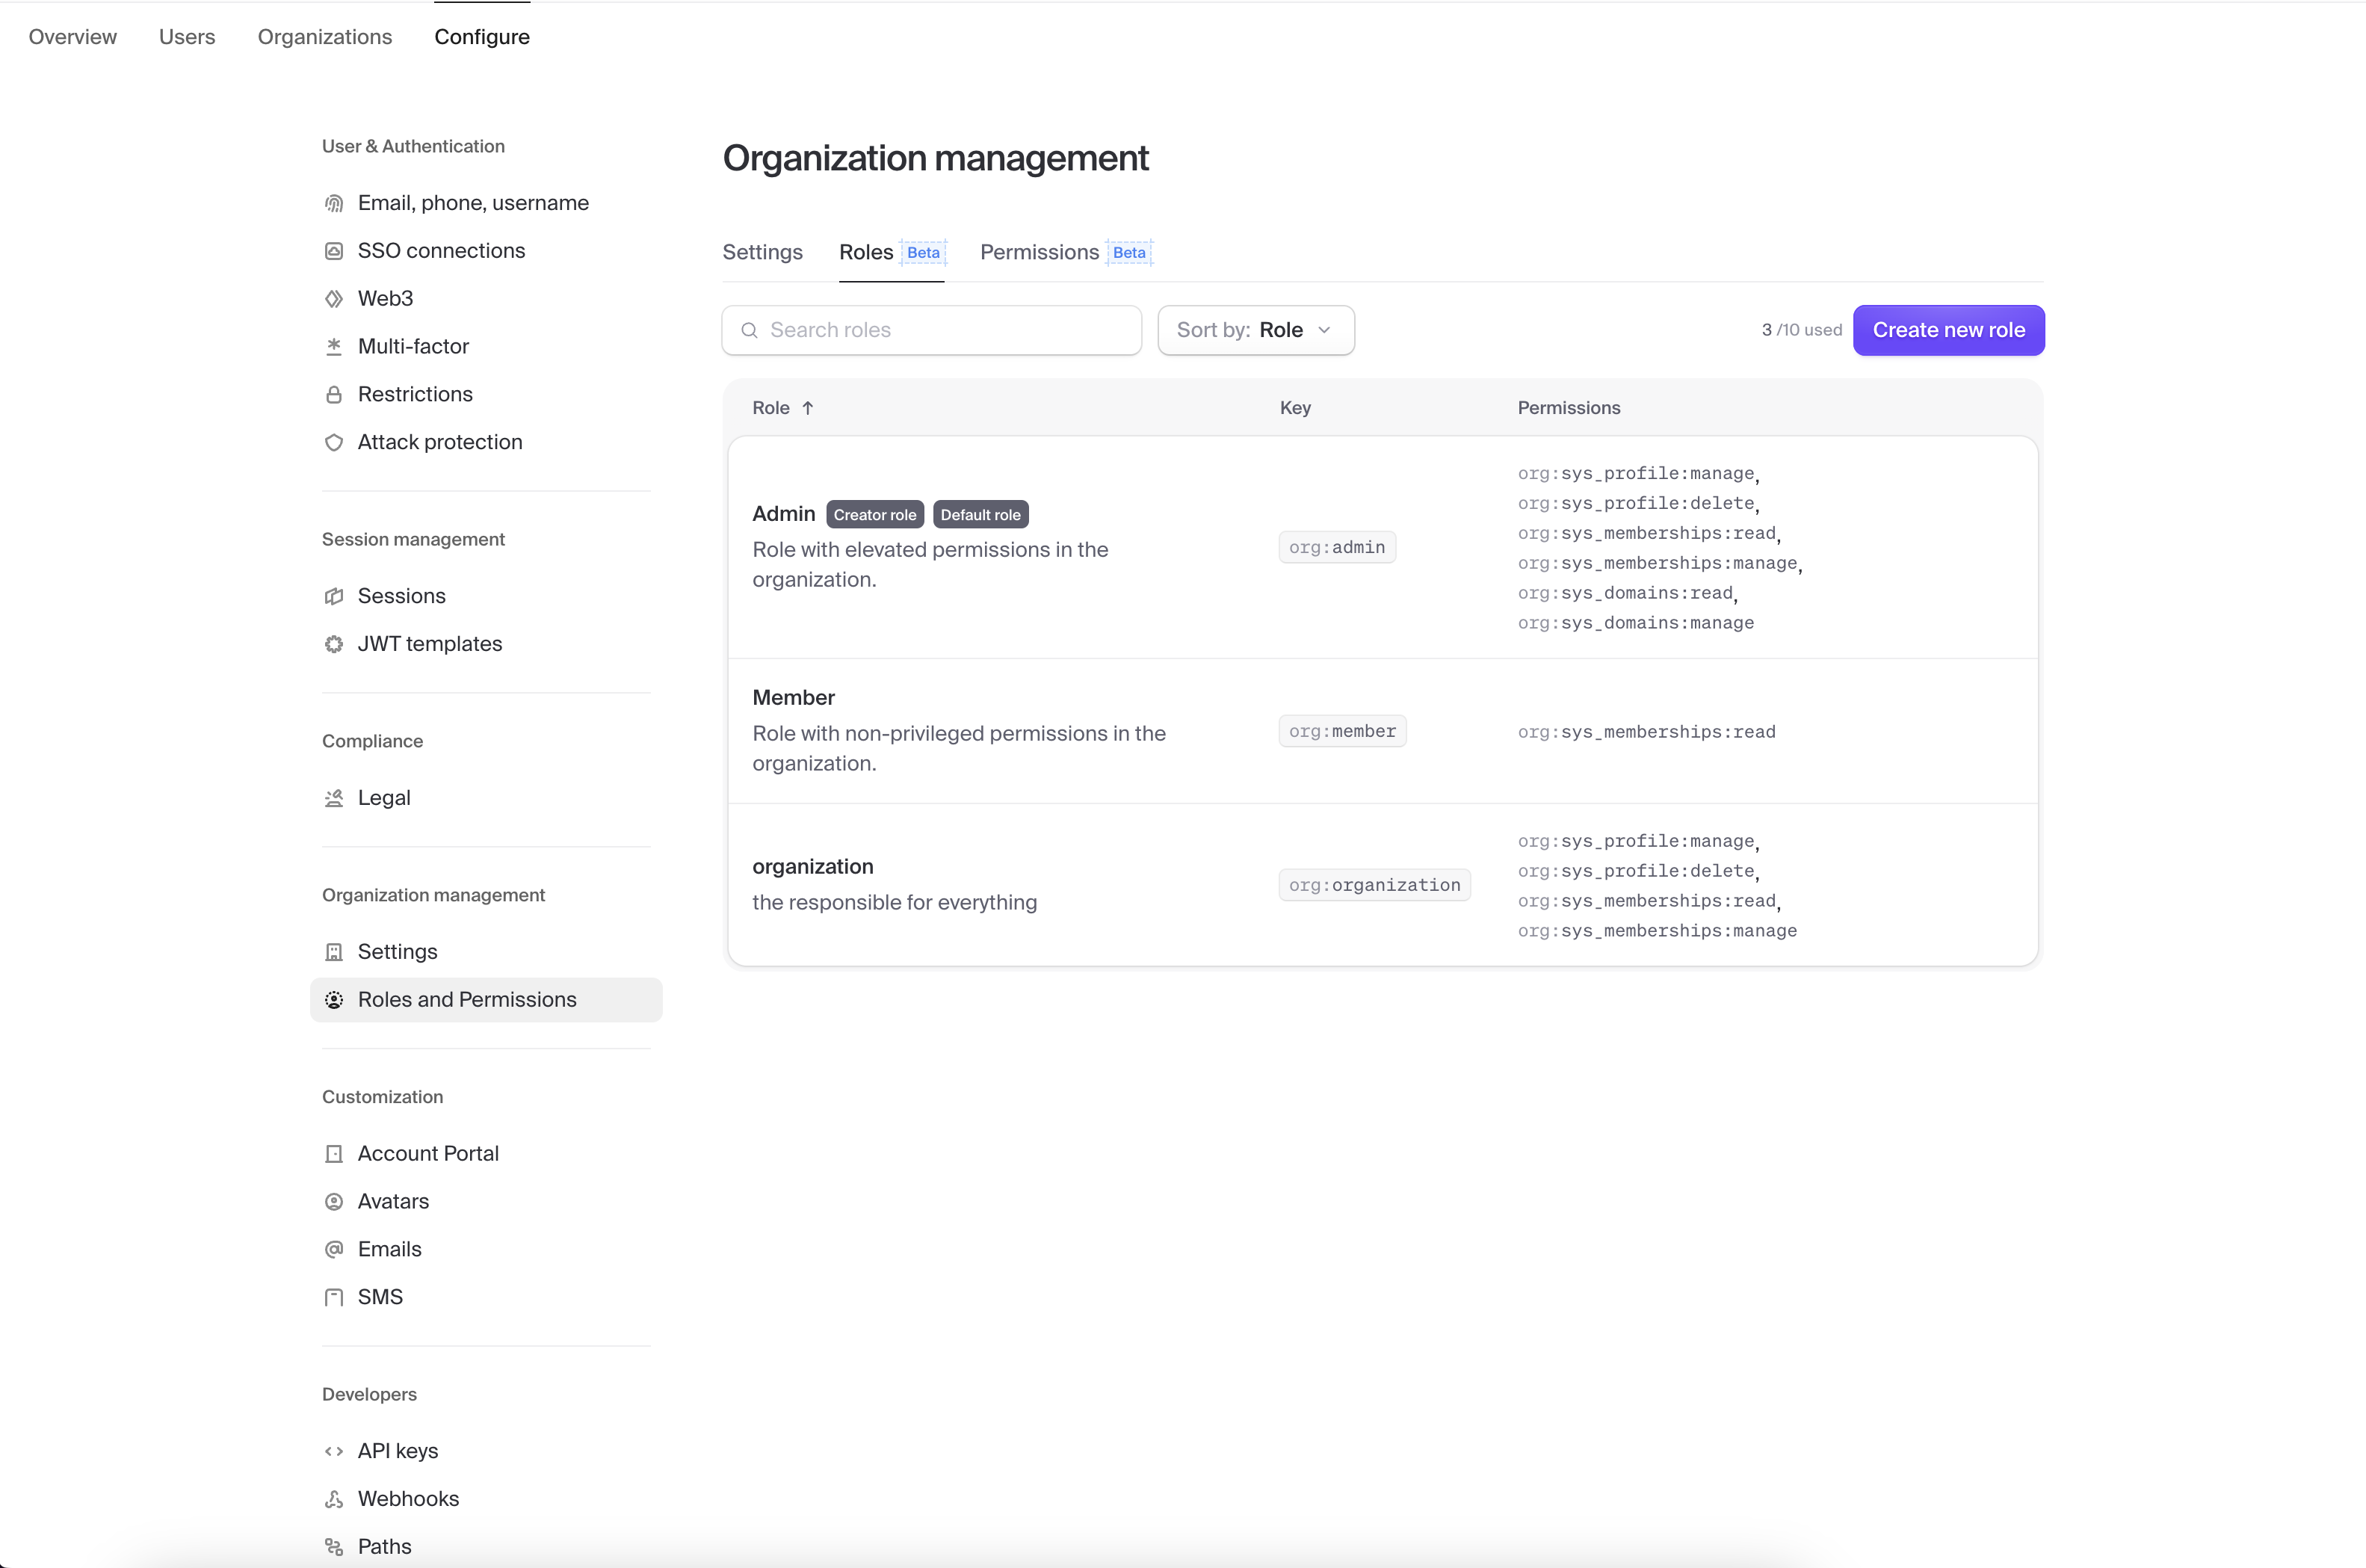
In the clerk dashboard, you have two default roles [admin, user] but you add a new role if you want by going to Role and Permission page , then hit Create new role button.
A dialog will appear as the following
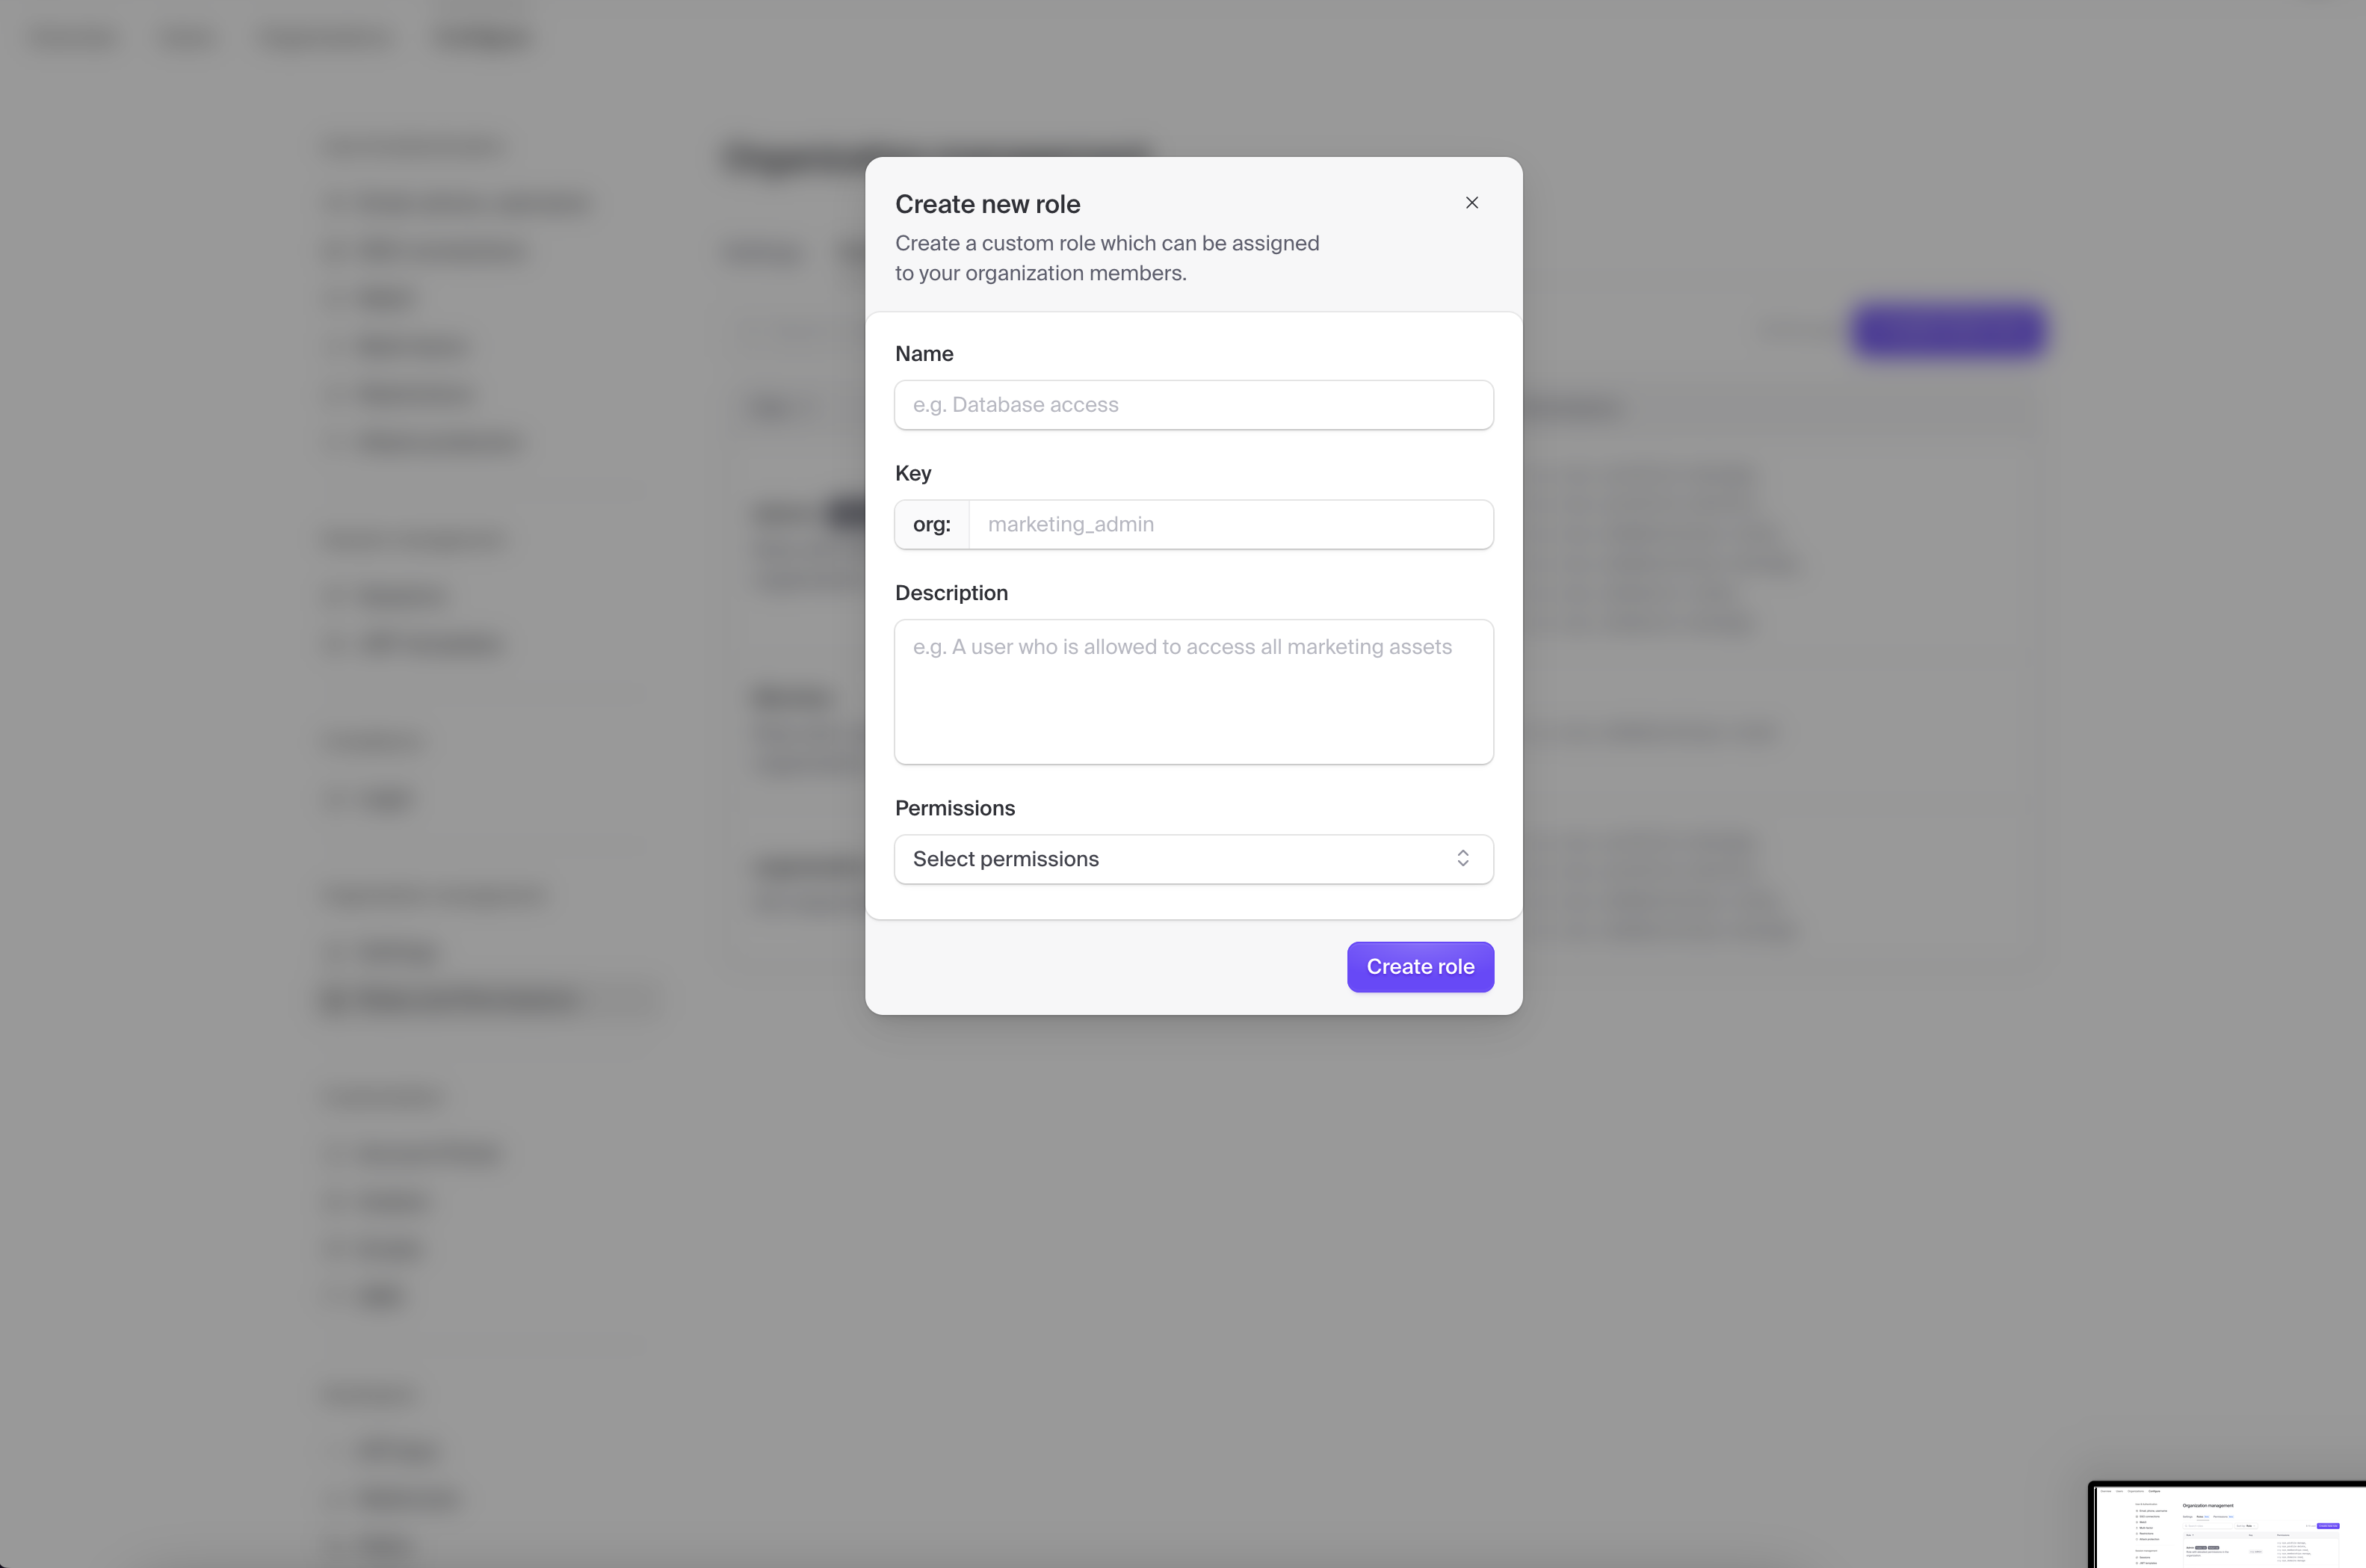
in which you can add role of your choice and use it.
Conclusion:
Integrating Hasura and Clerk is a powerful way to manage roles and permissions in your application efficiently. By leveraging Clerk for authentication and user management and Hasura's flexible role-based access controls, you can create a secure, scalable, and user-friendly system. Throughout this guide, we walked through the step-by-step process of setting up these tools to work seamlessly together, from configuring Clerk for user roles to mapping those roles in Hasura for precise permissions control.
With this setup, you now have a robust foundation to build feature-rich applications with granular access control. Whether you're developing a small project or a large-scale platform, this integration ensures that your app remains secure while maintaining flexibility for future growth. Now it's time to start building and watch your application thrive with this streamlined roles and permissions management system!
Subscribe to my newsletter
Read articles from Oussama Chahidi directly inside your inbox. Subscribe to the newsletter, and don't miss out.
Written by

Oussama Chahidi
Oussama Chahidi
Hi, my name is oussama and i am a self-taught full stack javascript developer with interests in computers. I like the expend my knowledge and learn new things each day cause i always see the beauty in mystery.