How To Host a Static Website in Azure Blob Storage
 Uzomah Chiemerie

Introduction
A static website functions much like an electronic brochure, delivering fixed information that doesn't frequently change. These websites consist of web pages filled with text, images, and other content that remains consistent for all visitors.
Hosting a static website on Blob Storage allows you to reduce costs while enjoying a straightforward hosting solution that ensures your website is both easily accessible and efficient.
In this tutorial, we'll guide you through the process of hosting your static website in Azure Storage. Please ensure you meet the following prerequisites before we get started:
Prerequisites
Saved static website file.
Create a storage account in the Azure portal.
Create a folder to house your static website data.
Enable Static Website in Azure.
Once you've got these prerequisites covered, you'll be ready to deploy your static website with ease. Let's dive in!
Step-by-Step Guide: Hosting Your Static Website on Azure
Step 1: Get Started by accessing the Azure Portal
Open your web browser and go to the Azure portal.
Sign in with your Azure account credentials.
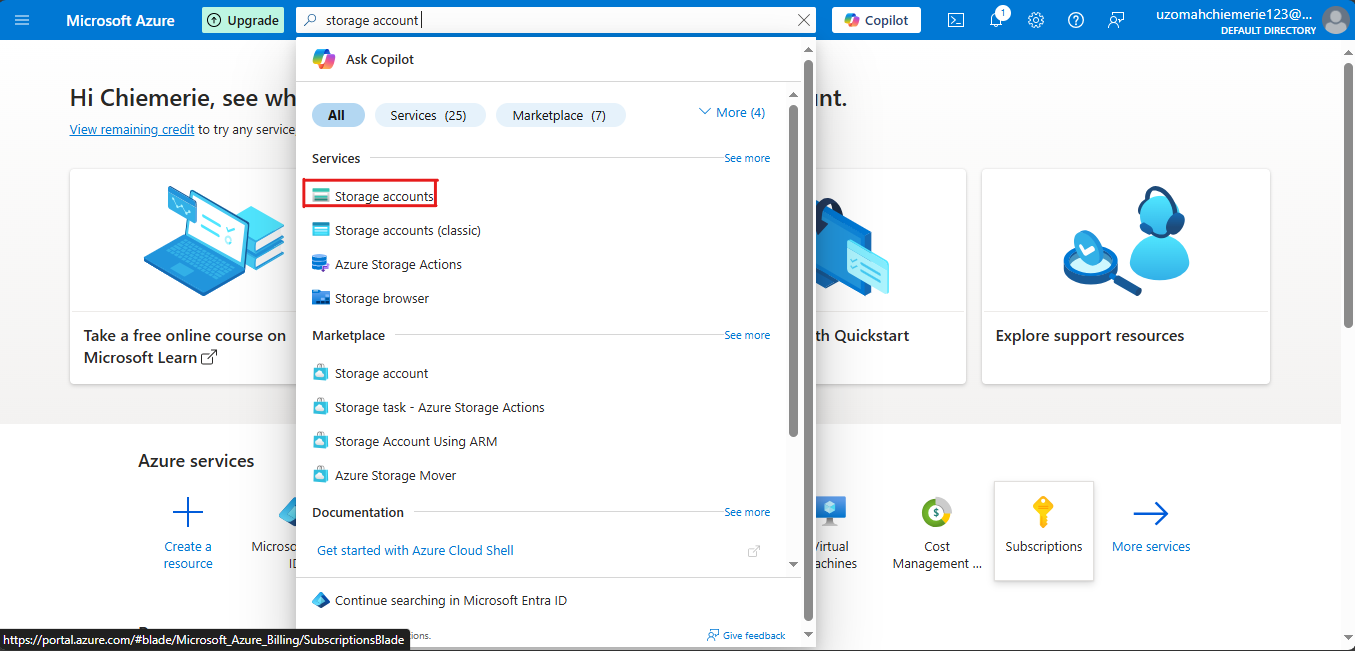
Step 2: Locating Storage account in Azure
Once you're in, navigate to the Storage Account tab. If you prefer, you can quickly locate it by using the search bar at the top. This straightforward step sets the stage for creating and managing your storage account.
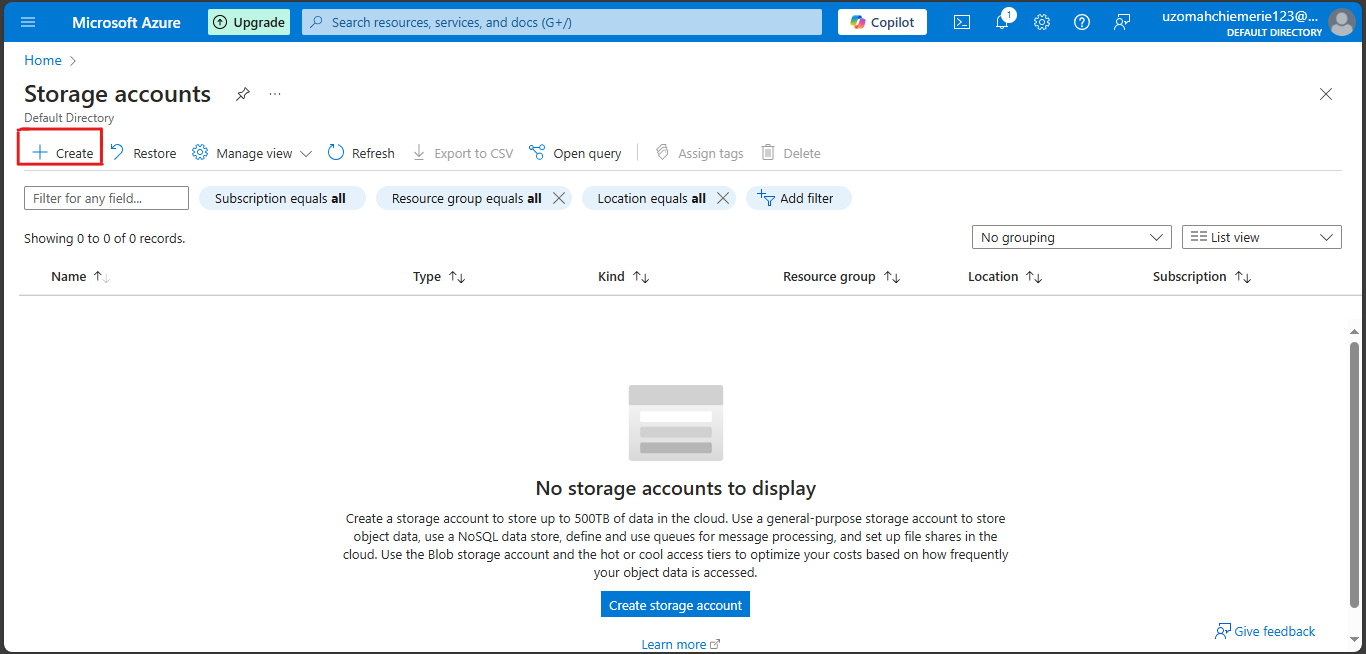
Click "Create" to start the creation process.
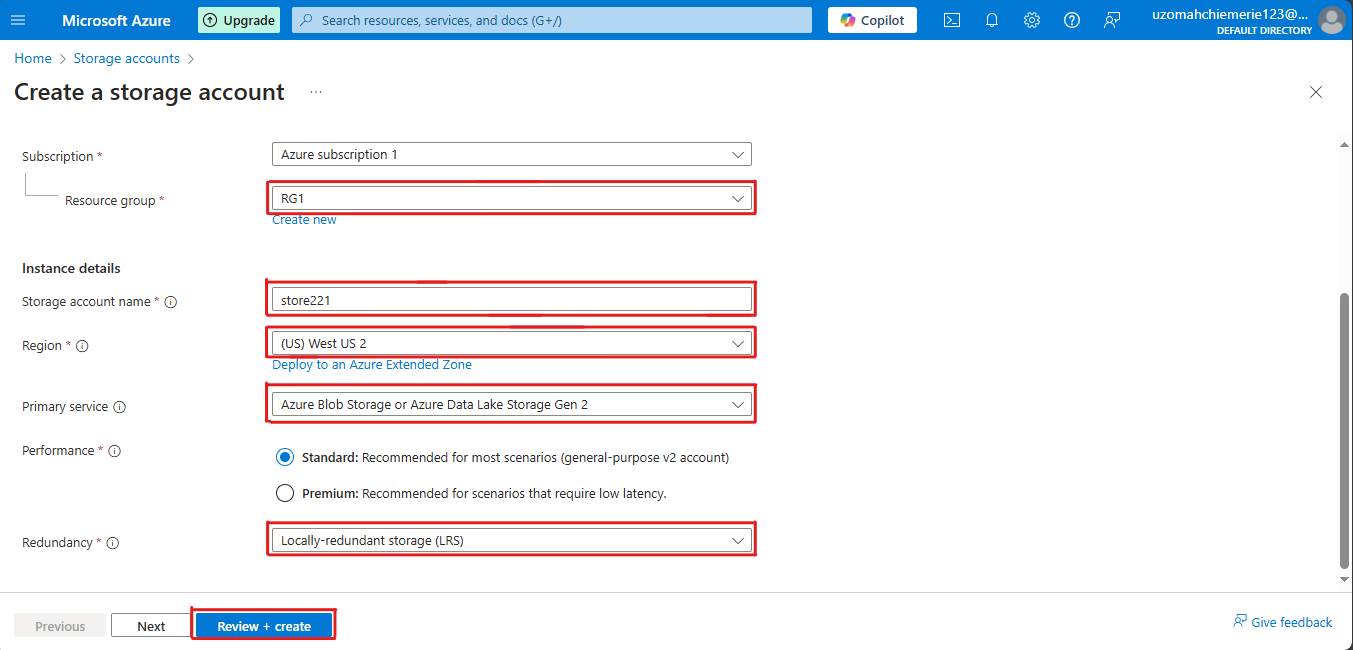
Step 3: Basic Configuration for Your Storage Account
Subscription: Select your Azure subscription.
Resource Group: Select an existing resource group or create a new one.
Name: Enter a unique name for your storage account.
Region: Choose the region where you want to deploy the storage account.
Primary service: Azure blob storage.
Redundancy: Locally redundant storage (LRS).
[select or create resource group, name, region, primary service and redundancy]
After setting up your storage account, click on review and create.
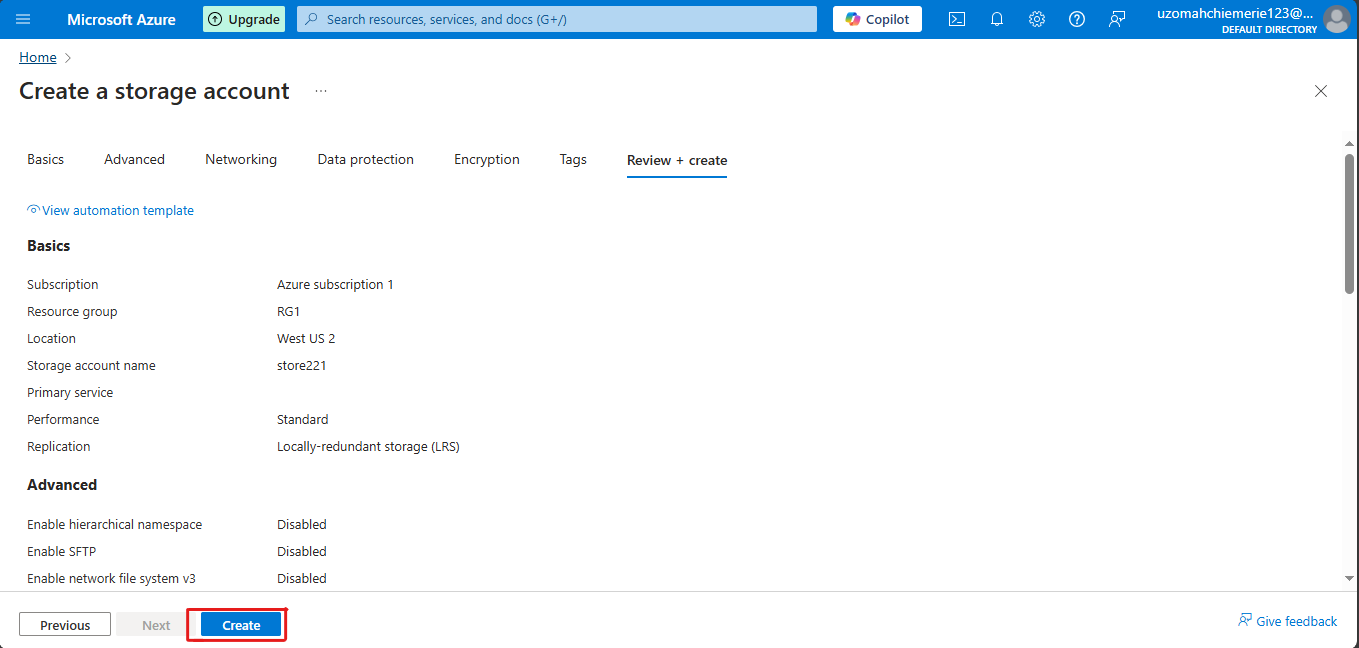
Once validation is passed, click on create.
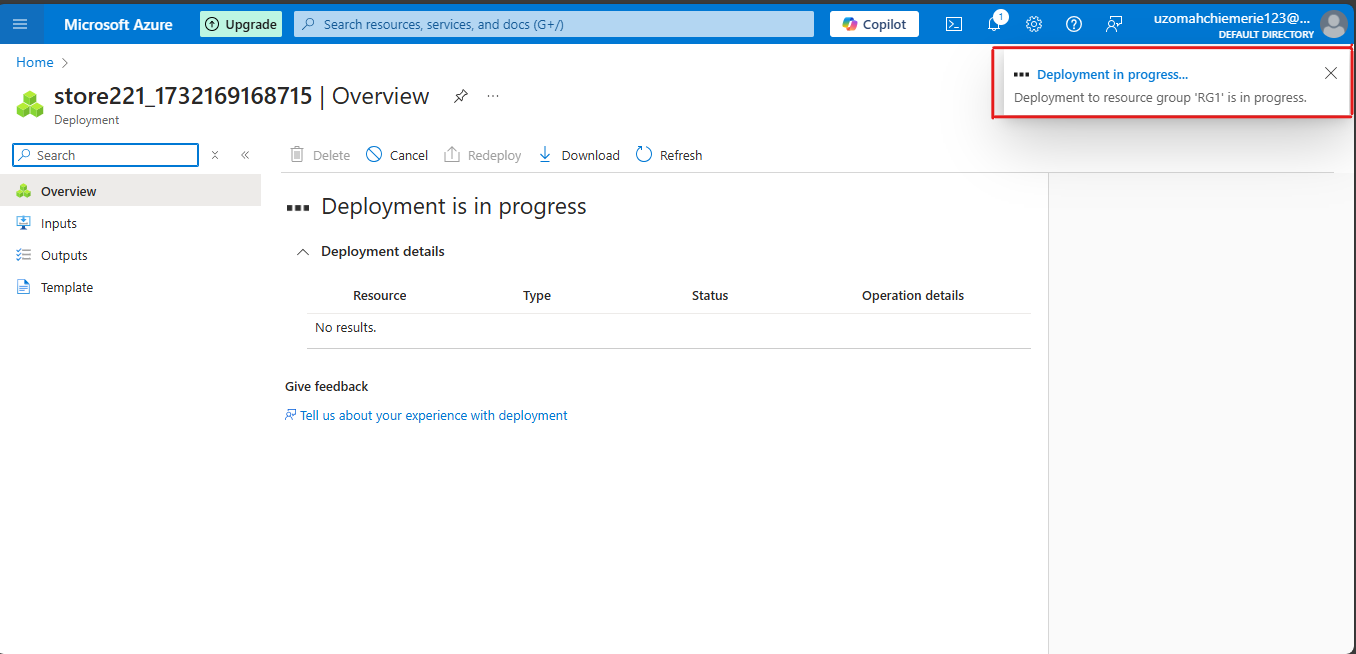
“Deployment in progress”
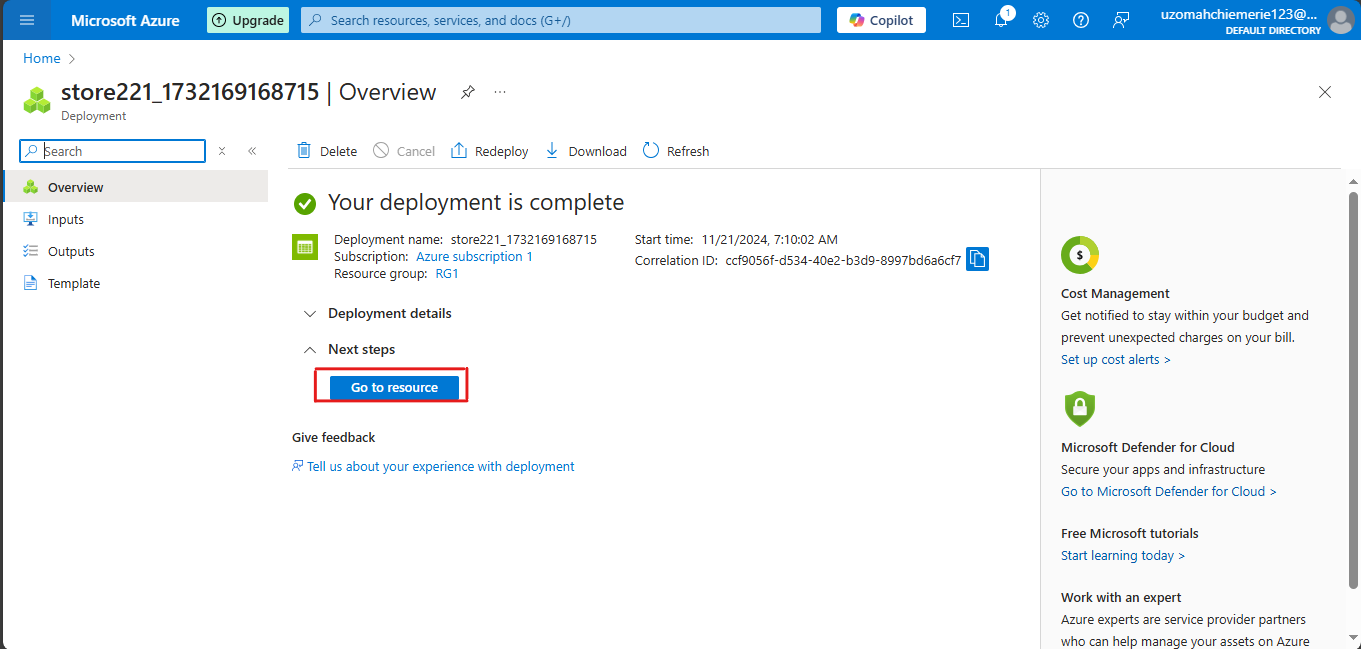
“Your deployment is complete”. Click on “Go to resource”.
Step 4: Enabling Static Website on Azure
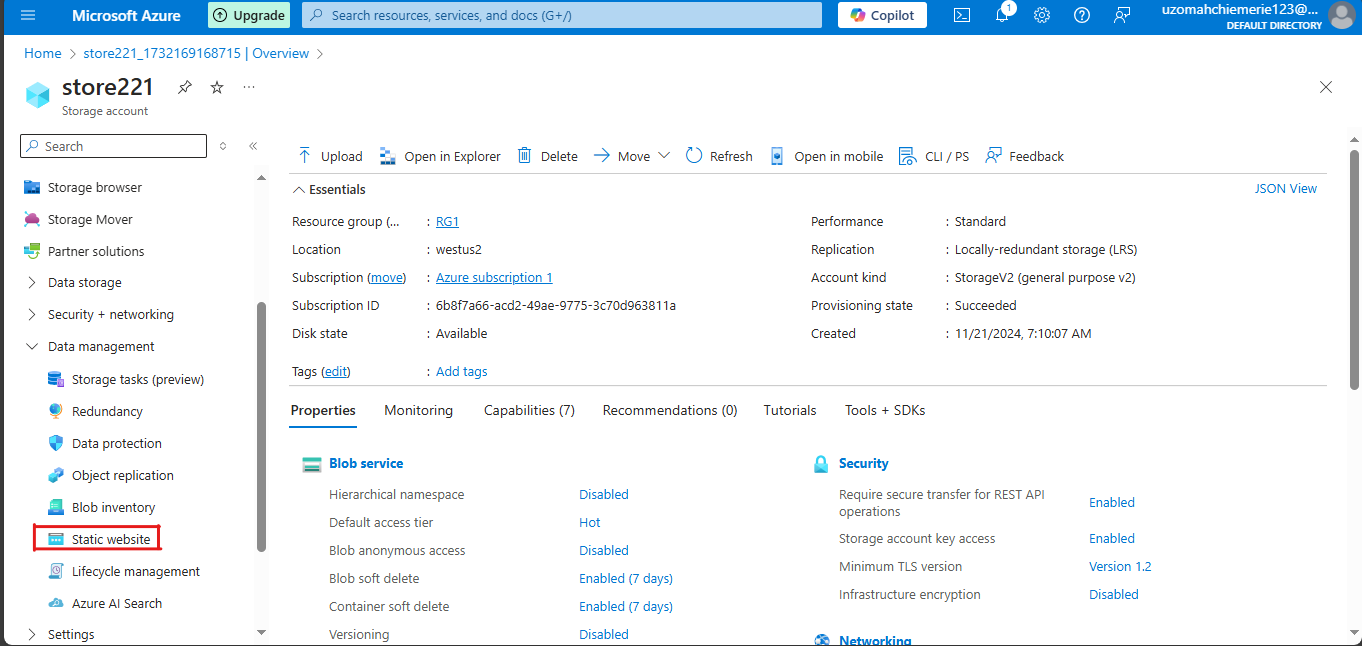
Go to your storage account and click on the “Static website’ button “Data management” under blade on the left side of the search bar.
Click on the "Enabled" button to enable the static website.
On the index document name type "index.html" and on the Error document path type "404.html".
Click on the save button.
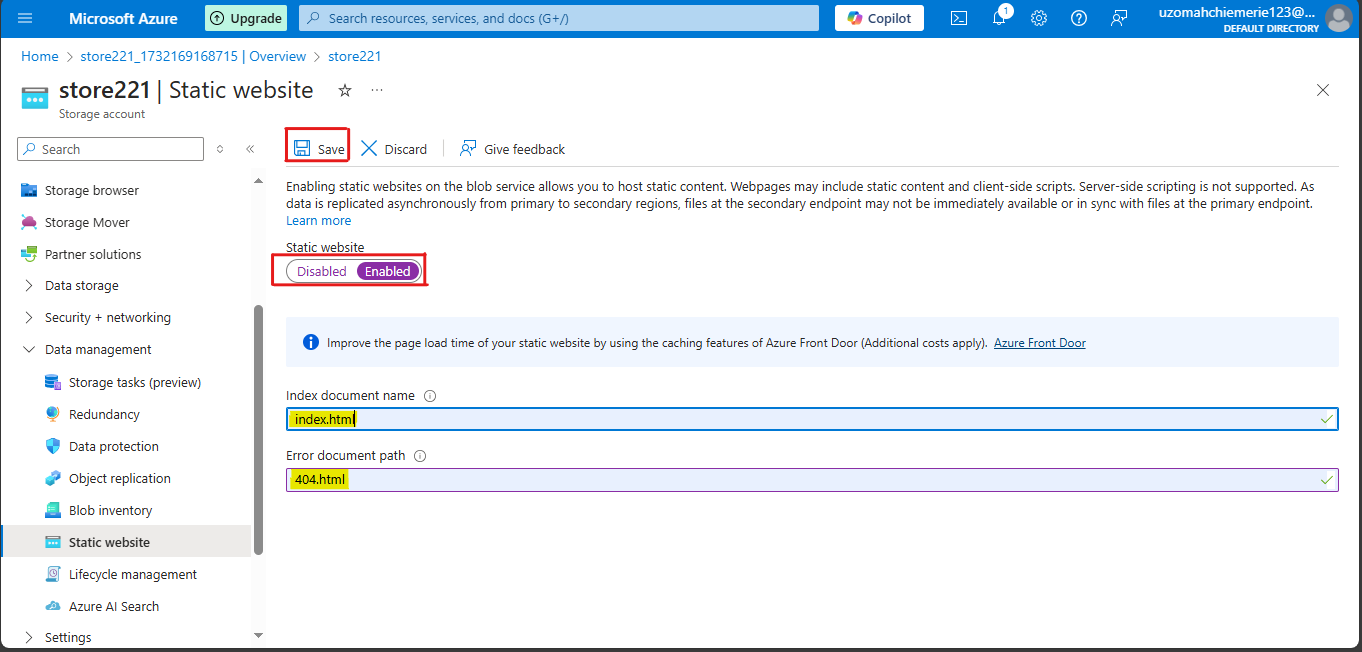
Once it's saved, it generates your primary endpoint. Now let’s store the static website file. Click on containers.
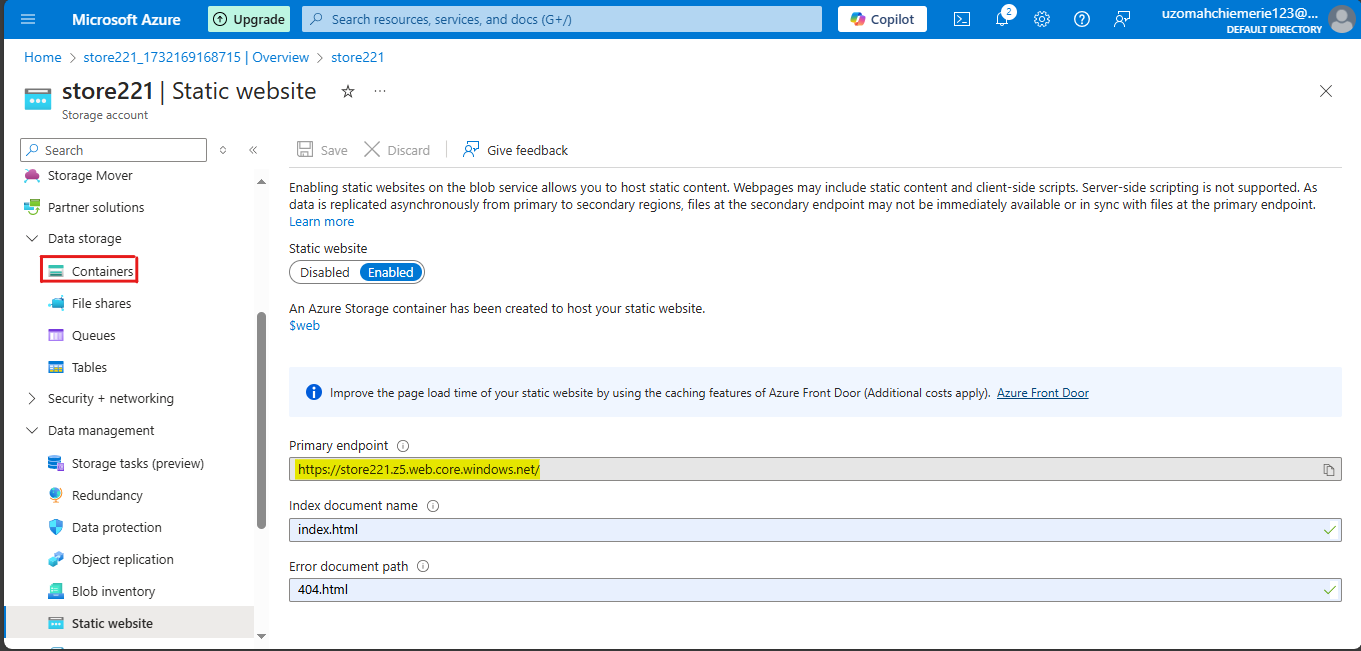
Step 5: Hosting a Static Website on Azure
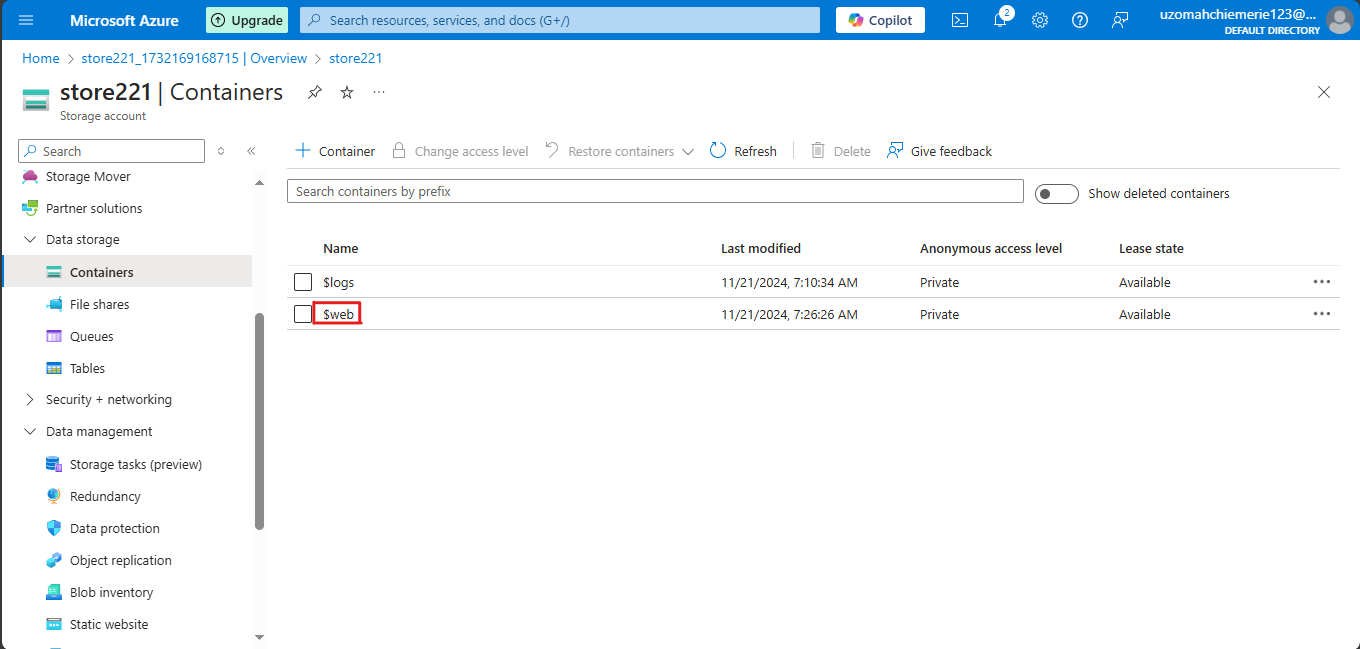
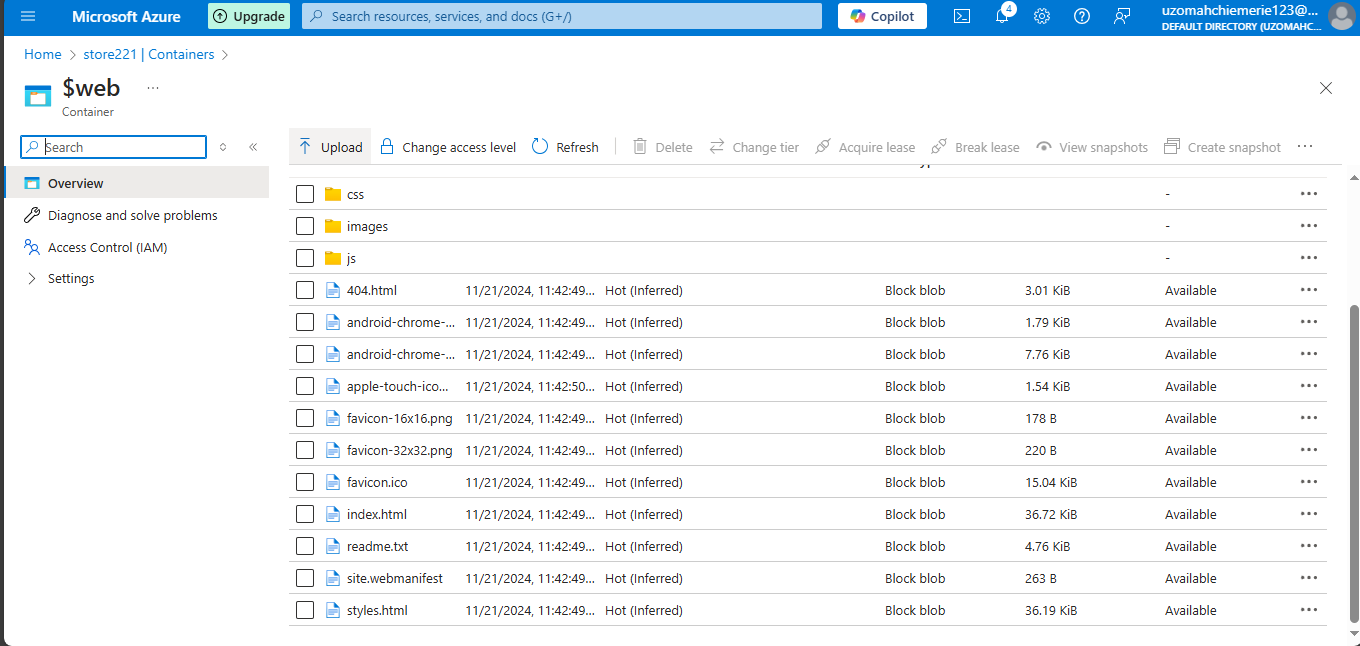
As you can see, a “$web container” has been created to host your static website data. Click on it.
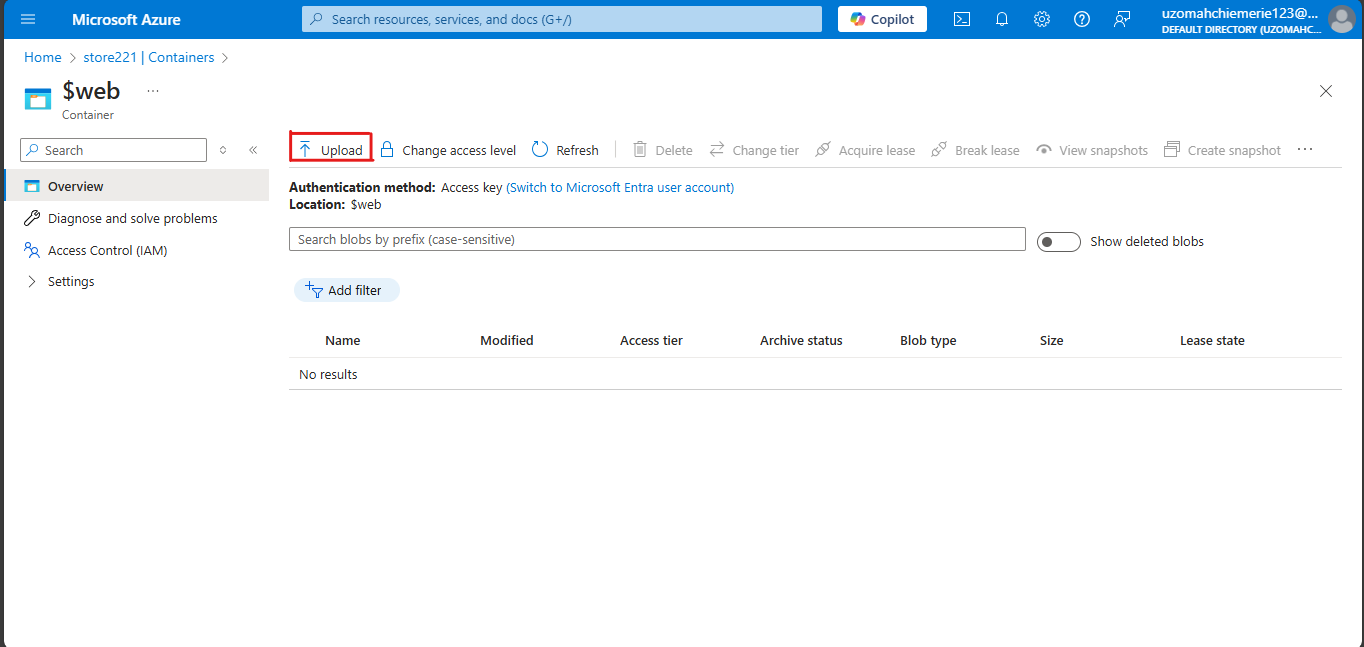
We will upload our static website files to Azure, so we click on upload.
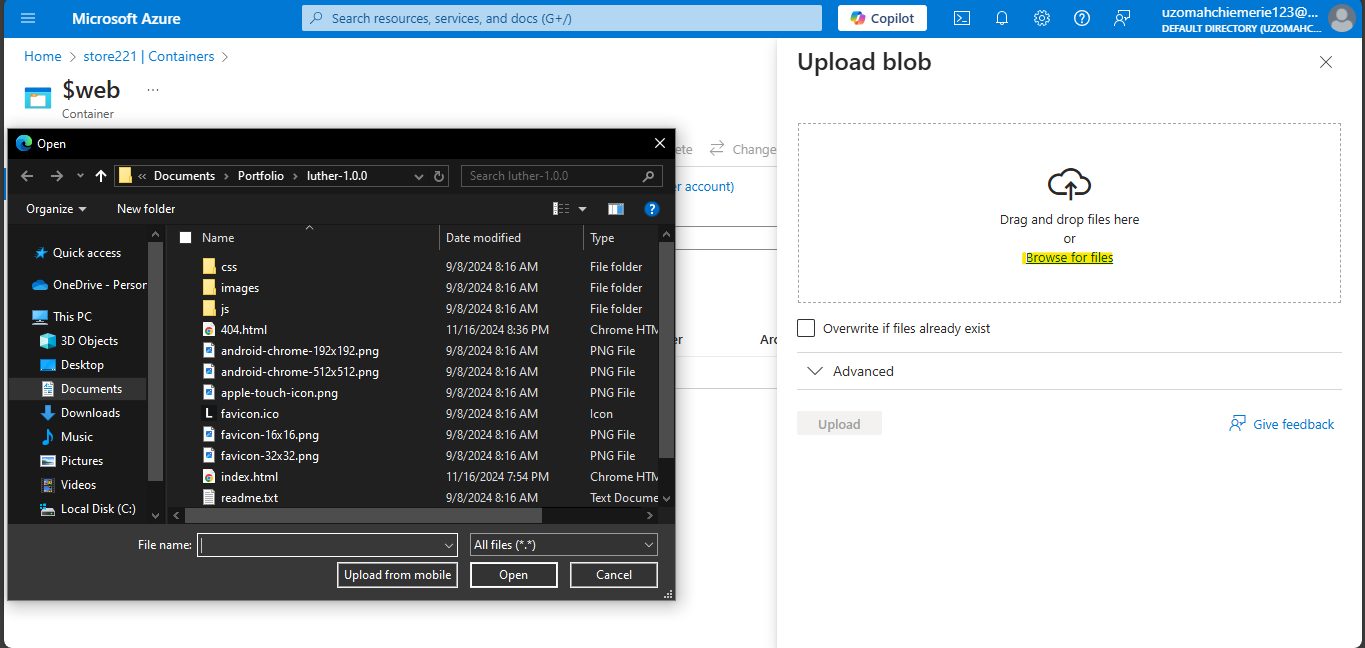
Click on “Browse for files”, go to where you saved the static website and then one by one drag and paste all the files seen. Ensure to click “upload”.
It should look like this.
Step 6: View Hosted Static Website
Go and copy the primary endpoint for the static website.
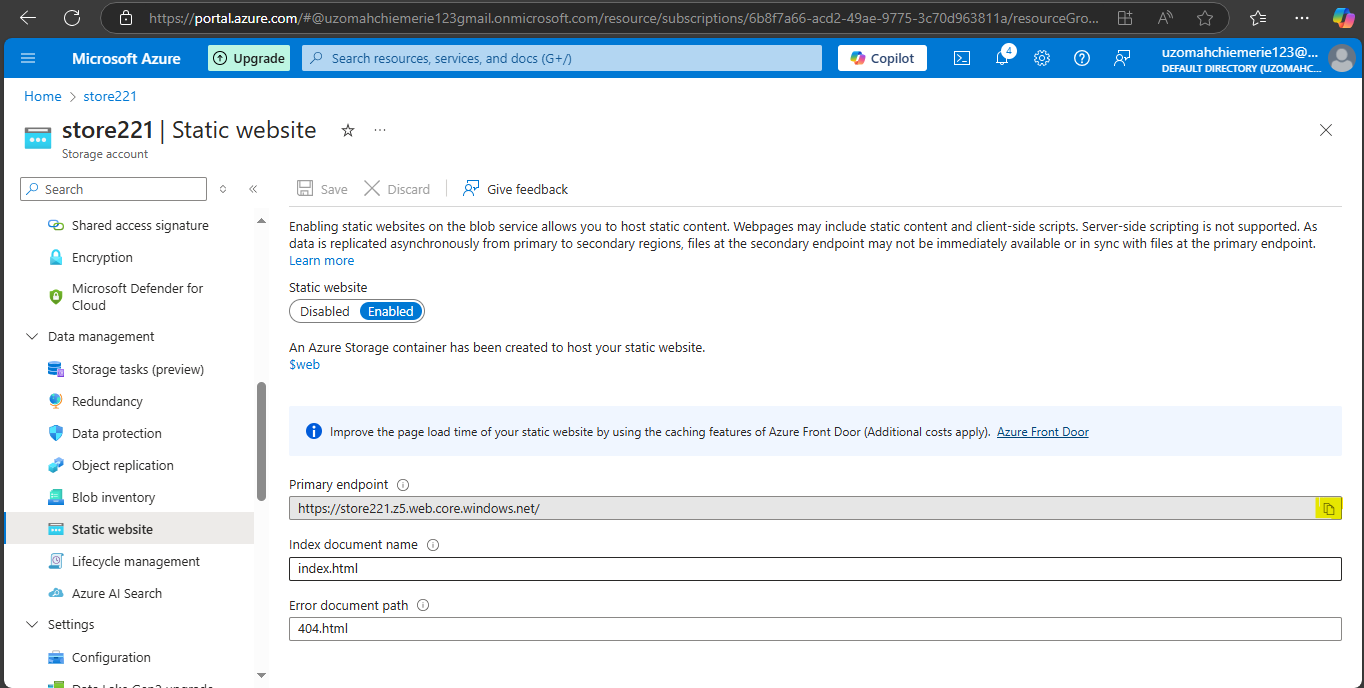
Paste the URL into your web browser and run it.

Clean Up: Efficiently Removing Unneeded Azure Resources
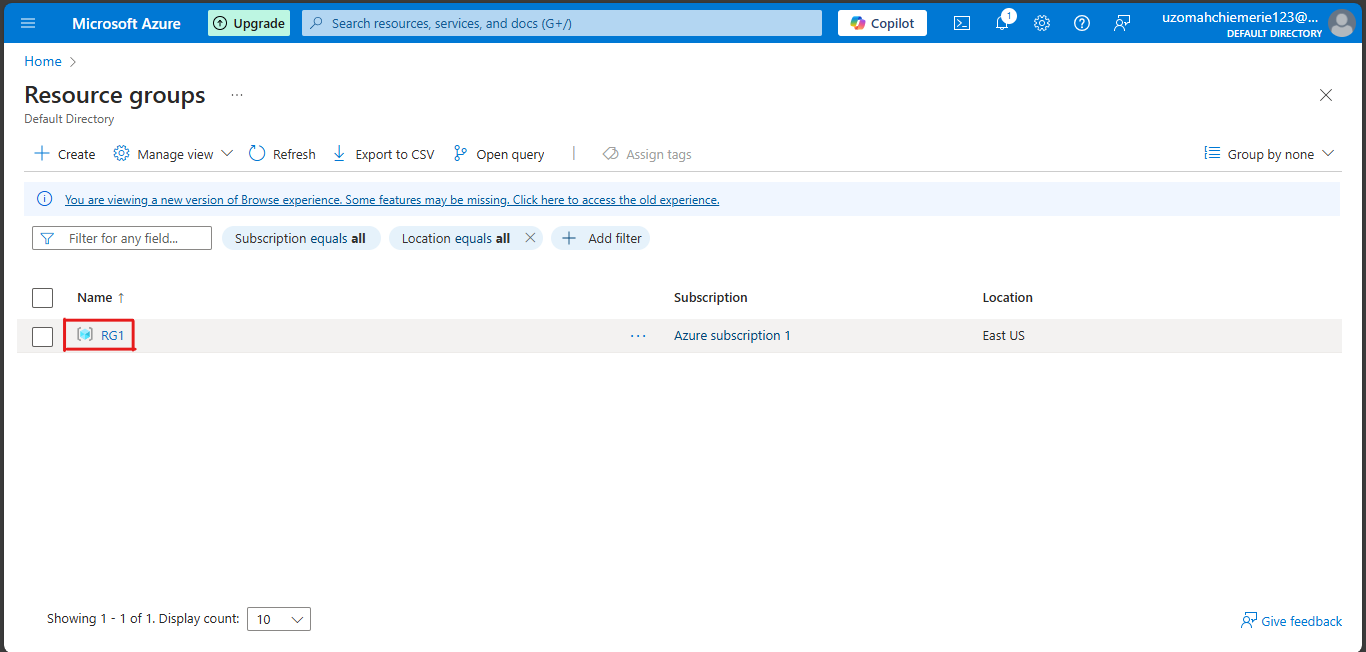
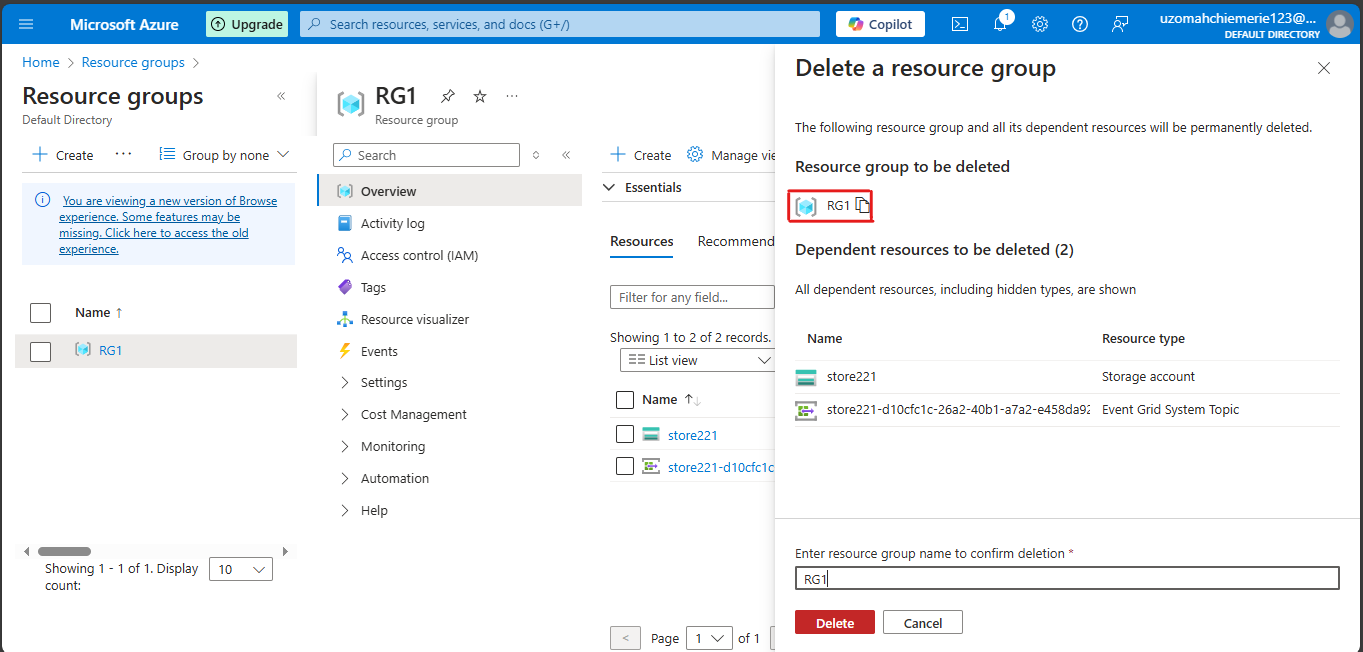
When you no longer need your storage account and related resources, you can easily clean them up. First, navigate to the Home page on the Azure portal. From there, select the resource group you want to delete, in this case, "RG1."
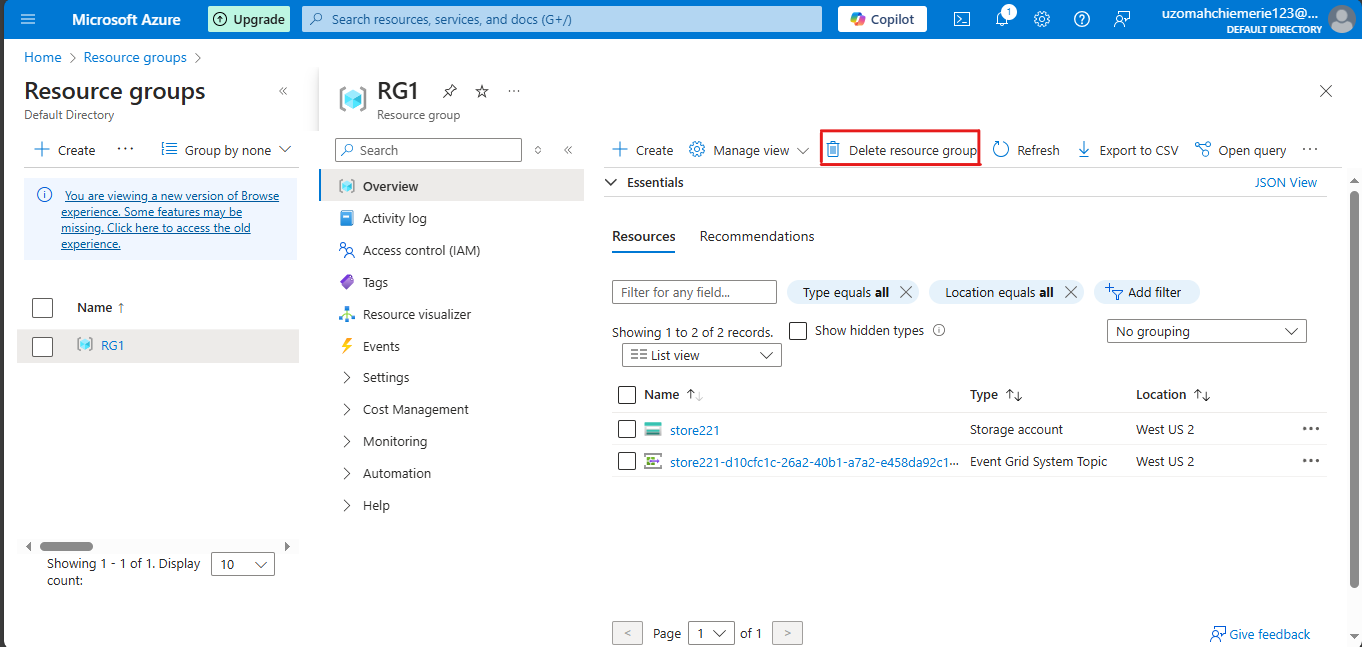
Once you're on the resource group page, simply click on Delete resource group at the top of the page. This will remove the resource group along with all its associated resources, ensuring your Azure environment stays tidy and organized (Also to incur fewer costs).
To finalize the deletion, type or copy and paste the name of the resource group. This step confirms your intention to delete the resource group and all associated resources, ensuring everything is removed safely and correctly. Click on delete
Conclusion
In conclusion, hosting a static website on Azure Blob Storage is a cost-effective and efficient solution for delivering consistent content to your audience. By following the step-by-step guide, you can easily set up your storage account, enable static website hosting, and upload your website files. This approach not only simplifies the hosting process but also ensures that your website is accessible and well-managed. Additionally, the ability to clean up resources when they are no longer needed helps maintain an organized Azure environment and control costs. With these tools and techniques, you can confidently deploy and manage your static website on Azure.
Subscribe to my newsletter
Read articles from Uzomah Chiemerie directly inside your inbox. Subscribe to the newsletter, and don't miss out.
Written by
