Dockerize Django Web Application with Multi-Stage Builds
 Yash Kharche
Table of contents
- What Is Docker and Why Is It Important?
- What Is a Multi-Stage Build in Docker?
- Docker Analogy: Think of Docker as a Lunchbox
- Step 1: Dockerfile Without Multi-Stage Build
- Step 2: Building the Image
- Step 3: Introducing Multi-Stage Dockerfile
- Step 4: Building the Multi-Stage Image
- Step 5: Running the Multi-Stage Image Locally
- Step 6: Comparing Image Sizes
- Conclusion
- FAQs
- Q1: What are the main benefits of using multi-stage Docker builds?
- Q2: How does a multi-stage build differ from a regular Docker build?
- Q3: Can I use multi-stage builds for non-Django applications?
- Q4: How does using multi-stage builds impact deployment speed?
- Q5: Can I use multi-stage builds with Docker Compose?
As a computer science student and a full-stack developer intern at The Hotspring, I've had the chance to work on a wide range of applications, including Django-based ones. Throughout my journey, I’ve also developed a strong interest in DevOps, particularly when it comes to optimizing application deployments. One of the most powerful tools in this area is Docker, especially when using Docker’s multi-stage builds.
In this blog, I’ll walk you through an example of how to optimize a Django application using multi-stage Docker builds. But before diving into the specifics, let’s first take a moment to understand why Docker is such a game-changer in modern application development.
The blog demonstrates how to dockerize the project which is available in this GitHub repository.
What Is Docker and Why Is It Important?
At its core, Docker is a tool that lets you package applications into containers, ensuring consistency across various environments. What this means for us as developers is that we can develop, test, and deploy our Django app locally, and then know that it will run the same way in production—whether that’s on AWS, GCP, or any other cloud provider.
However, as your application grows, your Docker images can get pretty large. They can include unnecessary dependencies and files that aren’t needed in production. That’s where multi-stage builds come into play.
What Is a Multi-Stage Build in Docker?
A multi-stage build in Docker allows you to split the build process into separate stages. By doing so, you can reduce the size of your final application image. You can have one stage to build your dependencies and then another to copy only the necessary files into the final image. This leads to a much smaller, cleaner, and more efficient image.
Let’s now take a deeper dive into how you can implement this in a Django application.
Docker Analogy: Think of Docker as a Lunchbox
Let me give you an analogy to help clarify.
Think of Docker like a lunchbox. Just as a lunchbox lets you carry your meal, keeping it fresh and contained, Docker packages an application with everything it needs to run—code, libraries, environment—into a single container. The lunchbox ensures that your meal stays exactly the same, whether you're eating at home, at school, or on a picnic. Similarly, Docker ensures that your application runs consistently across different environments, whether you're developing it on your local machine, testing it on a server, or deploying it in the cloud.
Now that we have a basic understanding of Docker, let’s jump into the steps to optimize a Django application using multi-stage builds.
Step 1: Dockerfile Without Multi-Stage Build
Let’s start with a basic Dockerfile that installs all the dependencies and sets up the Django application. Here’s what it looks like:
FROM ubuntu

WORKDIR /app

COPY requirements.txt /app
COPY toDeploy /app

ENV PIP_BREAK_SYSTEM_PACKAGES=1

RUN apt-get update && \
  apt-get install -y python3 python3-pip && \
  pip install -r requirements.txt && \
  cd toDeploy

RUN python3 manage.py makemigrations && \
  python3 manage.py migrate

ENTRYPOINT ["python3"]
CMD ["manage.py", "runserver", "0.0.0.0:8000"]
You can check out this basic Dockerfile in my GitHub repository.
This Dockerfile uses an Ubuntu base image, installs Python, and then installs the required Python packages from requirements.txt. It runs Django migrations before starting the server. While this setup works, it's not the most efficient approach.
Drawbacks:
The image will be large because Ubuntu is a heavy base image.
The build process installs unnecessary dependencies that aren't needed in production.
Step 2: Building the Image
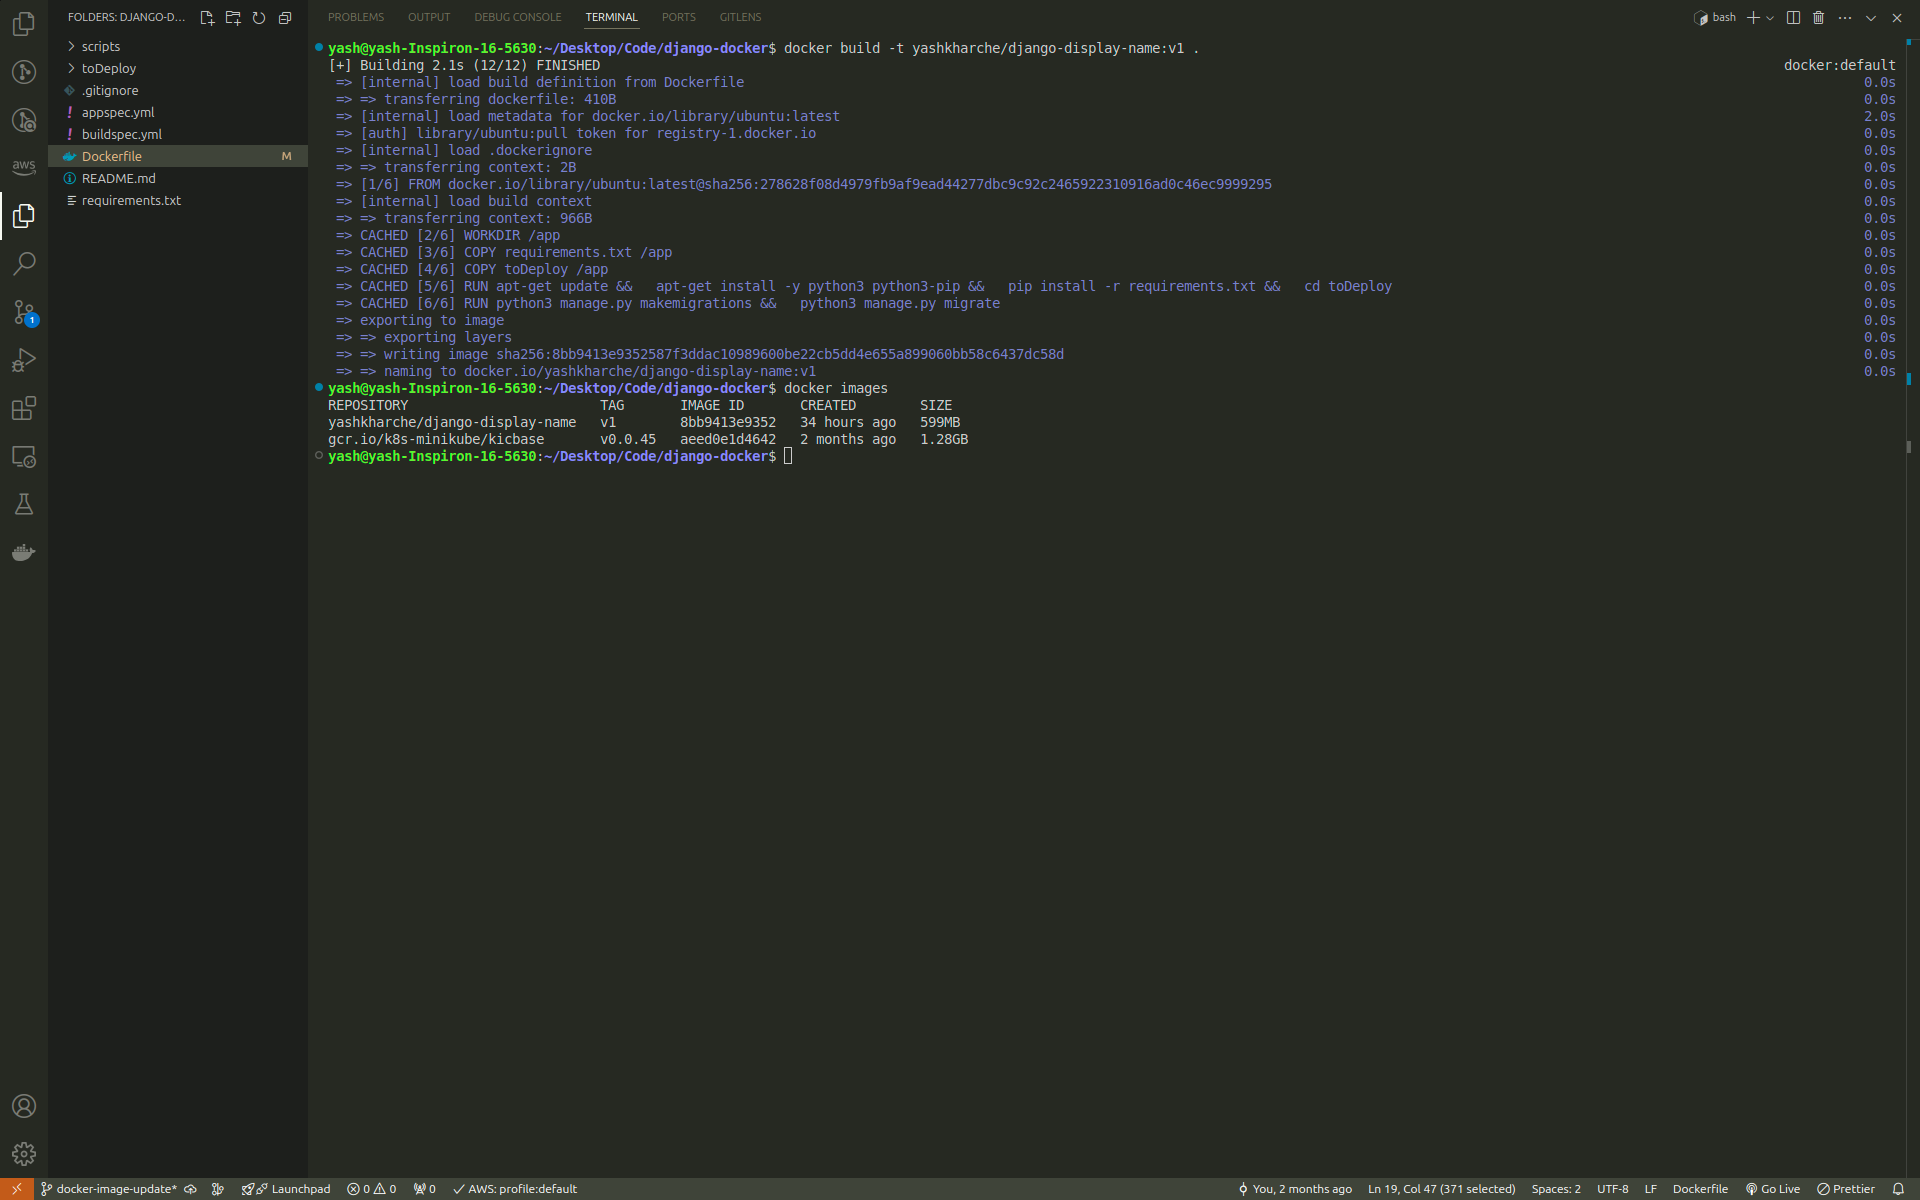
Now, let’s build the Docker image using the following command:
docker build -t <username>/django-display-name:v1 .
Once the image is built, you can check the images you have by running:
docker images
Step 3: Introducing Multi-Stage Dockerfile
Now, let’s optimize our Dockerfile by introducing multi-stage builds.
# Stage 1
FROM python:3.10-alpine AS builder
WORKDIR /app

COPY requirements.txt /app/
RUN pip install --no-cache-dir -r requirements.txt

# Stage 2
FROM python:3.10-alpine
WORKDIR /app

COPY --from=builder /usr/local/lib/python3.10/site-packages /usr/local/lib/python3.10/site-packages
COPY --from=builder /usr/local/bin /usr/local/bin

COPY toDeploy /app/toDeploy

WORKDIR /app/toDeploy

CMD ["sh", "-c", "python3 manage.py makemigrations && python3 manage.py migrate && python3 manage.py runserver 0.0.0.0:8000"]
Here’s what’s happening:
Stage 1 (Builder): We use a
python:3.10-alpinebase image and install only the necessary dependencies fromrequirements.txt. This stage doesn’t include the full Django app or unnecessary files.Stage 2 (Application): In this stage, we start with a fresh
python:3.10-alpineimage, copy over only the dependencies installed in the builder stage, and then copy the Django project files (toDeploy). Finally, we set up the entrypoint to run migrations and start the server.
By splitting the build and runtime stages, we ensure that the final image is much smaller and cleaner, as it doesn't include build tools or other unnecessary dependencies.
Step 4: Building the Multi-Stage Image
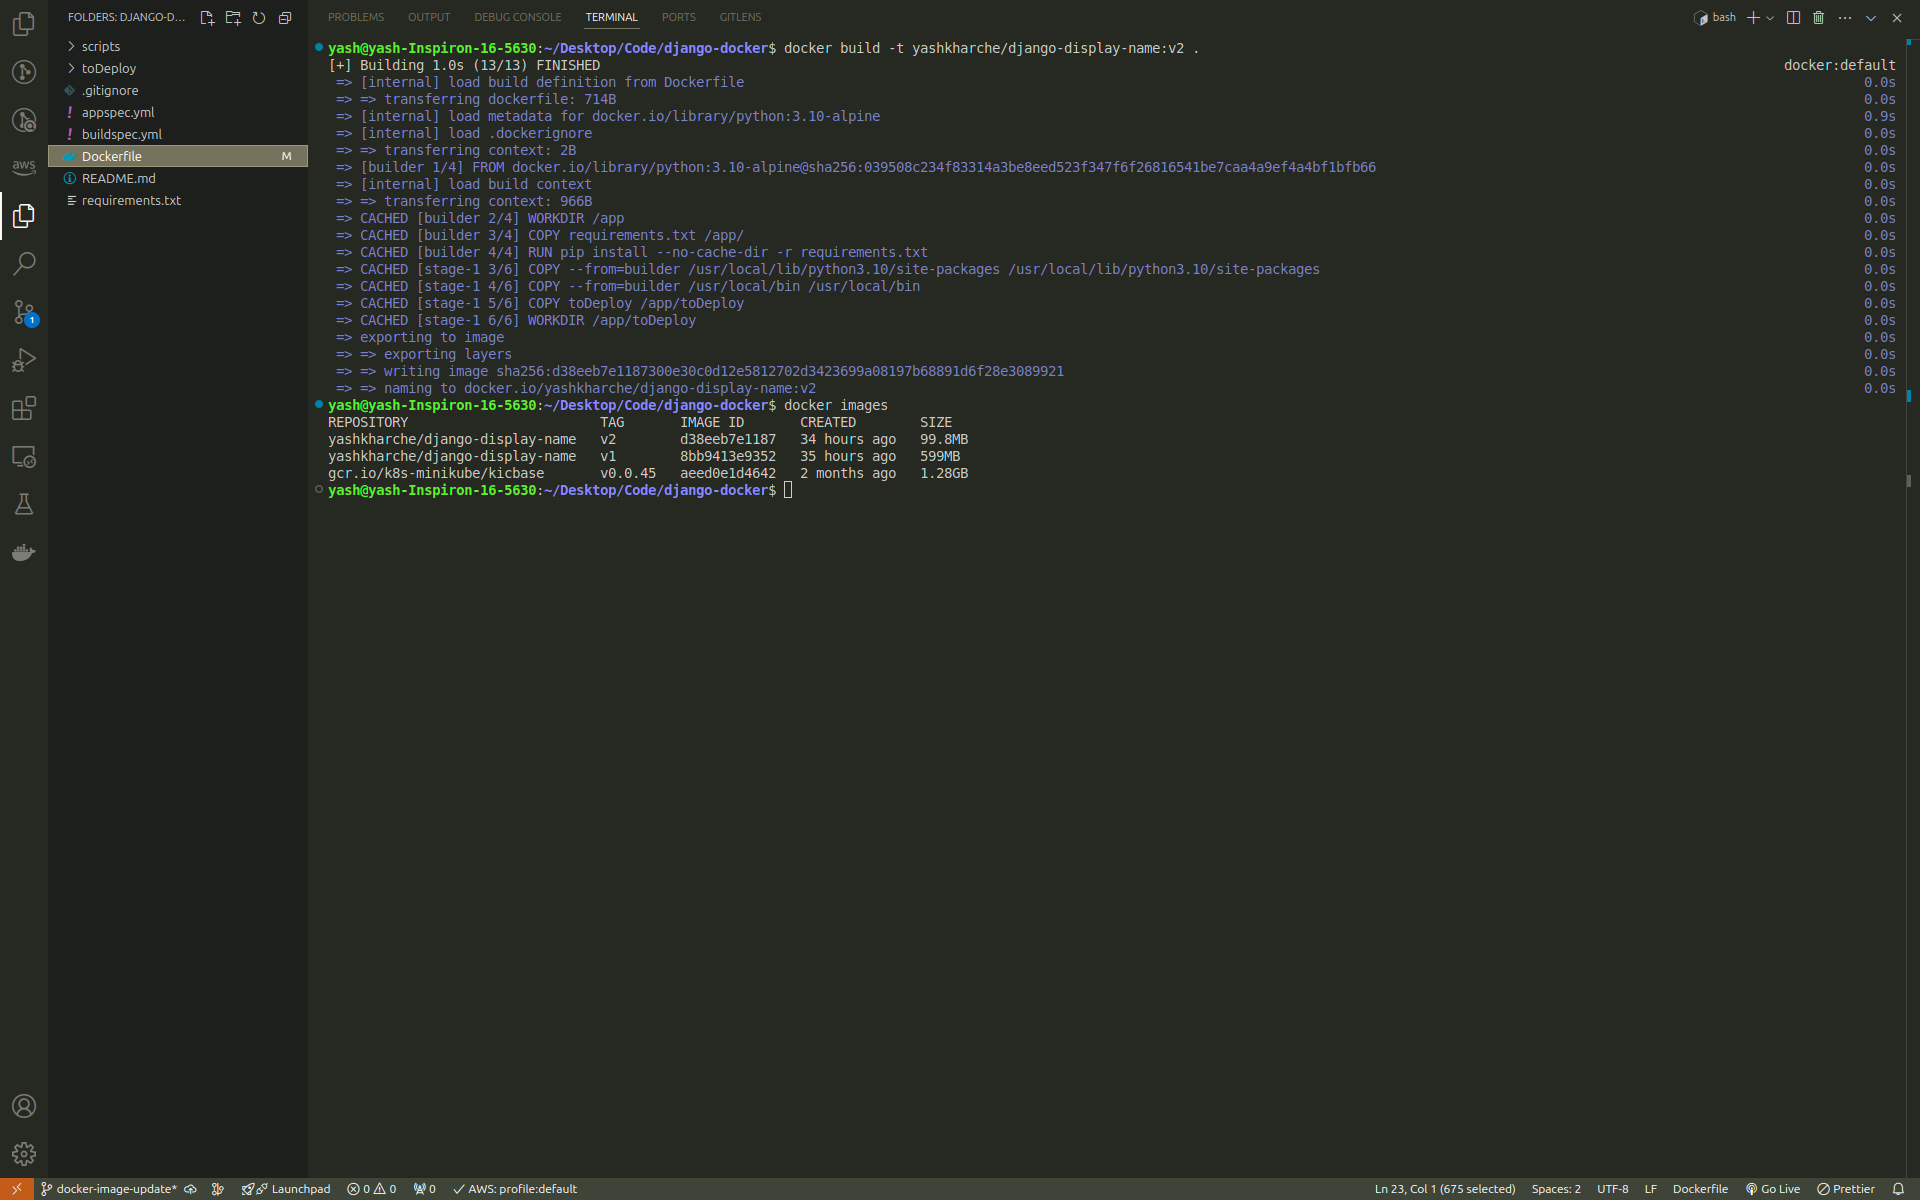
Now, let's build the optimized multi-stage Docker image with:
docker build -t <username>/django-display-name:v2 .
Once the image is built, we can again check the image sizes:
docker images
Step 5: Running the Multi-Stage Image Locally
To test the new multi-stage image, run the following command:
docker run -it -p 8000:8000 <username>/django-display-name:v2
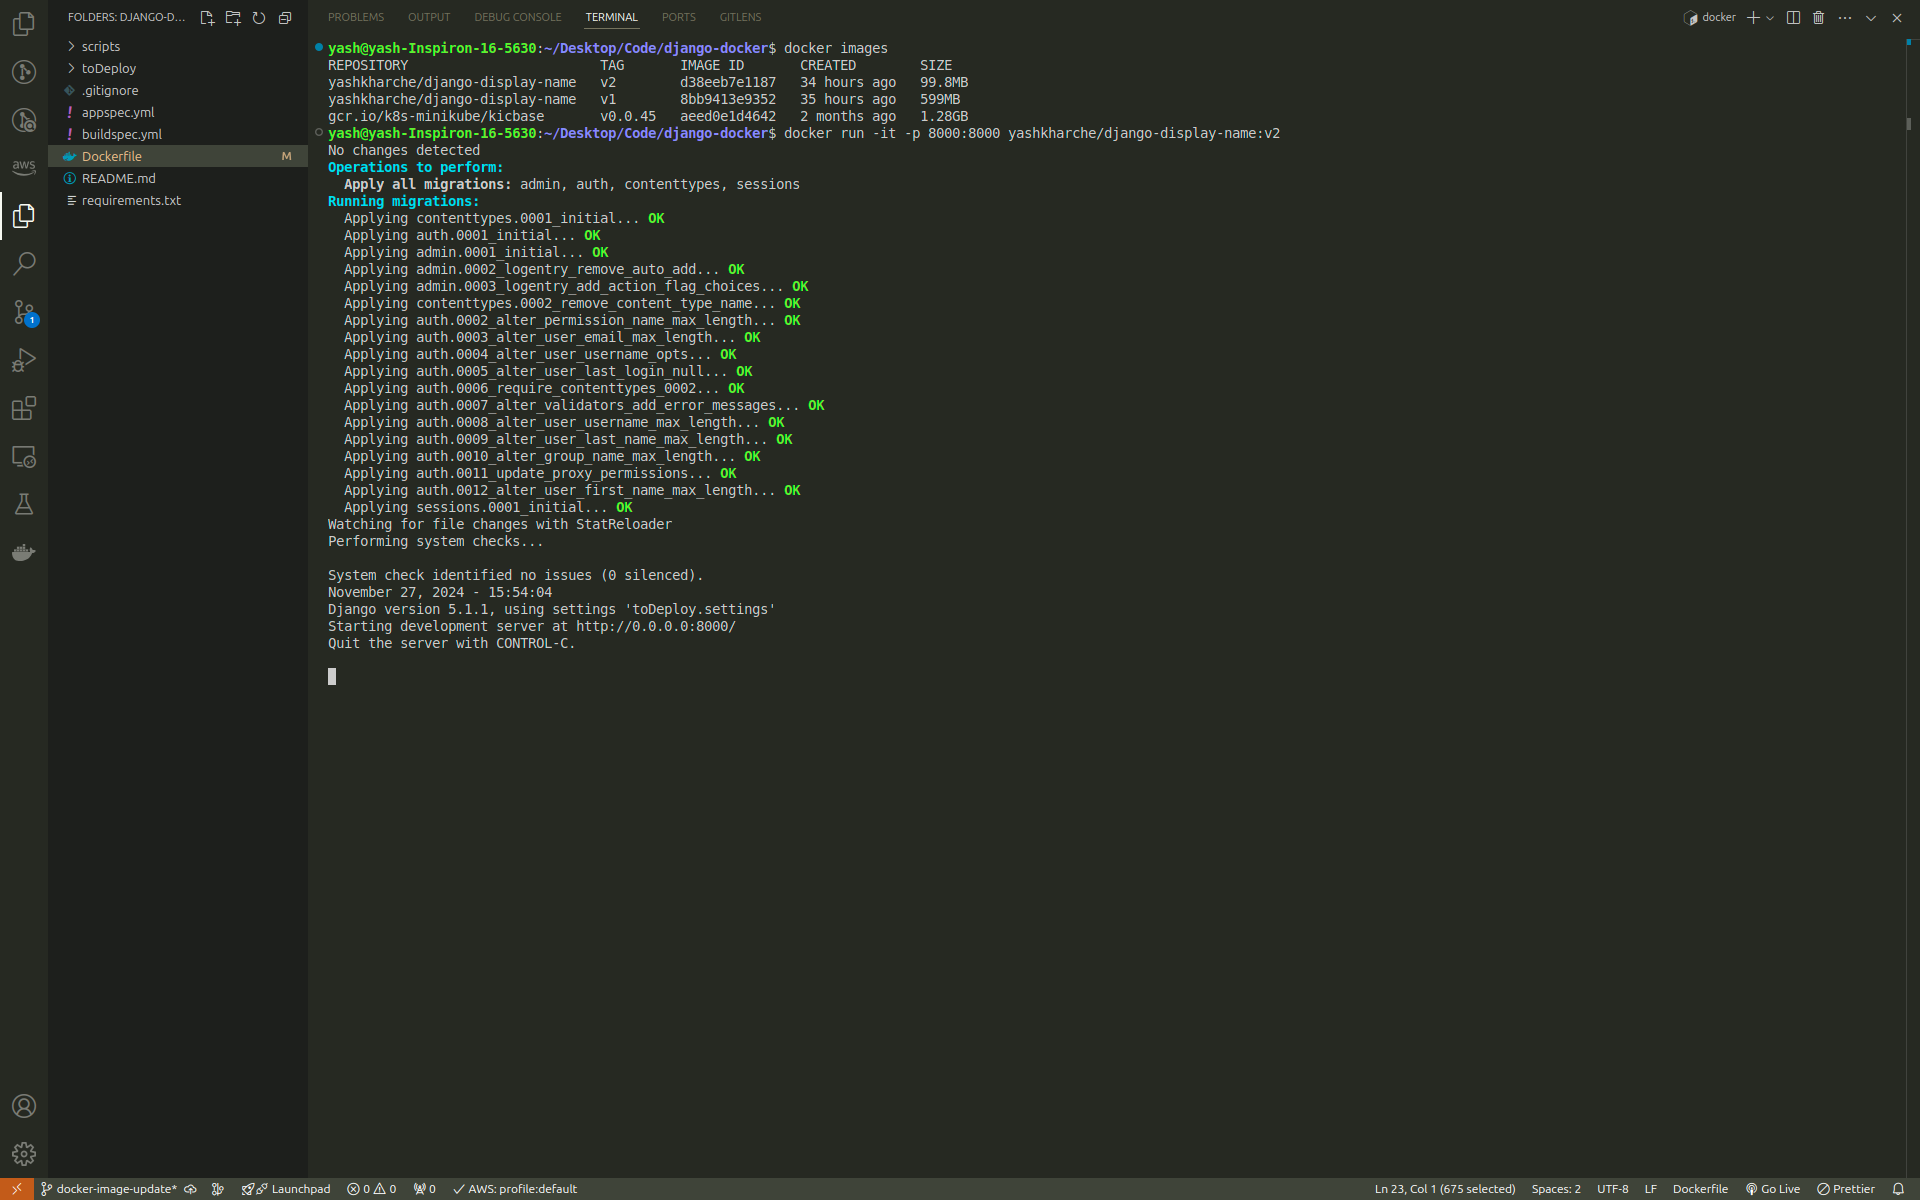
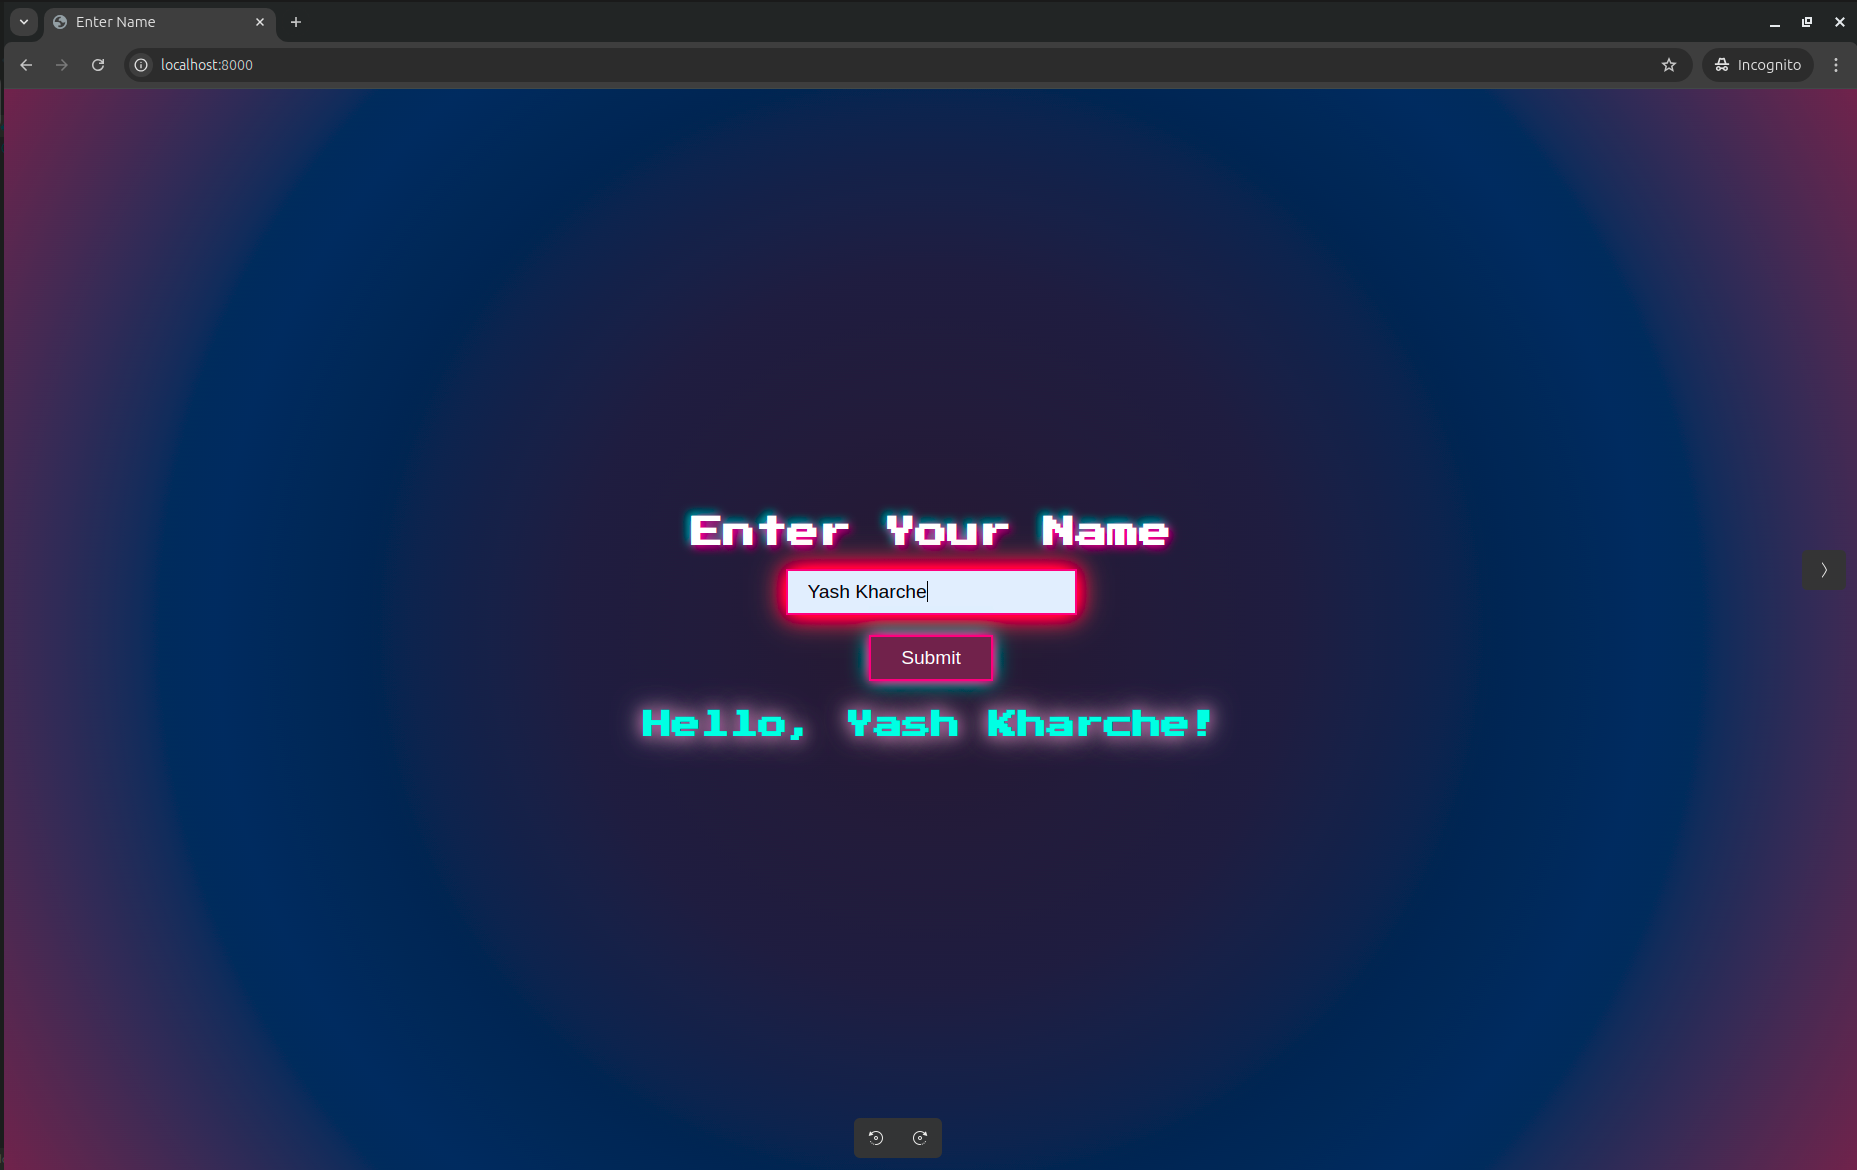
Then, go to your browser and open http://localhost:8000 to see the Django application in action.
Step 6: Comparing Image Sizes
After building both versions of the Docker image, you'll notice a significant reduction in size for the multi-stage build, from 599 MB to 99 MB. This is because we’ve excluded unnecessary build dependencies and kept only what’s needed for production, making the final image more efficient for deployment.
Conclusion
In this blog, we’ve learned how to optimize a Django application using Docker’s multi-stage builds. By separating the build and runtime stages, we were able to drastically reduce the size of the final Docker image, which leads to more efficient deployment pipelines.
I hope this guide helps you optimize your own Django applications with Docker. If you have any questions or feedback, feel free to drop them in the comments below!
FAQs
Q1: What are the main benefits of using multi-stage Docker builds?
A1: Multi-stage Docker builds help in creating smaller, more efficient Docker images by separating the build and runtime environments. This reduces the size of the final image by excluding unnecessary build dependencies, tools, and files, making deployments faster and more secure.
Q2: How does a multi-stage build differ from a regular Docker build?
A2: In a regular Docker build, all dependencies, build tools, and application files are bundled together in a single image. With multi-stage builds, you can use one stage to build dependencies and another to package only the essential files for the production environment. This results in a leaner final image.
Q3: Can I use multi-stage builds for non-Django applications?
A3: Yes, multi-stage builds are not limited to Django applications. They can be used with any application, including Node.js, React, Java, or even static websites. The approach works by separating the build process from the final application image, which can benefit virtually any software project.
Q4: How does using multi-stage builds impact deployment speed?
A4: Since multi-stage builds create smaller, more optimized Docker images, the deployment process becomes faster. Smaller images are quicker to push to container registries and pull down from production environments, reducing both time and bandwidth consumption.
Q5: Can I use multi-stage builds with Docker Compose?
A5: Yes, Docker Compose can be used with multi-stage builds. You can define different services in your docker-compose.yml file and specify the image built from a multi-stage Dockerfile. This allows you to run complex multi-container applications while still taking advantage of multi-stage build optimizations.
Subscribe to my newsletter
Read articles from Yash Kharche directly inside your inbox. Subscribe to the newsletter, and don't miss out.
Written by

Yash Kharche
Yash Kharche
I'm a Full-stack developer and a DevOps enthusiast with a passion for developing solutions that drive impact. Currently, I’m focused on implementing new features and solving issues for accessible, human-centered softwares at The Hotspring.