Mastering Kubernetes Storage: Understanding PersistentVolumes and Claims in Simple Terms
 Chetan Mohanrao Mohod
Persistent Volume & Persistent Volume Claim:
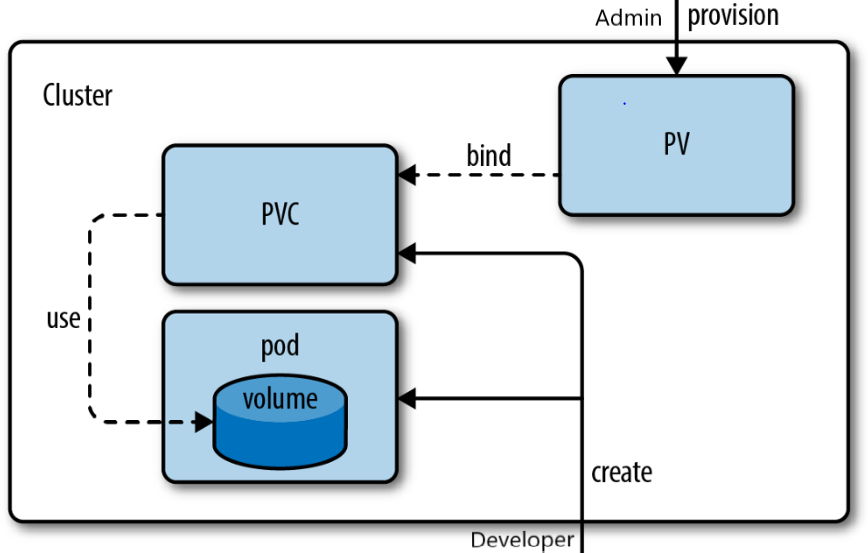
A PersistentVolume (PV) in Kubernetes is like a storage room you rent for your app's data, separate from the app itself. A PersistentVolumeClaim (PVC) is your request to use a part of that room.
Example:
Imagine you're running a bakery. The PV is the storage locker where you keep your ingredients (like flour and sugar). The PVC is your "claim" saying, "I need 10kg of flour from that locker for today's bread-making." This way, your ingredients stay safe even if you switch kitchens.
Before creating a Persistent Volume, it is necessary to follow several steps, starting from creating an EC2 instance to cloning certain repositories:
Create a virtual machine (VM) on any cloud provider. For this example, AWS is being used. After creating EC2 instance login to the EC2 instance using SSH.
Clone our kubestarter GitHub Repo to get started.
git clone https://github.com/Chetan-Mohod/kubestarter.git
- Now, we will create a kind cluster:
kind create cluster --name=your-cluster-name --config=config.yml
- Now check cluster has been created or not
kubectl get nodes
- Now, we will clone our SpringBoot App repository: Repo
git clone https://github.com/Chetan-Mohod/Springboot-BankApp.git
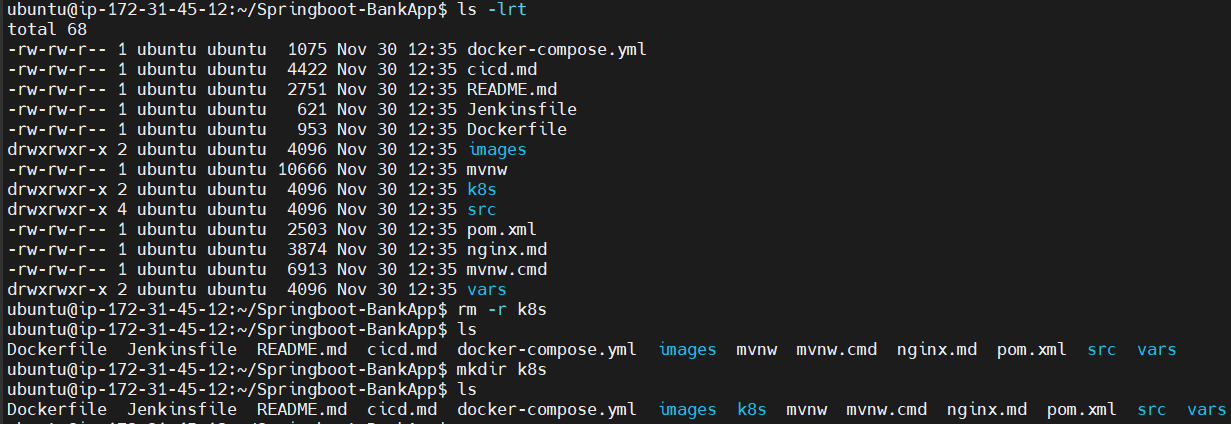
- We will remove some folder from this repo because we will create everything from scratch:
ls
rm k8s
mkdir k8s
cd k8s

We will write here all our configuration files:
- First we will create our namespace
#vim namespace.yml

kind: namespace
apiVersion:
  metadata:
    name: bankapp-namespace
kubectl apply -f namespace.yml

kubectl get ns
Once Namespace has been created then we can create any resource:
If one of our pods crashes, preserving its data is important. To address this, we use the concept of Kubernetes Persistent Volume.
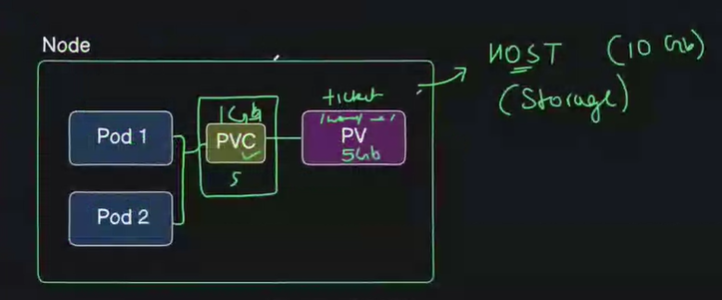
A Persistent Volume (PV) is a storage space allocated virtually from your host (node) by Kubernetes.
For example, if you create a Persistent Volume of 5GB on a host with 10GB, you allocate 5GB for Kubernetes from that host.
A Persistent Volume is linked to a Kubernetes cluster and your host machine with specific read/write policies or storage configurations.
A PV is similar to a Docker Volume, where in Docker, the container is bound to your host. In a PV, it is bound to the Kubernetes cluster and host.
Now, how do these pods obtain a Persistent Volume (PV)? They need to claim the PV using a Persistent Volume Claim (PVC).

- We will create a file named
persistentVolume.yml.
apiVersion: v1
kind: PersistentVolume
metadata:
  name: bankapp-pv
  namespace: bankapp-namespace
  labels:
    app: bankapp
spec: #Persistent Volume Spec
  capacity: #Capacity of Persistent volume that it can take storage from host
    storage: 5Gi
  accessModes:
    - ReadWriteOnce #Read write permission
  persistentVolumeReclaimPolicy: Retain  #If application deleted then persistent should be available that's why we Retain it
  storageClassName: manual  #Manual means if we have Kind cluster it will take storage class of that cluster.
  hostPath:
    path: "/tmp/bankapp-mysql" # This will be stored on the host machine running KIND
The term "hostPath" refers to storing all data on the cluster node. It specifies the path on the worker node within the cluster where the data will be kept.
Run
docker psto list the running containers and access any node.Use the command
docker exec -it container_id bashto enter a container.Once inside, use
lsto view the host path.

- Your data will be stored inside the kind cluster.
- To apply these changes, execute the following command:
kubectl apply -f persistentVolume.yml
- To verify the persistent volume, follow these steps:
kubectl get pv -n bankapp-namespace
You will observe that no one has claimed the persistent volume:

- A Persistent Volume Claim (PVC) is a configuration file used to request storage from a Persistent Volume. To utilize this, create a PVC file and apply it using the appropriate commands.
apiVersion: v1
kind: PersistentVolumeClaim
metadata:
  name: bankapp-pvc
  namespace: bankapp-namespace
  labels:
    app: bankapp
spec:
  accessModes:
    - ReadWriteOnce
  resources:
    requests:
      storage: 5Gi
  storageClassName: manual
kubectl apply -f persistentVolumeClaim.yml
Now, you will see that your persistent volume has been successfully claimed and bound.

Happy Learning :)
Chetan Mohod ✨
For more DevOps updates, you can follow me on LinkedIn.
Subscribe to my newsletter
Read articles from Chetan Mohanrao Mohod directly inside your inbox. Subscribe to the newsletter, and don't miss out.
Written by

Chetan Mohanrao Mohod
Chetan Mohanrao Mohod
DevOps Engineer focused on automating workflows, optimizing infrastructure, and building scalable efficient solutions.