Flutter Dio Part 1: Introduction to Dio
 Harish Kunchala
Table of contents

While building apps in Flutter is extremely fluid and wonderfully intuitive. We obviously know that we can’t build the next TikTok or Twitter by only building offline apps. Which is why we absolutely need internet capabilities in our Flutter apps.
There are several libraries that help us with our networking needs, but I think these two are the most popular in Flutter:
http: We can’t do any internet calls without adding the
httppackage. This is good for basic networking needs.dio: A powerful HTTP networking package for Dart/Flutter, supports Global configuration, Interceptors, FormData, Request cancellation, File uploading/downloading, Timeout, Custom adapters, Transformers, etc.
So, in this series, we’ll build a sample task management app that’ll go through every feature of dio in detail.
You can find all the code in the following repo: dio_tasker
Introduction to Dio:
- Create a New Flutter Project:
First, we’ll create a new flutter project named dio_tasker. Let’s open our terminal and run the following commands:
flutter create dio_tasker --platform android,ios --org com.yourorg
- Add Dio to our Project:
Next, let’s add Dio to our project dependencies. Within terminal, navigate to our project directory and let’s run the following command:
flutter pub add dio
- Set Up Dio:
Now let’s set up Dio in our project. First create a new directory under our lib/ named services. Create a file named api_service.dart under lib/services directory. This file will contain the code for making HTTP requests using Dio.
import 'package:dio/dio.dart';

class ApiService {
  // Create an instance of Dio
  final _dio = Dio();

  // Method to fetch tasks from the API
  Future<List<dynamic>> fetchTasks() async {
    // Make a GET request to the API endpoint
    final response = await _dio.get('https://jsonplaceholder.typicode.com/todos');
    // Return the response data
    return response.data;
  }
}
- Fetch and Display Tasks:
Next, we’ll update the main.dart to fetch and display tasks using ApiService class. So, let’s replace the code in lib/main.dart with the following:
import 'package:dio_tasker/services/api_service.dart';
import 'package:flutter/material.dart';

void main() {
  runApp(const MyApp());
}

class MyApp extends StatelessWidget {
  const MyApp({super.key});

  @override
  Widget build(BuildContext context) {
    return const MaterialApp(
      home: TaskListScreen(),
    );
  }
}

class TaskListScreen extends StatefulWidget {
  const TaskListScreen({super.key});

  @override
  State<TaskListScreen> createState() => _TaskListScreenState();
}

class _TaskListScreenState extends State<TaskListScreen> {
  // Create an instance of ApiService
  final ApiService _apiService = ApiService();
  // List to hold the fetched tasks
  List<dynamic> _tasks = [];

  @override
  void initState() {
    super.initState();
    // Fetch tasks when the widget is initialized
    _fetchTasks();
  }

  // Method to fetch tasks and update the state
  void _fetchTasks() async {
    // Fetch tasks from the API
    final tasks = await _apiService.fetchTasks();
    // Update the state with the fetched tasks
    setState(() {
      _tasks = tasks;
    });
  }

  @override
  Widget build(BuildContext context) {
    return Scaffold(
      appBar: AppBar(
        title: const Text('Task Manager'),
      ),
      body: ListView.builder(
        // Set the number of items in the list
        itemCount: _tasks.length,
        // Build each item in the list
        itemBuilder: (context, index) {
          return ListTile(
            // Display the task title
            title: Text(_tasks[index]['title']),
          );
        },
      ),
    );
  }
}
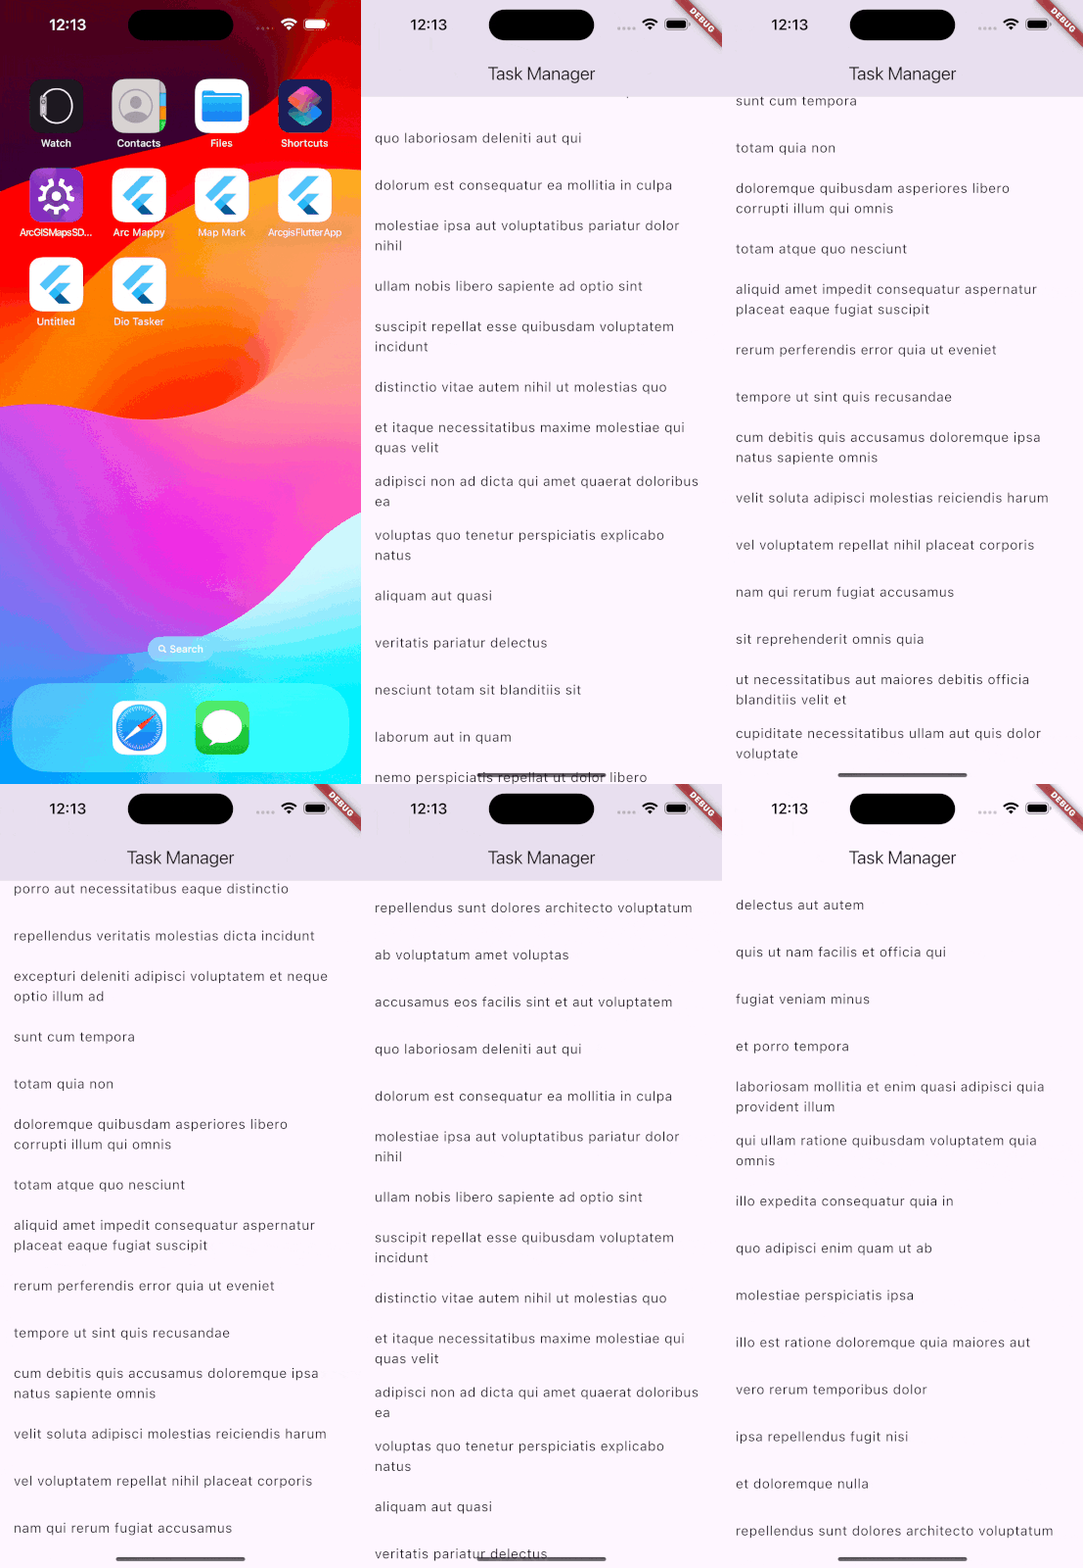
Output:
Now that we’ve added ApiService and also setup _fetchTasks() in main.dart to get the list of mock tasks. Let’s look out the output.

You can find the source code for the above code here: dio_tasker/01-introduction.
In the upcoming articles. We’ll go through additional features of dio. Happy Coding 🐦.
Subscribe to my newsletter
Read articles from Harish Kunchala directly inside your inbox. Subscribe to the newsletter, and don't miss out.
Written by
