How to Build Multilingual Apps with i18n in React
 Ayantunji Timilehin
I recently worked on an exciting project that involved creating a website capable of switching between languages to appeal to a broader audience. This made me understand the concept of "localization" better, which typically entails adapting content to make it relevant, accessible, and relatable for users in different languages and regions.
Localization isn’t just about translating words, it’s about creating an experience that makes users feel at home, no matter their language. For example, global platforms like Amazon make language switching so seamless that it feels almost magical. Beyond enhancing user experience, this feature plays a crucial role in boosting businesses by reaching a wider audience and fostering stronger connections with customers worldwide.
Table of Contents
What is i18n, and Why Use It?
i18n, short for internationalization, means that an application supports multiple languages. "i18n" is derived from the fact that there are 18 letters between the first "i" and the last "n" in "internationalization." It’s all about making your app adaptable for global audiences by handling text translation, formatting dates and numbers, managing currencies, and accommodating regional conventions.
By enabling internationalization, your app becomes not just a tool but an inclusive platform that speaks directly to a user’s preference and culture.
Let’s dive right in
We’ll create a very simple demo multilingual web application with a dark mode toggle feature to demonstrate how to achieve this concept.
Prerequisites
Basic Knowledge of React - You should understand how to create components, manage state, and use Hooks like
useStateanduseEffect. If you’re new to React, I recommend starting with the official React docs for a solid foundation.Familiarity with Internationalization Concepts - Knowing the basics of internationalization (i18n) and why it’s important will give you context for the project. This article's earlier sections cover the essentials.
Tailwind CSS - We'll use Tailwind CSS for styling. It's a utility-first CSS framework that helps you build modern, responsive designs without leaving your HTML. If you’re unfamiliar, check out Tailwind's documentation.
Node.js - Make sure Node.js is installed on your system to handle dependencies. You can download the latest version from Node.js.
Package Manager - Either npm (included with Node.js) or yarn is needed to manage project dependencies
Tools we’ll be using
Code Editor
Localization Library: react-i18next
Icons Library: hero-icons
Step 1: How to Set Up the Project
Initialize the Project
Use Vite for fast setup:
npm create vite@latest multilingual-demo
Follow the instructions that show up in your terminal, selecting React and TypeScript for development as shown in the image below:

Install Dependencies
Run the following commands in your terminal to install the dependencies required for this project:
npm install i18next react-i18next i18next-browser-languagedetector i18next-http-backend heroicons
npm install tailwindcss postcss autoprefixer
npx tailwindcss init
Configure TailwindCSS
Update the tailwind.config.ts file:
/** @type {import('tailwindcss').Config} */
module.exports = {
  content: ["./src/**/*.{js,jsx,ts,tsx}"],
  darkMode: "class", //For our dark mode functionality
  theme: {
    container: {
      center: true,
      padding: "1.25rem",
      screens: {
        sm: "1200px",
      },
    },
    extend: {},
  },
  plugins: [],
};
Add TailwindCSS to src/index.css:
@tailwind base;
@tailwind components;
@tailwind utilities;
Step 2: How to Set Up Internationalization with i18next
Initialize i18next
Create an i18n.tsx file in the src folder and configure i18next:
import i18next from "i18next";
import LanguageDetector from "i18next-browser-languagedetector";
import { initReactI18next } from "react-i18next";
import Backend from "i18next-http-backend";

i18next.use(LanguageDetector).use(initReactI18next).use(Backend).init({
  returnObjects: true,
  fallbackLng: "en", // Language to fallback to if the selected is not configured
  debug: true, //To enable us see errors
  //   lng: "en", //Default language as english
});
Let’s take a quick look at the contents of this file, as it plays a key role in enabling the translation functionality. This file is responsible for setting up the core of the translation process and making sure that the language-switching feature works smoothly across your app.
i18next: The core internalization library we’re using for translation.LanguageDetector: Helps us detect the user's preferred language automatically, based on browser settings.initReactI18next: Is responsible for integrating thei18nextplugin with React and provides Hooks like theuseTranslationHook and other utilities.Backend: Fetches translation data dynamically from an external source. In this case, we’ll be using JSON files.
Import this file into the main.tsx file:
//main.tsx

import React, { StrictMode } from "react";
import { createRoot } from "react-dom/client";
import "./index.css";
import App from "./App.tsx";
import "./i18n.tsx";  //Import here

createRoot(document.getElementById("root")!).render(
  <StrictMode>
    <React.Suspense fallback="loading">
      <App />
    </React.Suspense>
  </StrictMode>
);
Create Translation Files
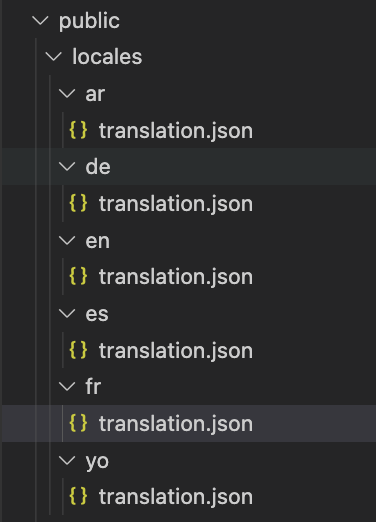
In the public/locales directory, create subfolders for each language (for example, en, fr) and include translation.json files:
en/translation.json
{
    "greeting": "Welcome to the Language Playground",
    "detail": {
        "line1": "Did you know that over 7,000 languages are spoken worldwide?",
        "line2": "This Playground demonstrates how web applications can support users in multiple languages, making them accessible and inclusive to people from different backgrounds."
    }
}
fr/translation.json
{
    "greeting": "Bienvenue sur le terrain de jeu linguistique",
    "detail": {
        "line1": "Saviez-vous que plus de 7 000 langues sont parlées dans le monde ?",
        "line2": "Ce terrain de jeu démontre comment les applications web peuvent prendre en charge les utilisateurs dans plusieurs langues, les rendant accessibles et inclusives aux personnes de différents horizons."
    }
}
Here, you can add as many languages with their translation files that will be supplied to i18next. Note that the keys in the JSON files are the same as these would be used as references when displaying them on the website.

Step 3: How to Build Components
Create a components folder in the src directory and add the following components:
Language Selector
Create the LanguageSelector component – contains a select element to help users switch languages dynamically:
import { useEffect, useState } from "react";
import i18next from "i18next";
import { useTranslation } from "react-i18next";

type languageOption = { language: string; code: string };

const languageOptions: languageOption[] = [
  {
    language: "English",
    code: "en",
  },
  { language: "French", code: "fr" },
  { language: "German", code: "de" },
  { language: "Spanish", code: "es" },
  { language: "Arabic", code: "ar" },
  { language: "Yoruba", code: "yo" },
];

const LanguageSelector = () => {
  // Set the initial language from i18next's detected or default language
  const [language, setLanguage] = useState(i18next.language);

  const { i18n } = useTranslation();

  const handleLanguageChange = (e: React.ChangeEvent<HTMLSelectElement>) => {
    const selectedLanguage = e.target.value;
    setLanguage(selectedLanguage);
    i18next.changeLanguage(selectedLanguage); // Update language in i18next
  };

  useEffect(() => {
    document.body.dir = i18n.dir(); //sets the body to ltr or rtl
  }, [i18n, i18n.language]);

  return (
    <select
      id="language"
      value={language}
      onChange={handleLanguageChange}
      className="p-2 border border-gray-300 rounded-md shadow-sm focus:border-indigo-500 focus:ring focus:ring-indigo-200 focus:ring-opacity-50
        dark:bg-gray-800 dark:border-gray-600 dark:text-gray-200 dark:focus:border-indigo-400 dark:focus:ring-indigo-700 dark:focus:ring-opacity-50"
    >
      {languageOptions.map(({ language, code }, key) => (
        <option value={code} key={key}>
          {language}
        </option>
      ))}
    </select>
  );
};

export default LanguageSelector;
Initialize the language with the language detected by
i18nextor the default set language.The
useTranslationHook exposesi18ninstance fromi18nextto interact with the internationalization settings.The
handleLanguageChangefunction would be used to update the language selected by the user. It’s triggered when the user selects a new language from the dropdown menu.
Implementing Text Direction
The dir attribute in HTML is a critical feature for ensuring accessibility and inclusivity in web applications, especially when dealing with languages that differ in text direction. For example:
Left-to-Right (LTR): Most languages, including English, French, and Spanish, follow this direction.
Right-to-Left (RTL): Languages like Arabic, and Hebrew require text alignment and layout to be flipped to maintain readability and cultural context.
To achieve this in our app, we set the document.body.dir to the dir from i18n while listening for changes in language selection using the useEffect hook
Dark Mode Toggle
Create the DarkModeToggle component to switch between light and dark mode as preferred by the user.
import { useEffect, useState } from "react";
import { SunIcon, MoonIcon } from "@heroicons/react/solid";

const DarkModeToggle = () => {
  const [darkMode, setDarkMode] = useState(false);

  useEffect(() => {
    // Check local storage or system preference on first load
    const isDark =
      localStorage.getItem("theme") === "dark" ||
      (!localStorage.getItem("theme") &&
        window.matchMedia("(prefers-color-scheme: dark)").matches);
    setDarkMode(isDark);
    document.documentElement.classList.toggle("dark", isDark);
  }, []);

  const toggleDarkMode = () => {
    setDarkMode(!darkMode);
    document.documentElement.classList.toggle("dark", !darkMode);
    localStorage.setItem("theme", !darkMode ? "dark" : "light");
  };

  return (
    <button
      aria-label="Toggle dark mode"
      onClick={toggleDarkMode}
      className="p-1 rounded"
    >
      {darkMode ? (
        <SunIcon
          className="w-6 h-6 text-yellow-500 "
          onClick={toggleDarkMode}
        />
      ) : (
        <MoonIcon className="w-6 h-6 text-gray-900 " onClick={toggleDarkMode} />
      )}
    </button>
  );
};

export default DarkModeToggle;
Header Component
The Header component serves as a parent component to the DarkModeToggle and languageSelector components.
import DarkModeToggle from "./DarkModeToggle";
import LanguageSelector from "./LanguageSelector";

const Header = () => {
  return (
    <header className="container flex justify-between">
      <DarkModeToggle />
      <LanguageSelector />
    </header>
  );
};

export default Header;
Step 4: Main App Component
In the src/app file, include the following:
import { useTranslation } from "react-i18next";
import Header from "./components/Header";

const App = () => {
  const { t } = useTranslation();

  const line1 = t("detail.line1");
  const line2 = t("detail.line2");

  return (
    <div className="h-[100vh] bg-white text-black dark:bg-gray-900 dark:text-white py-8">
      <Header />
      <div className="container text-center max-w-2xl mt-28">
        <h1 className="text-4xl font-bold">{t("greeting")}</h1>
        <p className="mt-8">{line1}</p>
        <p className="mt-2">{line2}</p>
      </div>
    </div>
  );
};

export default App;
The
useTranslationHook fromreact-i18nextexposes thetfunction, which is used to fetch translated text.It fetches the translated string based on a key from your translation files (for example,
en.json,fr.json).
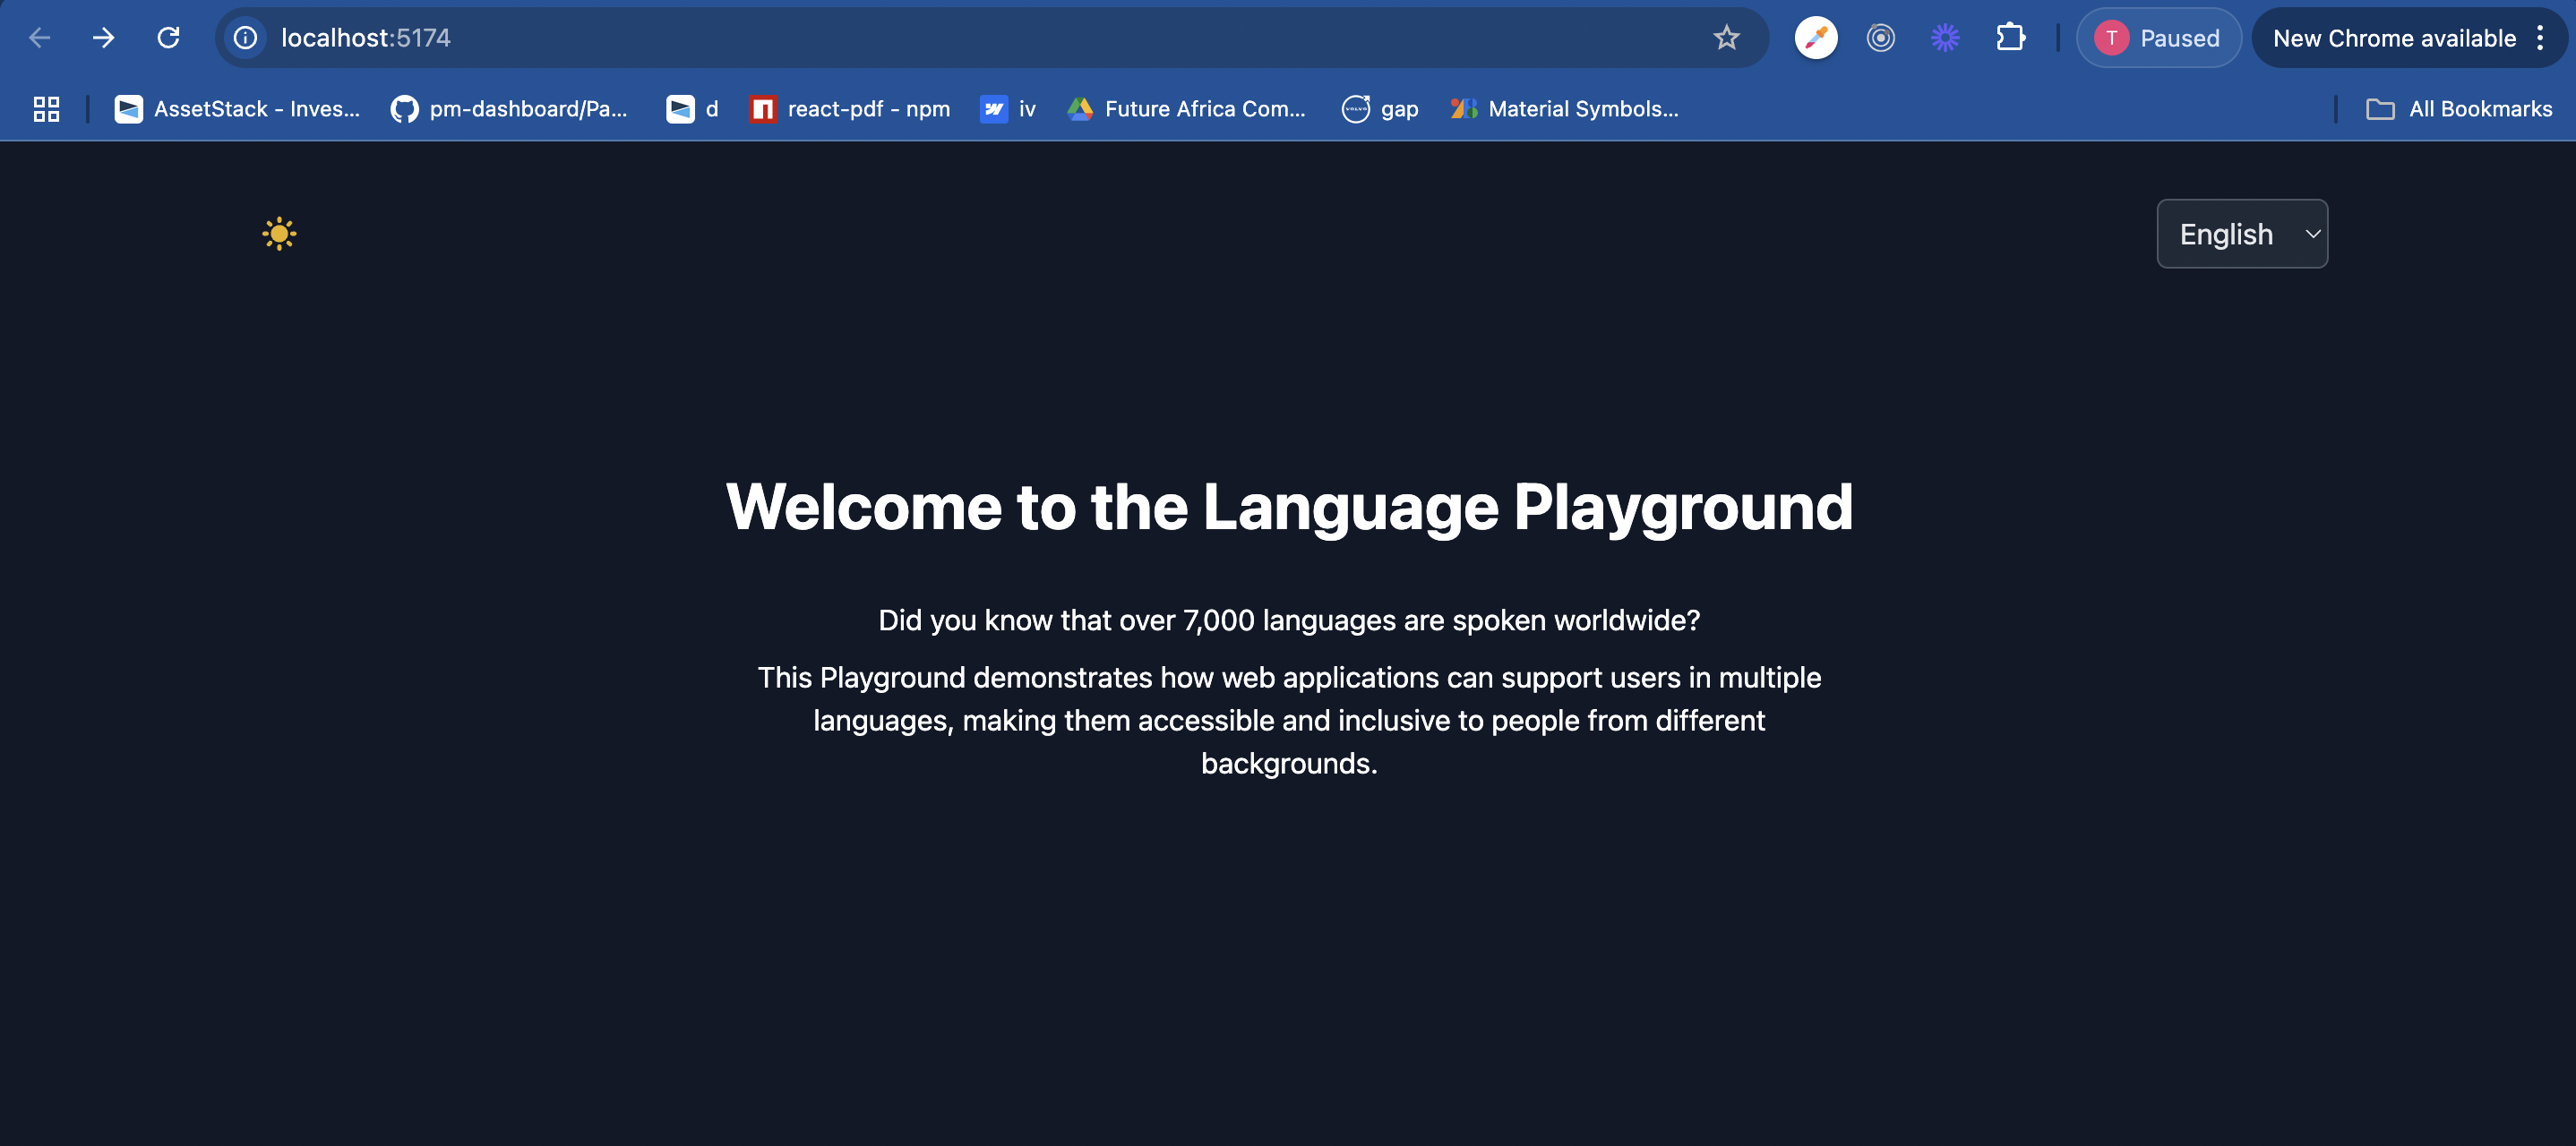
By following these steps, your app should now be fully functional with translations seamlessly integrated. This is what the final result of our app looks like:

Check out the live demo and the source code on GitHub
Conclusion
Creating websites that give users the flexibility to select their preferred language is not just a technical achievement but a step toward making the web more inclusive and welcoming.
By combining internationalization (i18n) with tools like React-i18next and styling with Tailwind CSS, you can build applications that are flexible, user-friendly, and accessible to a global audience.
In this project, we walked through setting up i18n, adding a language switcher, and including “dark mode” for better usability.
References
Subscribe to my newsletter
Read articles from Ayantunji Timilehin directly inside your inbox. Subscribe to the newsletter, and don't miss out.
Written by

Ayantunji Timilehin
Ayantunji Timilehin
Software Engineer passionate about performance and accessibility, building inclusive and efficient web experience