My Homelab Journey: Step-by-Step Guide with Raspberry Pi - Part 1
 Ayoub Touba
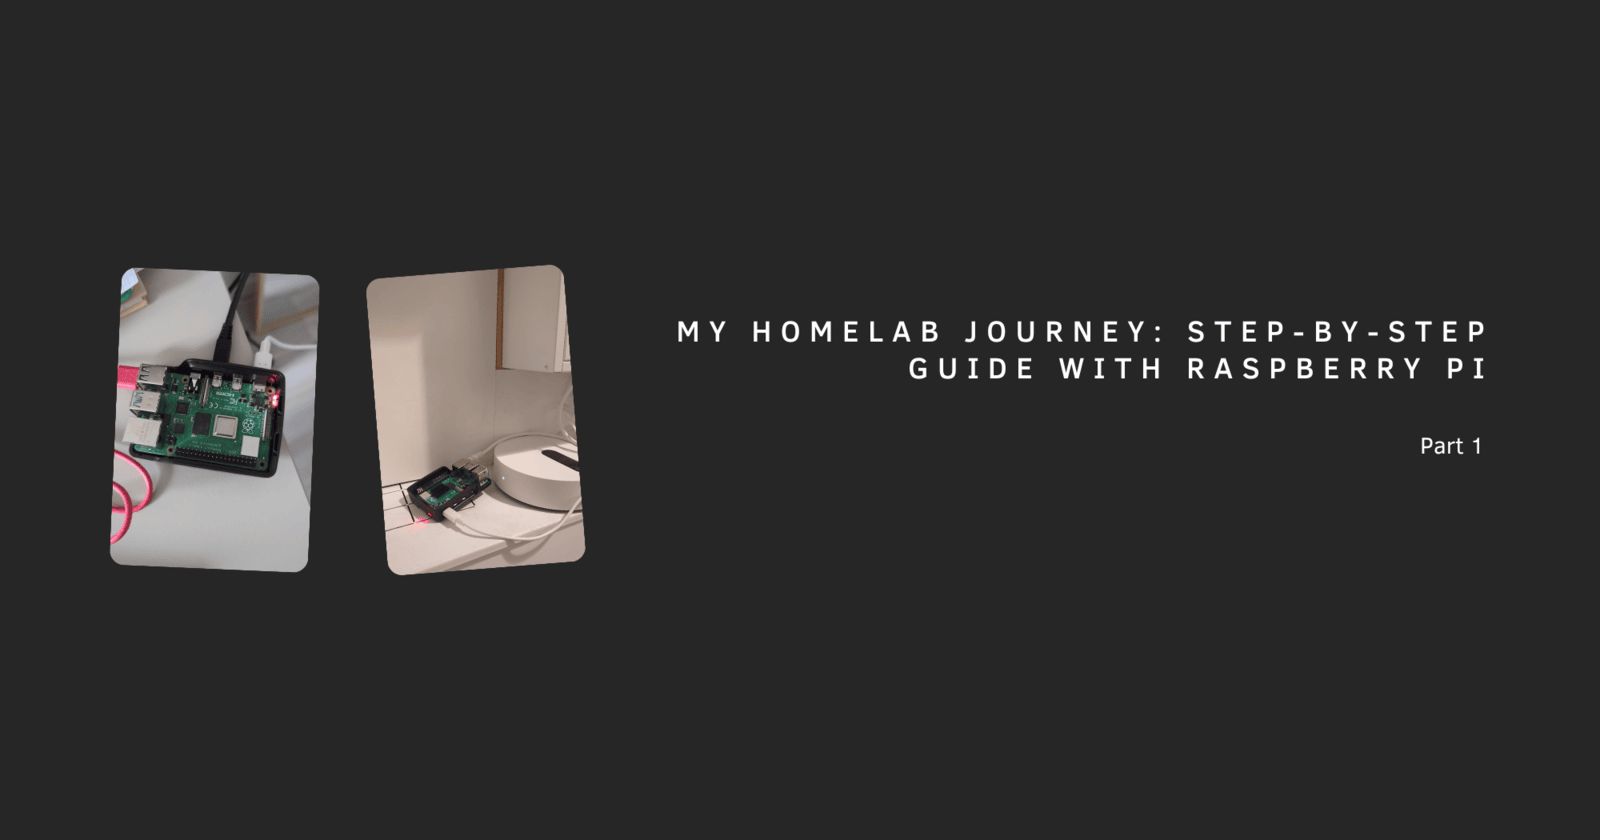
A few months ago, I got into DIY electronics, 3D modeling, and 3D printing, and one thing led to another—I discovered homelabs! It’s a whole world of tinkering with servers, networking, and running self-hosted applications.
I decided to take baby steps into this world with my Raspberry Pi 4 (8GB). At first, it was just for testing out things like Docker, Portainer, and AdGuard (to block ads and solve a DNS issue I’ll explain later). I also set up Nginx Proxy Manager for managing SSL and reverse proxies. I won’t lie—the learning curve was tough. But I ended up learning so much about networking, system configs, and other cool stuff that I didn’t expect to get into.
Now, I’m upgrading my setup with a larger microSD card and thought, why not document the process and share it? Hopefully, this helps someone else get started too!
Step 1: Getting Started with Raspberry Pi
First things first—you need a Raspberry Pi. Whether it’s a Pi 3, Pi 4, Pi 5, or even a Pi Zero 2W, any of them will work depending on what you’re planning to do. I went with the Raspberry Pi 4 (8GB) for its power and versatility.
For the operating system, I used Raspberry Pi Imager, which makes the setup super easy. It even lets you configure things like the root user, Wi-Fi, and hostname right out of the box.
Here’s what I did:
Download Raspberry Pi Imager
You can grab it from Raspberry Pi Software.Set Up the OS
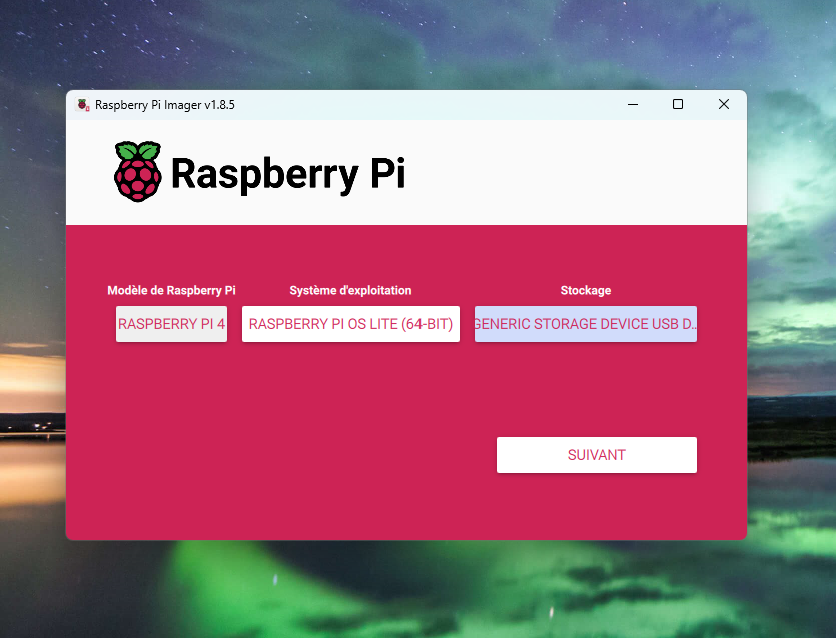
Choose your Raspberry Pi model.
Select the operating system—I went with Raspberry Pi OS Lite (64-bit) because I didn’t need the desktop version.
Insert your microSD card and select it as the storage.
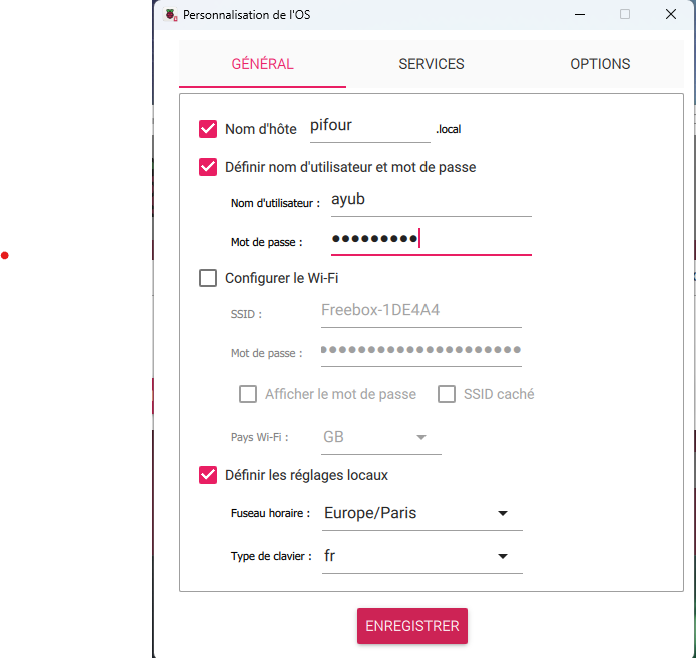
Configure Advanced Options
Before flashing, you can click the gear icon (Advanced Options) to set:Hostname: I named mine
pifour.localfor easier access on the network.User credentials: Set your username and password.
Wi-Fi credentials: I added these for initial setup, but later switched to Ethernet for better performance.
Flash the Card
Once everything is configured, click “Write” and let it do its thing.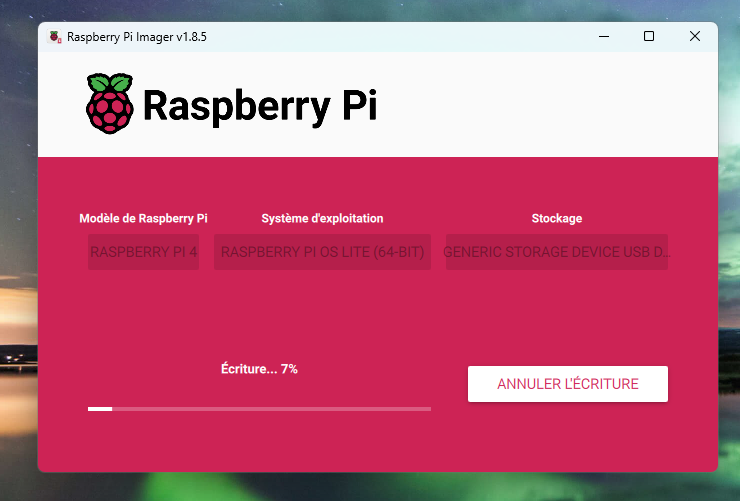
When the process is done, pop the microSD card into your Pi, connect the power, and you’re ready to roll!
Step 2: Connecting to the Raspberry Pi
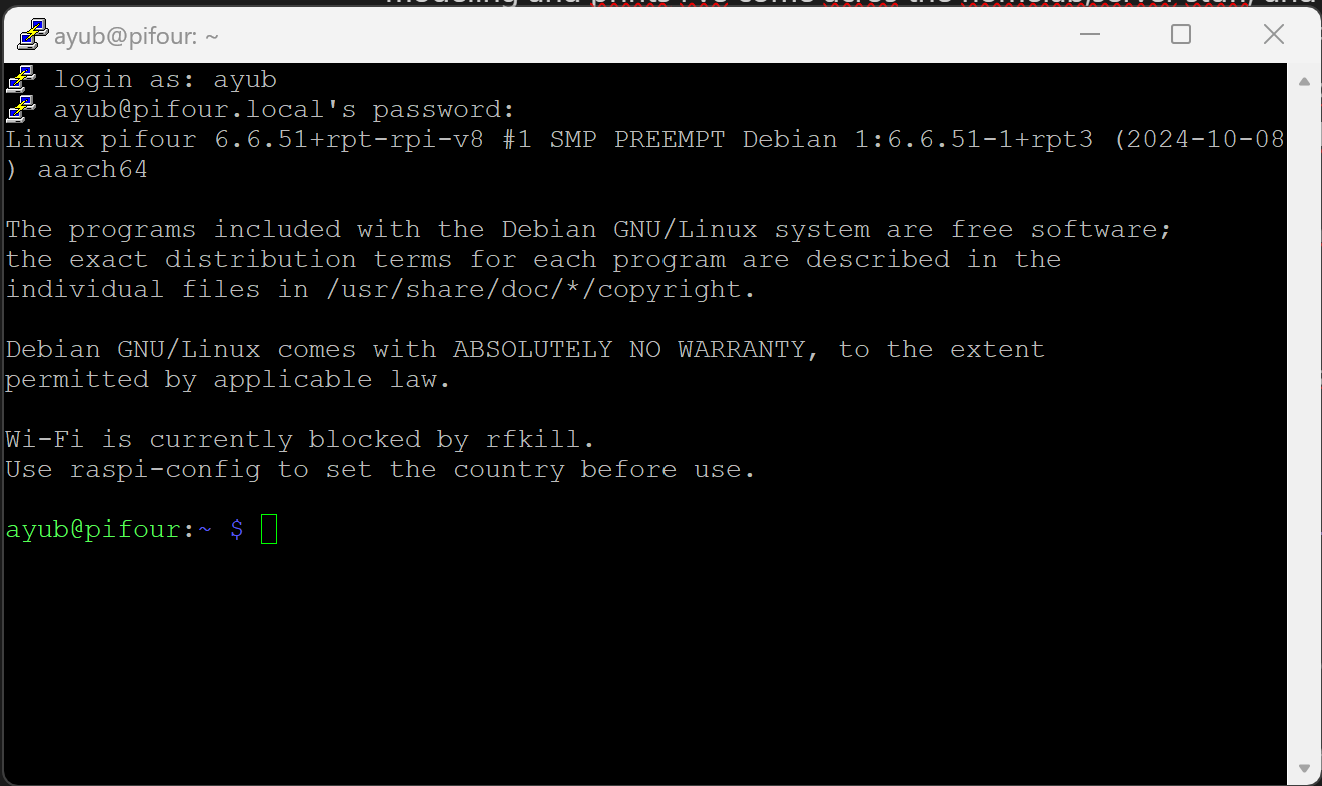
Once your Raspberry Pi is powered up and running, it’s time to connect to it. I used SSH from my laptop to access it remotely. If you’re unsure of the IP address, you can check your router’s admin page or connect the Pi to a monitor and use the hostname -I command to find it.
I used PuTTY on Windows, but you can also use the terminal on macOS or Linux.
Here’s how I connected:
Launch PuTTY (or your terminal).
Enter the Pi’s IP address as the Host Name and click Open.
Log in with the username and password you set up during the Raspberry Pi Imager configuration.
Once logged in, the first thing I did was update the system. Keeping your Pi updated is crucial for security and performance:
sudo apt update && sudo apt upgrade -y
Step 3: Setting a Static IP Address
One of the first tweaks I made was setting a static IP address for the Pi. This prevents its IP from changing every time the router restarts, which is super helpful when you’re running services like Docker or AdGuard.
You can do this through your router’s DHCP settings (easier) or directly on the Pi. I went with the latter using nmcli.
Steps to Set a Static IP:
Find the Network Interface Name:
Run this command to see the connection name (usuallyWired connection 1for Ethernet):sudo nmcli -p connection showAssign a Static IP:
Replace192.168.1.6with your desired IP, and192.168.1.254with your gateway/DNS address:sudo nmcli c mod "Wired connection 1" ipv4.addresses 192.168.1.6/24 ipv4.method manual sudo nmcli c mod "Wired connection 1" ipv4.gateway 192.168.1.254 sudo nmcli c mod "Wired connection 1" ipv4.dns 192.168.1.254Restart the Connection:
sudo nmcli c down "Wired connection 1" && sudo nmcli c up "Wired connection 1"
Now your Raspberry Pi will always have the same IP address, making it much easier to access and manage!
Step 4: Securing the Raspberry Pi with SSH Keys
I wanted to make my Raspberry Pi more secure and simplify the login process, so I set up SSH key-based authentication. This way, I could log in without entering my password, and it’s much harder for someone else to gain unauthorized access.
If you're new to SSH keys and want a detailed guide, I recommend this excellent tutorial from Pi My Life Up. It breaks down the process step-by-step and is perfect for beginners.
In case you prefer a quick overview, here’s what I did:
Steps to Set Up SSH Keys:
Generate an SSH Key Pair on Your Laptop:
On Linux or macOS, run the following command in your terminal:ssh-keygen -t rsa -b 4096This generates a public and private key pair. You’ll find them in
~/.ssh/id_rsa(private) and~/.ssh/id_rsa.pub(public).If you’re on Windows, you can use PuTTYgen to create the keys.
Set Up the SSH Directory on the Pi:
After connecting to your Pi via SSH, create the.sshdirectory and set the right permissions:mkdir -p ~/.ssh chmod 700 ~/.sshCopy the Public Key to the Pi:
From your laptop, run:ssh-copy-id pi@192.168.1.6Replace
piwith your username and192.168.1.6with your Pi’s IP address.If
ssh-copy-idisn’t available, you can manually copy the key:cat ~/.ssh/id_rsa.pub| ssh pi@192.168.1.6 "cat >> ~/.ssh/authorized_keys" chmod 600 ~/.ssh/authorized_keysDisable Password Login:
To improve security, I disabled password-based SSH logins:sudo nano /etc/ssh/sshd_configFind and change the line:
#PasswordAuthentication yesTo:
PasswordAuthentication noSave the file (
Ctrl + O, thenCtrl + X) and restart SSH:sudo systemctl restart ssh
Now I could log in securely without a password, making my Raspberry Pi much safer and easier to access.
Step 5: Setting Up a Firewall with UFW
To add an extra layer of security, I installed UFW (Uncomplicated Firewall). It’s a simple tool to manage firewall rules and block unwanted access.
Installing and Configuring UFW:
Install UFW:
sudo apt install ufw -yAllow SSH Connections:
Before enabling the firewall, make sure SSH is allowed so you don’t lock yourself out:sudo ufw allow 22Allow Additional Ports (Optional):
If you plan to use HTTP or HTTPS for web services, allow those ports as well:sudo ufw allow 80 sudo ufw allow 443Enable Rate Limiting for SSH:
To prevent brute force attacks, limit SSH connection attempts:sudo ufw limit 22Enable the Firewall:
sudo ufw enableCheck the Firewall Status:
sudo ufw status verbose
That’s it! My Raspberry Pi was now more secure, with SSH keys and a firewall protecting it.
Step 6: Installing Docker on the Raspberry Pi
With my Raspberry Pi secured and ready, I moved on to installing Docker—a must-have tool for running and managing containerized applications. Docker simplifies deploying apps by isolating them in containers, and it’s perfect for a homelab setup.
Step 1: Update the System
First, I made sure my Raspberry Pi was up-to-date:
sudo apt update && sudo apt upgrade -y
Step 2: Install Docker
Docker provides an official installation script that handles everything for you. I used the following command to install it:
curl -fsSL https://get.docker.com | sudo sh
This script downloads and installs Docker, making it a straightforward process.
Step 3: Verify the Installation
Once the installation was complete, I checked whether Docker was running:
sudo systemctl status docker
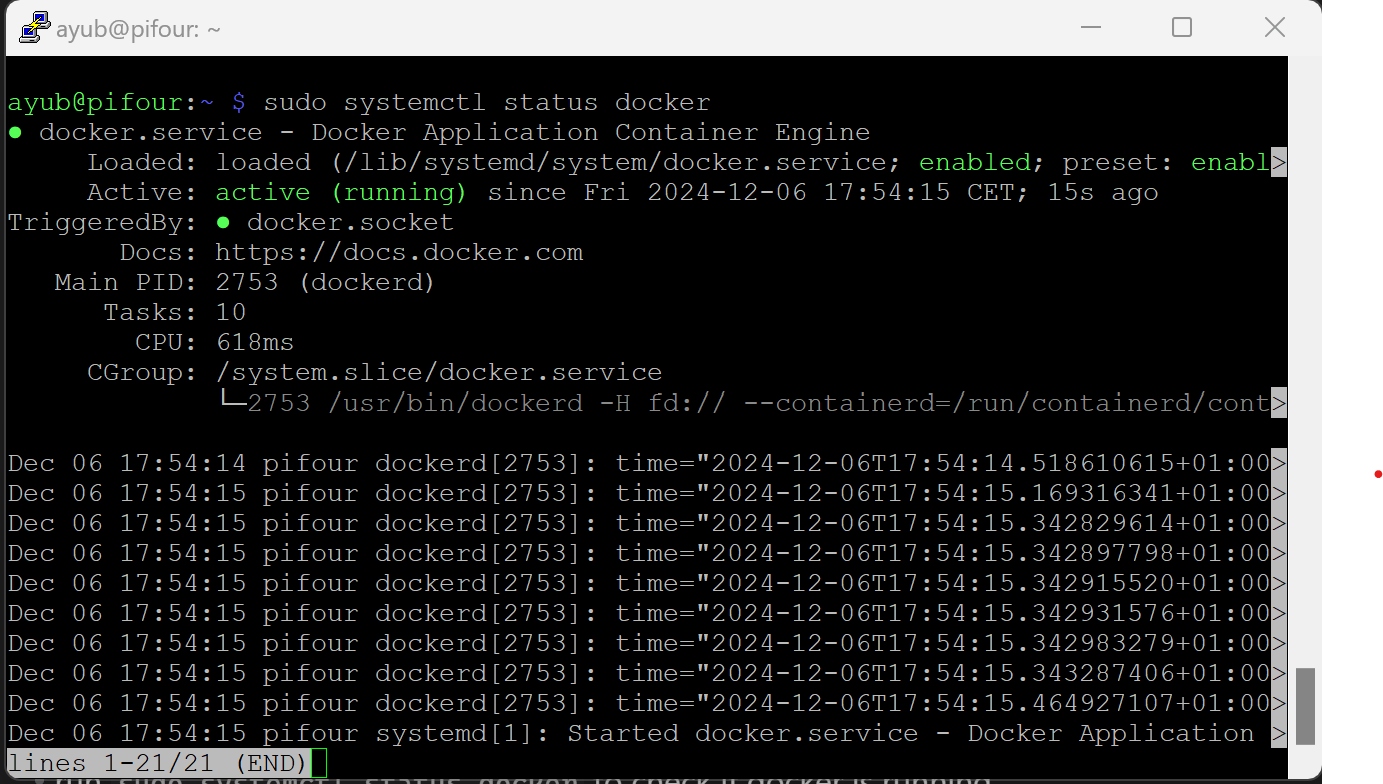
The output confirmed that Docker was active and running.
Step 4: Add My User to the Docker Group
To avoid typing sudo for every Docker command, I added my user to the docker group:
sudo usermod -aG docker pi
Replace pi with your username if it's different.
For the changes to take effect, I logged out and back in. I then confirmed my user was part of the docker group:
groups
Step 5: Test Docker
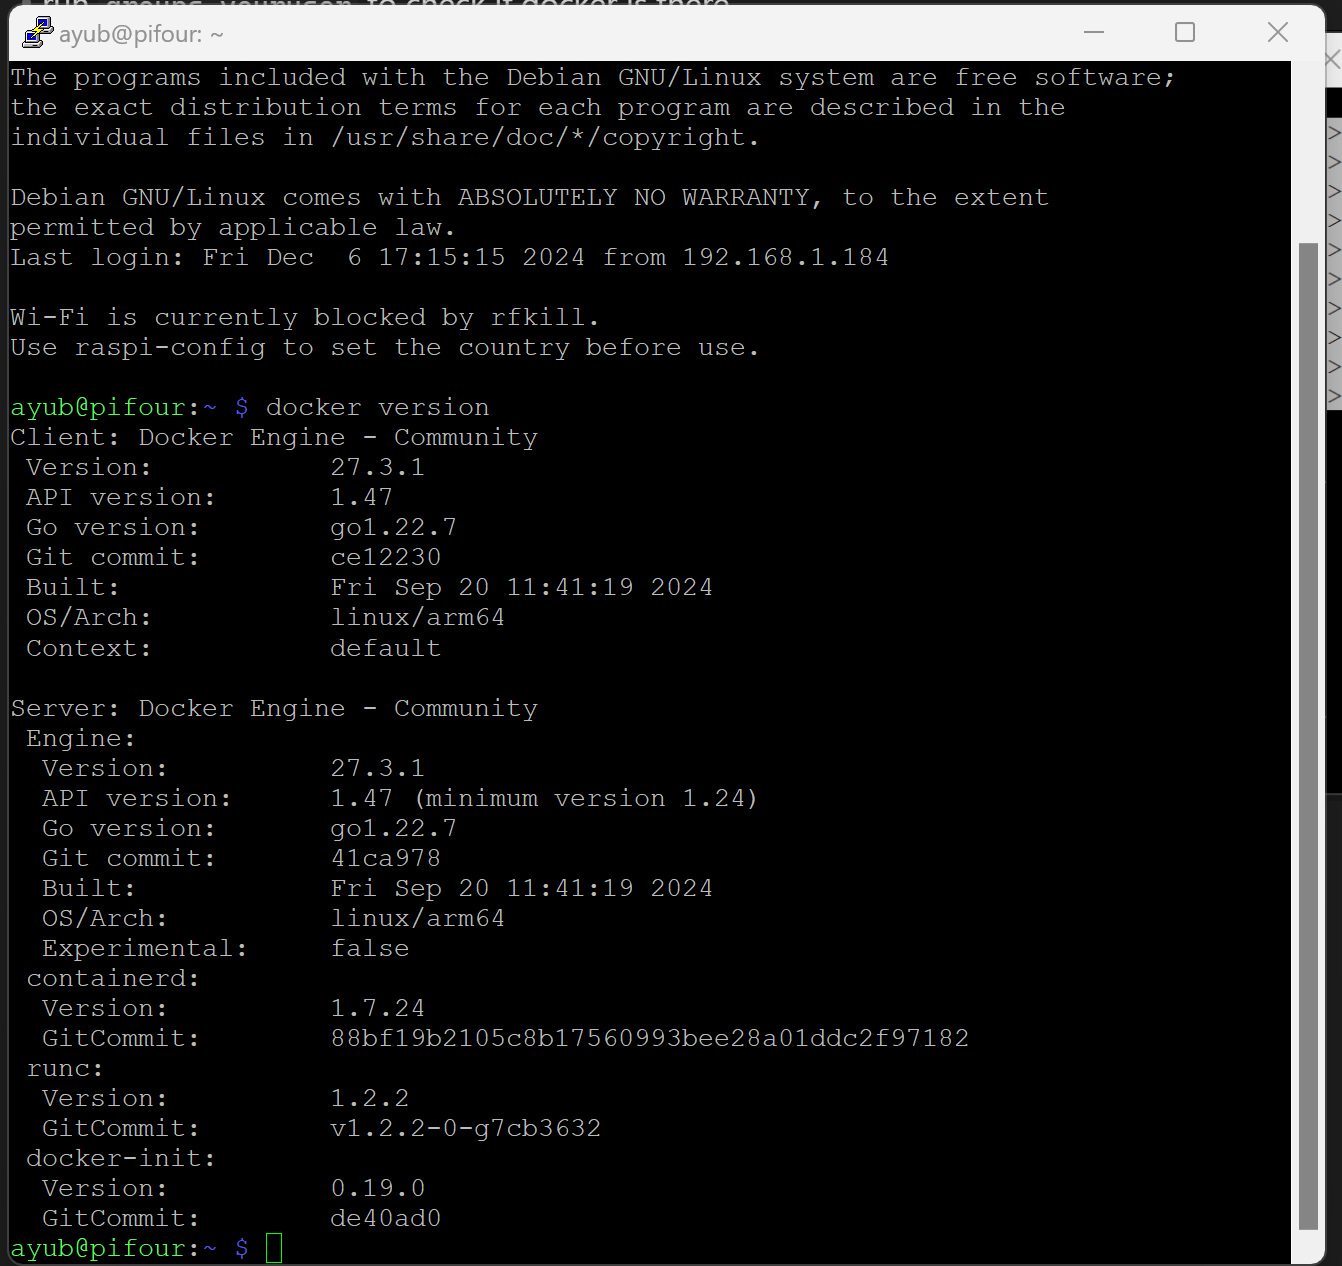
To ensure Docker was set up correctly, I ran:
docker version
The command displayed the installed Docker version and confirmed everything was working as expected.
Step 7 : Installing Docker Compose
While Docker is great for managing individual containers, Docker Compose simplifies managing multi-container applications, which is essential for more complex setups like running Portainer.
Step 1: Install Docker Compose
I installed Docker Compose with this simple command:
sudo apt install docker-compose -y
Step 2: Verify Docker Compose
To confirm it was installed, I checked the version:
docker-compose --version
Wrapping It Up
Congrats on getting your Raspberry Pi up and running! You’ve laid the foundation for a powerful homelab setup. In the next article, we’ll dive into installing Portainer, setting up AdGuard, configuring Nginx Proxy Manager, and running other exciting self-hosted apps. Stay tuned—your homelab journey is just getting started!
Subscribe to my newsletter
Read articles from Ayoub Touba directly inside your inbox. Subscribe to the newsletter, and don't miss out.
Written by

Ayoub Touba
Ayoub Touba
With over a decade of hands-on experience, I specialize in building robust web applications and scalable software solutions. My expertise spans across cutting-edge frameworks and technologies, including Node.js, React, Angular, Vue.js, and Laravel. I also delve into hardware integration with ESP32 and Arduino, creating IoT solutions.
